Setting up the gateway and VN host server - LSM 3.6 Business + Prof.
- Locking system created (see Setting up a locking system).
- SmartRelais 3 Advanced configured and networked (see system manual for SmartRelais 3 Advanced).
- VN host installed (see VN host).
- Use Edit - to open the SmartRelais 3 Advanced’s properties (alternatively, double click).
- Change to the "Configuration/Data" tab.
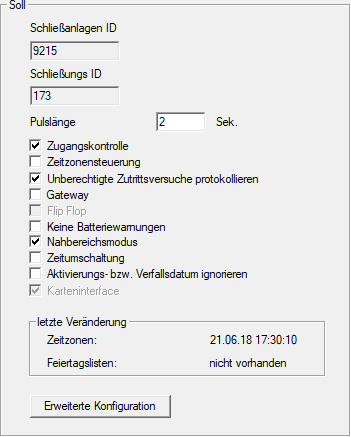
- Activate the
 Time zone management and Audit trail checkboxes.
 - Activate the Gateway check box.
- Warning about pending programming will open.
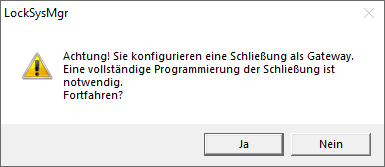
- Click on the OK button.
- Warning closes.
- Click on the Yes button.
- Programming requirement (flash) is displayed.
- Authorise all identification media which are to receive new authorisations at the gateway at a later point.
- Programme the SmartRelais 3 Advanced.
- Programming requirement disappears.
- Use Network to select the input.
- The VN host server window will open.

- Make sure that the VN host server entry is selected from the drop-down menu in the VNHost section.
NOTE

Different communication nodes on the SmartRelais 3 Advanced
The VN host server is always used for the virtual network on the SmartRelais 3 Advanced. However, another communication node can also be used for programming, remote opening and similar.
- Select the VN host server entry for the virtual network even if your SmartRelais 3 Advanced is using another communication node.
- Click on the Apply button.
- Click on the OK button.
- VN host server window closes.
- Use Network to select the input.
- Switch to the VN host server communication node using the
 and
and  buttons.
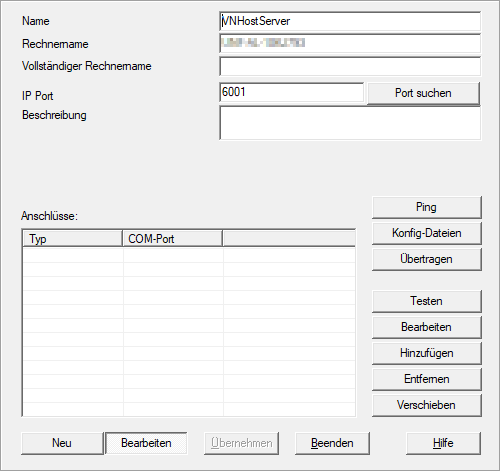
- Click on the Config files button.
- The Explorer window will open.
- Select the VN host server’s installation folder.
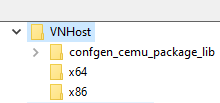
- Click on the OK button.
- Explorer window closes.
- The LockSysMgr window will open.
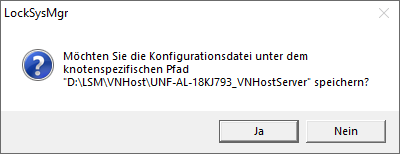
- Click on the No button.
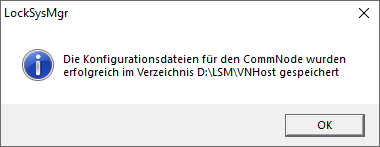
- Config files are saved.
- Click on the Transmit button.
- Config files are forwarded to the VN host server communication node.
- If your SmartRelais 3 Advanced is connected via another communication node: Also save and transfer the config files for this communication node.
- Virtual network ready for use.
You can now monitor the status of your virtual network (see Check virtual network status).