Exporting authorisation changes - LSM 3.6 Business + Prof.
Exporting authorisation changes only works if there is at least one change. To perform the test, remove authorisation for locking cylinder 1 from transponder 1, for example.
- Perform a reset before the first export (see Resetting tasks in the virtual network).
- Use Programming - to select the entry.
- The Export to virtual network (SREL2) window will open.
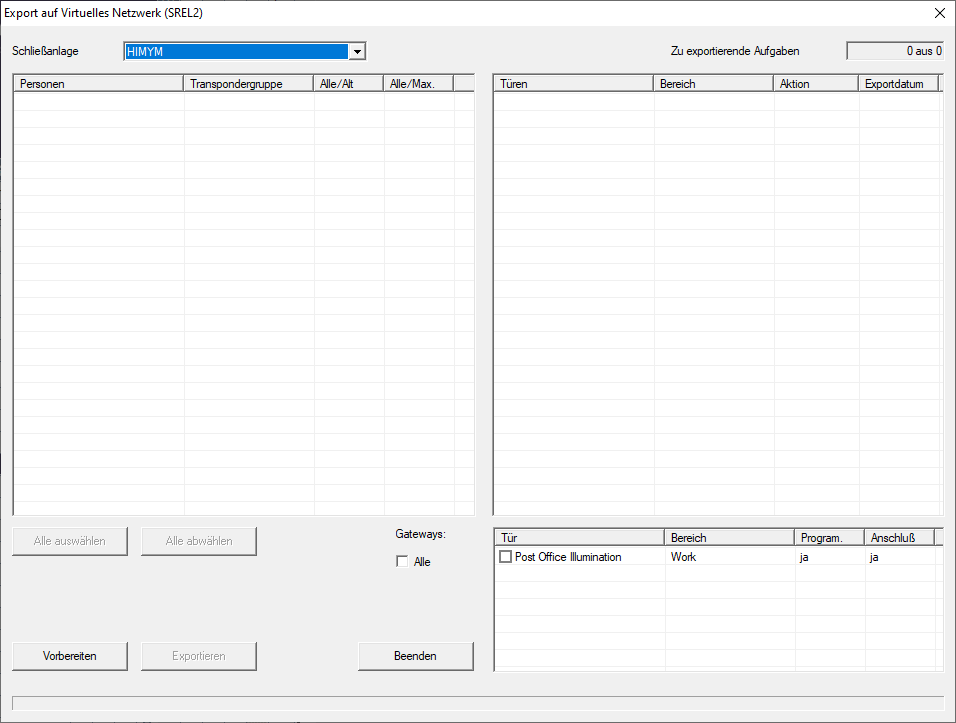
- Select all SmartRelay 2 G2s to which you need to send/export the changes.
- Check whether you have selected the correct locking system in the drop-down menu.
- Click on the Prepare button.
- All exportable changes are listed in the Persons section.
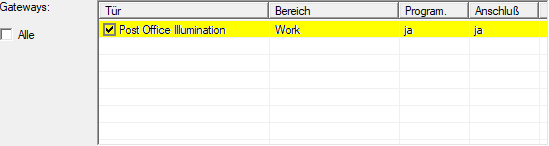
- Select all changes that you wish to export to the previously selected SmartRelay 2 G2.

- Click on the Export button.
- The export process will start. The changes are sent to the gateway.
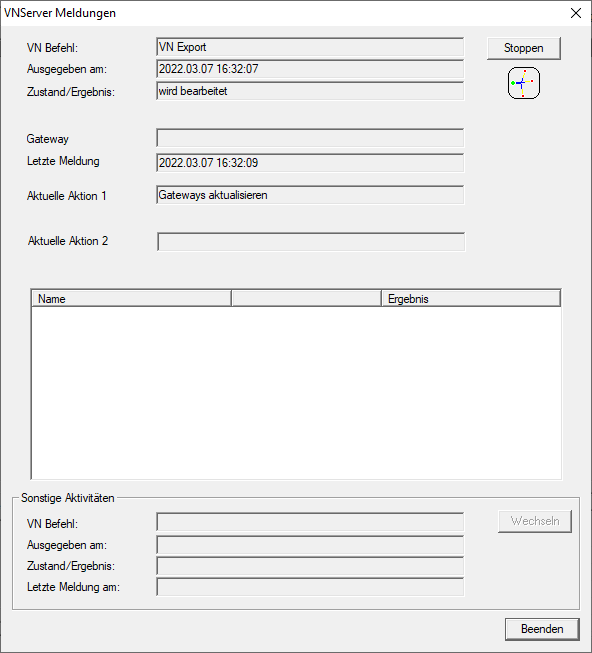
- A summary of the export is displayed.

You can now track the exported tasks in the overview (Status of the tasks in the virtual network (SREL2.G2)).
The authorisation change is now available at the gateway. There are now two scenarios:
- Transponder 1 books at the gateway. Locking device 1 will later recognise that transponder 1 is no longer authorised and refuse access.
- Another transponder (not transponder 1) first makes a booking at the gateway and authorises locking device 1. Transponder 1’s locking ID is communicated to locking cylinder 1.
With LSM 3.6 and higher, it is possible to "inform" any number of transponders one or two other transponder IDs which need to be deactivated.
Programme the TIDs to be disabled directly
The IDs to be disabled are saved on the transponder during the programming process.
- The transponder is physically available.
- The transponder's programming window is open.
- Click on the TIDs to deactivate button.
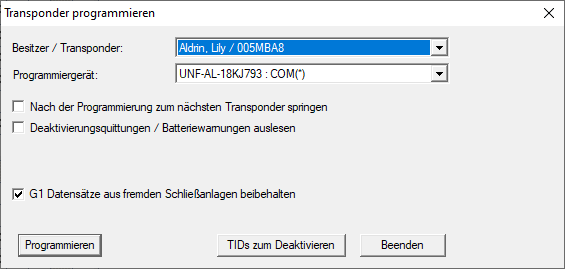
- The list will open.
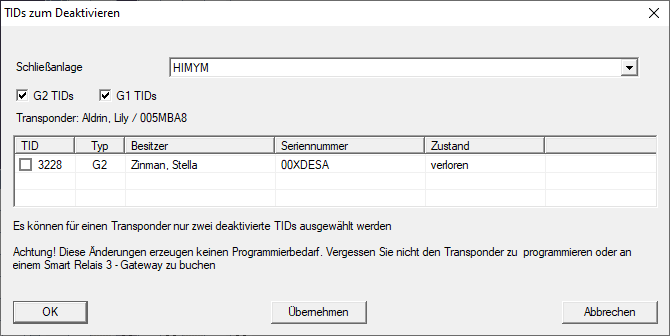
- Activate one or two check marks in the TID column to save the TIDs to be deleted on the transponder.
- Click on the OK button to confirm your input.
- Continue with the programming.
- The checked TIDs will be saved to the transponder as TIDs to delete. When the transponder is authenticated on one of the locking devices concerned, the TIDs to be deleted are deactivated at the locking device.
Add the TIDs to be blocked to the properties
The IDs to be deactivated are saved on the transponder either during the next programming process or the next booking on a gateway.
- The transponder's properties window is open.
- Change to the "Configuration" tab.
- Click on the TIDs to deactivate button.
- The list will open.
- Activate one or two check marks in the TID column to save the TIDs to be deleted on the transponder.
- Click on the OK button to confirm your input.
- The checked TIDs are saved on the transponder either during the next programming process or the next booking on a gateway.