Creating PIN code keypads - AXM Classic
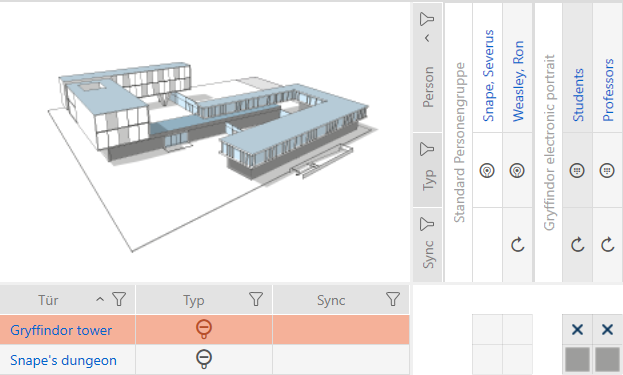
PIN code keypads allow your users to engage and disengage locking devices using a number code (PIN) (also see Identification media, locking devices and the locking plan).
In the interests of best practice (see Best practice: setting up the locking system), SimonsVoss recommends that you configure schedules/time groups first:
- Creating a schedule or Create time group (see Time groups and schedules for background information )
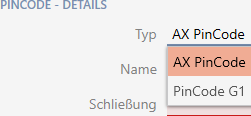
A PIN code keypad AX is created in this example. You can create a PIN code keypad 3068 in the same way, but you cannot specify the length of the PINs and the PINs in your AXM Classic (also see PIN Code G1 vs. PIN Code AX).
NOTE

Authorisations set automatically
Your AXM Classic assumes that you also want to authorise newly created PINs. Newly created PINs therefore automatically receive authorisation for the assigned locking device.
- AXM Classic open.
- Locking device has been created for the PIN code keypad (see Creating a locking device in the AXM manual).
- Click on the button
 .
. - The window will open.
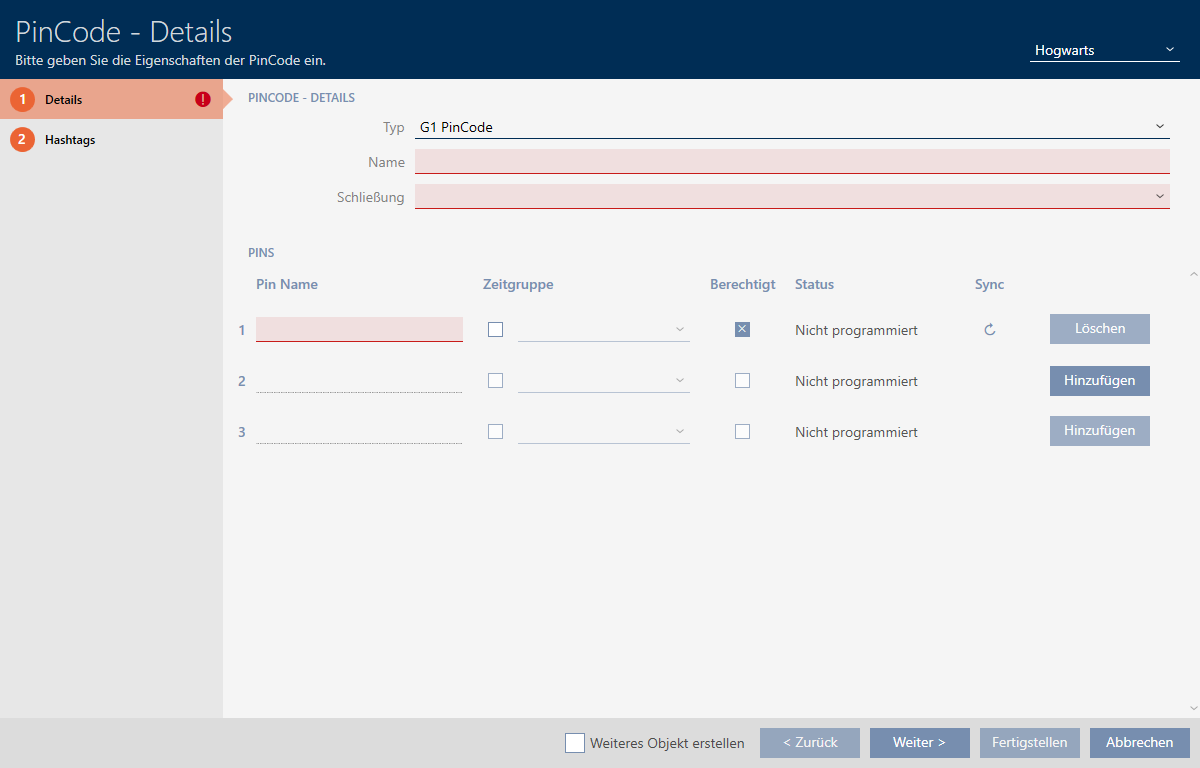
- Select the PIN code keypad you wish to create from the drop-down menu.
- Enter a name for the PIN code keypad in the field.
- Select the locking device on which you would like to use the PIN code keypad from the drop-down menu.

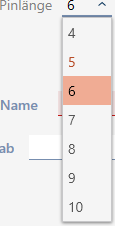
- If you are creating a PIN code keypad AX, select the length of the PINs from the drop-down menu.
- Enter the name to be displayed in the matrix for this PIN in the field.
- Enter a PIN.
- Authorisation is set automatically.
NOTE
Duplicate PINs not permitted for PIN code keypad AX
All PINs for a PIN code keypad must be different for reasons of security and traceability.
Your AXM Classic detects duplicate PINs and highlights them with in red.
- Disable the
 Authorised checkbox if you want to authorise the PIN at a later stage.
 - If you want to control an activation/expiry date or the authorisation in terms of time, use
 to expand the PIN settings.
 - If necessary, enter the activation/expiry date in the or field.
(PIN code keypad AX: possible to the exact day; PIN code keypad 3068: possible to the exact hour) - Select the
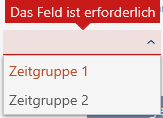
 Time group checkbox if required.
 - A drop-down menu will appear.
- Select the time group you want to use for this PIN from the drop-down menu.
- If necessary, click the button to create additional PINs.
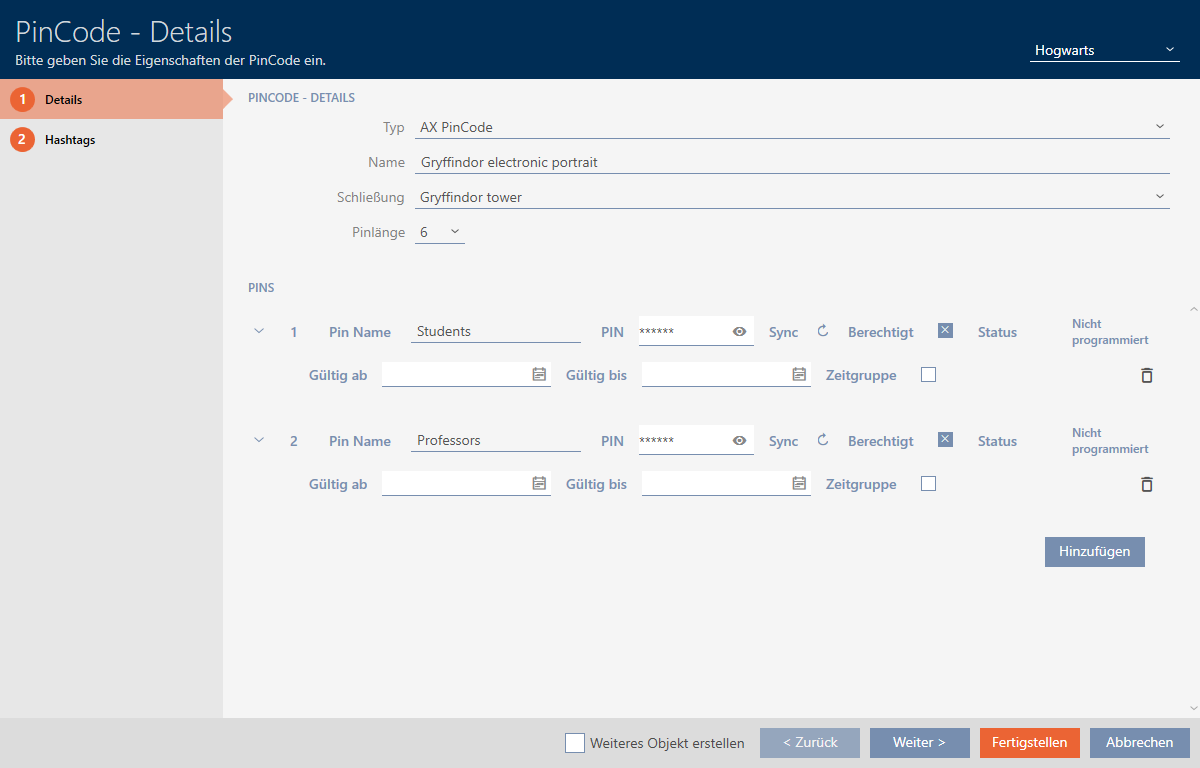
- Use the button to switch to the next tab or complete the entries with the button.
- Use
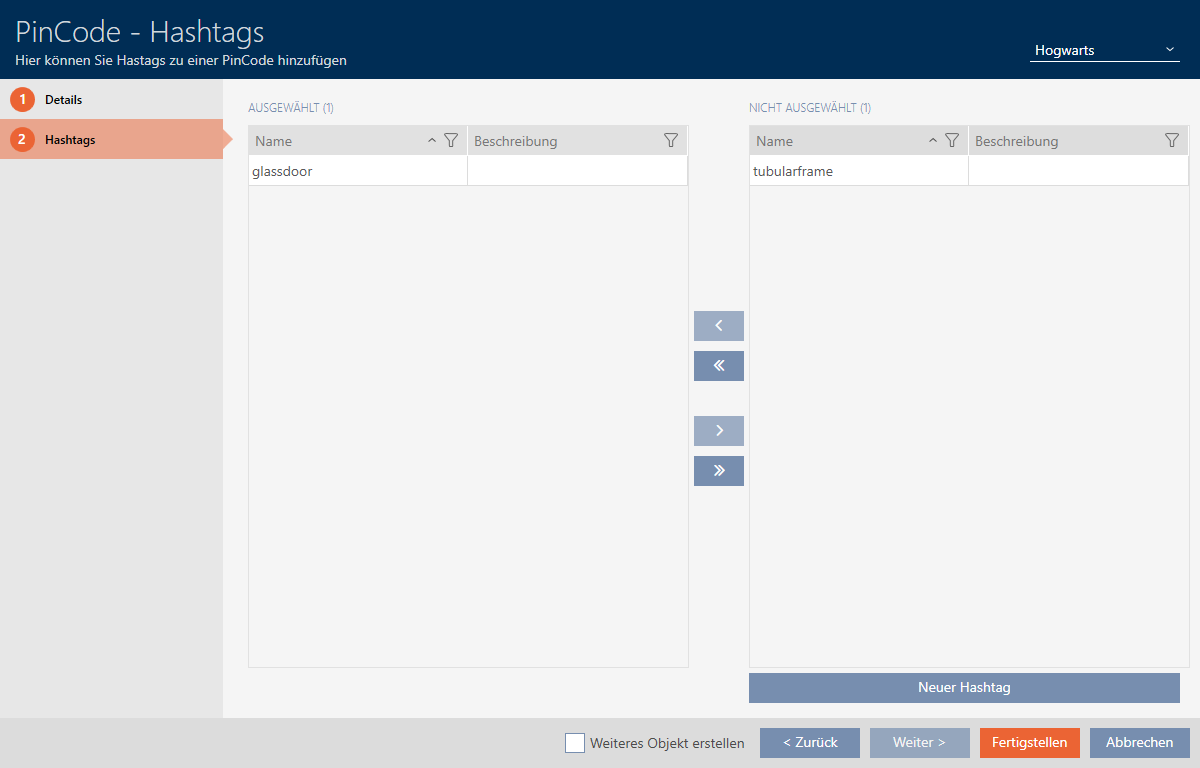
 to sort/filter the displayed entries if required (see Sorting and filtering).
 - Select the required hashtags in the right column (Ctrl+click for single hashtags or Shift+click for multiple hashtags).
- Use
 to move only the selected hashtags or
  to move all hashtags.
 NOTE
Double-clicking as an alternative to arrow keys
Double-clicking an entry in the list will also move this entry to the other column.
- The highlighted hashtags in the left-hand column are used for this PIN code.
- Select the Create additional objects checkbox to leave the window with the same settings open for the next PIN code to be created.
- Click the button to create the PIN code.
- window closes.
- Newly created PIN code is listed or displayed in the matrix.