Creating transponders and cards - AXM Classic
NOTE

Activating cards or transponders for a locking system
The only credential types available are those that have been activated in your locking system.
- If necessary, activate cards or transponders in the locking system properties (see Enable cards or transponders).
In the interests of best practice (see Best practice: setting up the locking system), SimonsVoss recommends that you configure access levels, person groups and schedules/time groups:
- Access levels (see Access levels for background information )
- Creating a person group (see Person groups for background information )
- Creating a schedule or Create time group (see Time groups and schedules for background information )
- AXM Classic open.
- Click on the
 button.
 - The window for creating an identification medium will open.
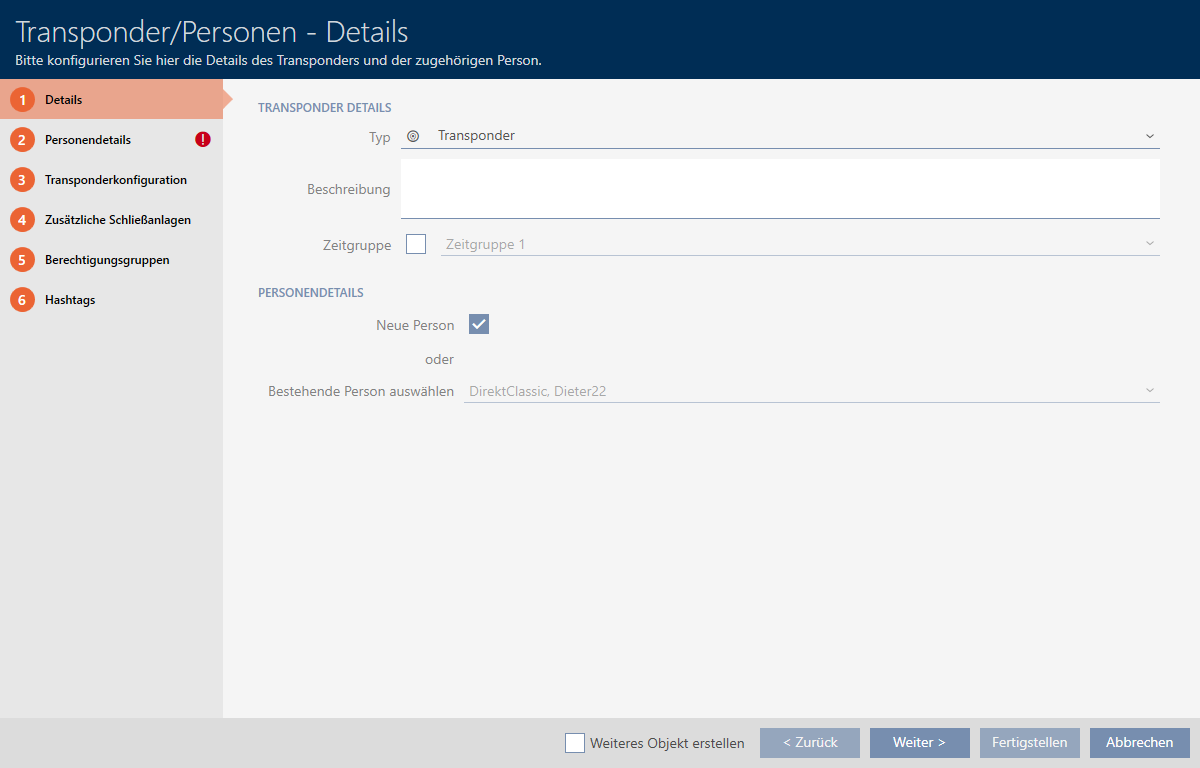
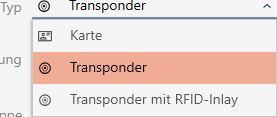
- Select the identification medium you wish to create from the drop-down menu.
- Enter a description if required.
- If the identification medium is to feature time-controlled authorisations: select the
 Time group checkbox.
 - Select the time group from the drop-down list (e.g. ).
- Activate the New person check box.
- AXM Classic will automatically create a new person for the new identification medium. Deactivate this check box to select an existing person (e.g. for a second identification medium or a replacement identification medium).
- The tab is shown.
- Click on the tab.
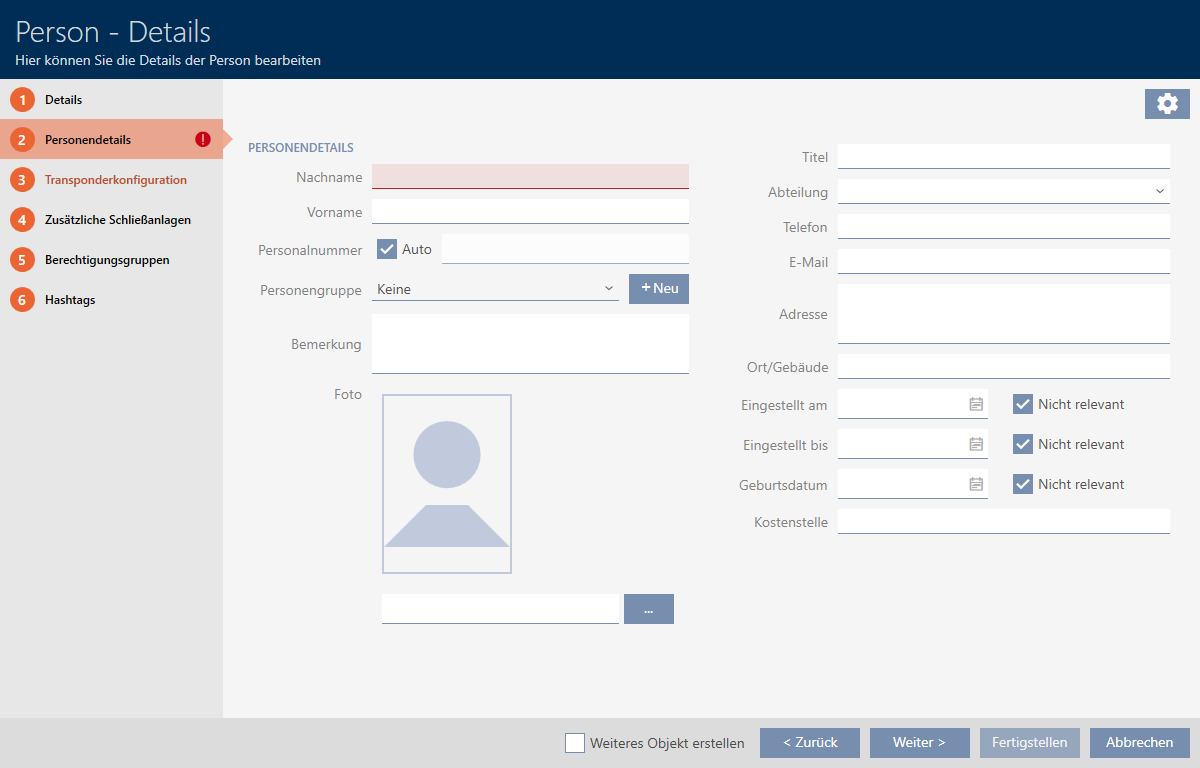
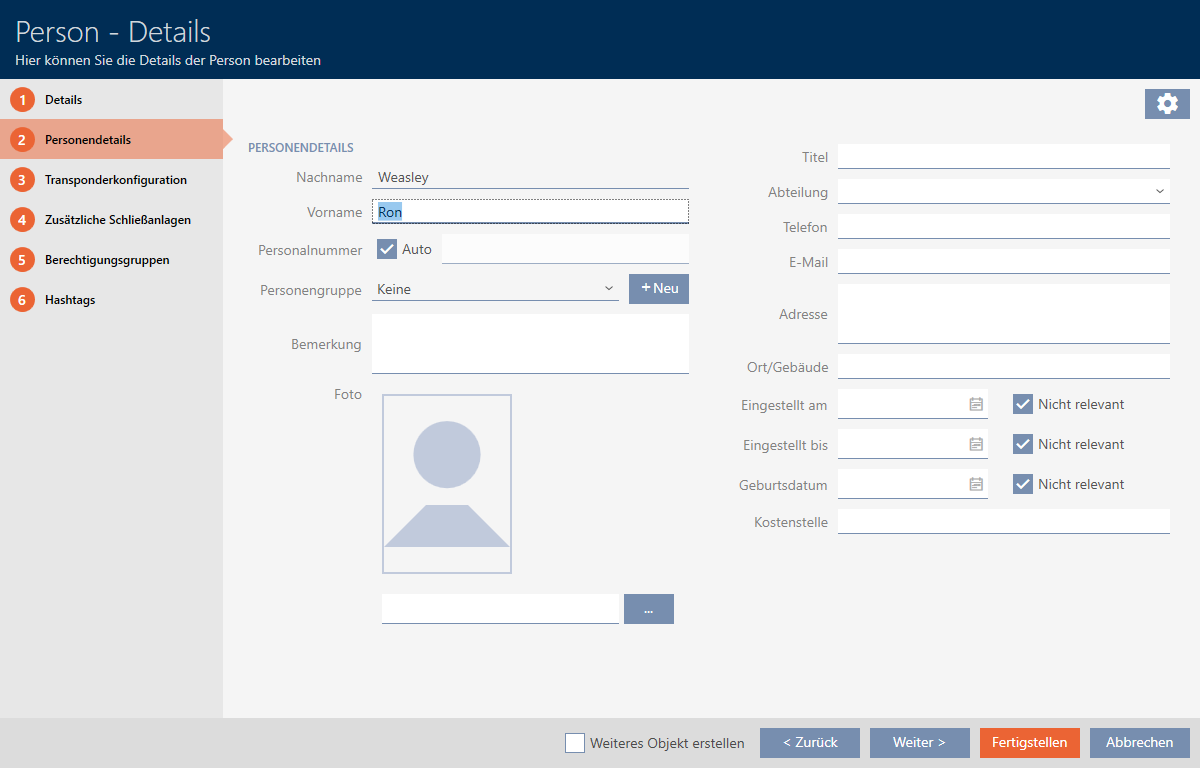
- Enter the surname and first name of the person who will receive the identification medium in the and fields.
- The surname and first name will be displayed in the matrix at a later point in time.
- The personnel number is generated automatically.
NOTE
Personnel number formula or manual entry
The AXM Classic generates personnel numbers based on the following formula: PN-1, PN-2, PN-X. The abbreviation PN can be changed if required (see Changing automatic numbering).
Alternatively, you can enter personnel numbers manually:
- Activate the
 Auto check box.
 - The field is activated.
- Enter the personnel number in the field.
- Activate the
- If you wish to assign this person to a person group: Select the person group to which this person belongs from the drop-down menu.

- Give further details about the person if required.
- You can then simply select the information you enter in the field from a list for other persons.
- If you want to edit the , or fields: Deactivate the relevant Not relevant check box.
- Use the button to switch to the next tab or complete the entries with the button.
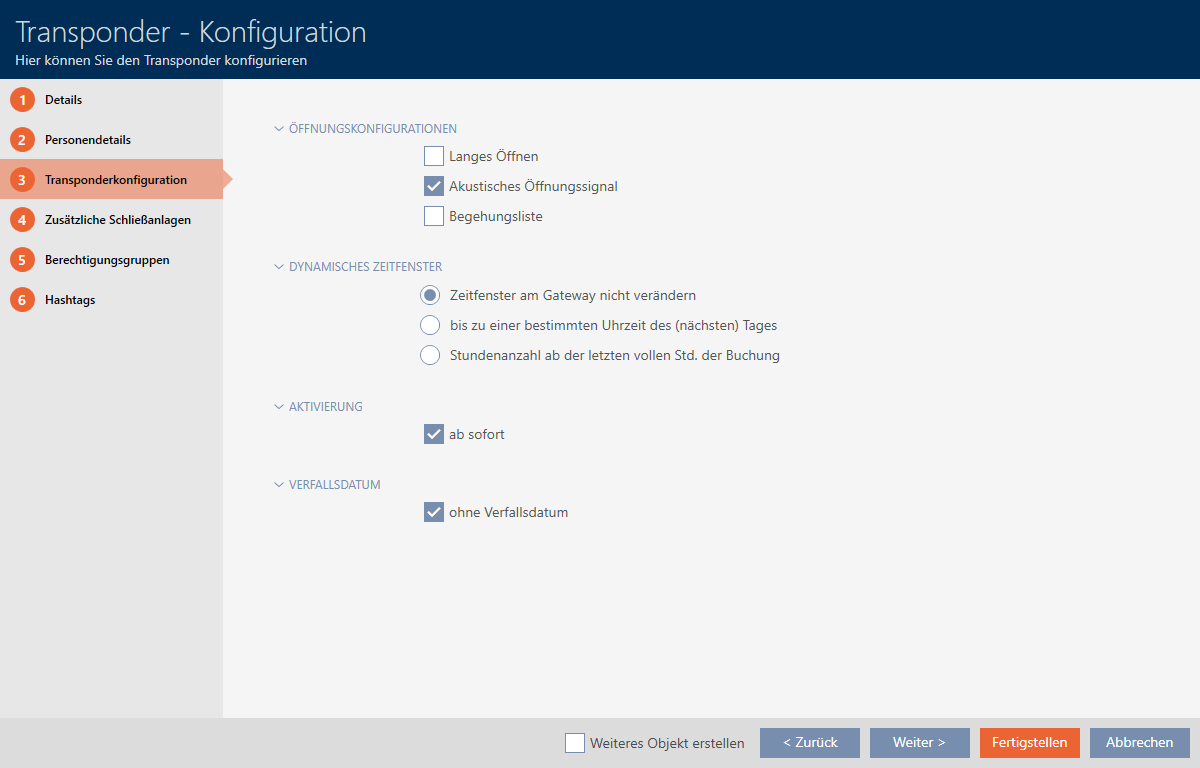
- If locking devices need to open twice as long for this identification medium (doubling to max. 25 s): select the Long opening checkbox.
- If you don't wish locking devices for this identification medium to beep: disable the No acoustic opening signal checkbox.
- If you need to save the locking devices on which the identification medium was used on the identification medium: select the Personal audit trail checkbox.
- If you do not want the transponder to be usable immediately: disable the from now checkbox. Then enter an activation date.
- If the transponder is only to be used for a limited period of time, disable the without expiry date checkbox. Then enter an expiry date.
- Use the button to switch to the next tab or complete the entries with the button.
- If you wish to use the identification medium in other locking systems in this project: Use the button to add further locking systems (see Use identification media in multiple locking systems).
NOTE
Limitations for Transponder - Additional locking systems
Depending on the type of identification medium, different volumes of memory space are available for additional locking devices (e.g.: G2 transponders can store four G2 locking systems). The locking system also needs to support the identification medium (e.g.: transponders cannot be used in card-only locking systems).
- Make sure that there is sufficient memory space on your identification medium.
- Make sure that the required locking system supports your identification medium. Upgrade the locking system if necessary (see Enable cards or transponders).
- Ensure that the locking system memory spaces do not overlap in the case of cards.
- Use the button to switch to the next tab or complete the entries with the button.
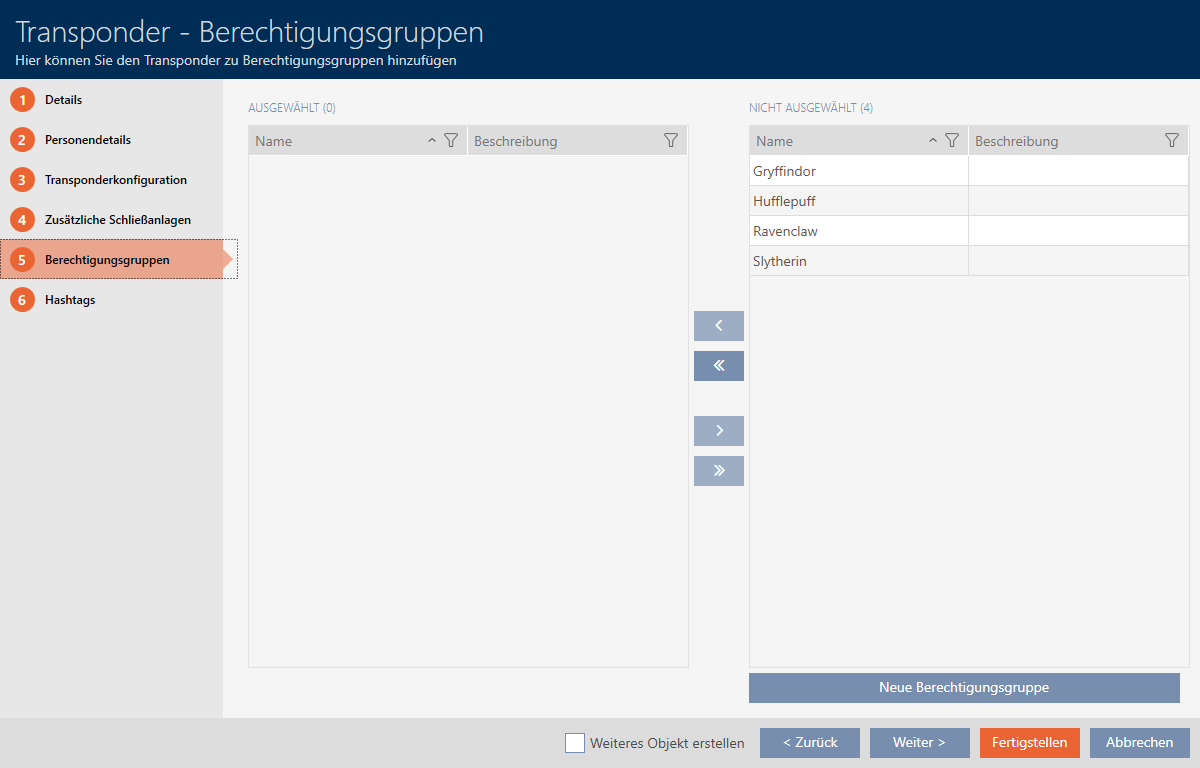
- Use
 to sort/filter the displayed entries if required (see Sorting and filtering).
 - Select the required access levels in the right column (Ctrl+click for single groups or Shift+click for multiple groups).
- Use
 to move the selected access levels only or
  to move all displayed access levels.
 - The identification medium is assigned to the highlighted access levels.
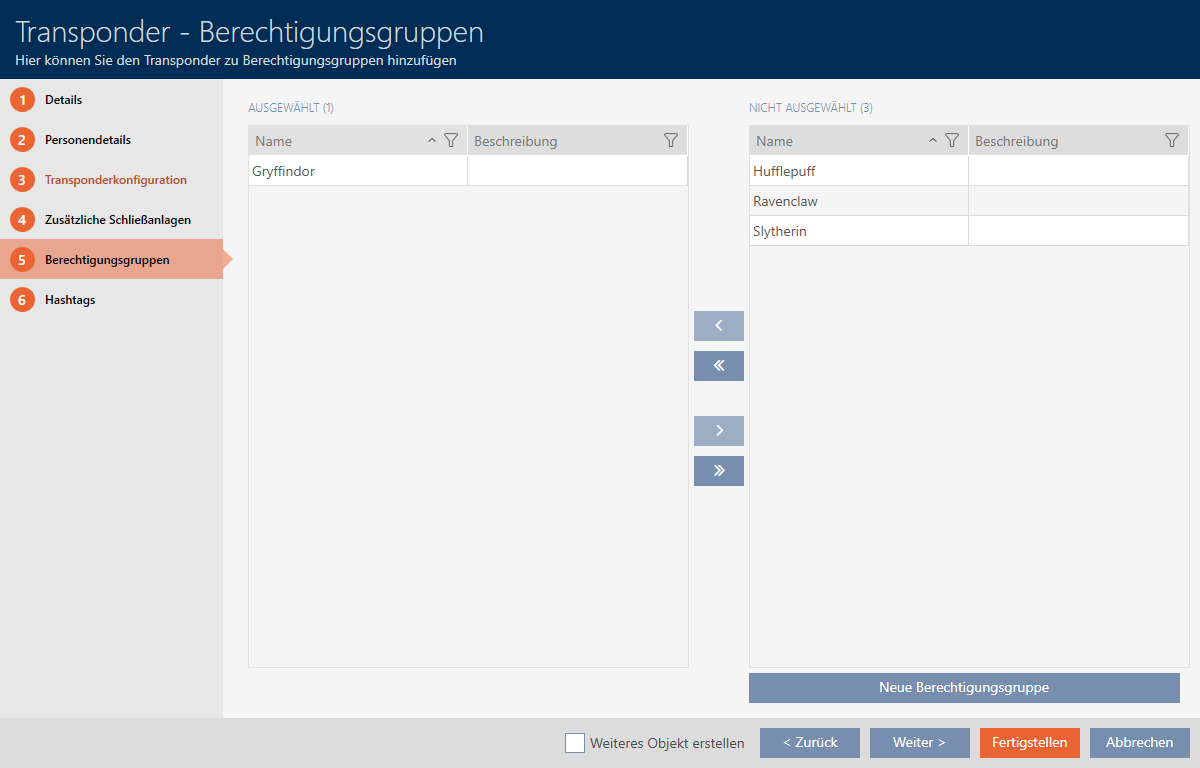
NOTE
Double-clicking as an alternative to arrow keys
Double-clicking an entry in the list will also move this entry to the other column.
- Use the button to switch to the next tab or complete the entries with the button.
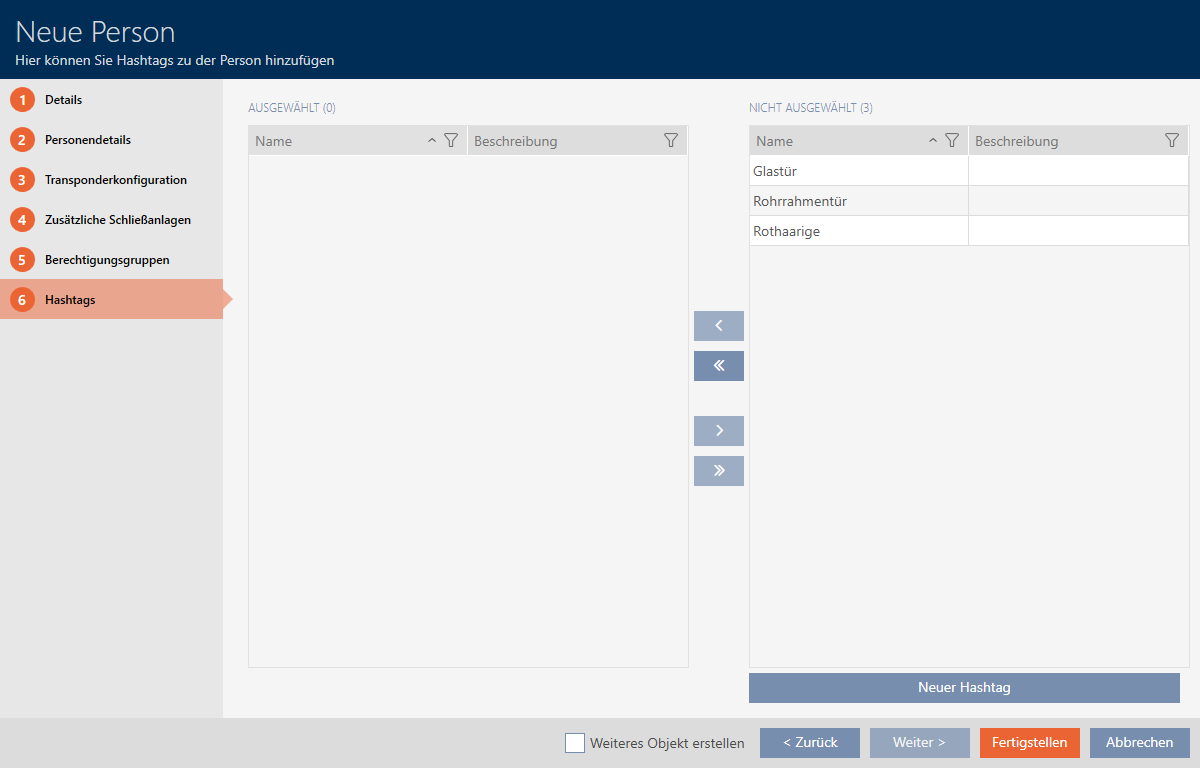
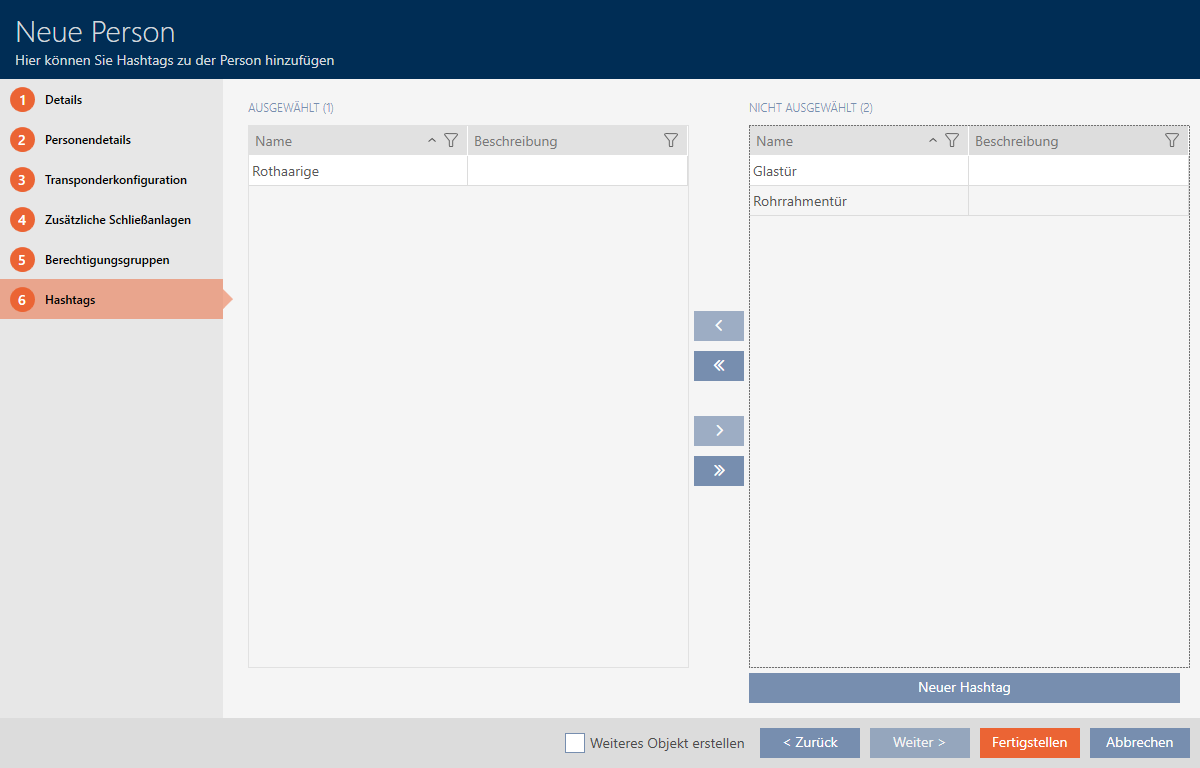
- Use to sort/filter the displayed entries if required (see Sorting and filtering).
- Select the required hashtags in the right column (Ctrl+click for single hashtags or Shift+click for multiple hashtags).
- Use to move only the selected hashtags or to move all hashtags.
NOTE
Double-clicking as an alternative to arrow keys
Double-clicking an entry in the list will also move this entry to the other column.
- The highlighted hashtags in the left-hand column are used for this identification medium.
- Select the Create additional objects checkbox to leave the window with the same settings open for the next identification medium to be created.
- Click on the button to create the identification medium.
- The window for creating a new identification medium closes.
- Newly created identification medium is listed or displayed in the matrix.
Also see
- Identification media, locking devices and the locking plan
- Access levels
- Best practice: setting up the locking system
- Access levels
- Creating a schedule
- Create time group
- Changing automatic numbering
- Sorting and filtering
- Time groups and schedules
- Use identification media in multiple locking systems
- Enable cards or transponders