RS-485: Add multiple GatewayNodes - Step-by-Step WO
- All GatewayNodes powered and mounted.
- RS-485 configured (seeRS-485 ConfigNode)
- SmartIntego Manager opened.
- Right-click the ConfigNode entry.
- The window Administration opens.
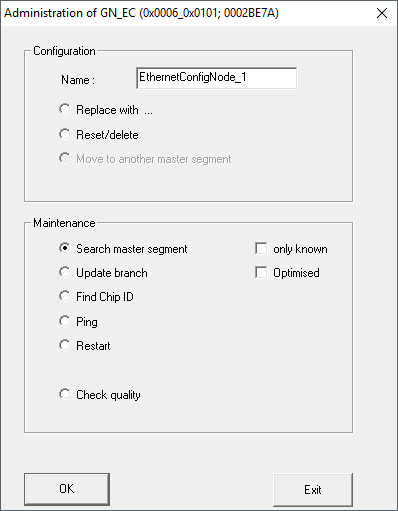
- Select the option
 Search master segment.
 - Click on the button OK.
- Window Administration closes.
- SmartIntego Manager searches master segment.
- The window Search results opens.
Column "Nodes in this segment" → GatewayNodes assigned to the current ConfigNode
in the column "Nodes in other segments" → GatewayNodes assigned to other ConfigNodes in
the column "New Nodes" → GatewayNodes assigned without assigning
RSSI value of all columns refers to the connection from the current ConfigNode to the GatewayNodes. Values > -100 dBm are normal for wired components. 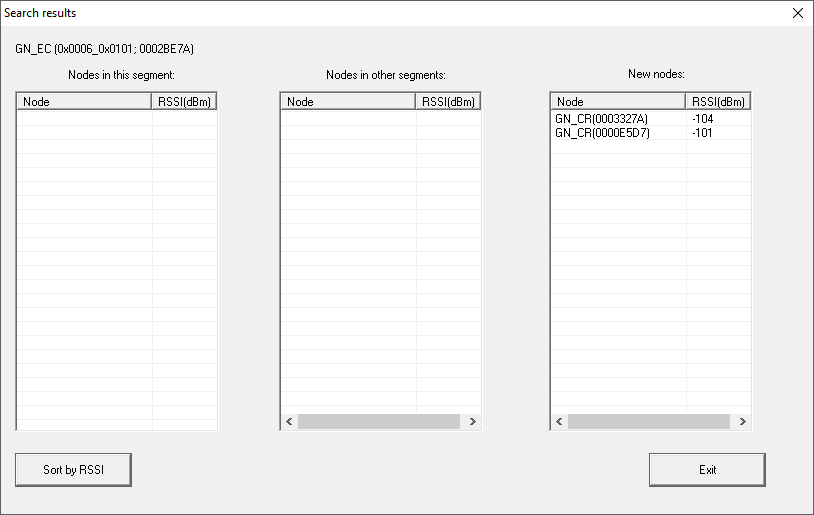
- Select the new GatewayNodes you want to add to the current segment (Ctrl+ Mouse selection).
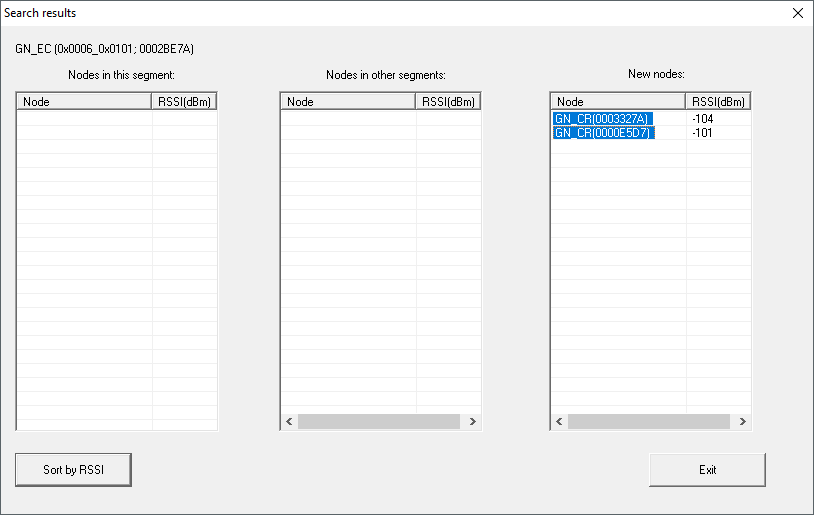
- Drag and drop the GatewayNodes into the Nodes in this segment column.
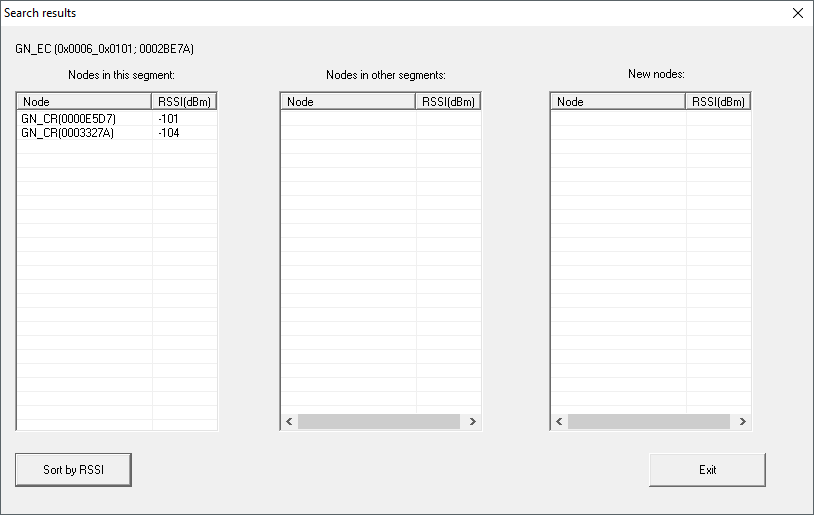
- Click on the Exit button.
- Window Search results closes.
- Right-click the entry of the new GatewayNode.
NOTE

Name assignment by name list
If you are using a name list (Creating, expanding and importing a name list see), you no longer need to name the GatewayNodes.
- The window Administration opens.
- Specify the name of your GatewayNode.
- Click on the button OK.
- Window Administration closes.
- Click on the button Save.
- SmartIntego Manager contacts the GatewayNode.
- SmartIntego Manager assigns GatewayNode device address.
- SmartIntego Manager saves routing table in the GatewayNode.
- If necessary, repeat the designation for the other GatewayNodes.
- If necessary, add further locking devices to the new segment.
- Click on the button Save.
- SmartIntego Manager contacts the GatewayNode.
- SmartIntego Manager assigns GatewayNode device address.
- SmartIntego Manager saves routing table in the GatewayNode.
- Click on the button Save.
NOTE
Data loss due to improper termination
The data is not transferred to the SmartIntego tool (WO) until the SmartIntego Manager is properly ended. After saving, the files are permanently saved in the * ikp file in the SmartIntego tool (WO).
- Click on the Save button.
- Close SmartIntego Manager correctly using the button Exit.