Add individual LockNodes - Step-by-Step WO
- LockNode reachable from at least one GatewayNode.
- SmartIntego Manager opened.
- Right-click on the GatewayNode with which you want to search for the LockNode.
- The window Administration opens.
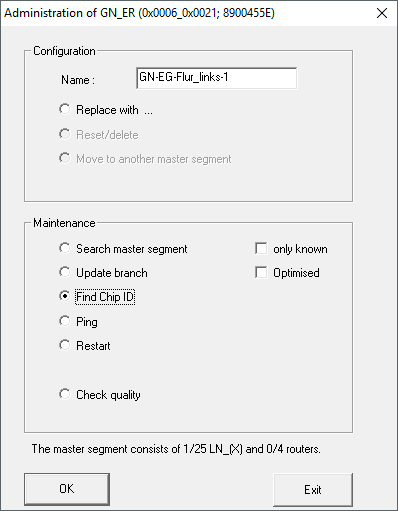
- Select the option
 Find Chip ID.
 - Click on the button OK.
- Window Administration closes.
- The window Search for node opens.
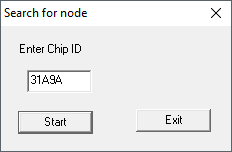
- Enter the chip ID without leading zeros (see LockNode, LockNode packaging or supplied sticker).
- Click on the Start button.
- Window Search for node closes.
- Reset is being performed.
- The window Results opens.
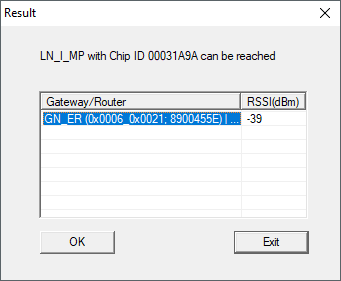
- Select the entry of the GatewayNode.
- Click on the button OK.
- Window Results closes.
- Right-click the entry of the new LockNode.
- The window Administration opens.
- Enter a name (alternative: list of names for updating the names, see)Creating, expanding and importing a name list.
- Click on the button OK.
- Window Administration closes.
- LockNode is added.
View after import
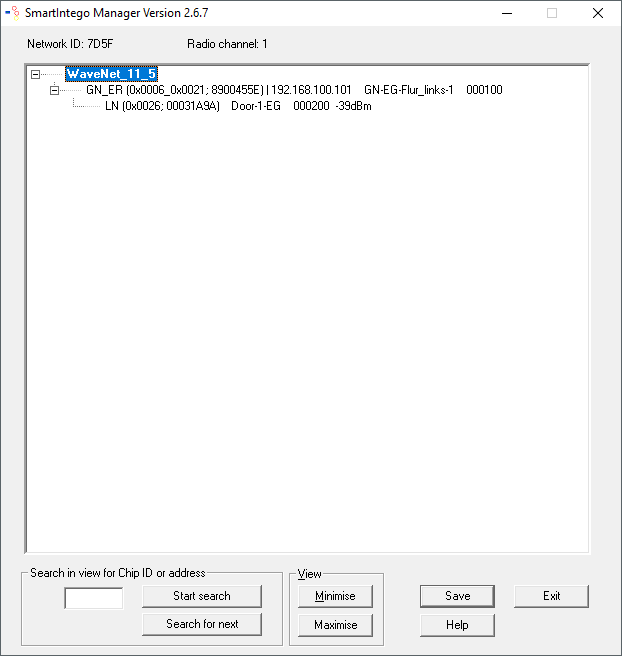
SmartIntego Manager shows you the following information for the locking device:
- WaveNet address
- Chip ID
- Name
- Device Address
- Last RSSI value measured by SmartIntego Manager in dBm
Import to SmartIntego Tool (WO)
- Click on the button Save.
- Click on the Exit button.
- Transfer and save values in SmartIntego tool (WO).
NOTE

Data loss due to improper termination
The data is not transferred to the SmartIntego tool (WO) until the SmartIntego Manager is properly ended. After saving, the files are permanently saved in the * ikp file in the SmartIntego tool (WO).
- Click on the Save button.
- Close SmartIntego Manager correctly using the button Exit.