Restructuring the system - Step-by-Step WO
- SmartIntego Manager opened.
- Doors closed.
- No moving obstacles between locking devices and GatewayNodes.
- Right-click on the navigation root (WaveNet_XX_X).
- The window Administration opens.
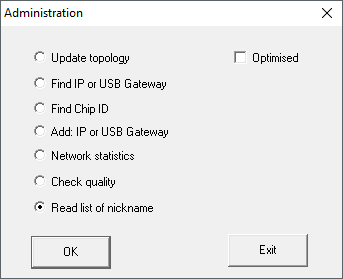
- Select the option
 Read list of nicknames.
 - Click on the button OK.
- Window Administration closes.
- Select the name list.
- Import the name list.
- Right-click on the navigation root (WaveNet_XX_X).
- The window Administration opens.
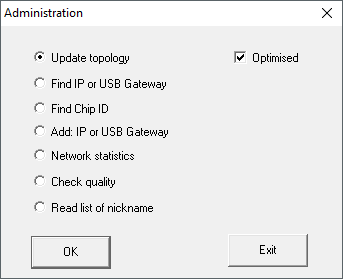
- Select the option Update topology.
- Activate the checkbox
 SI-Manager Update topology: Optimised [offen].
 - Click on the button OK.
- Window Administration closes.
- Query opens for host names.
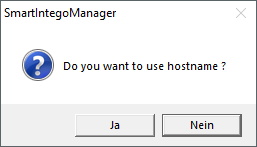
- Reject the use of host names (Wherever possible, always work with the IP address to reduce dependency on DNS servers).
- Query for host name closes.
- The window for specifying the maximum number of LockNodes per GatewayNode opens.
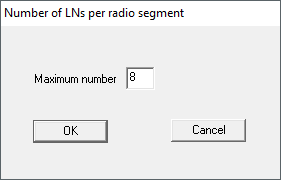
- Specify the maximum number of LockNodes per GatewayNode.
NOTE

Information on specifying the maximum number of LockNodes per gateway
The number of LockNodes supported can be limited by the integrator system. This particularly applies to integrator systems with hardware controllers (limitation of the number of locking devices per controller).
- In this step, specify the maximum locking devices supported by the integrator system (use the limit when reallocating).
- In this example, the integrator system supports eight LockNodes per GatewayNode. Therefore, the number is limited to eight LockNodes per GatewayNode when assigned.
- Click on the button OK.
- Window for specifying the maximum number of LockNodes per GatewayNode closes.
- The window Select node opens.
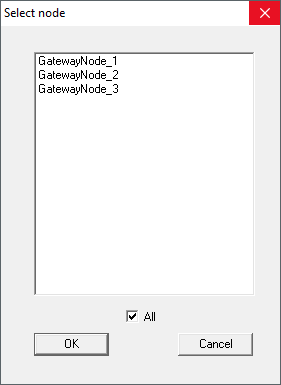
- Highlight all GatewayNodes with which you want to address LockNodes (usually all).
- Click on the button OK.
- Window Select node closes.
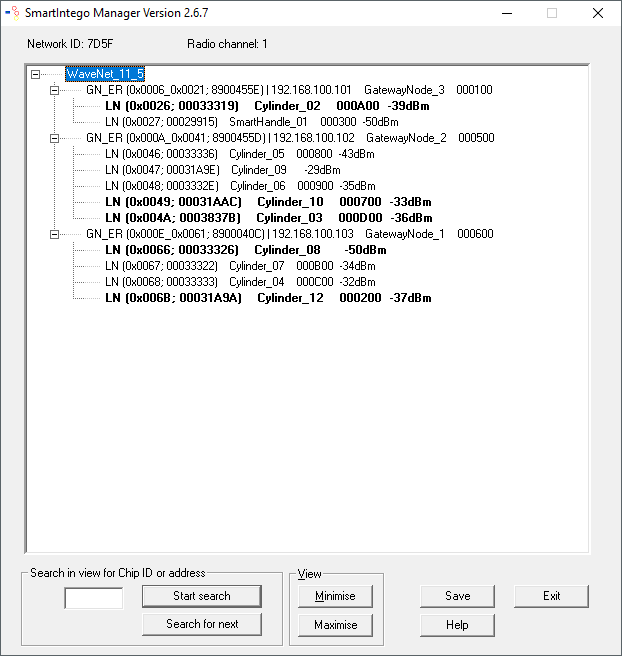
- Allocation is changed based on measured RSSI value.
- Device address remains the same.
- Duration: Approximately two minutes per GatewayNode.
- Modified assignment is displayed in SmartIntego Manager.
- Click on the button Save.
- The data record is saved.
- Click on the Exit button.
- Assignment has been accepted.
NOTE
Manual configuration if CSV import of the configuration file is missing
Some integrator systems do not support CSV import of the configuration file.
- Configure manually in the integrator system (considerable effort).
NOTE
Different procedure for Mercury components
Mercury GatewayNodes will change the device address (LockNodes) when moving.