Assigning LockNodes to another RouterNode - WaveNet
The signal quality of the radio link between RouterNodes and LockNodes (and other RouterNodes) is influenced, among other things, by the following:
- Environmental conditions (interference signals, building materials)
- Centres distance
You can improve these conditions and thus the signal quality of the radio link between RouterNodes and LockNodes by assigning the LockNode to a RouterNode that is closer or less disturbed.
As long as you move the LockNode within the same CentralNode/Ethernet RouterNode segment, you can easily reassign the LockNode as described below. Otherwise, reset the LockNode in the WaveNet Manager and re-insert it at the planned RouterNode (see Best Practice: Reset with the WaveNet Manager und Adding Lock Nodes to WaveNet).
Reassigning a single LockNode to a RouterNode
- WaveNet Manager opened via LSM (see Best Practice: From the LSM software)
- Right-click on the LockNode entry that you want to assign to another RouterNode.
- The window Administration opens.
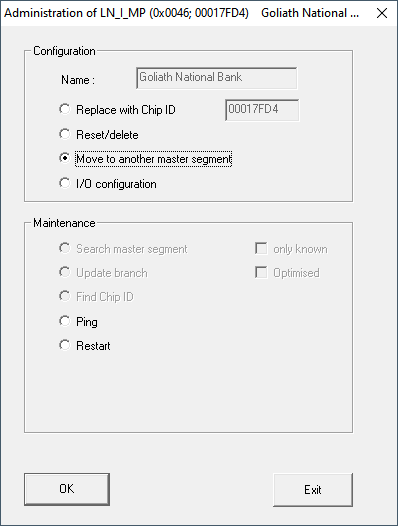
- In the area Configuration select the option
 Move to another master segment.
 - Click on the OK button.
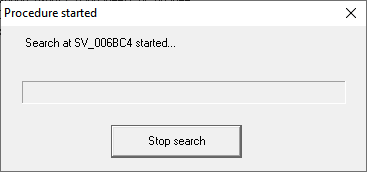
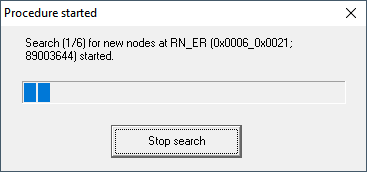
- The Procedure started window opens temporarily.
- Window Select CN/RN router opens (If the results window opens directly, then there are no other Router/CentralNodes in the segment. You must reset the LockNode and add it to another RouterNode).
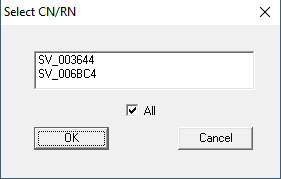
- Select the router/central nodes that are eligible to move the LockNode. (If necessary, select the checkbox
 all.)
all.) - Click on the OK button.
- Signal quality between LockNode and selected RouterNodes is measured.
- The window Result opens. You will see the list of previously selected RouterNodes with measured values.
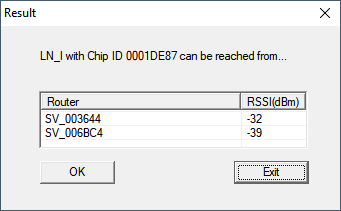
- Select the RouterNode to which you want to assign your LockNode.
NOTE

Best signal quality
From the possible RouterNodes, select the RouterNode whose RSSI value is closest to 0 (0 = theoretical best value).
NOTE
Exclamation mark before RouterNodes in the list
For certain network structures, you can only assign the selected LockNode to certain RouterNodes. RouterNodes to which you cannot assign the selected LockNode are marked with an exclamation mark in front of the entry (e.g. if the maximum number of LockNodes for this RouterNode has already been reached). These RouterNodes are displayed for completeness only.
- Click on the OK button.
- The Result window closes.
- LockNode is assigned to the desired RouterNode.
Reassigning several LockNodes to one RouterNode
- WaveNet Manager opened via LSM (see Best Practice: From the LSM software)
- LockNodes and RouterNodes connected to power supply.
- LockNodes and RouterNodes connected to WaveNet (test see Testing accessibility (WaveNet).
- LockNodes with currently poor connection known (see Check signal quality.
- Right-click on the RouterNode to which you want to reassign LockNodes.
- The window Administration opens.
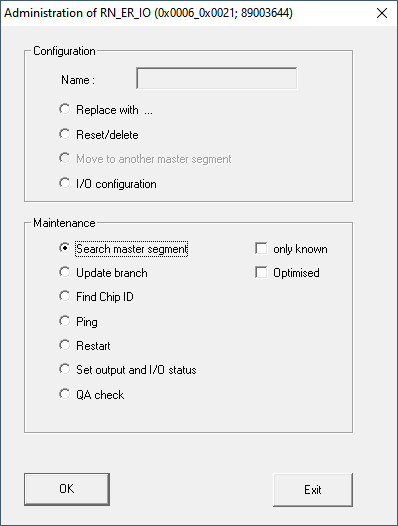
- In the area Maintenance select the option Search master segment.
- Activate the checkbox only known.
- Click on the OK button.
- The Administration window closes.
- The window WaveNetManager opens.
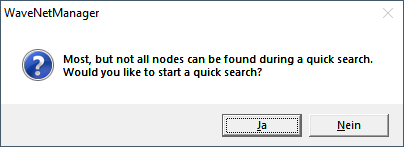
- Click button Yes (quick search) or No (regular search).
NOTE
Quick search
If you perform a fast search, the RouterNode will only send a single broadcast. If you perform a regular sweep, the RouterNode sends a total of six broadcasts. The quick search is completed faster, but the normal scan is more thorough and finds LockNodes that were not reached during a quick search.
- The WaveNetManager window closes.
- The Procedure started window opens temporarily.
- The window Search results opens.
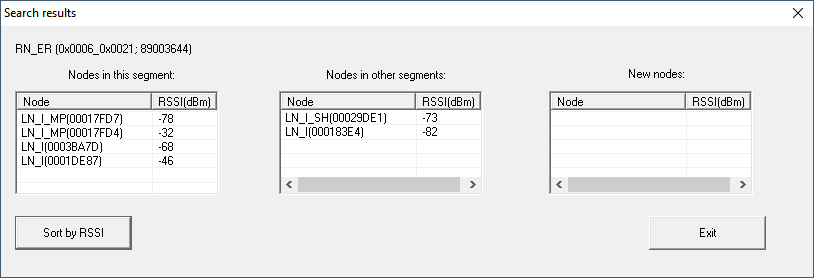
You will see an overview table of the LockNodes found by the RouterNode during the search. This table has three columns:
Nodes in this segment | Nodes from other segments | New nodes |
|---|---|---|
These LockNodes are located in the WaveNet topology and are already assigned to the RouterNode. | These LockNodes are located in the WaveNet topology, but are assigned to a different RouterNode. | These RouterNodes are not not in the WaveNet topology. |
Each column contains two sub-columns:
Nodes | RSSI |
|---|---|
Name of the LockNode | Signal strength of the LockNode connection to the searching RouterNode |
Unit of signal strength
The WaveNet Manager displays the signal strength as an RSSI value (Received Signal Strength) in dBm. This value is:
- Logarithmic: In practice, an improvement of 10 dBm means twice the signal strength.
- Negative: The theoretical best value is 0 dBm and is only achieved by cable connections. The closer the value is to 0 dBm (i.e. the smaller the amount), the better the reception.
- Mark the known LockNodes with bad connection in the middle column (nodes of other segments) if the RSSI value is better.
You can see the current RSSI values in the main window of the WaveNet Manager. - Use drag and drop to move the LockNodes to the left-hand column (nodes in this segment) to assign them to the current RouterNode (which you used to search).
- LockNodes are assigned to the current RouterNode.
NOTE
Assignment duration
When you reassign LockNodes, the WaveNet Manager communicates with the LockNodes to transfer the configuration and check the LockNode. This check takes a few seconds
- If necessary, confirm the IO configuration of the LockNode by clicking the OK (you can change the IO configuration at any time, see I/O configuration and protection functions).
- LockNodes are assigned to the RouterNode.