Step 2: Bolt sensor installation - SmartHandle 3062
Preparation of the bolt sensor
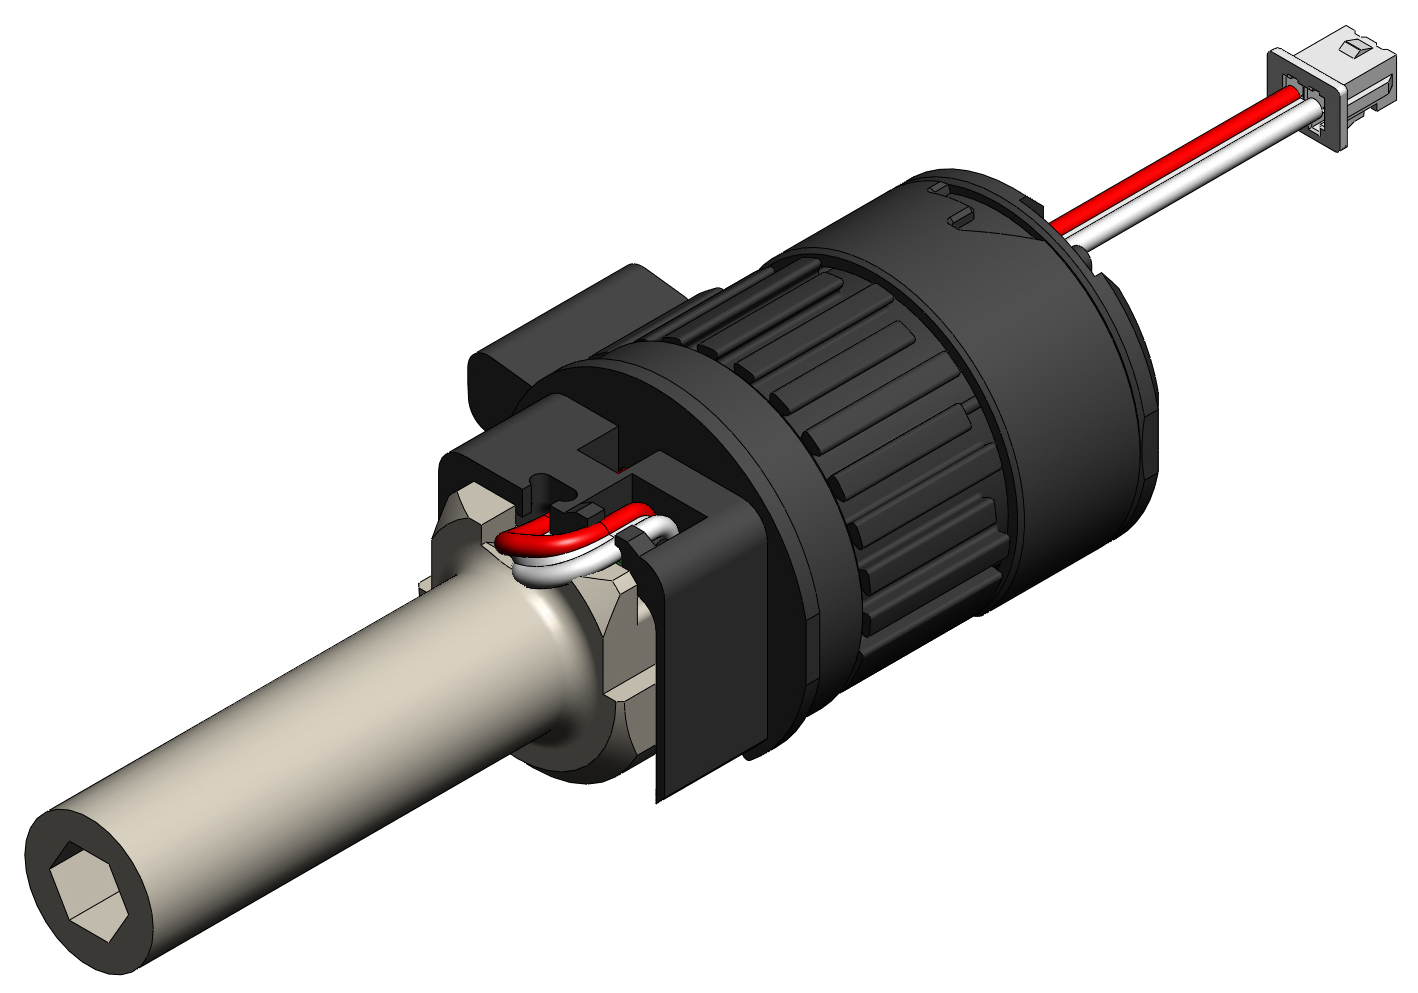
For preparation, the bolt sensor (C) has to be mounted onto the installation tool according to the following illustration:
The bolt sensor cone may need to be moved, depending on the door lock used. In most cases, the cone can remain in the pre-set "Position 1".
The cone can be moved with the following steps:
- Make sure that the bolt sensor (C) is placed firmly on the installation tool (D).
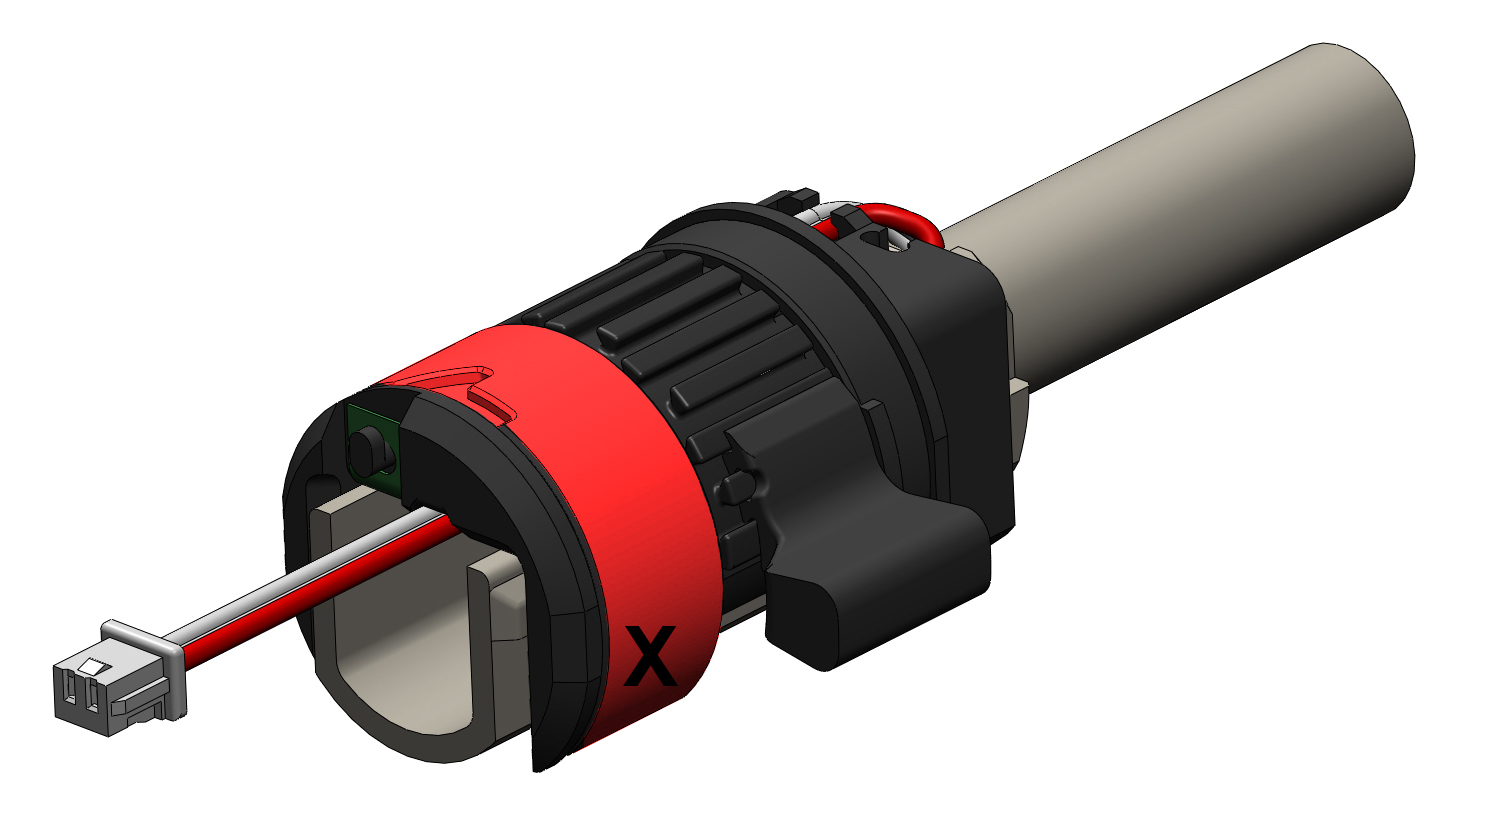
- Simply release the outer ring segment from point X (see illustration above) by turning in the direction of the arrow.
- Move the cone parallel to the axial direction to release it.
- Pull the cone to the required position.
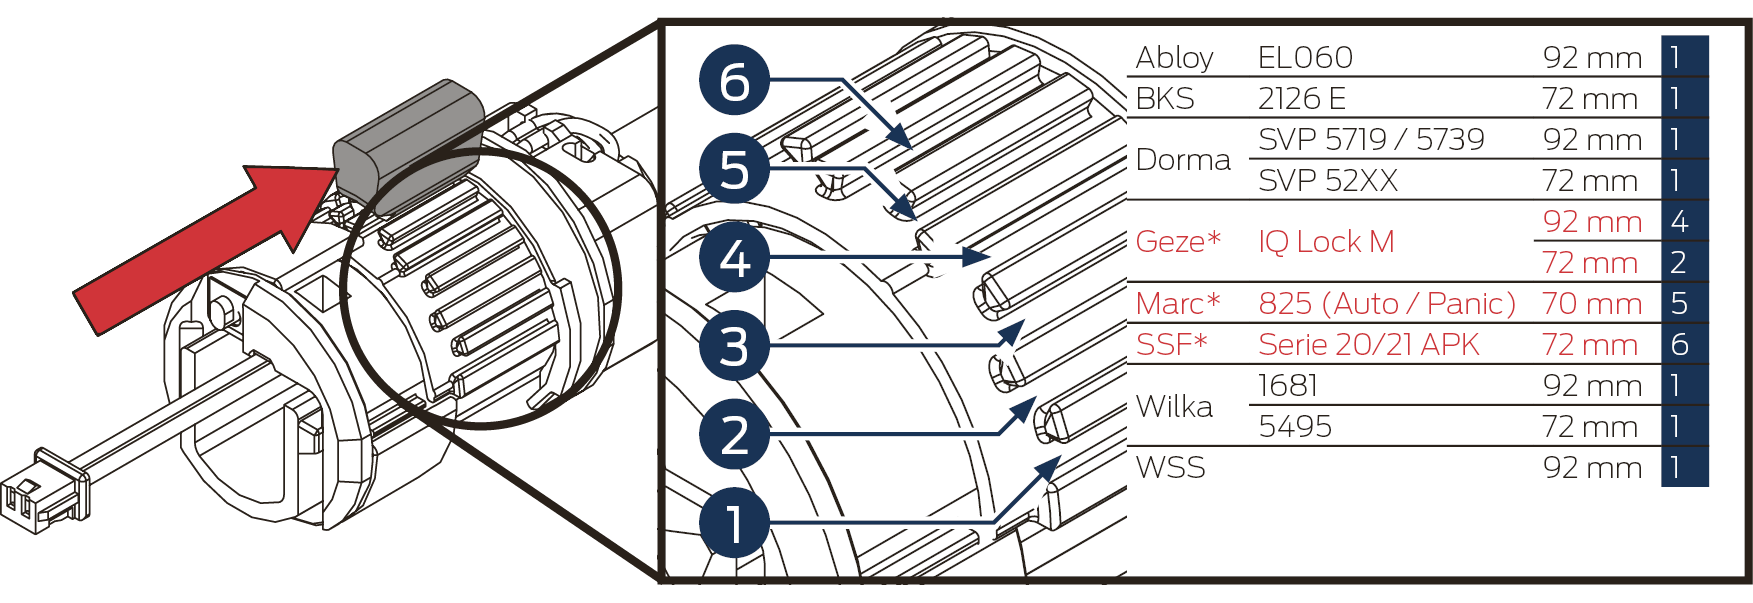
- The correct position can be found online at
 www.simons-voss.com.
 - Every bar corresponds to a position. The first bar corresponds to the unauthorized position zero. The illustration depicts the cone at position 1.
- Turn the ring segment back to the original position until you hear it audibly snap back into position.
Determining the installation direction
- The door lock must be in the unbolted position when it is installed.
- The square opening in the bolt sensor must always point to the right towards the door hinges when the bolt sensor is fitted. This determines whether the bolt sensor needs to be fitted from the inner or outer side of the door.
Fitting the bolt sensor from the inner side
- Carefully release cable from the bolt sensor cable duct (C) to guide the plug out onto the inner side.
- Push the bolt sensor into the profile cylinder opening via the installation tool (D) until it stops.
- The square opening in the bolt sensor must always point to the right towards the door hinges.
- Rotate bolt sensor 90º, so that the bolt sensor opening points downwards.
- Pull the installation tool to remove.
- The bolt sensor remains in the lock. The rectangular opening in the bolt sensor faces downwards.
Fitting the bolt sensor from the outer side
- Push the bolt sensor (B) into the profile cylinder opening via the installation tool (D) until it stops.
- The square opening in the bolt sensor must always point to the right towards the door hinges.
- Rotate bolt sensor 90º, so that the bolt sensor opening points downwards.
- Pull the installation tool to remove.
- The bolt sensor remains in the lock. The rectangular opening in the bolt sensor faces downwards.
Fix anti-twist mechanism in the door lock
- Introduce the anti-twist mechanism (E) in the rectangular opening of the bolt sensor until you hear it snap into position. If necessary, the anti-twist mechanism can be slightly pressed together so that it fits through the lock better.
- The anti-twist mechanism is firmly situated in the lock and keeps the bolt sensor in its position.