Read locking device - LSM 3.6 Basic Online
One of the great advantages of networked locking devices is that you can conveniently check the status from your workstation.
You can even automate this with the Task Manager.
You can then further process the information in LSM, for example by means of warnings and messages (see Warning monitor and Manage warnings).
- LSM open.
- Locking devices to be read out programmed and networked (see Creating a WaveNet radio network and incorporating a locking device).
- Select via Network the entry .
- Windows Task manager launches.
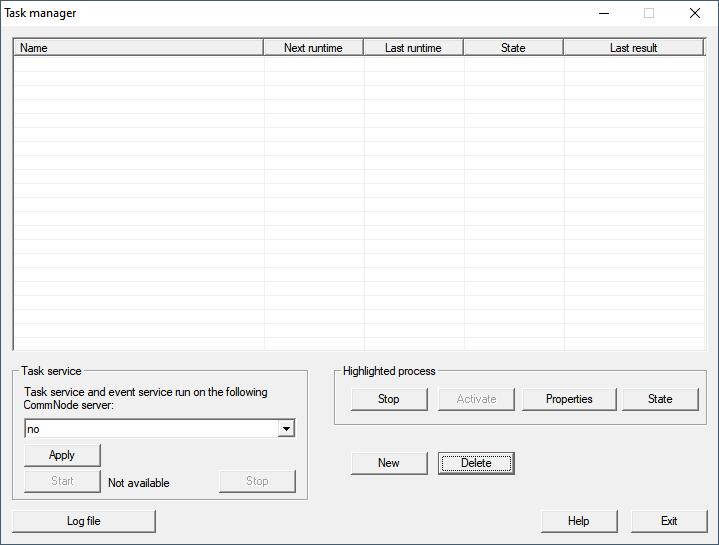
- Click on the button Newto create a new task.
- Windows Task launches.
- Enter a name for the task.
- From the drop-down menu, select the entry Read lock state off.
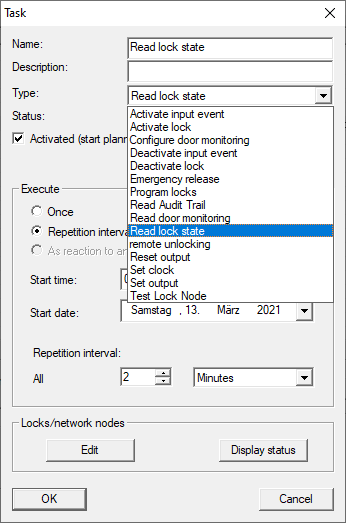
- Select in the area Execute the option
 Repeat interval off.
 - Set the desired interval.
NOTE

Effect of the repeat interval on the battery run time
The more often you read the locking device, the more often the locking device is woken up from the energy-saving standby mode. Battery life may therefore be shorter.

- Click in the area Locks/network nodes on the button Edit.
- Windows Administration launches.
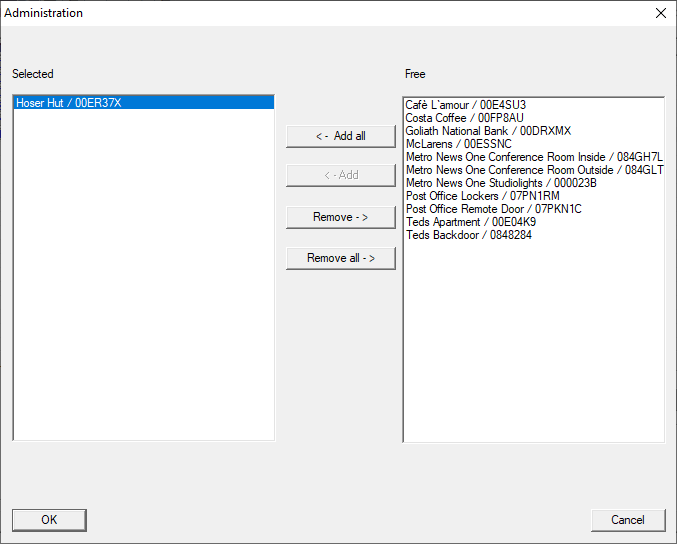
- Select the locking devices you want to read.
- Then move the locking devices using the button ← Add into the left column.
- Click on the OK button.
- Windows Administration closes.
- Click on the OK button.
- Windows Task closes.
- Task is listed in the Task Manager.
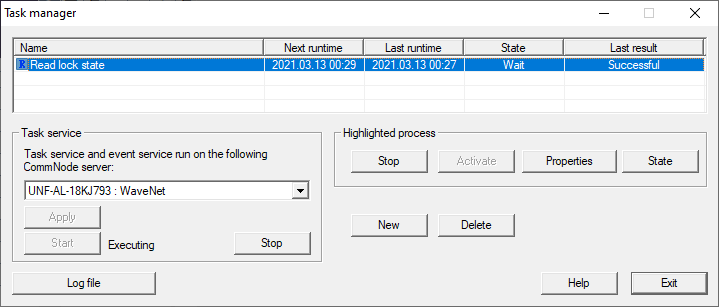
- Ensure that in the field: Task service in the drop down menu of the appropriate CommNode is selected.

- Make sure that the task service is also running.

- Click on the Exit button.
- Windows Task manager closes.
- Locking status of the set locking devices is queried automatically.