Installing the fitting - Digital SmartHandle AX
- Door pre-drilled.
- PH2 screwdriver at hand.
- TX15 screwdriver at hand.
- Vernier calliper at hand.
- Pincers at hand.
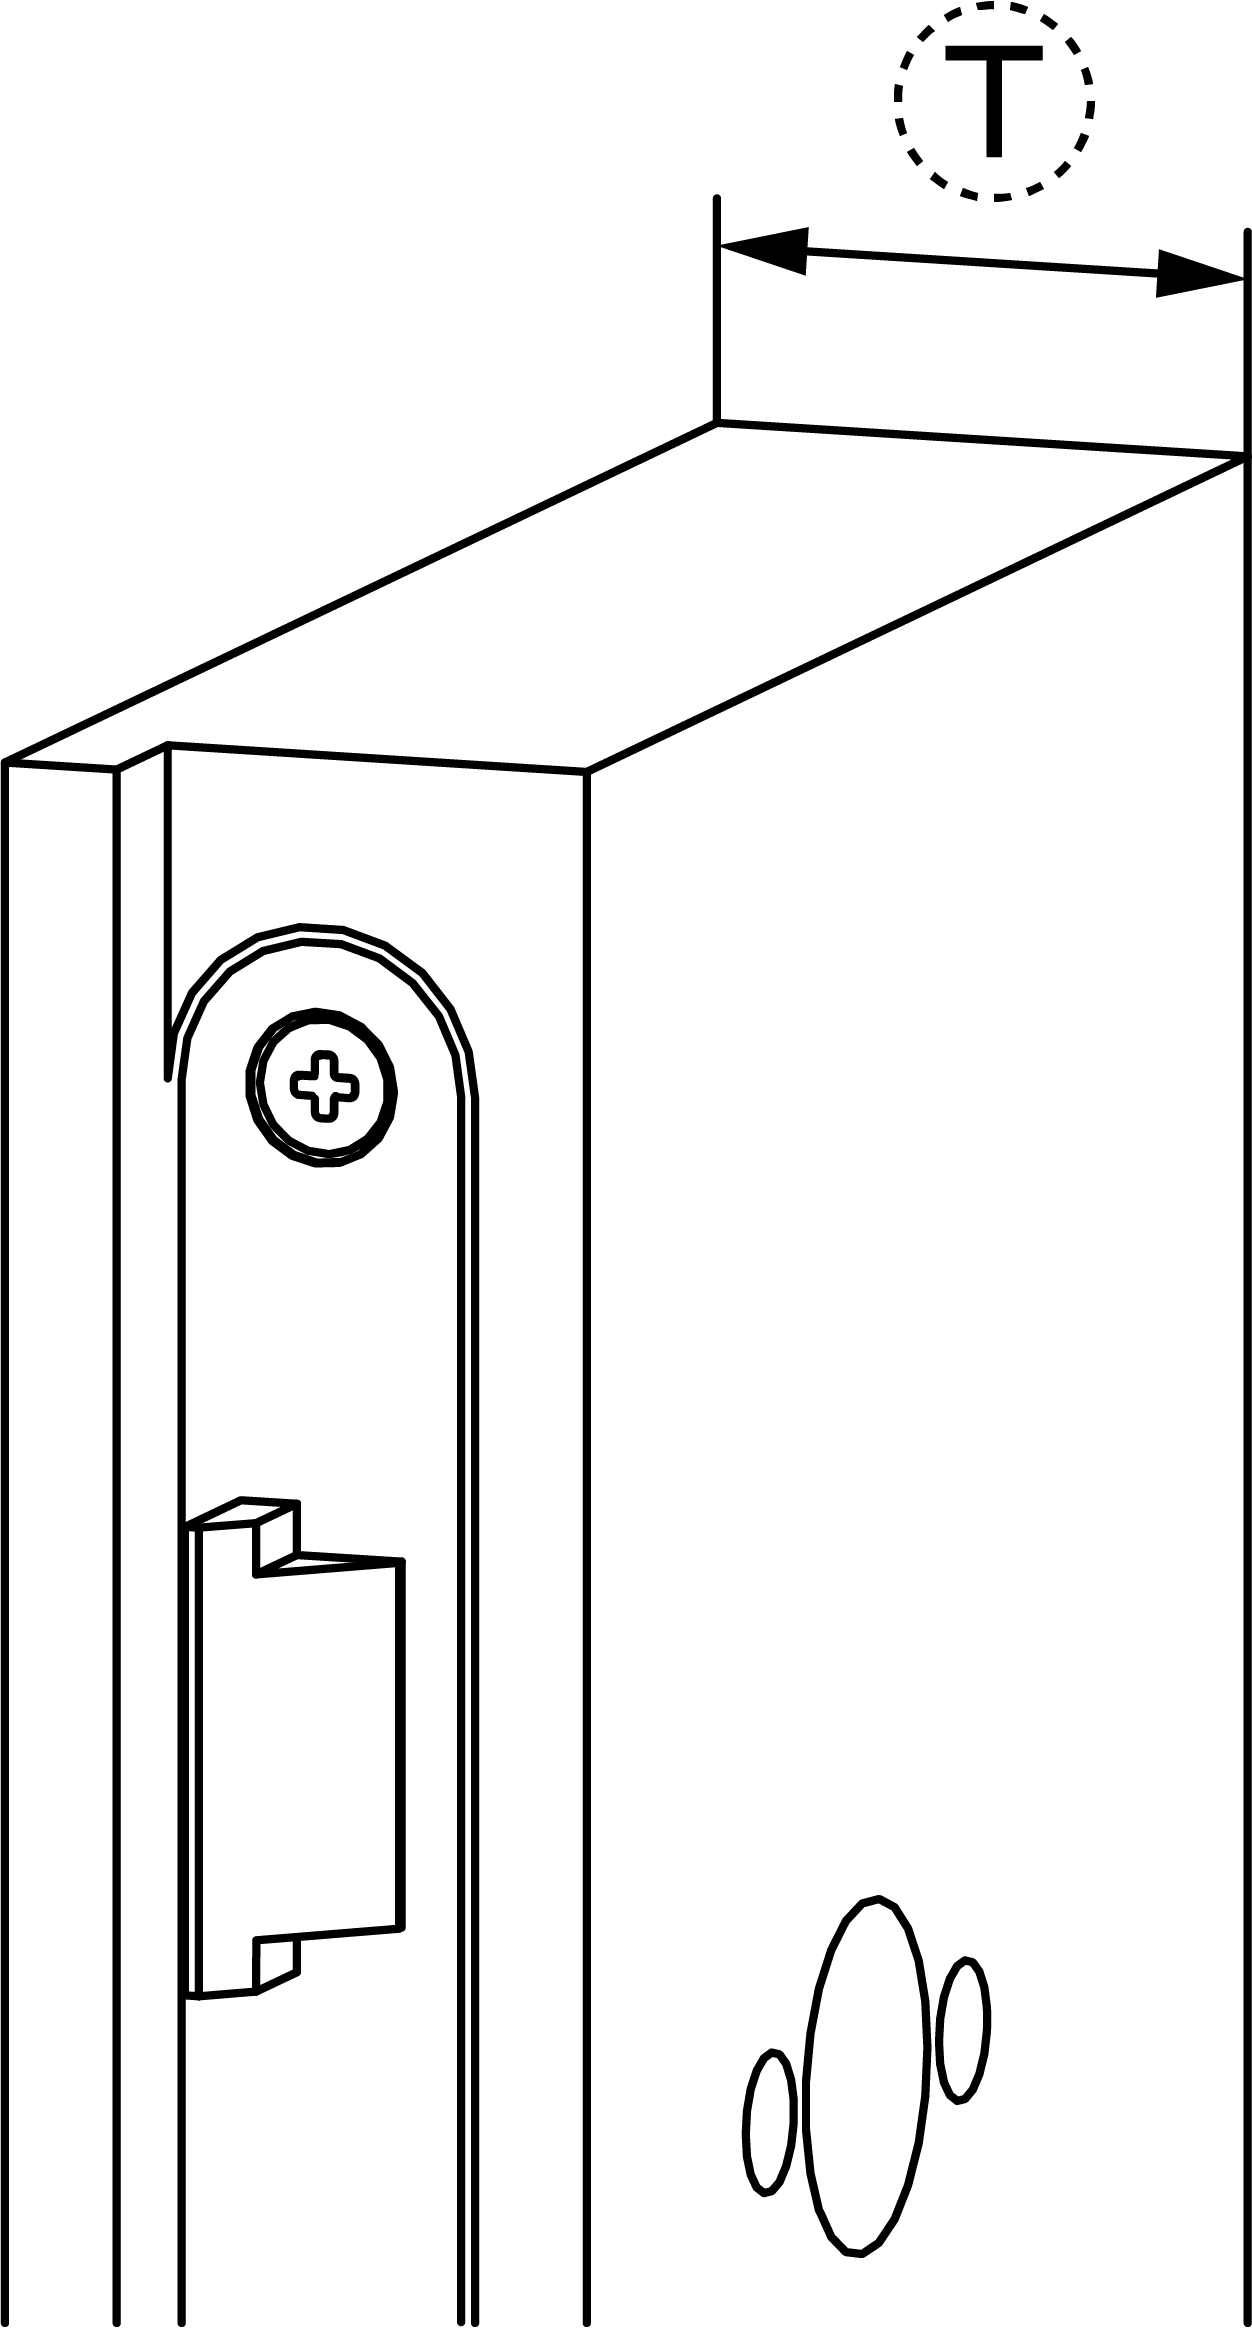
- For S, M and L: measure the door thickness.
- For S, M and L: determine the cutting points on the cut-to-length screws.
- For S, M and L: shorten the cut-to-length screws.

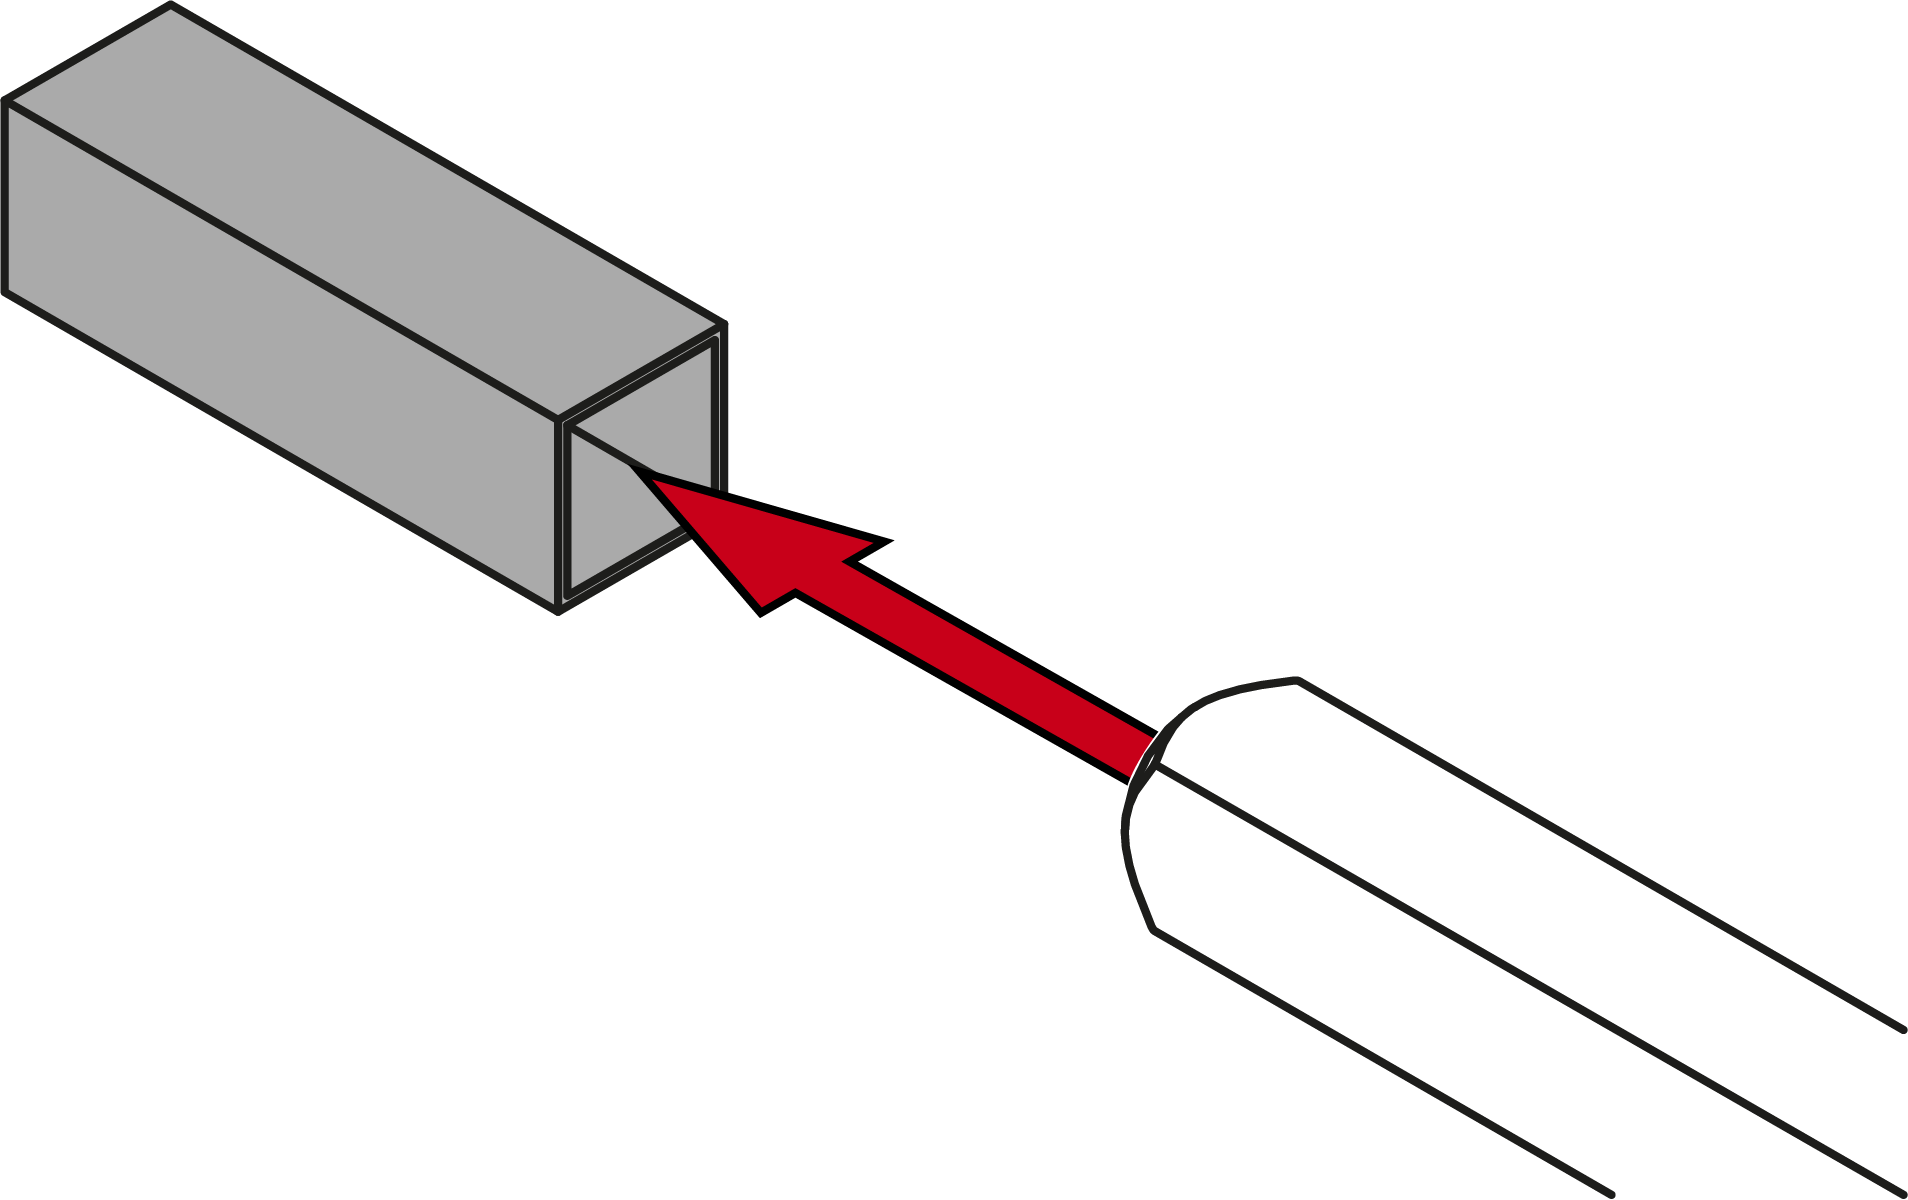
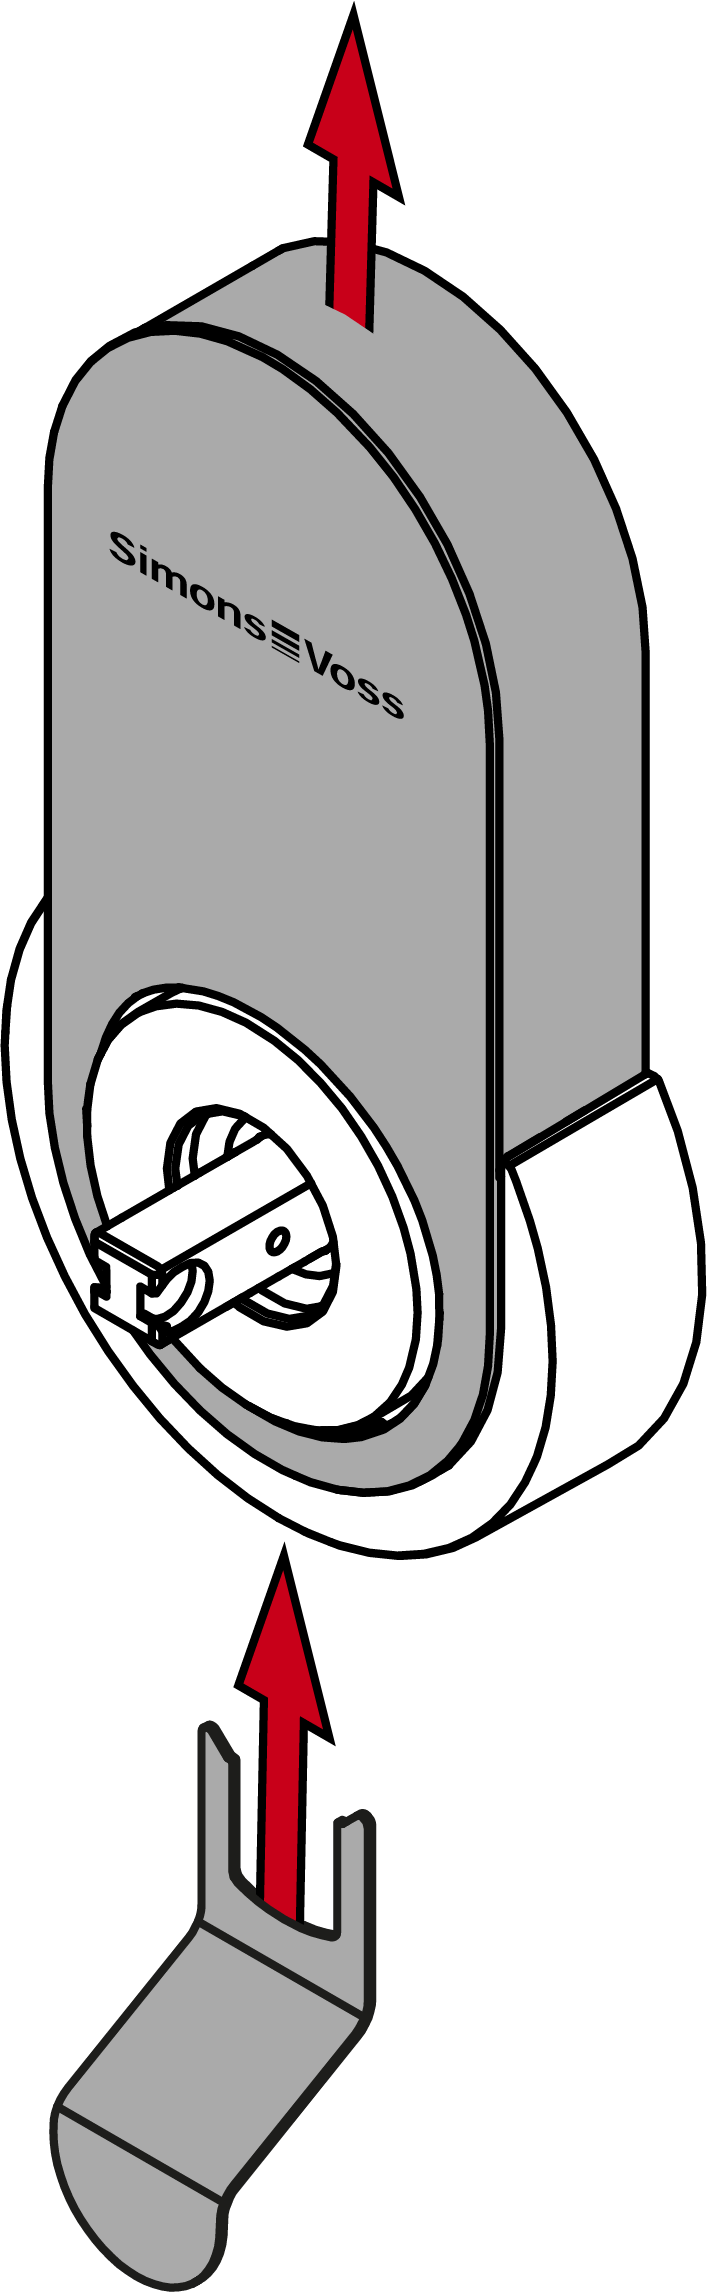
- For 7 mm spindle: insert the adapter sleeve onto the side of the spindle with the pin.
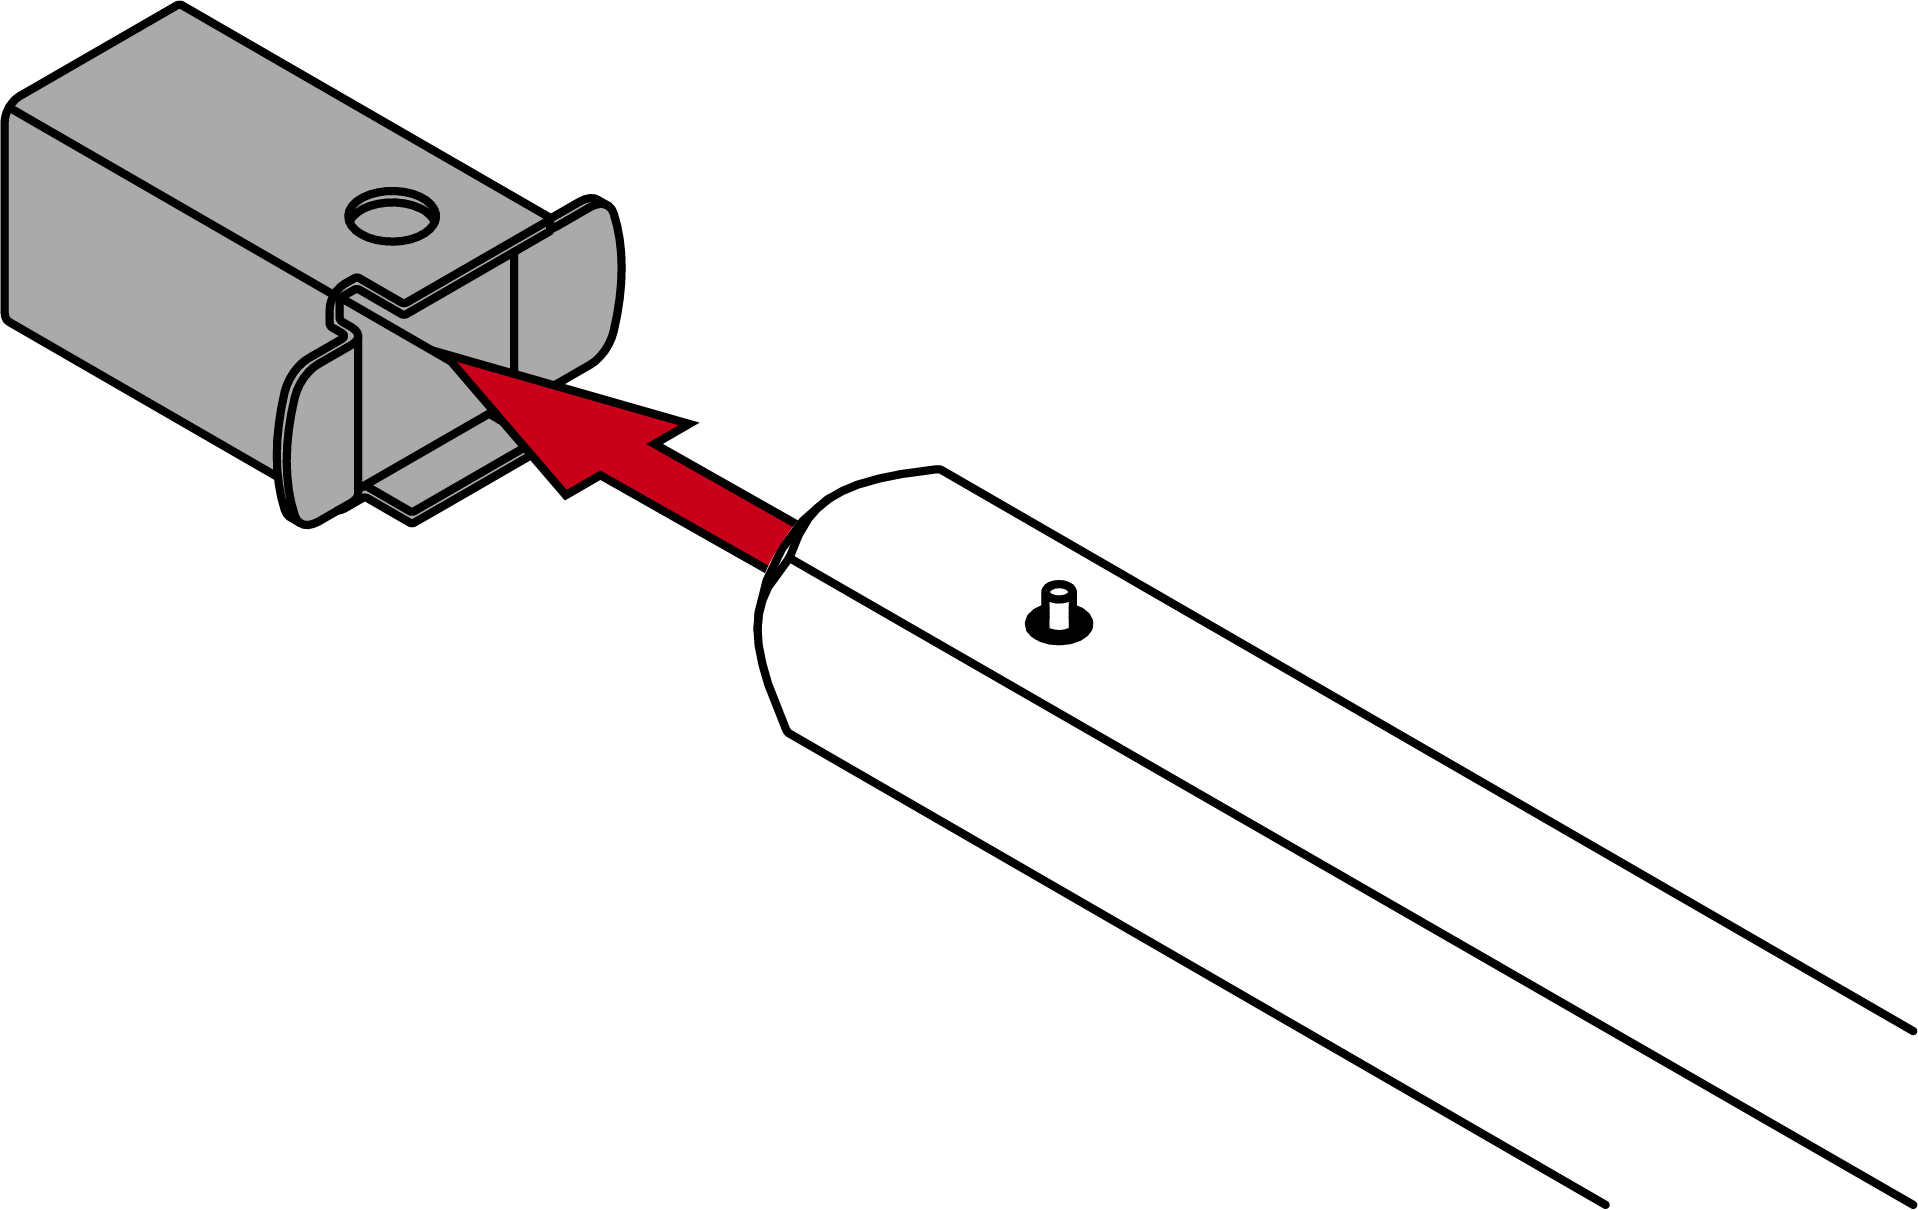
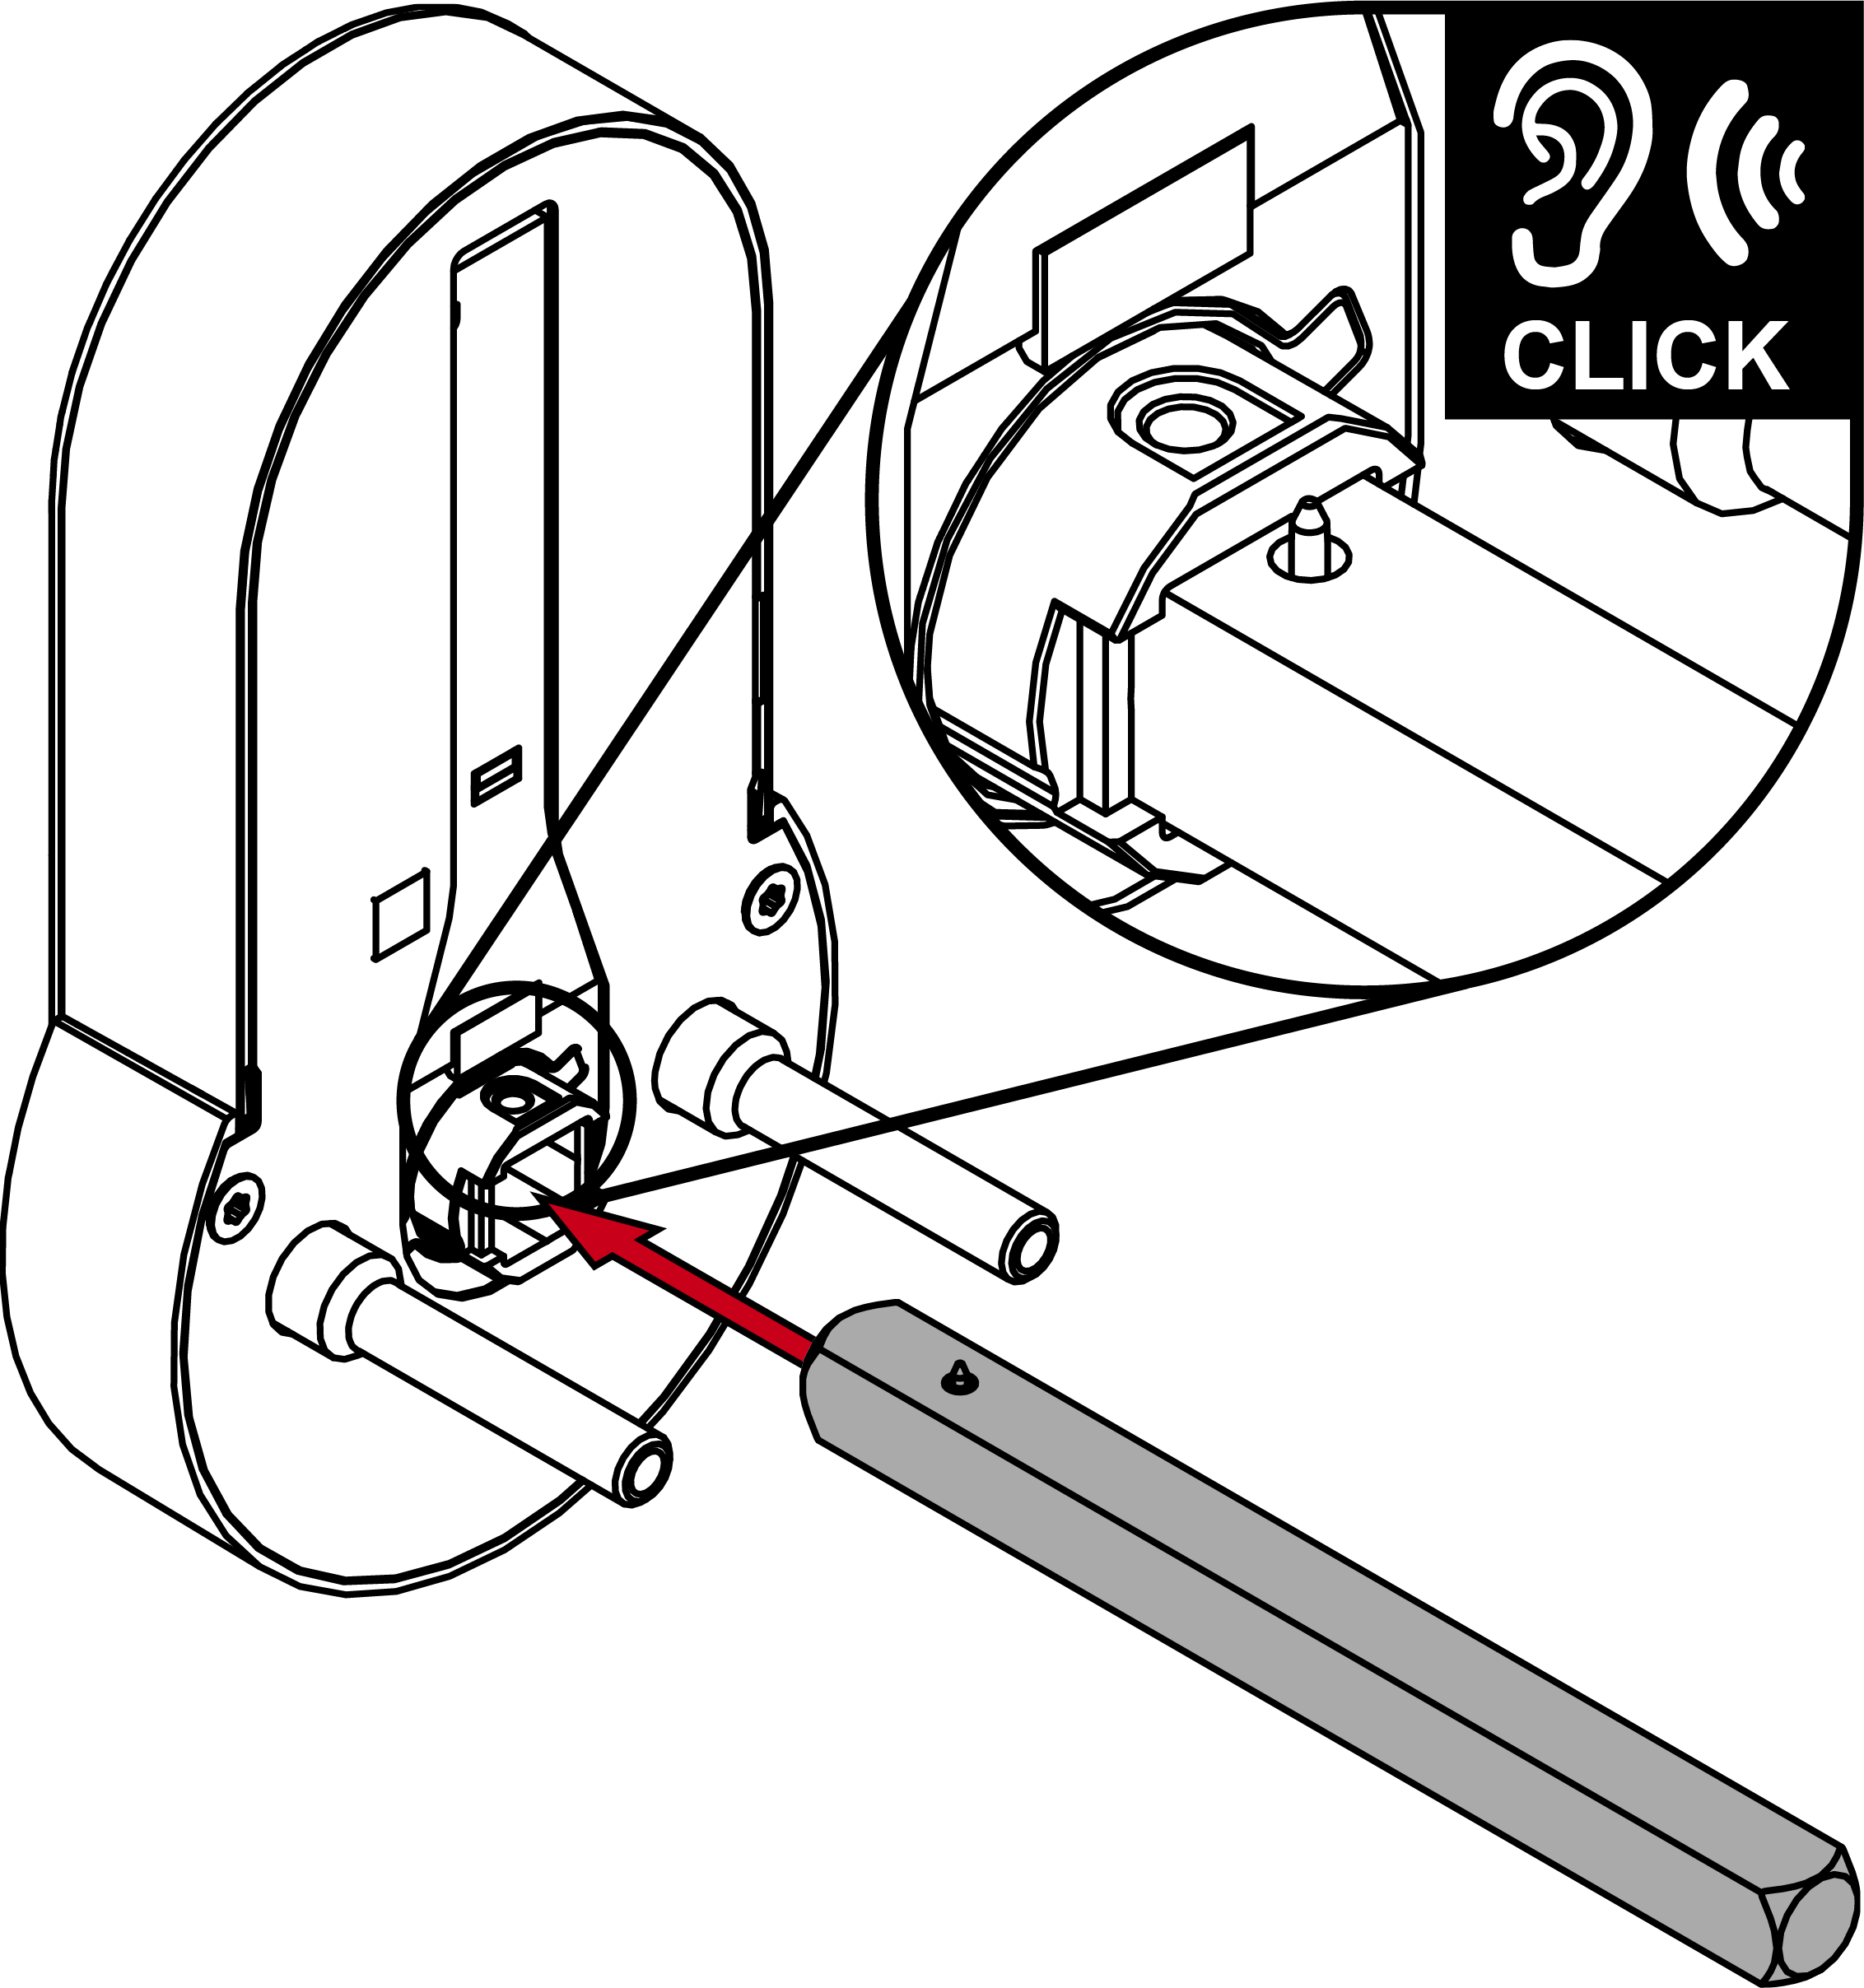
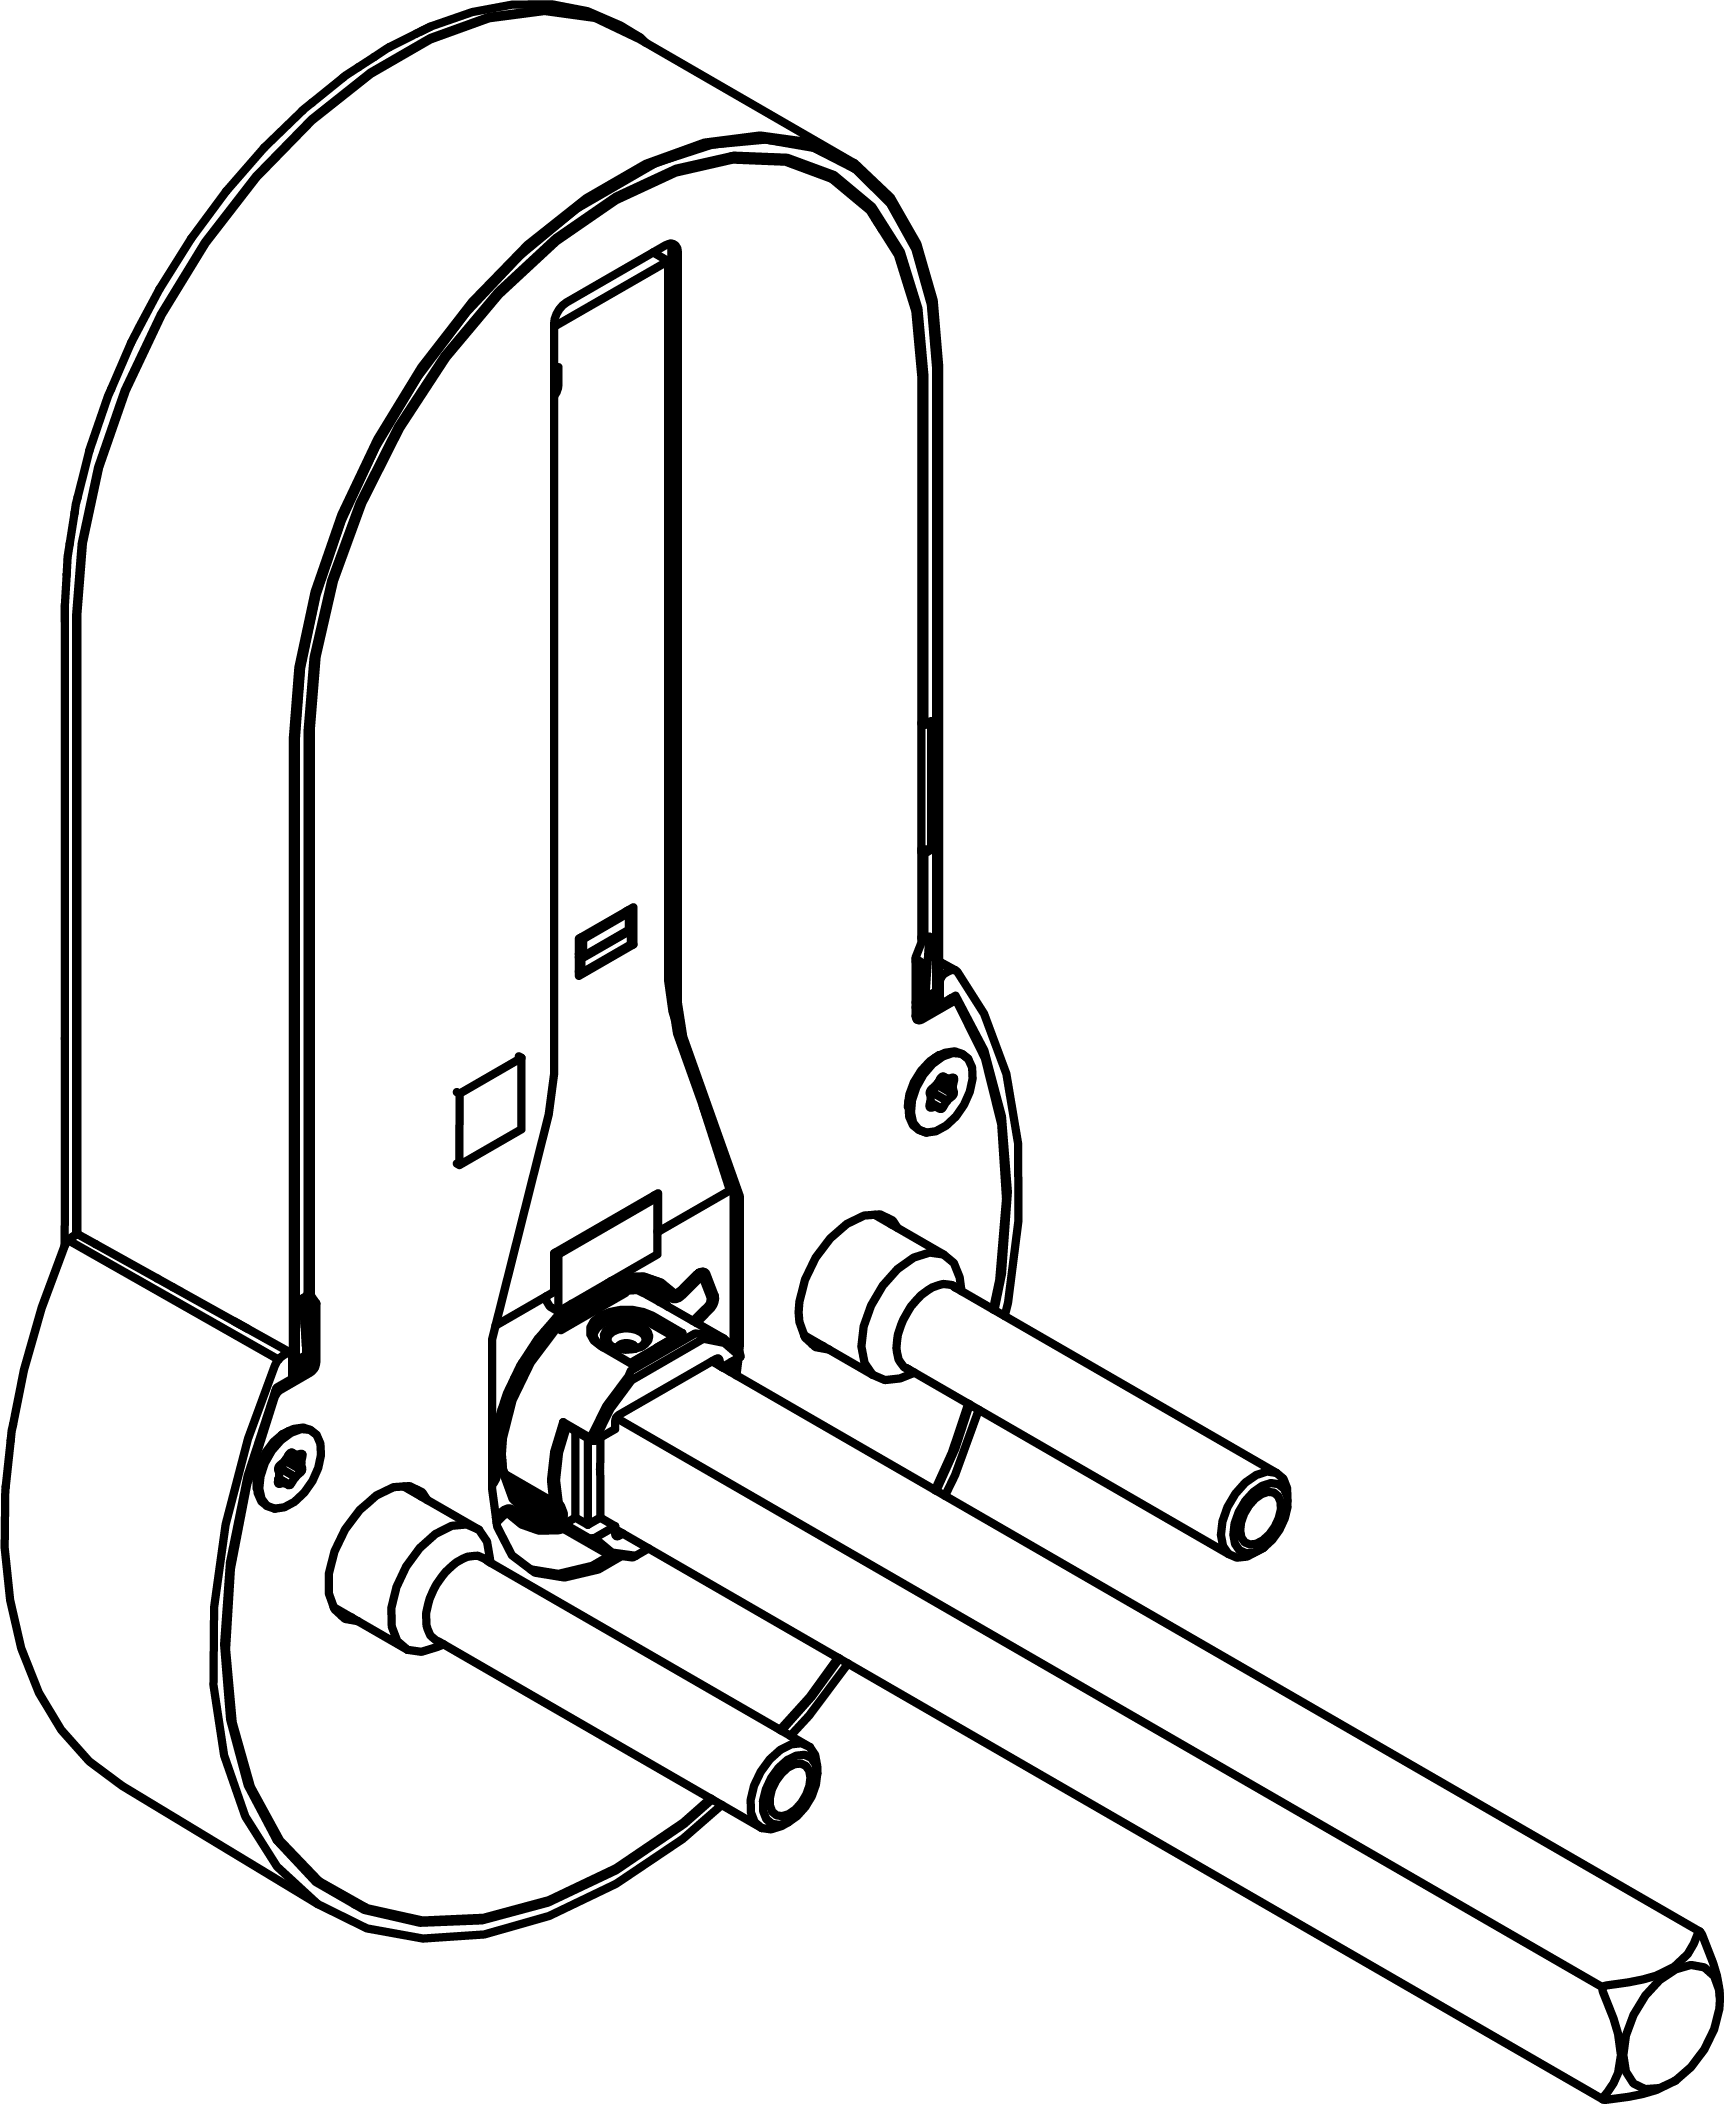
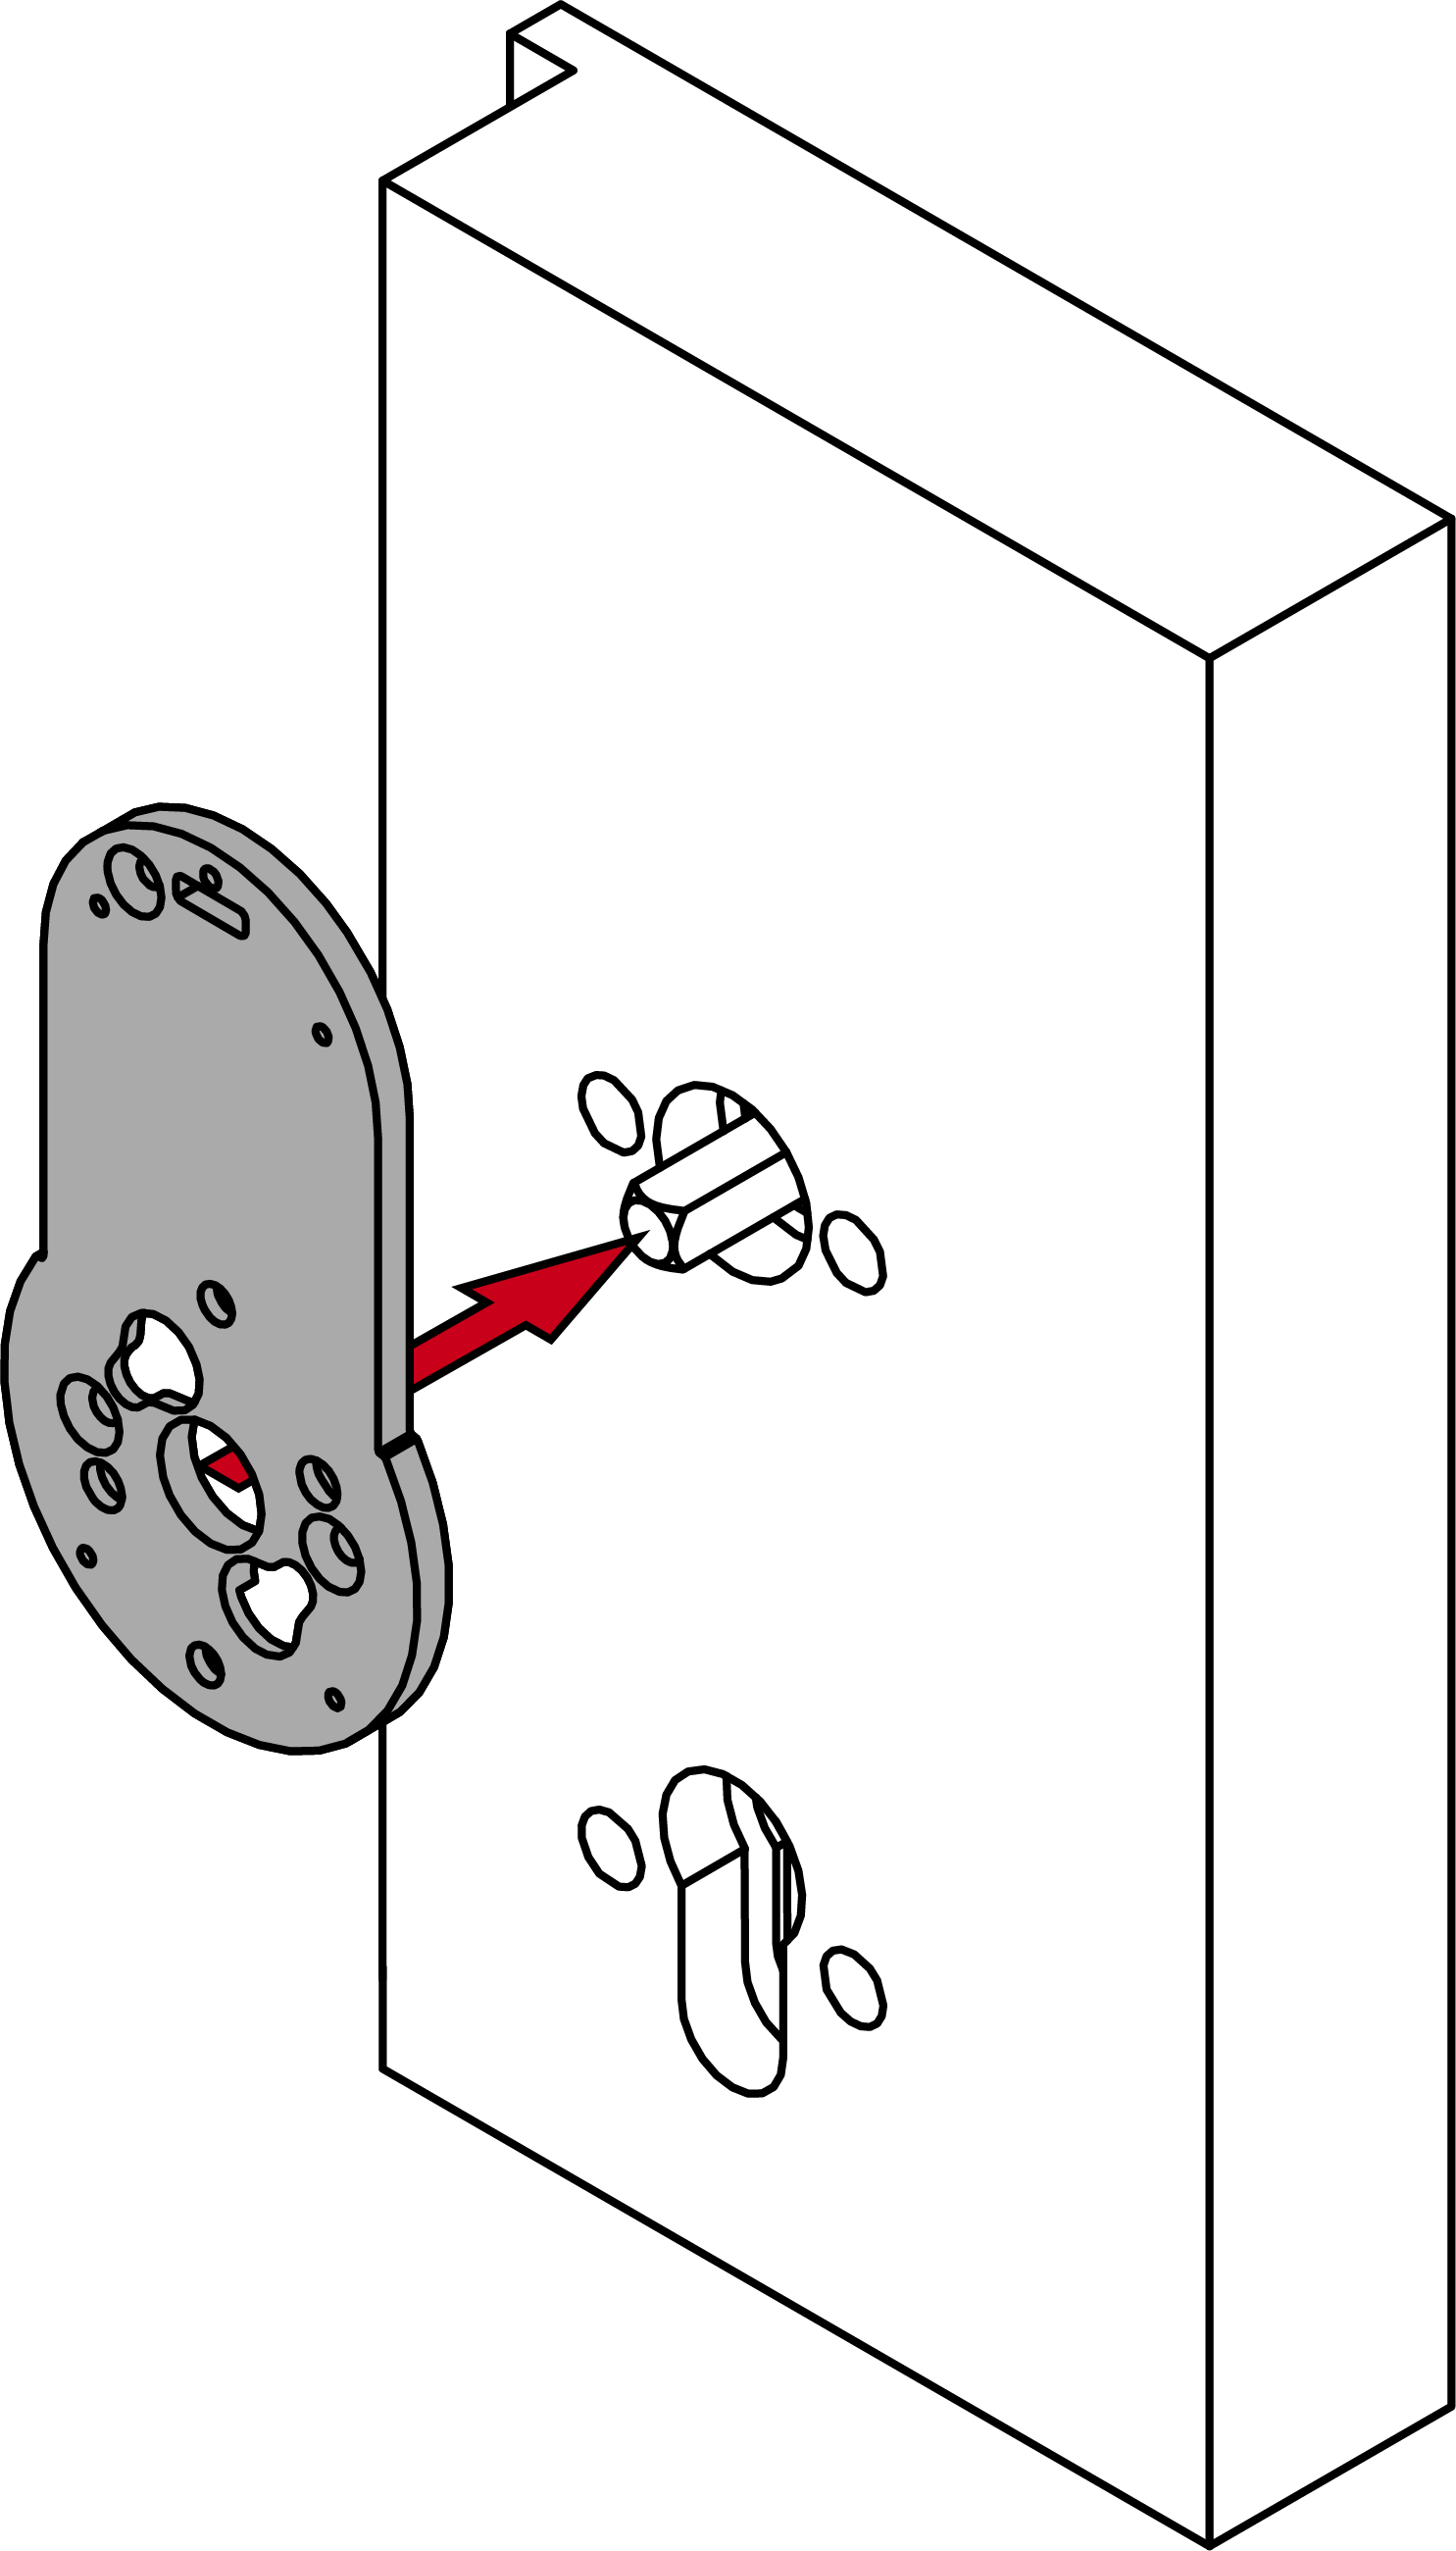
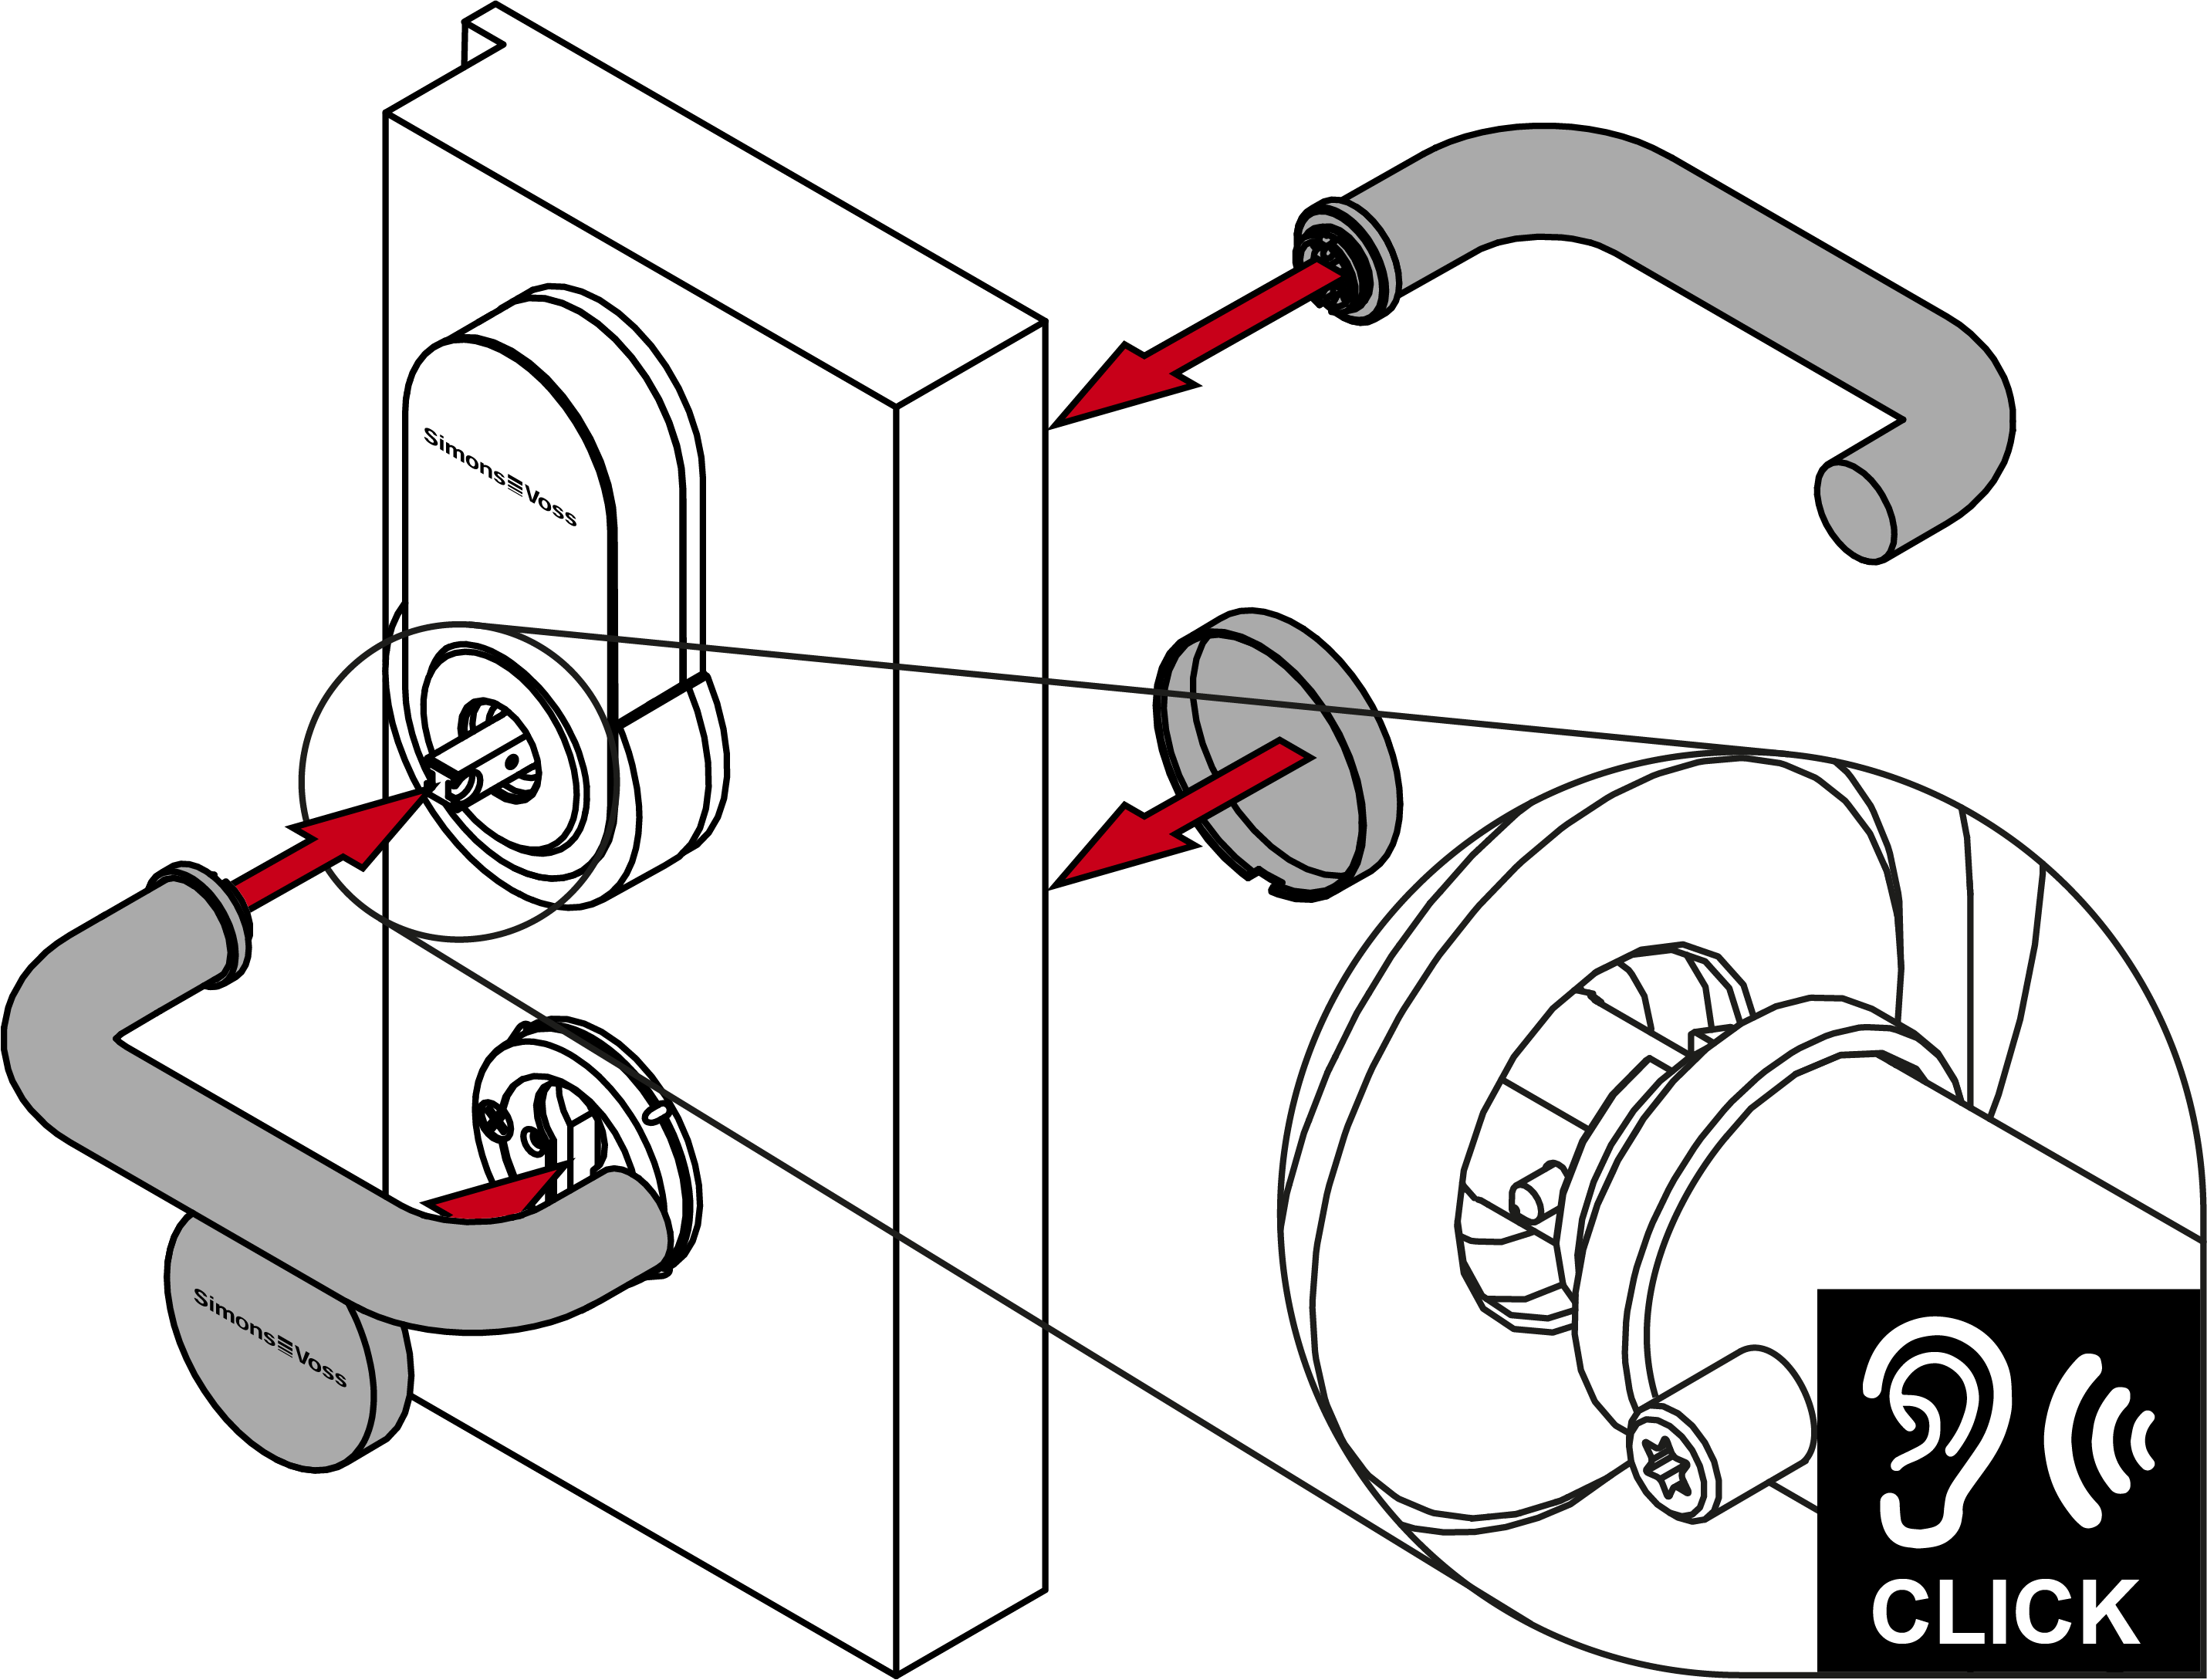
- Insert the spindle with the pin side into the fitting.
- Pin will snap into position in the mount.
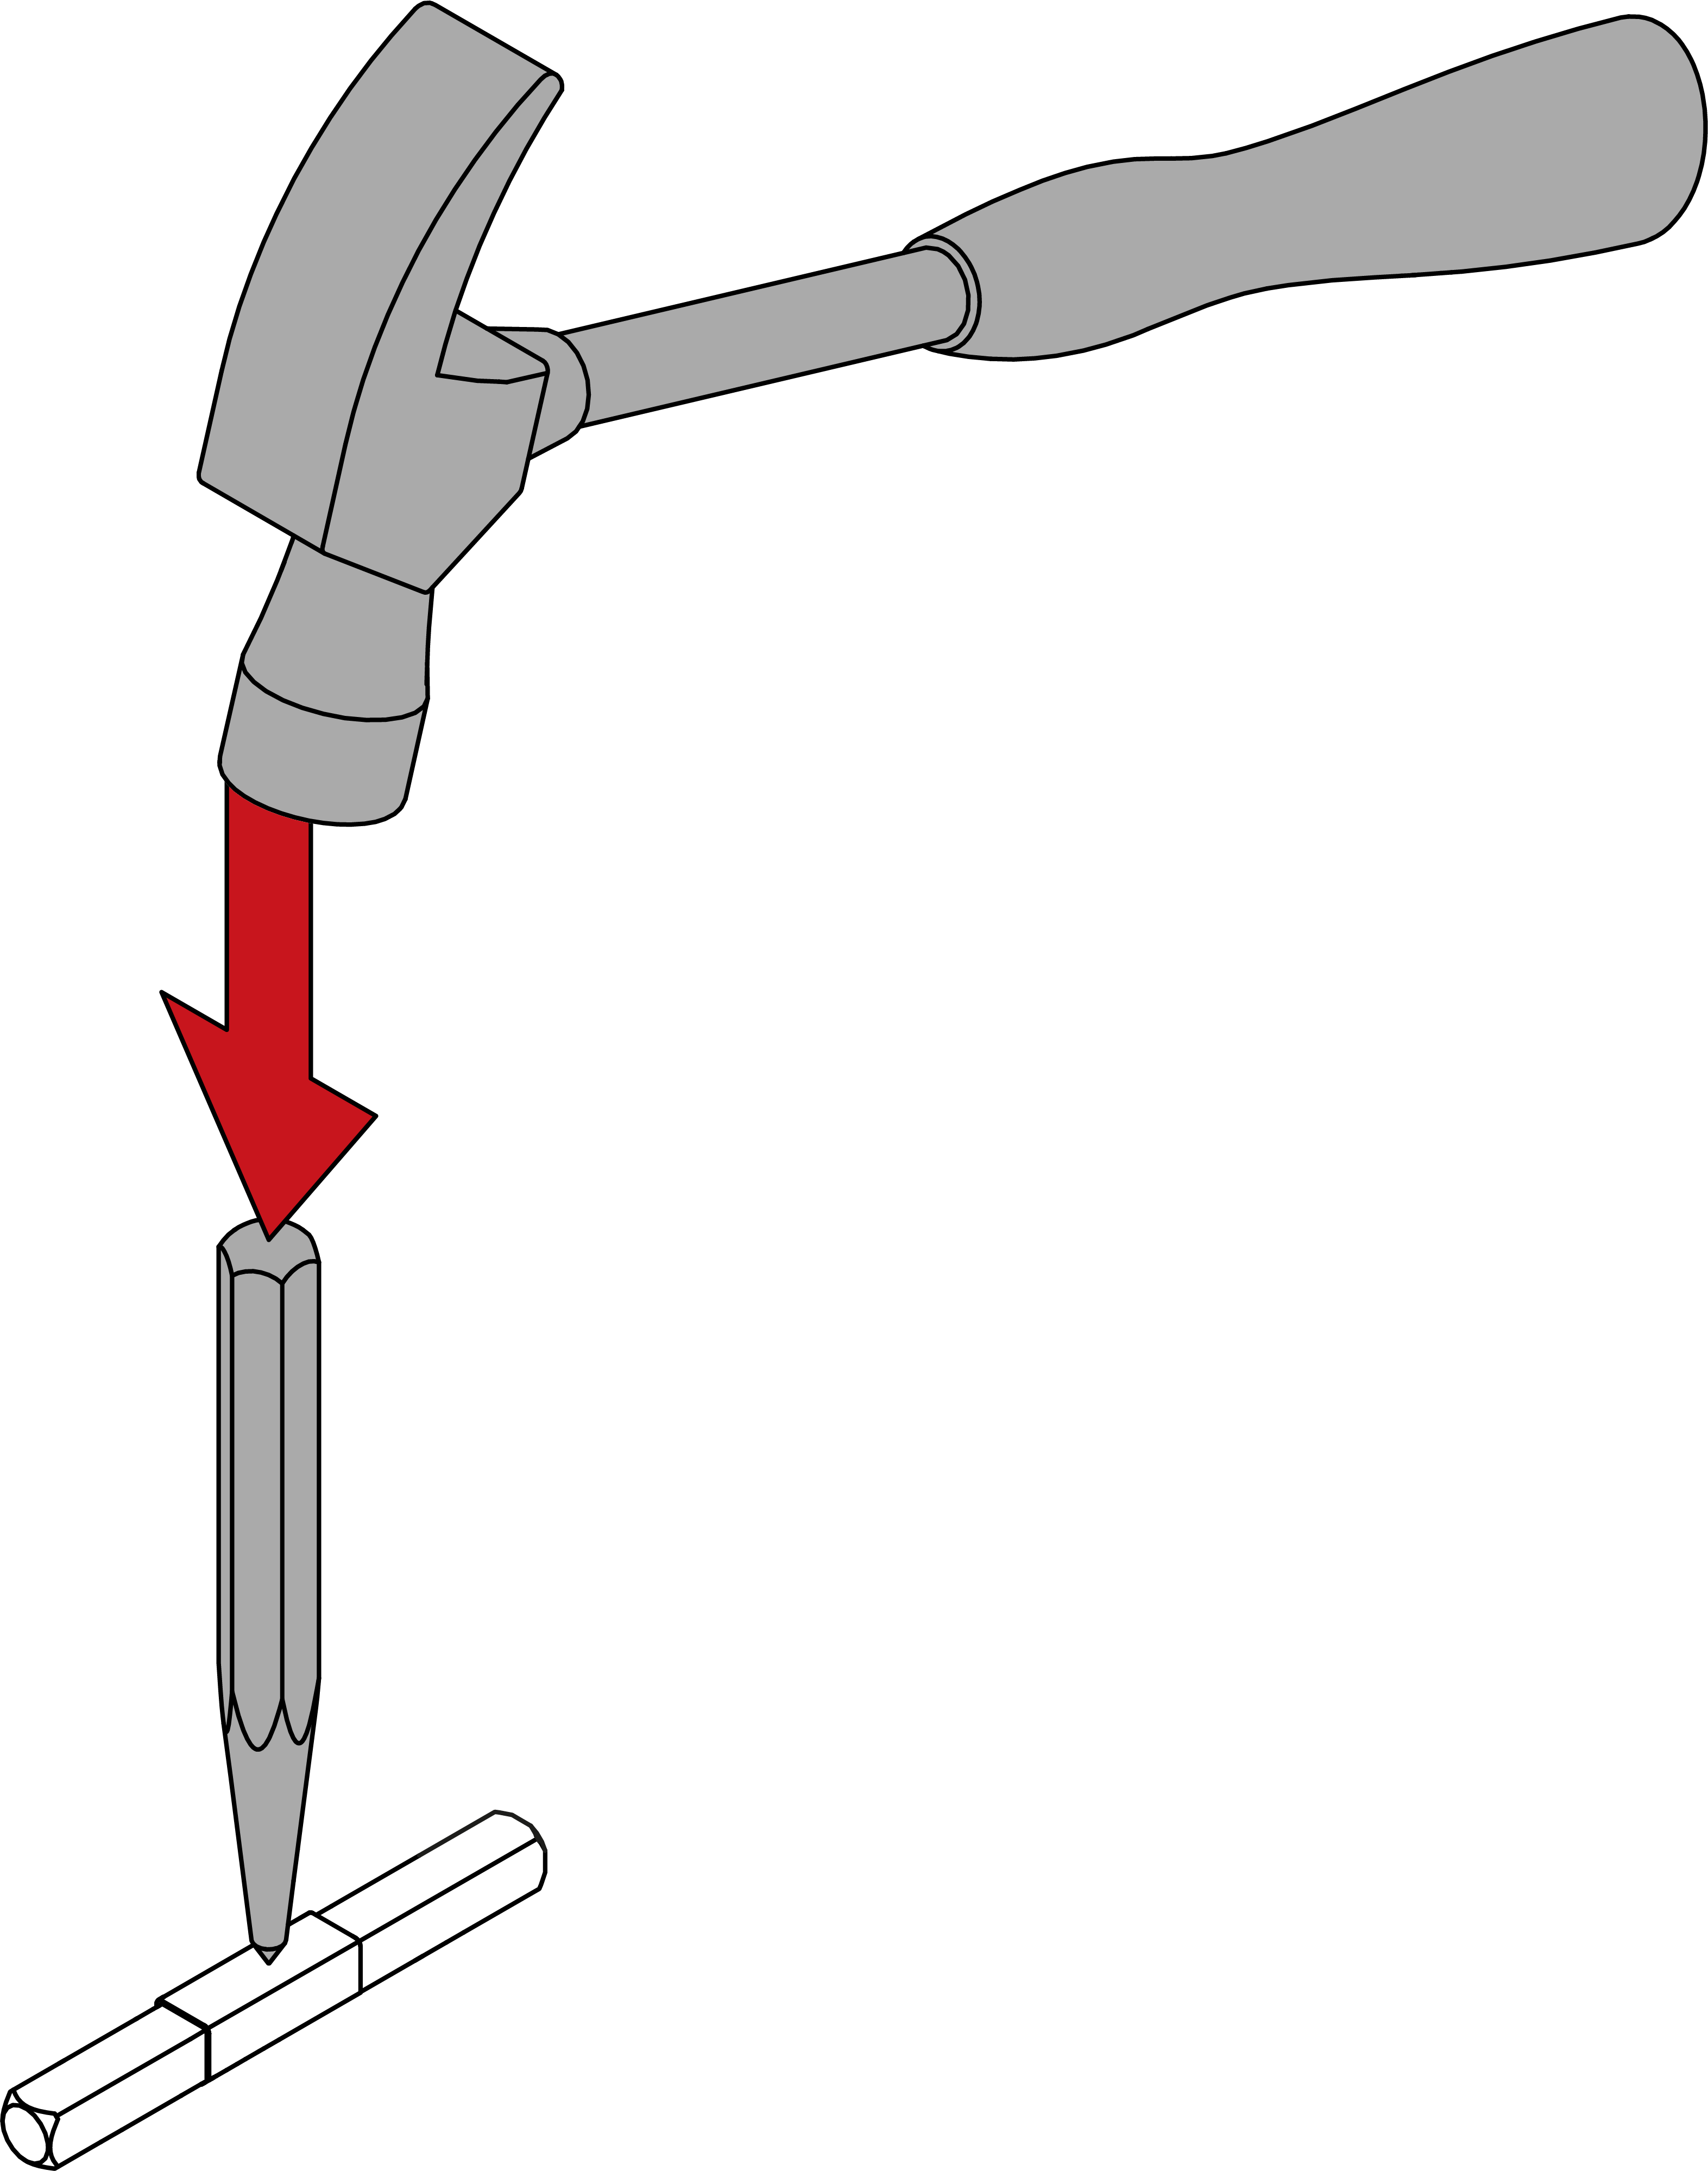
- For 8.5 mm, 9 mm and 10 mm spindles: slide the adapter sleeve into the centre of the spindle. Use a punch and hammer to make an indent in the adapter sleeve to prevent it from slipping.
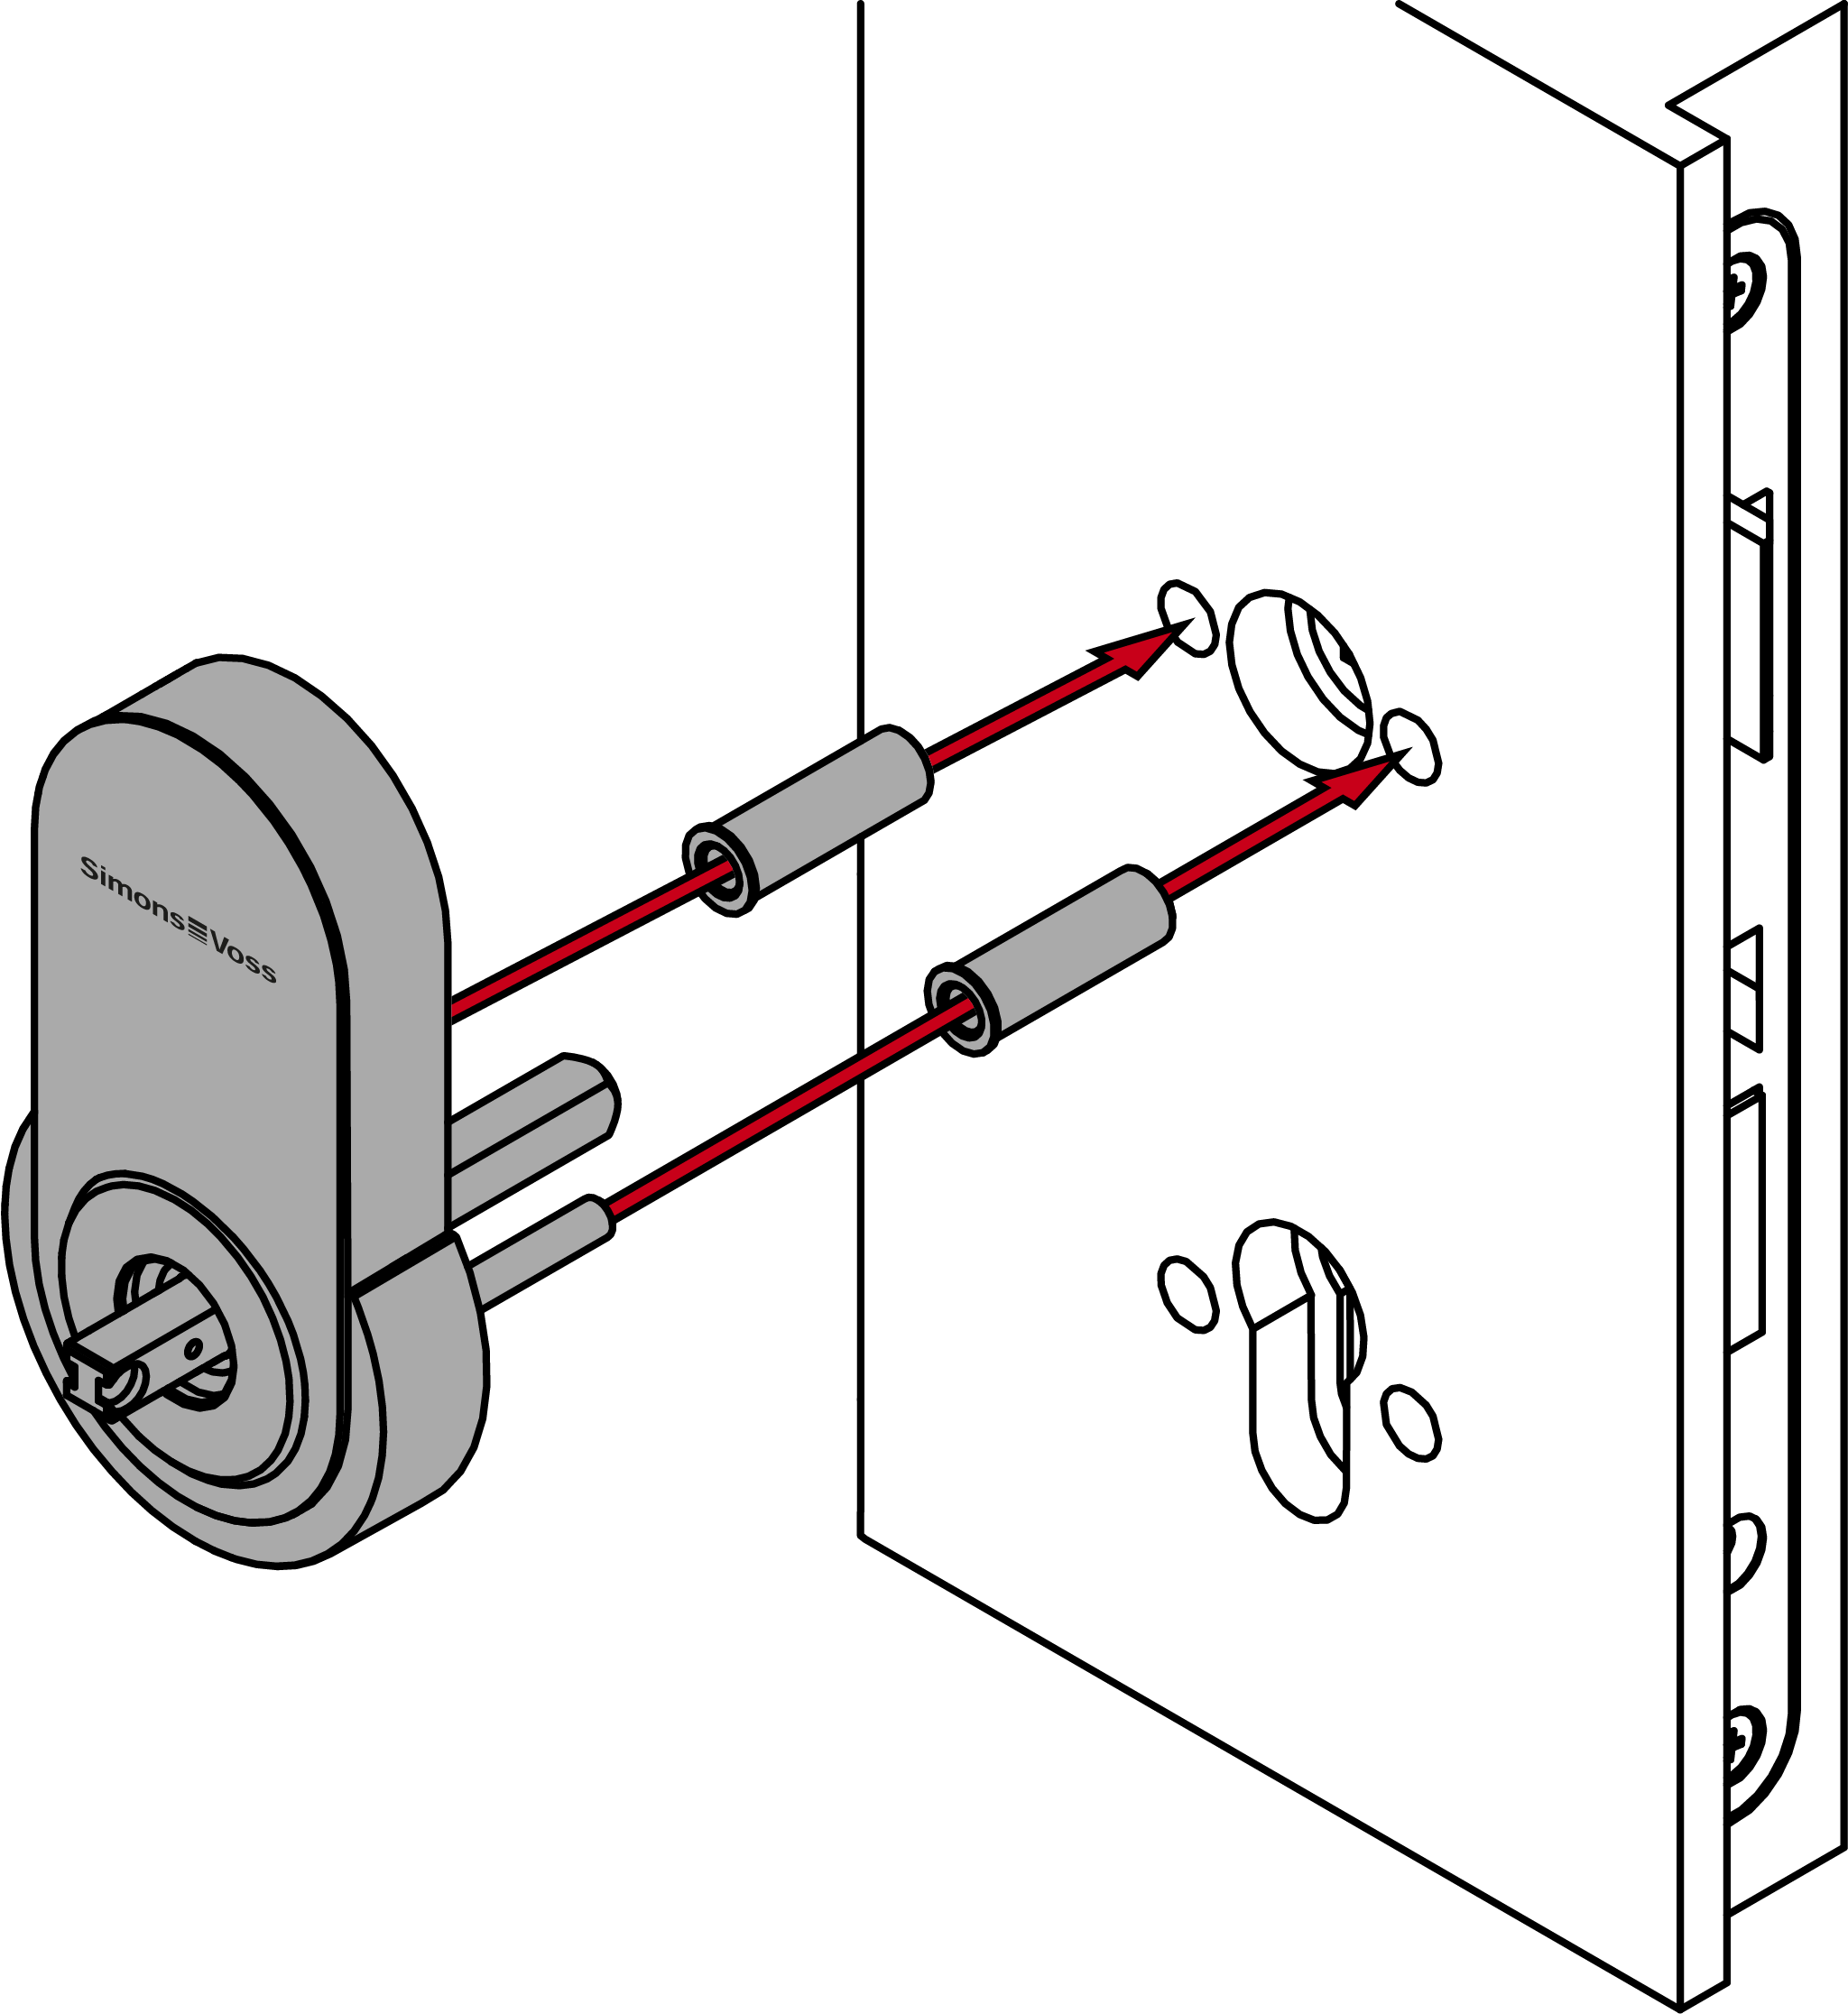
- Insert the outer fitting, with adapter sleeves if necessary, into the door from the outside.
Ø mortise lock fastening hole
Adapter sleeves
5.5 mm–6.3 mm
No adapter sleeves
6.4 mm–7.3 mm
6.4 mm
7.4 mm–8.7 mm
7.4 mm
≥ 8.8 mm
8.8 mm
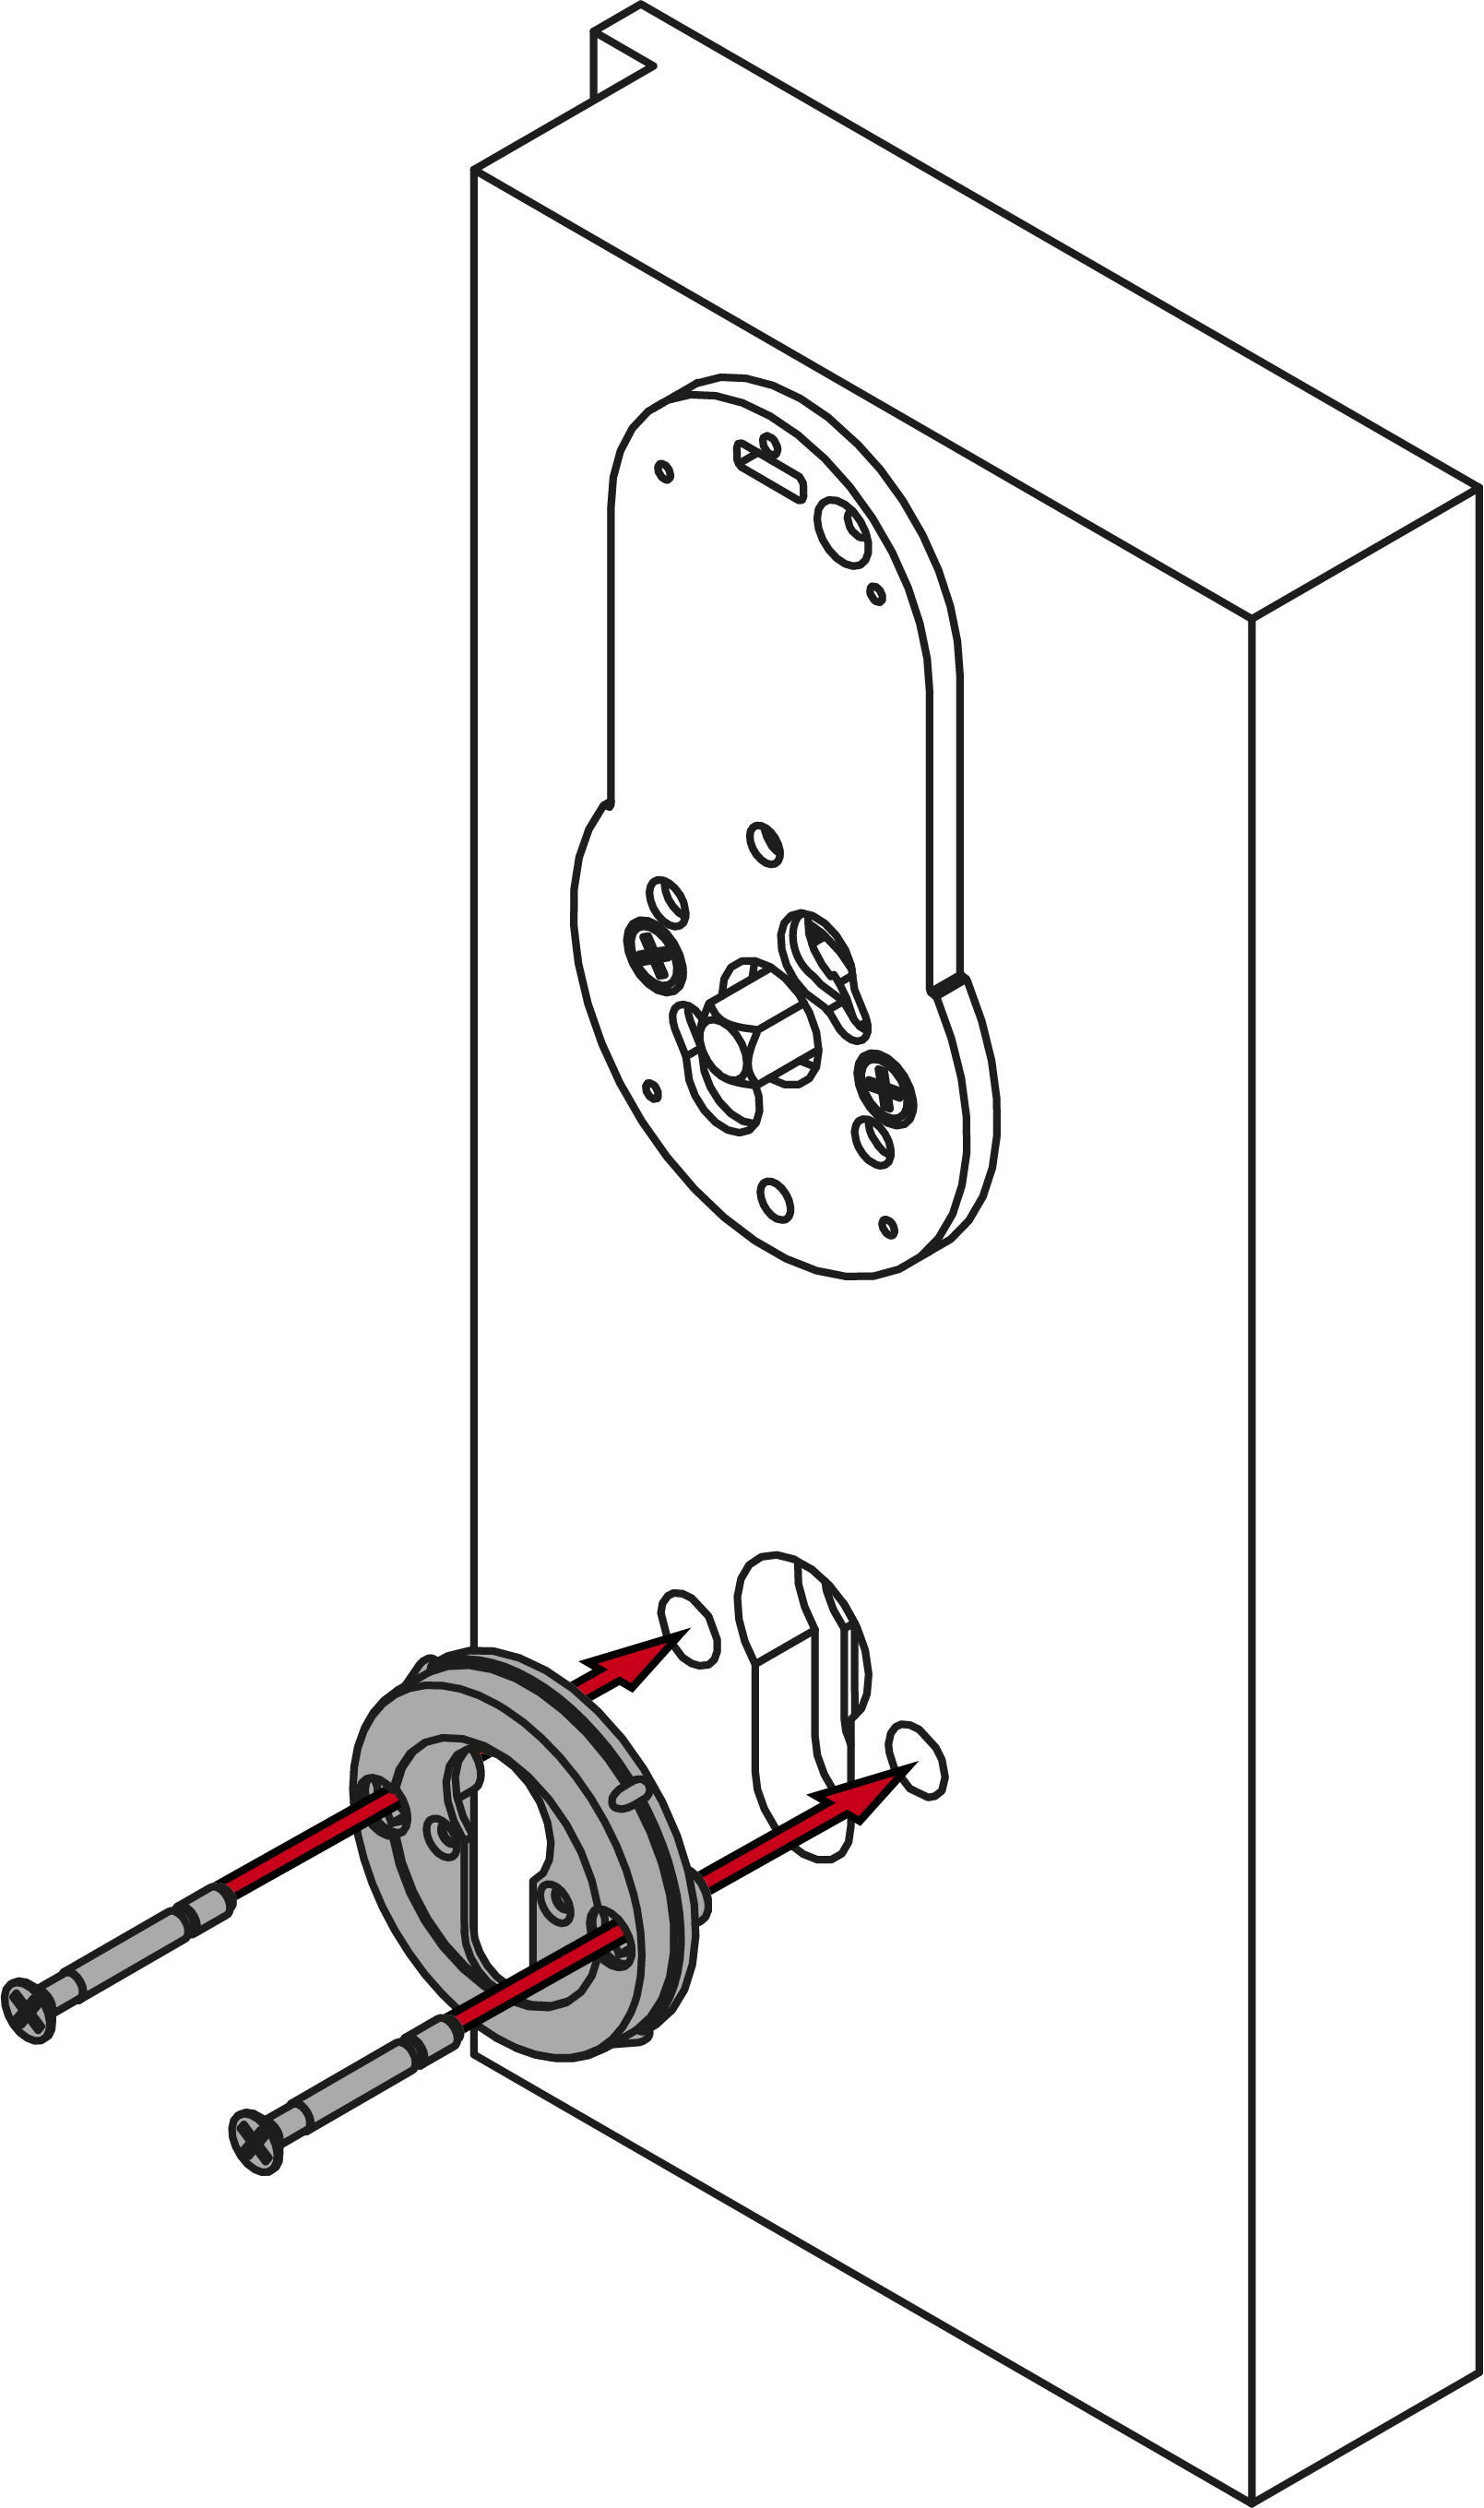
- Insert the escutcheon base into the door with the sleeve nuts on the outer side.
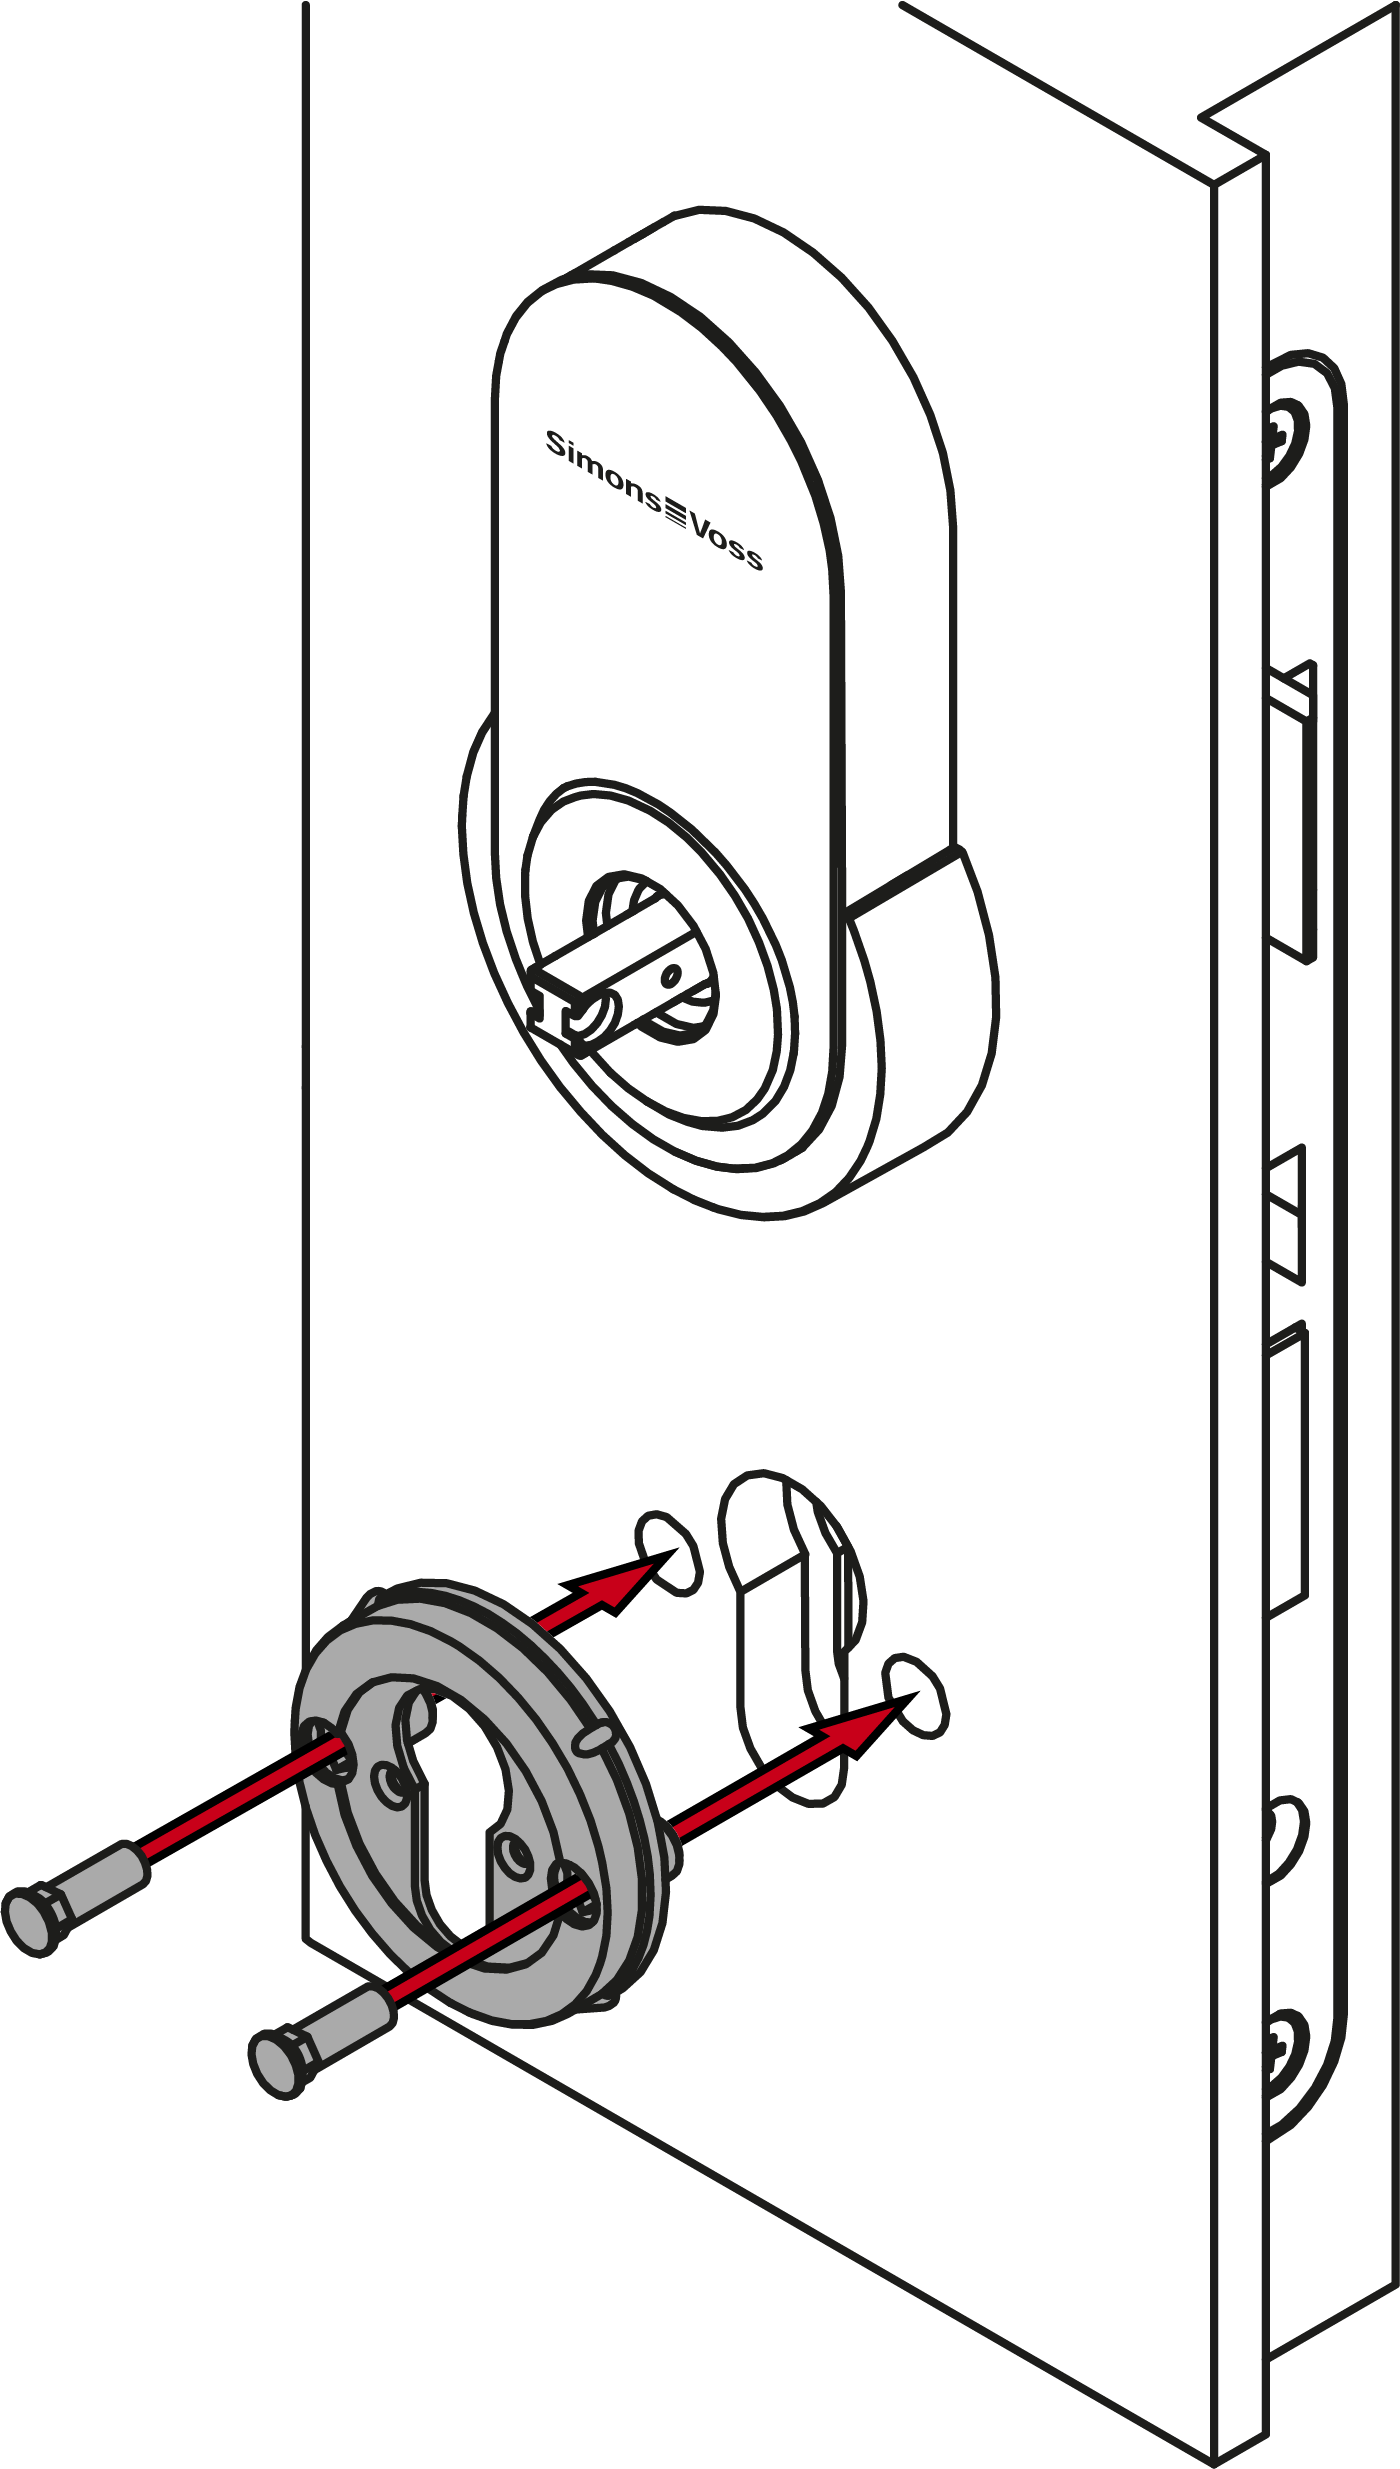
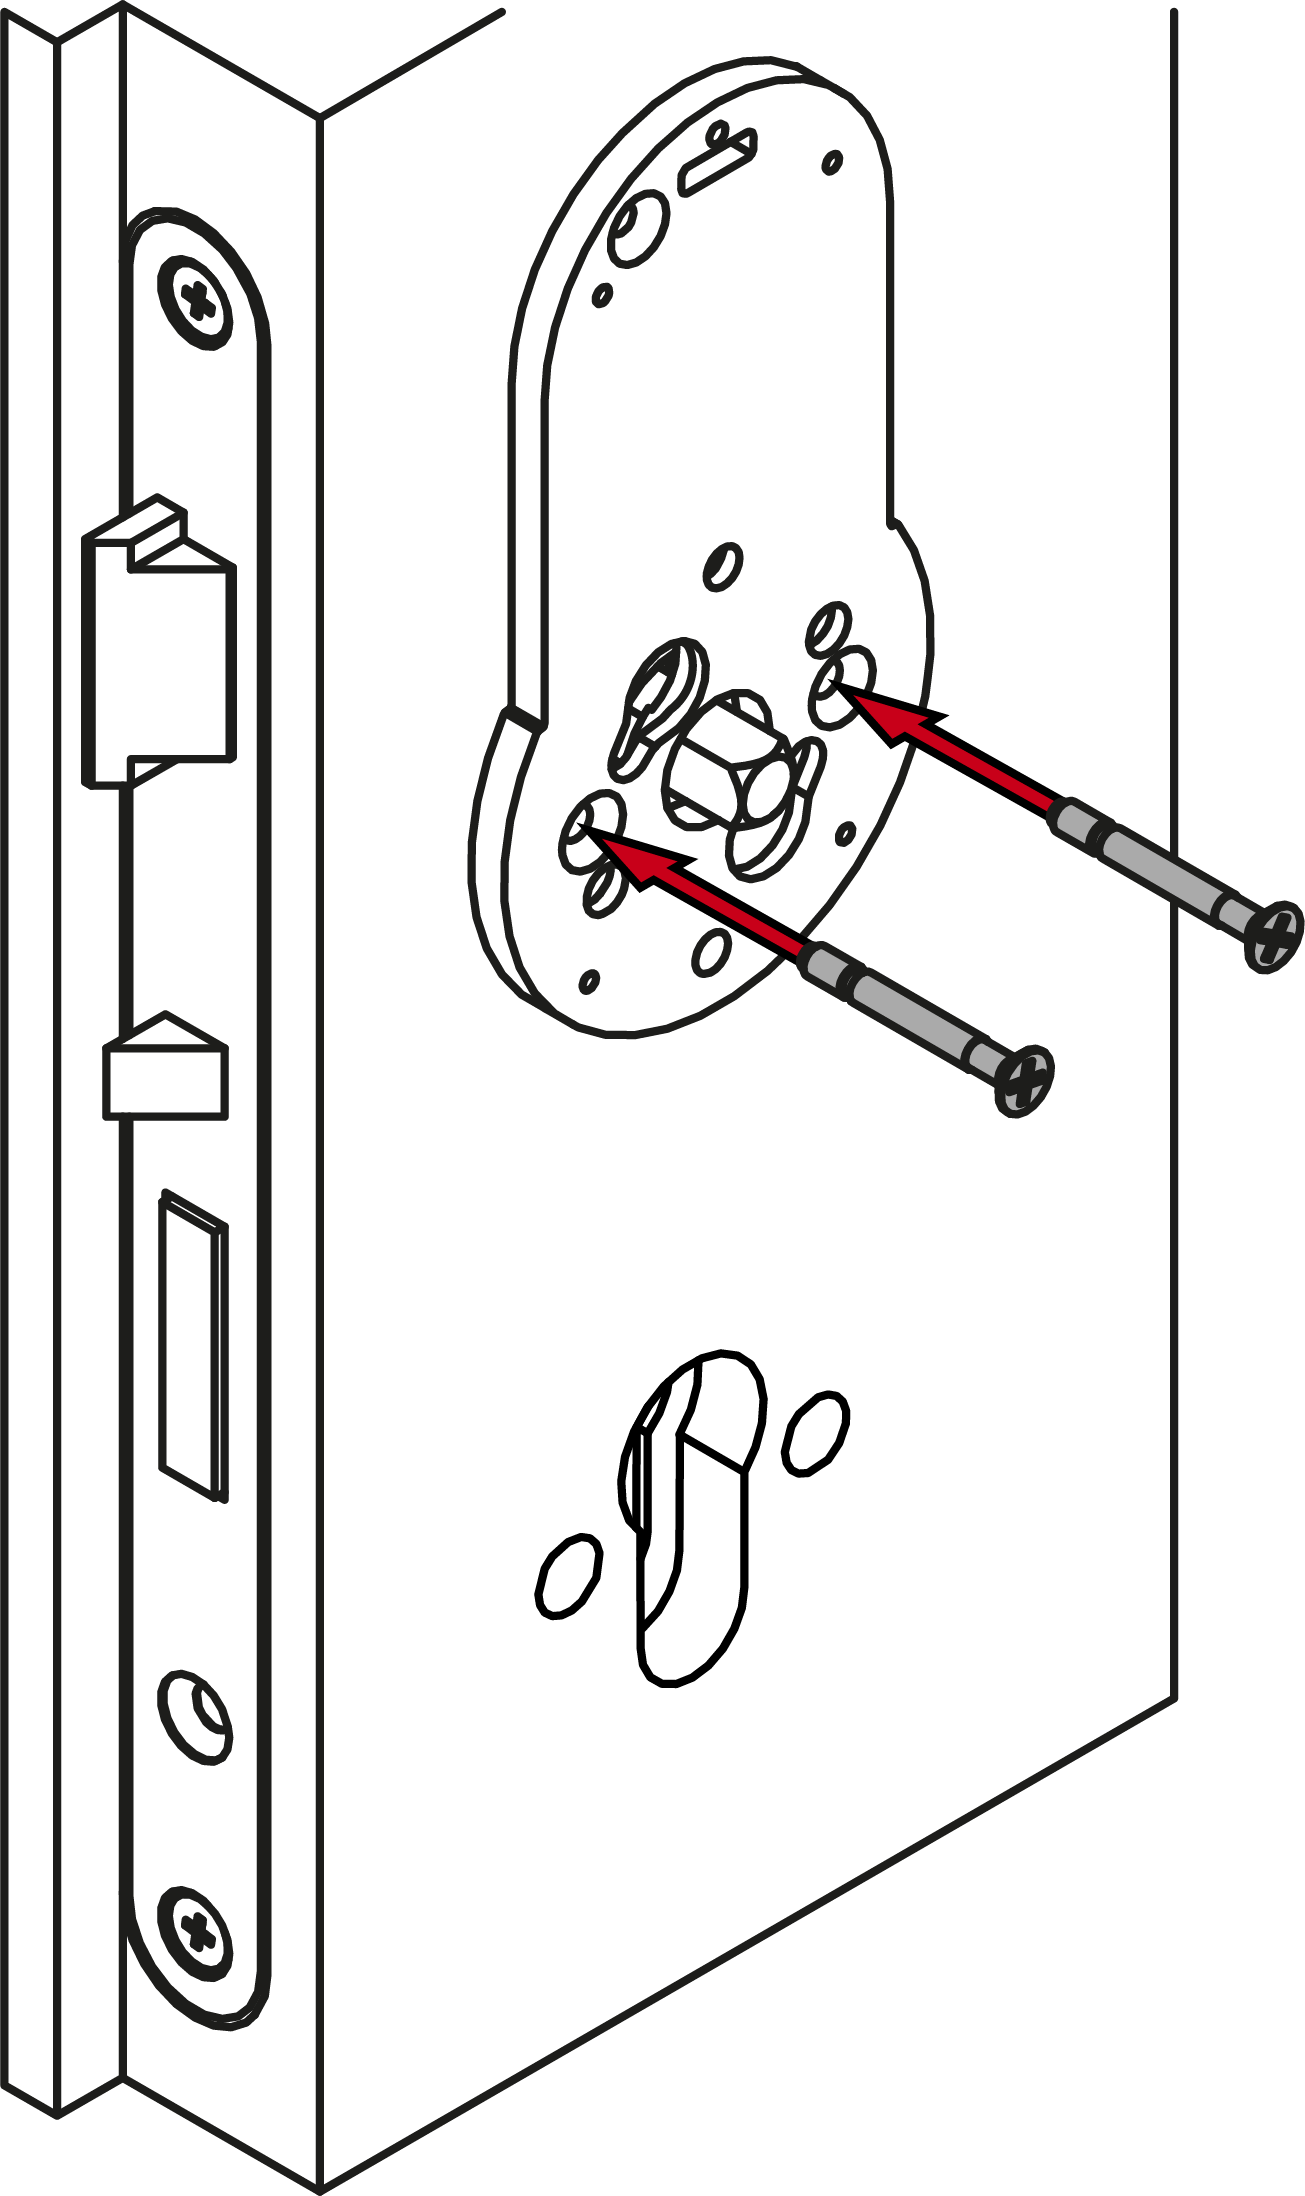
- Position the adapter plate on the door.
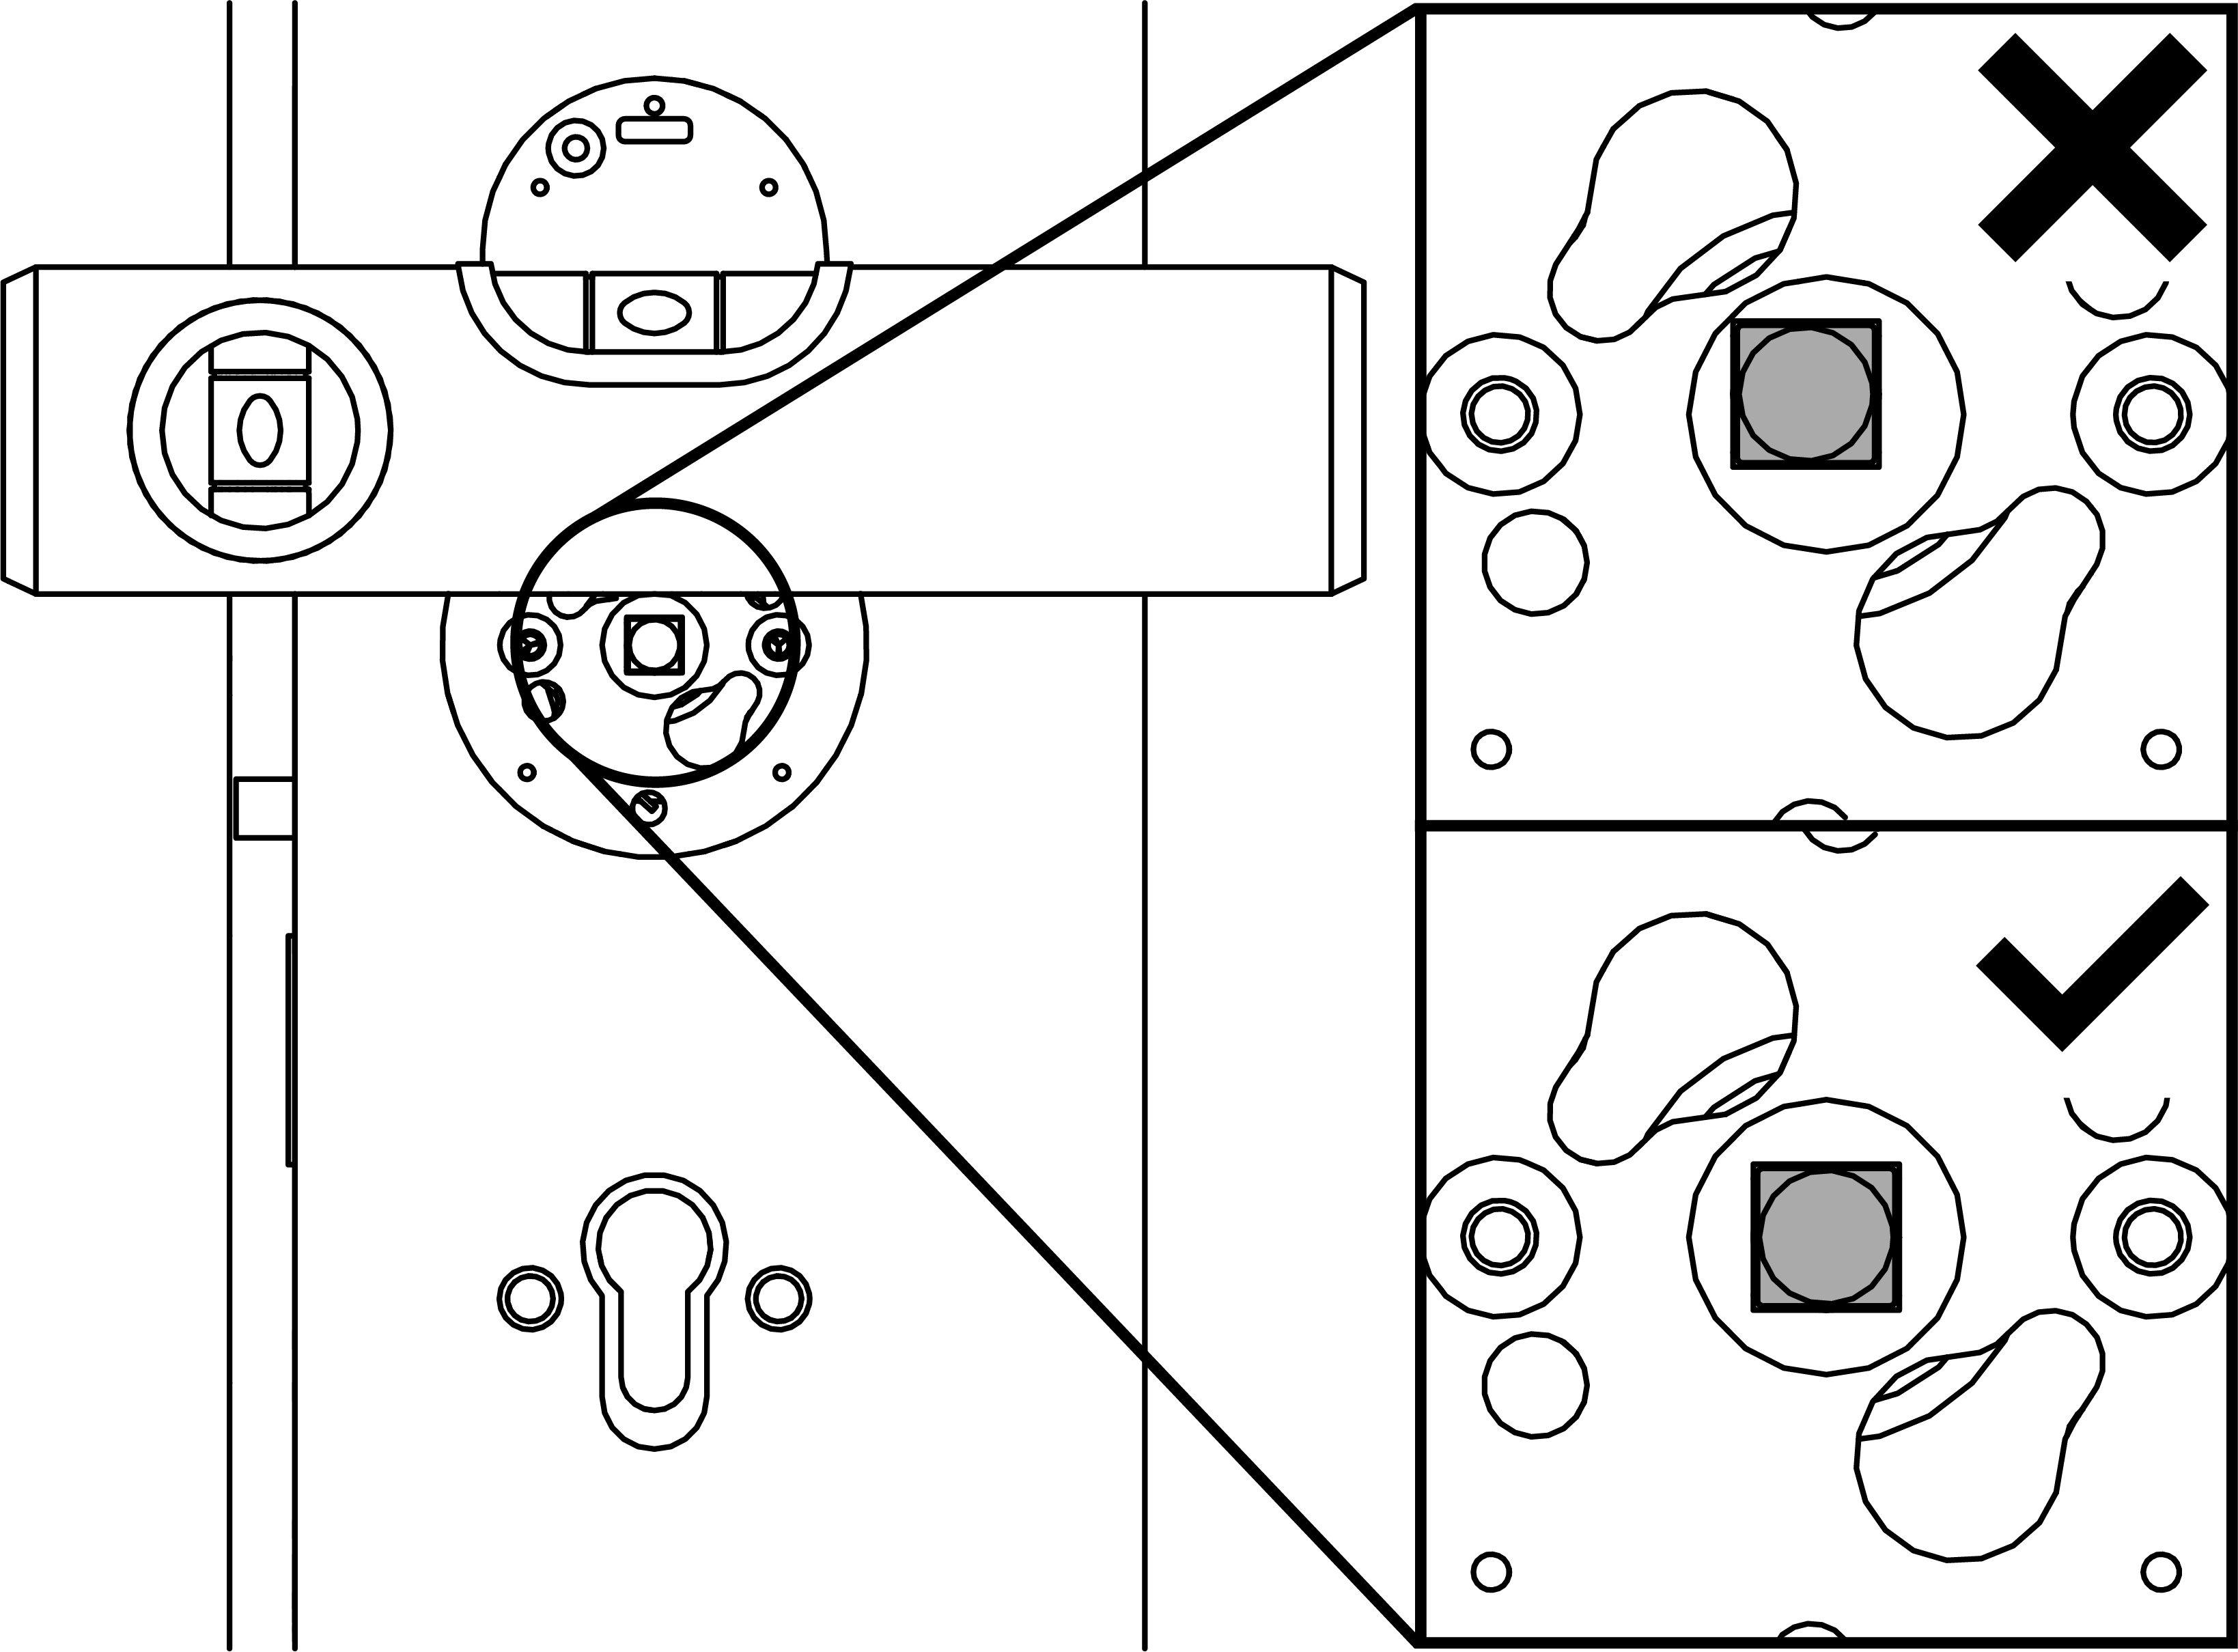
- Align the adapter plate so that the spindle is precisely centred and the adapter plate is perfectly perpendicular.
- Screw the adapter plate firmly into place (PH2, torque 1.1 Nm).
- Screw the escutcheon base into place on the inner side.
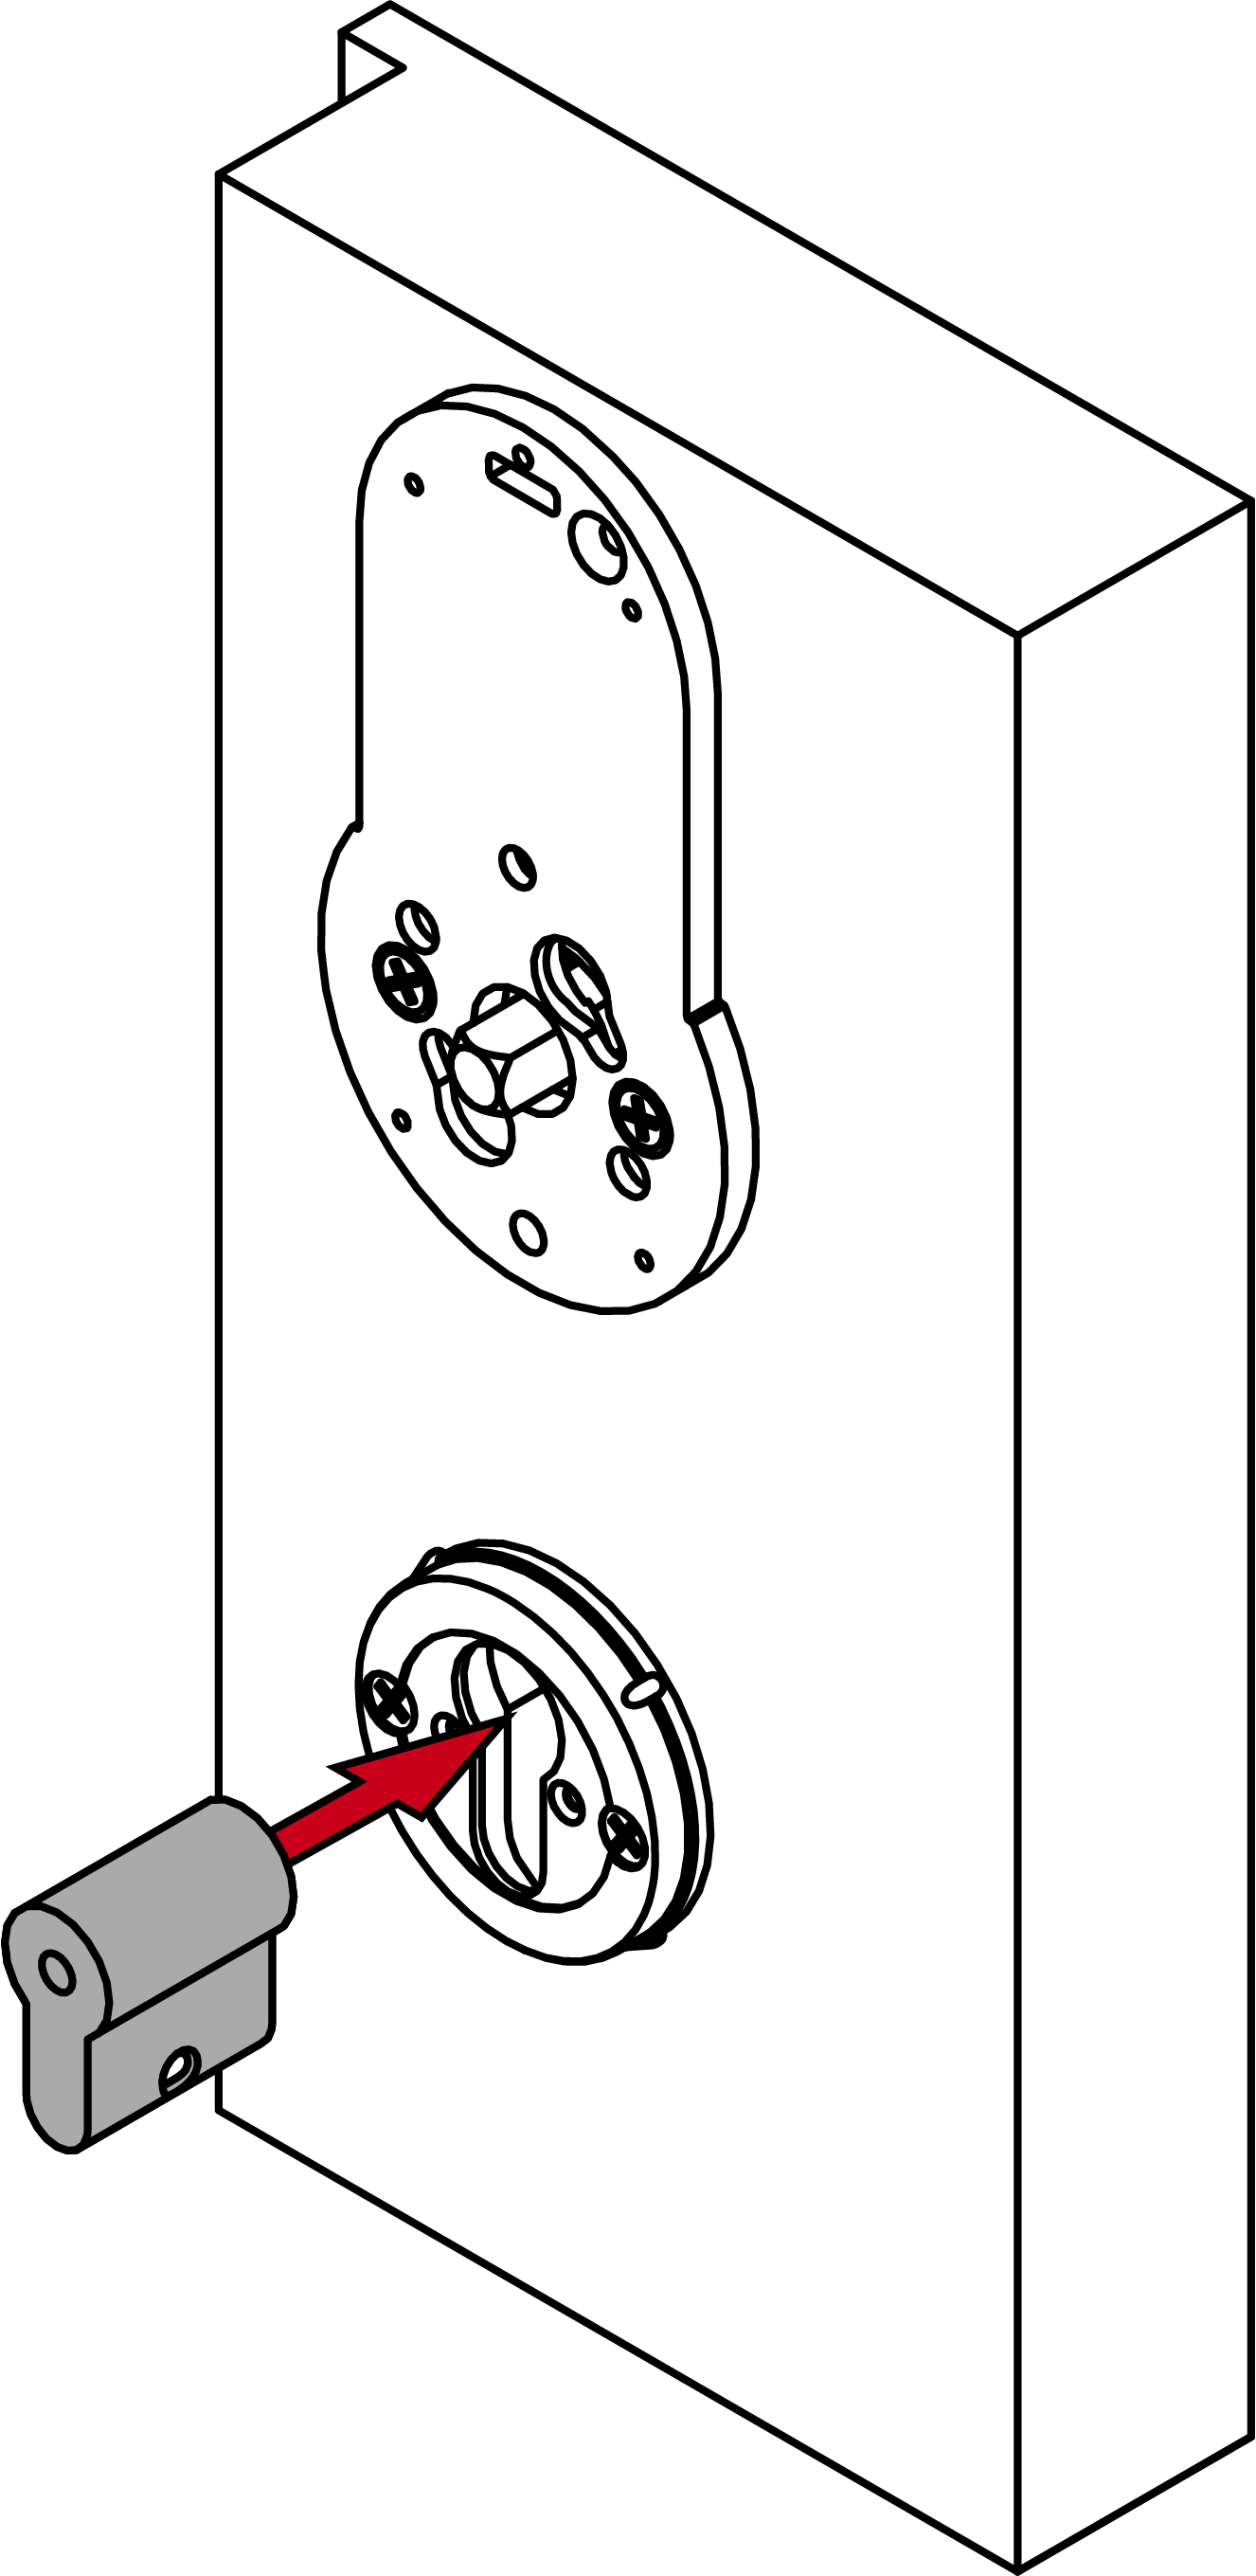
- Insert the dummy cylinder.
NOTE

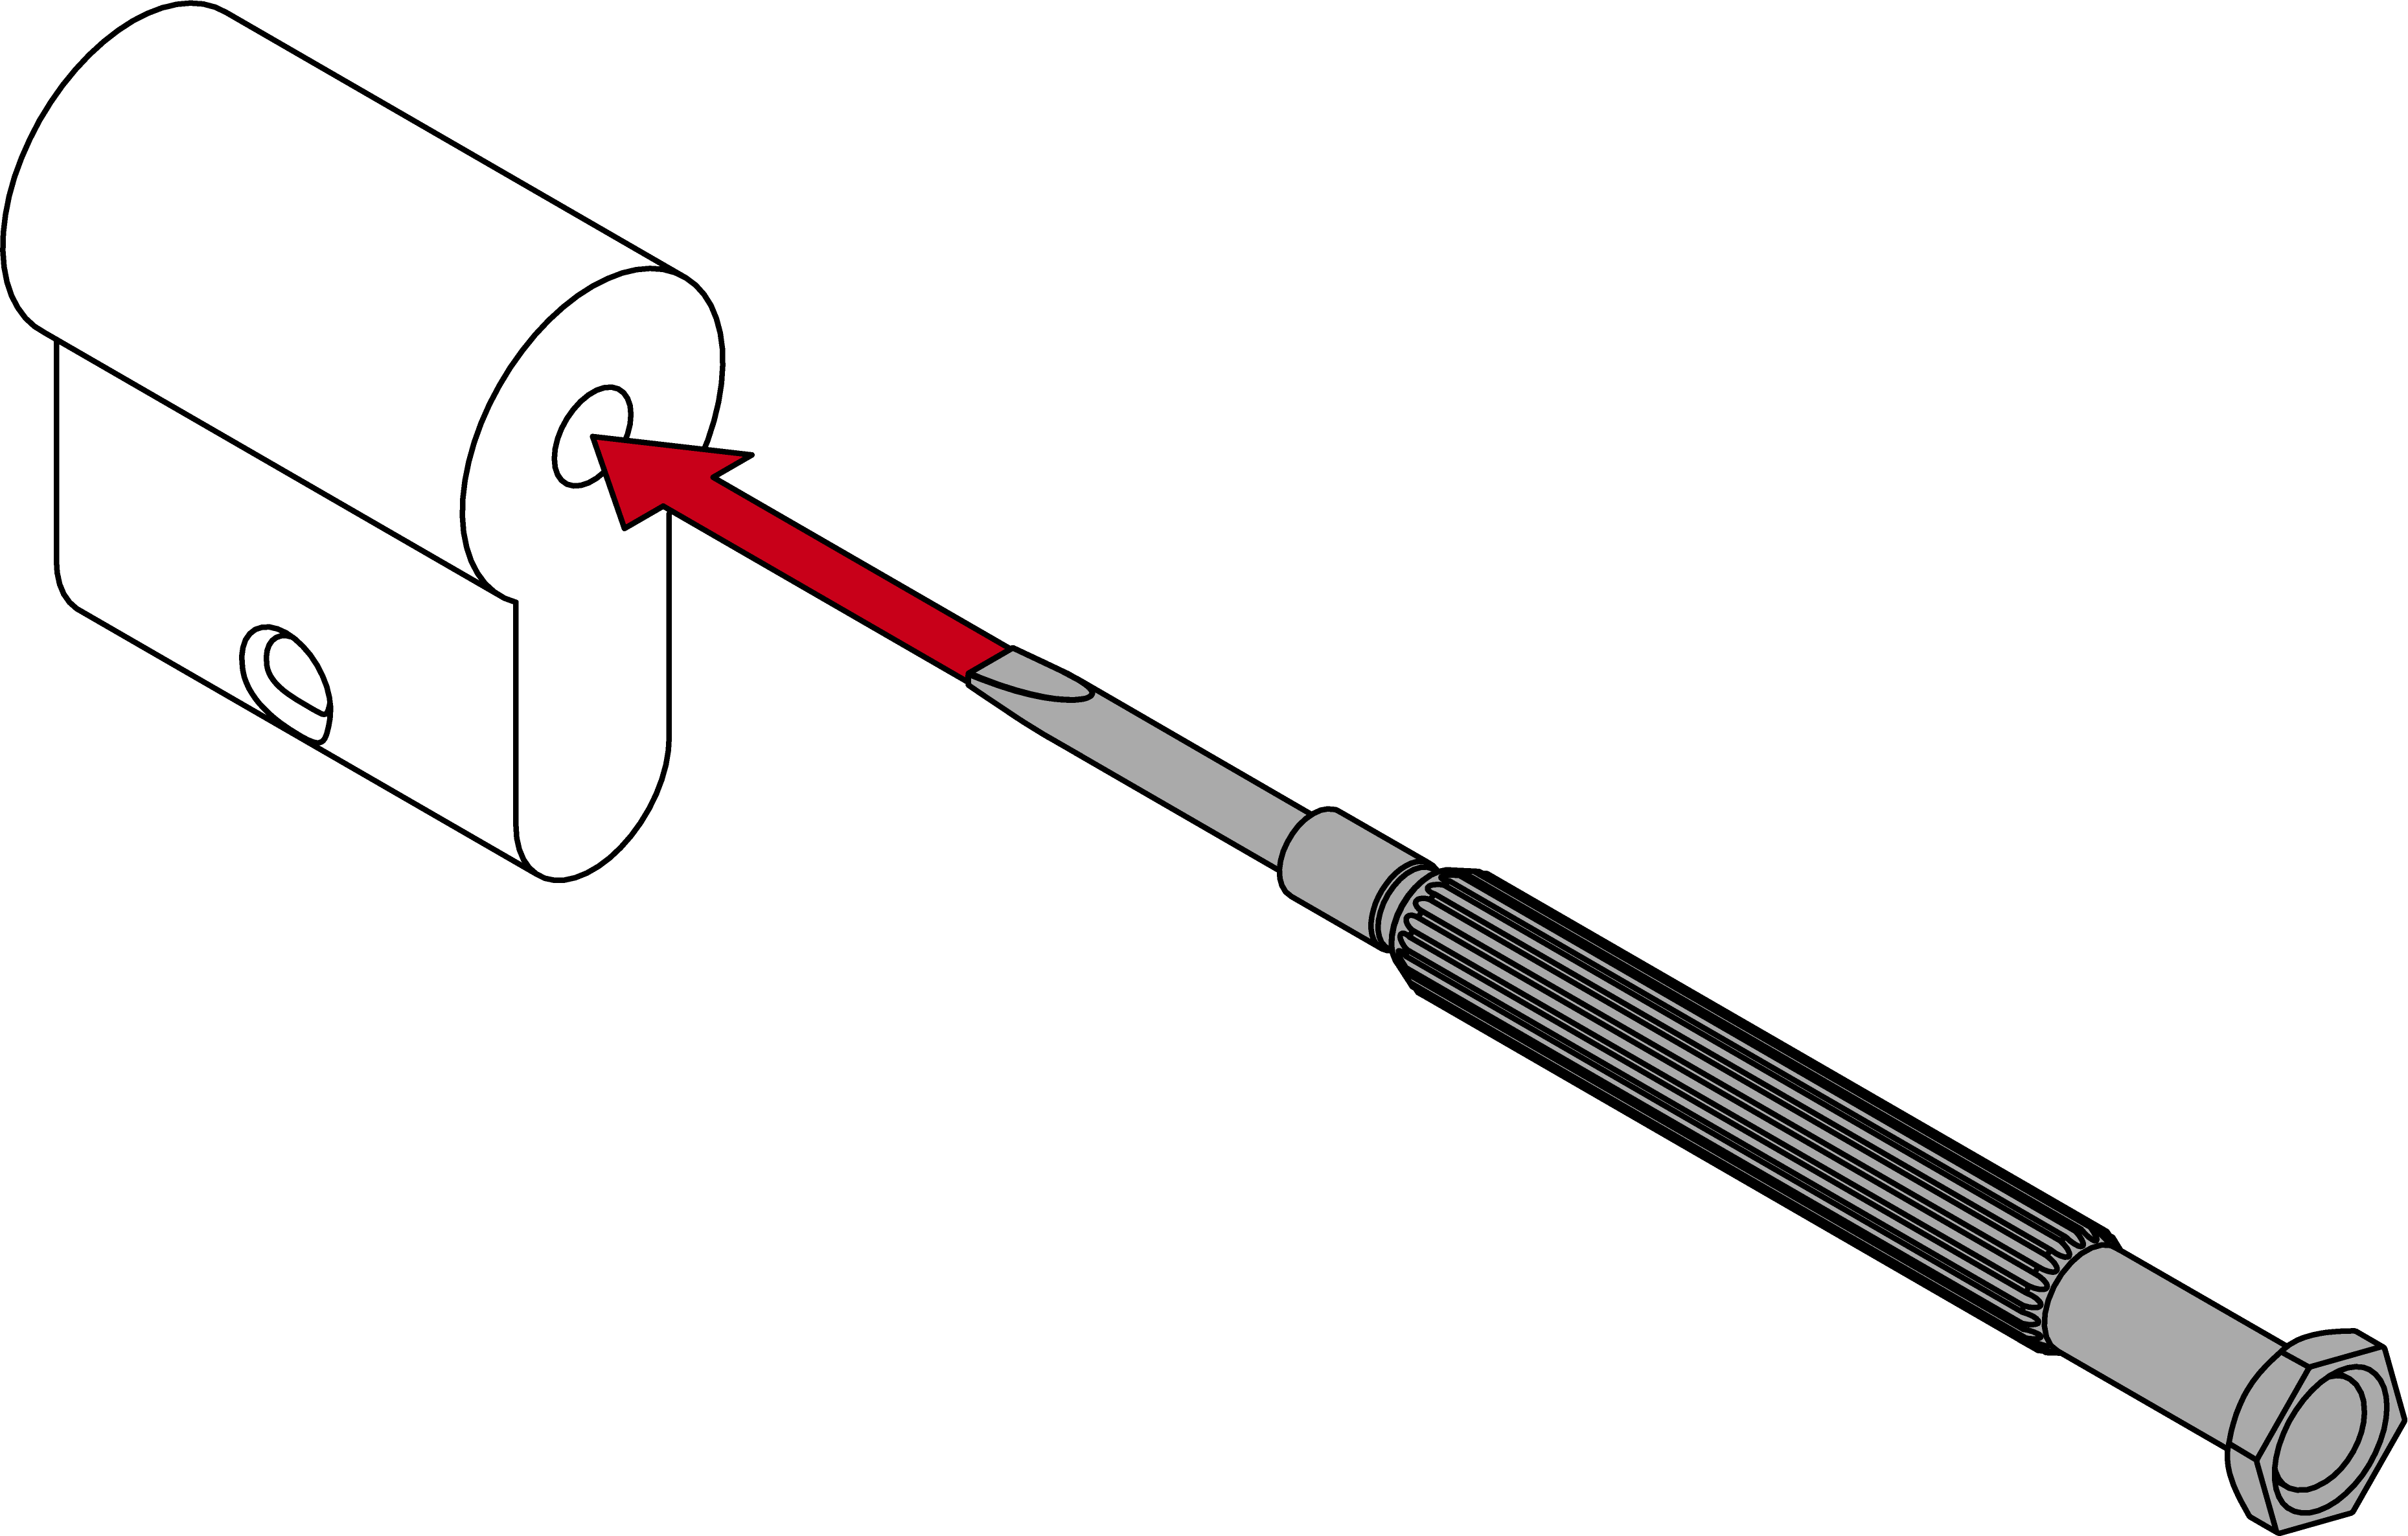
Feed the blank cylinder into the hole using a screwdriver
It is difficult to position the blank cylinder correctly, especially in thick doors.
- Insert a screwdriver into the hole in the blank cylinder.
- Position the blank cylinder using the screwdriver.
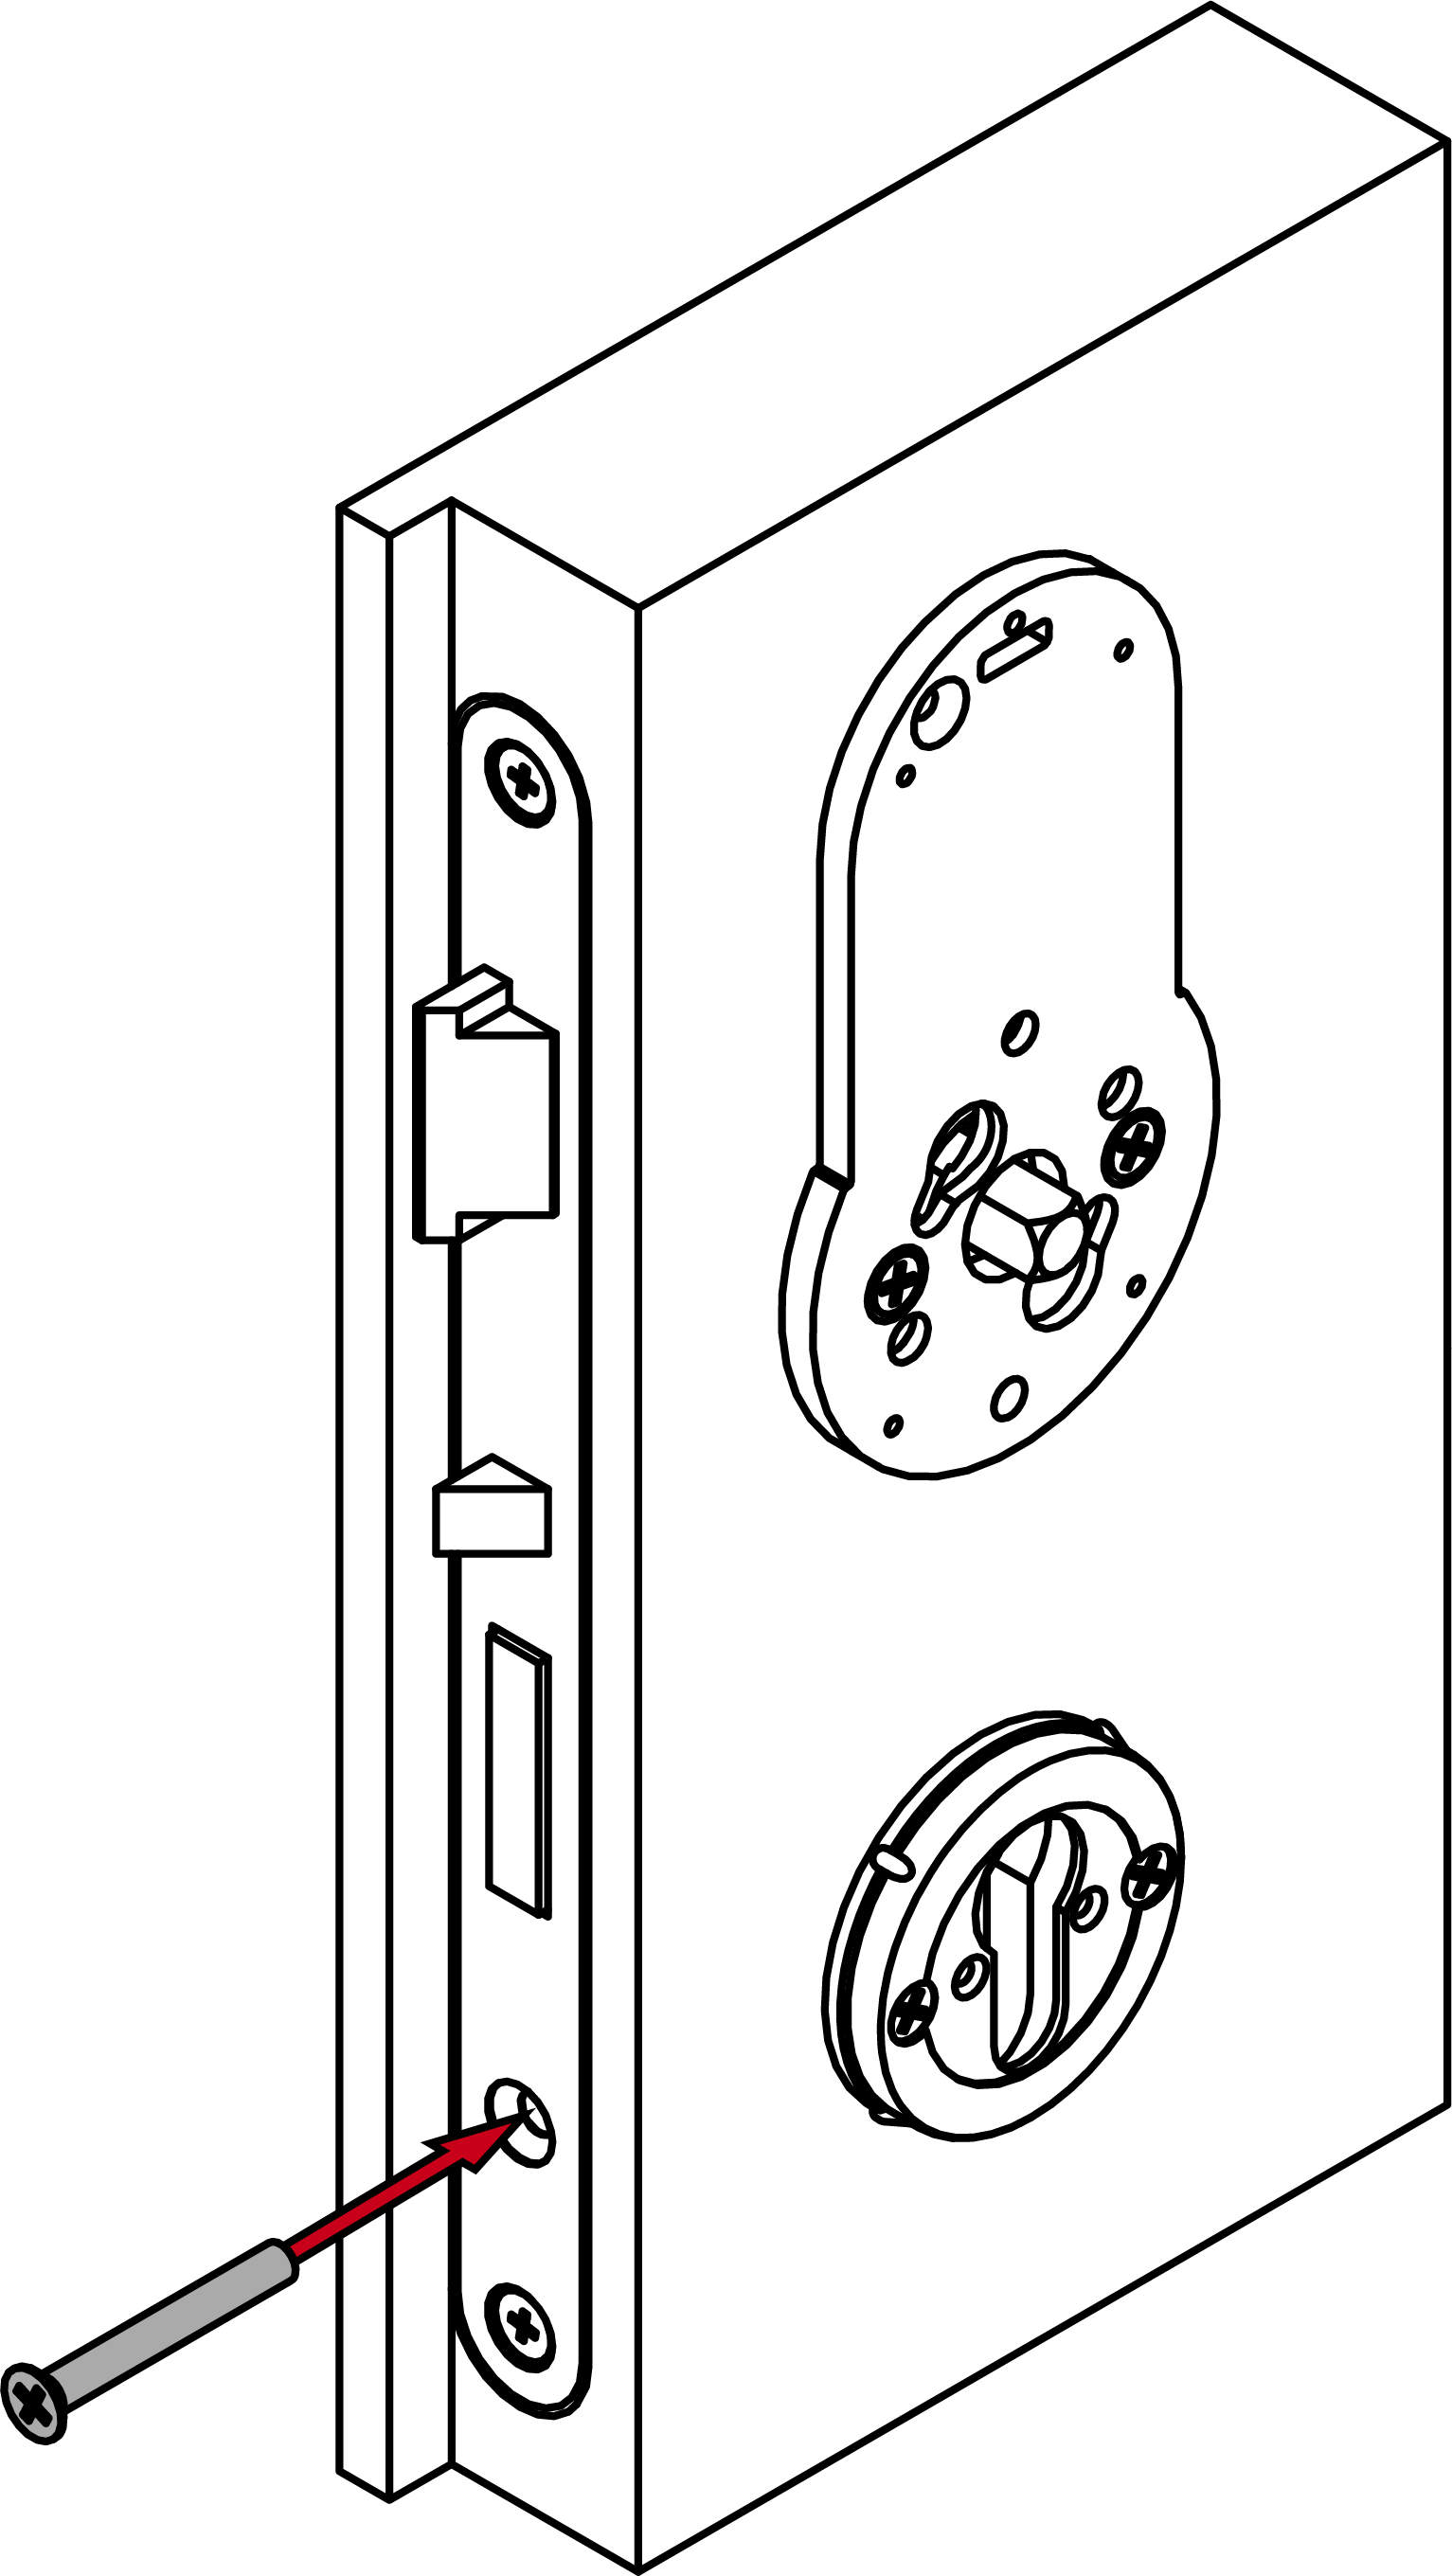
- Screw the dummy cylinder firmly into place (PH2, torque 1.1 Nm).
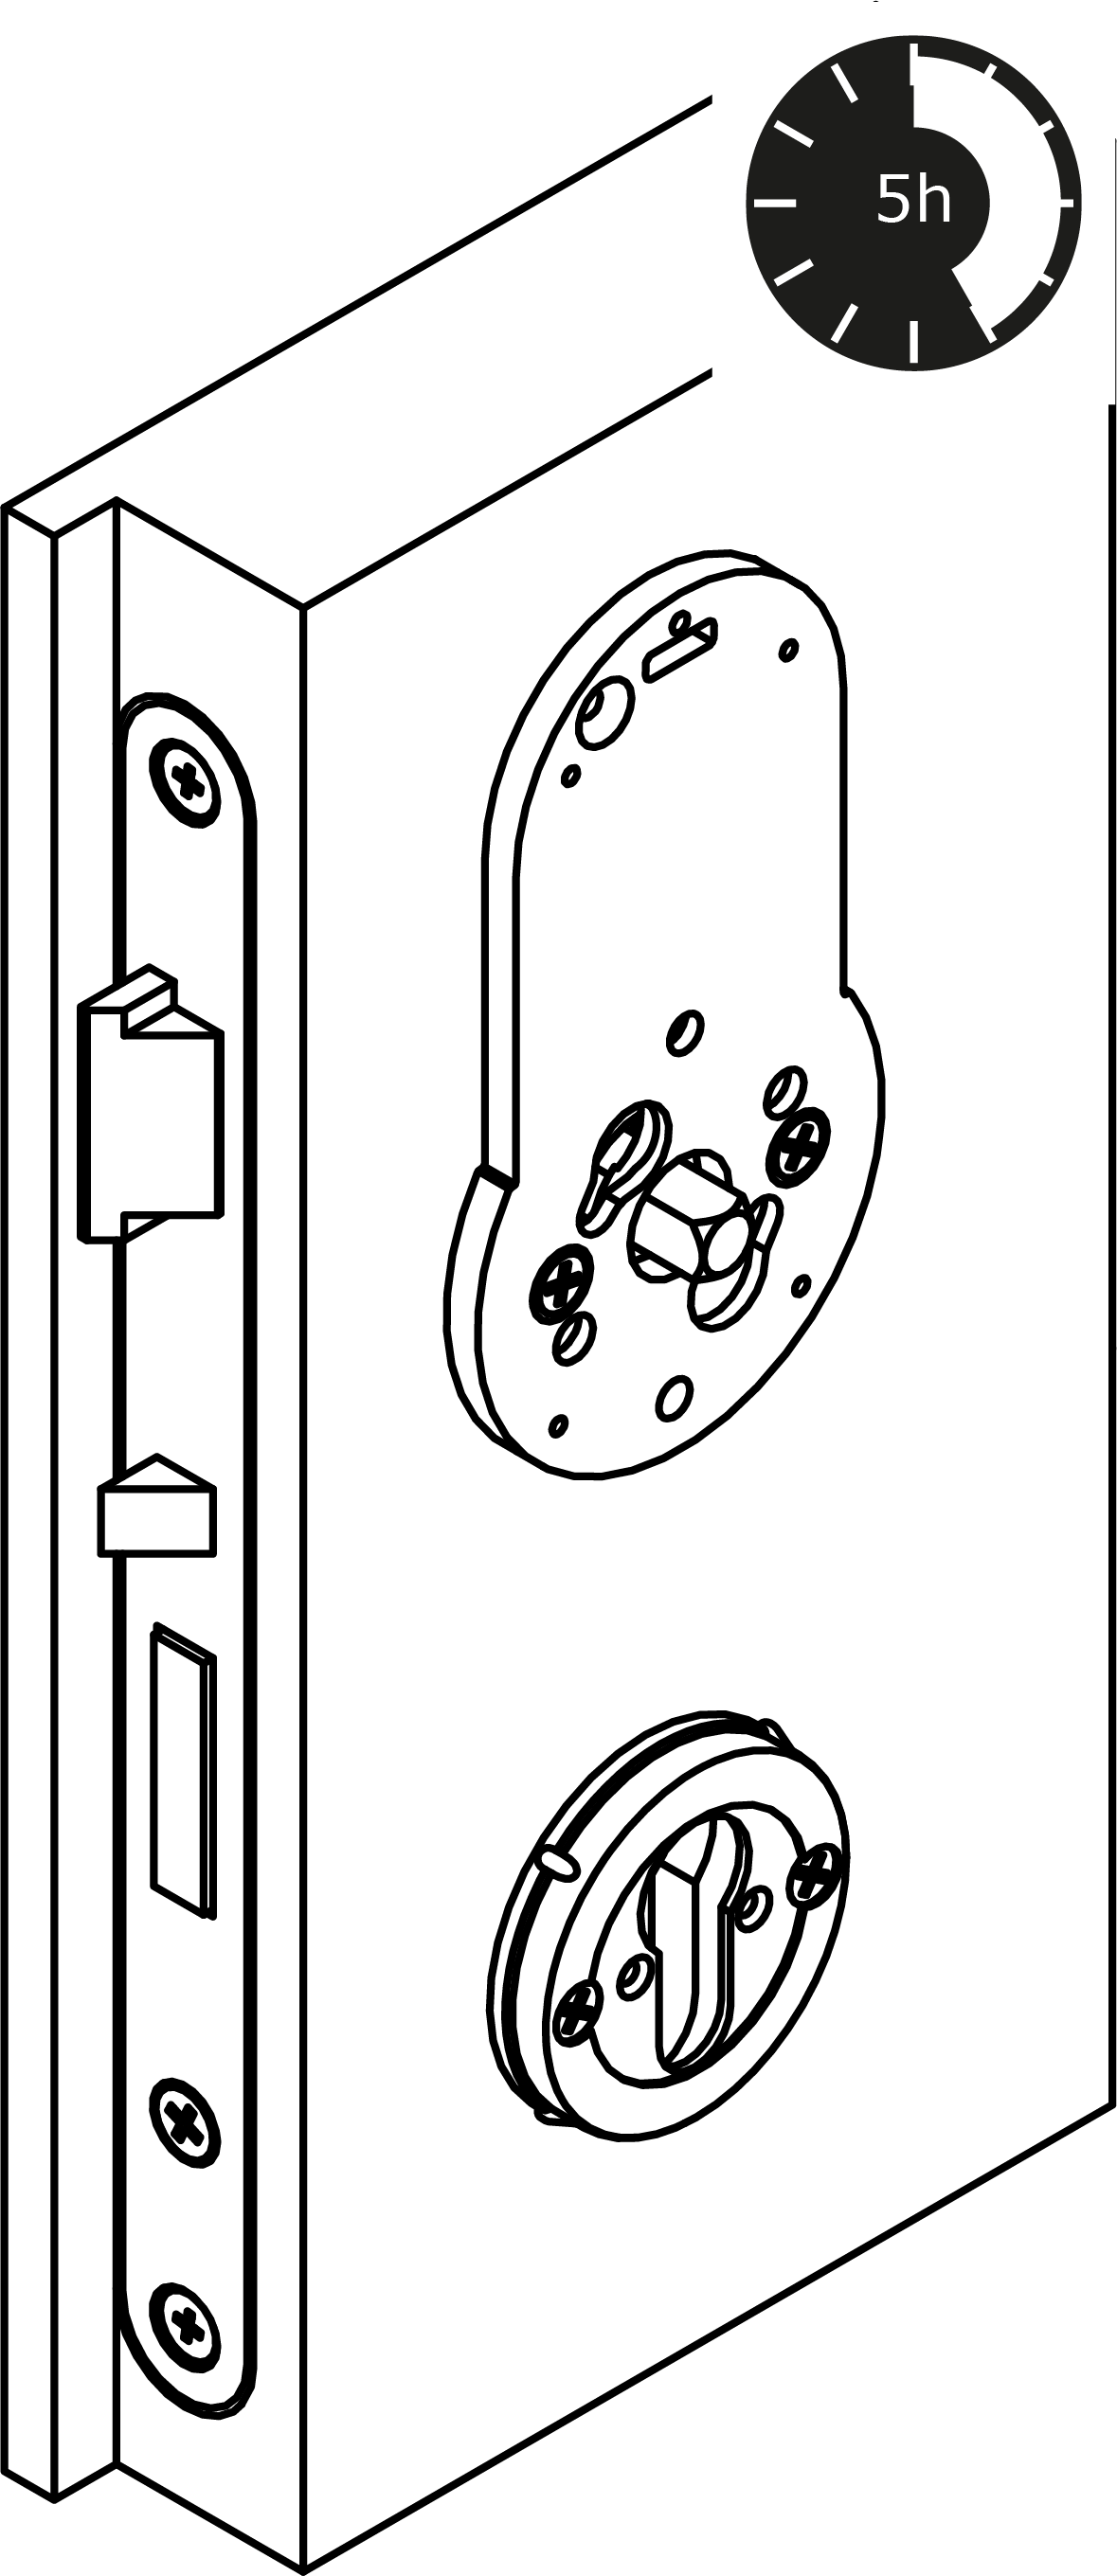
- Wait five hours for the anti-slip coating to set.
NOTE
Rest time for anti-slip surface
The supplied adapter plate feature a non-slip surface. This requires a settling time for it to be fully effective.
- After installing the adapter plate, wait five hours before continuing with the installation.
- If you need to finish installing beforehand, do not turn the handle as far as it will go.
- Remove the cover with the tool.
- For 7 mm spindle: attach the adapter sleeve to the spindle.
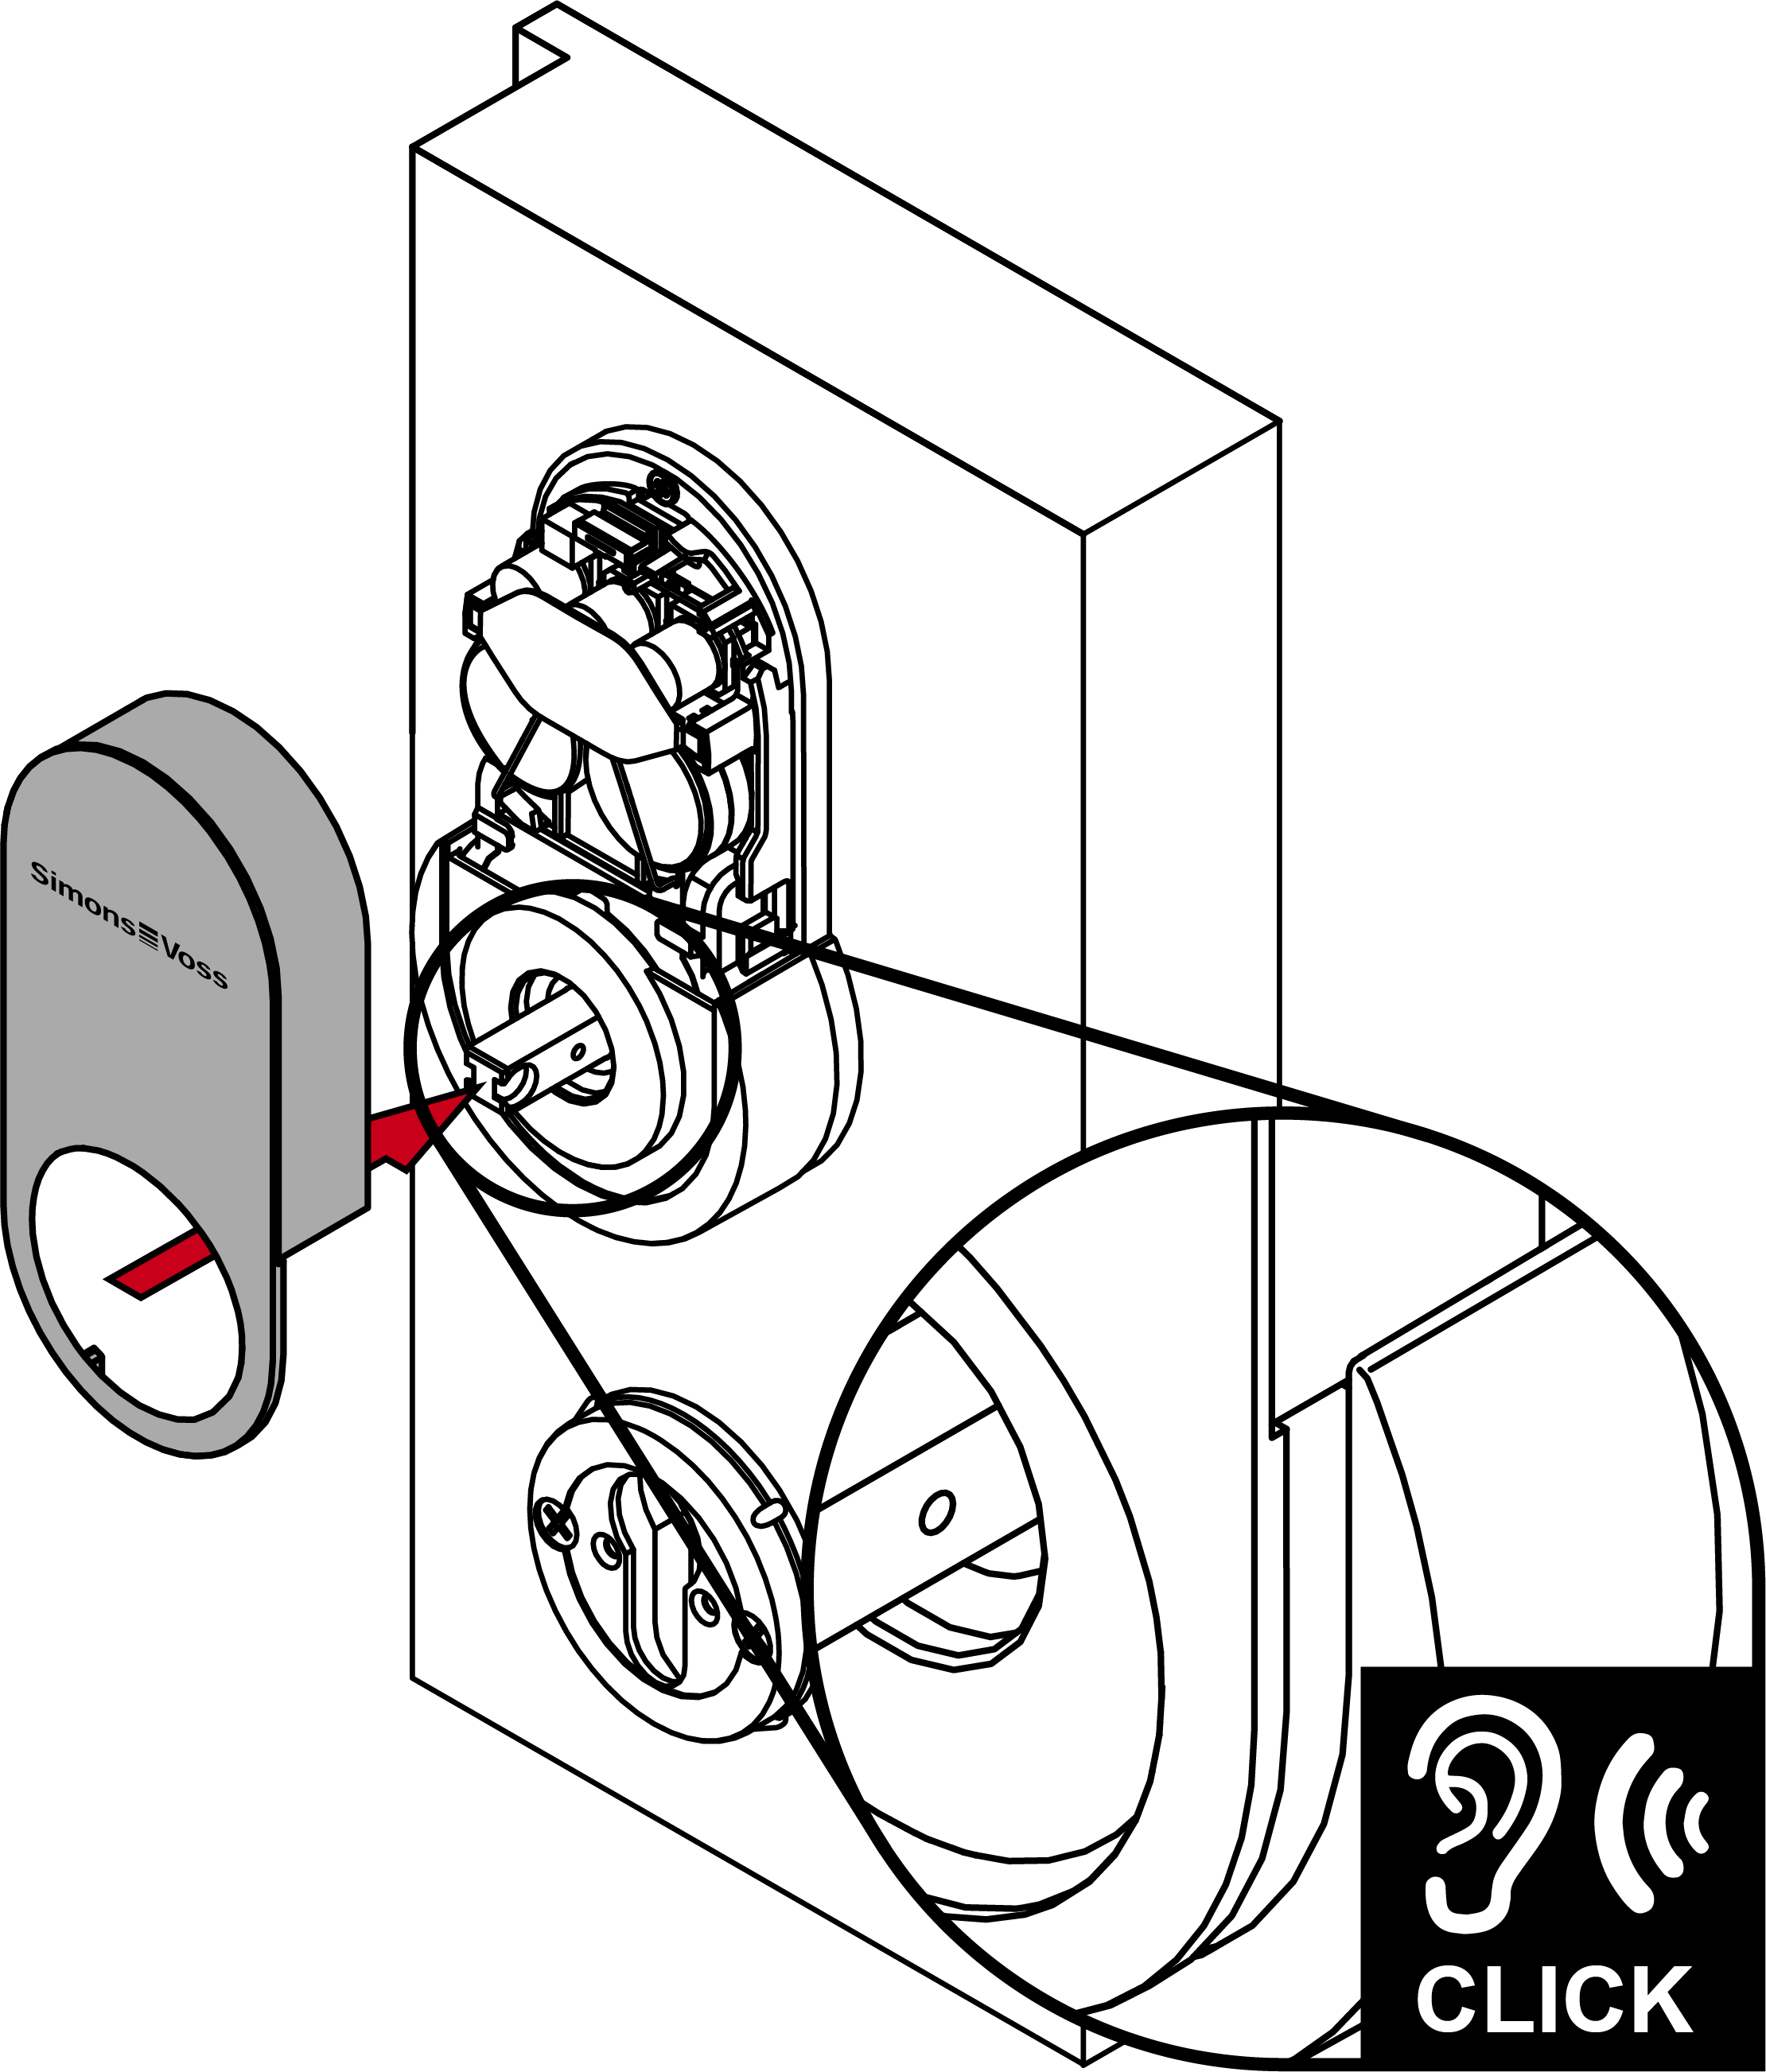
- Insert the fitting into the adapter plate.

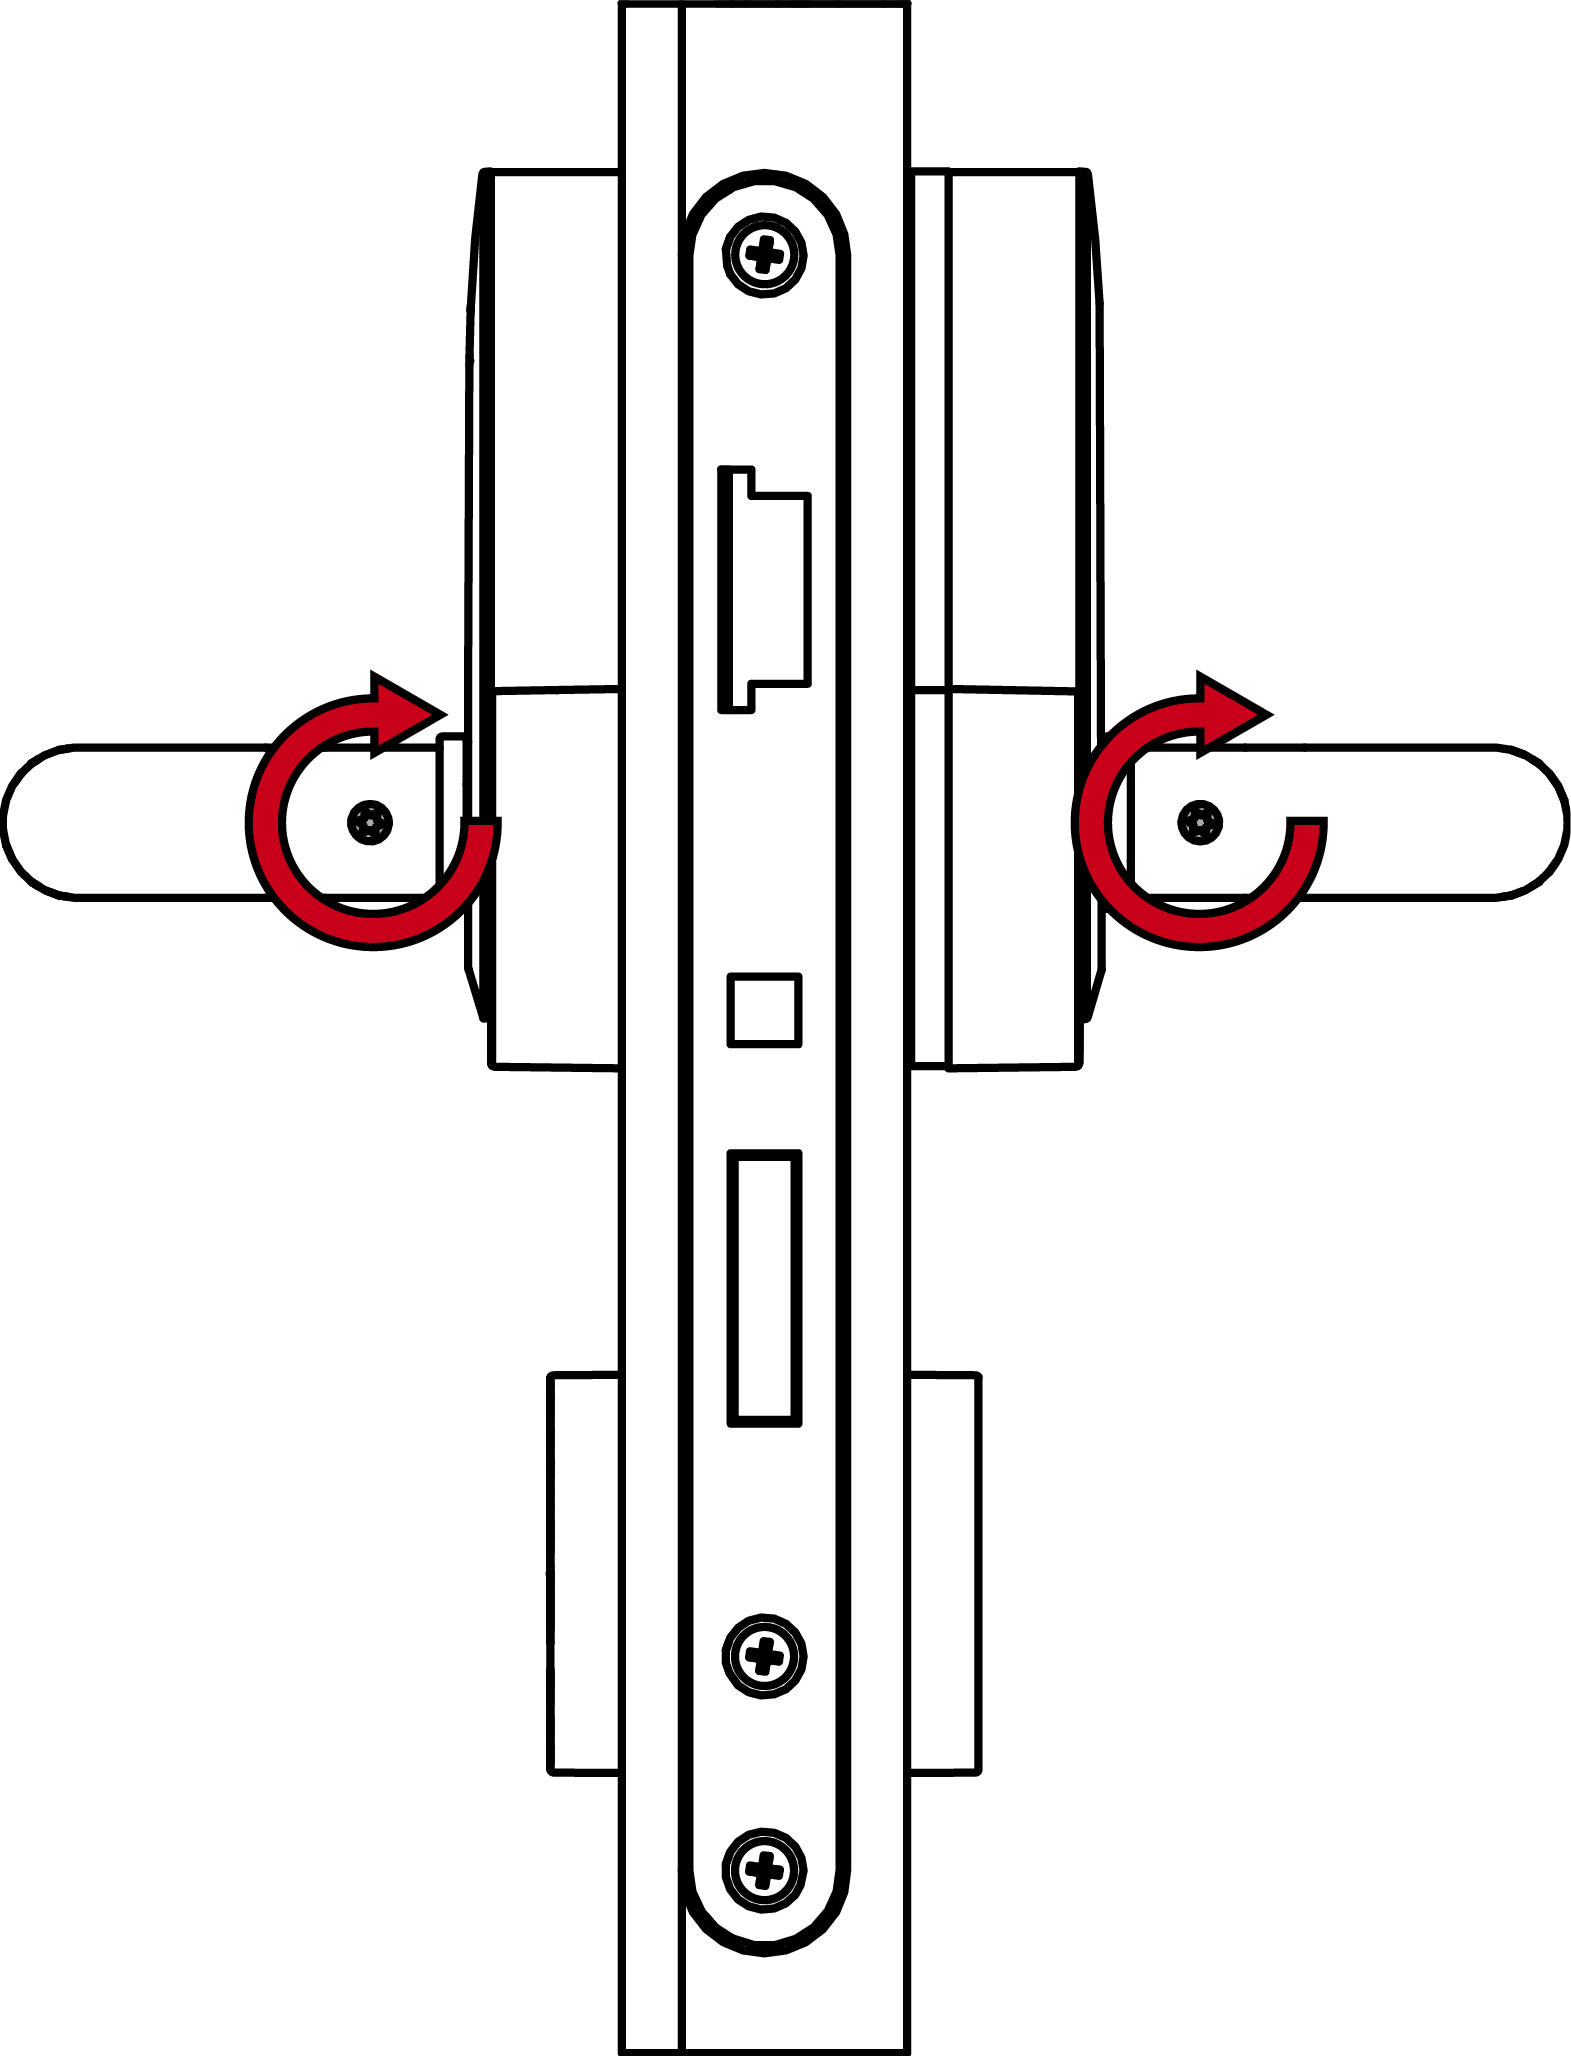
- Rotate the fitting until it is straight.
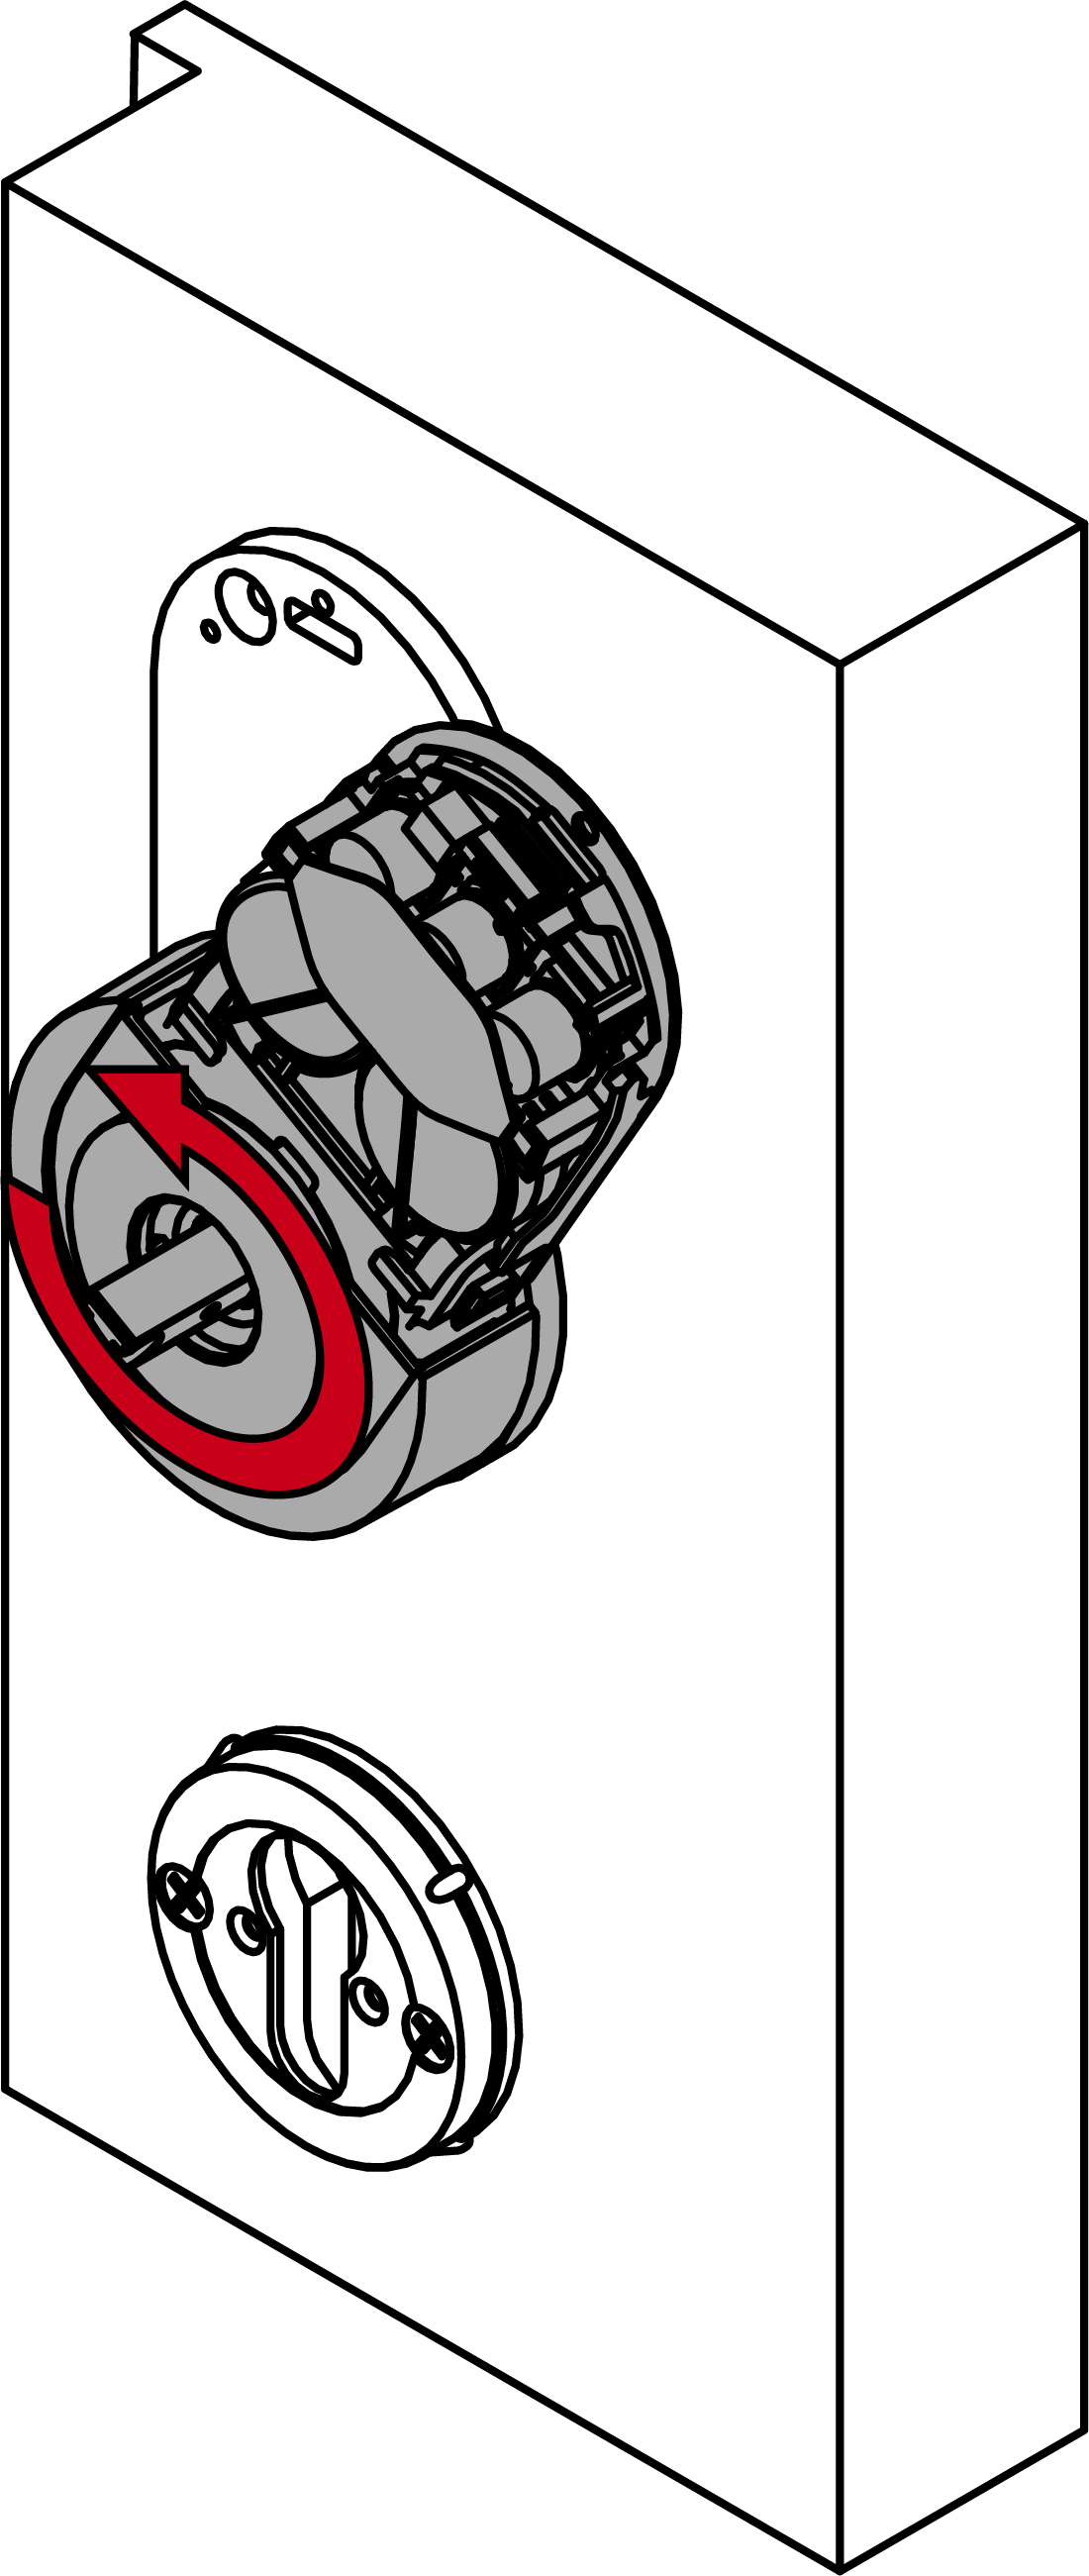
- Screw the fitting firmly onto the adapter plate to prevent it from twisting.
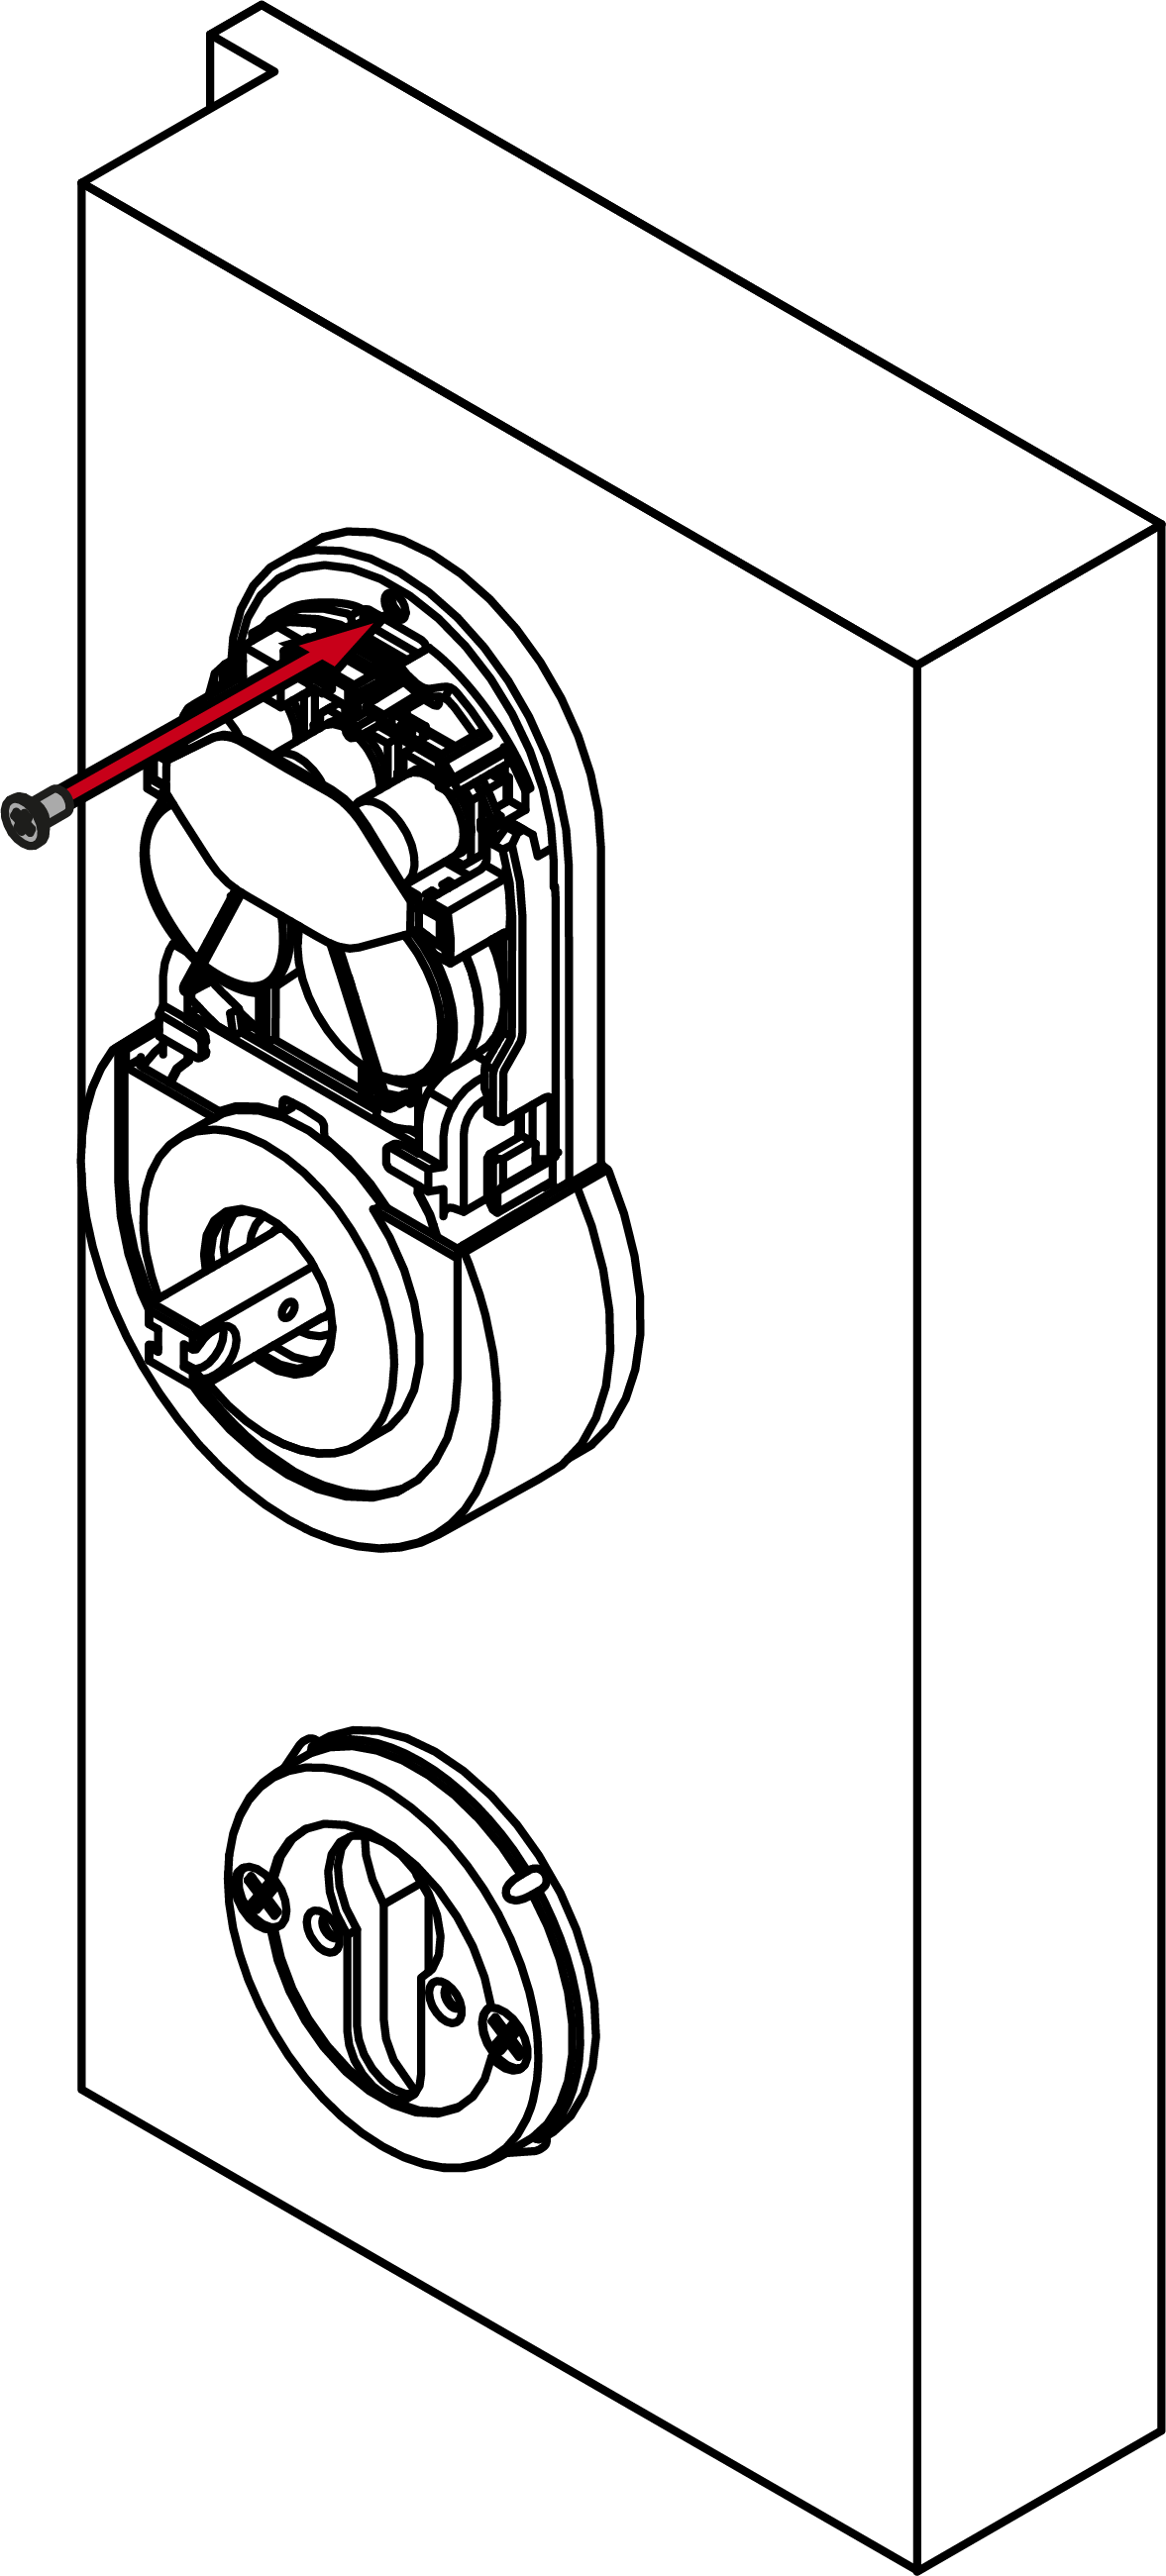
- Place the cover on the fitting.
- Place the outside handles on the fittings.
- Place the covers on the escutcheon bases.
- Fasten the grub screws firmly onto both handles (TX15, torque 5.0 Nm).
- Fitting is now installed.