Installing the fitting - Digital SmartHandle AX
- Door pre-drilled.
- PH2 screwdriver at hand.
- TX15 screwdriver at hand.
- Vernier calliper at hand.
- Pincers at hand.
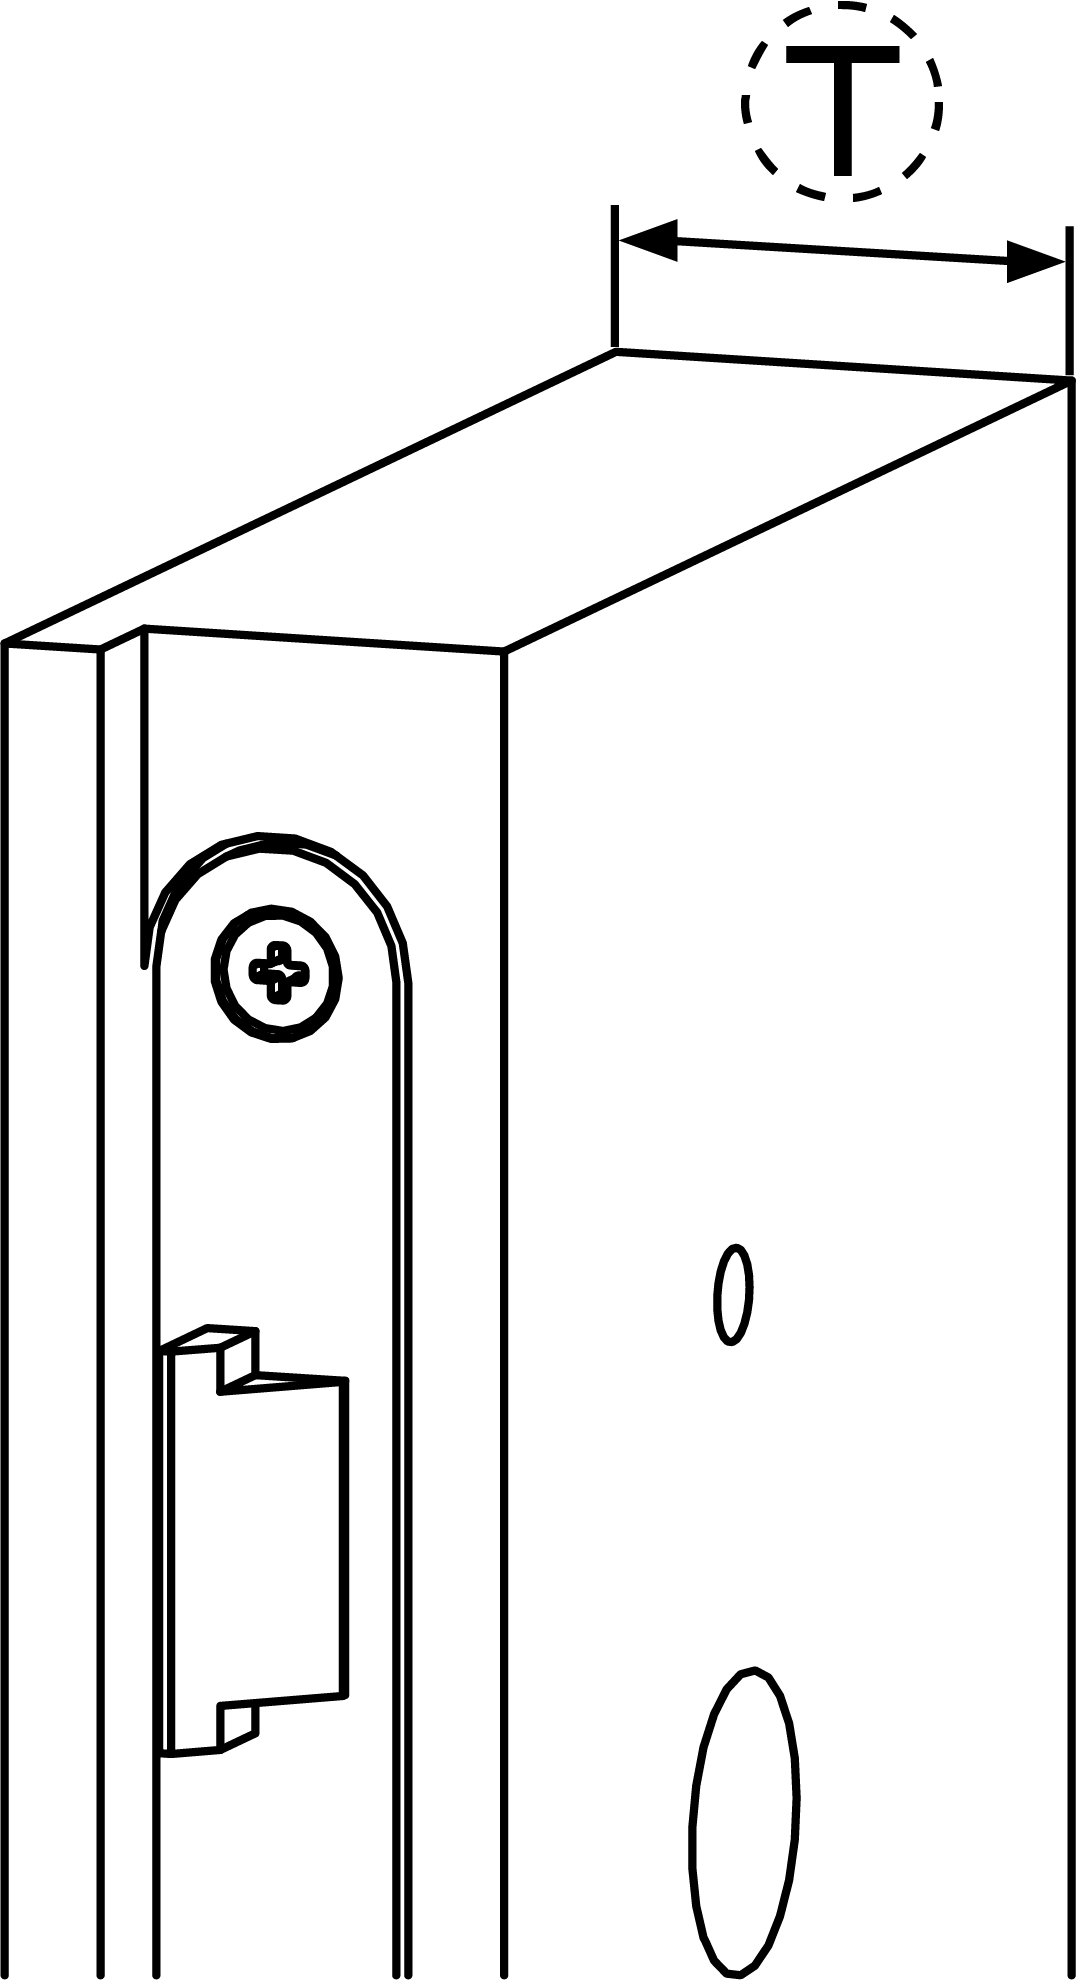
- Measure the door thickness.
- Determine the cutting points on the cut-to-length screws.
- Trim the cut-to-length screws.
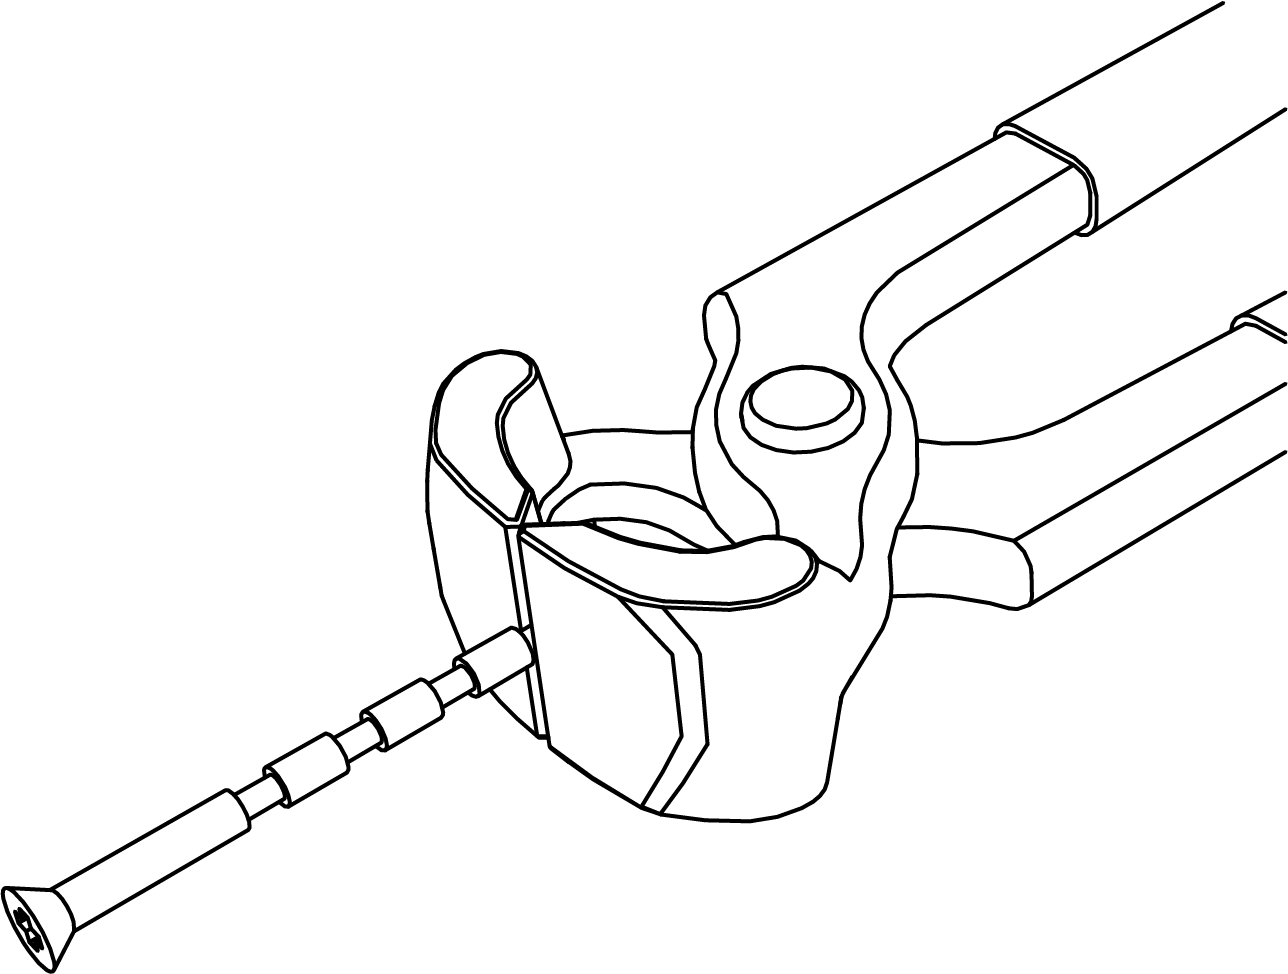
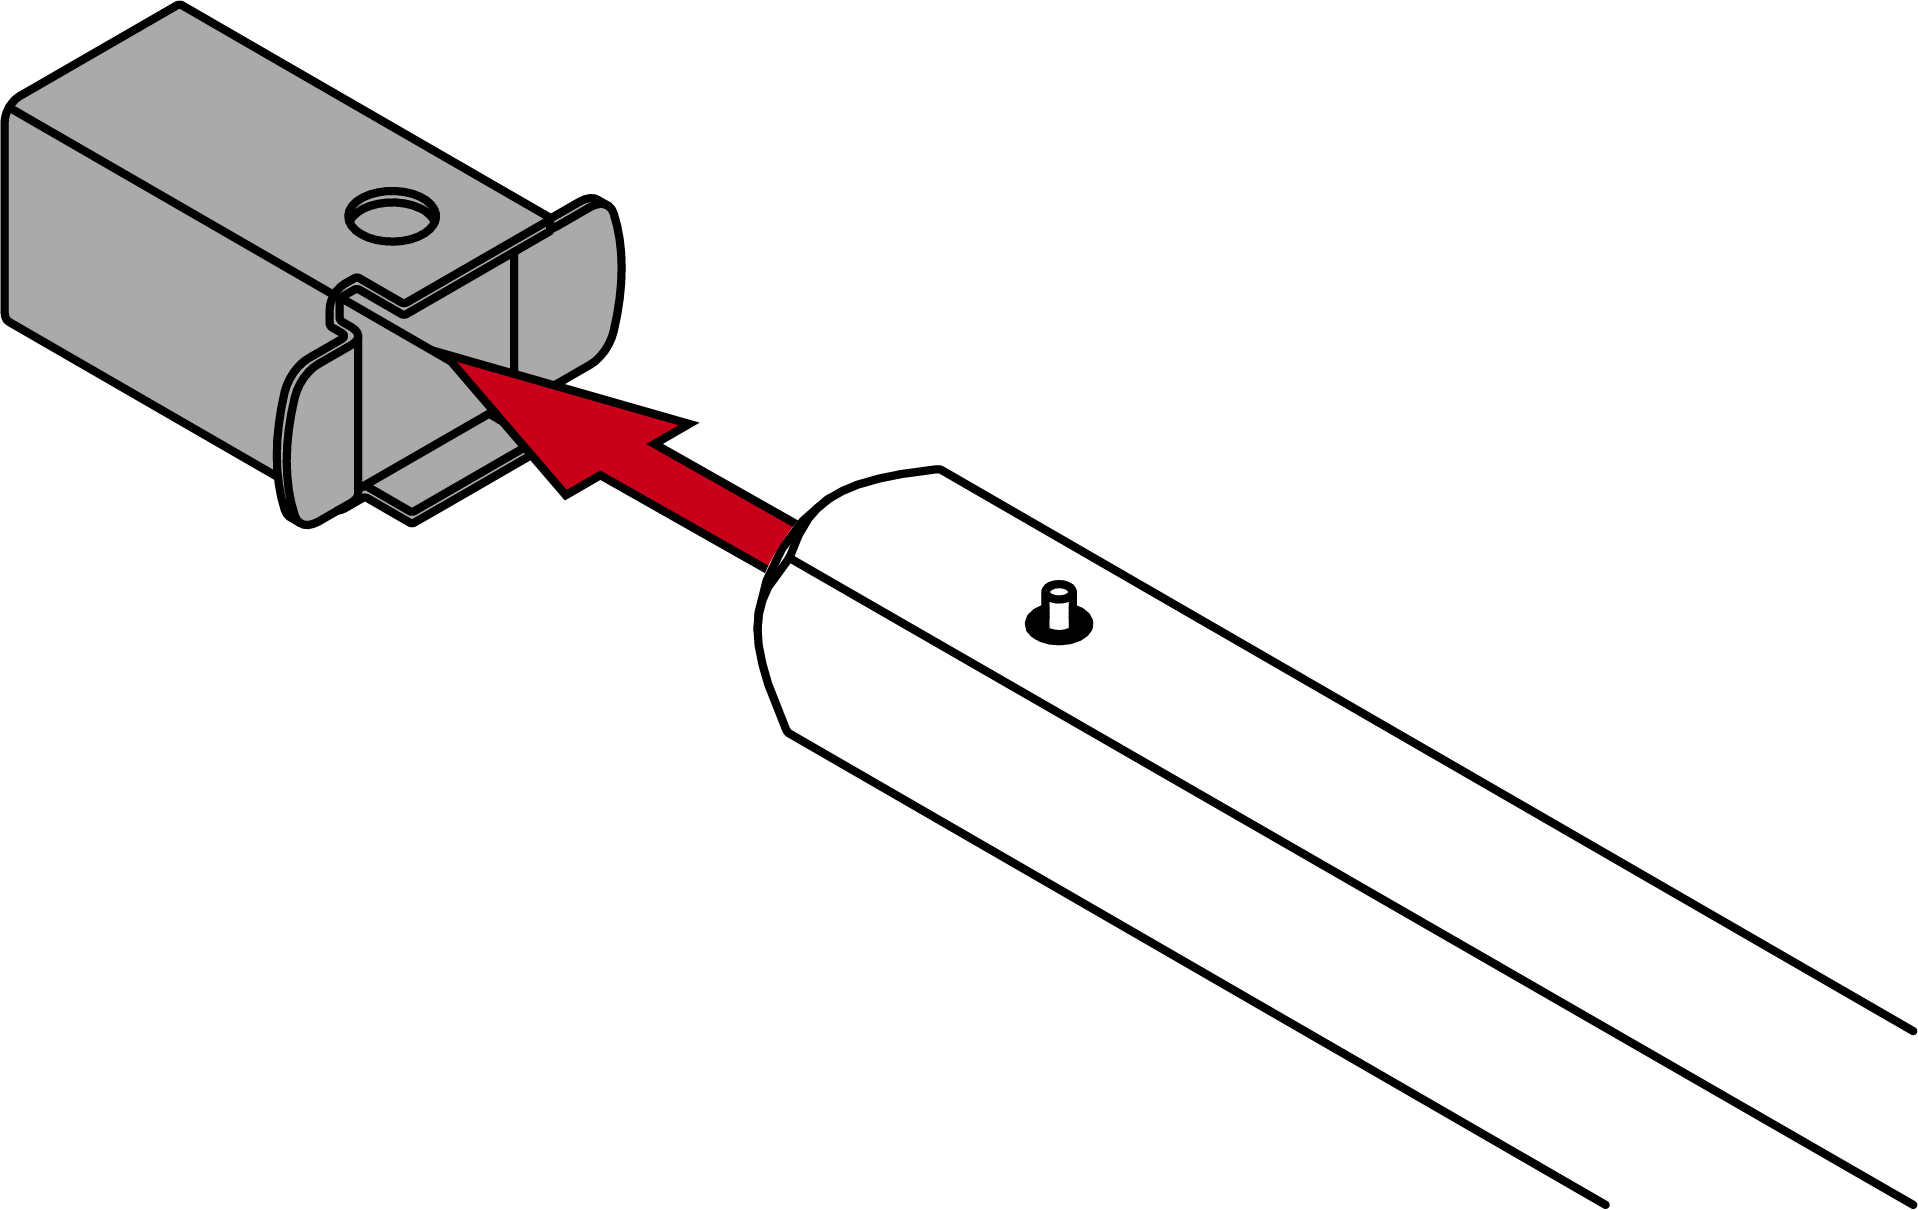
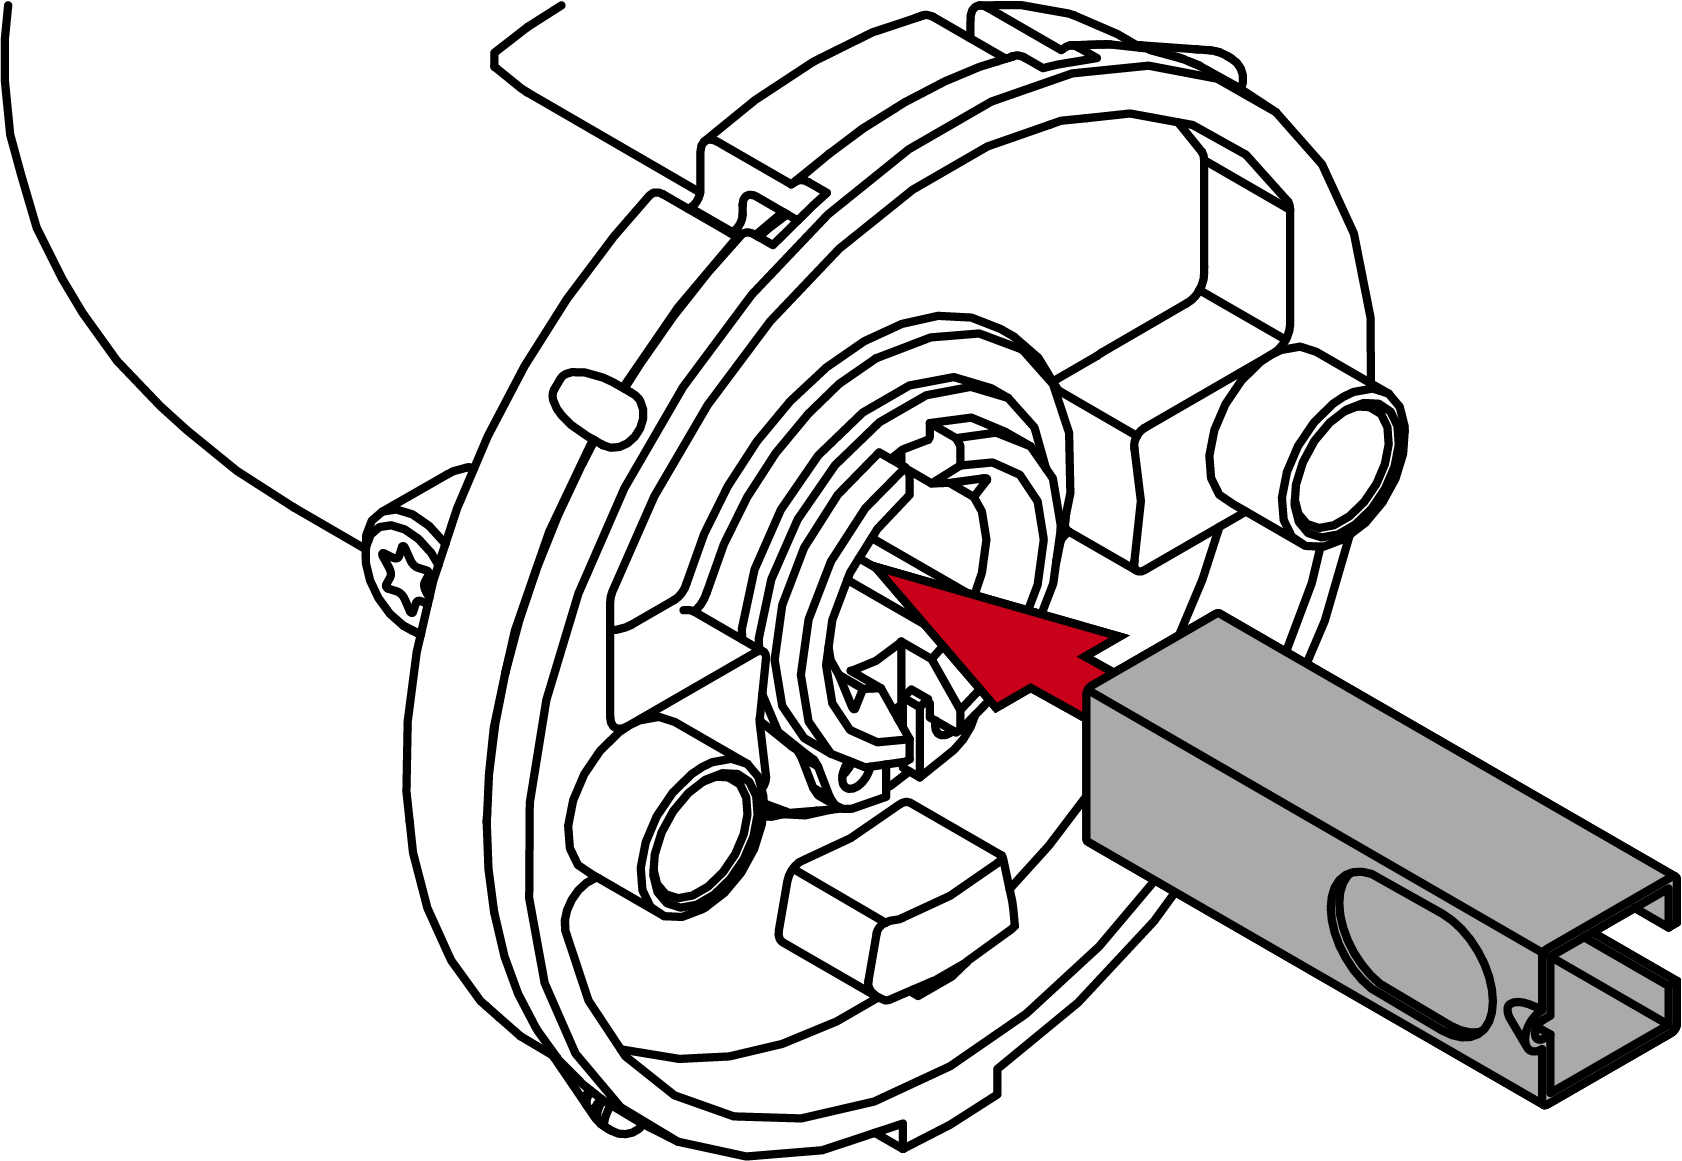
- For 7 mm spindle: insert the adapter sleeve onto the side of the spindle with the pin.
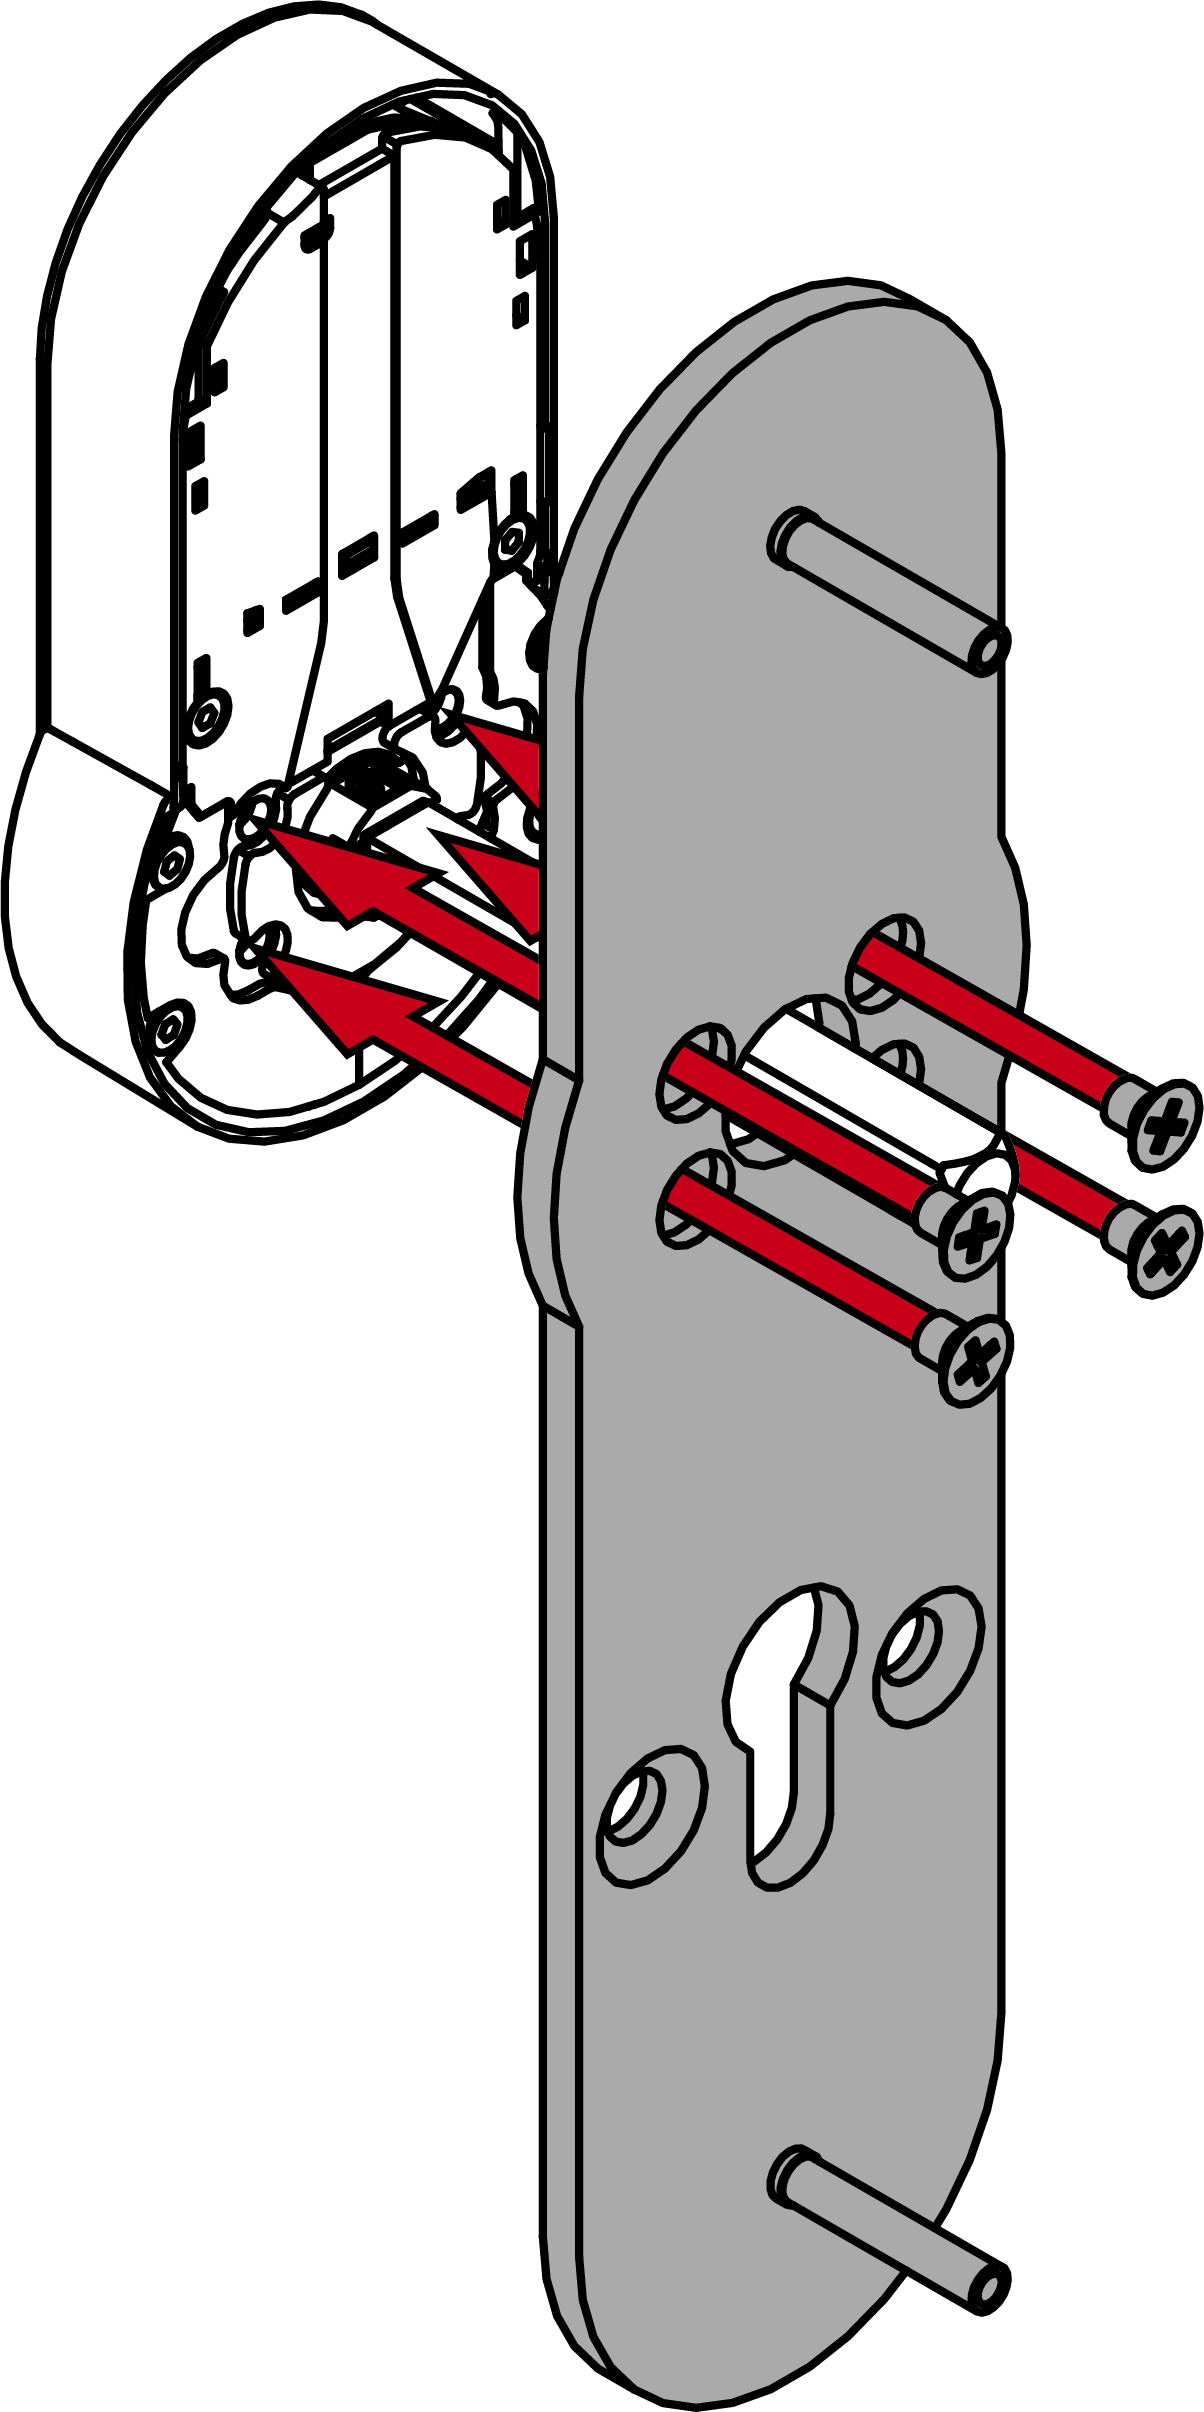
- Insert the spindle with the pin side into the fitting.
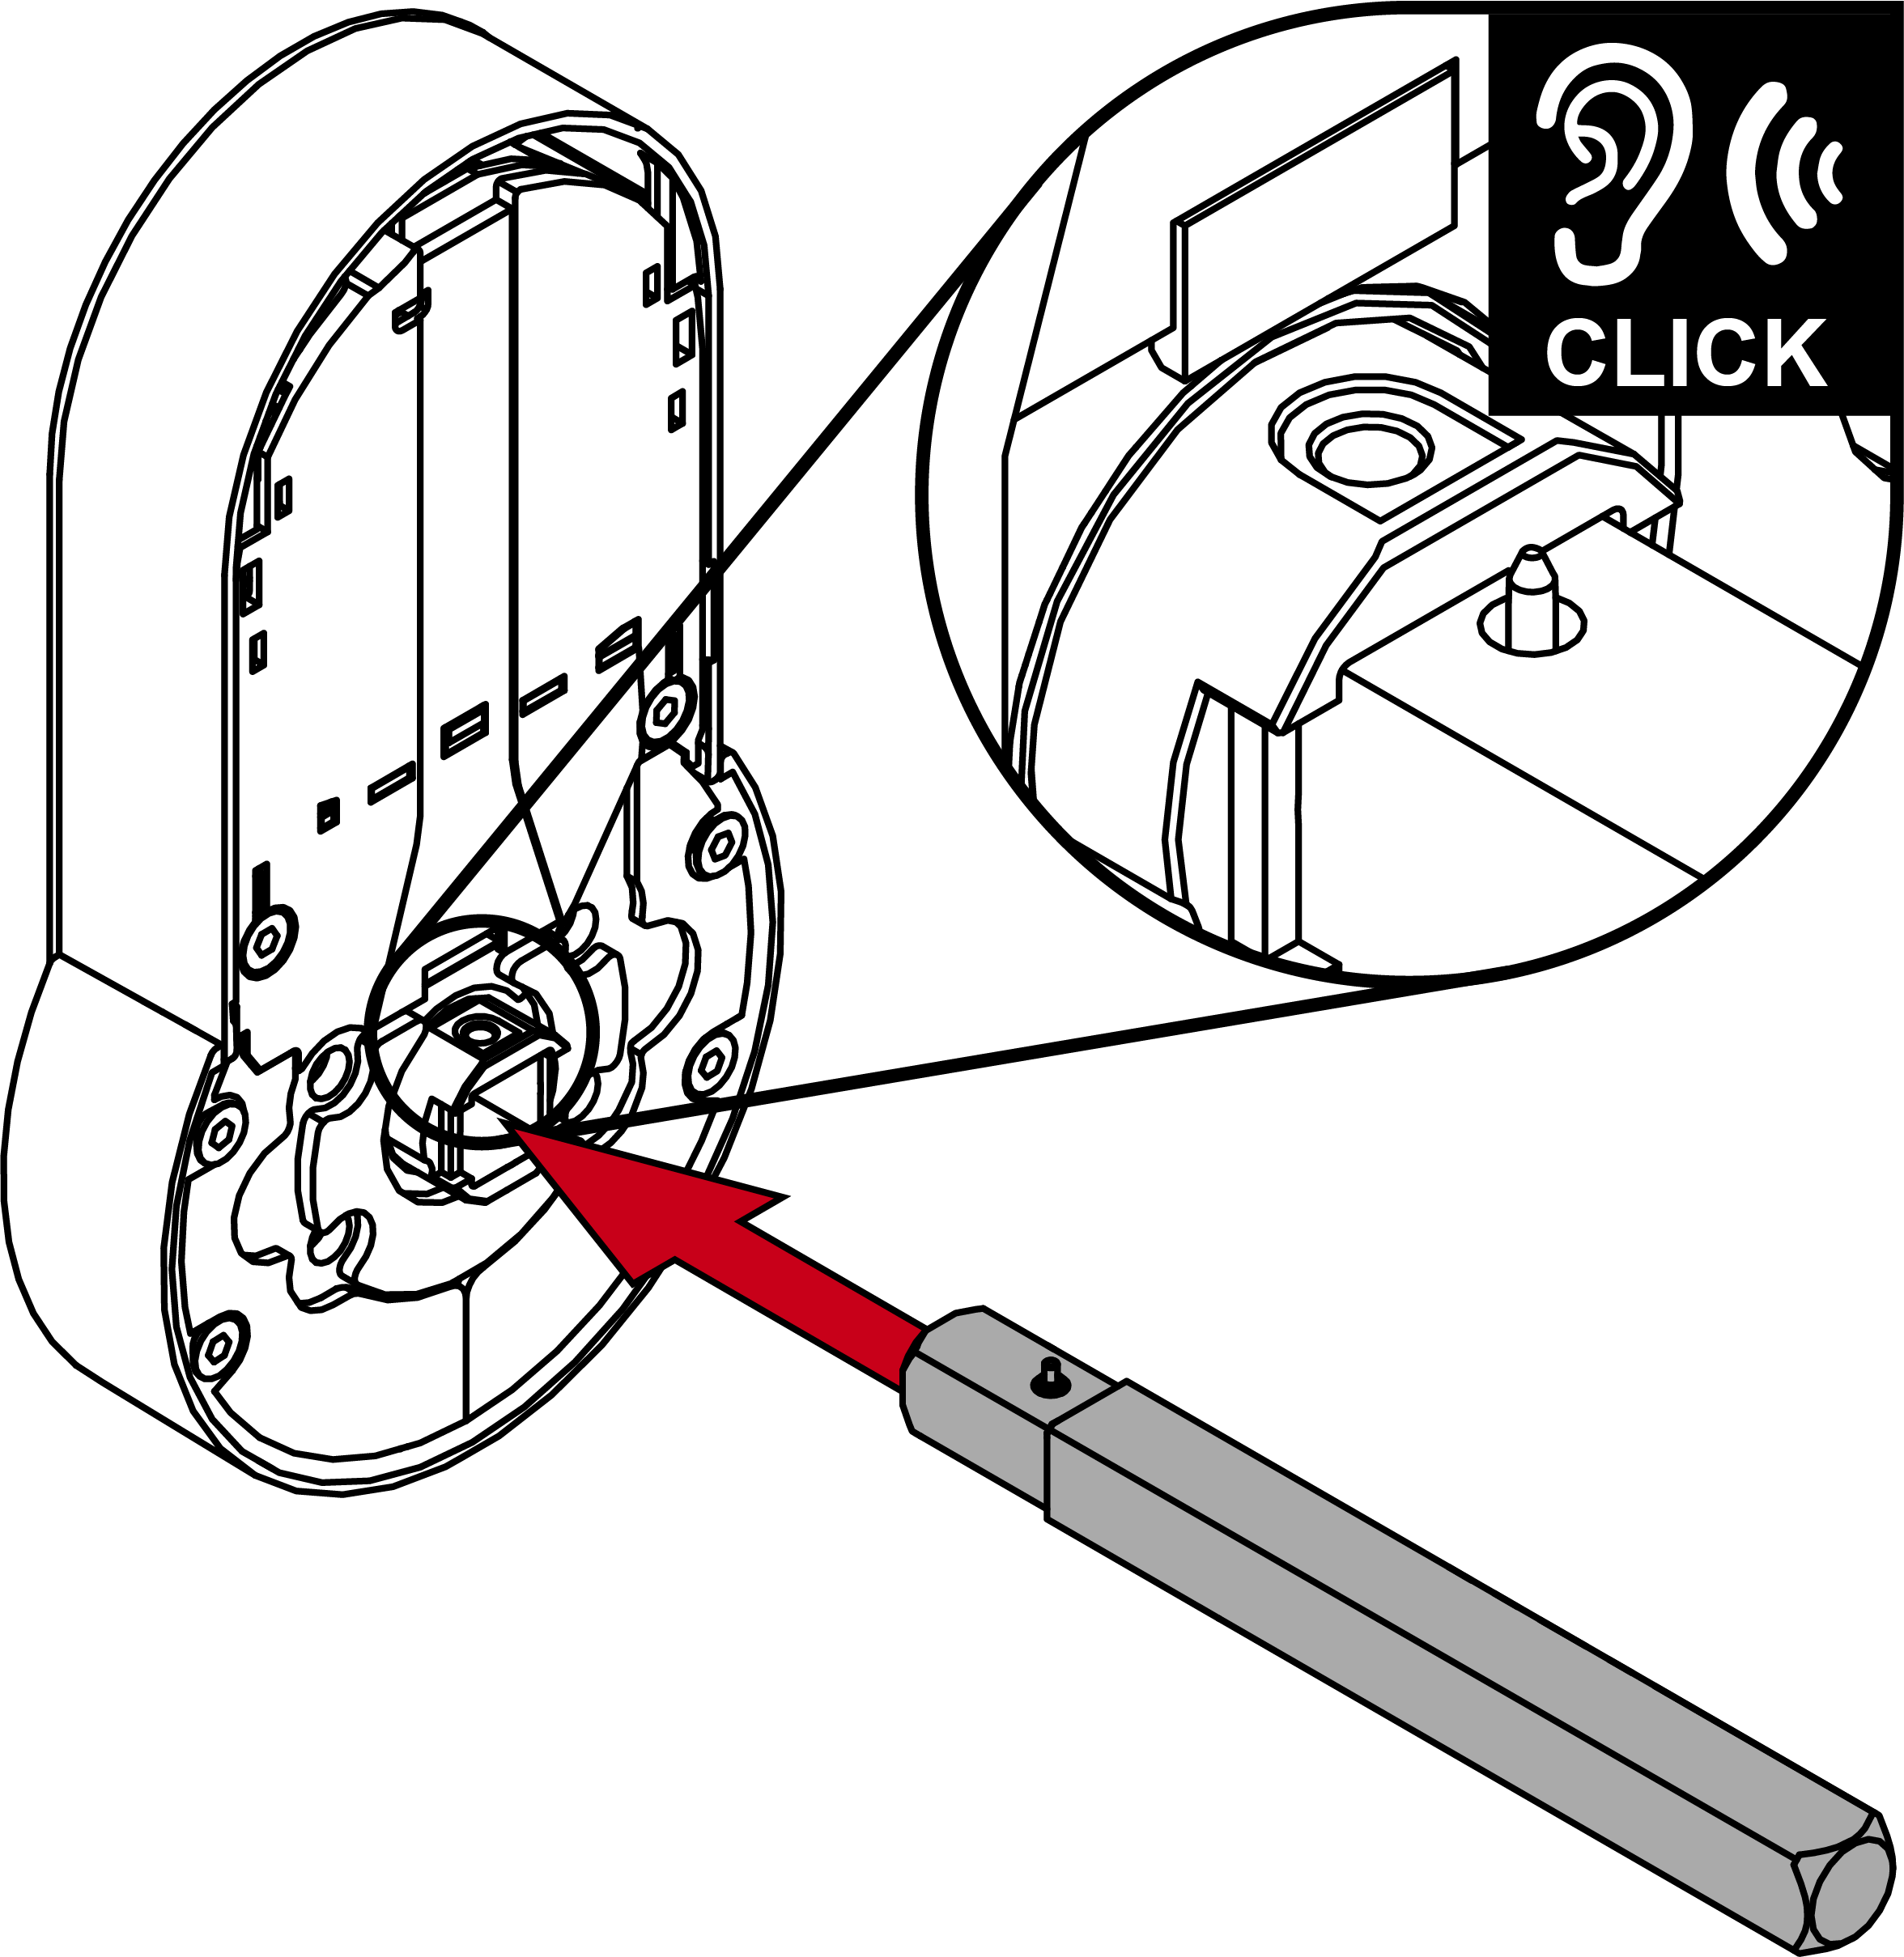
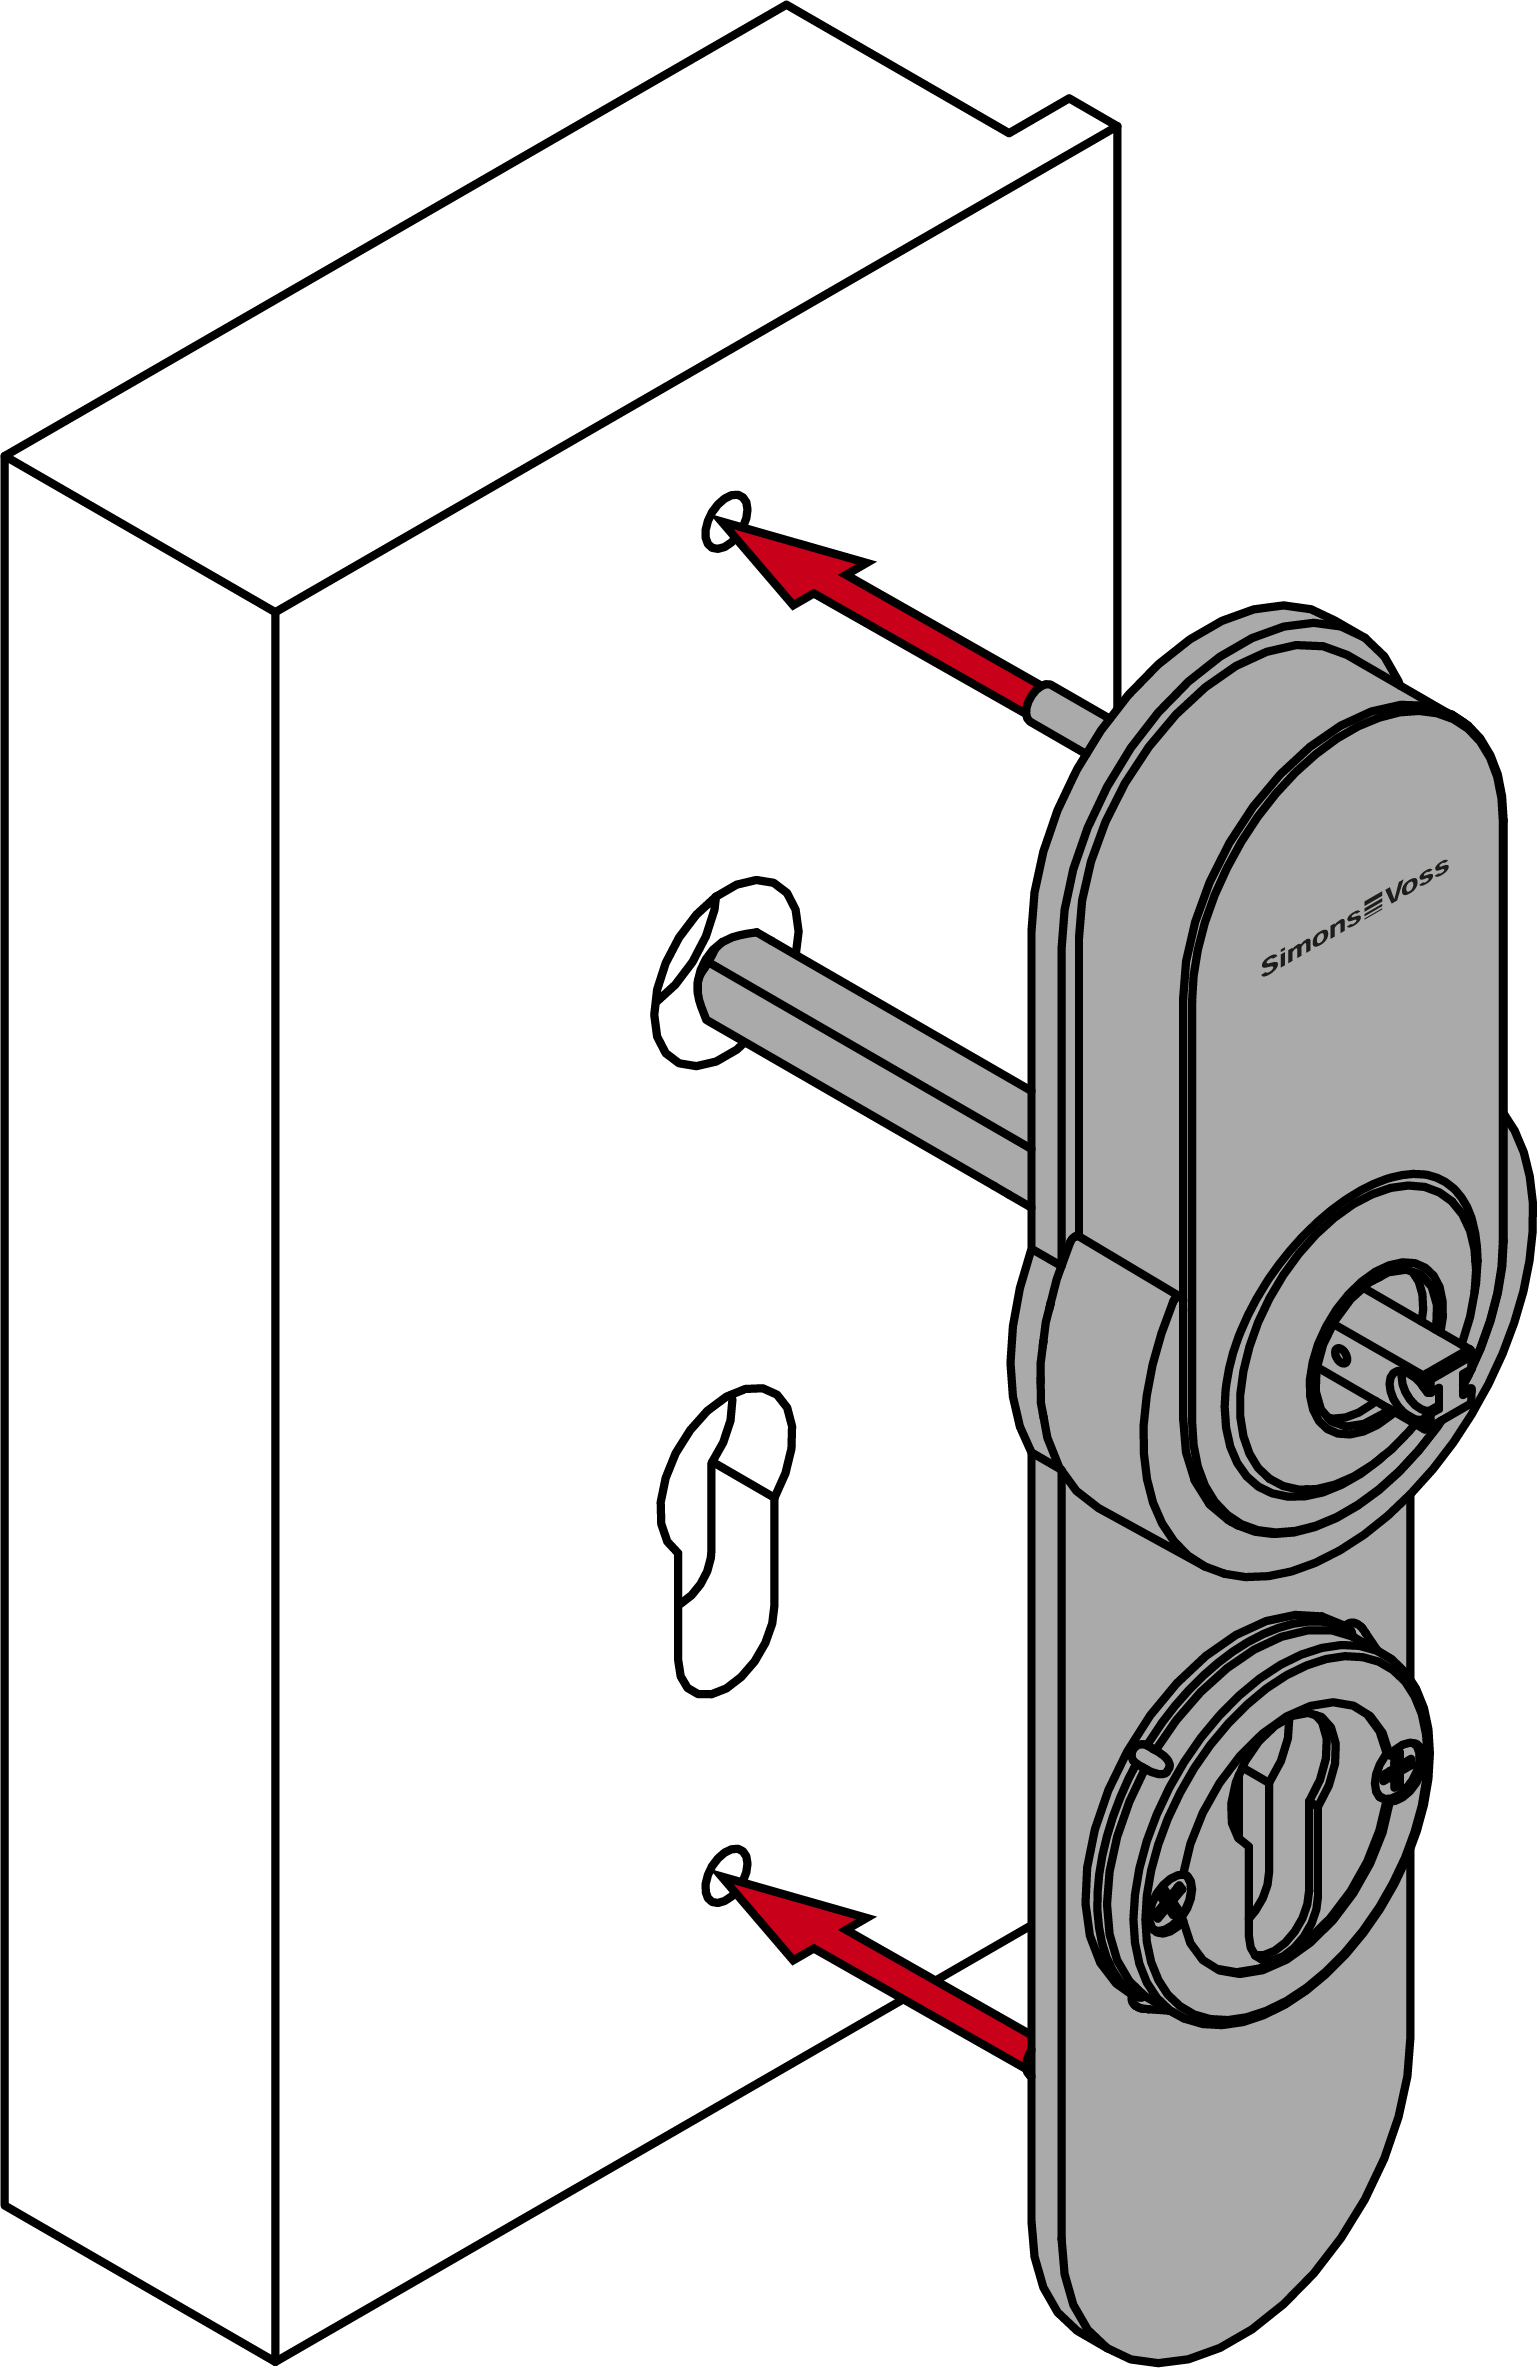
- Screw the outer adapter plate to the fitting (PH2, torque 1.1 Nm). You can identify the outer adapter plate by the welded stud bolt nuts.
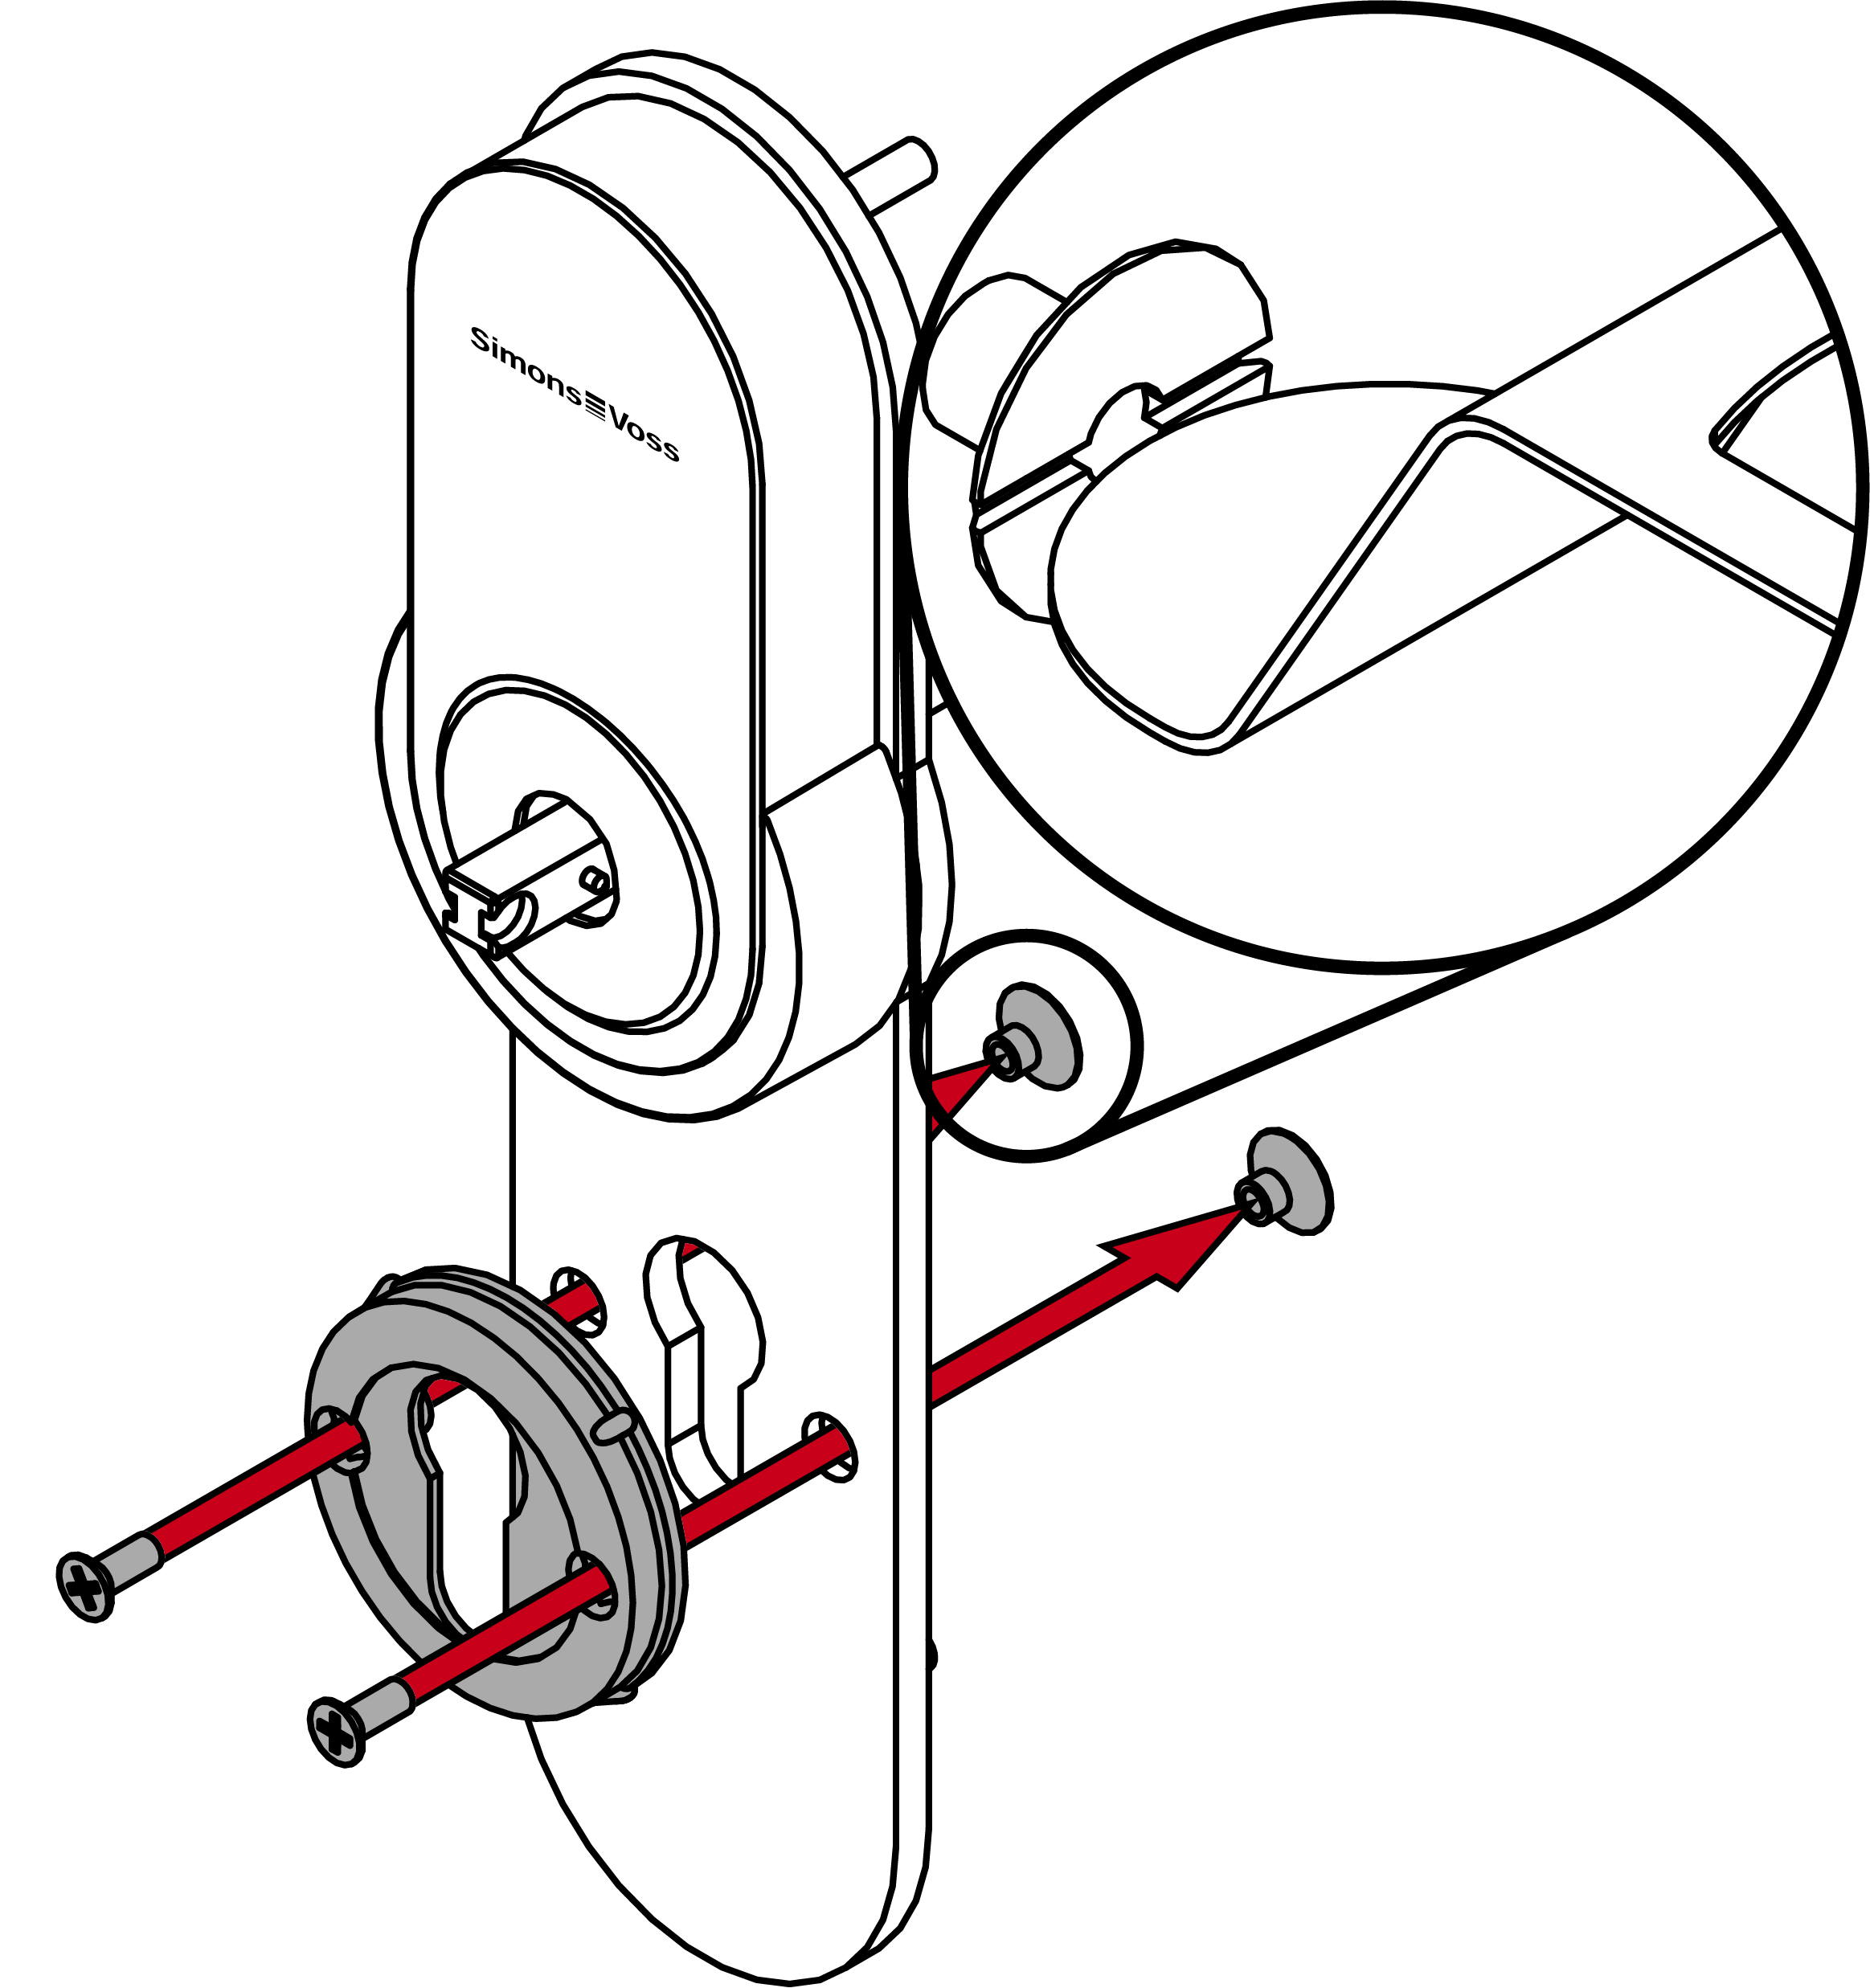
- Hold the countersunk nuts with the special tool and screw the escutcheon base firmly to the outer adapter plate (PH2, torque 1.1 Nm).
- For 7 mm spindle: place the adapter sleeve in the inner handle in such a way that the recess faces the grub screw.
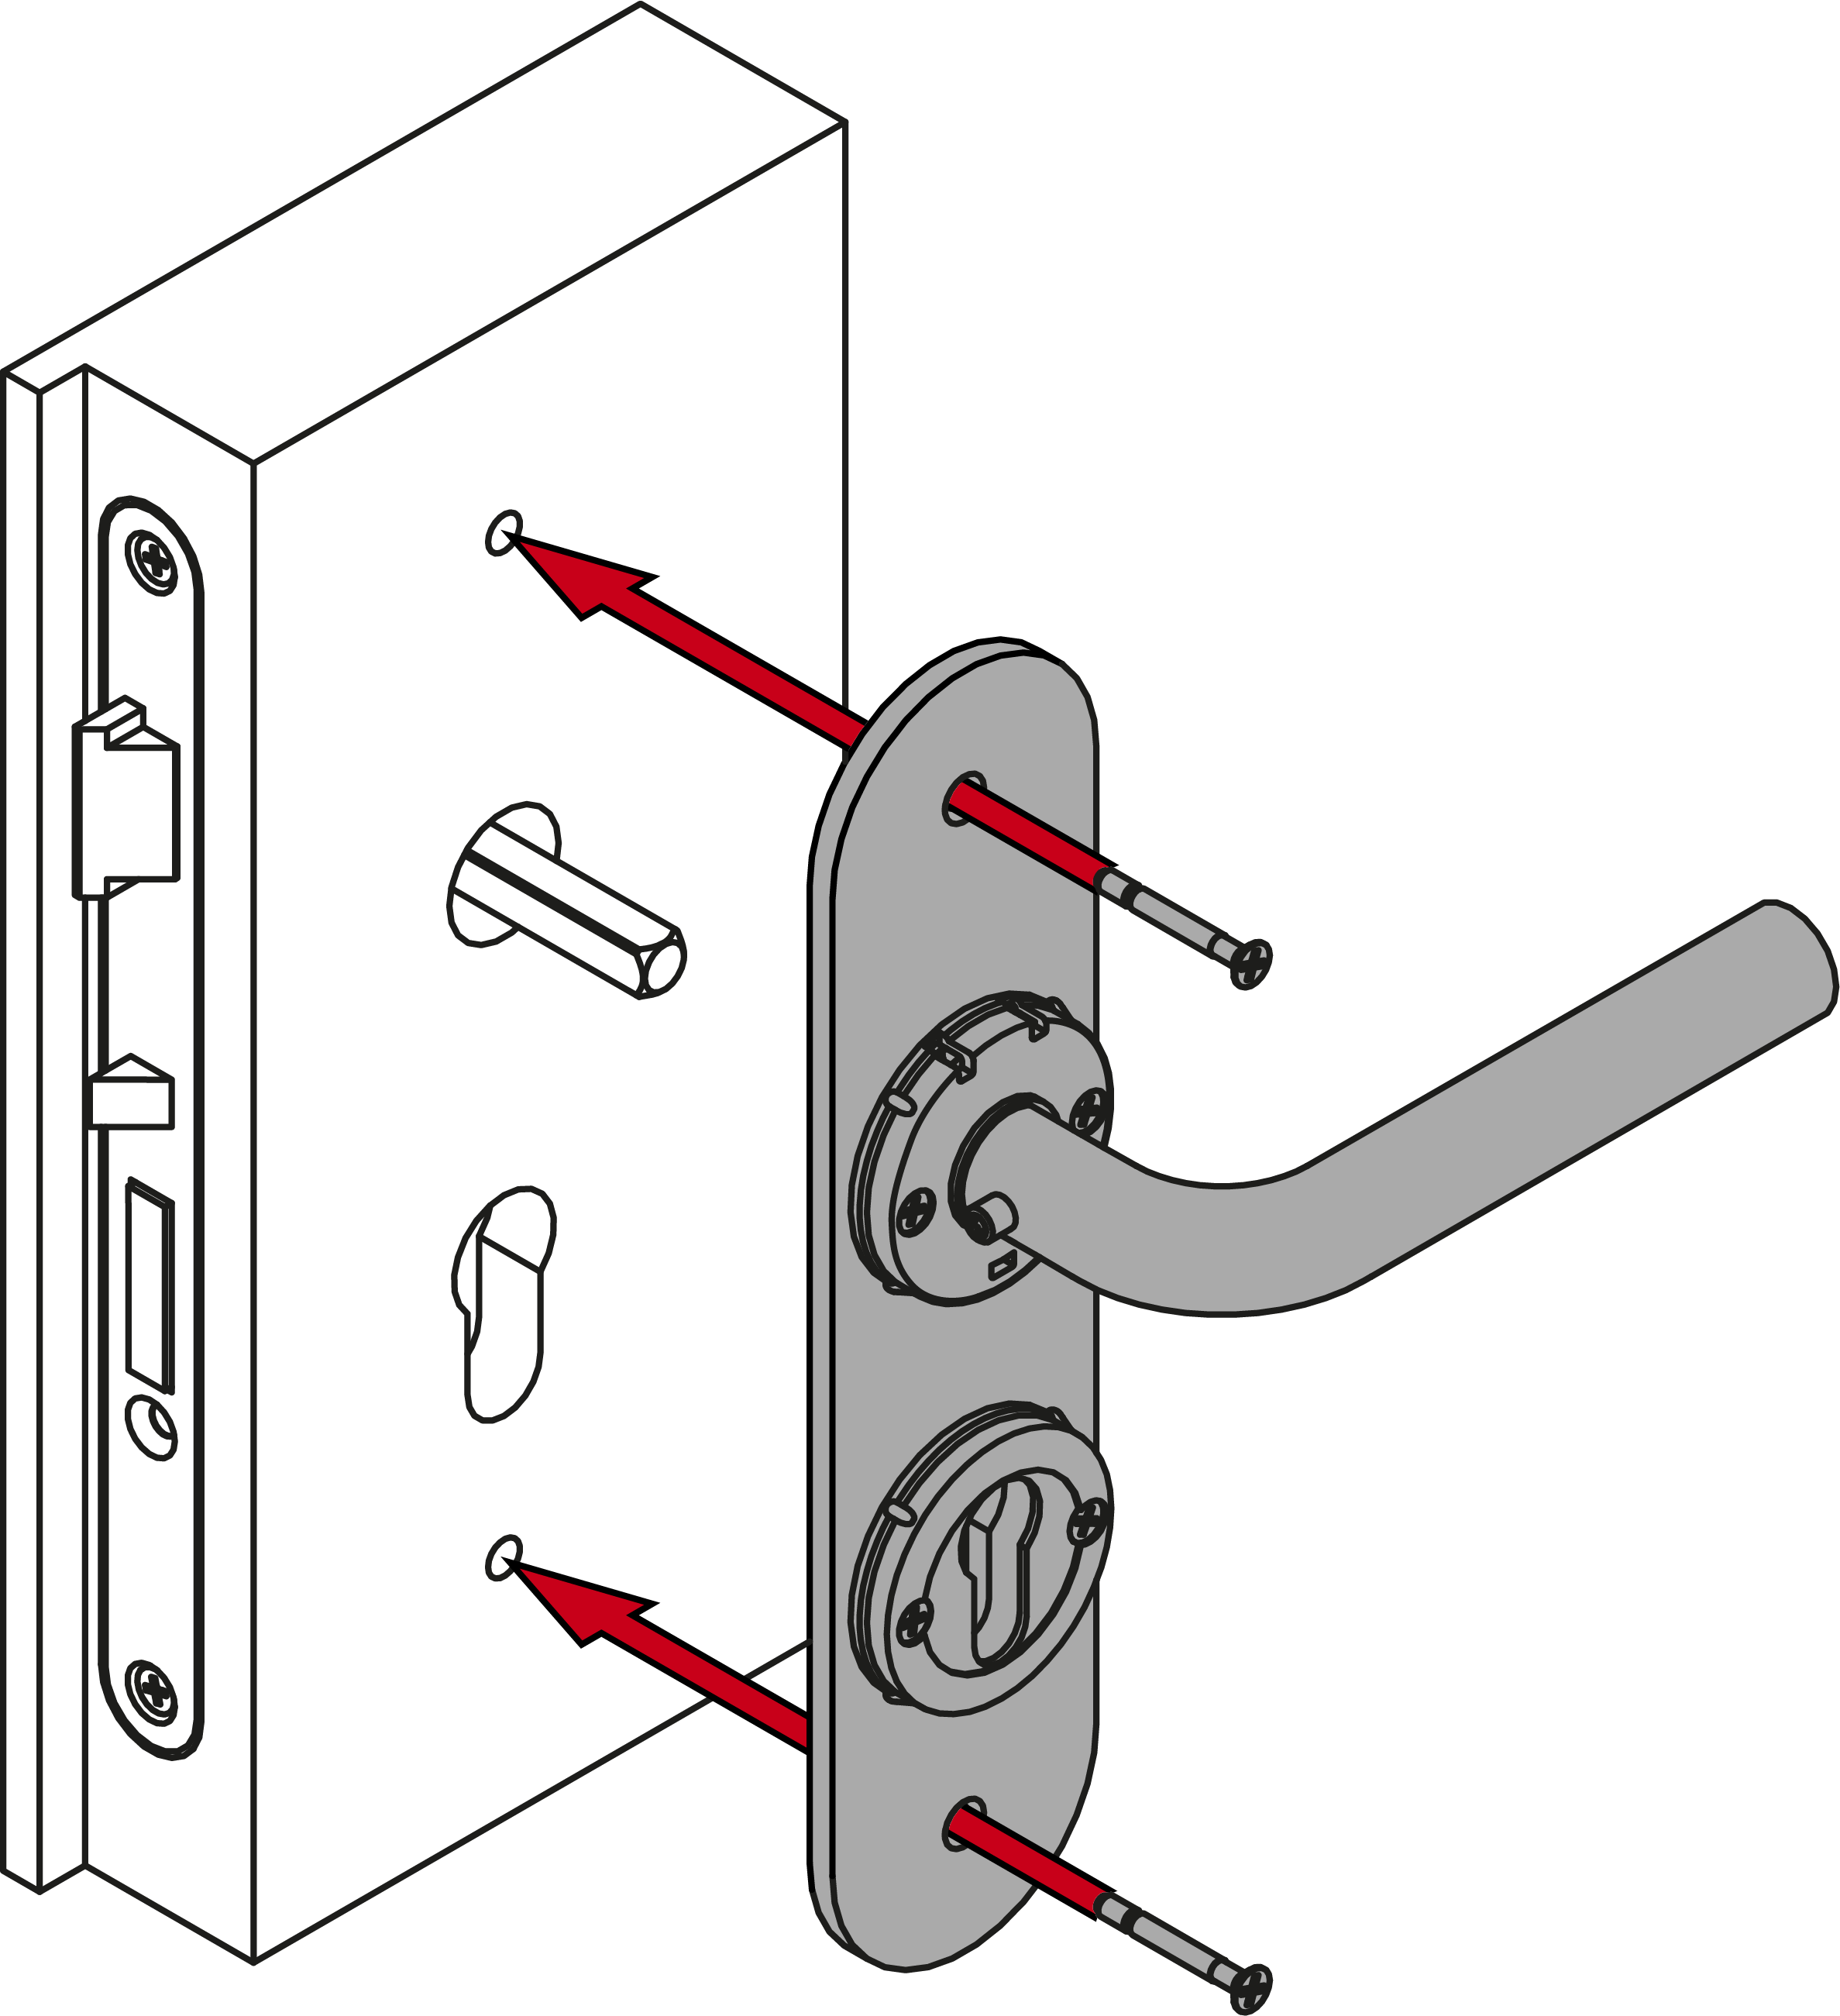
- Hold the countersunk nuts firmly with the special tool and screw the inner handle and the escutcheon base tightly onto the inner adapter plate (PH2, torque: 1.1 Nm).
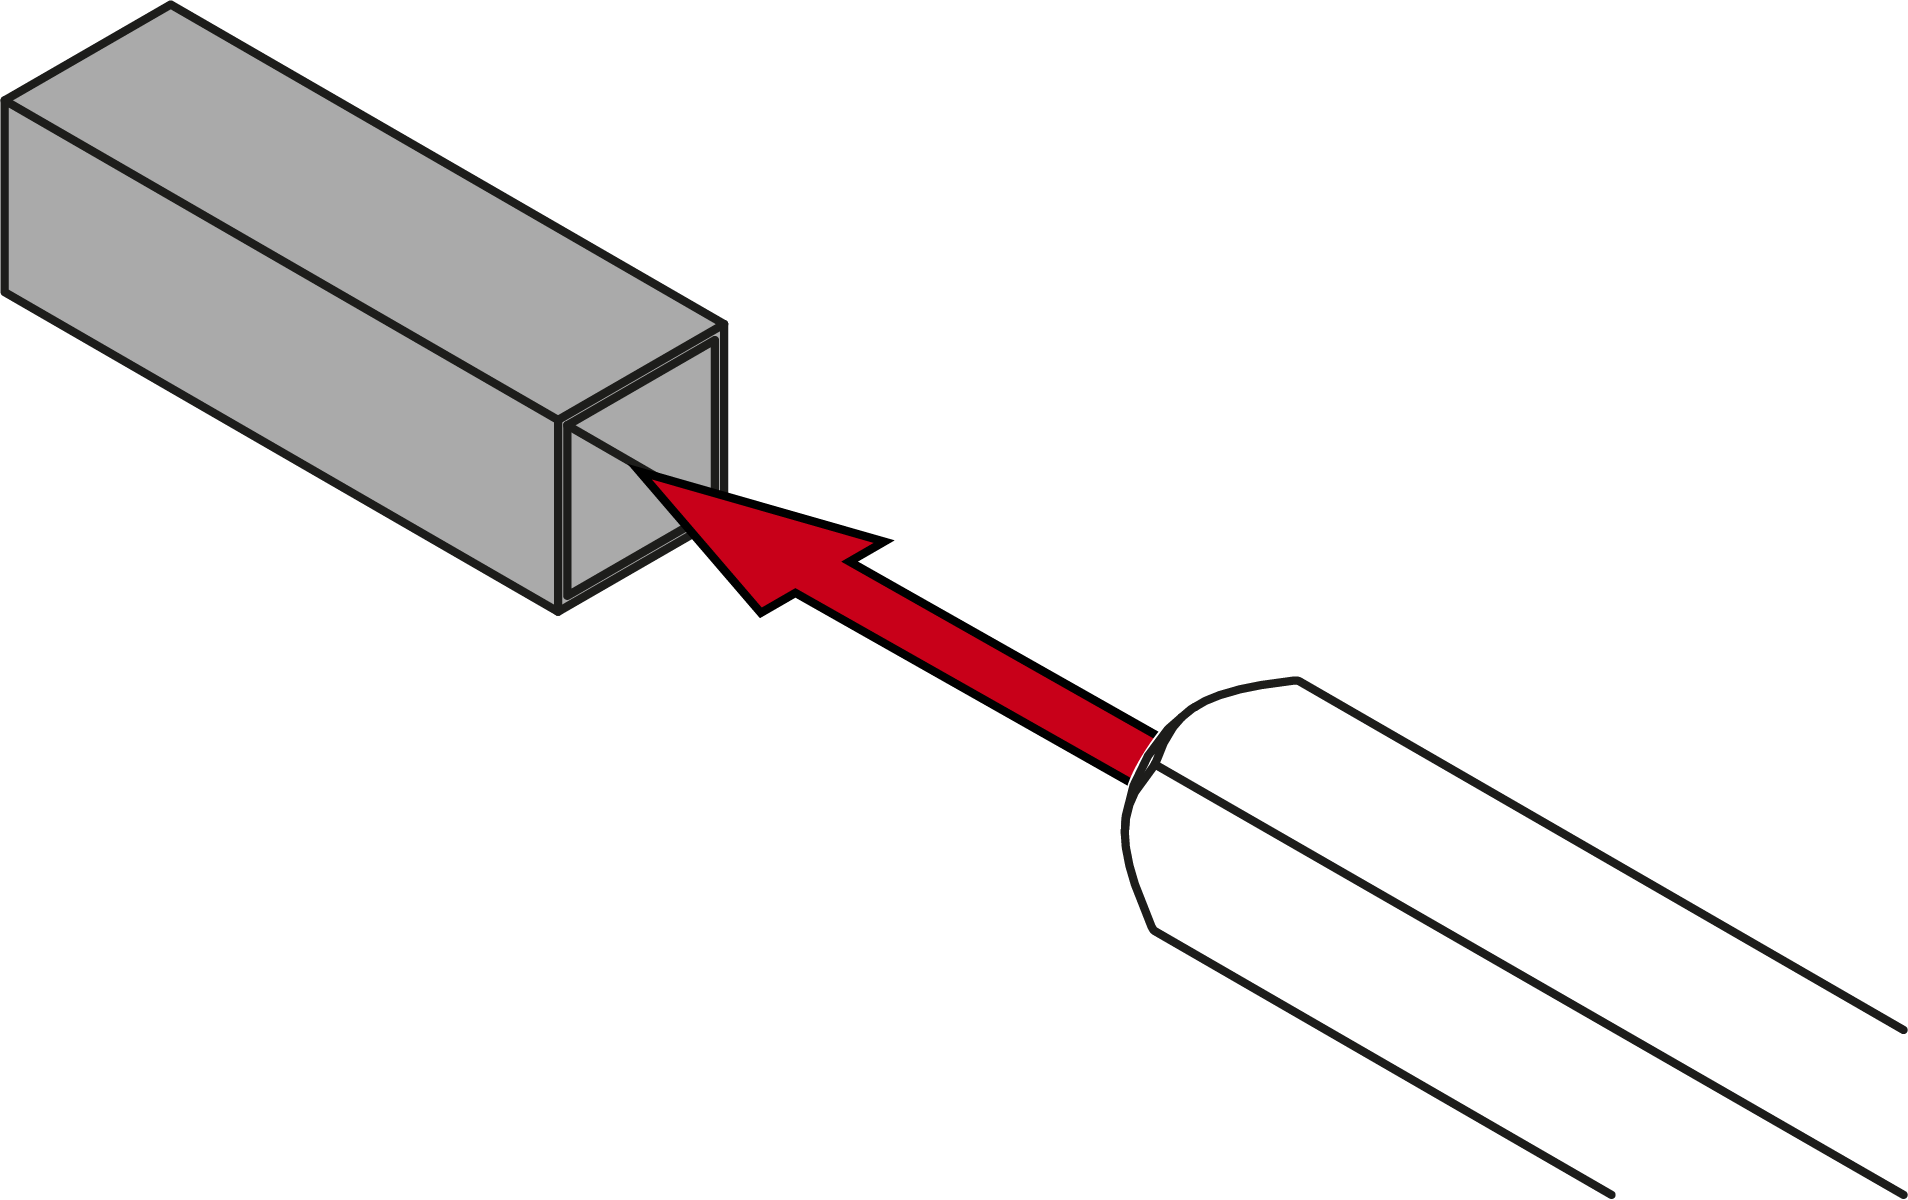
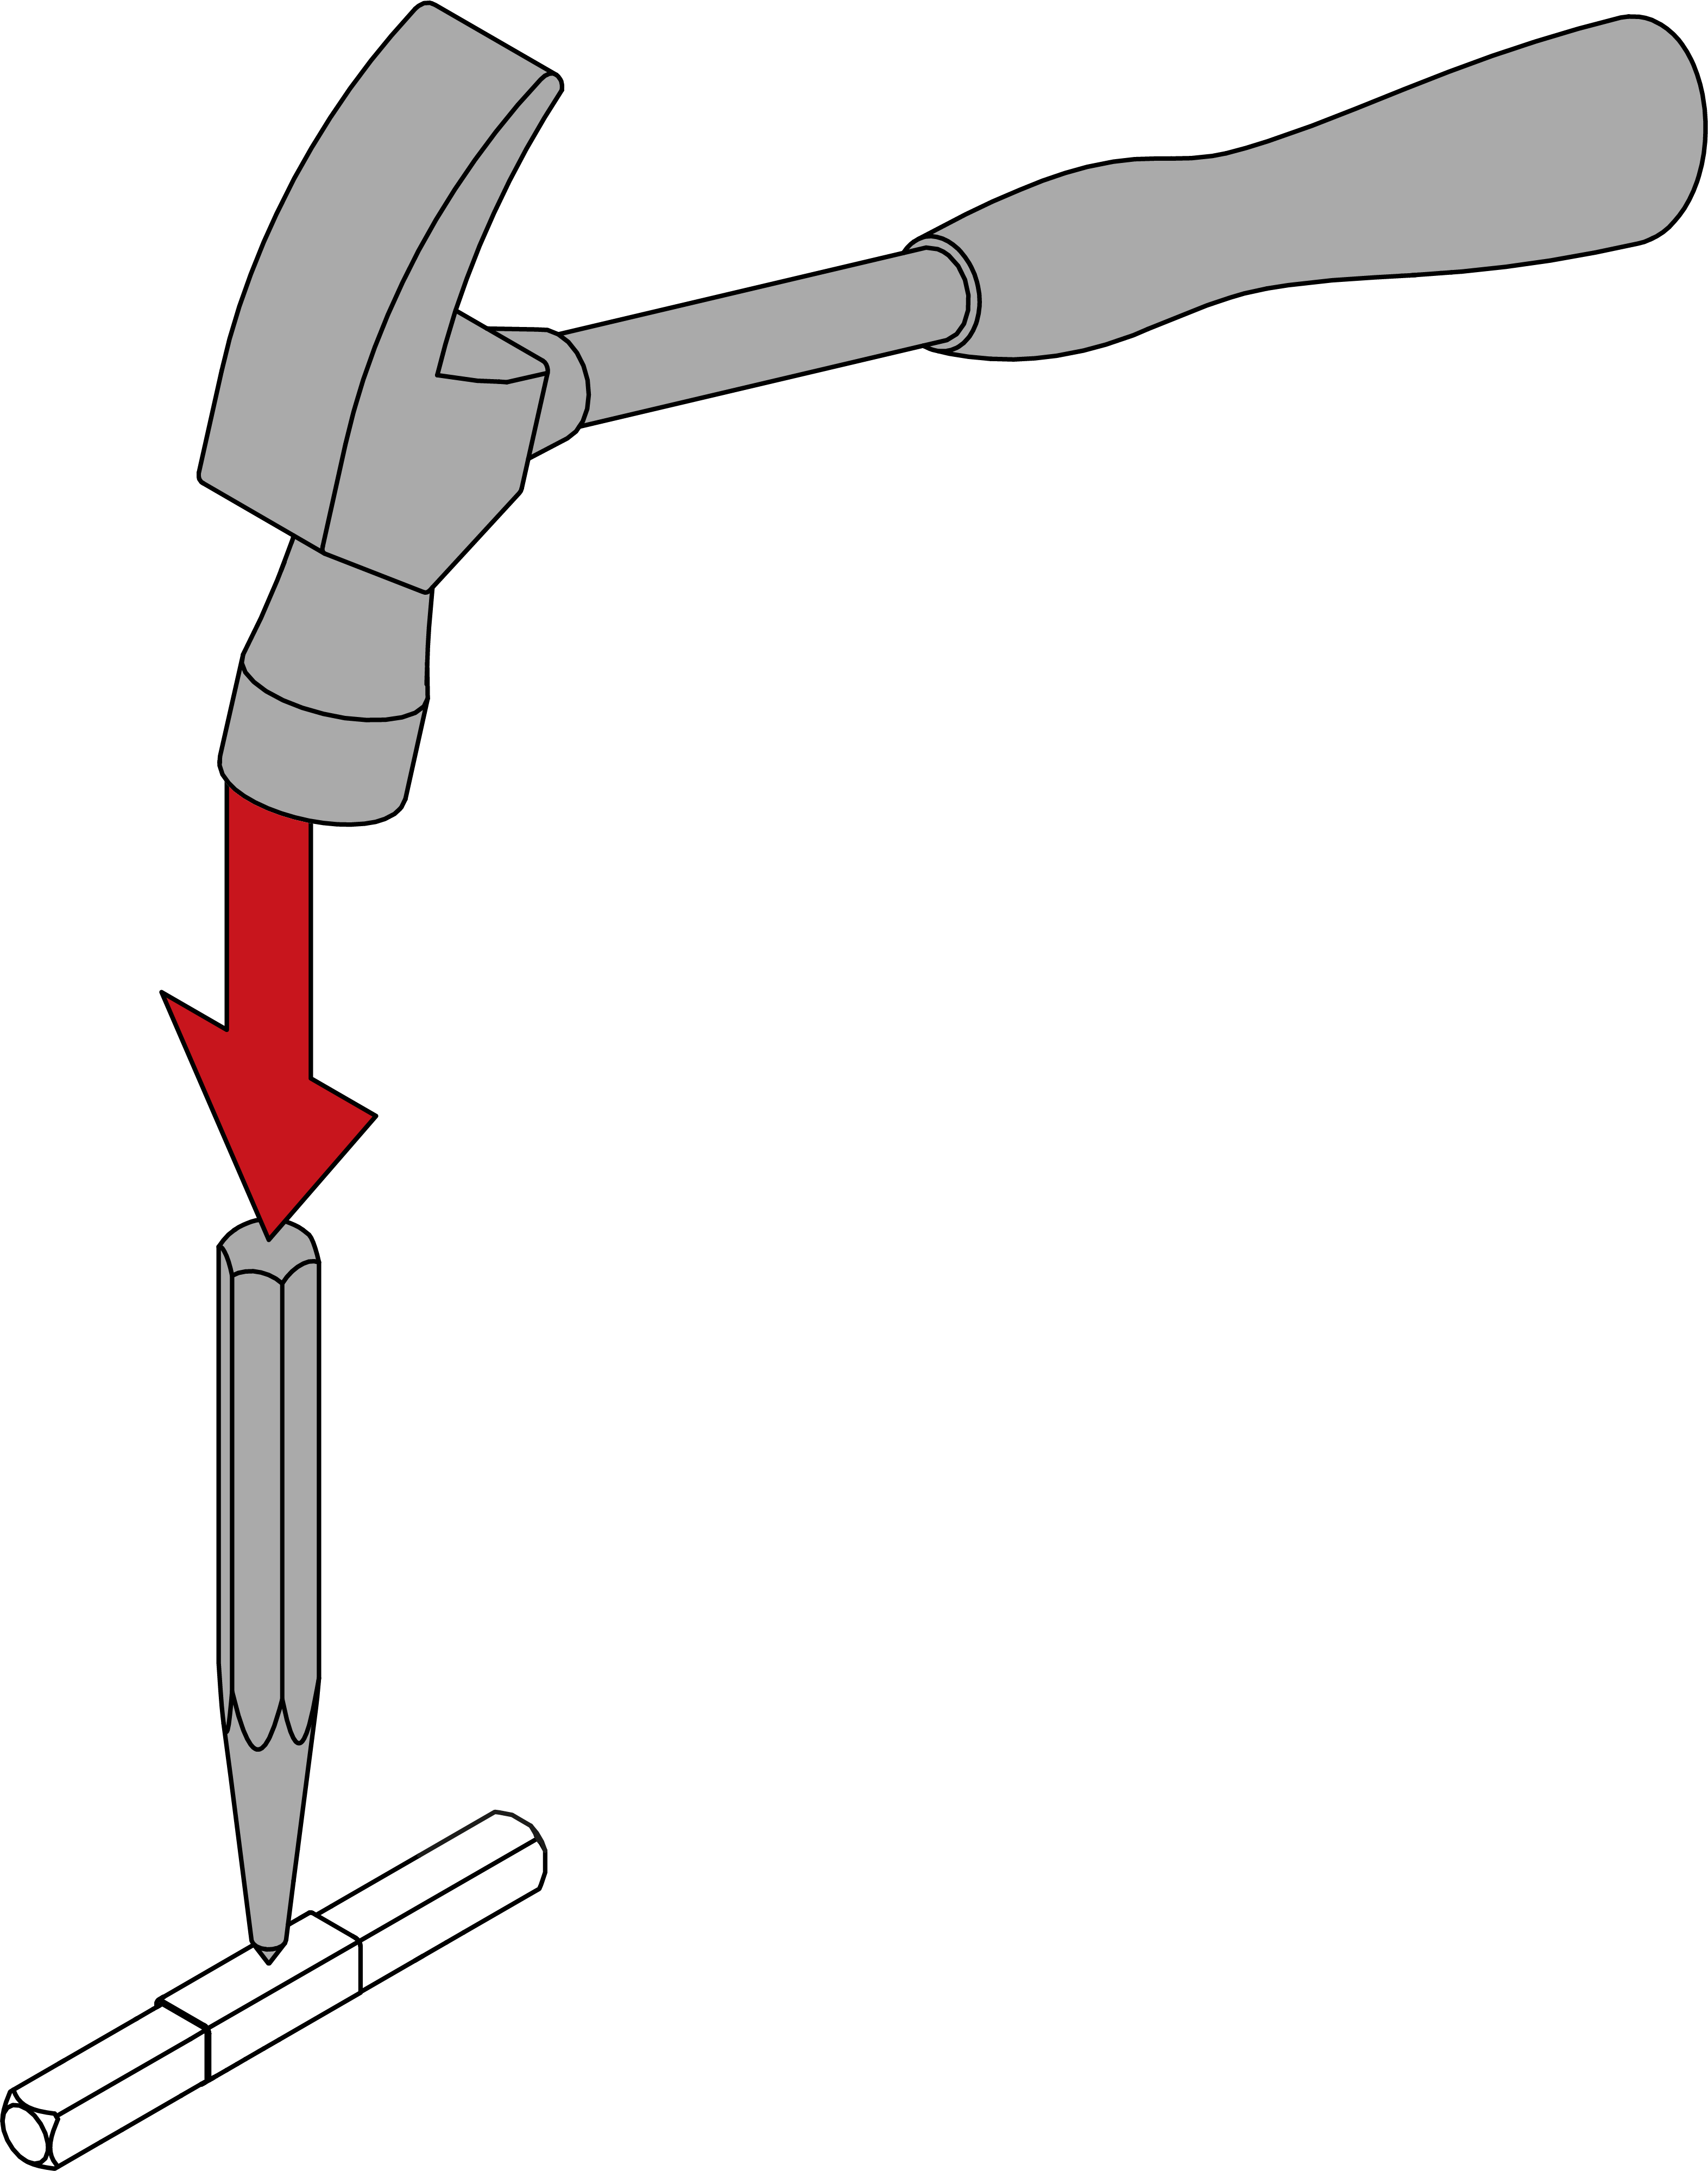
- For 8.5 mm and 10 mm spindle: slide the adapter sleeve into the centre of the spindle. Use a punch and hammer to make an indent in the adapter sleeve to prevent it from slipping.
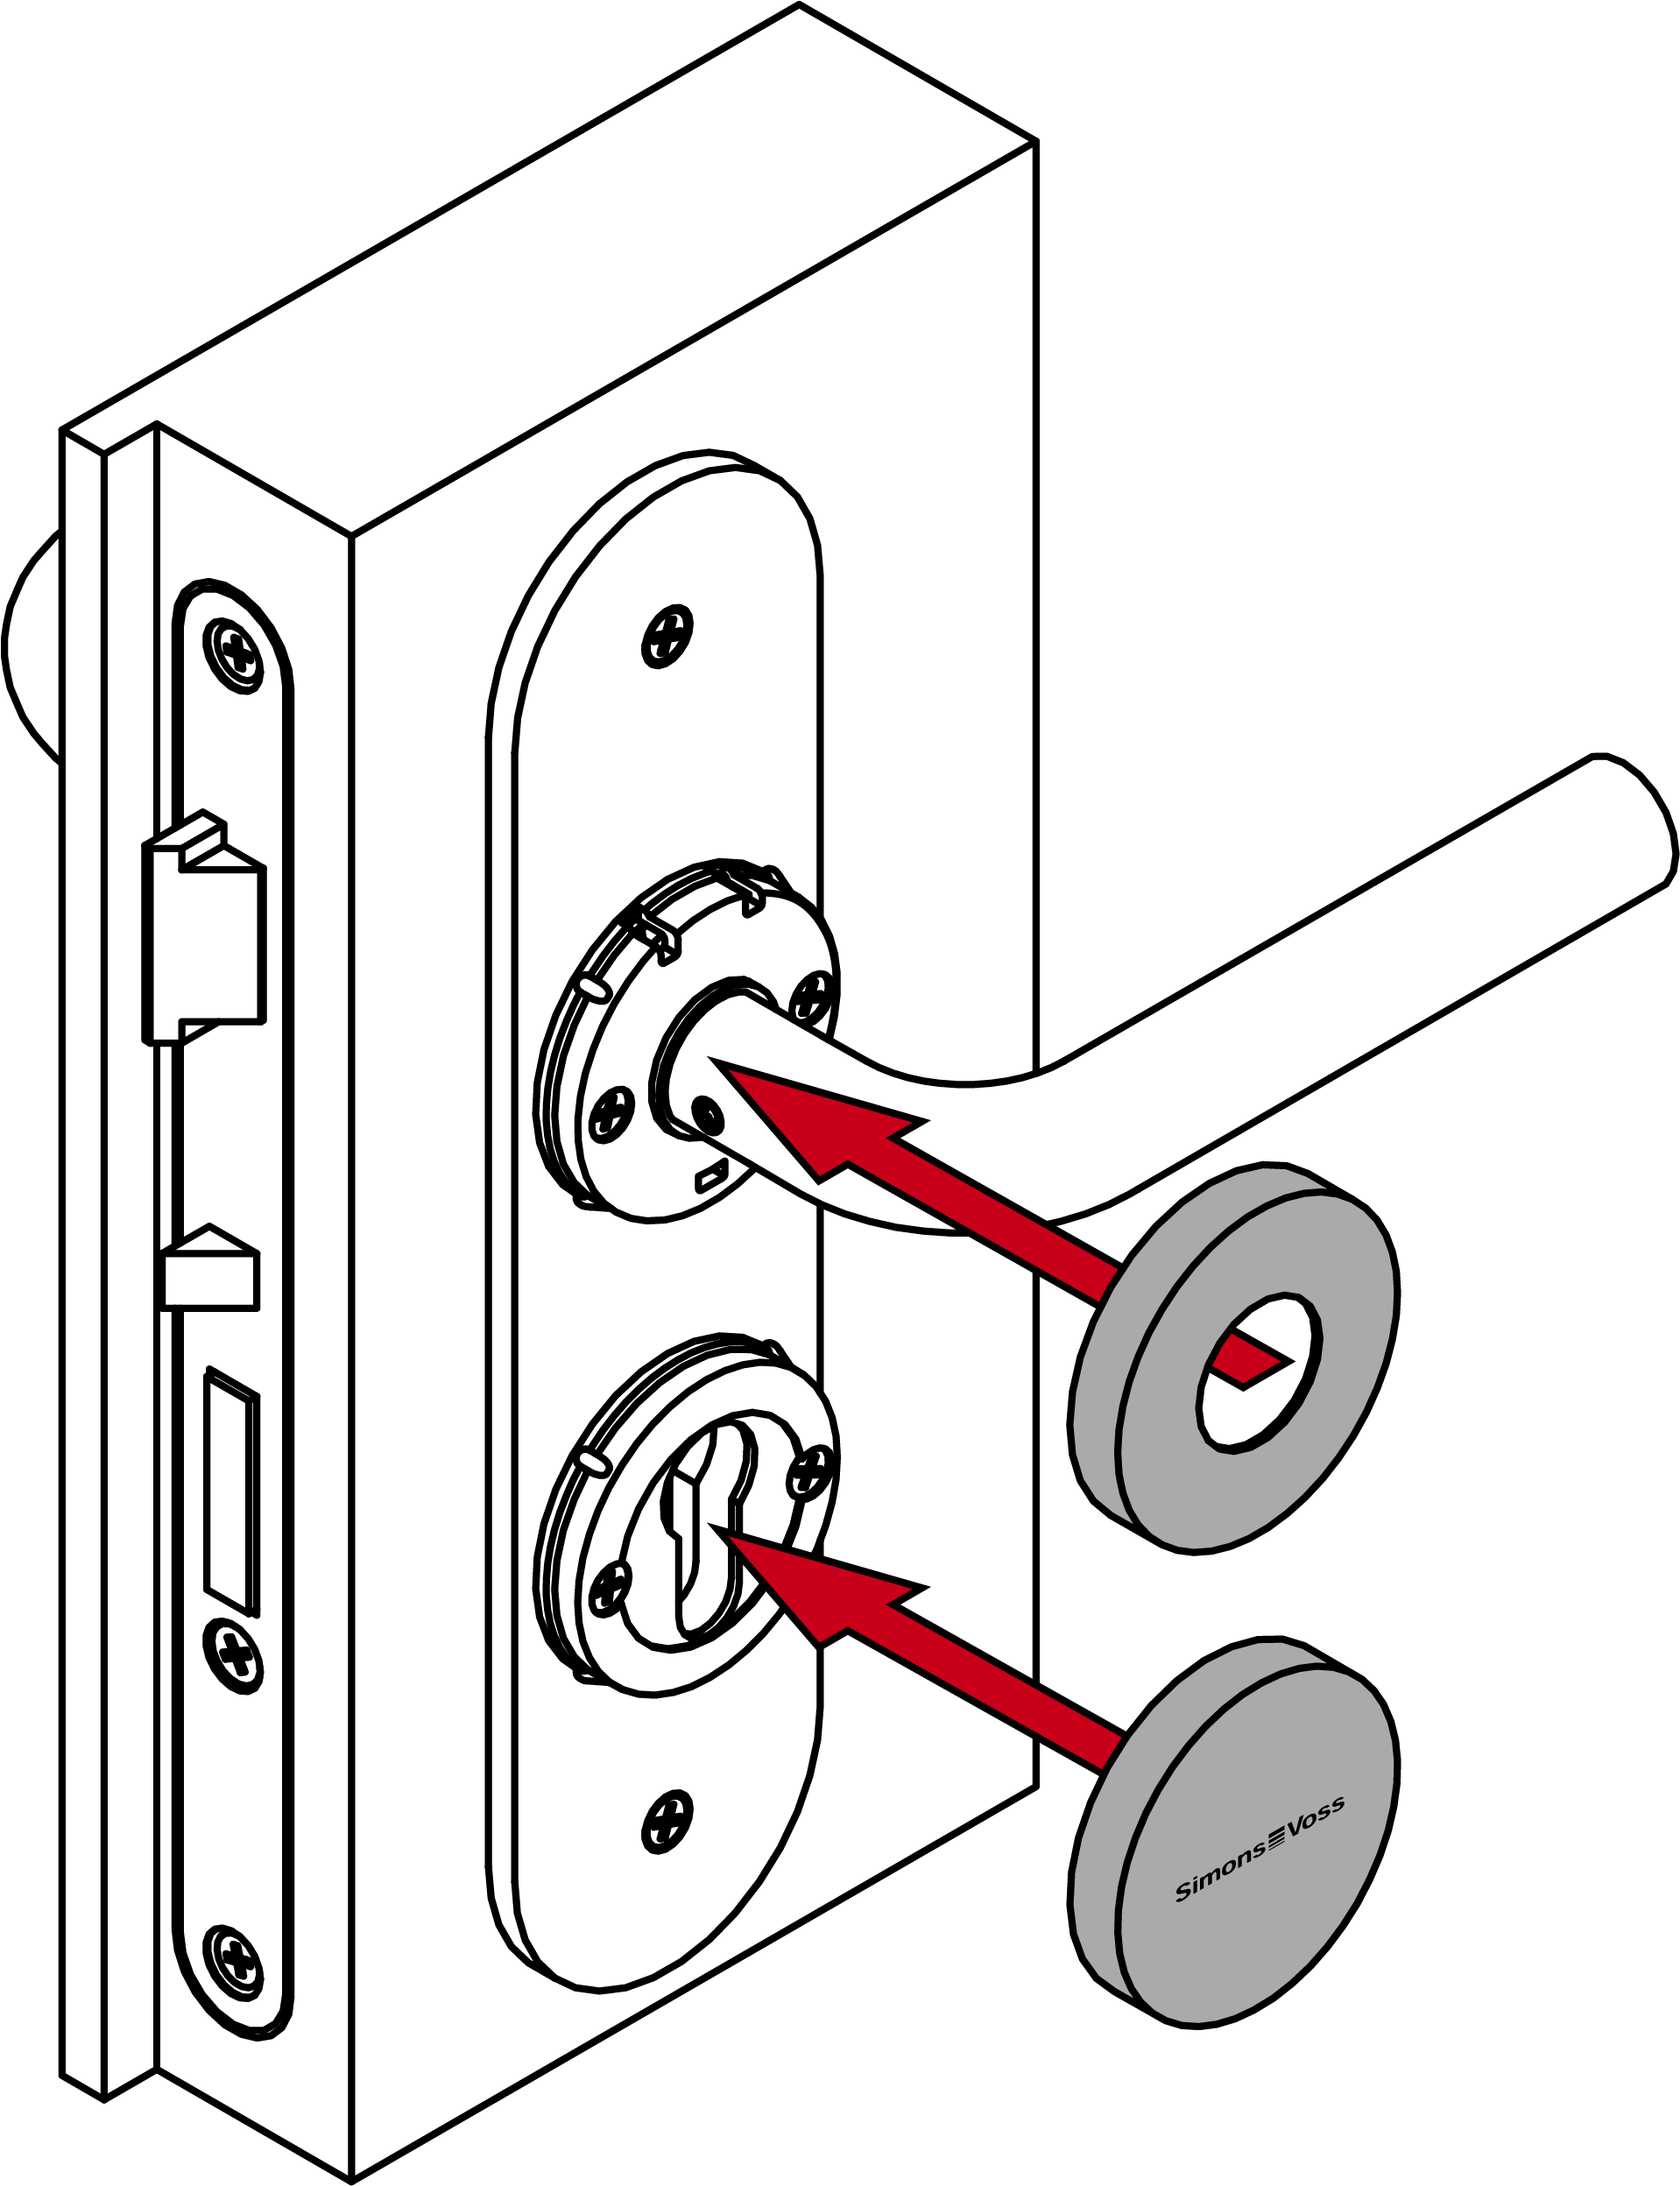
- Insert the fitting with the adapter plate and the spindle into the door from the outside.
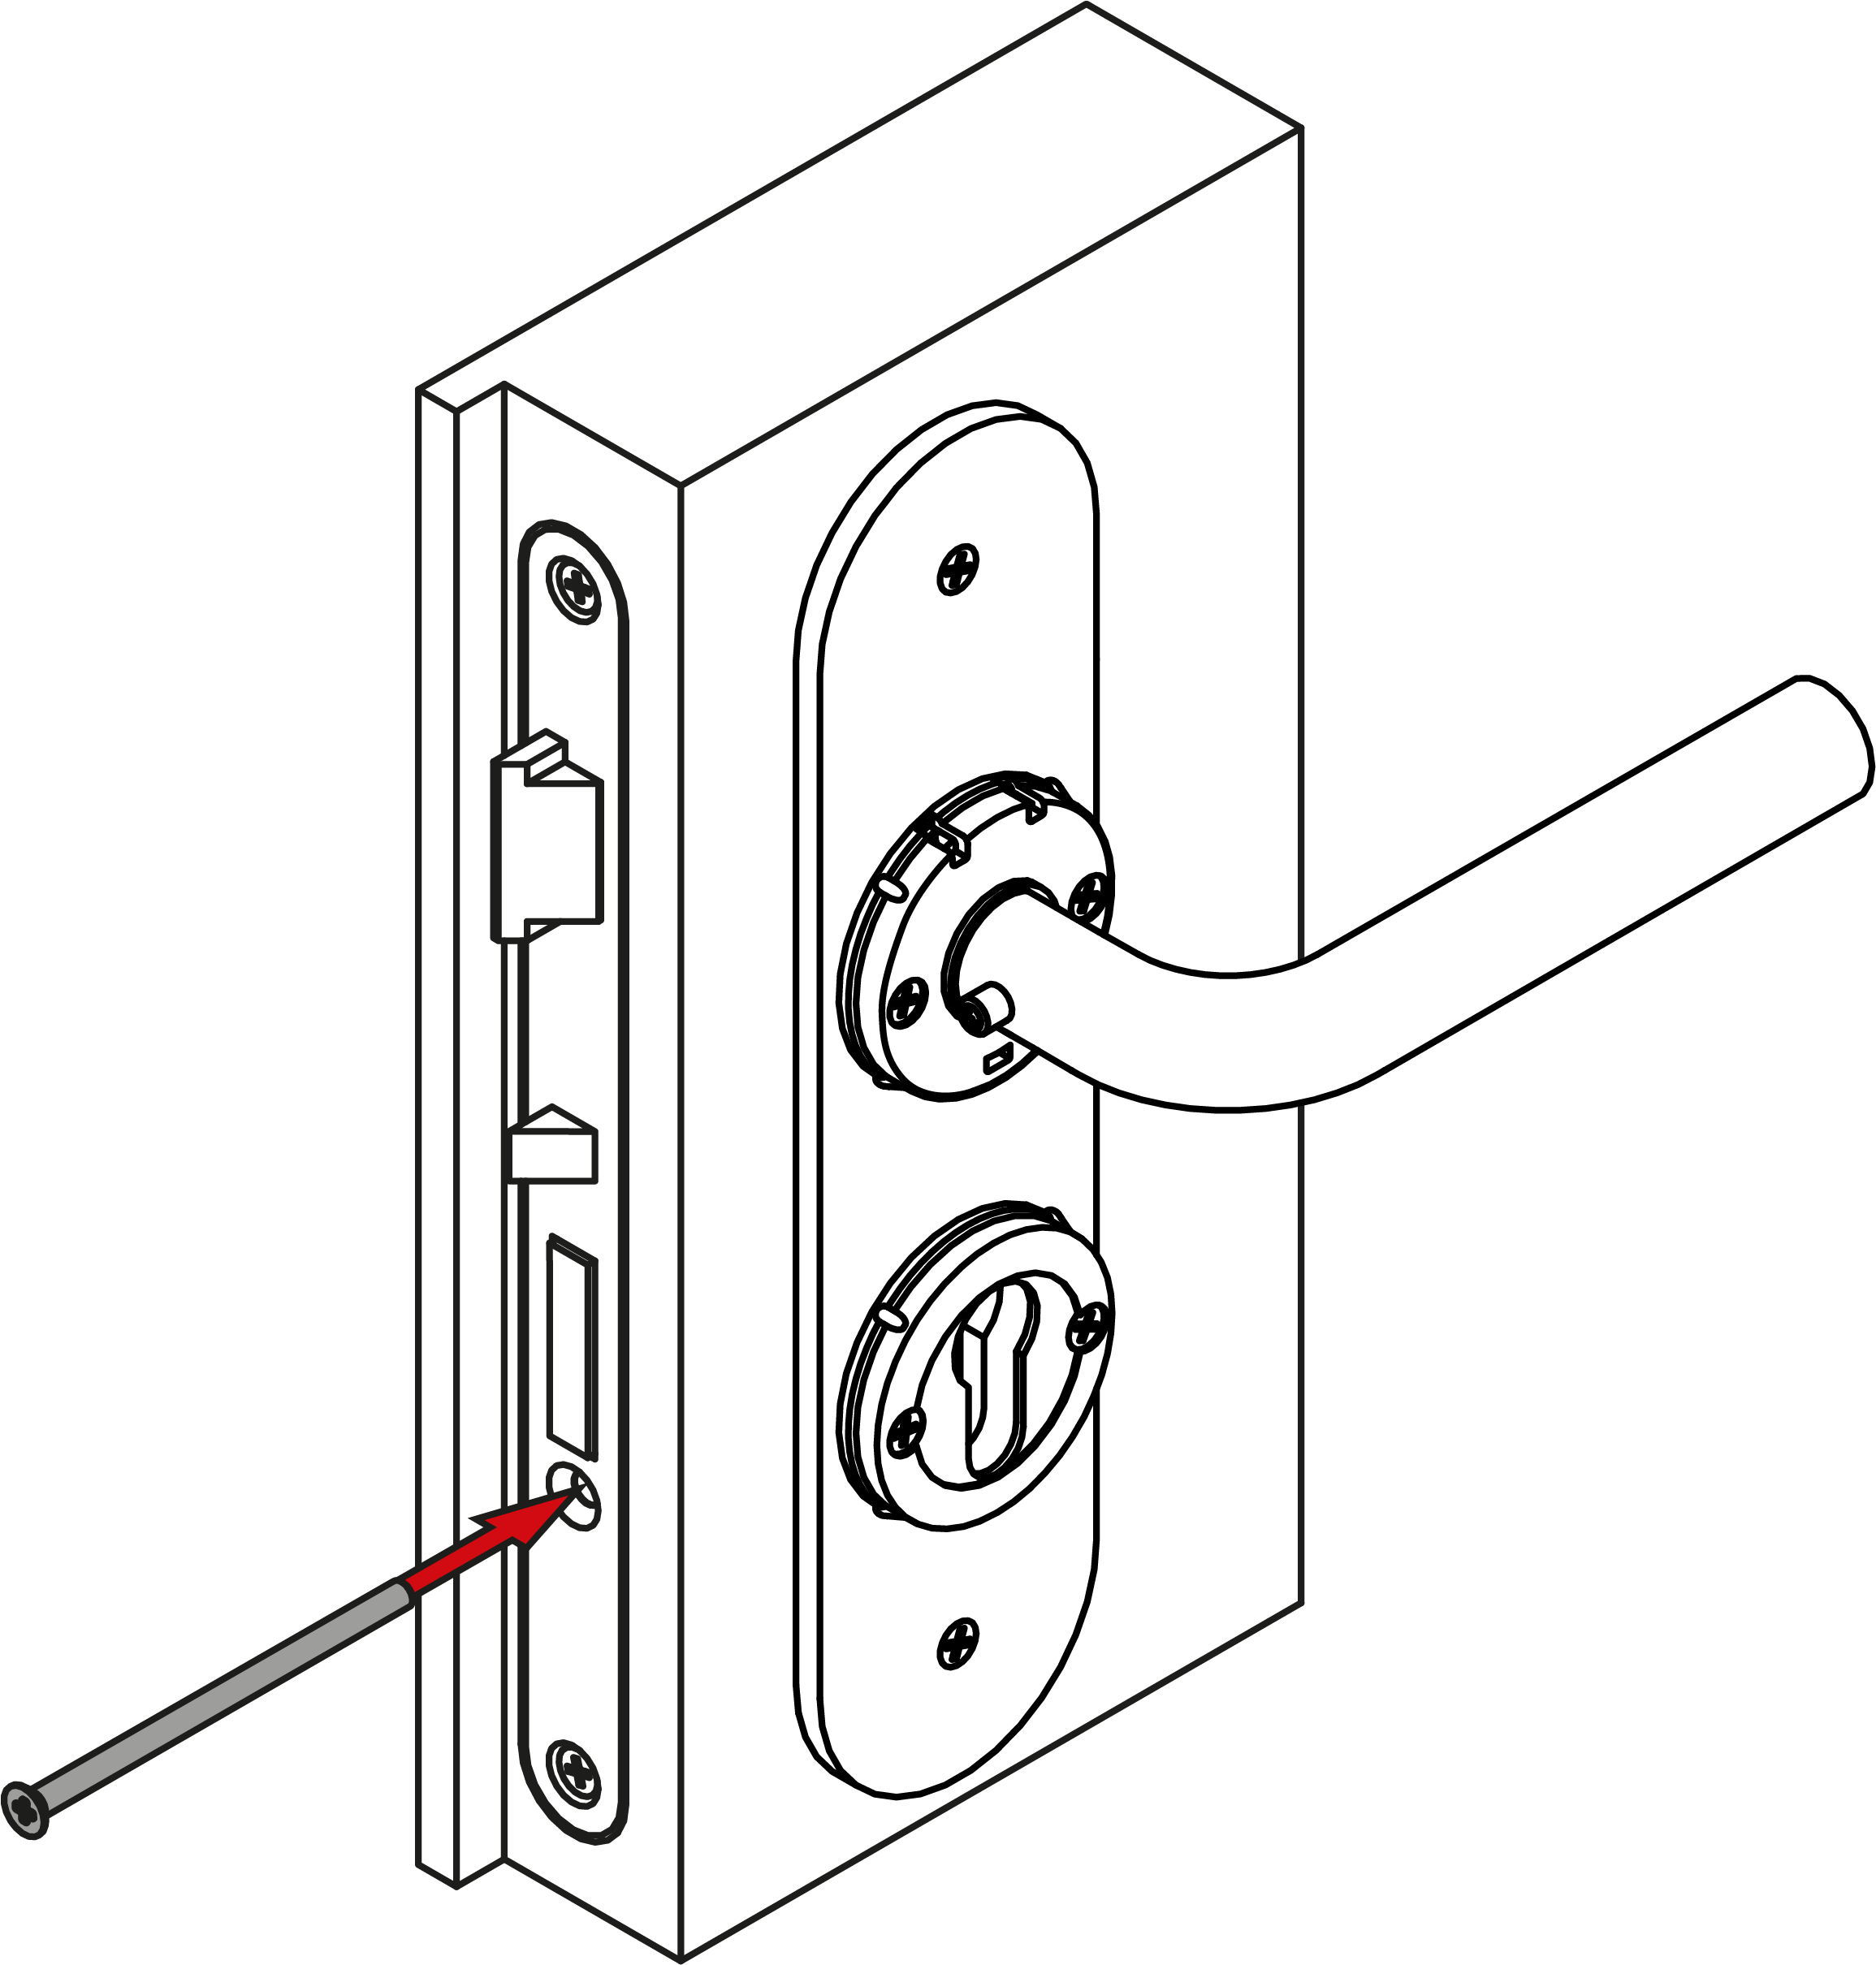
- Screw the inner handle and adapter plate firmly into place (PH2, torque 1.1 Nm).
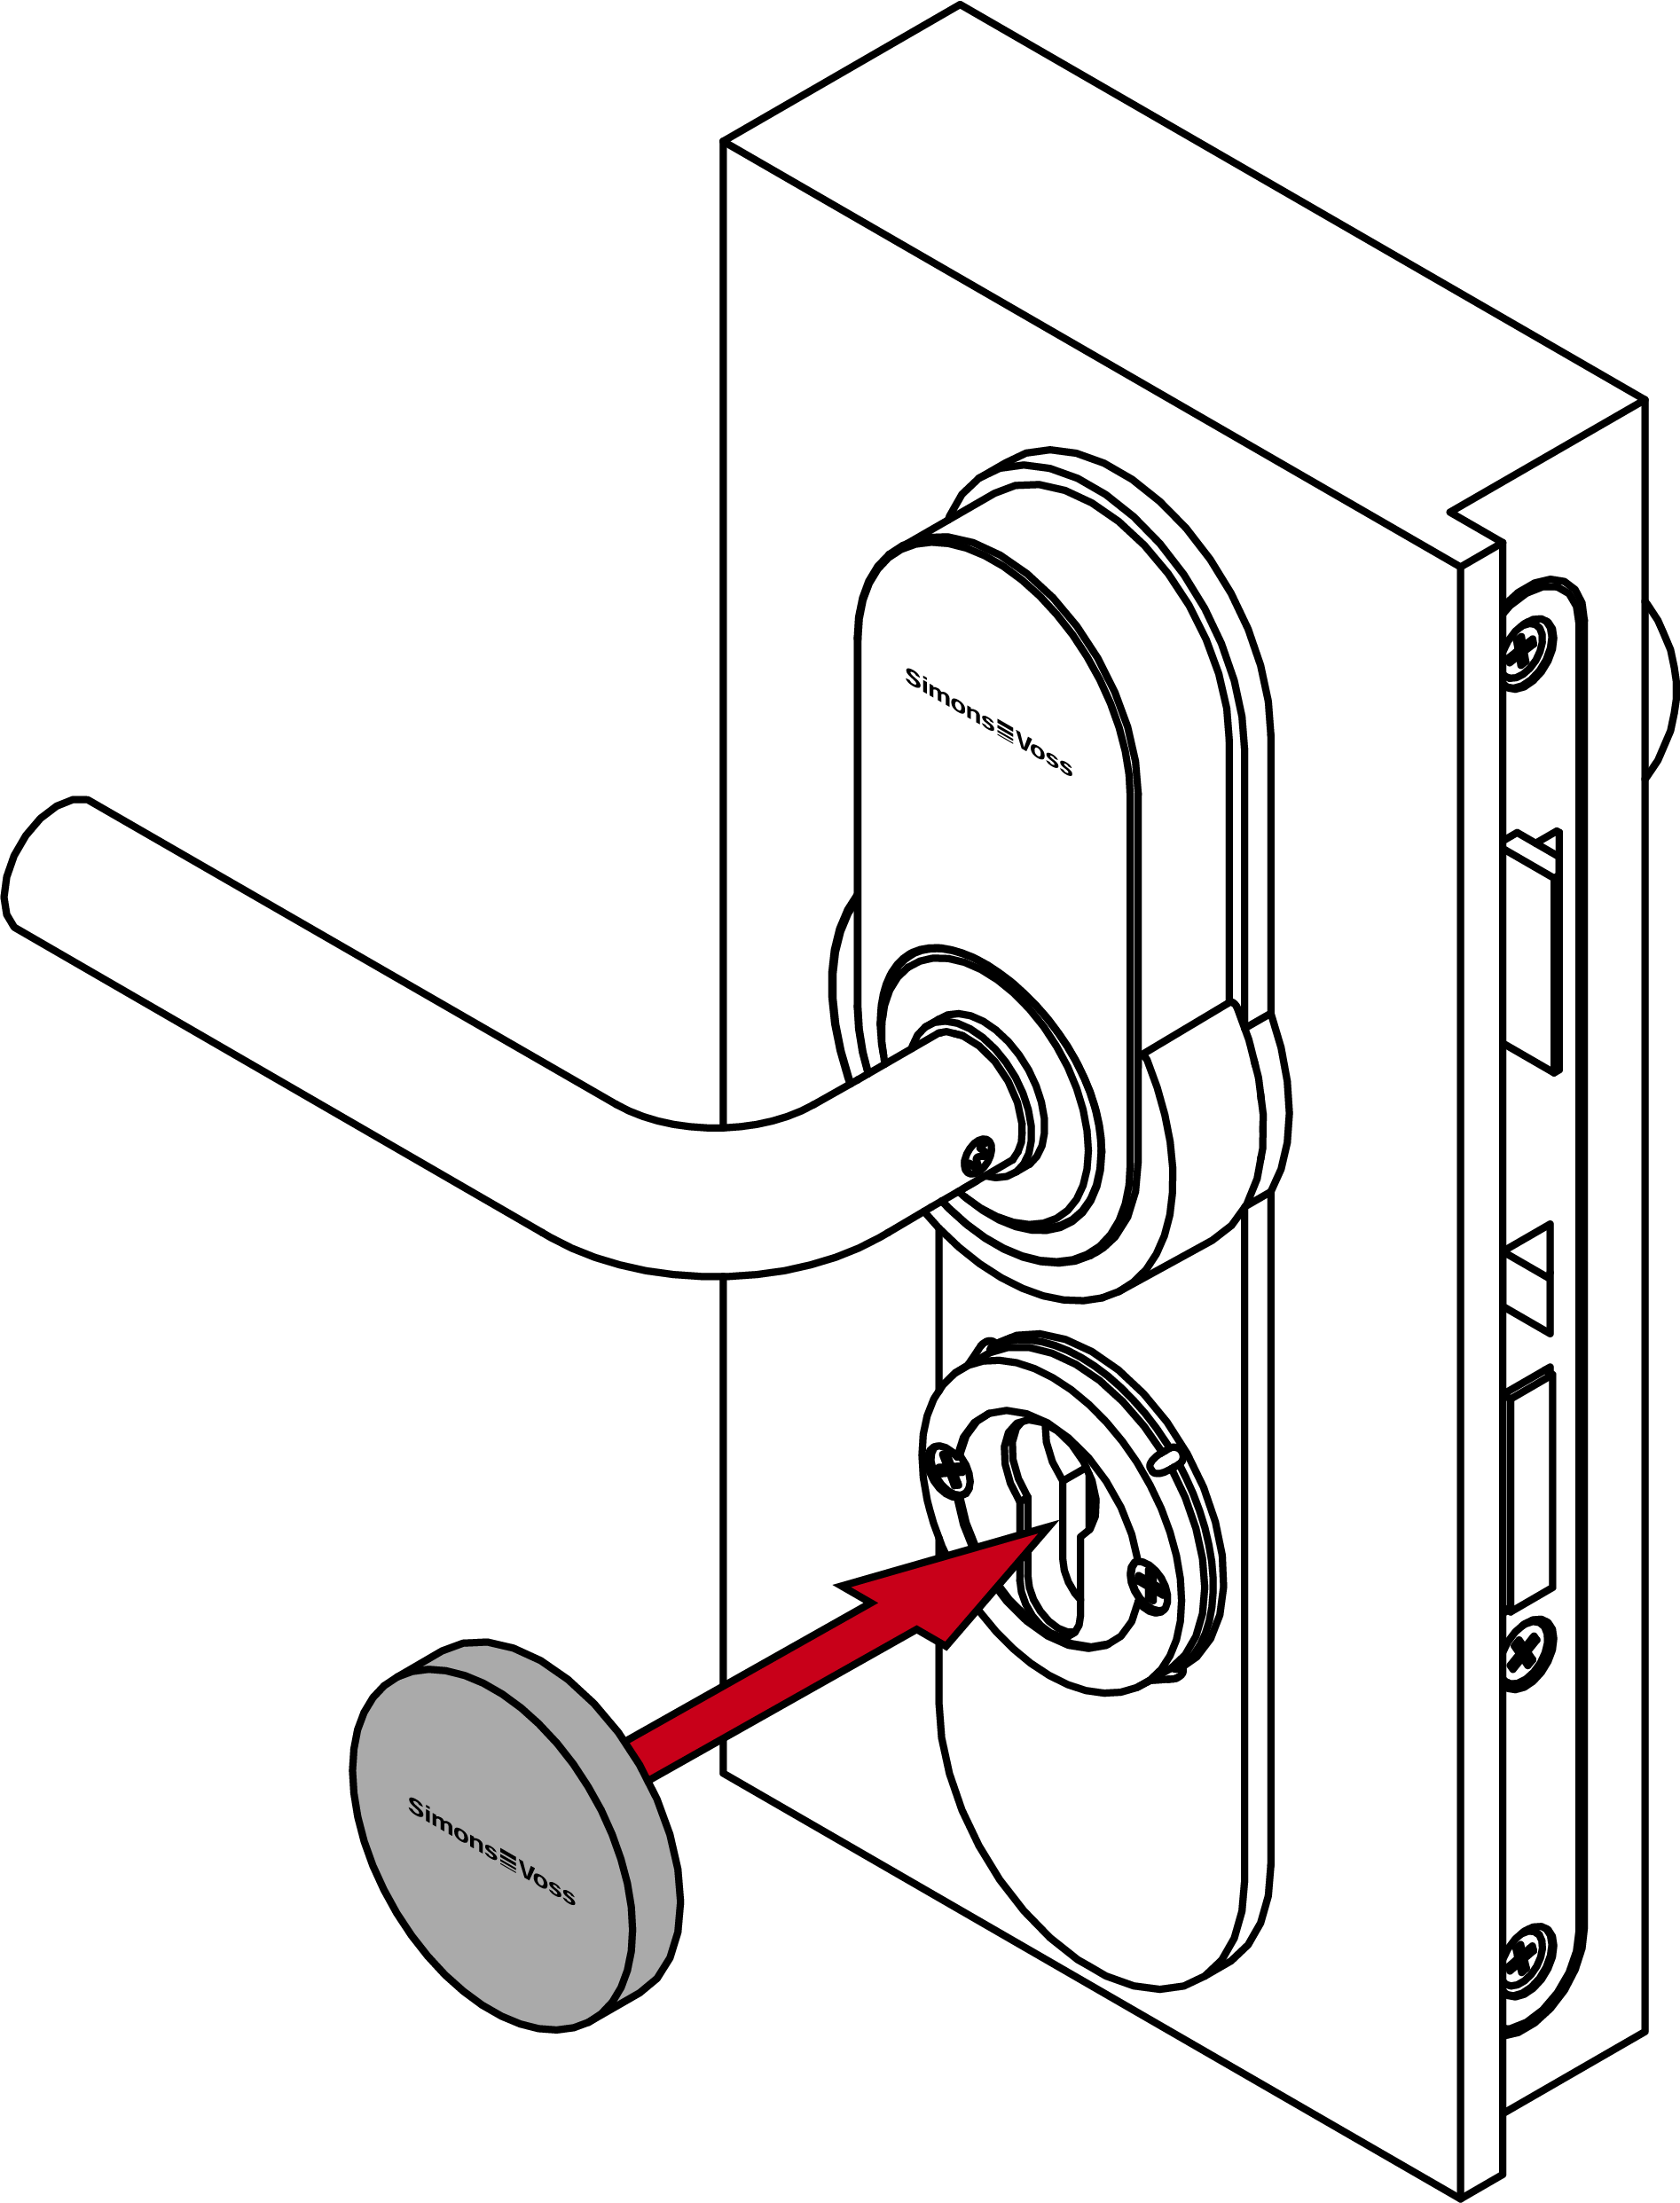
- For FH: insert the dummy cylinder.
NOTE

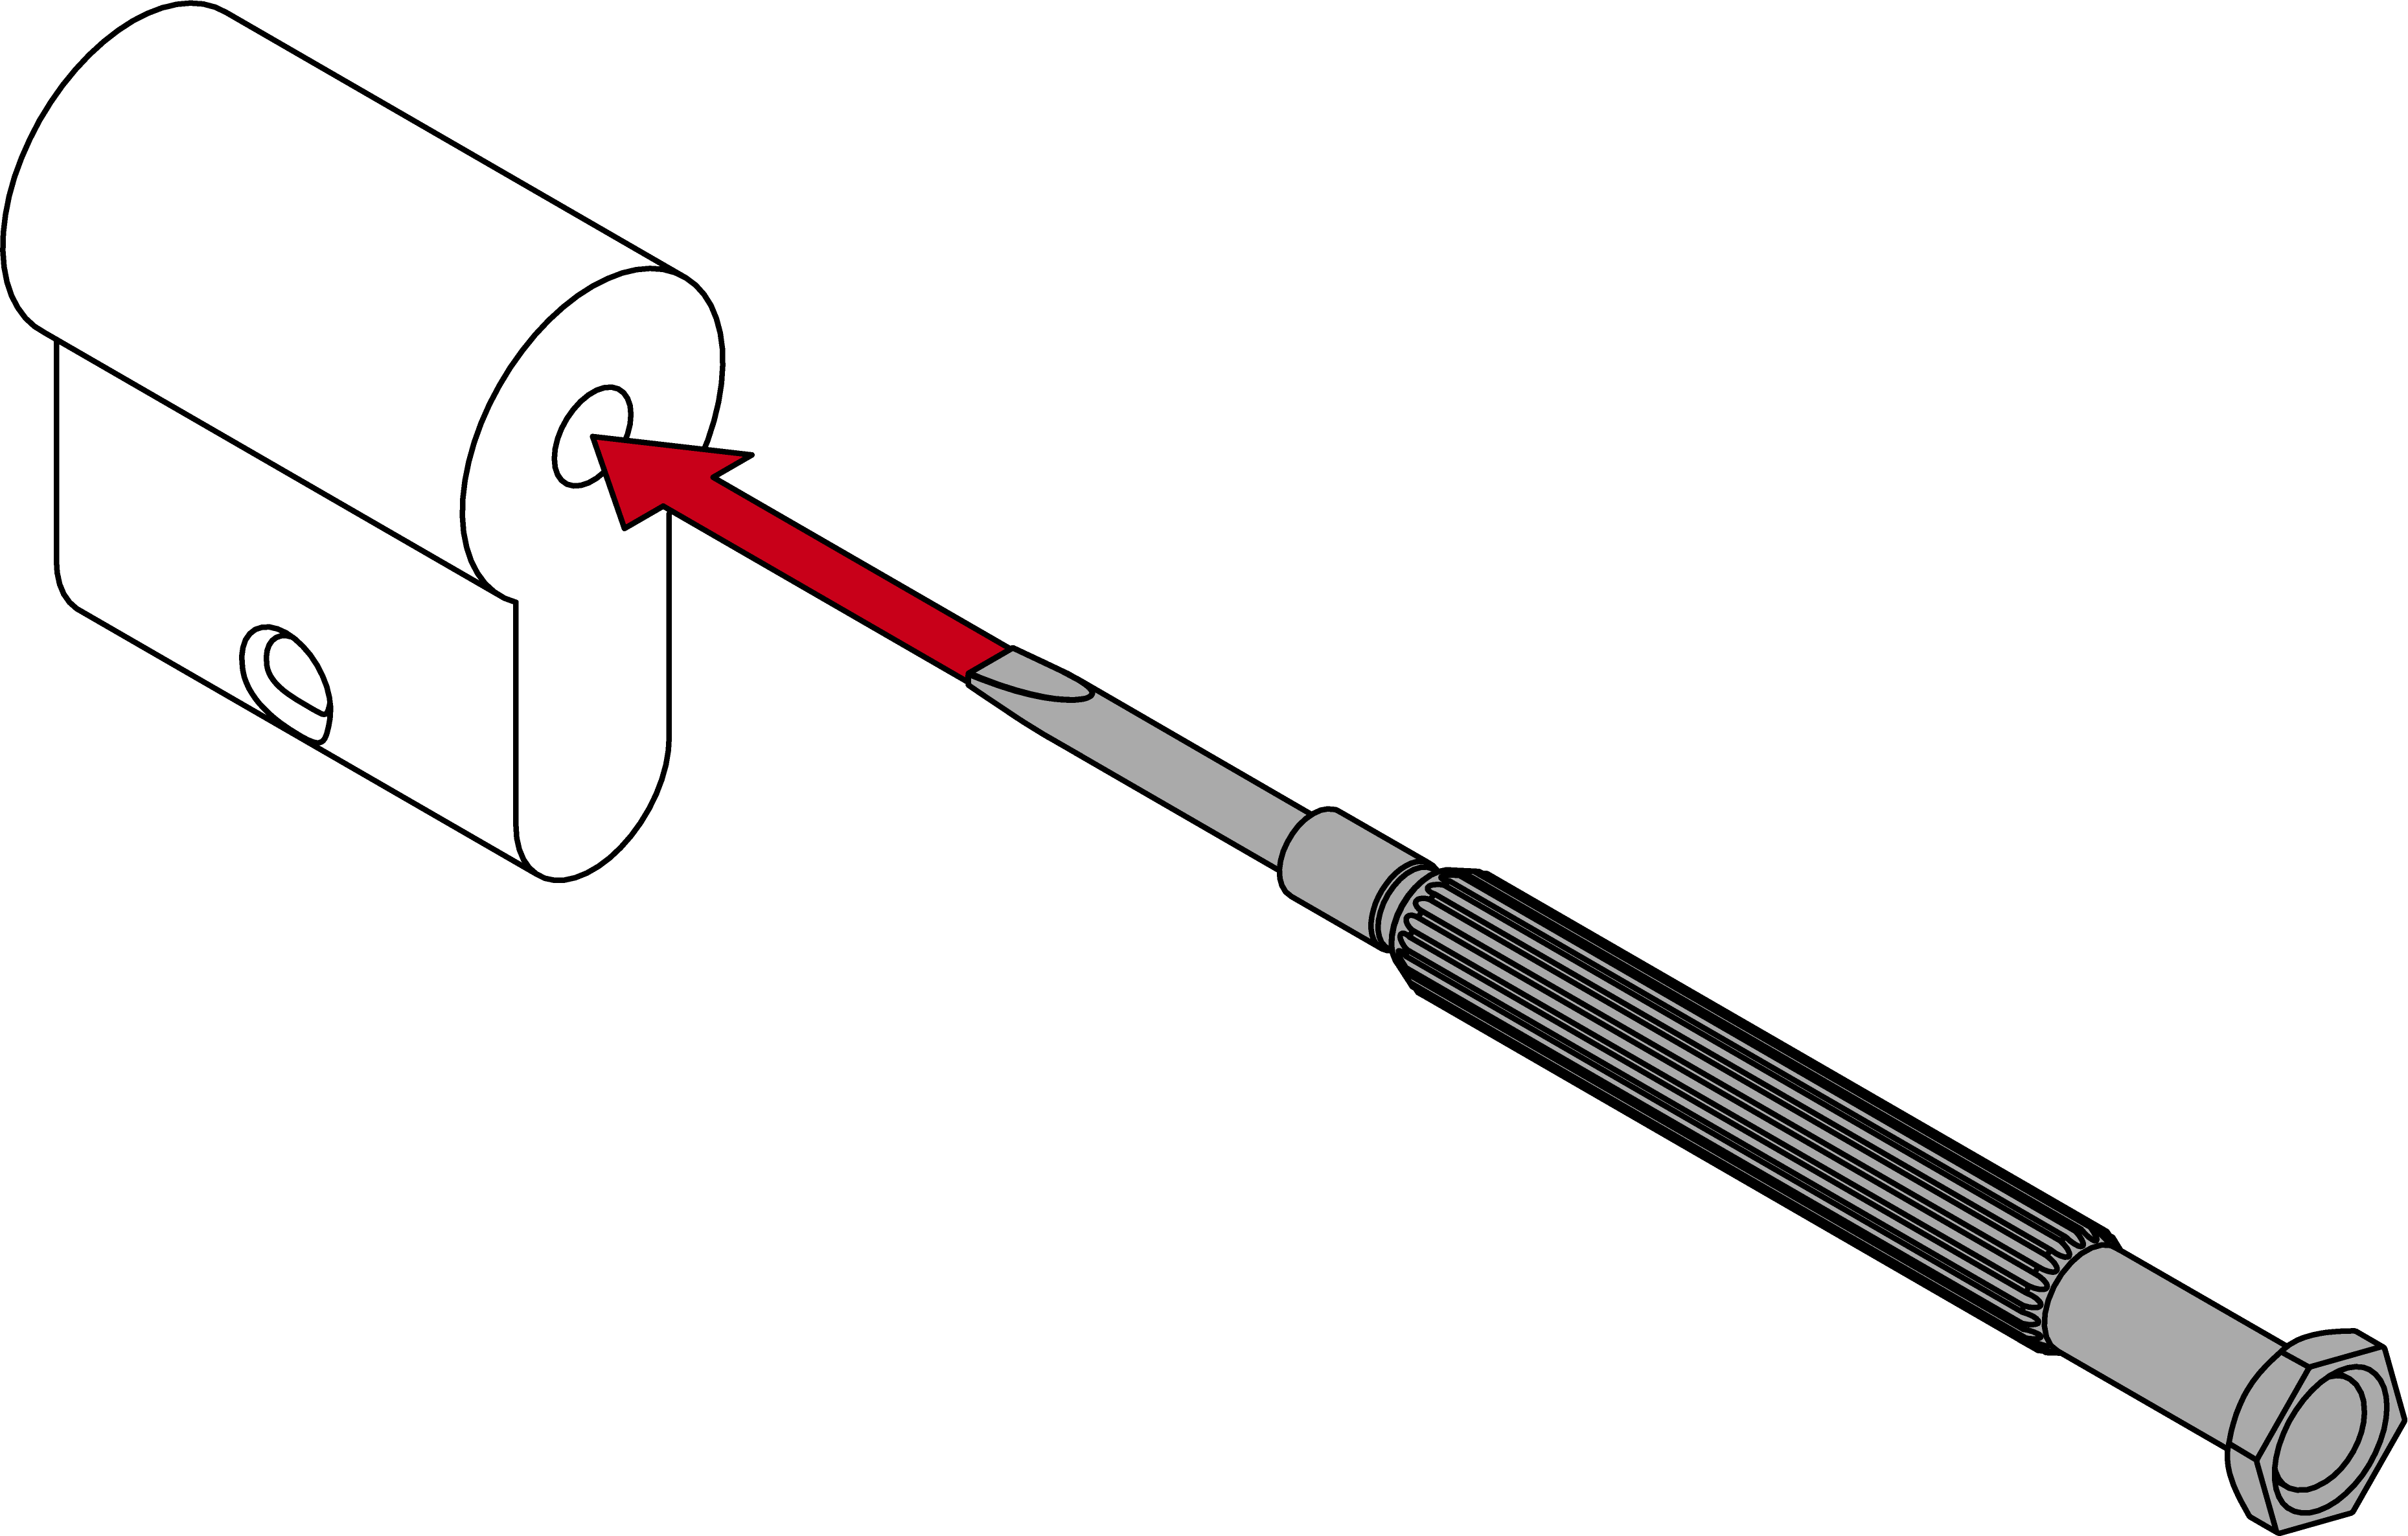
Feed the blank cylinder into the hole using a screwdriver
It is difficult to position the blank cylinder correctly, especially in thick doors.
- Insert a screwdriver into the hole in the blank cylinder.
- Position the blank cylinder using the screwdriver.
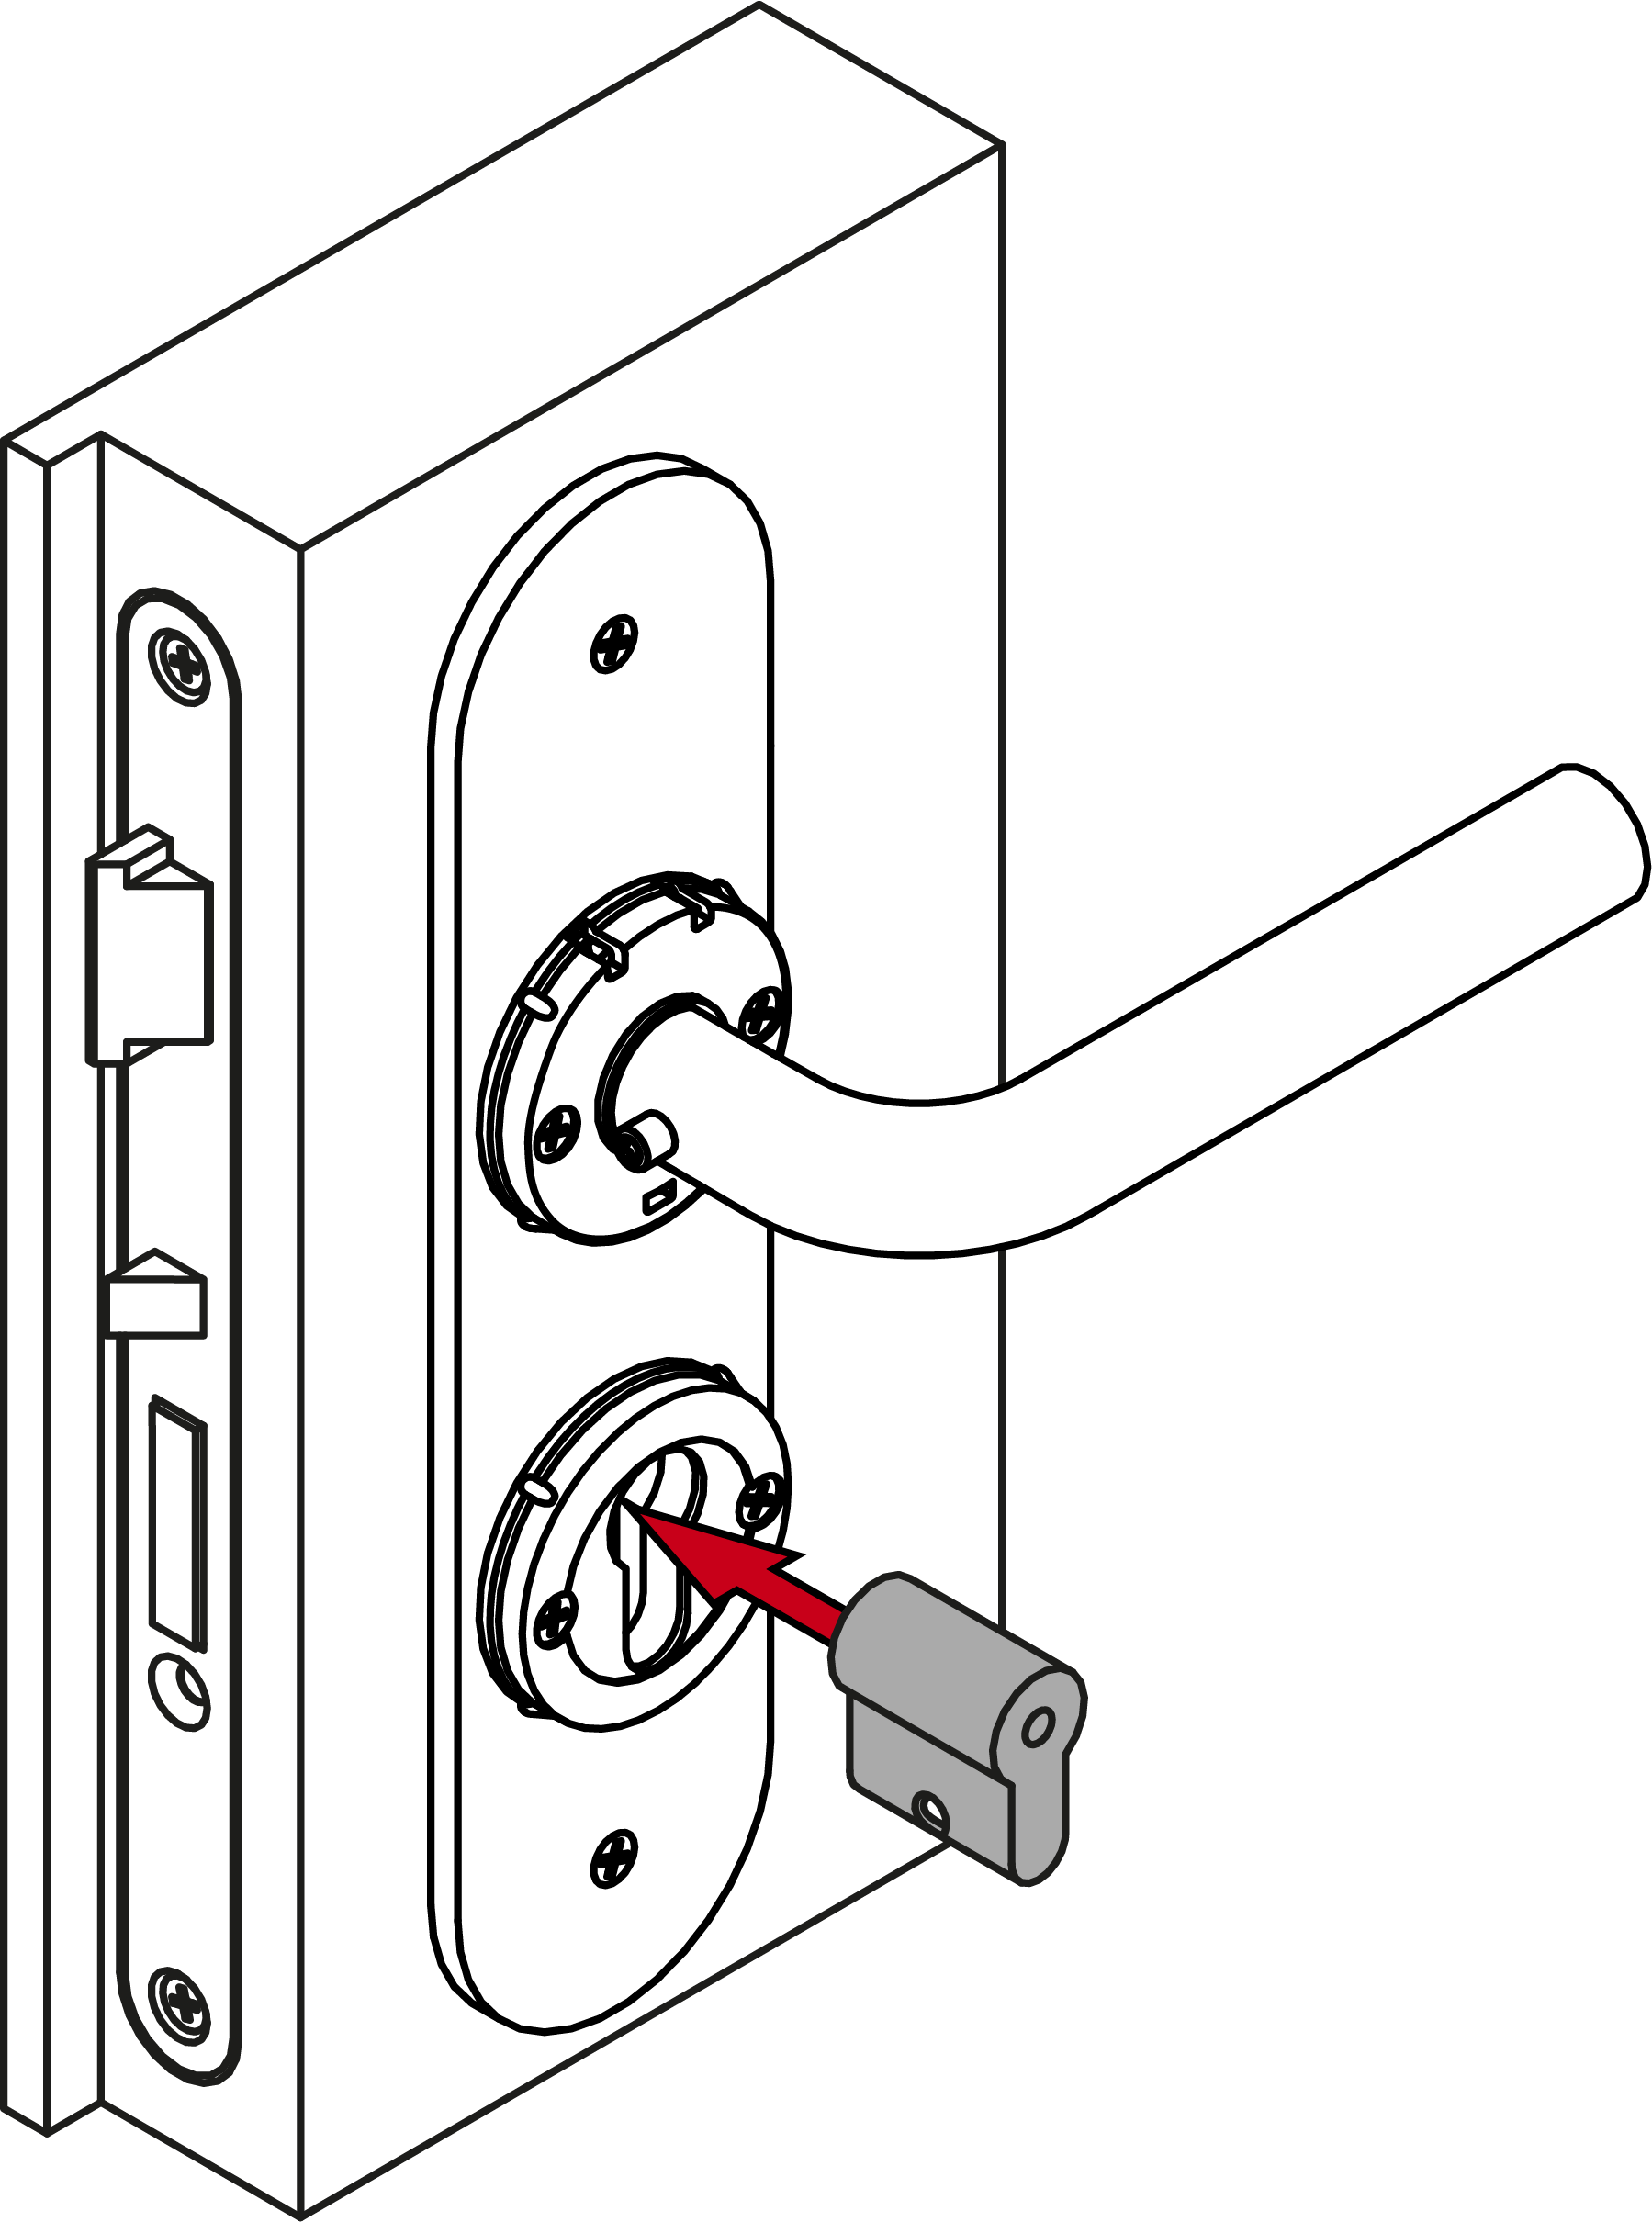
- For FH: screw the dummy cylinder firmly into place (PH2, torque 1.1 Nm).
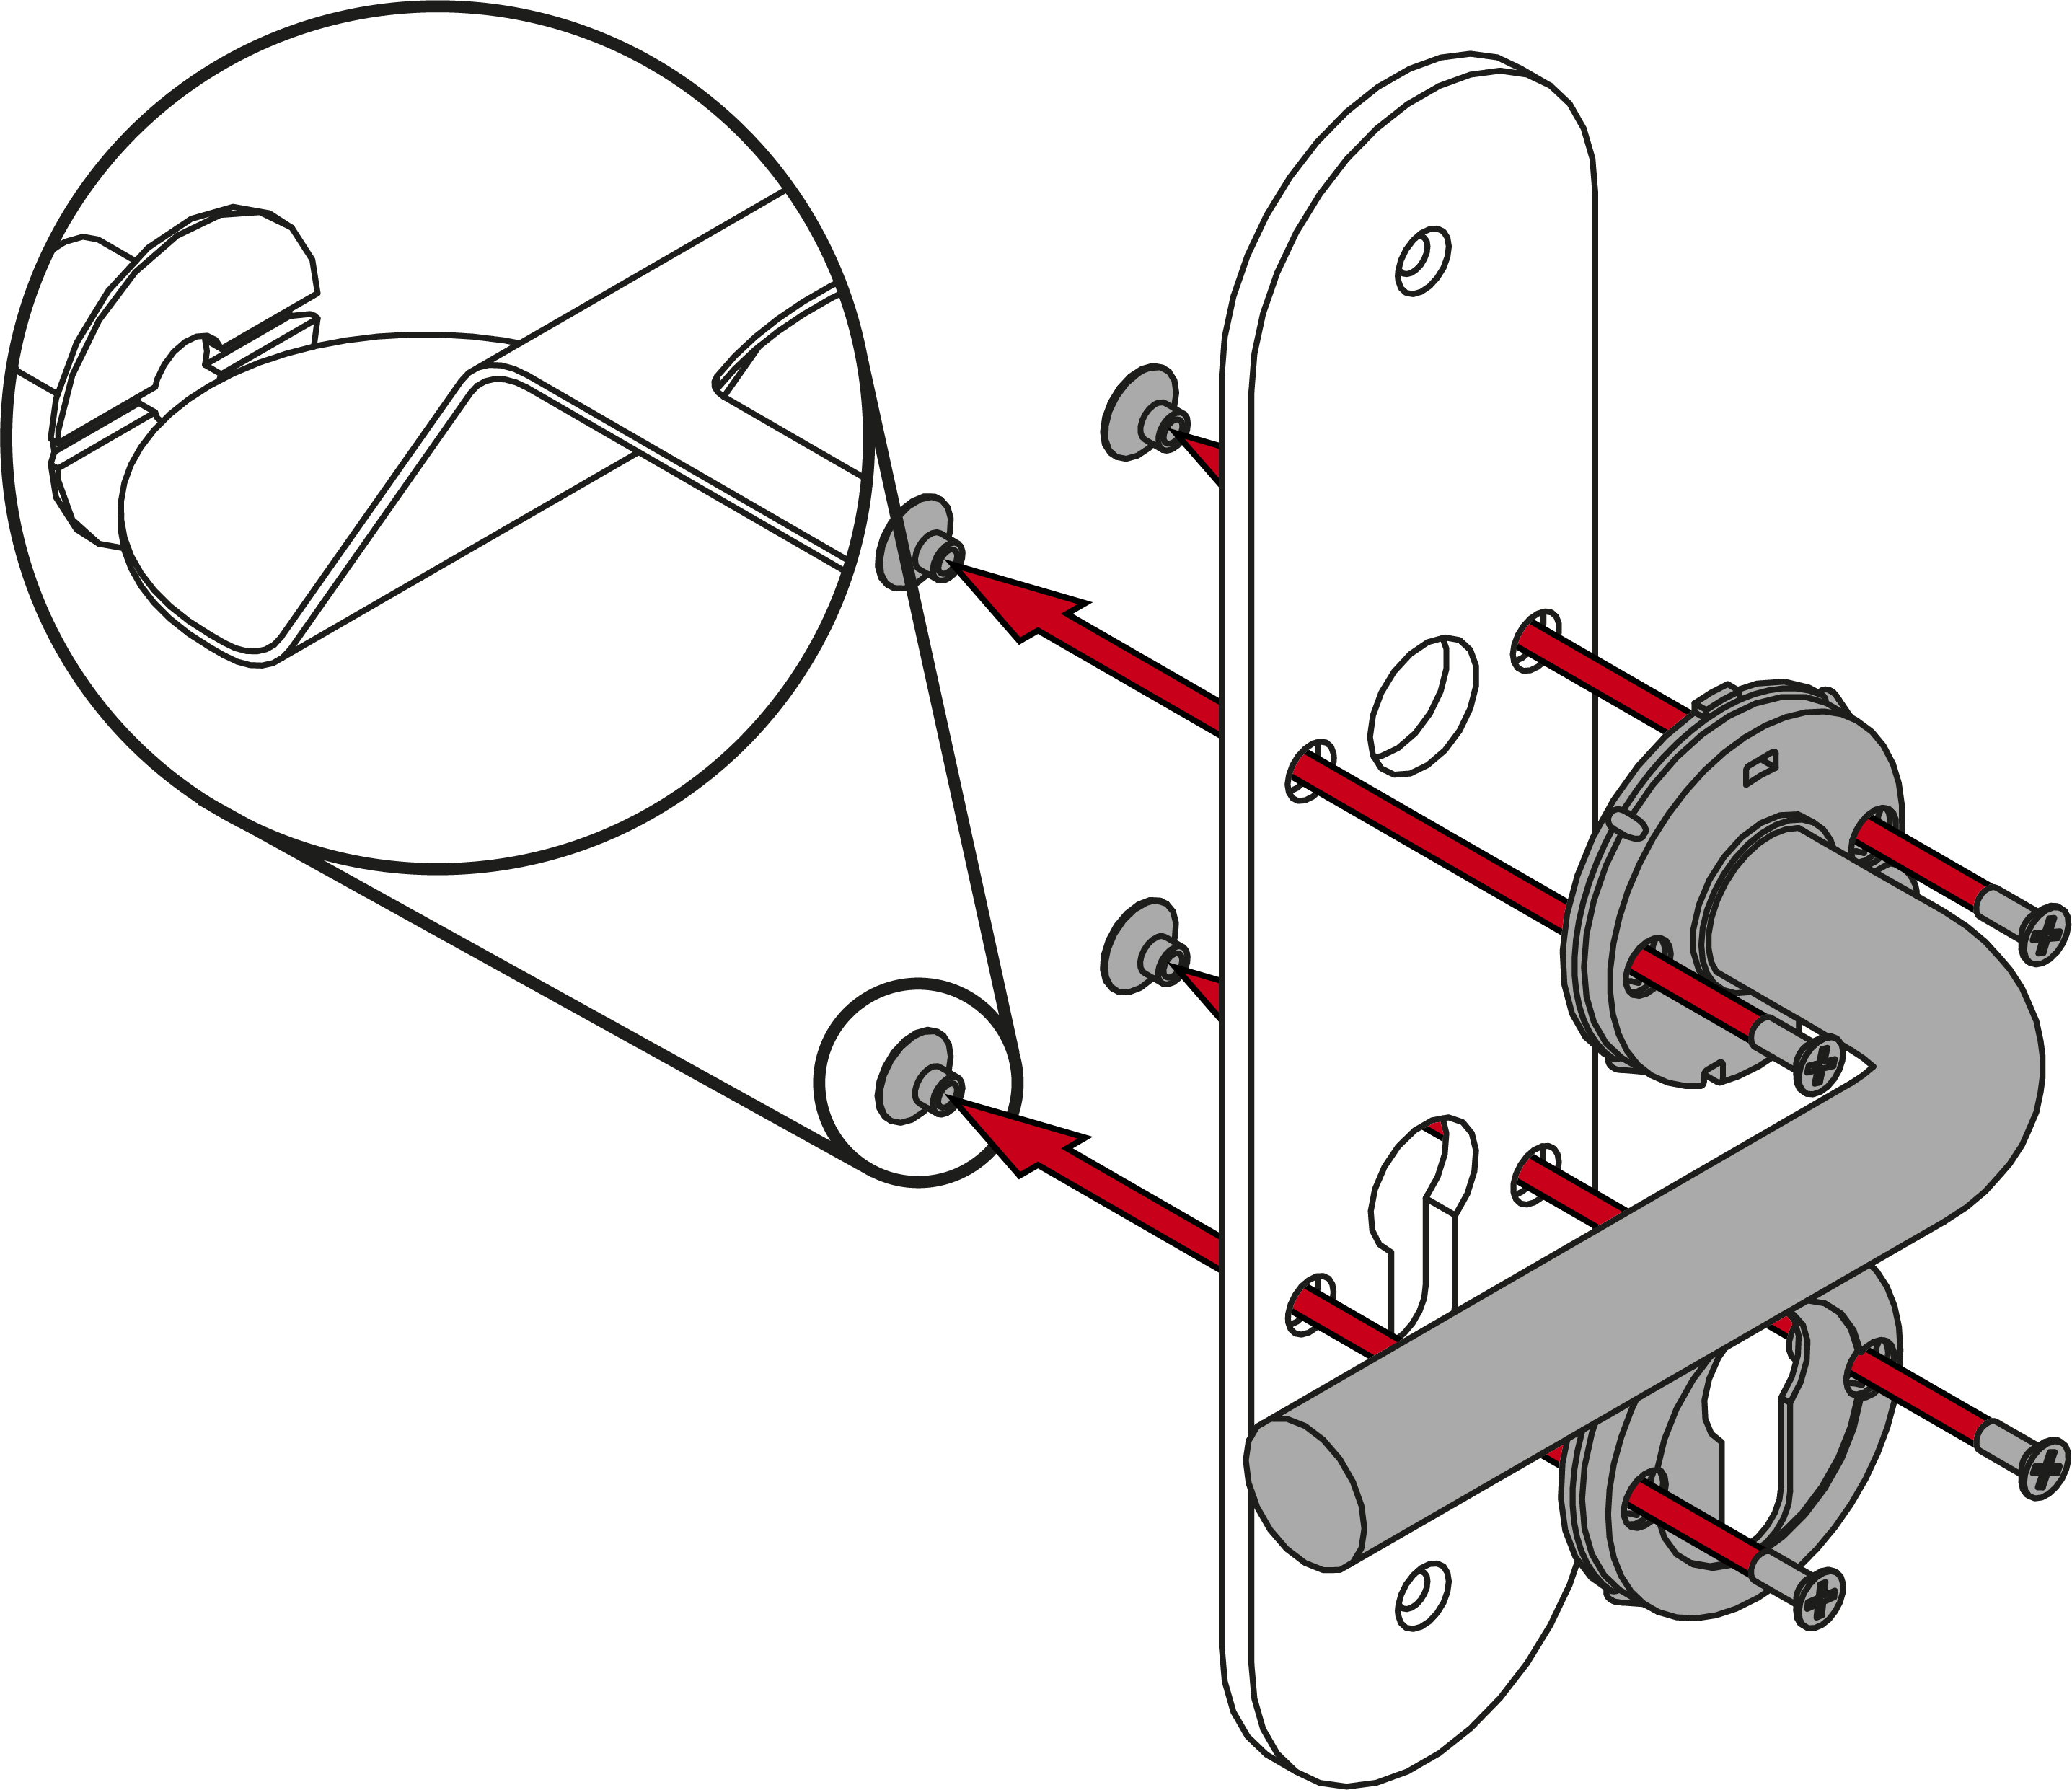
- Fit the outside handle into position on the fitting.
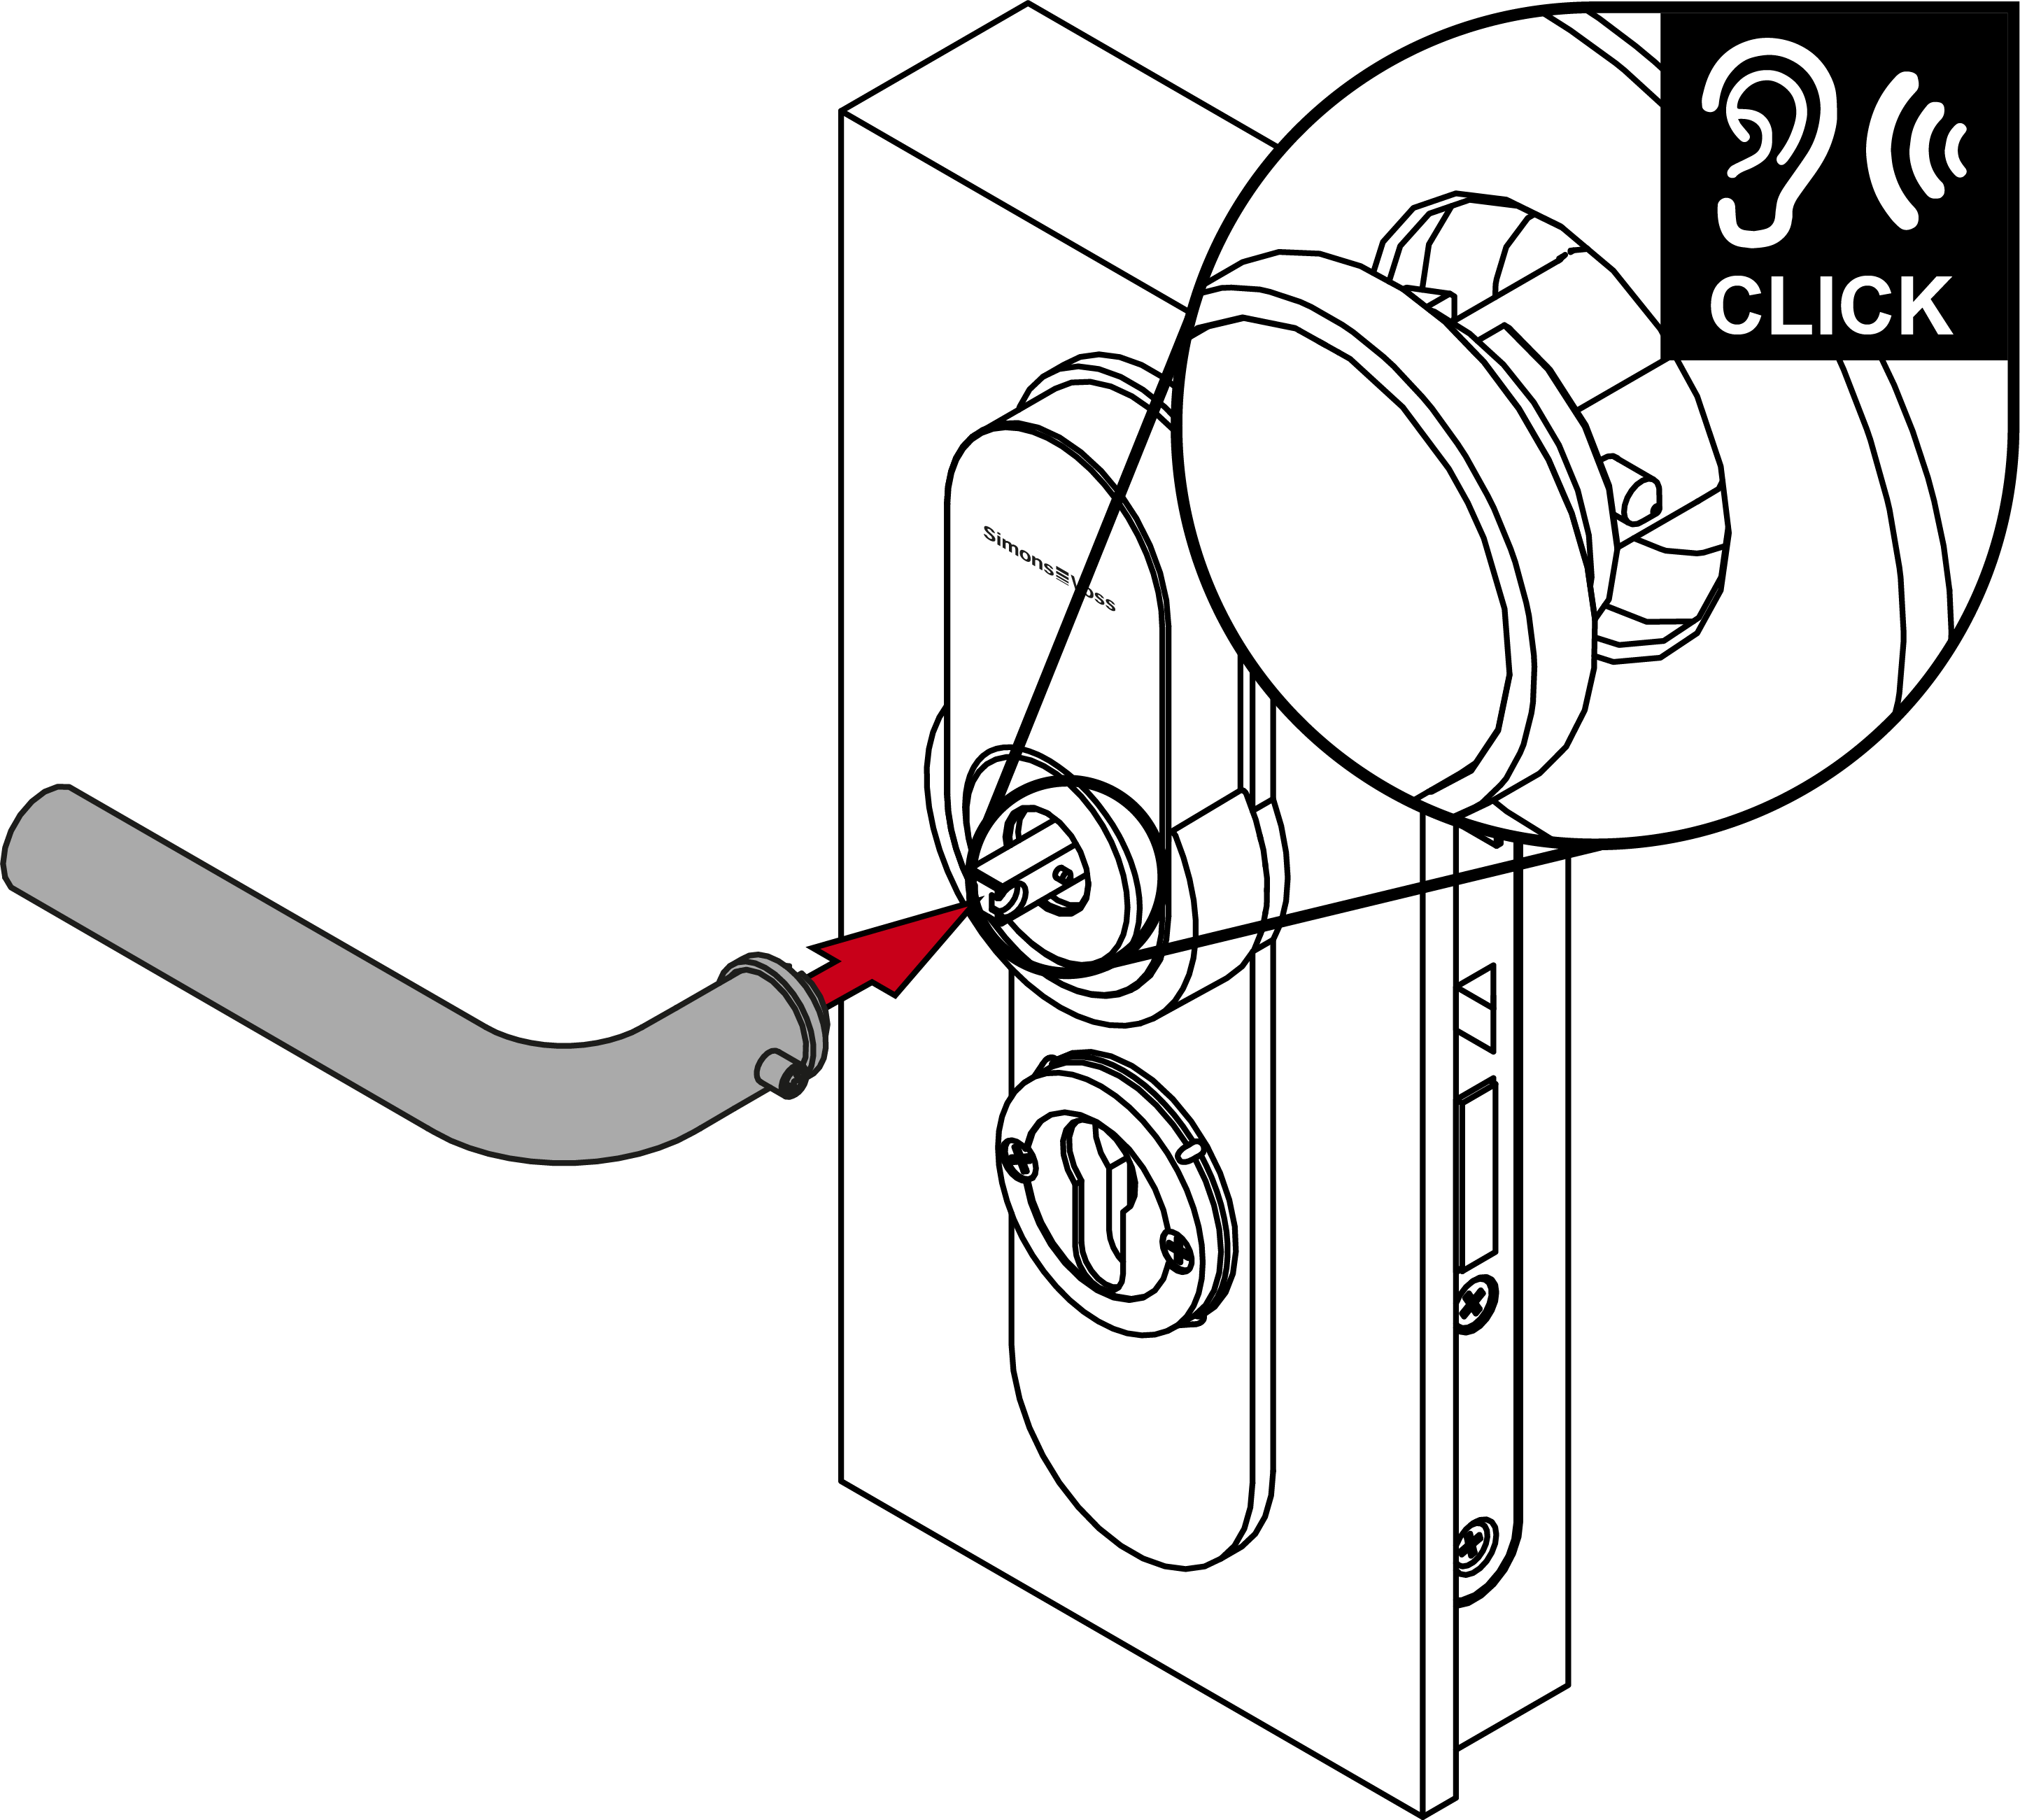
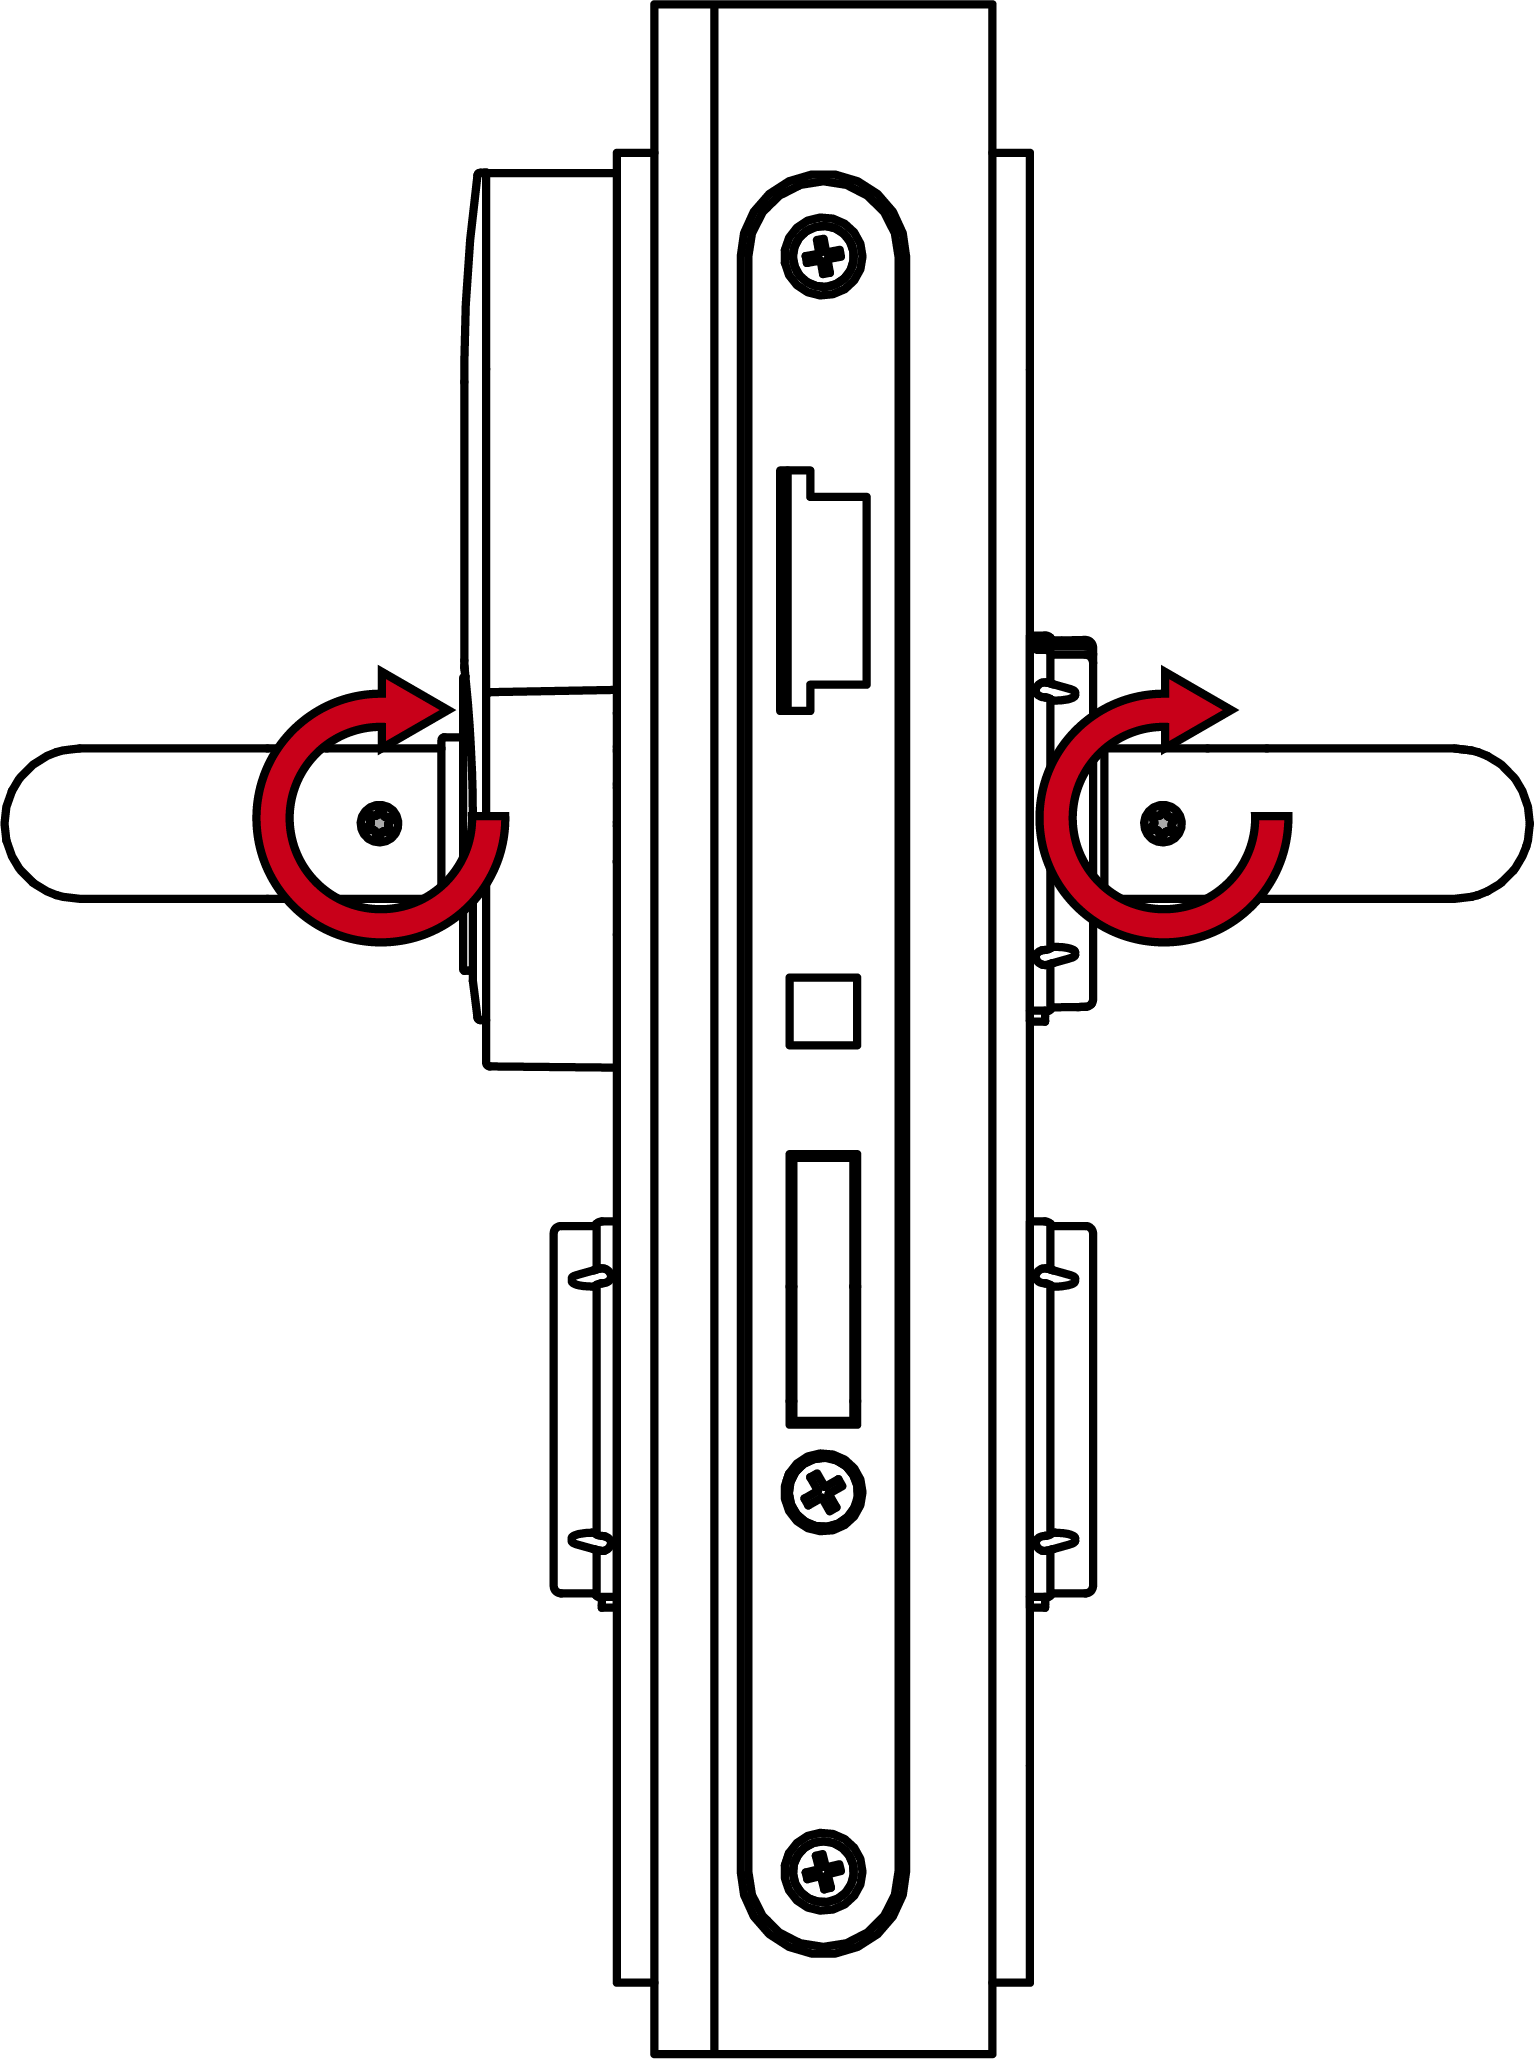
- Fasten the grub screws firmly onto both handles (TX15, torque 5.0 Nm).
- Place a cover with the notch facing downwards on the escutcheon base.
- Place the two cover plates with the notch facing downwards onto the escutcheon base and the inner handle.
- Fitting is now installed.