Installing the fitting for BKS - Digital SmartHandle AX
- Door pre-drilled.
- PH2 screwdriver at hand.
- TX15 screwdriver at hand.
- Vernier calliper at hand.
- Saw at hand.
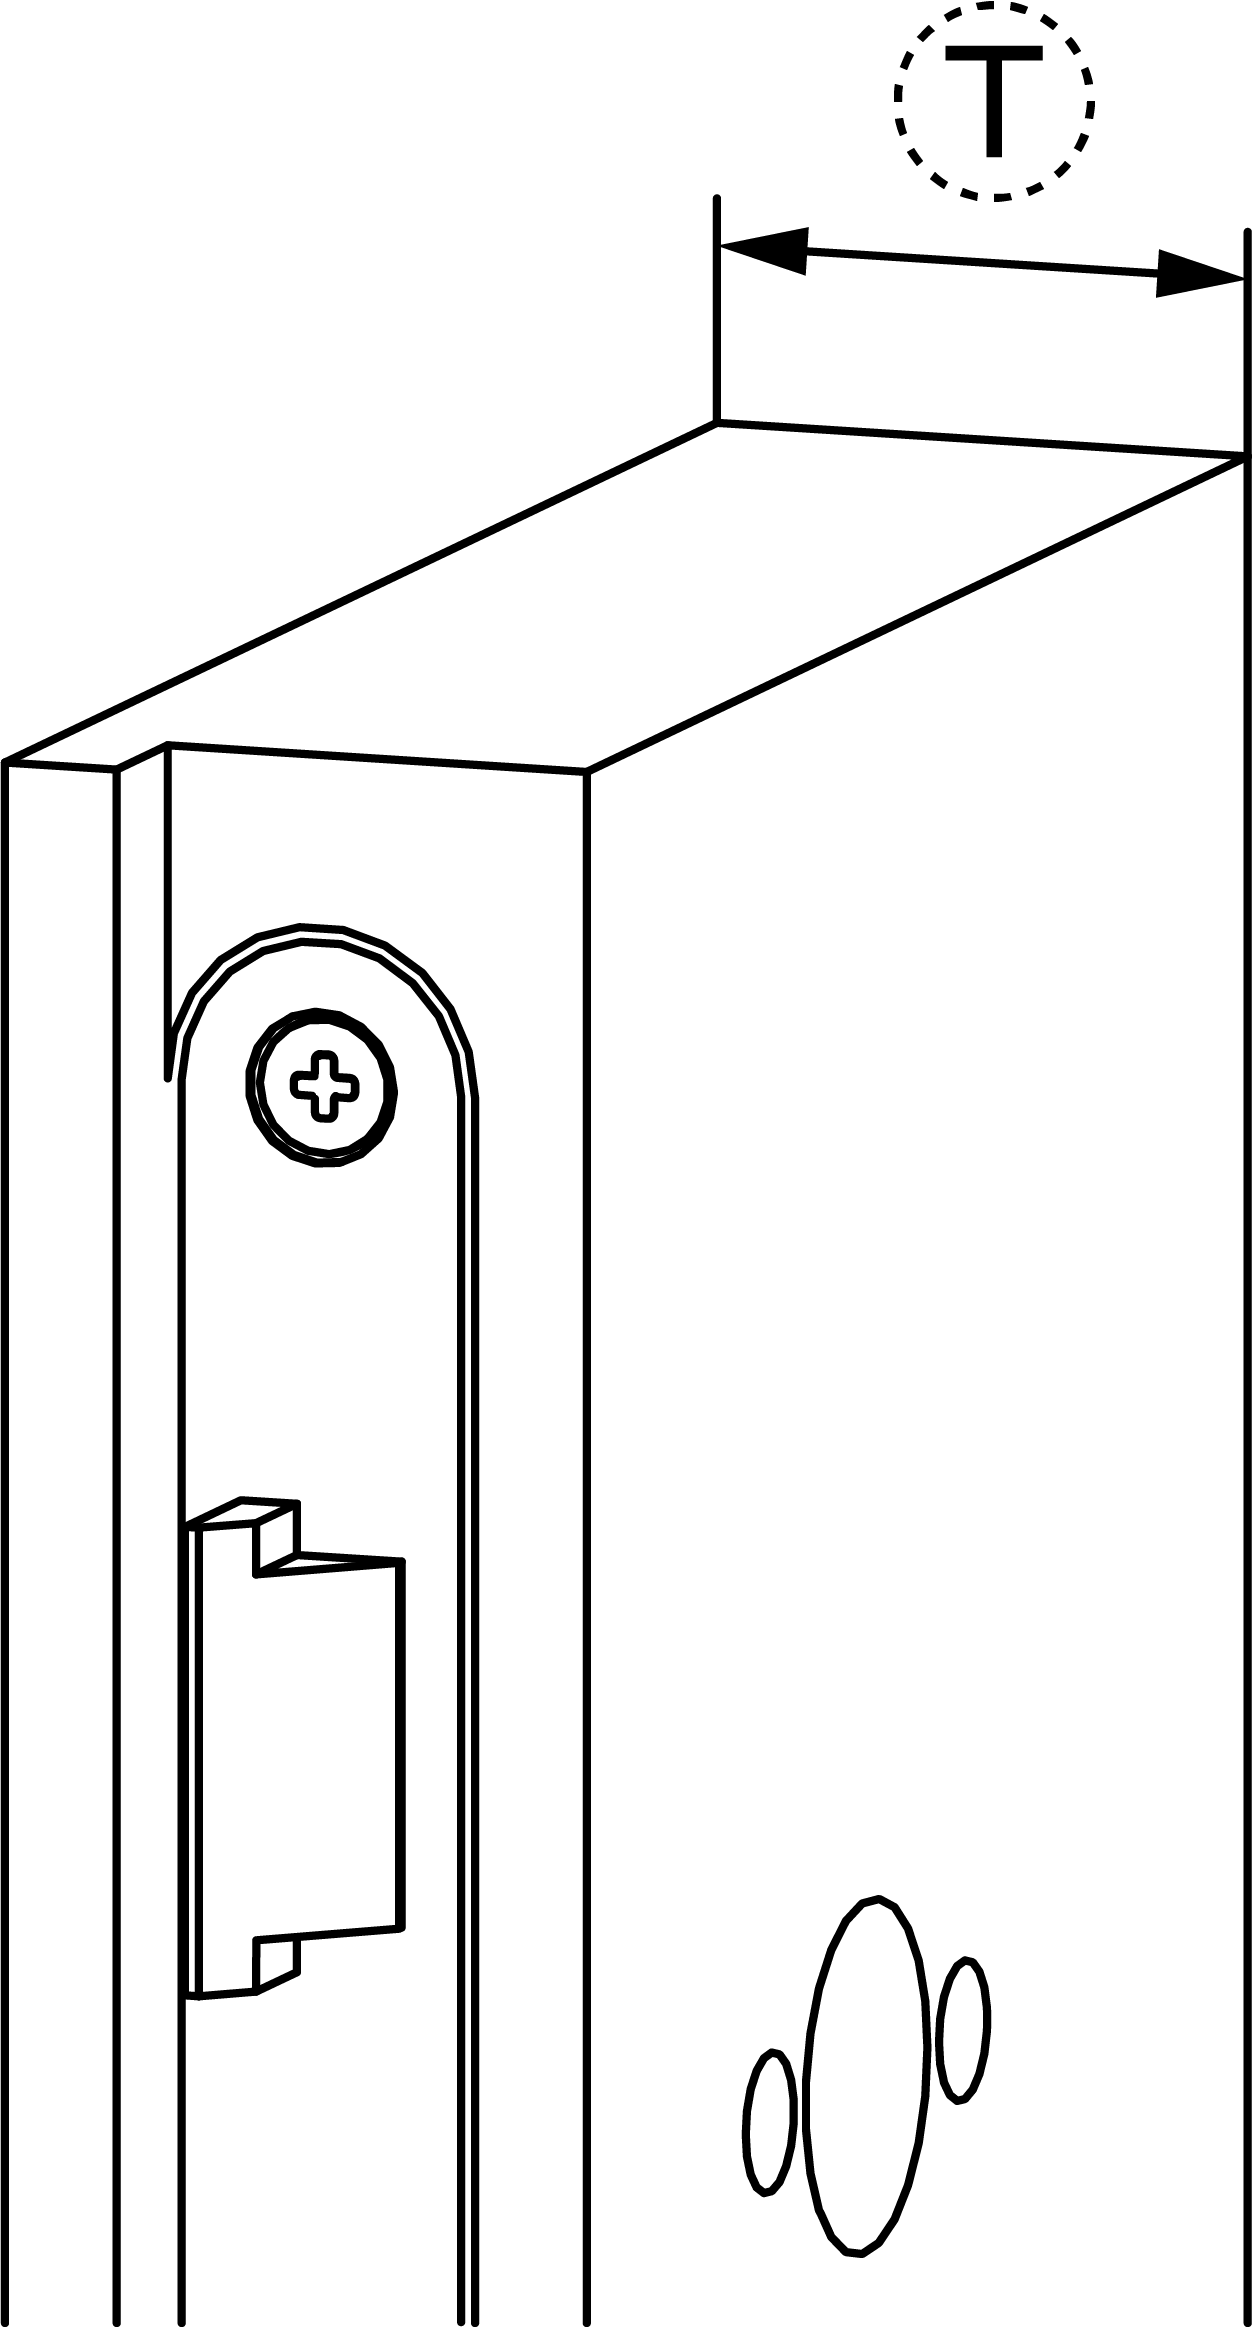
- Measure the door thickness.
- Order the L1 screw of the appropriate length from BKS.
- Mark the sawing points on the L2 screws.
- Determine the length X, depending on the panic bar type.
- Mark the sawing point on the spindle.
- Use a suitable saw to cut the screws and spindle.

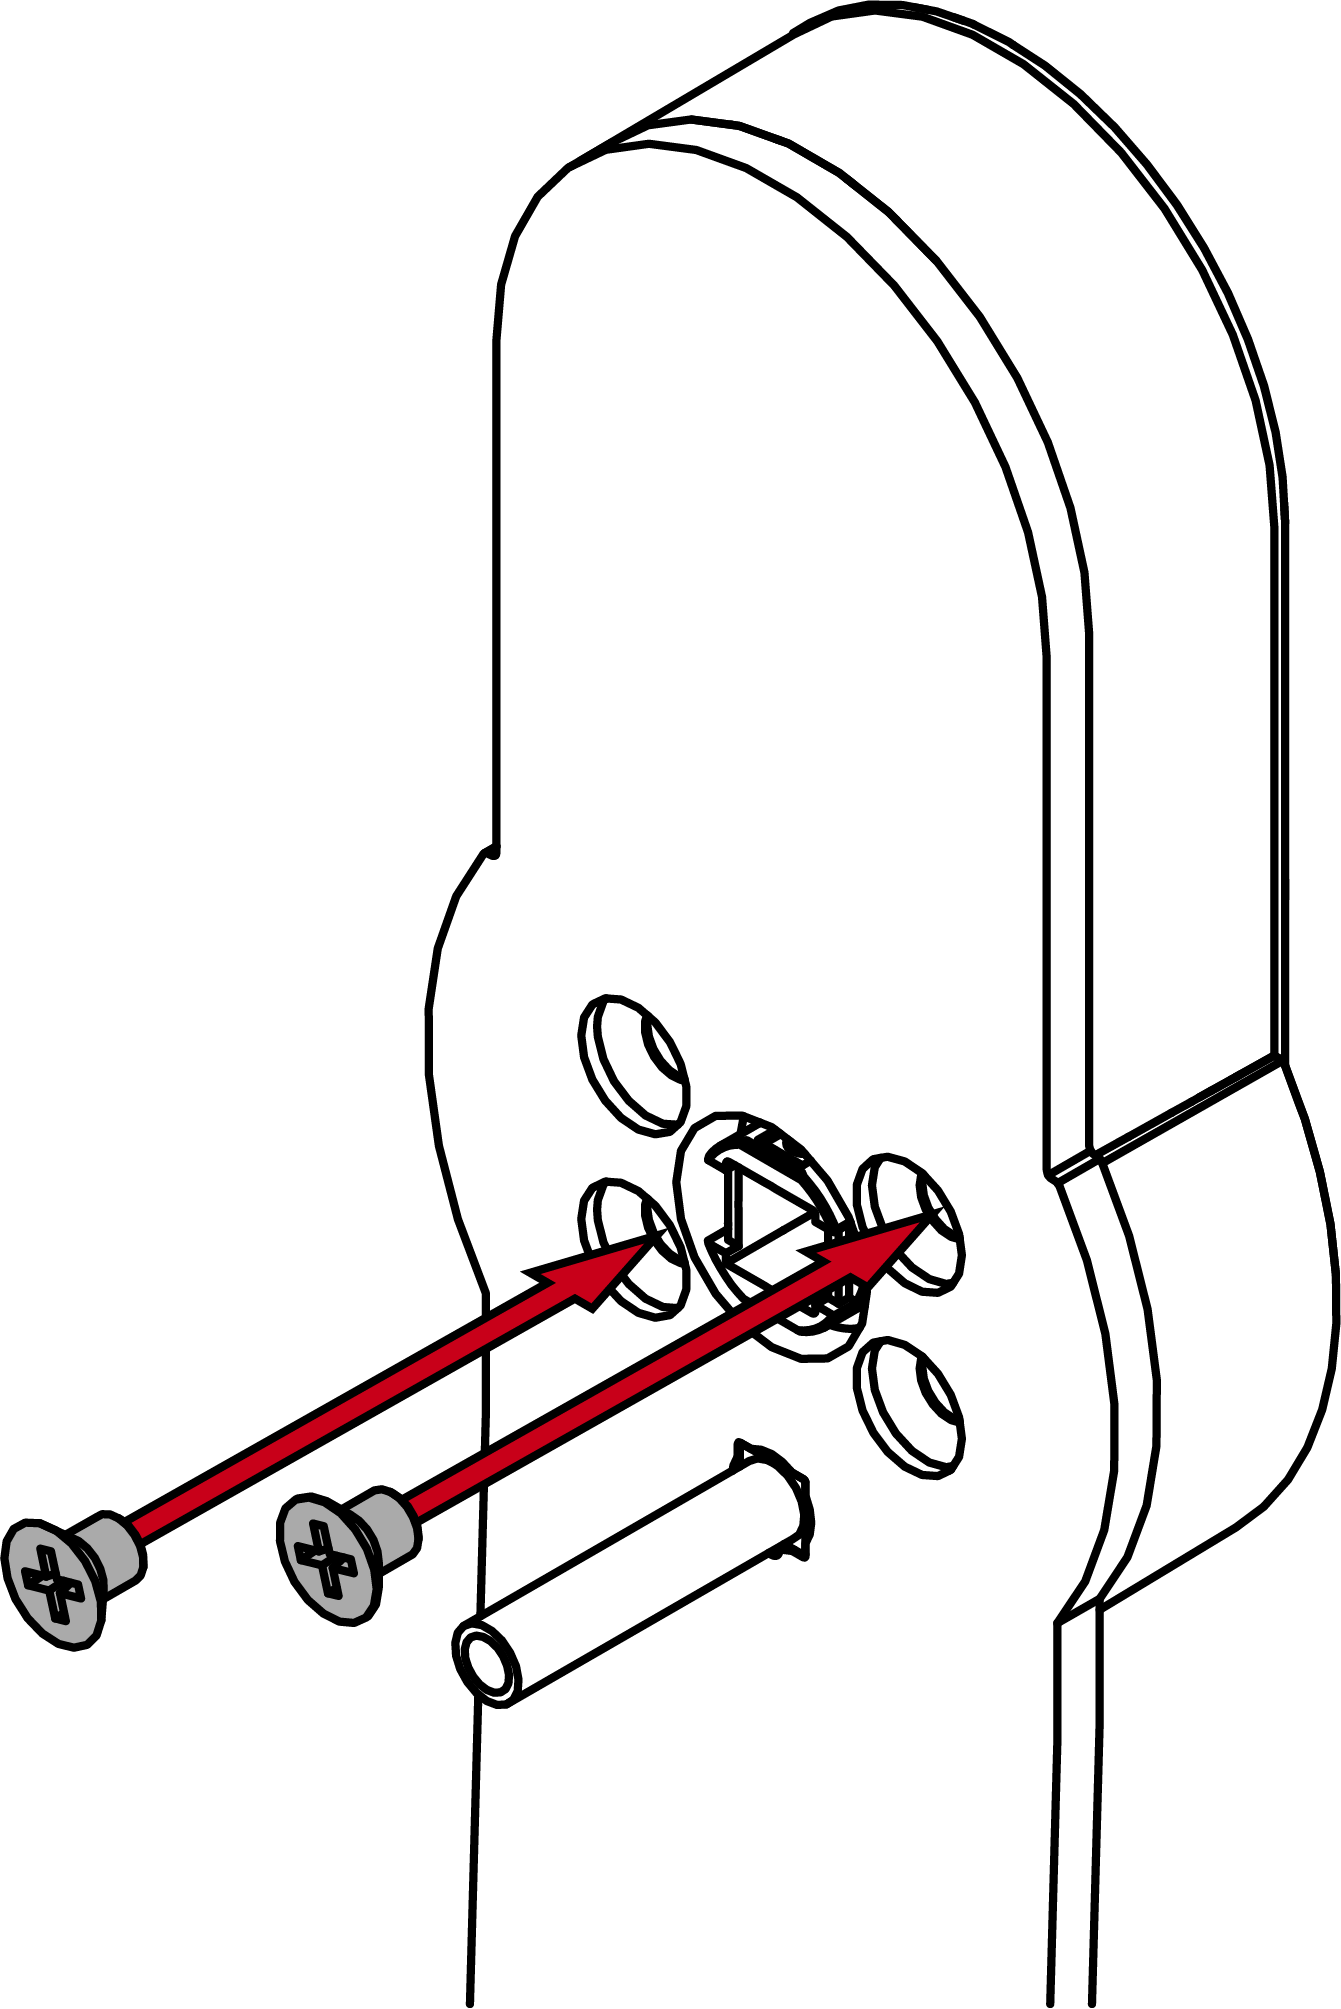
- Insert the sleeve nuts into the adapter plate.
- Place the adapter plate on the electronic fitting.
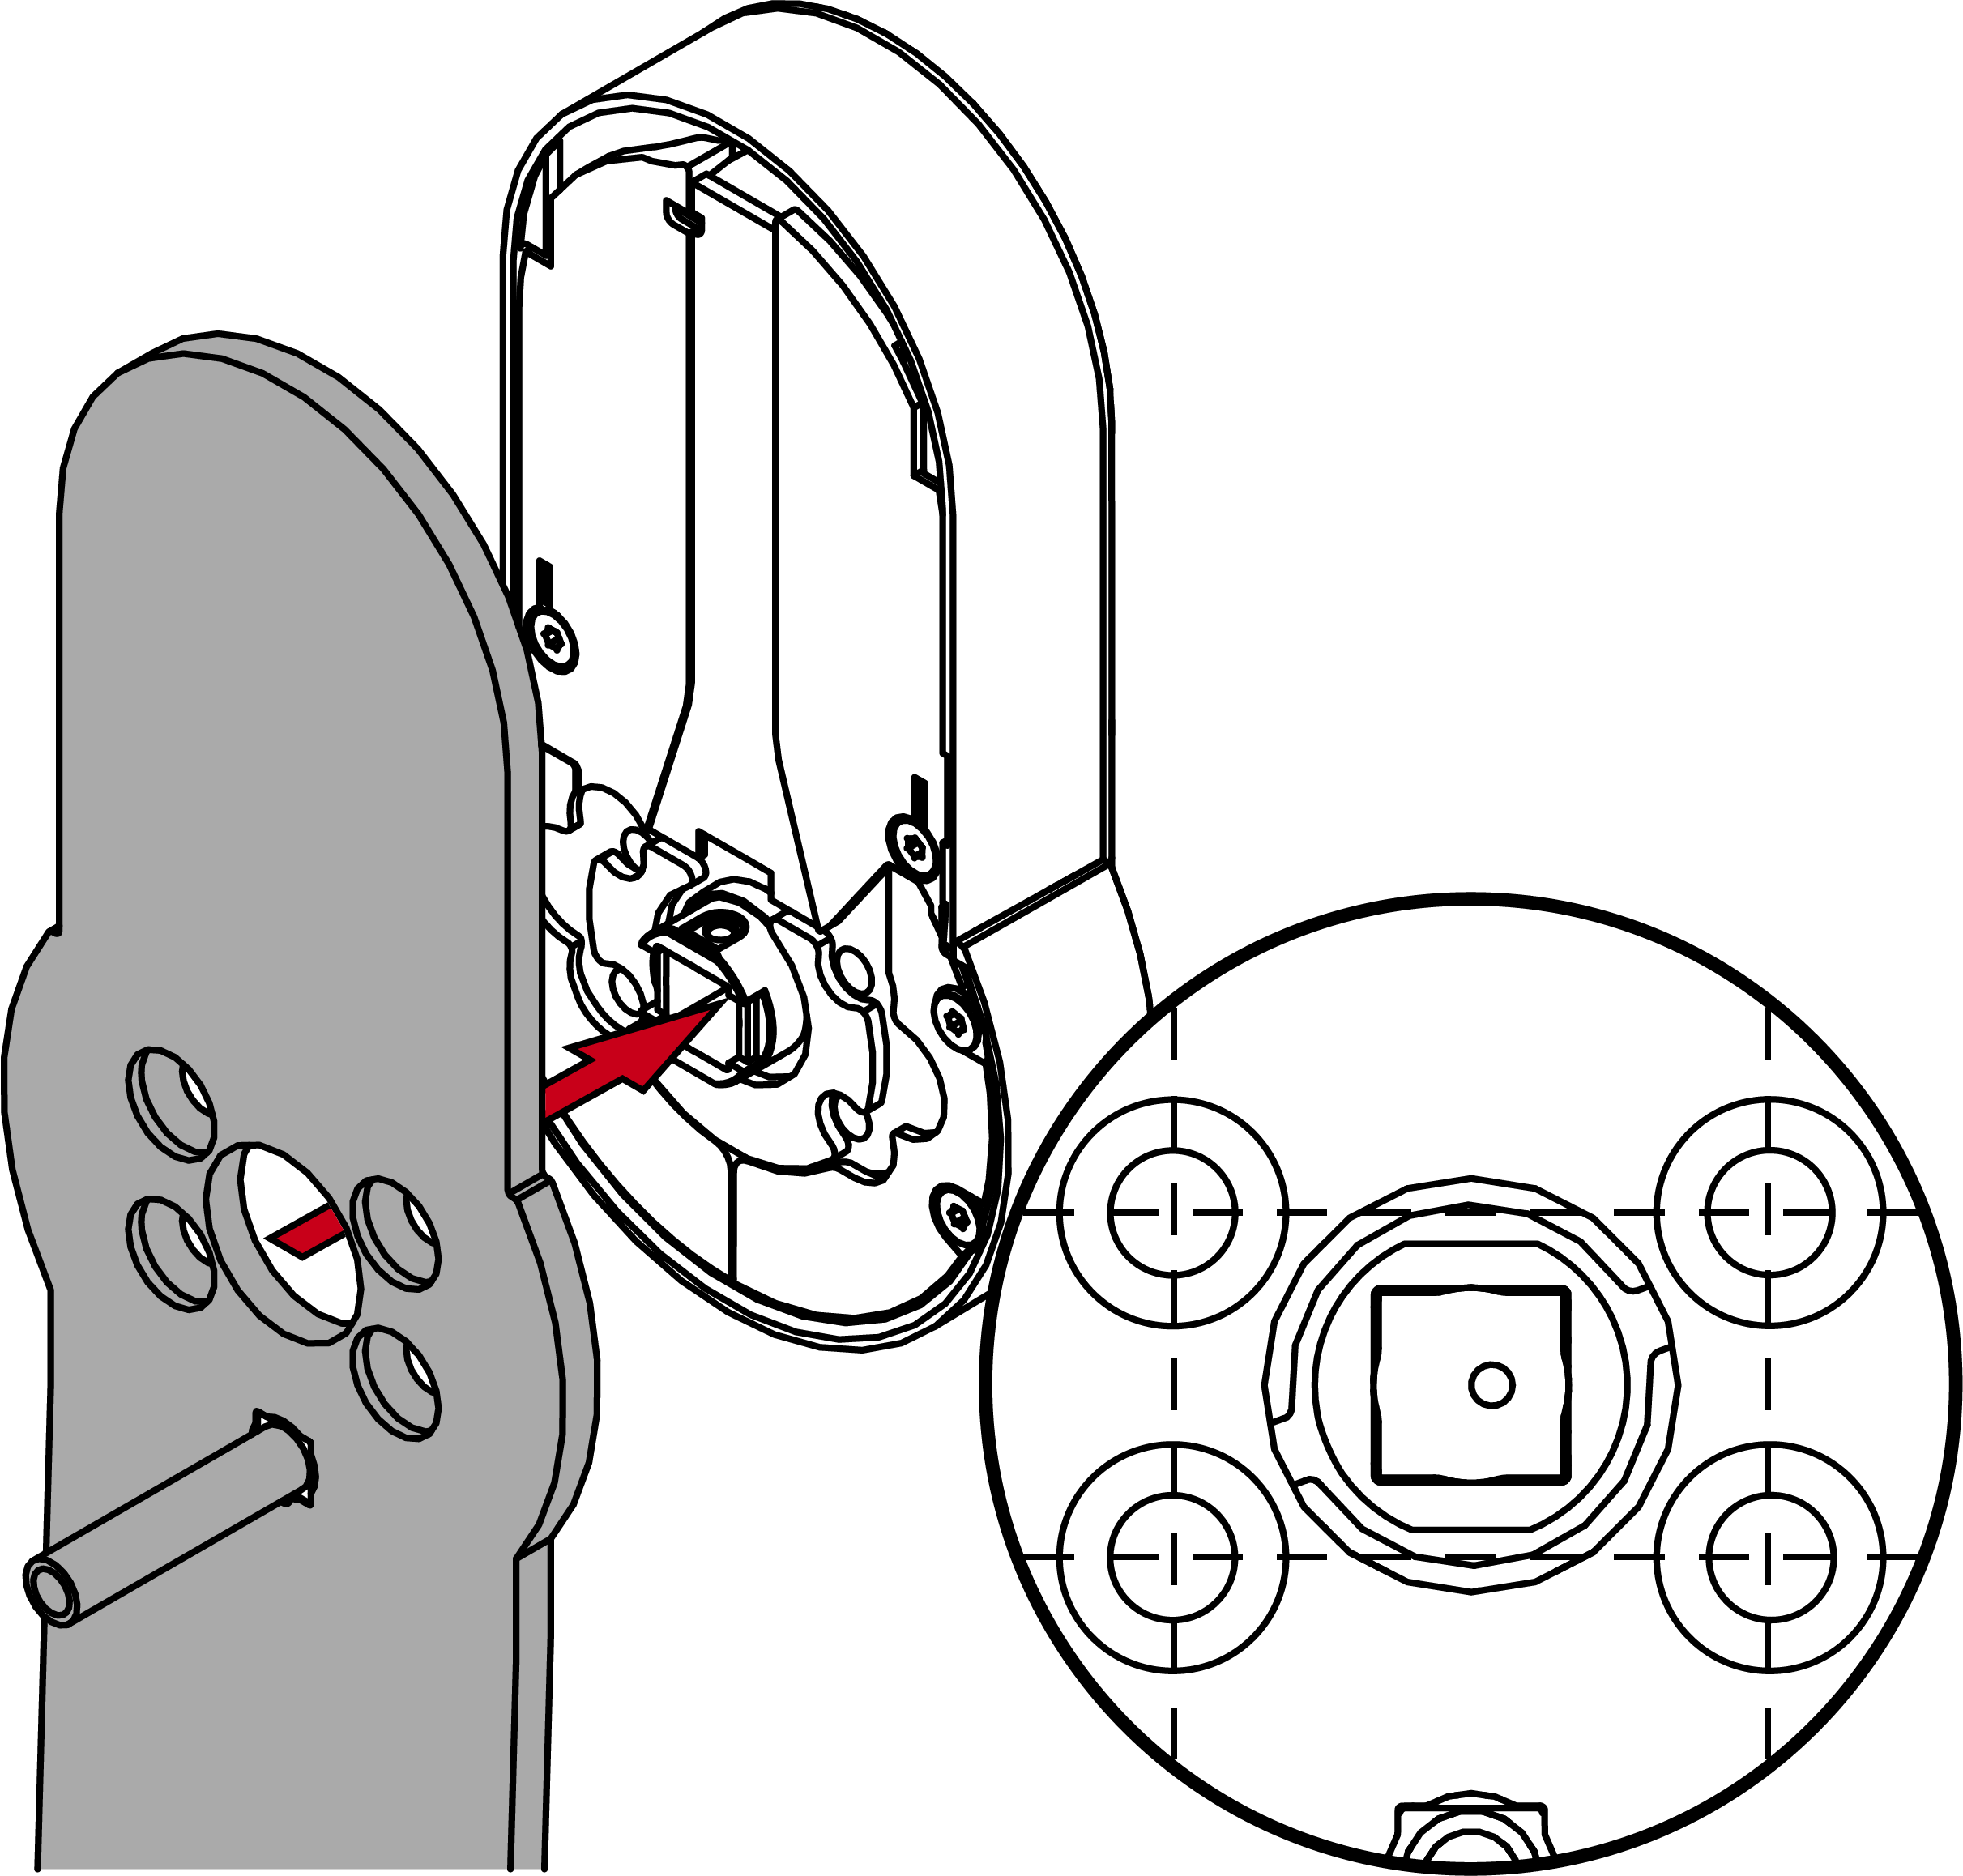
- Align the holes in the adapter plate with the threads in the fitting.
- Fasten the adapter plate firmly in a criss-cross sequence (PH2, torque 1.1 Nm).
- Insert the spindle with the pin side into the fitting.
- Insert the fitting with adapter plate, spindle and escutcheon base into the door.
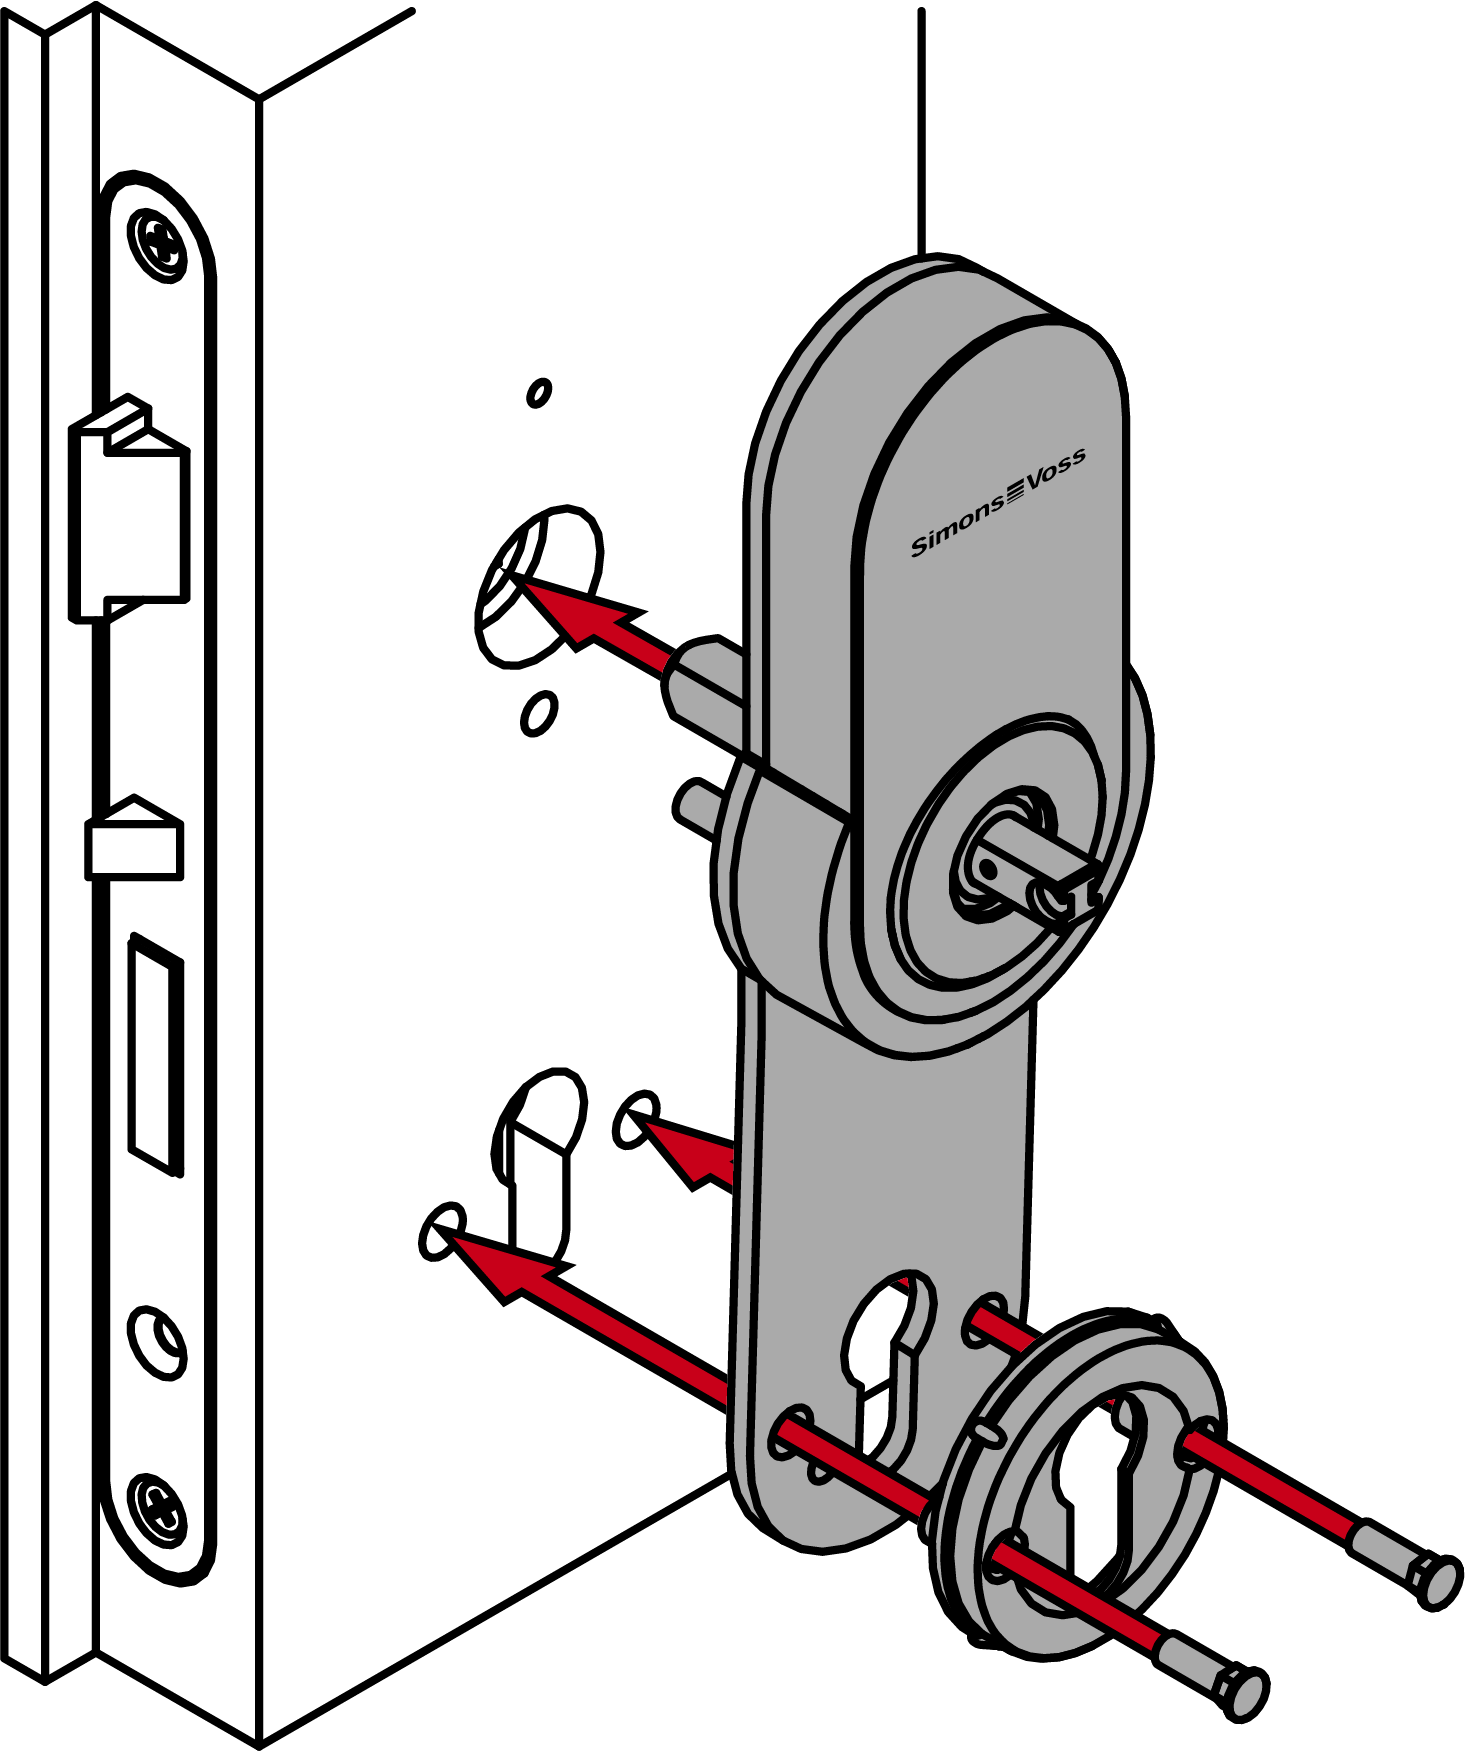
- Screw the fitting into place in the centre as described in the BKS documentation (use the L1 screw and the wood screw ordered from BKS).
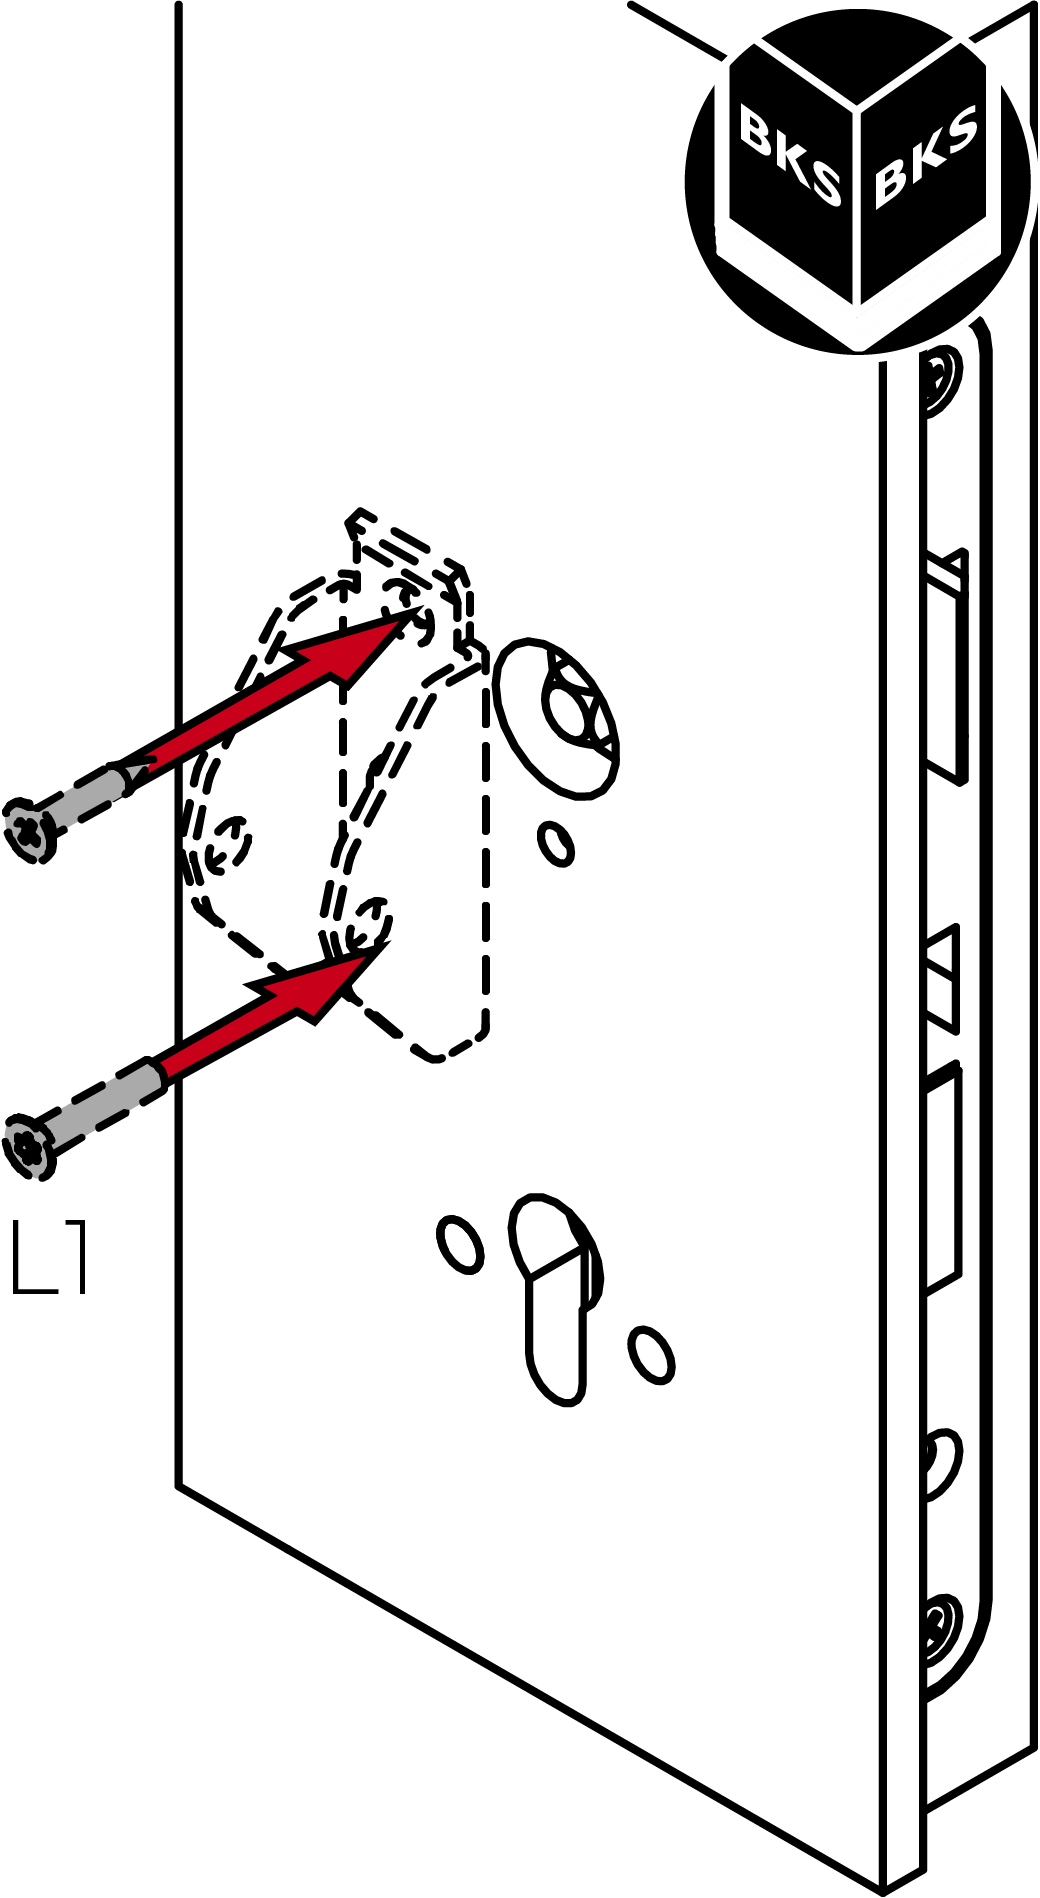
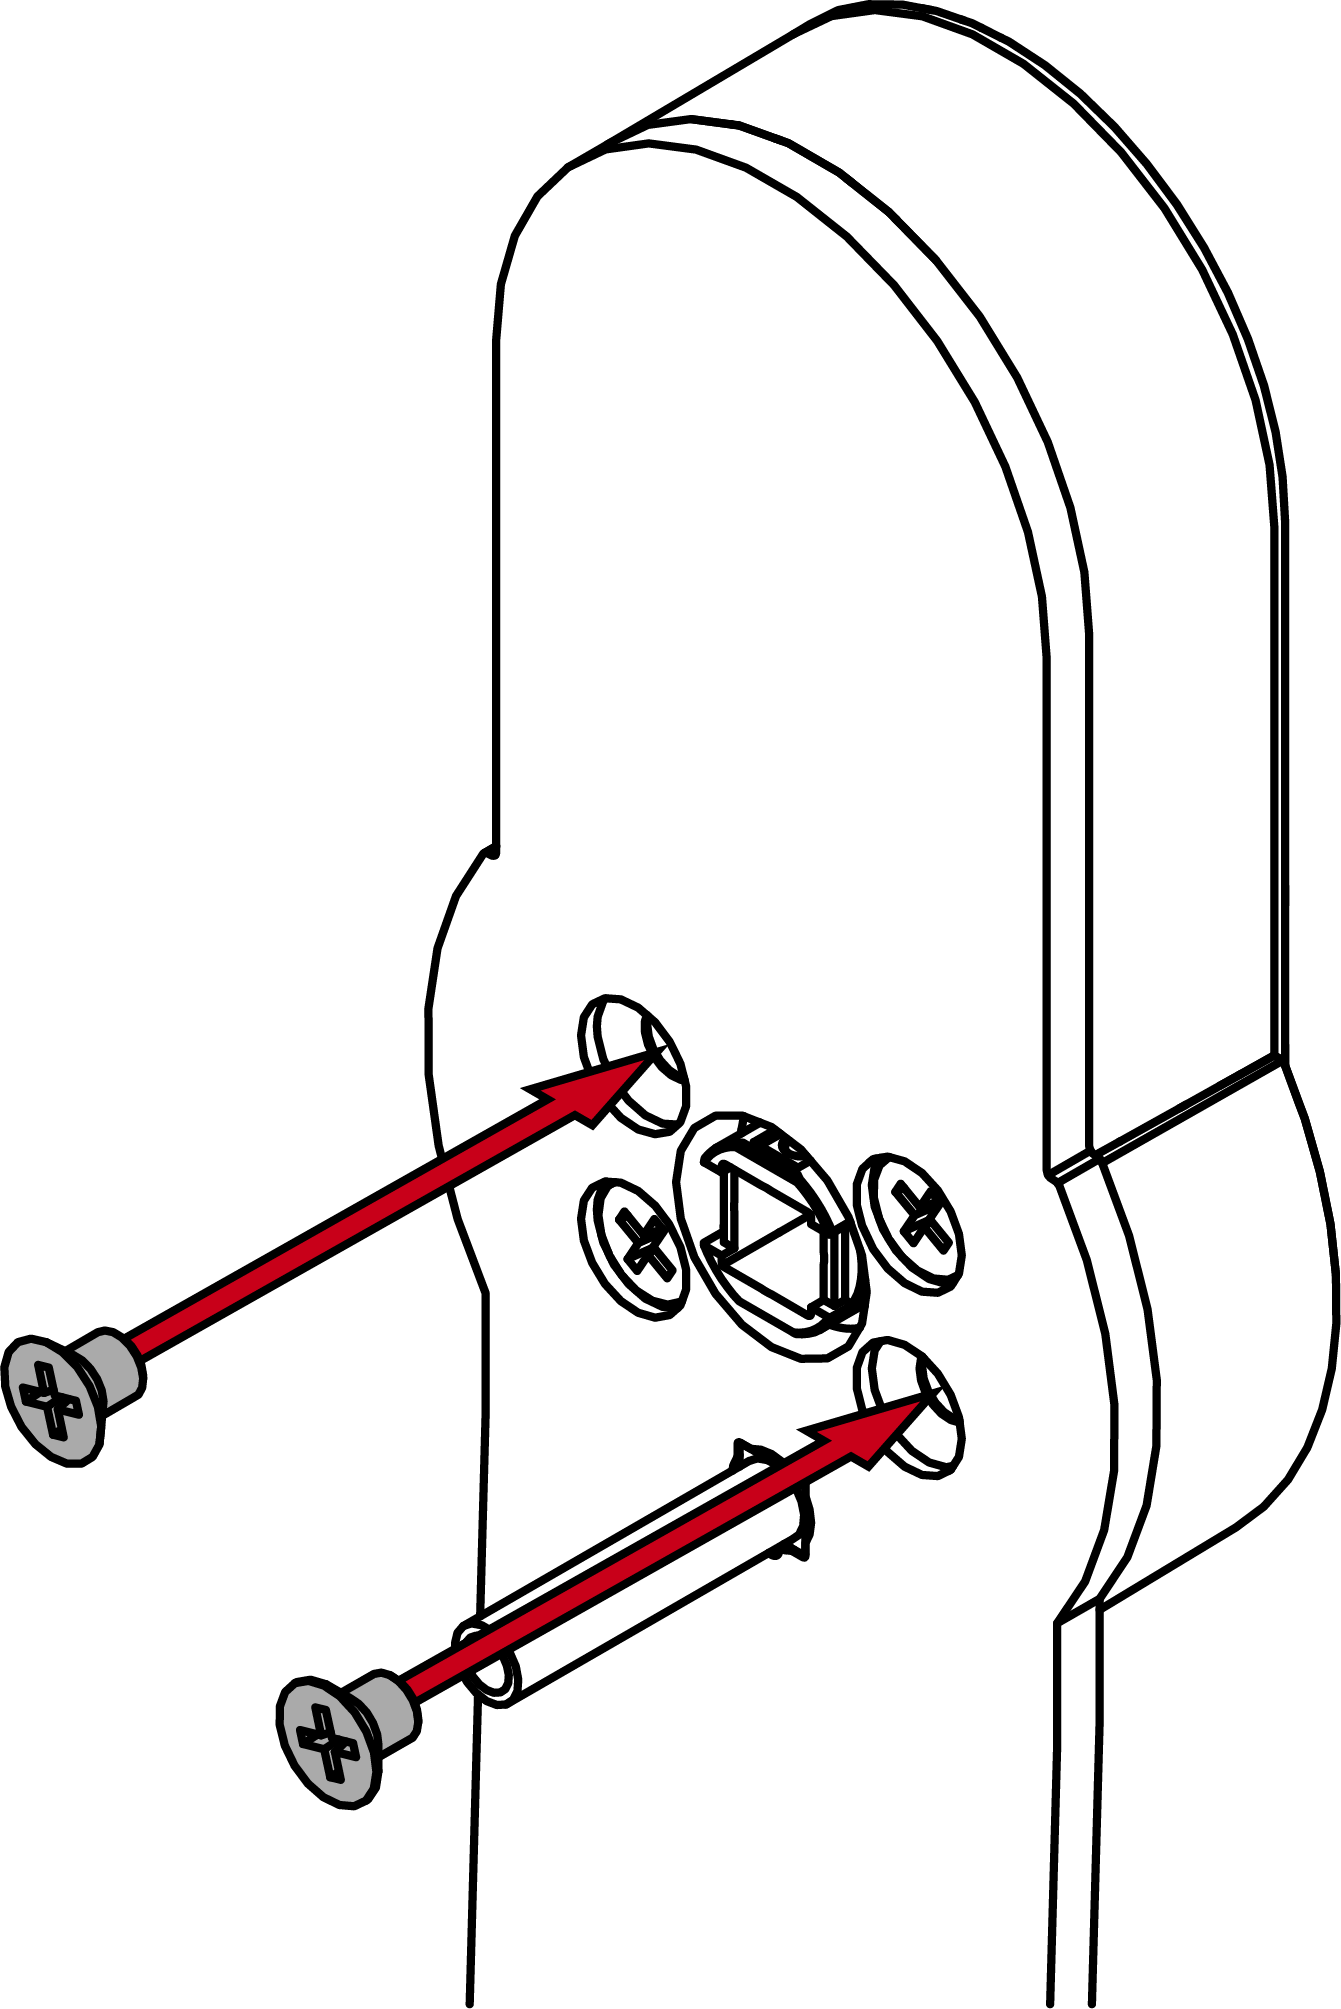
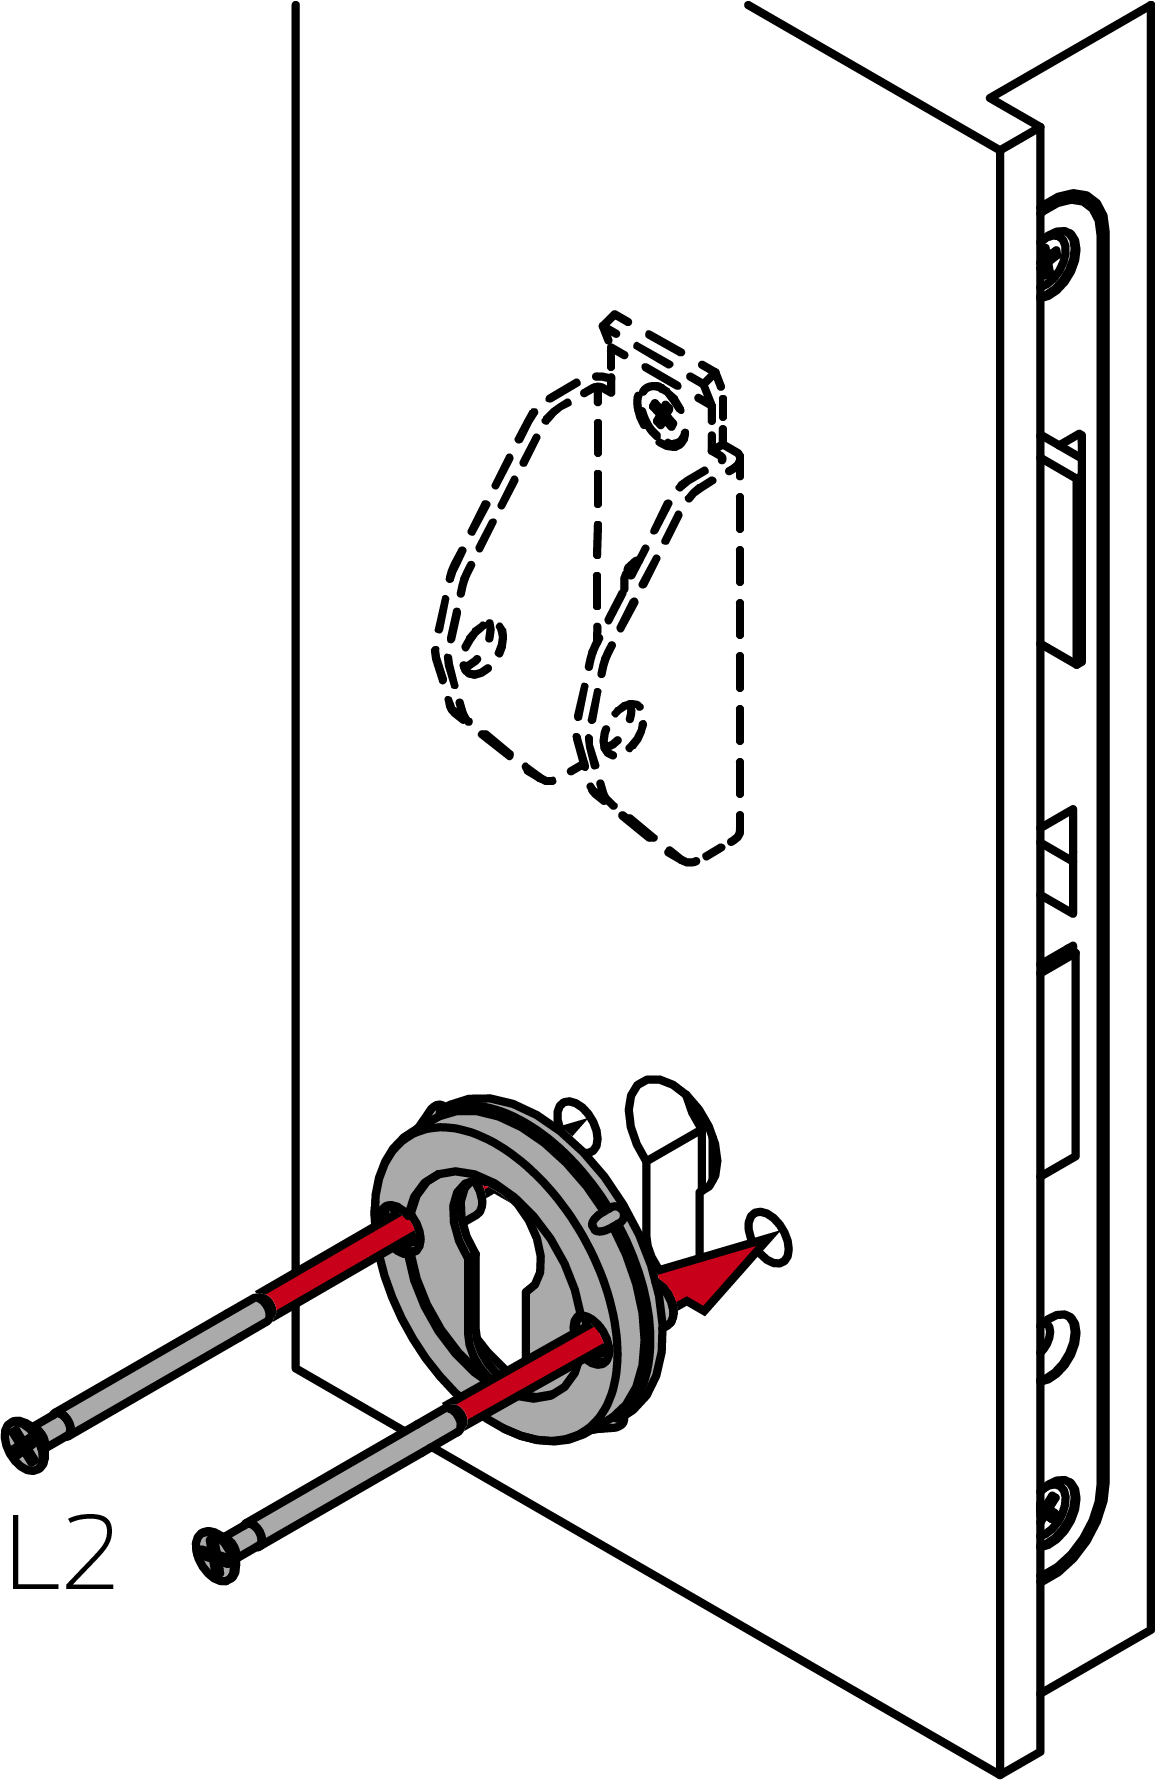
- Screw the escutcheon base to the assembly using the L2 screws (PH2, torque: 1.1 Nm).
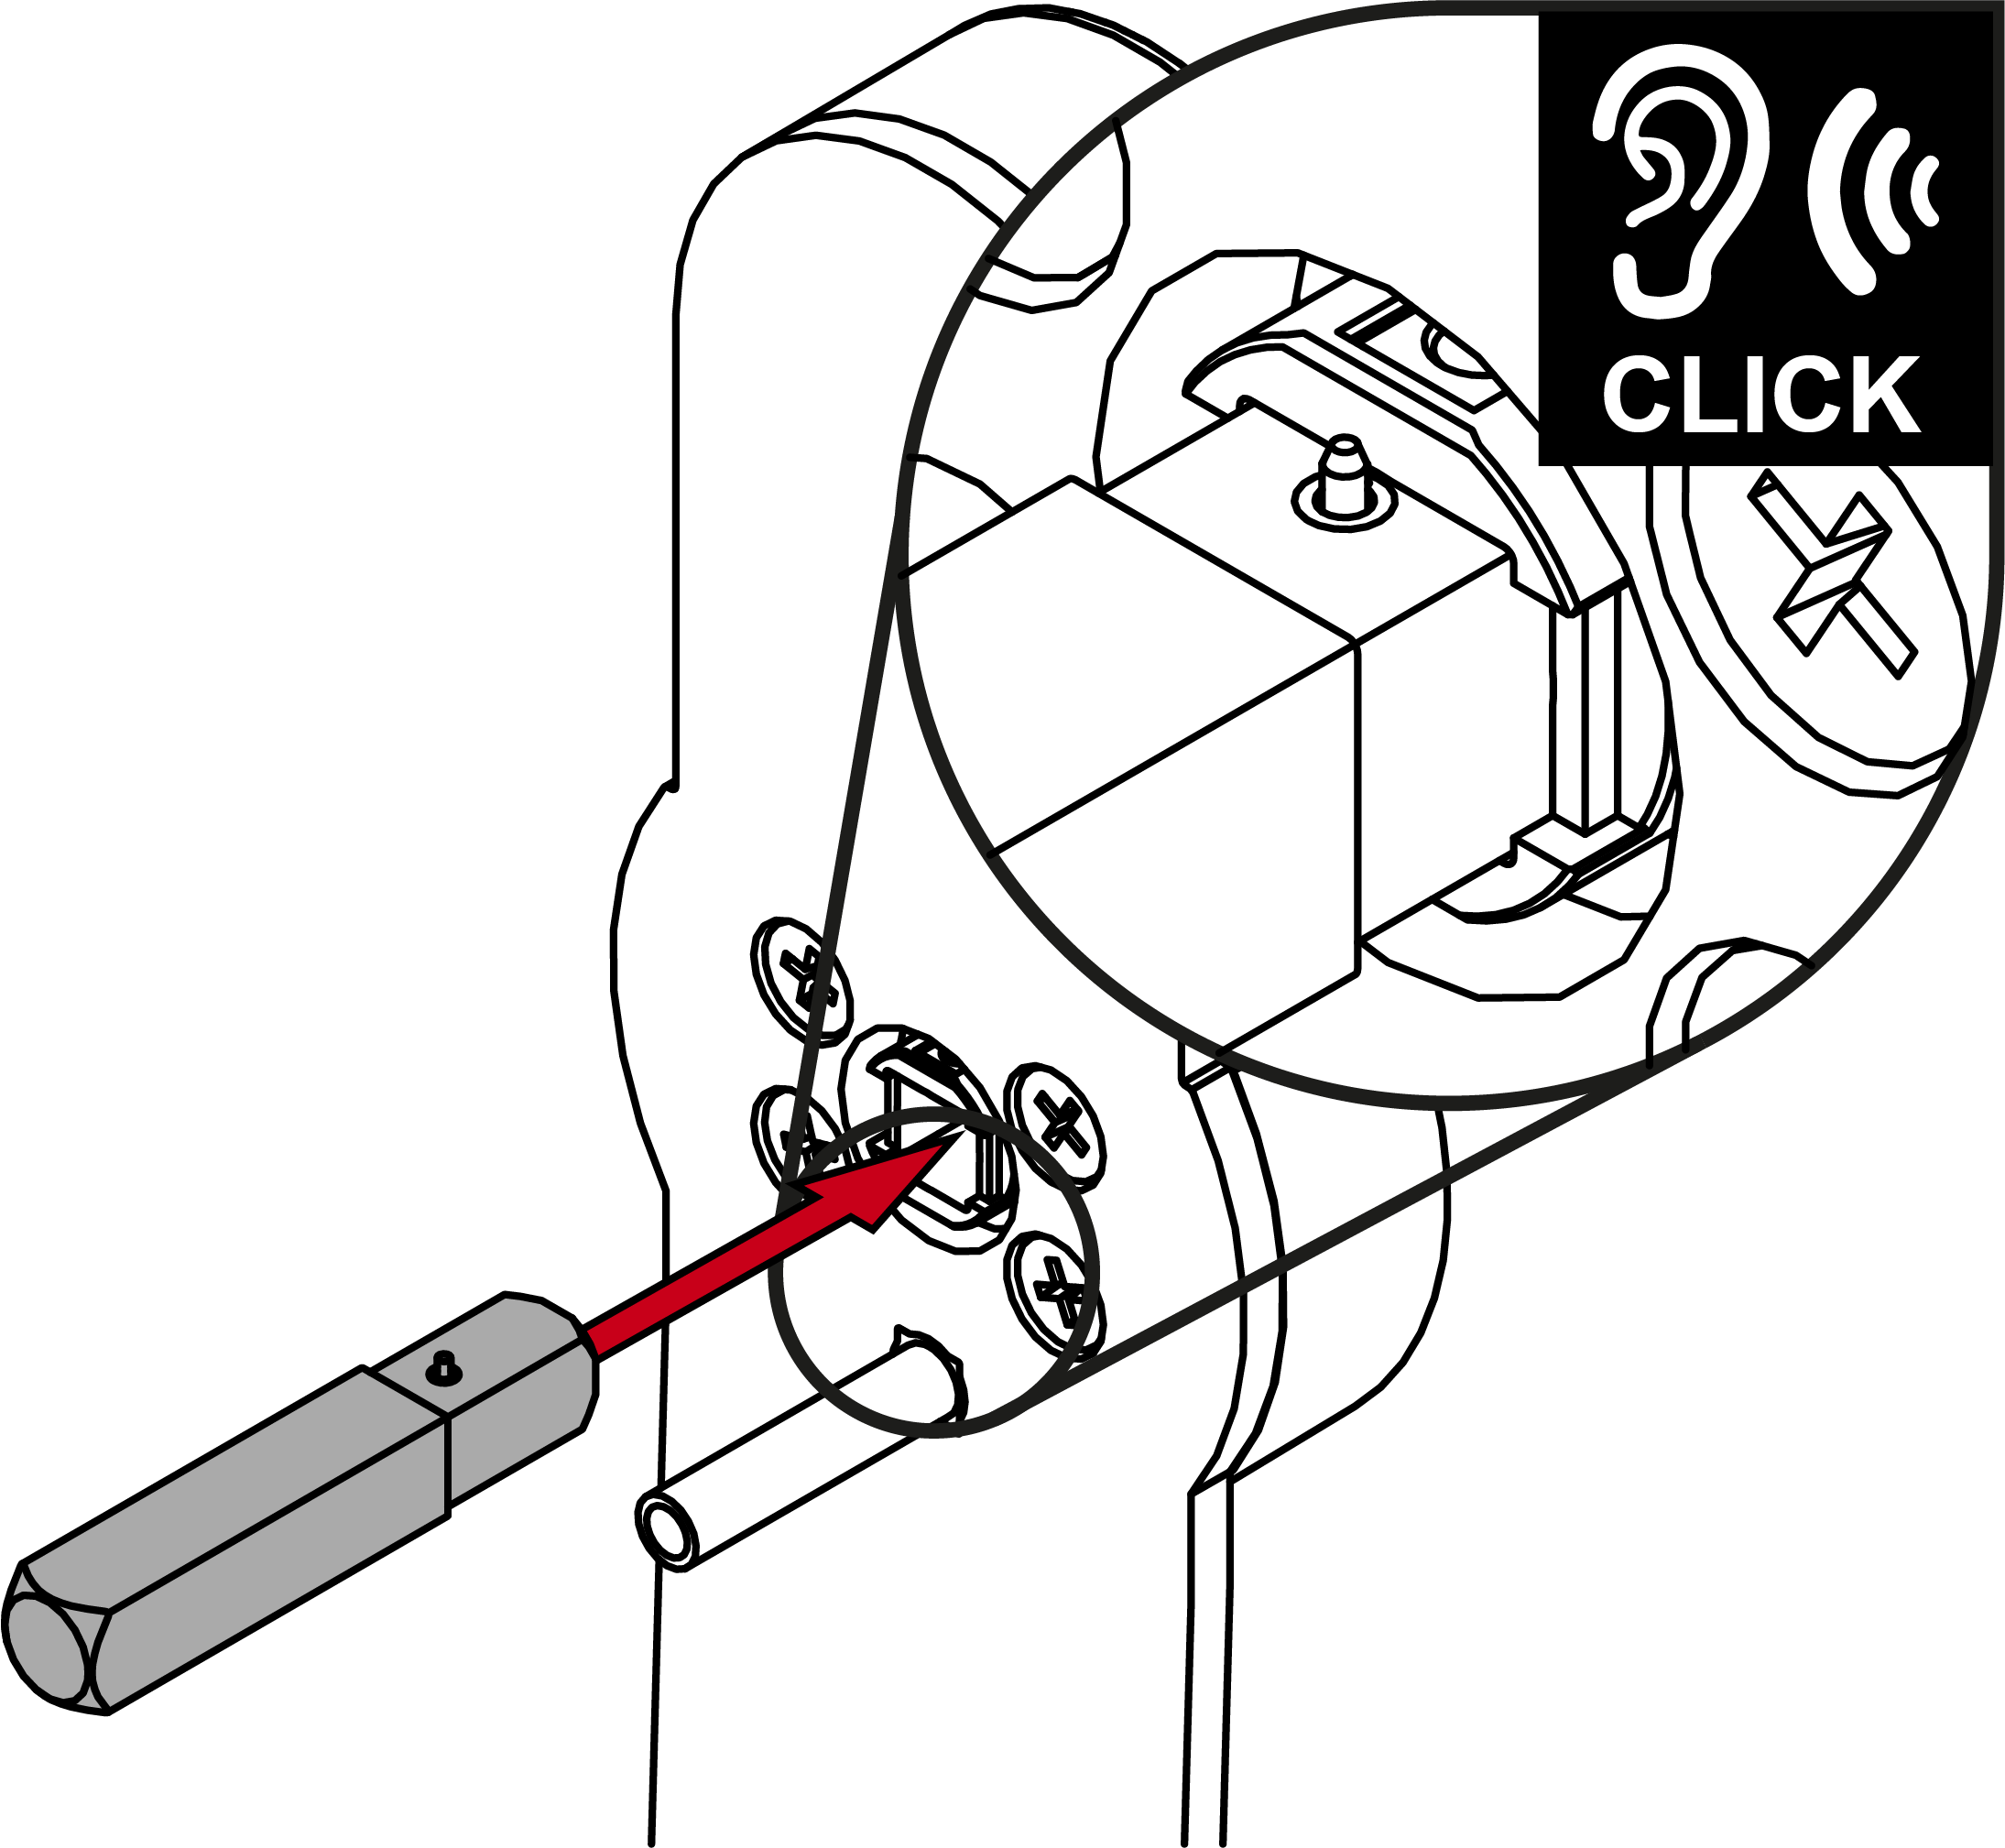
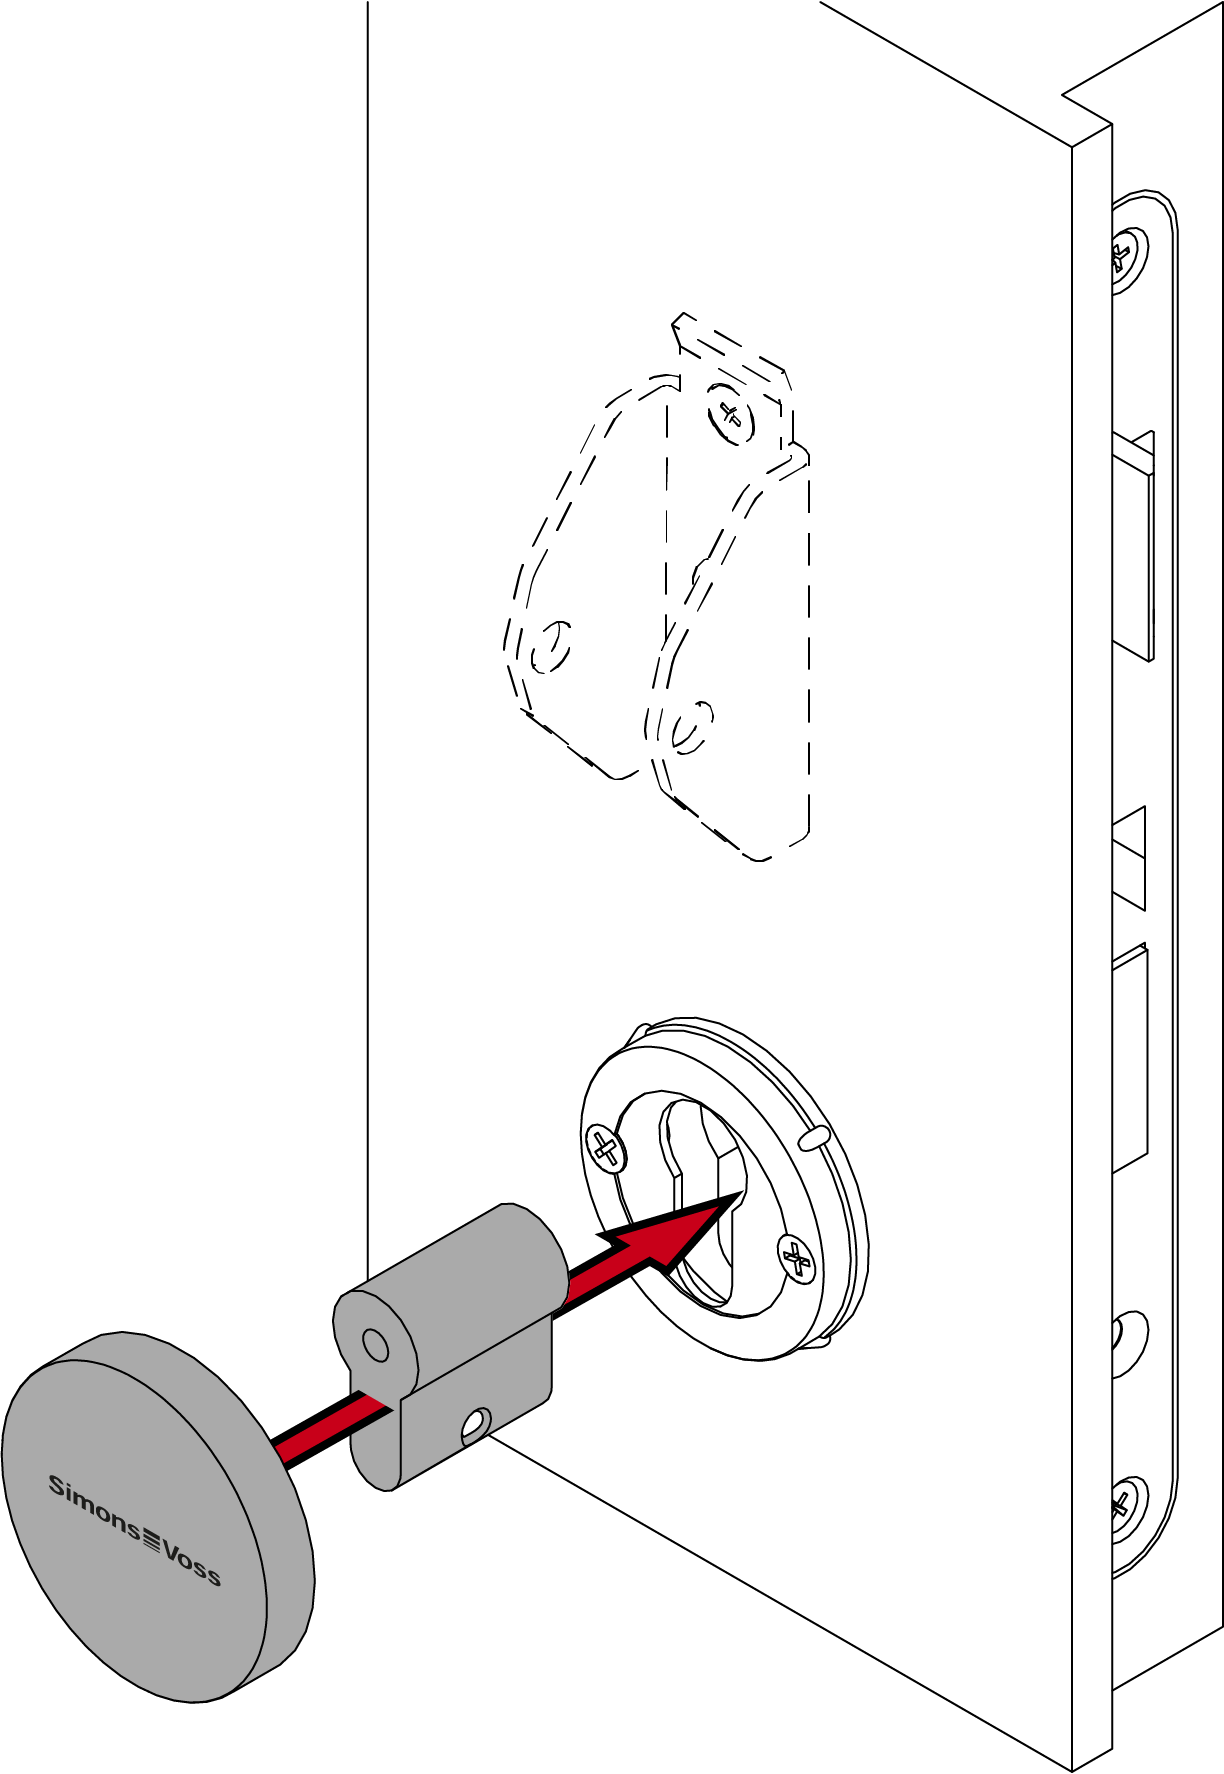
- Insert the dummy cylinder.
NOTE

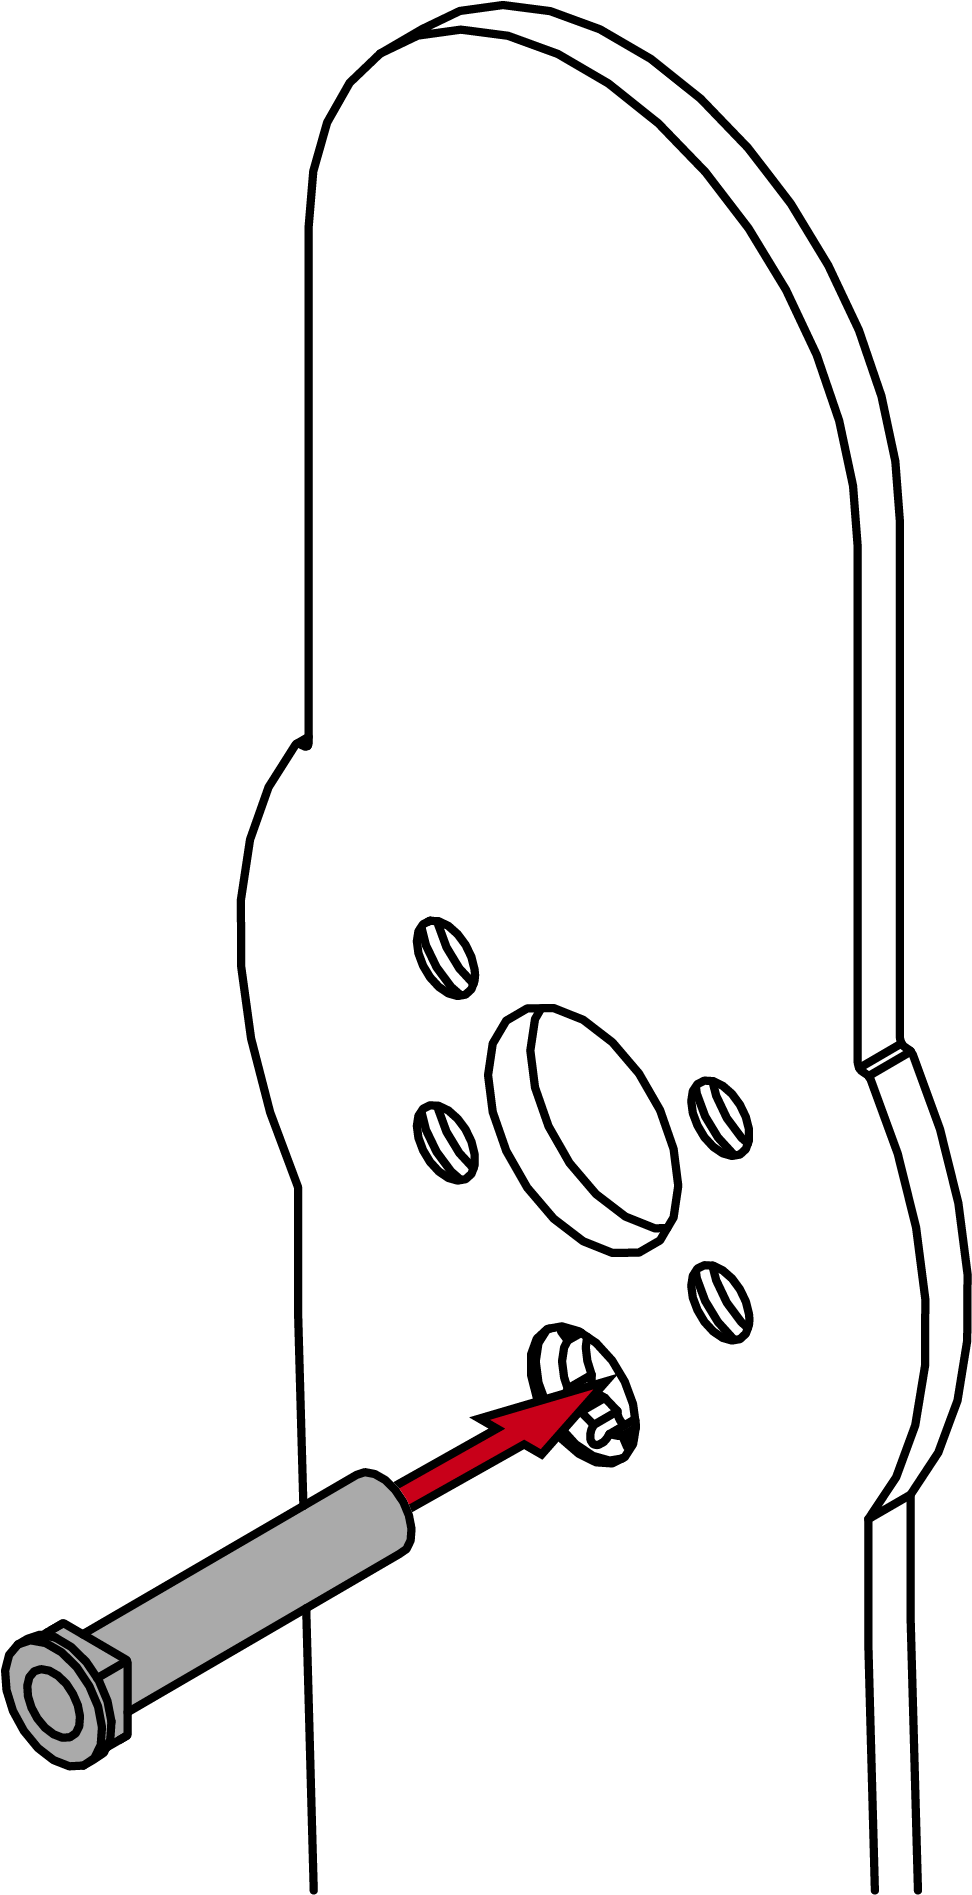
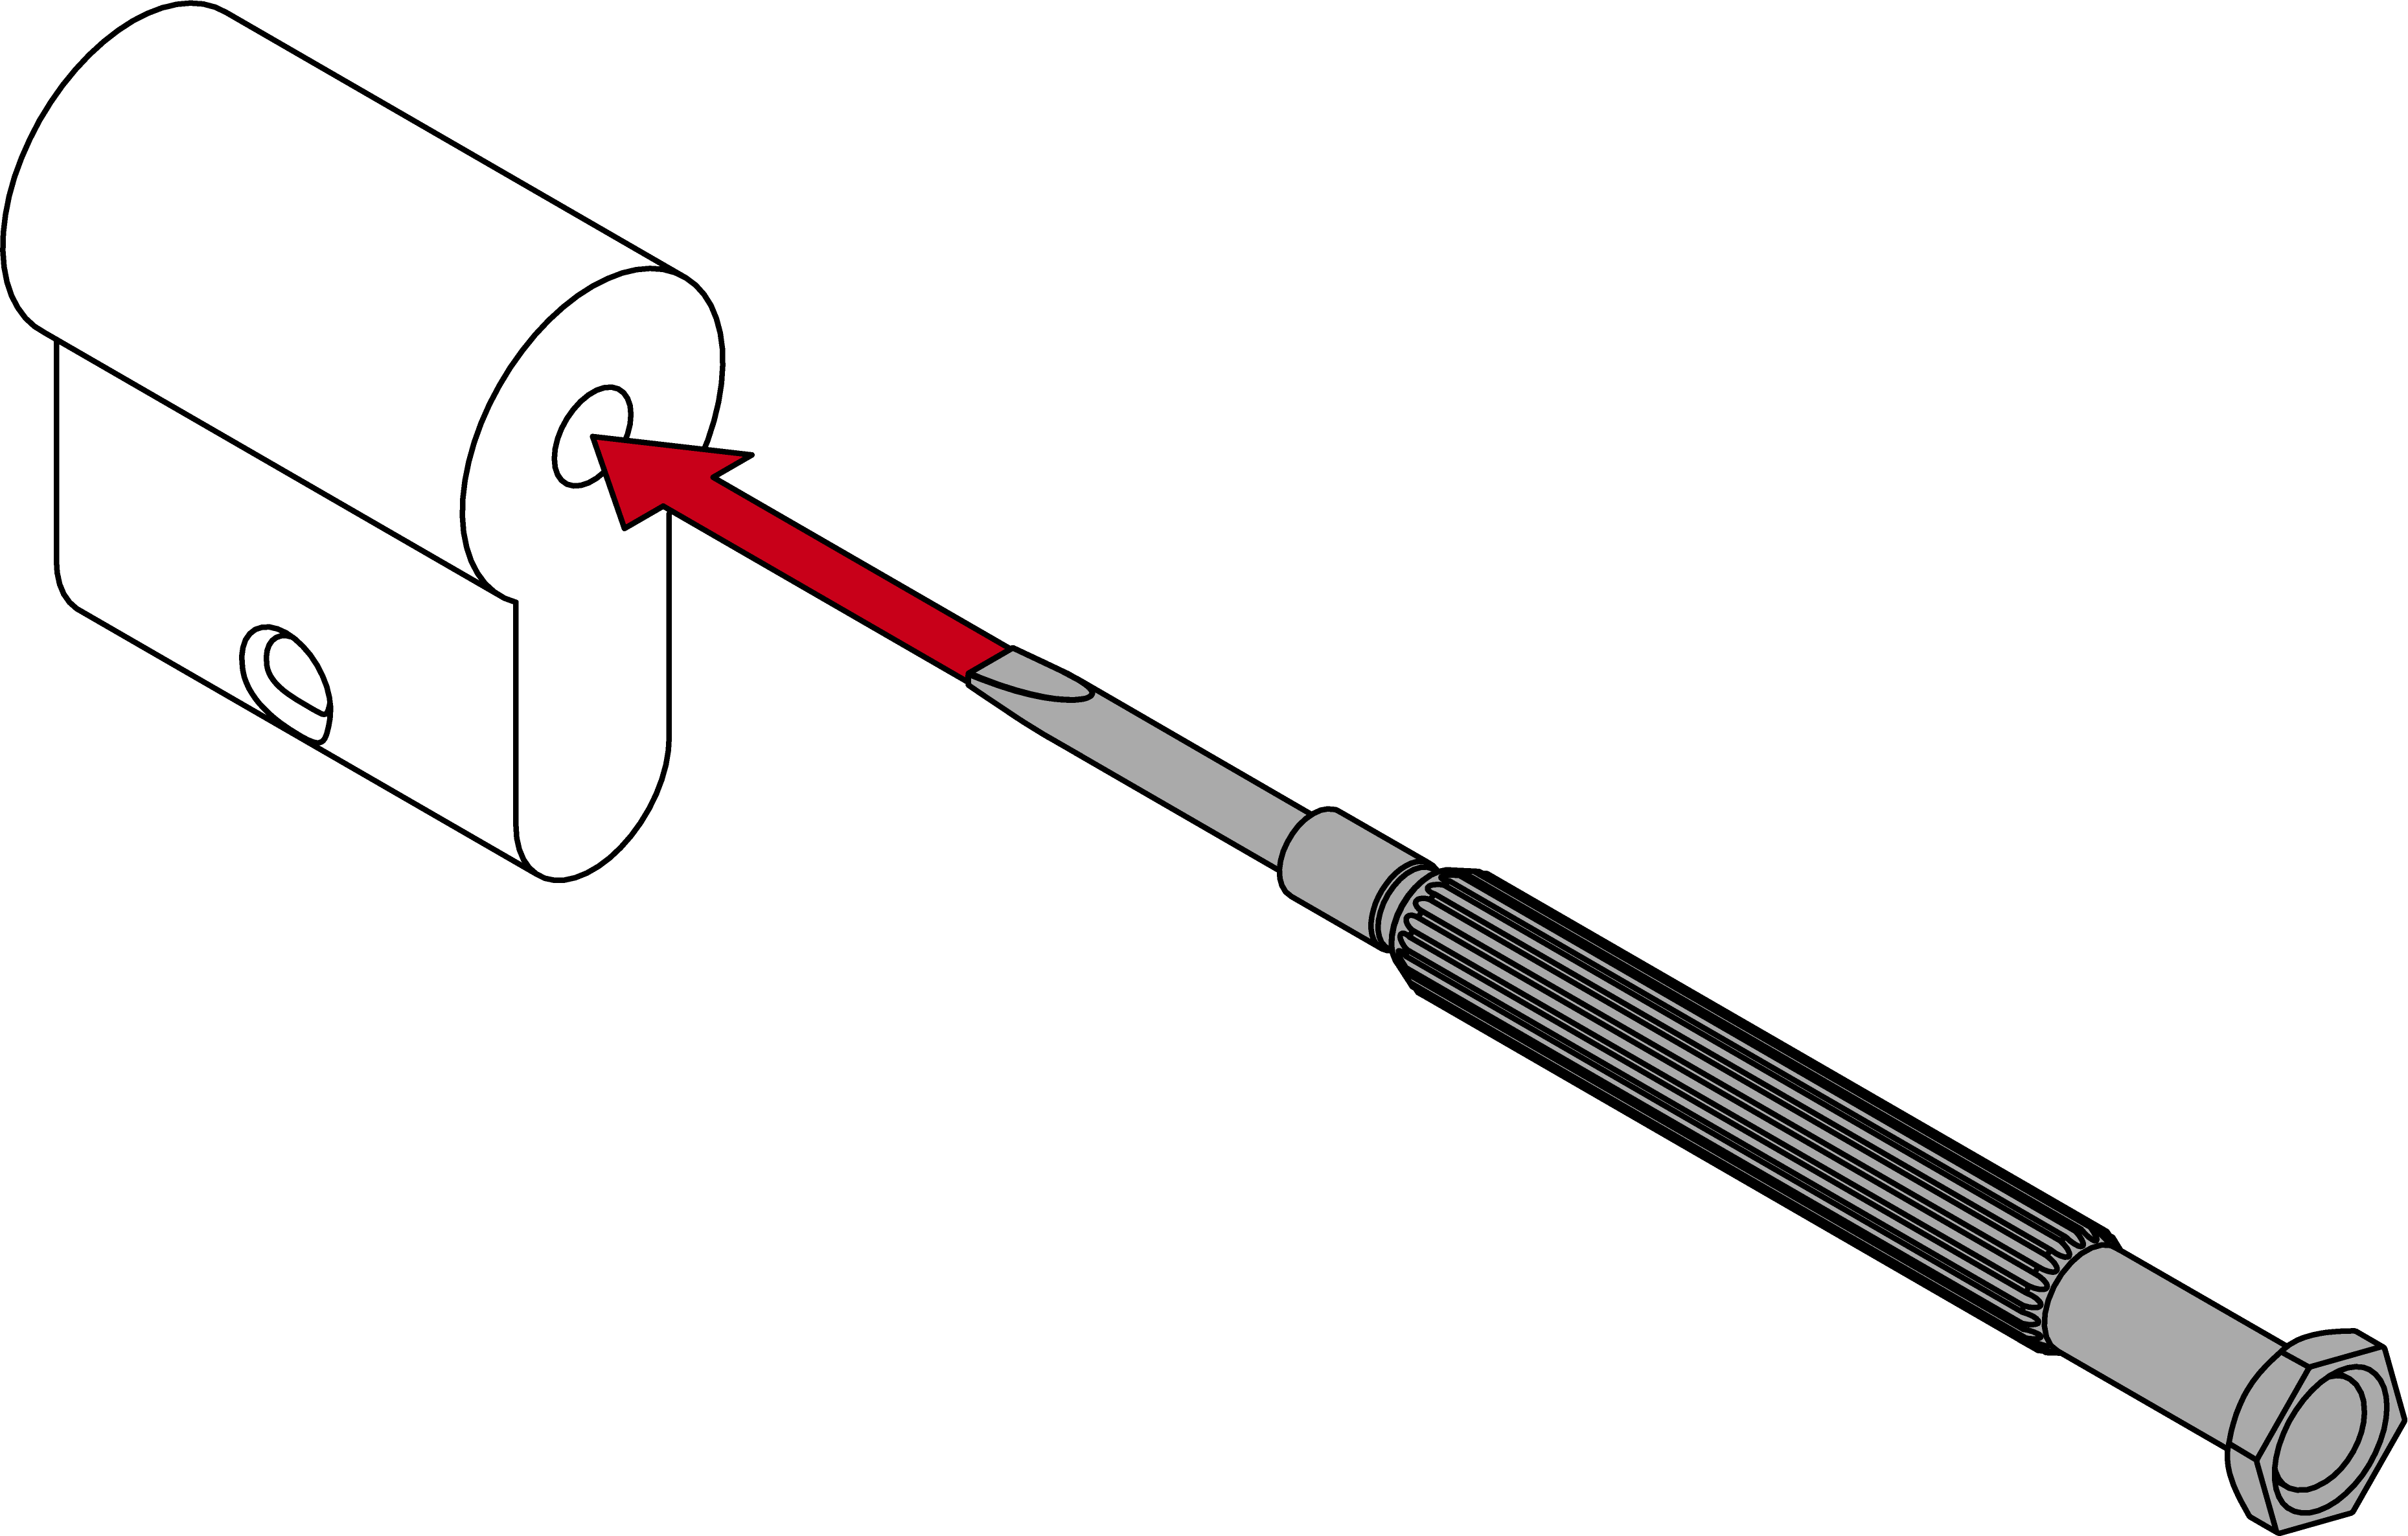
Feed the blank cylinder into the hole using a screwdriver
It is difficult to position the blank cylinder correctly, especially in thick doors.
- Insert a screwdriver into the hole in the blank cylinder.
- Position the blank cylinder using the screwdriver.
- Place the escutcheon cover on the escutcheon base.
- Push the handle onto the outer fitting.
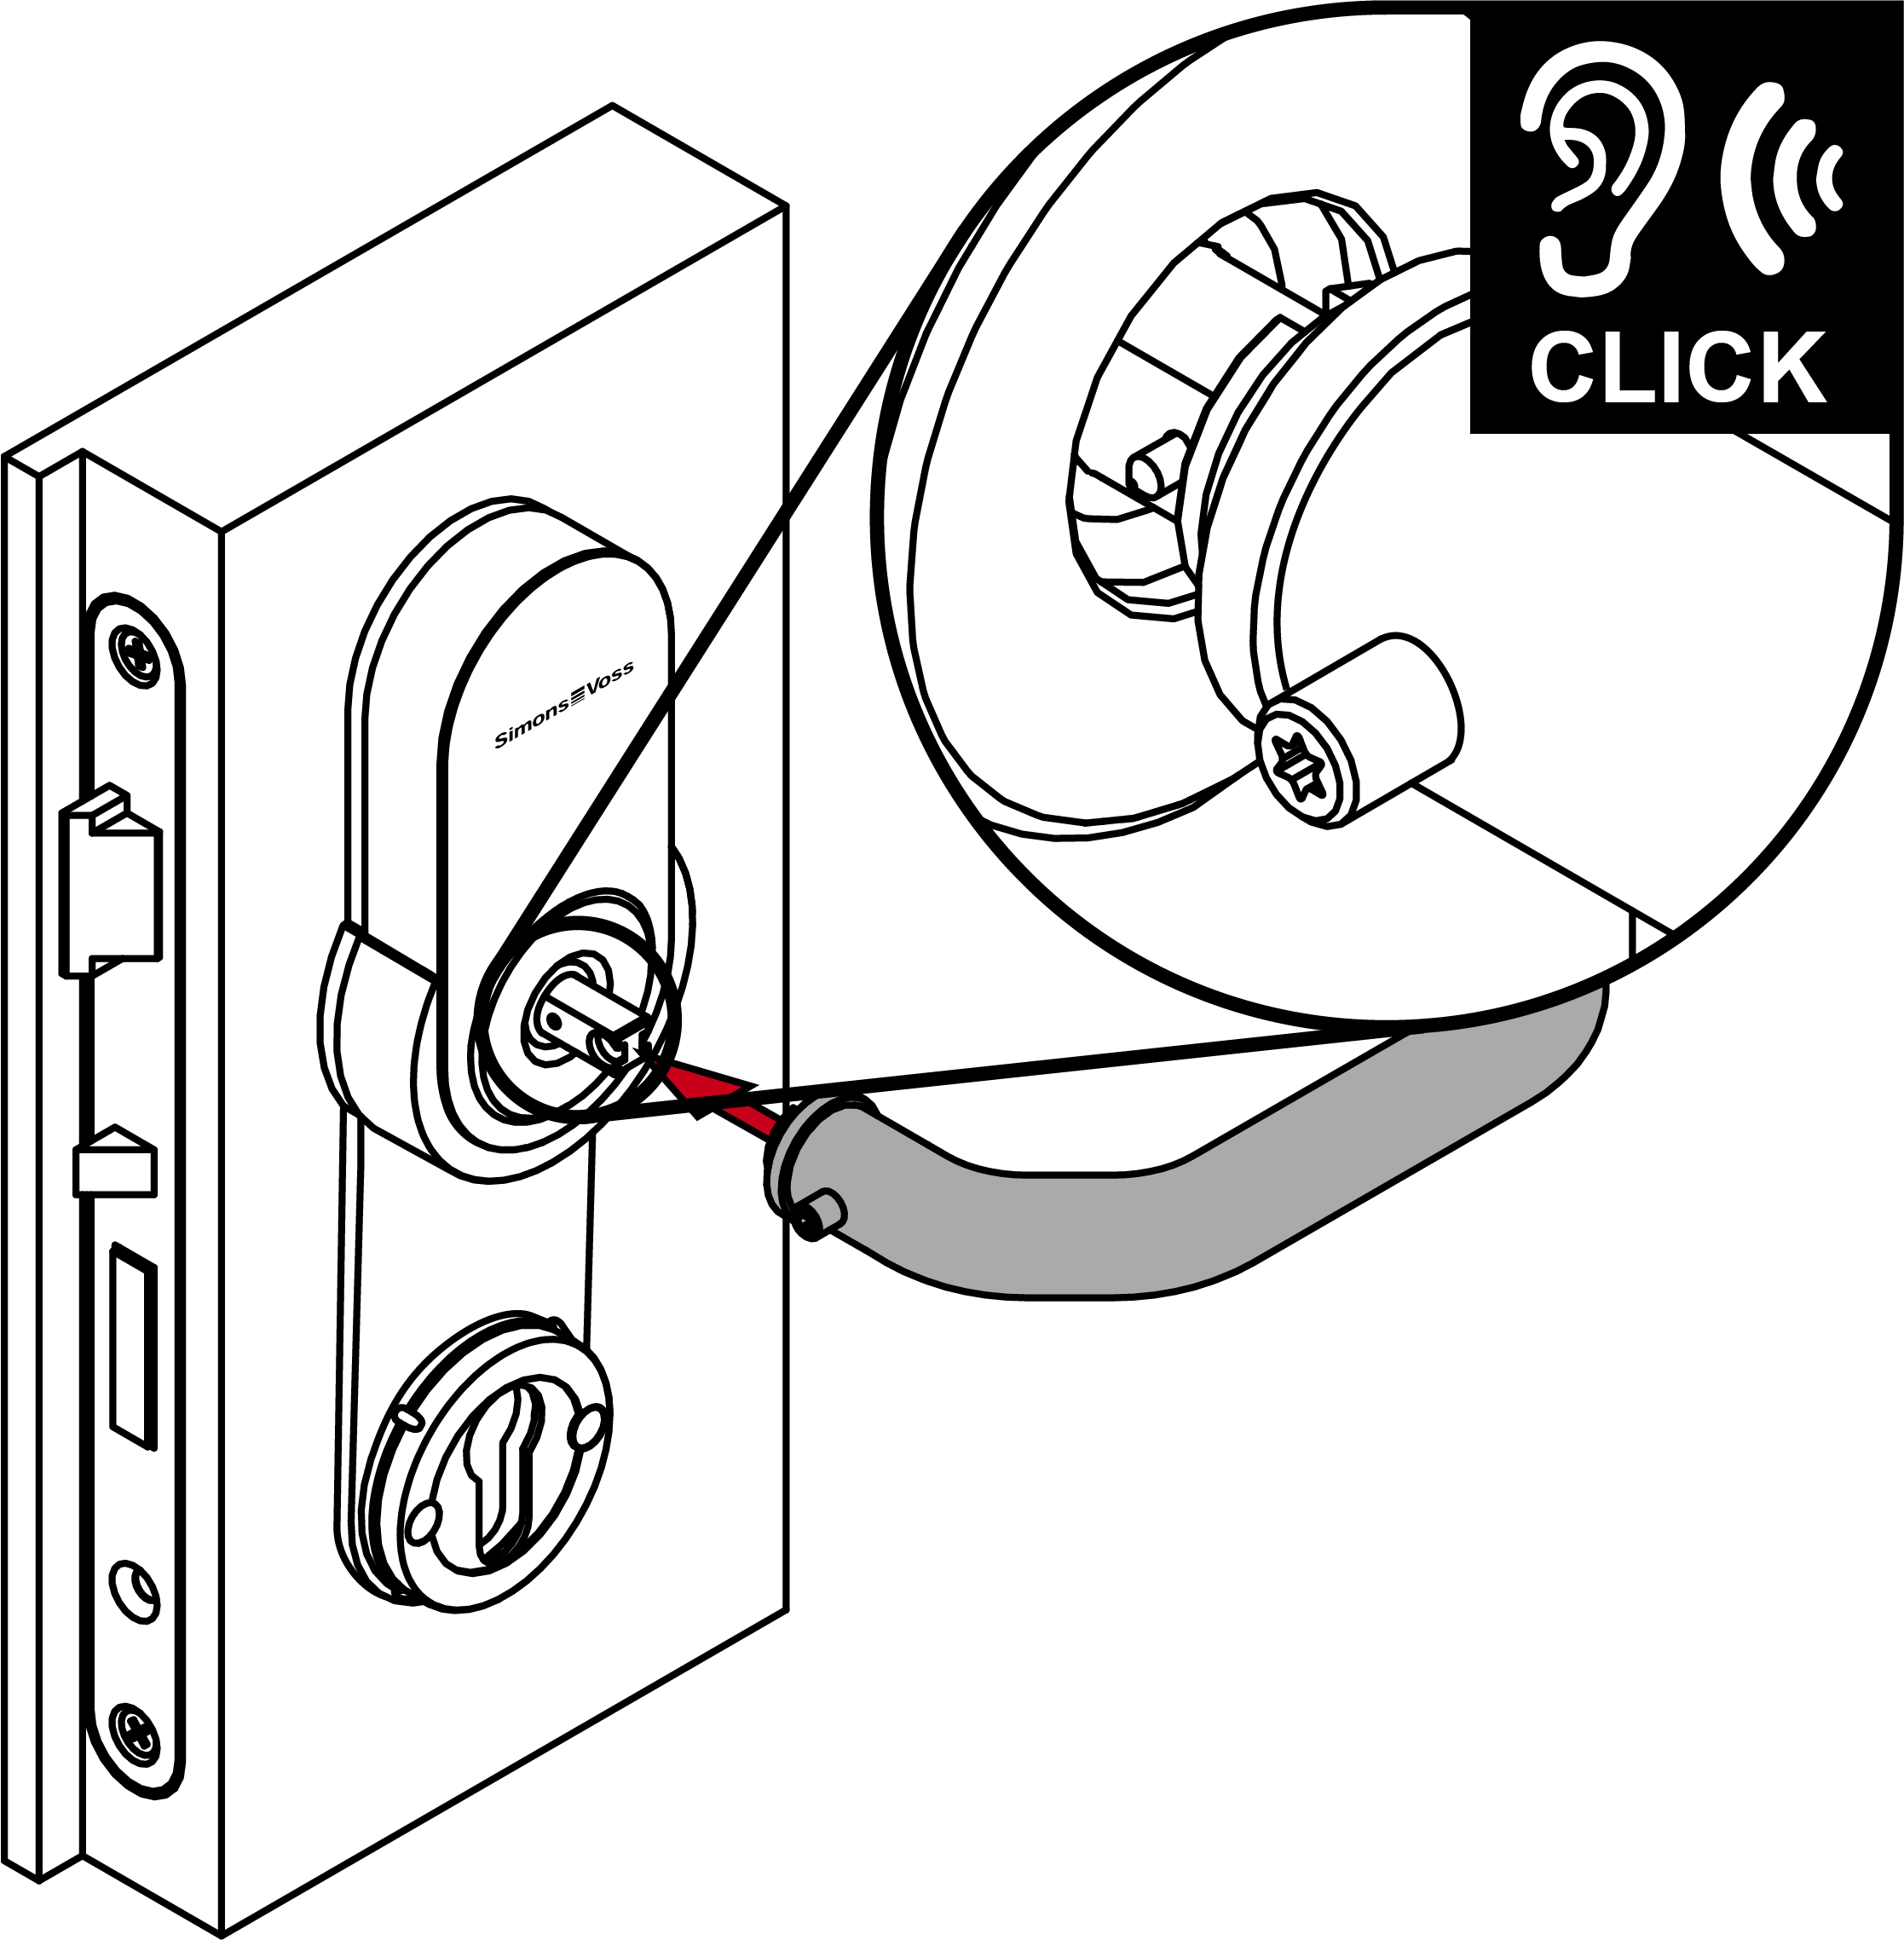
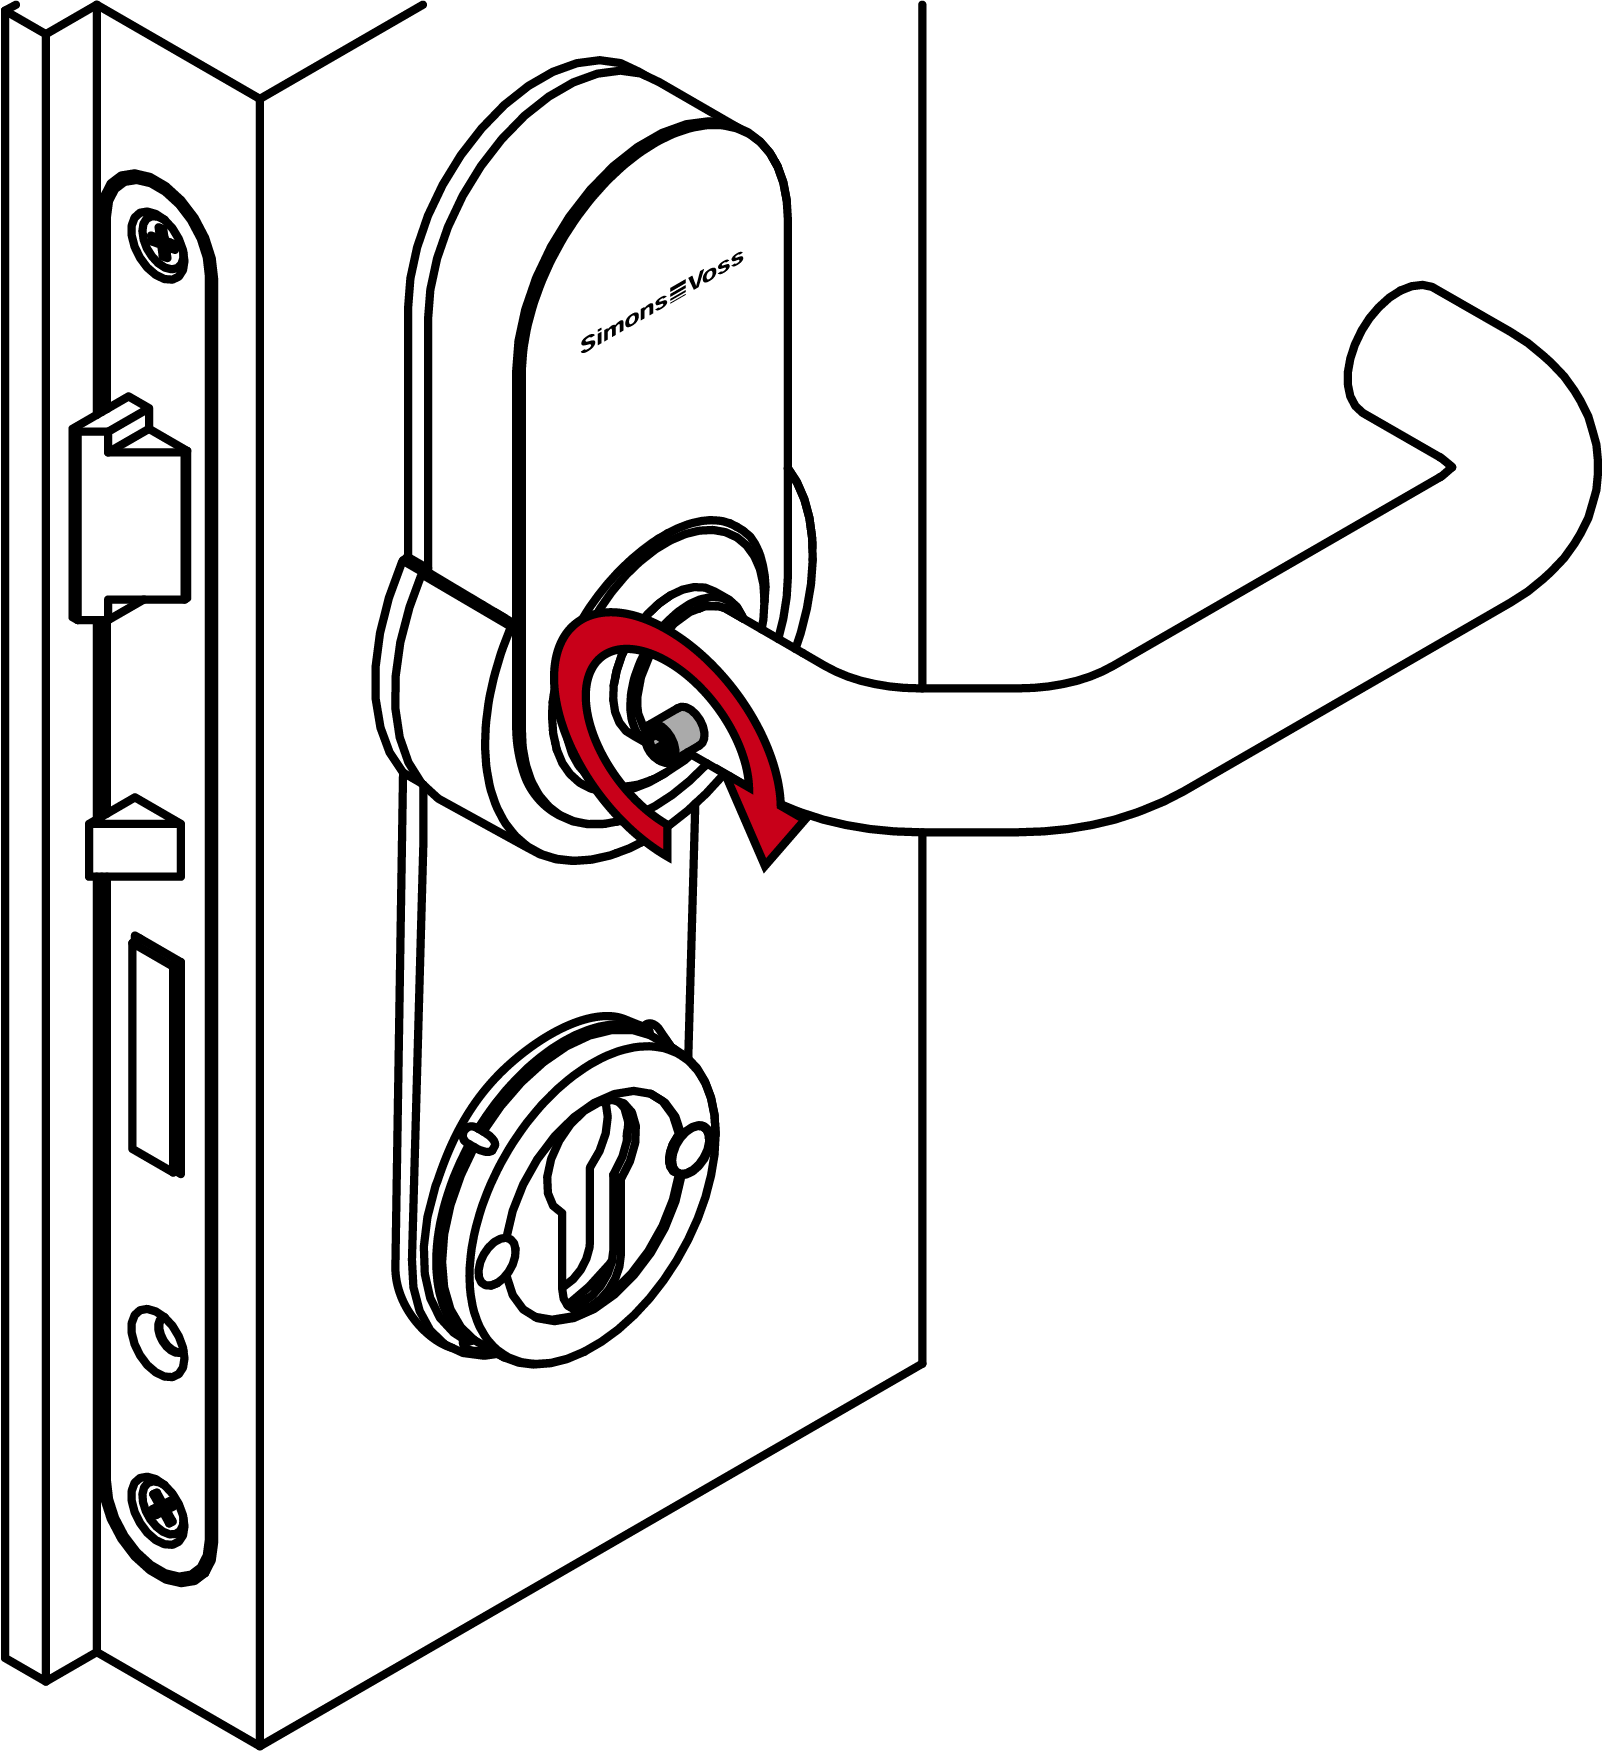
- Firmly fasten the grub screw on the outside handle (TX15; torque: 5.0 Nm).
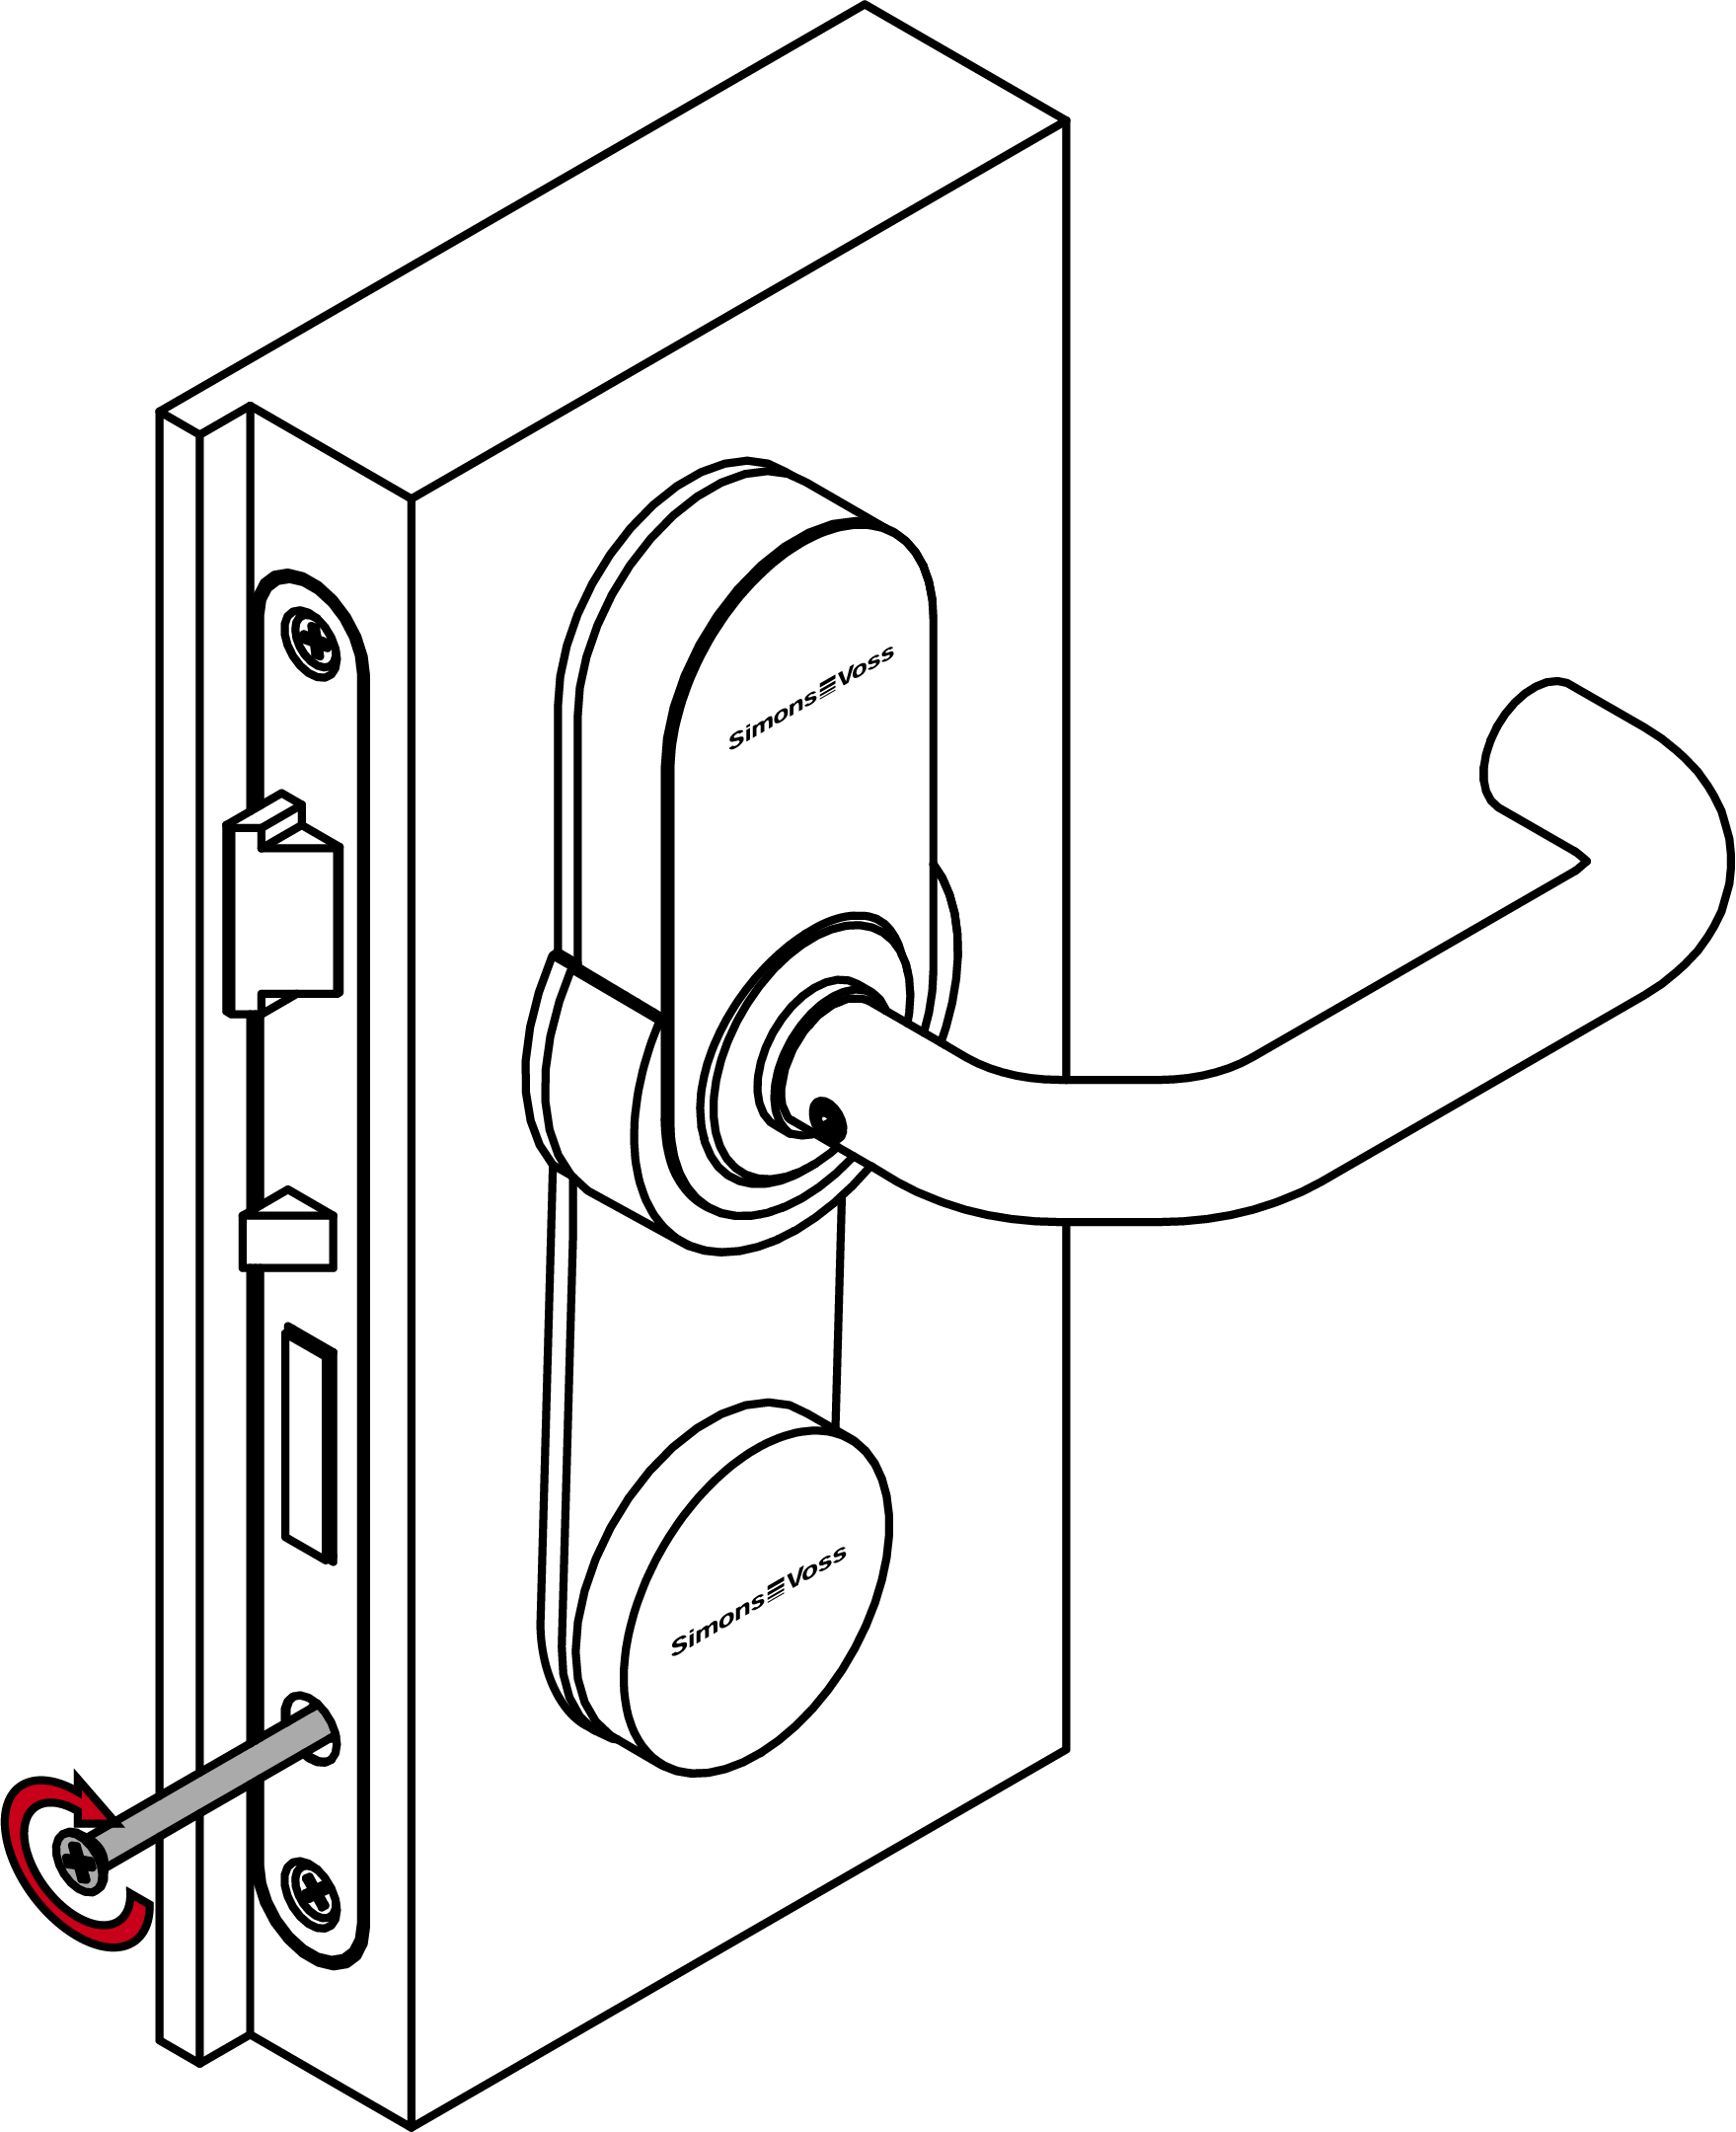
- Screw the dummy cylinder firmly into place (PH2, torque 1.1 Nm).
- Fitting is now installed.