Installing the fitting - Digital SmartHandle AX
- Door pre-drilled.
- PH2 screwdriver at hand.
- TX15 screwdriver at hand.
- Vernier calliper at hand.
- Pincers at hand.
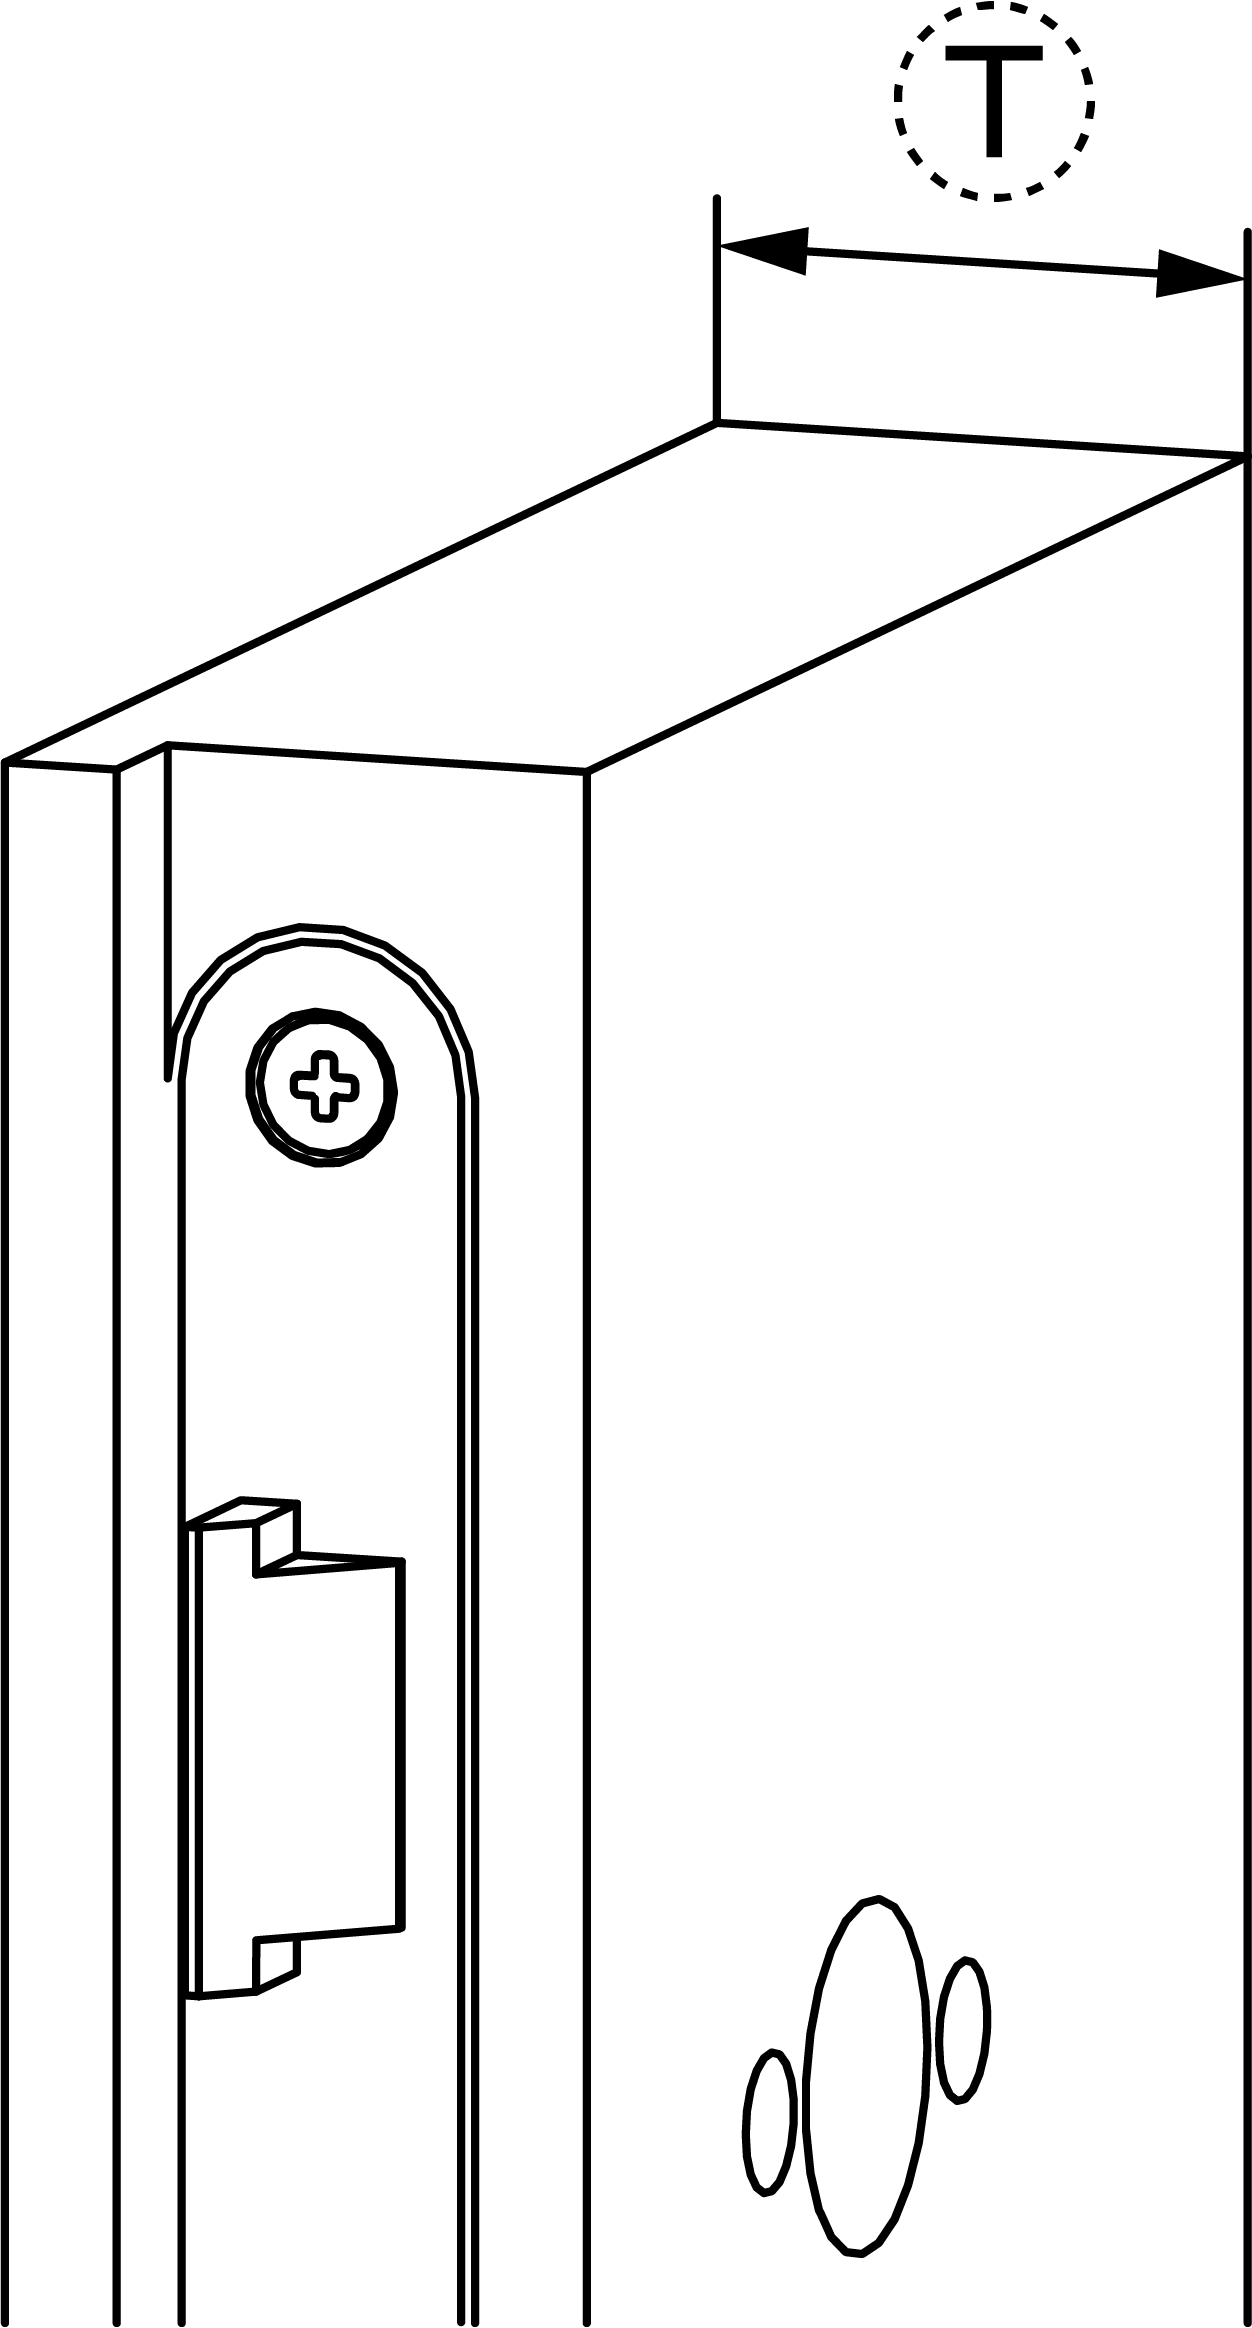
- For S, M and L: measure the door thickness.
- For S, M and L: determine the separation points on the cut-to-length screws L1 and L2.
- For S, M and L: trim the cut-to-length screws L1 and L2.

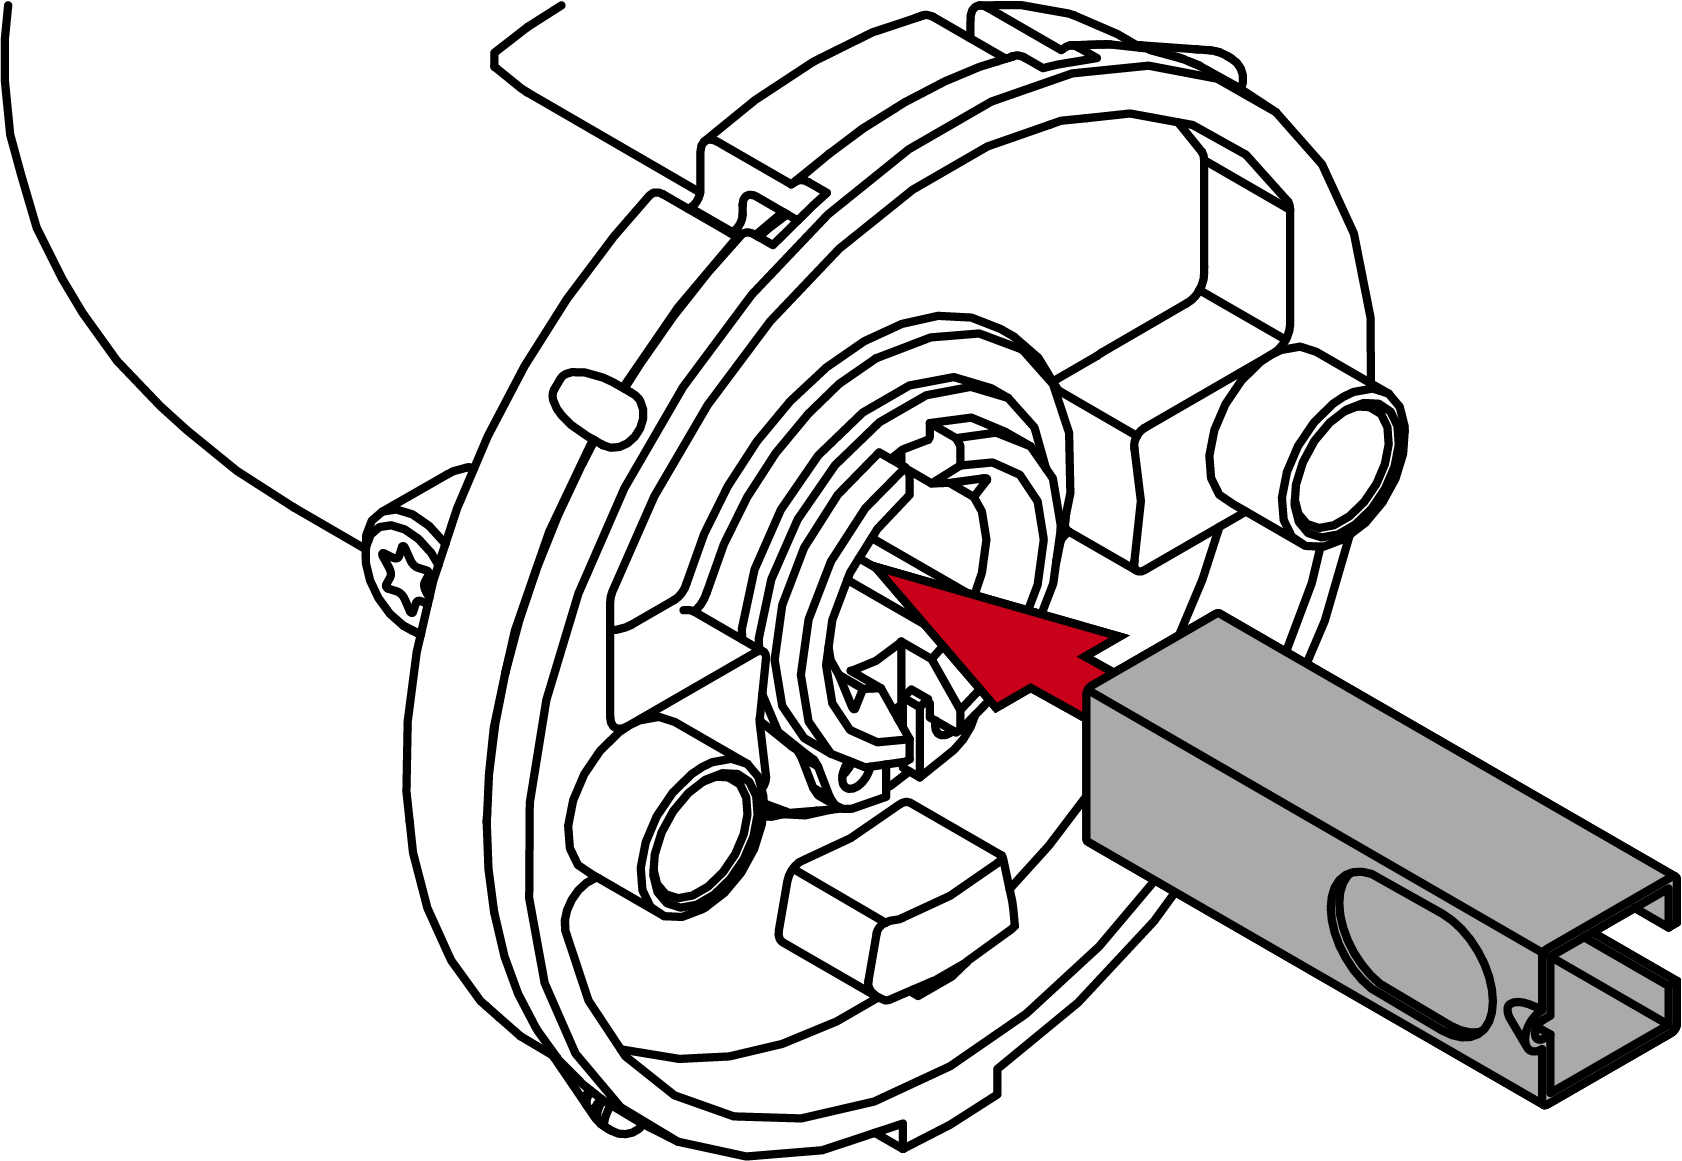
- For 7 mm spindle: place the adapter sleeve in the inner handle in such a way that the recess faces the grub screw.
- Determine your inner handle’s direction rotation as viewed from the inside: clockwise (clockwise = CW) or anti-clockwise (counter-clockwise = CCW).
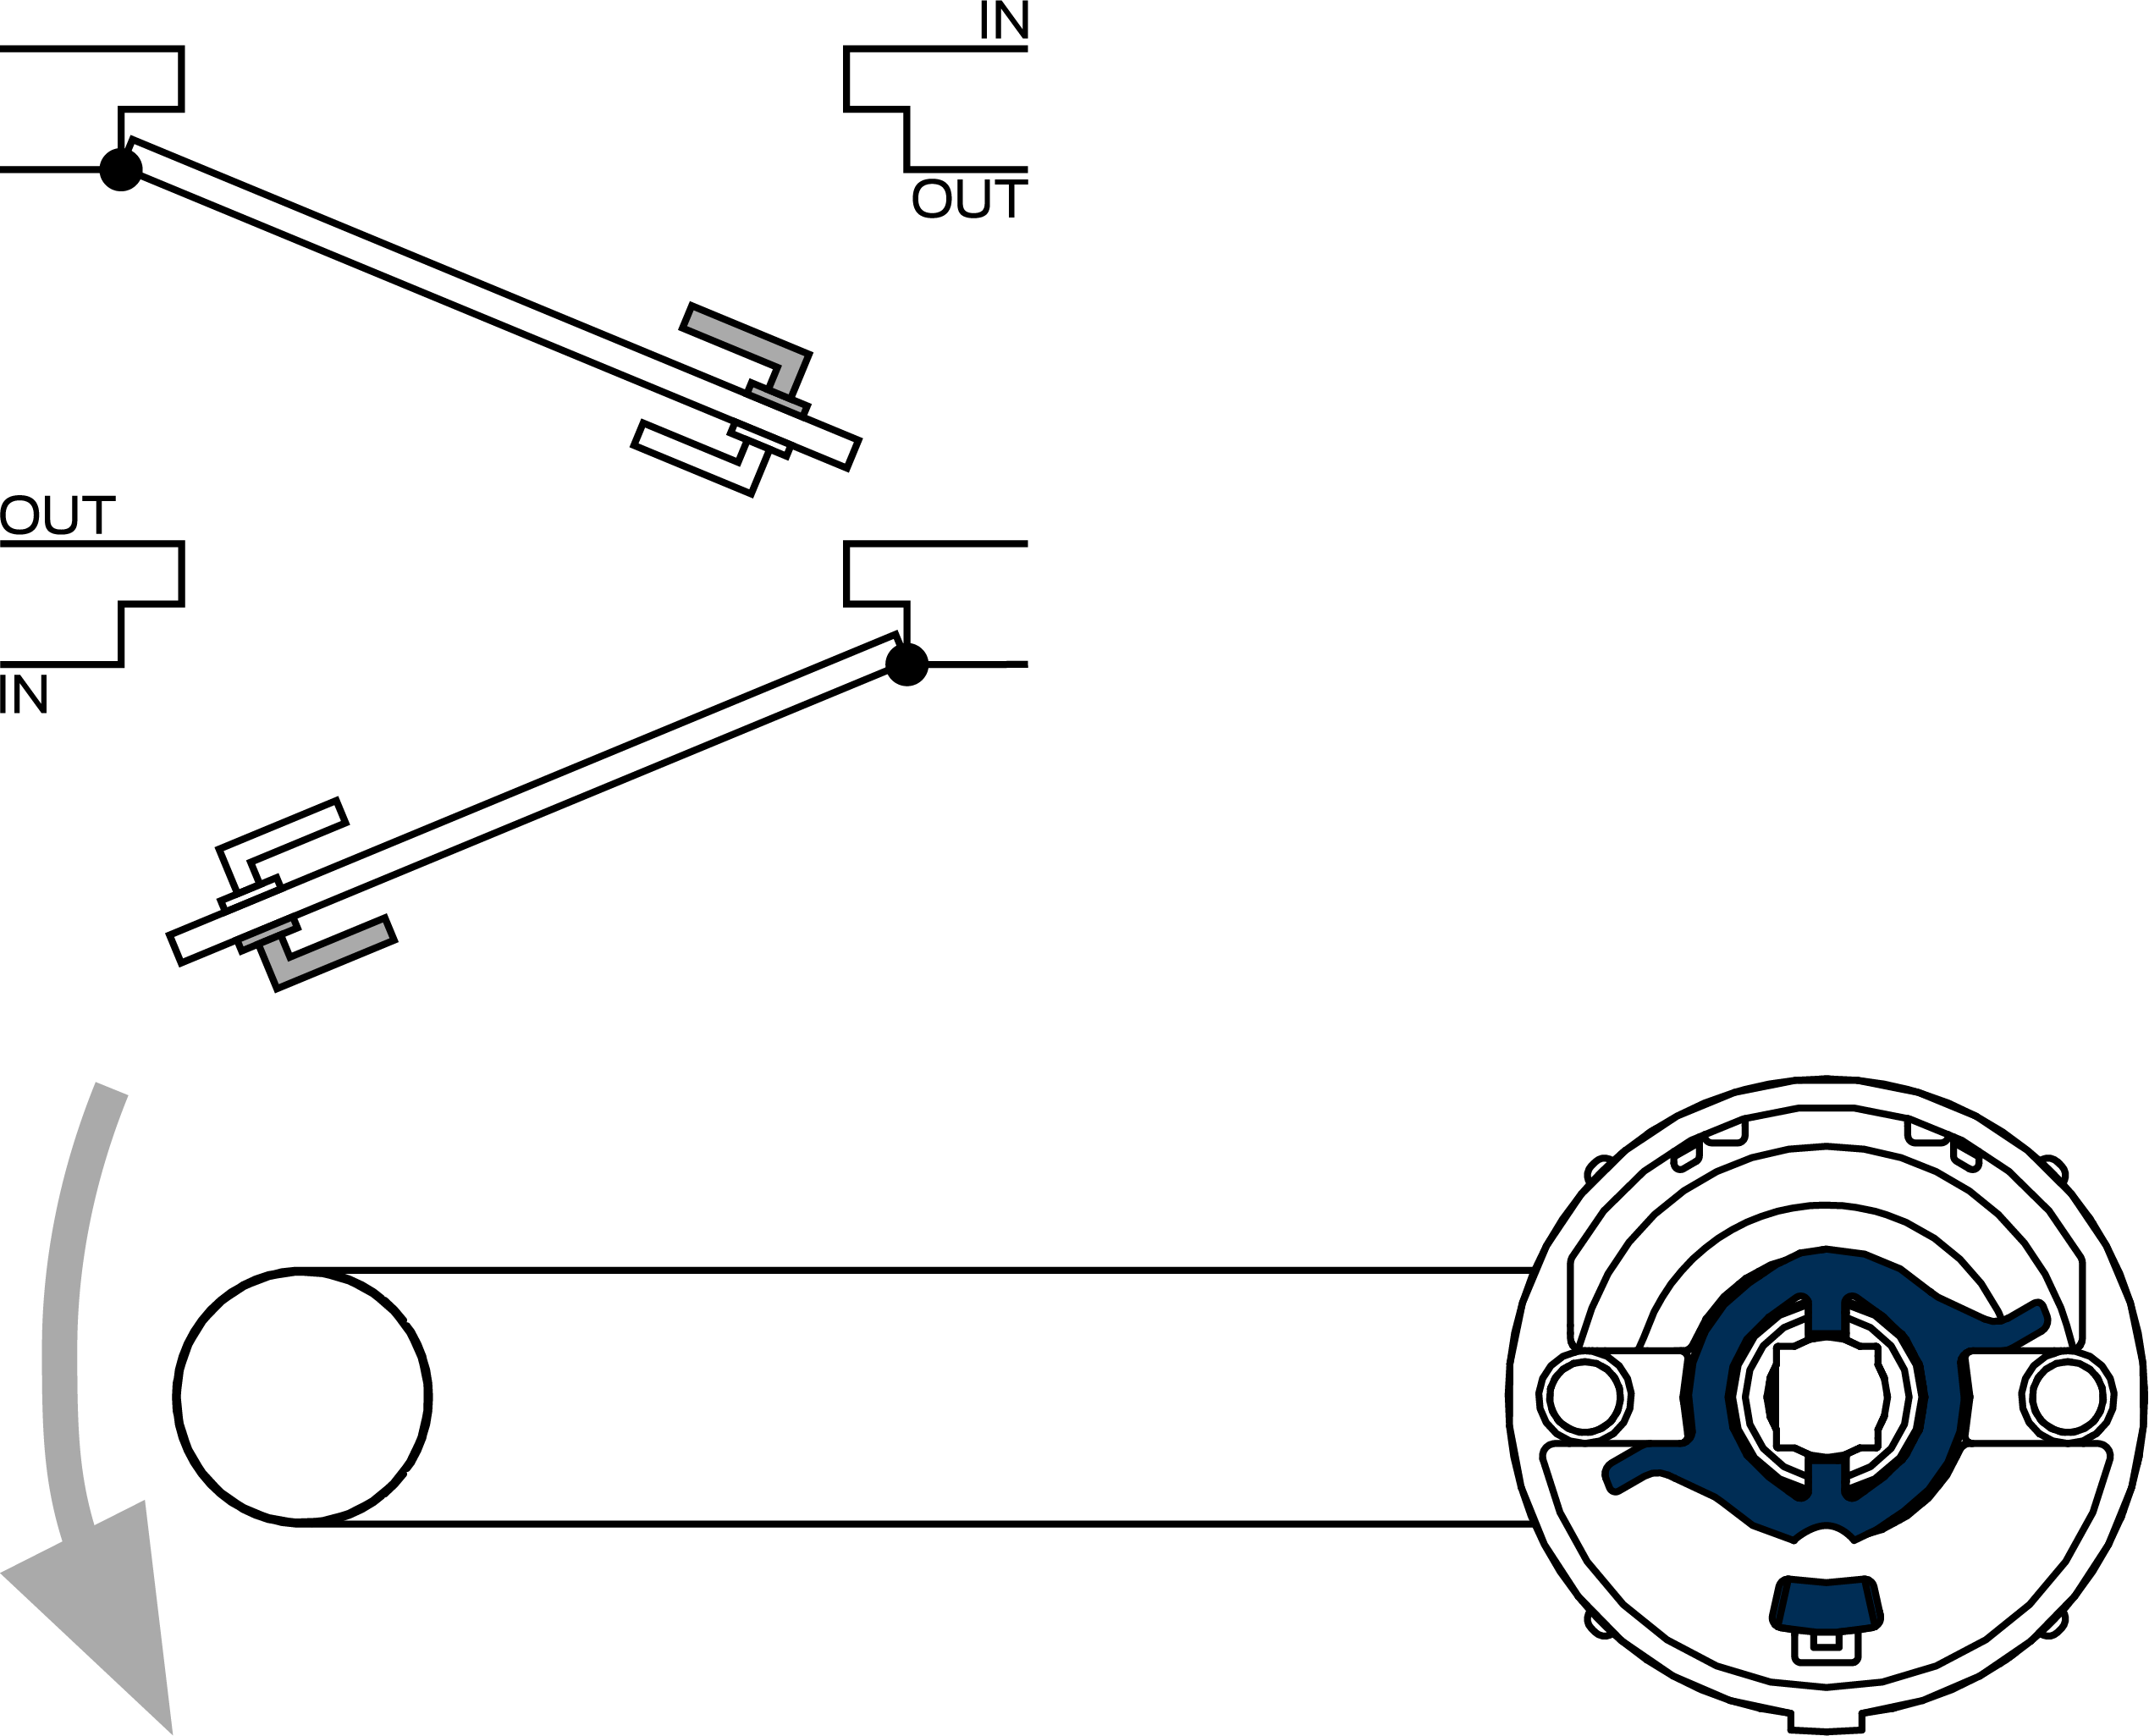
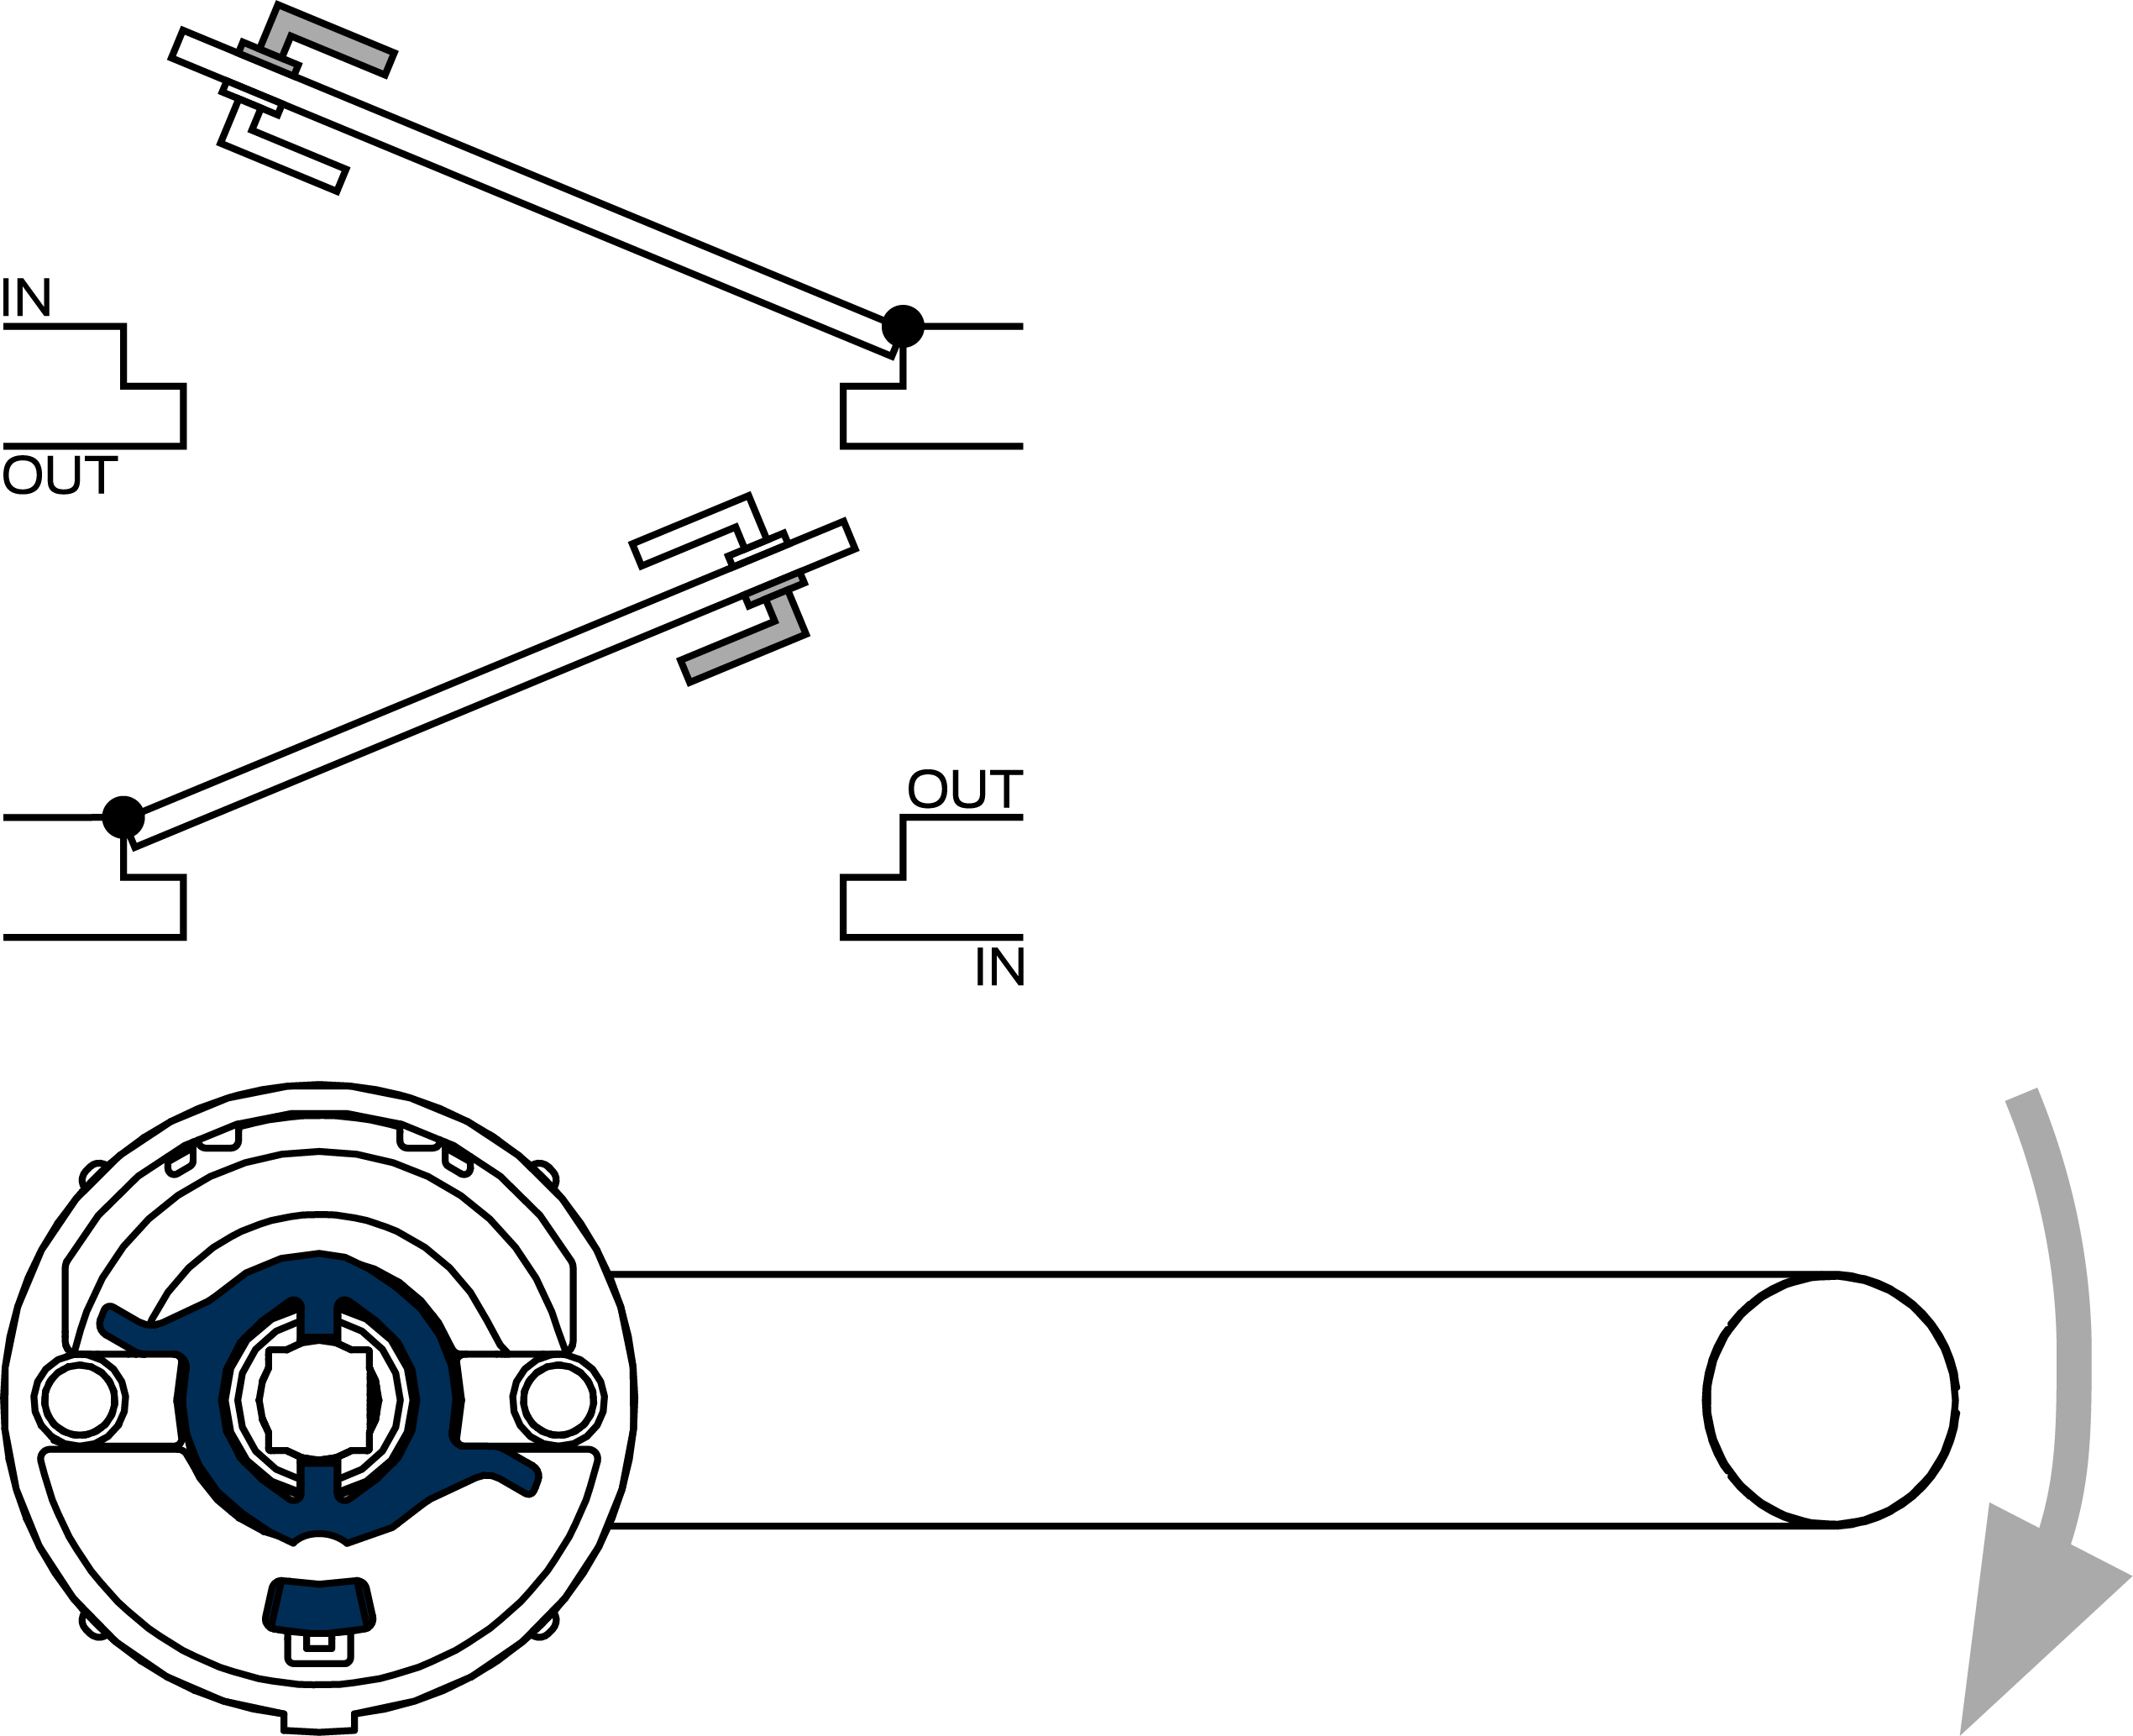
- Insert the interchangeable plate into the inner handle as required.


- Press the spring plate on one side against the interchangeable plate so that the spring is compressed.
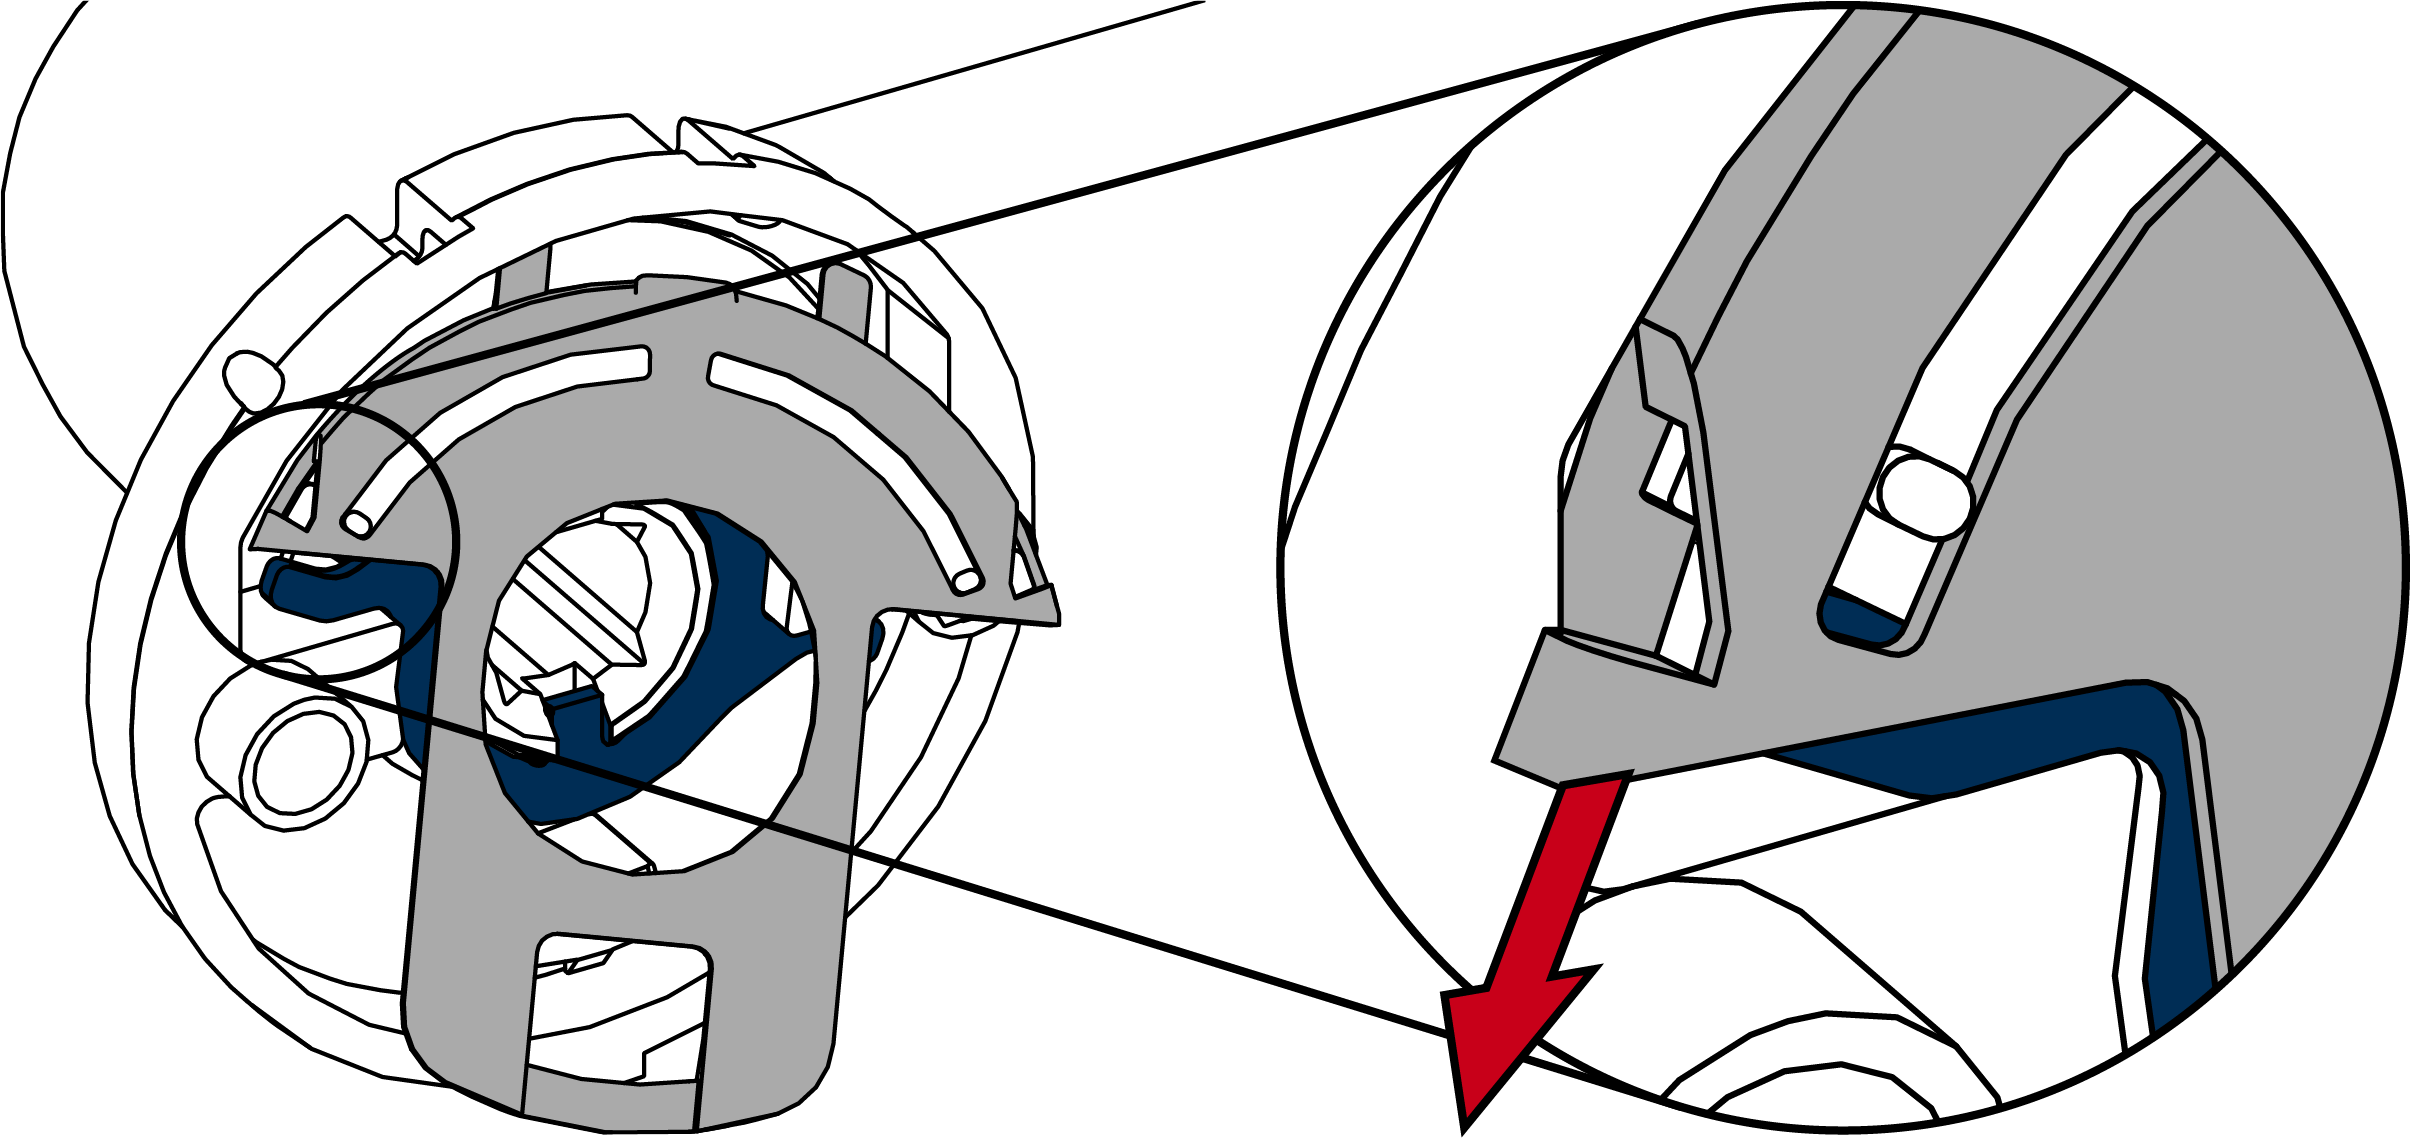
- At the same time, hook the spring plate tabs into the slot in the inner handle.
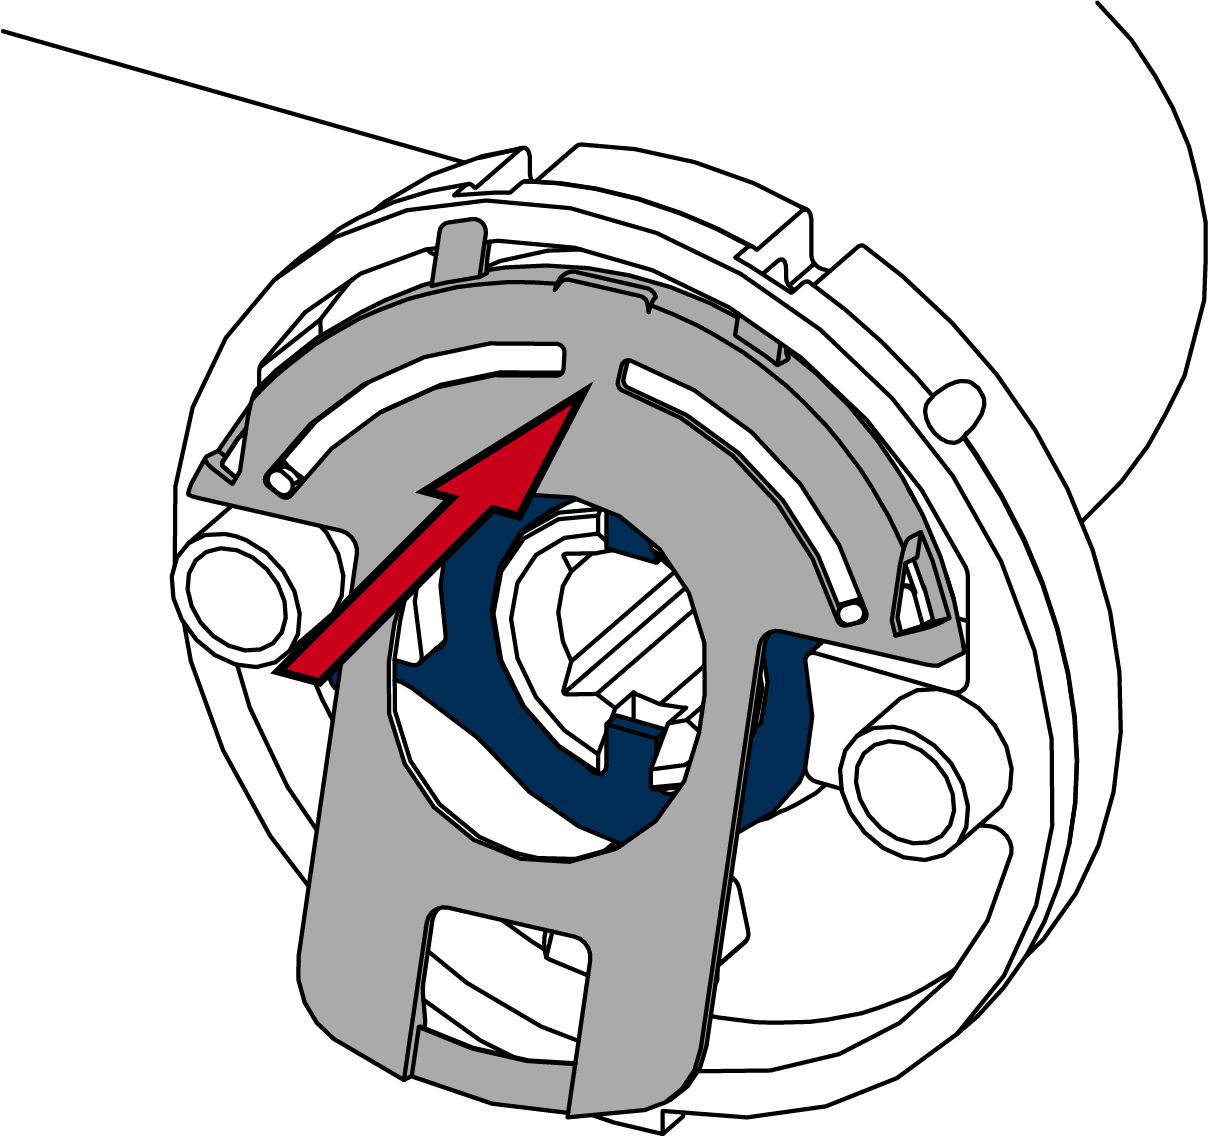
- Press down the spring plate bracket.
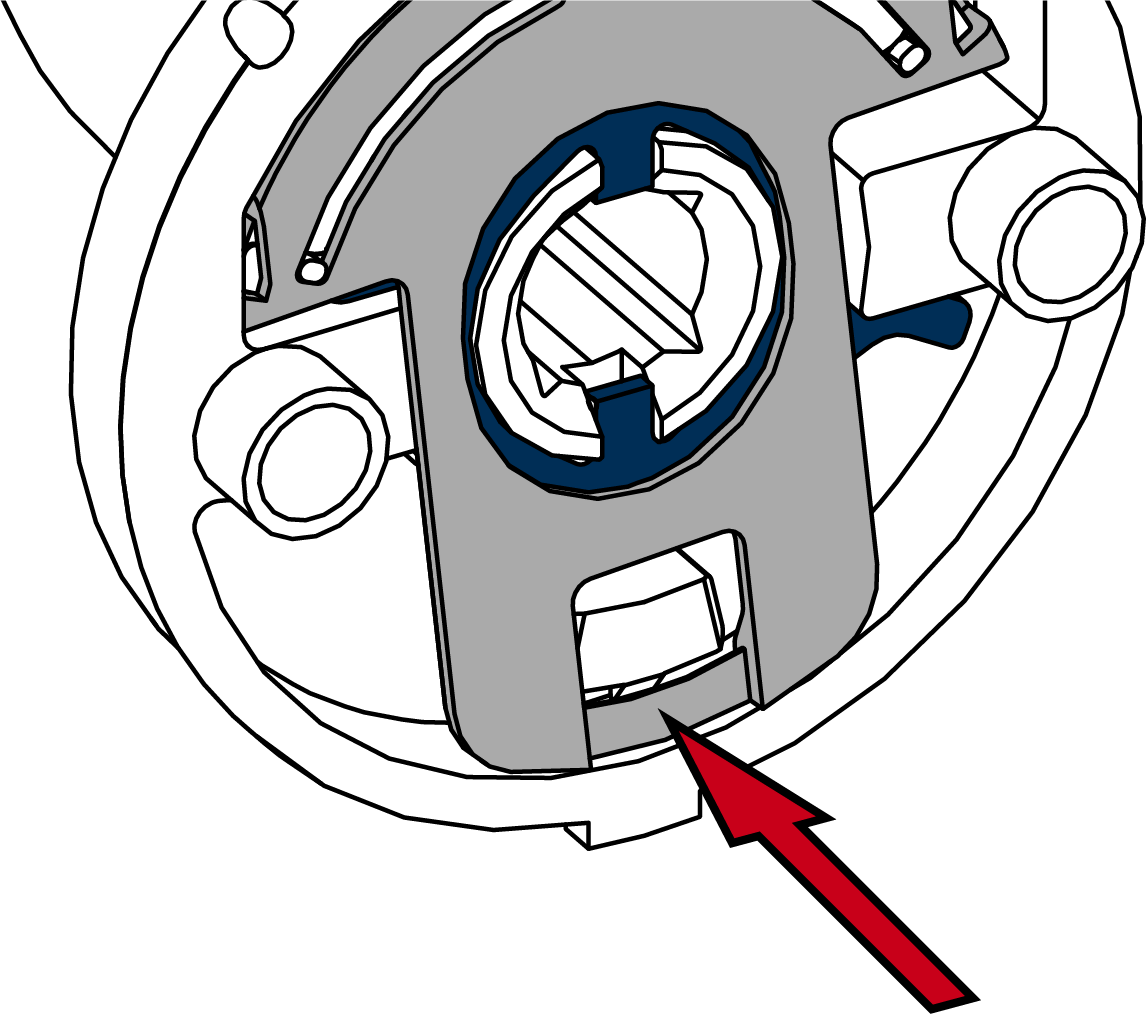
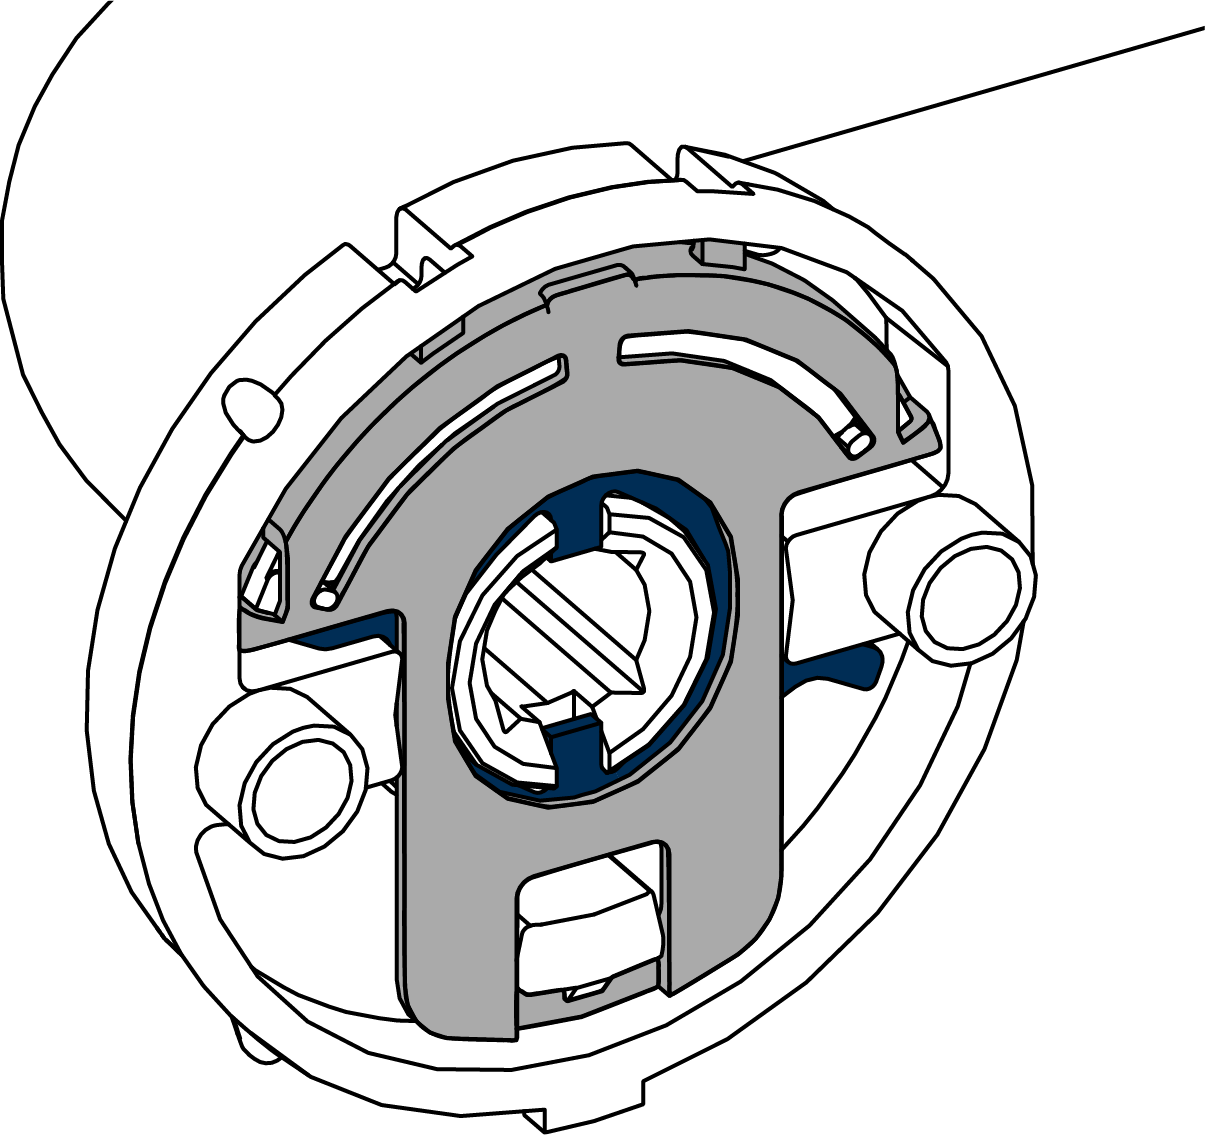
- The inner handle is now ready.
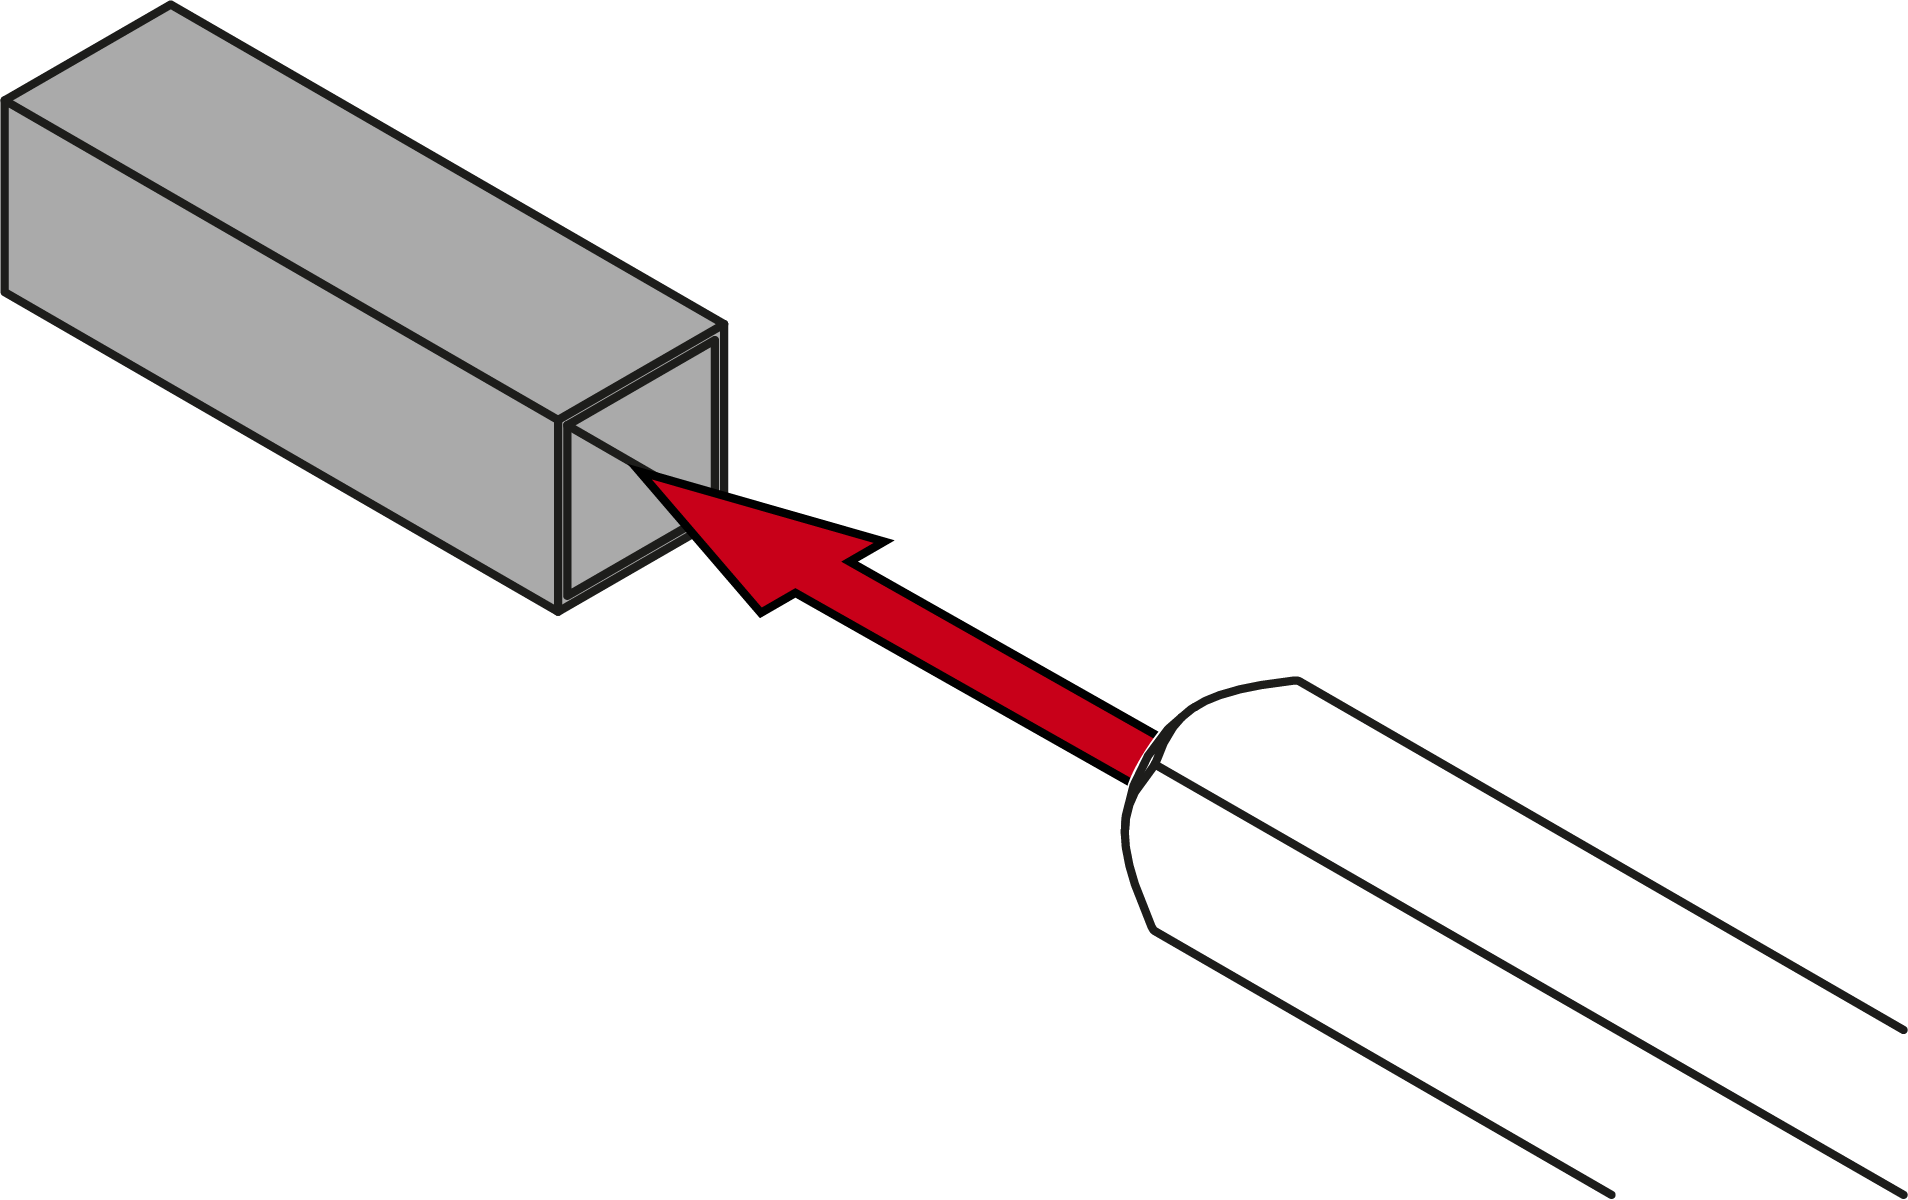
- For 7 mm spindle: insert the adapter sleeve onto the side of the spindle with the pin.
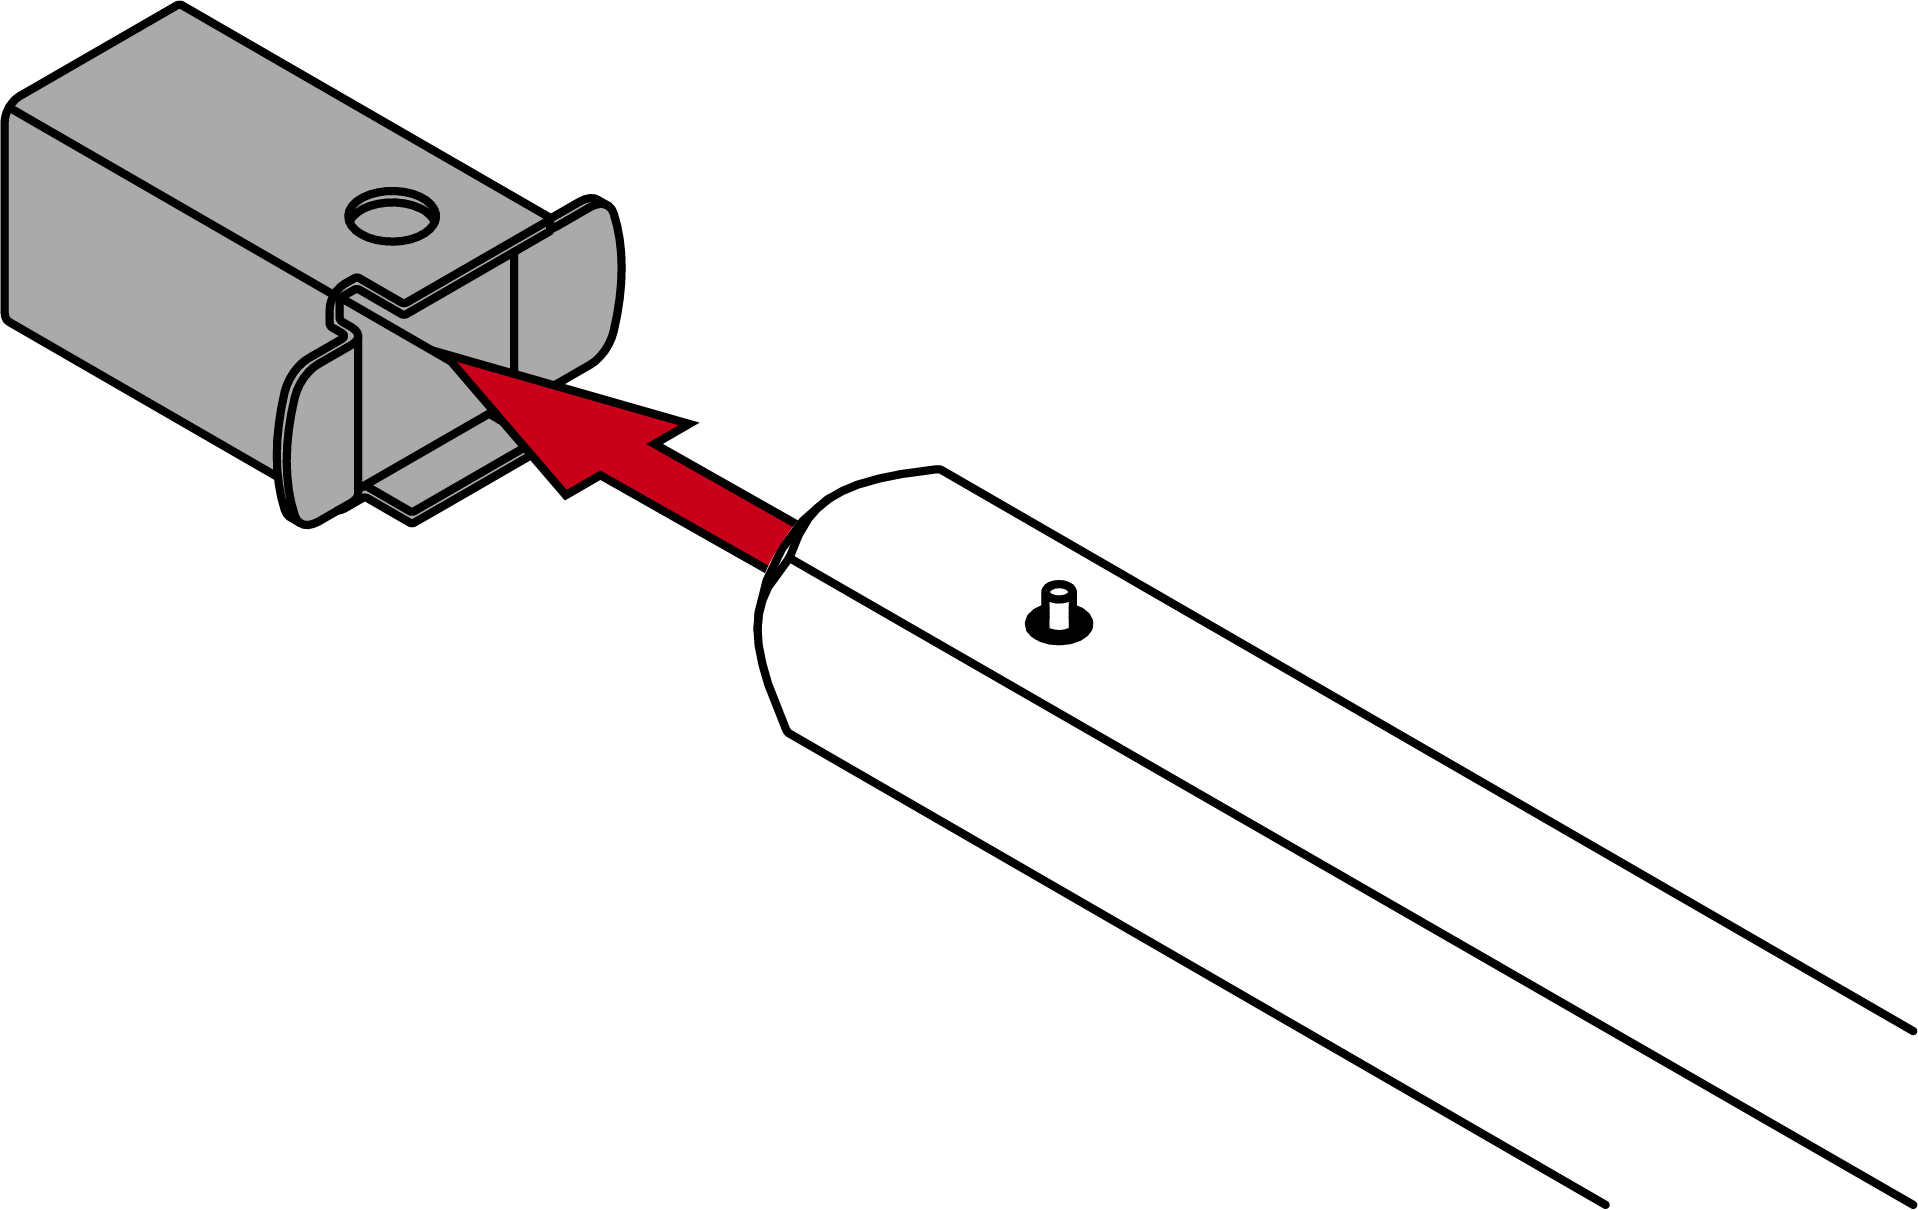
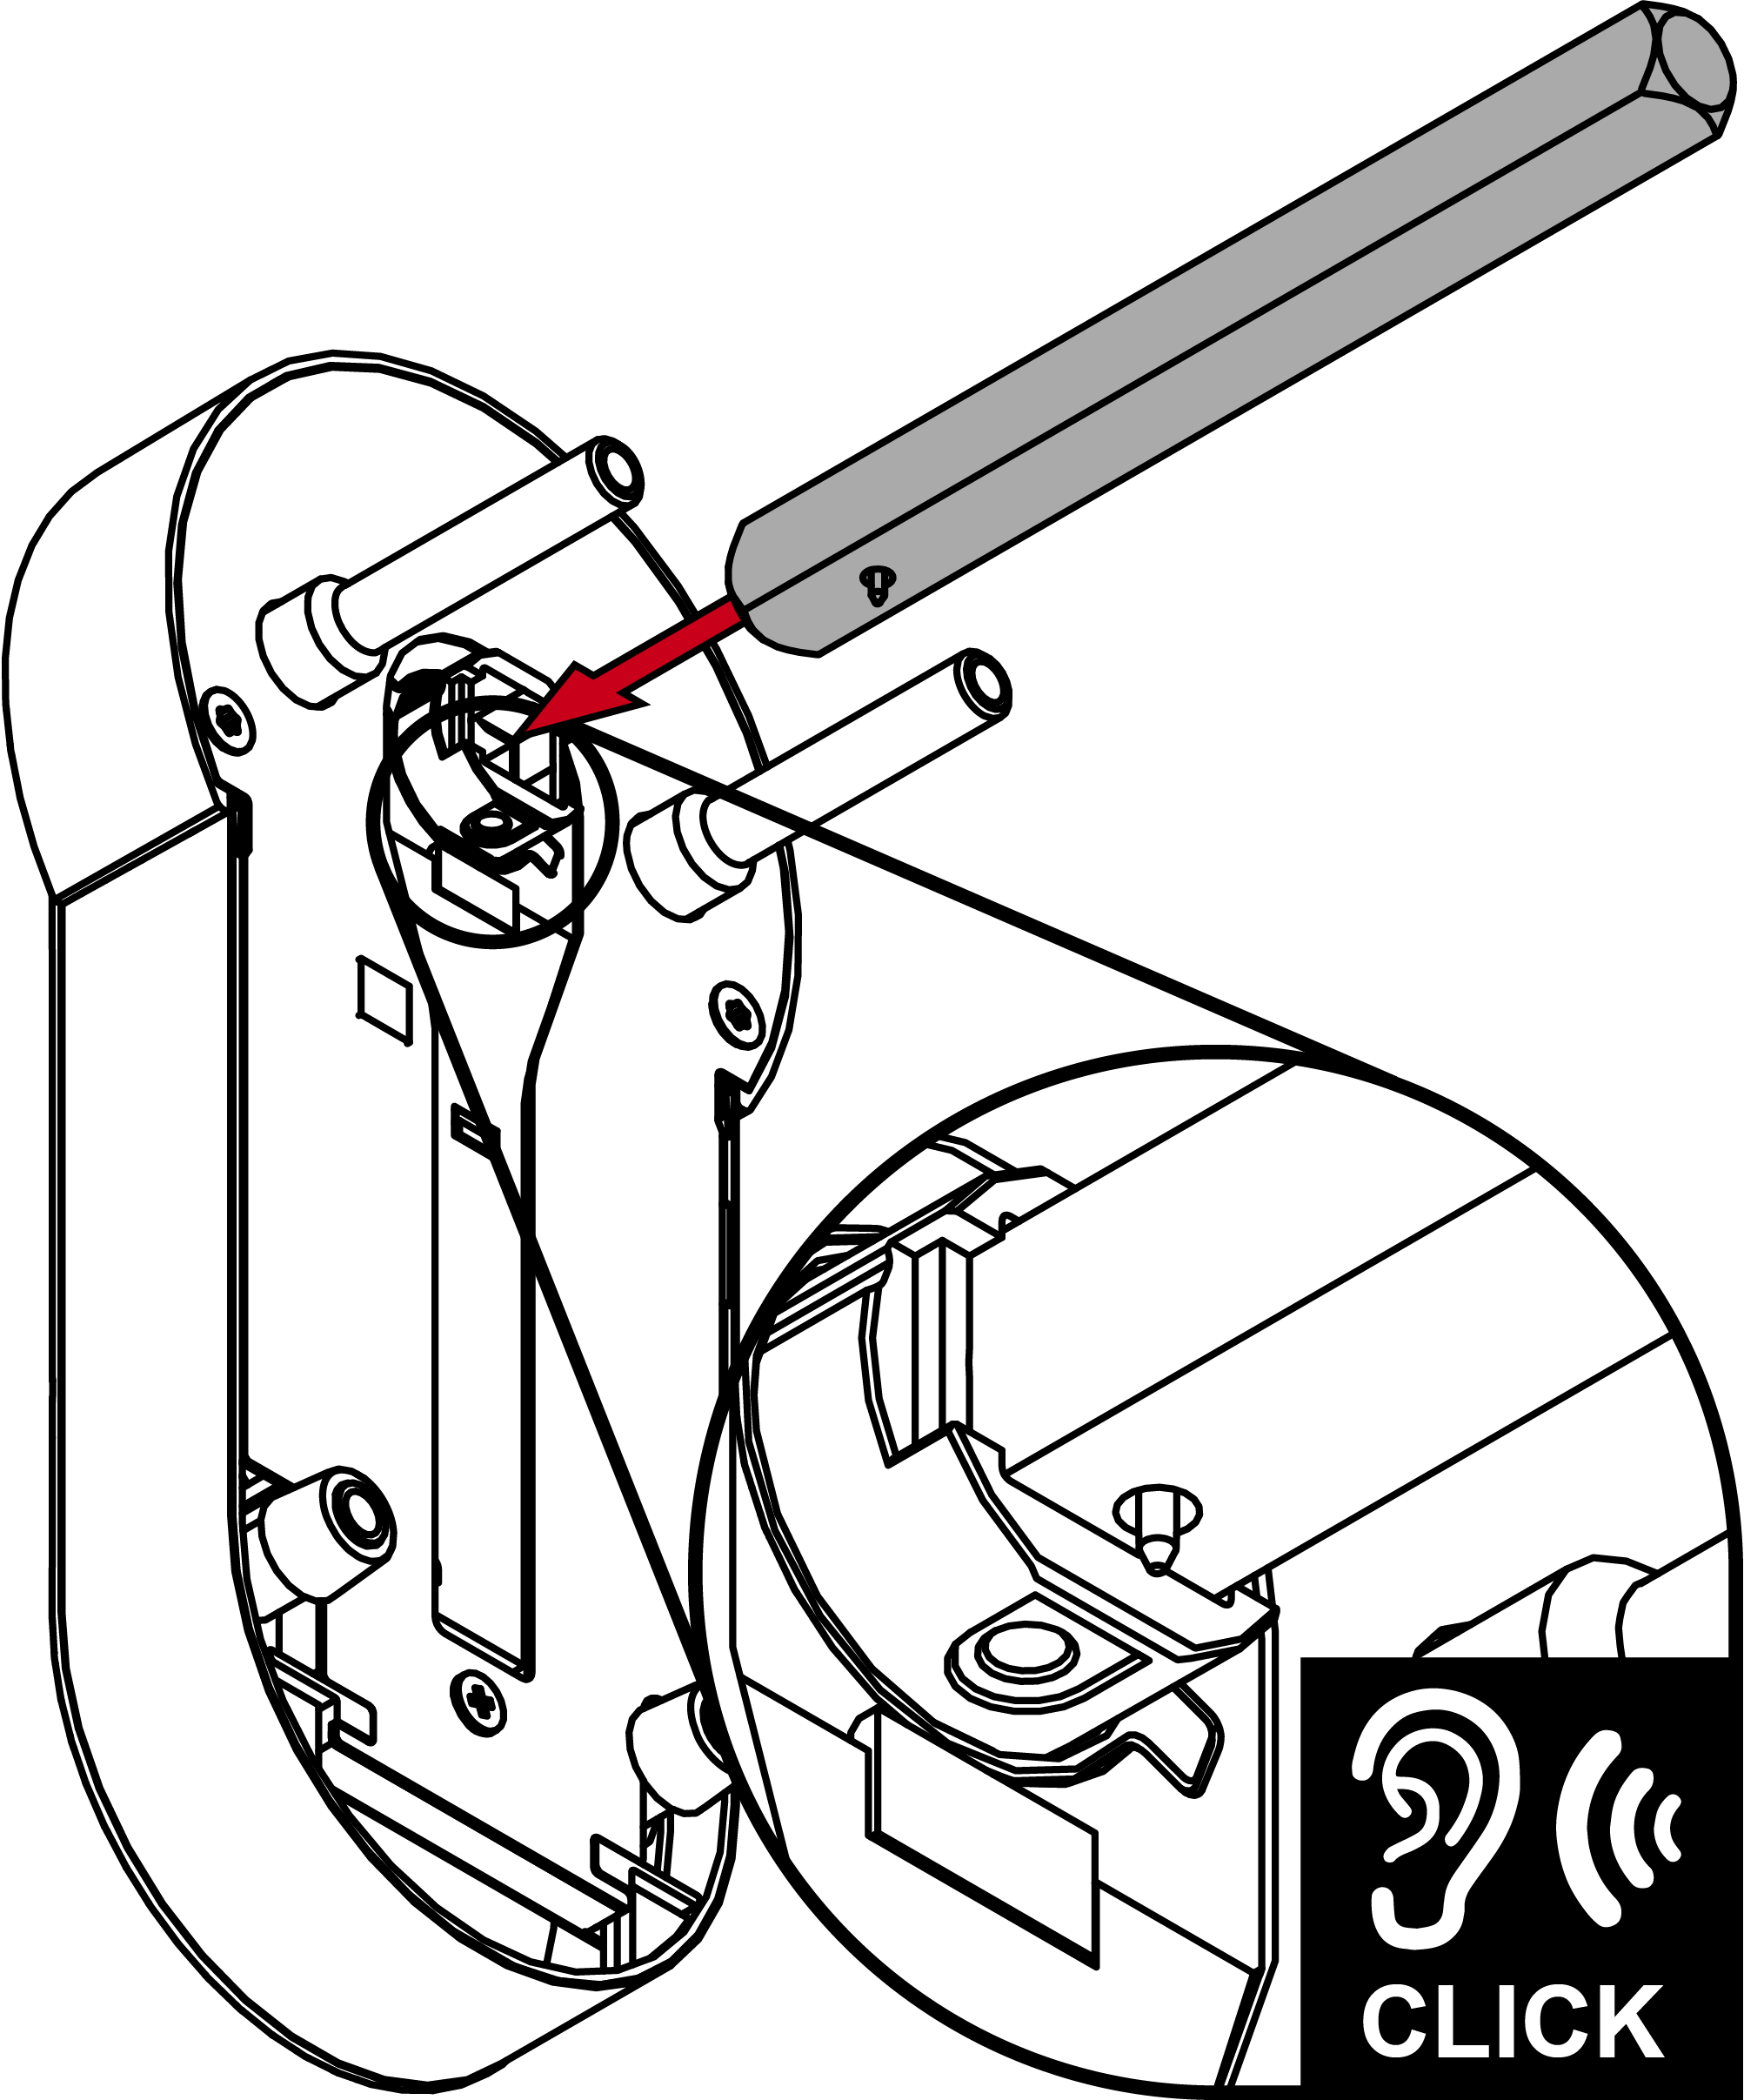
- Insert the spindle with the pin side into the fitting.
- Pin will snap into position in the mount.

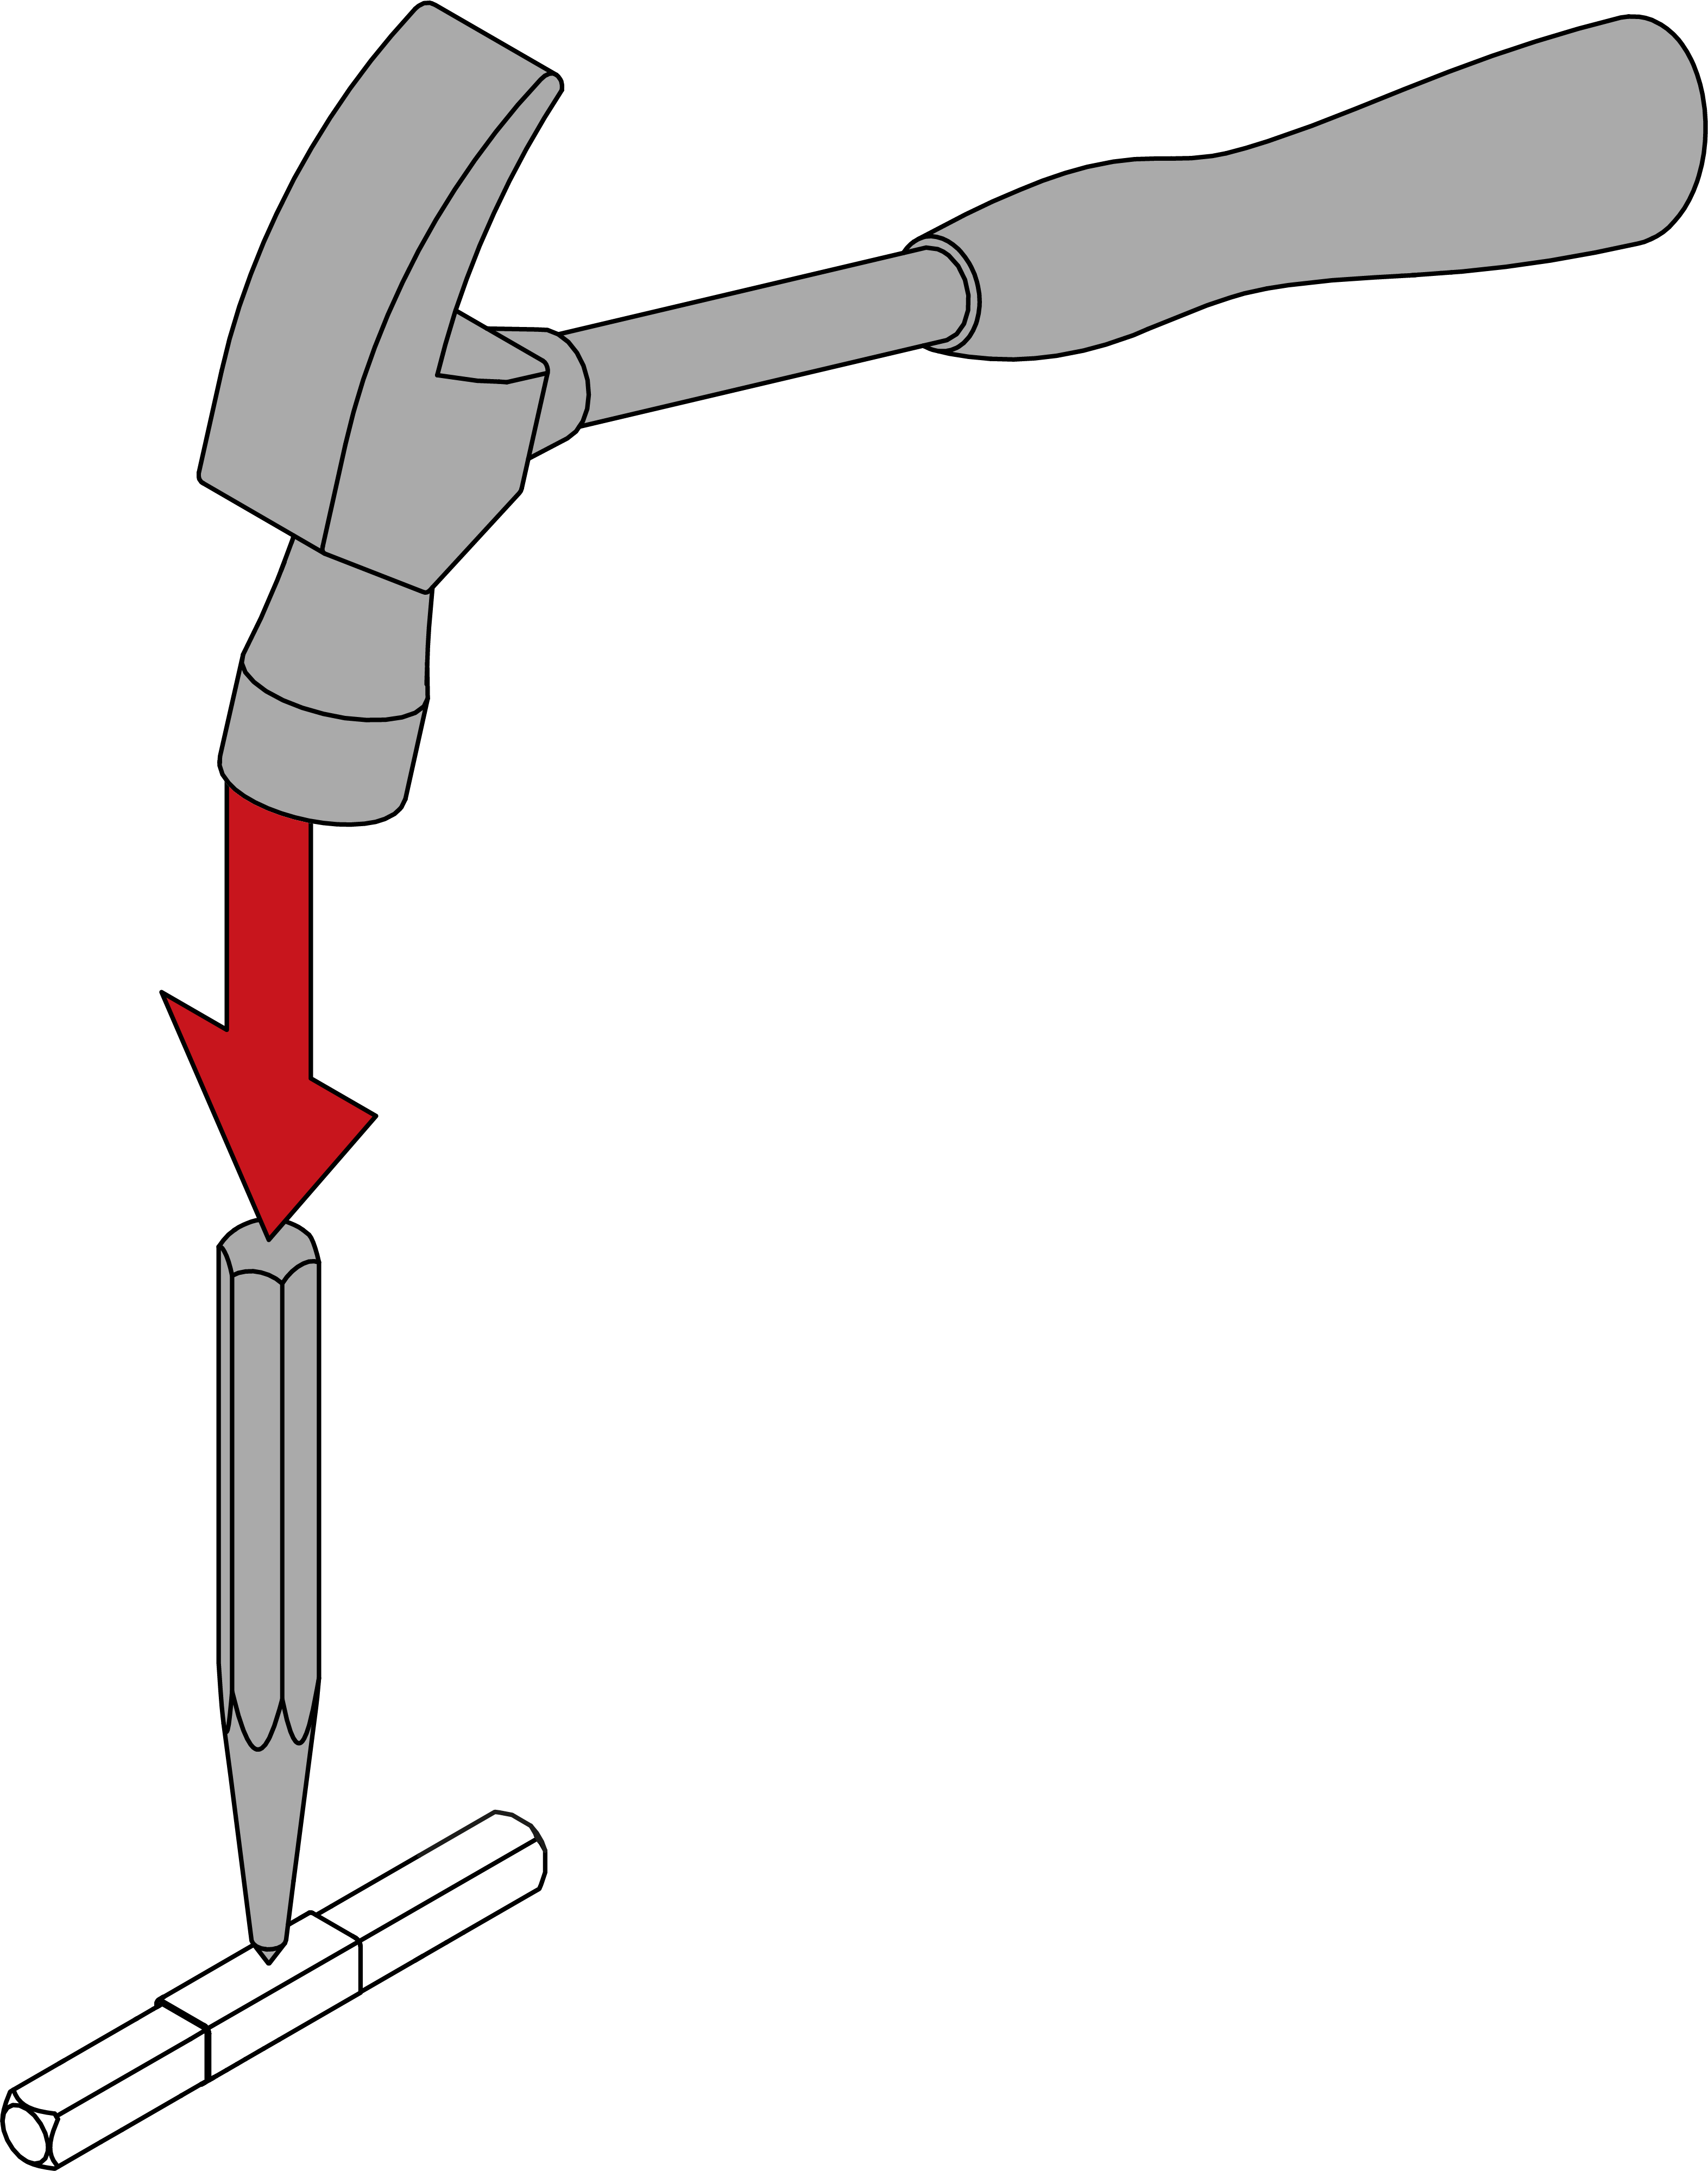
- For 8.5 mm and 10 mm spindle: slide the adapter sleeve into the centre of the spindle. Use a punch and hammer to make an indent in the adapter sleeve to prevent it from slipping.
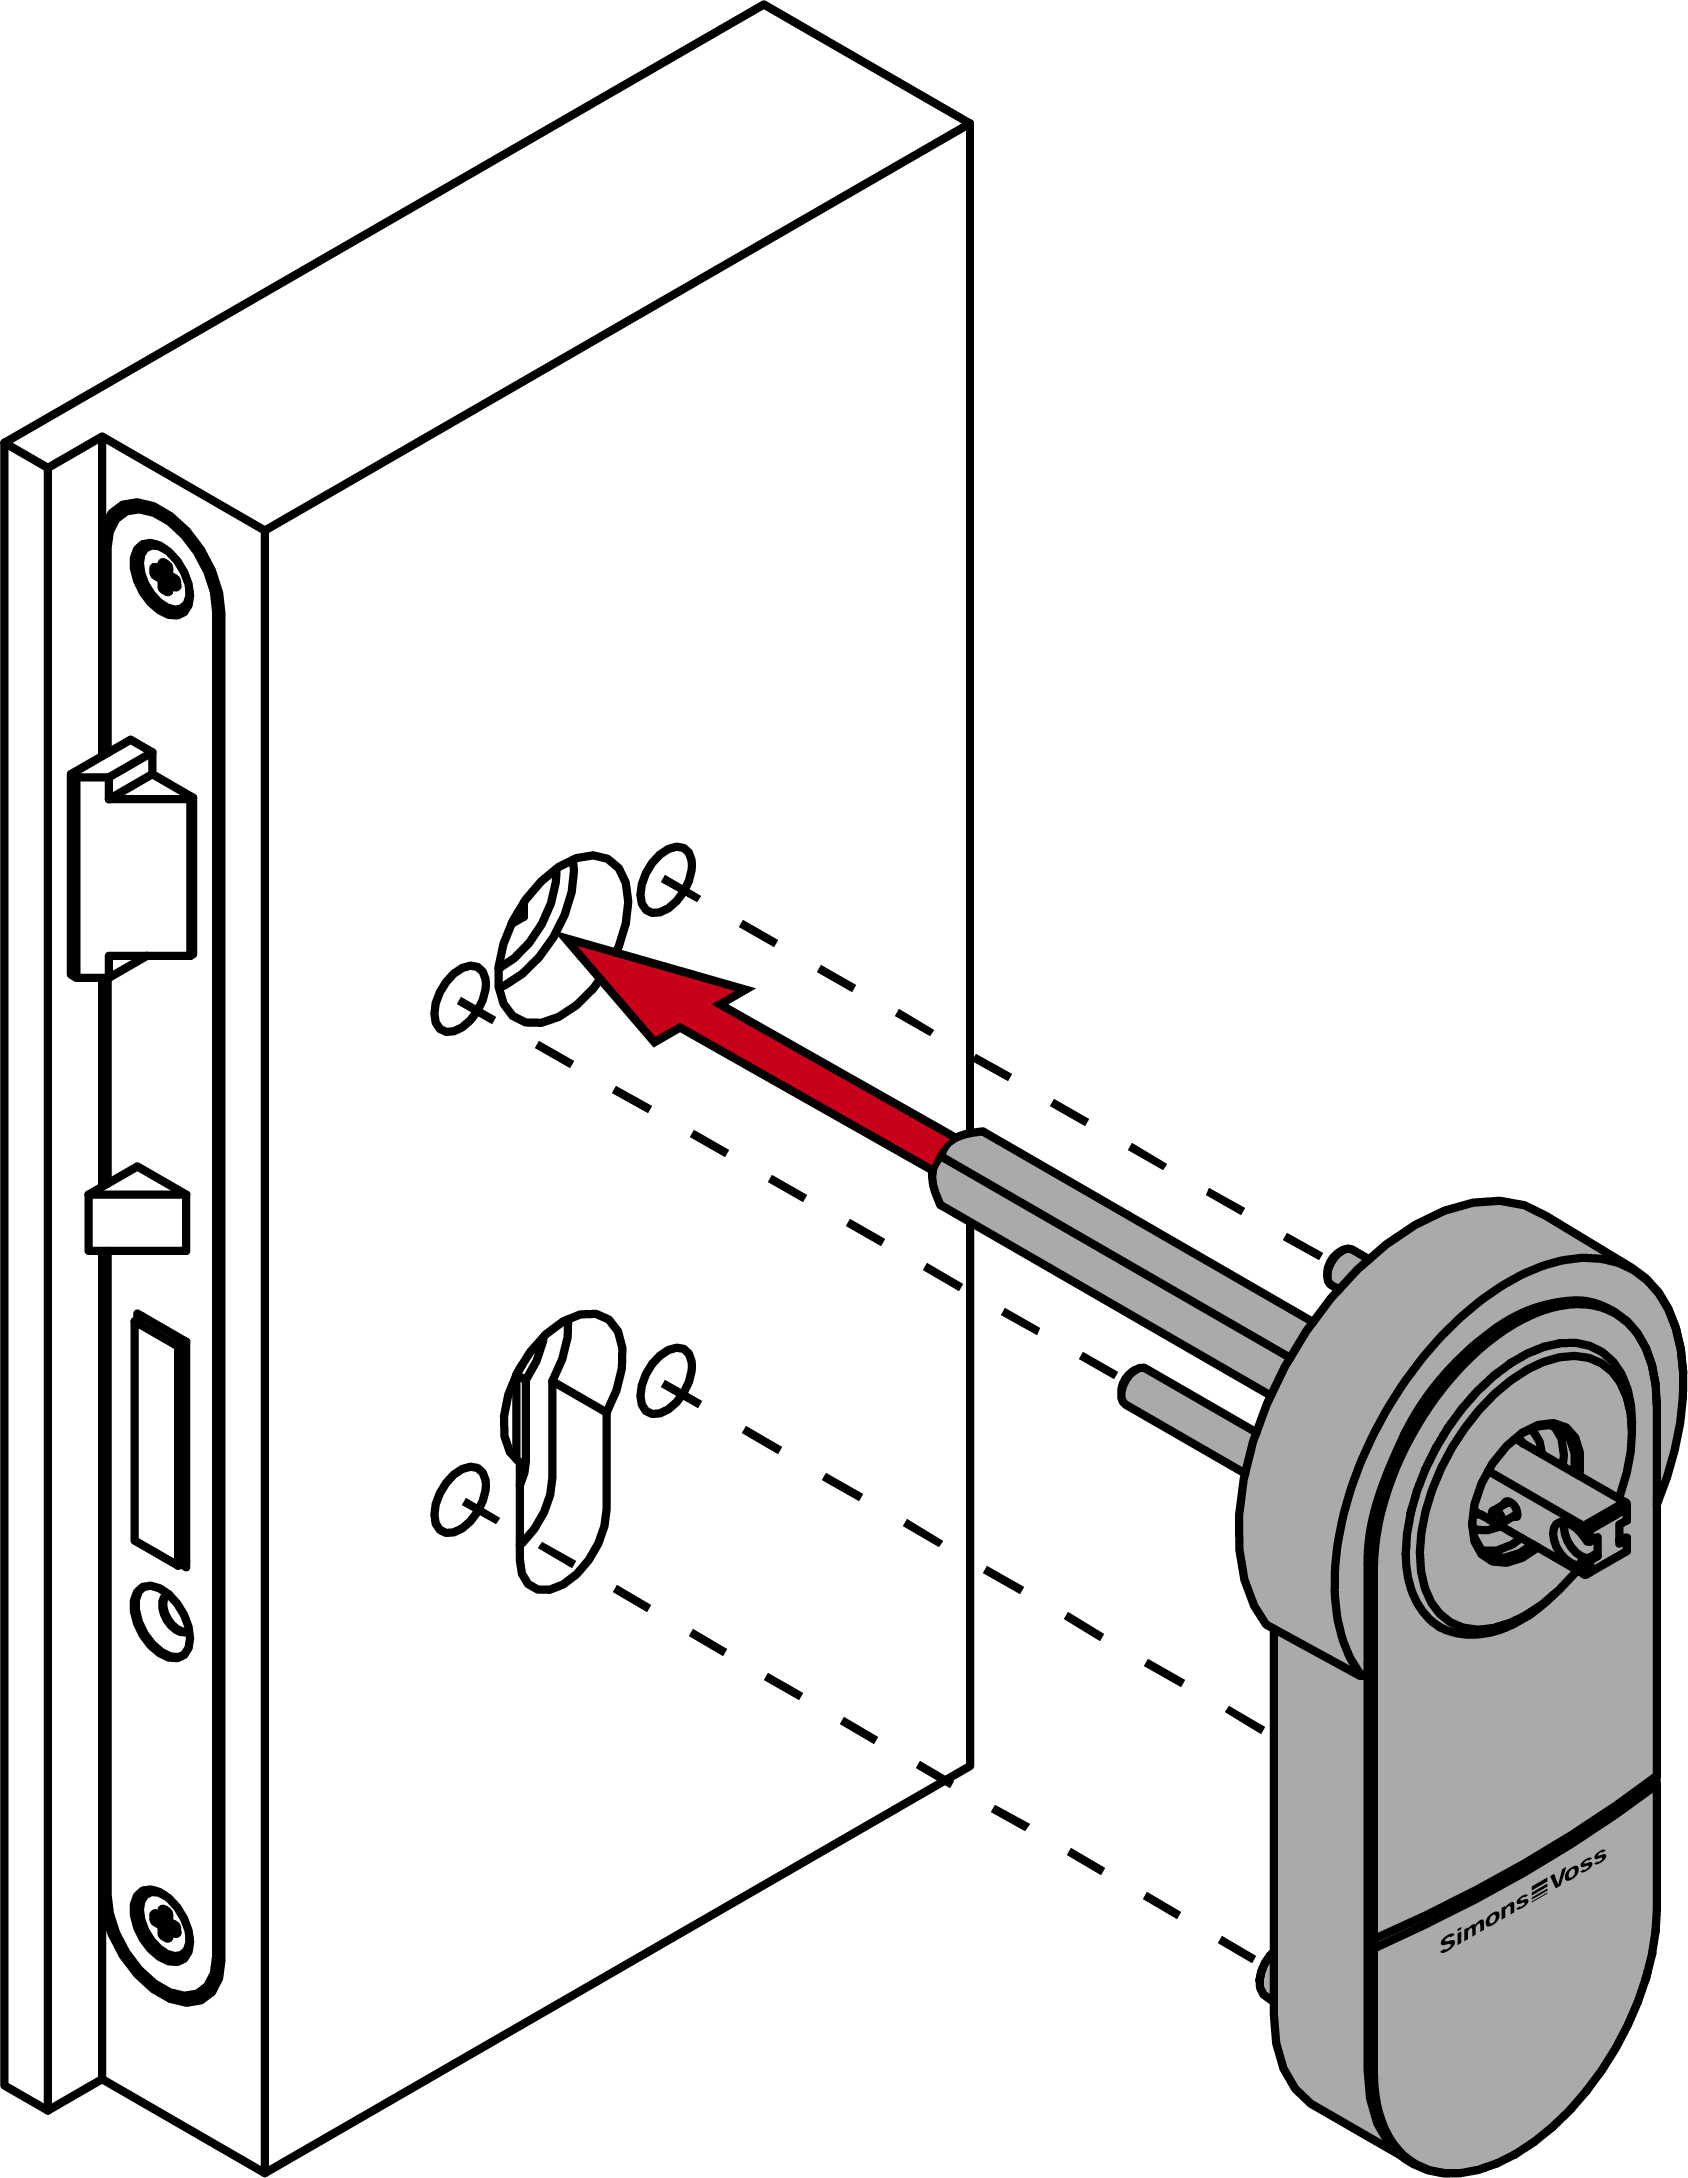
- Insert the fitting with the spindle into the door.
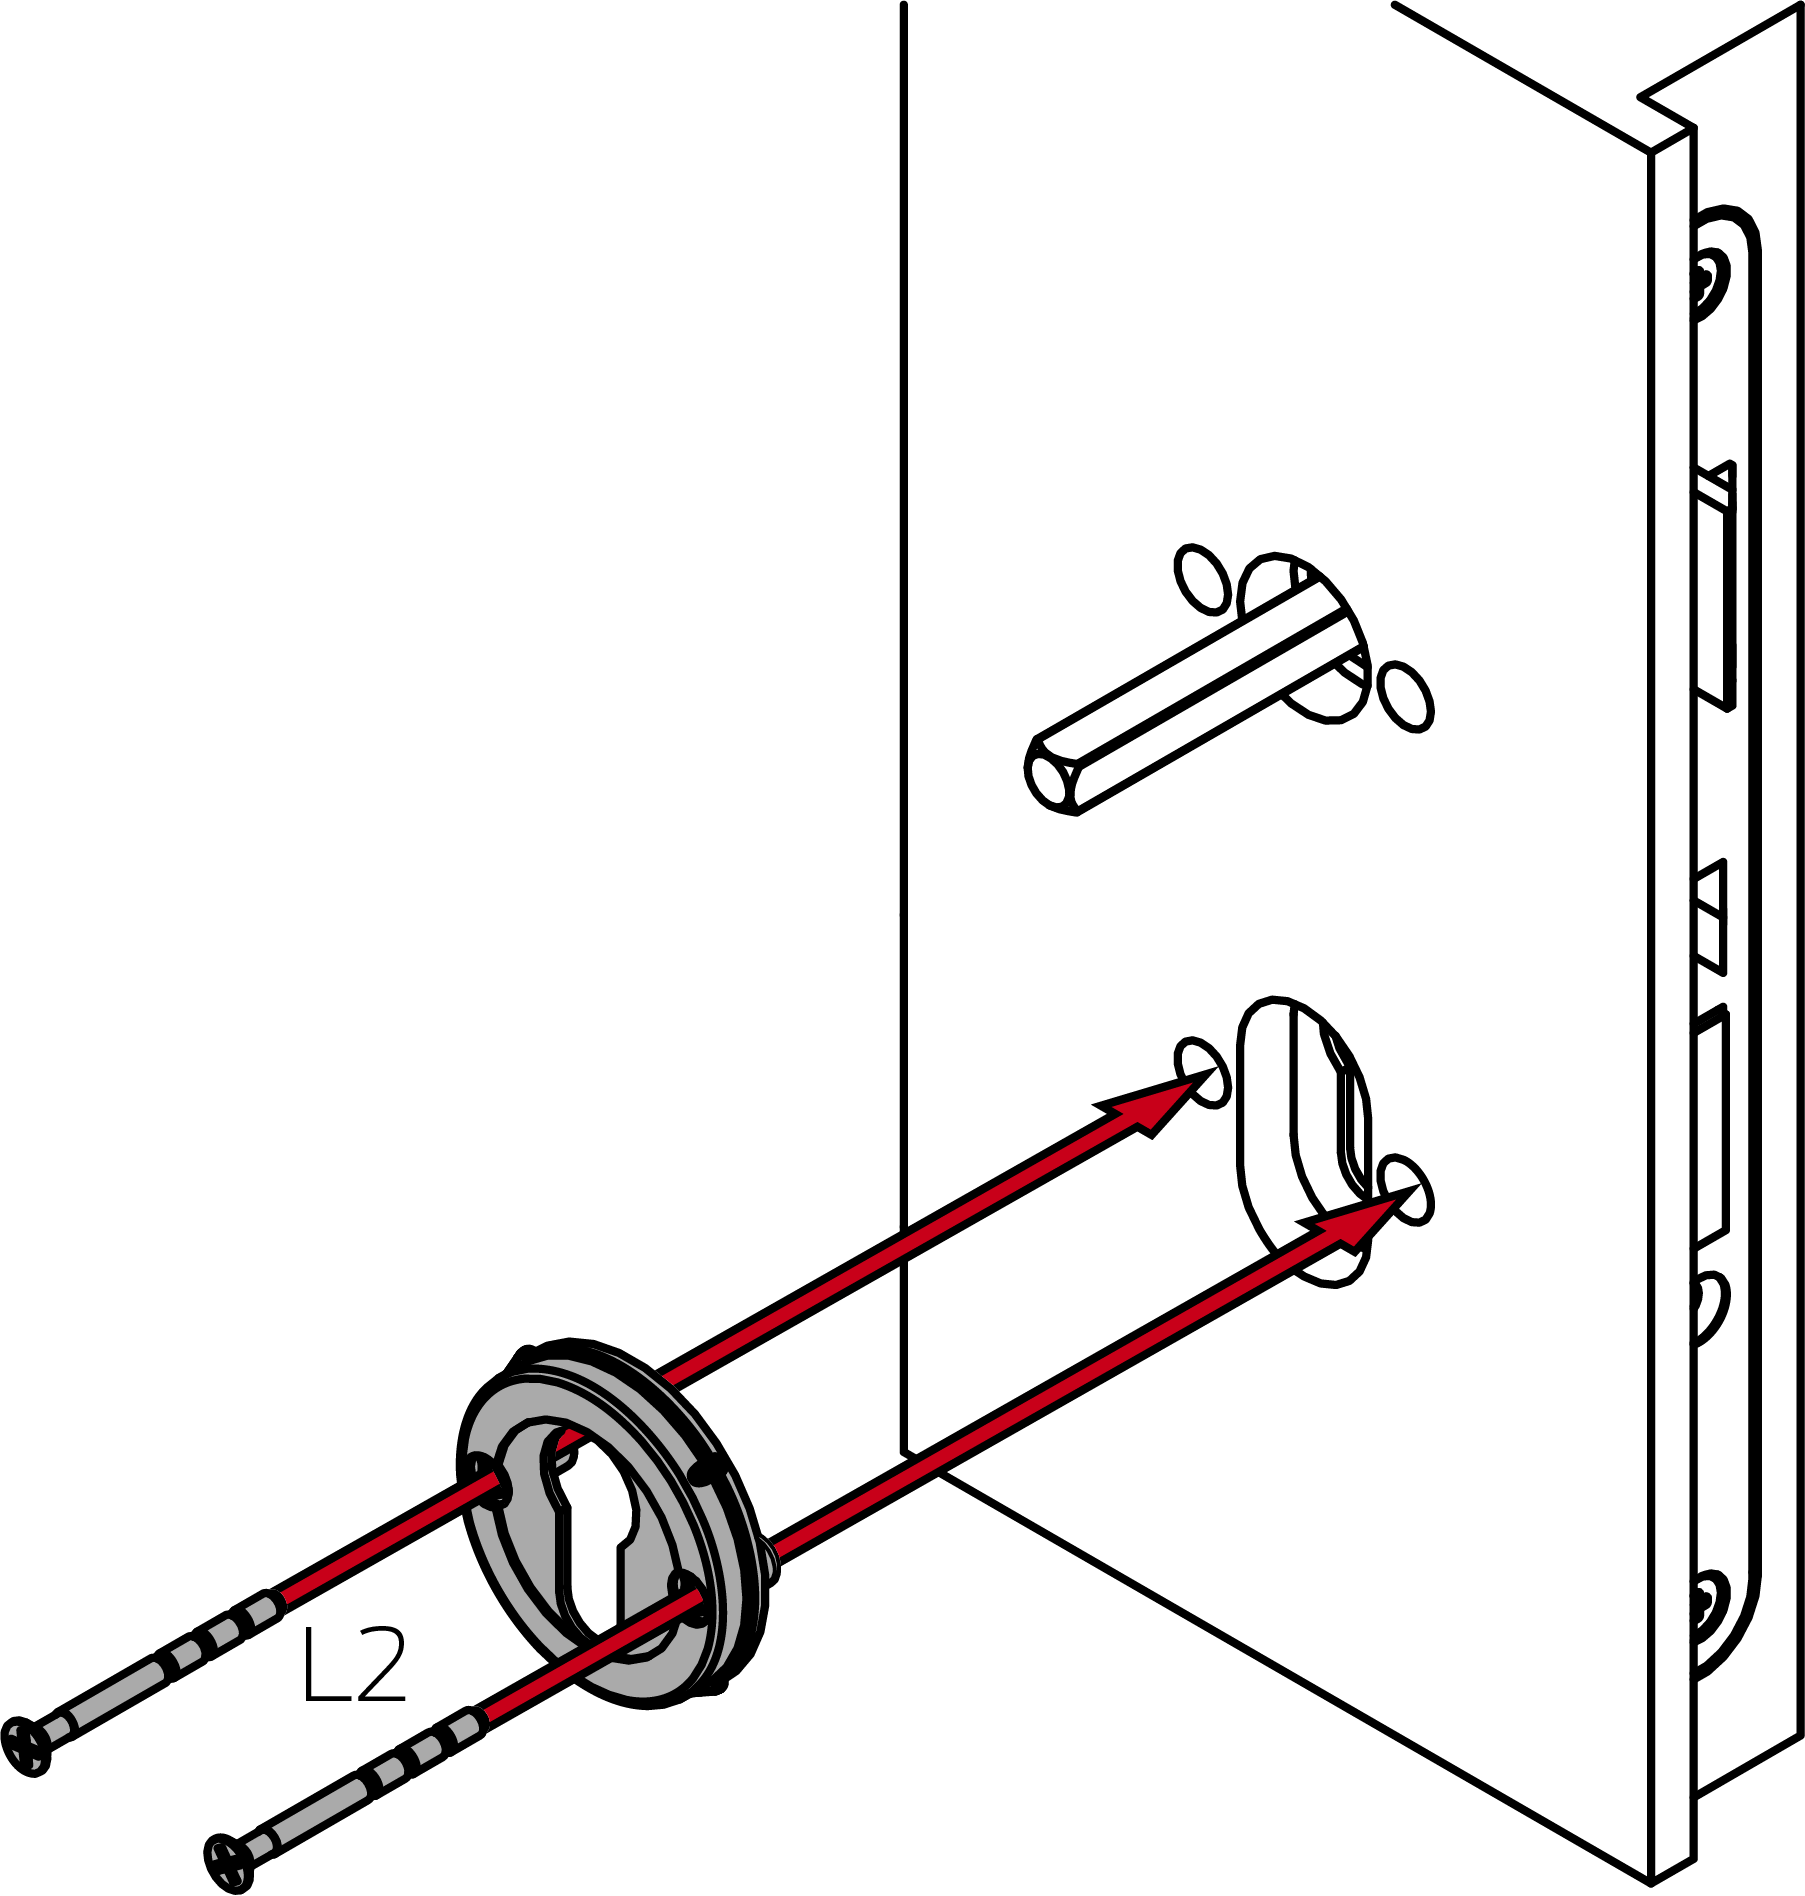
- Fasten the escutcheon base to the locking cylinder hole with the L2 screws (PH2, torque: 1.1 Nm).
- Fasten the inner handle firmly with the L1 screws (PH2, torque 1.1 Nm).

- For FH: insert the dummy cylinder.
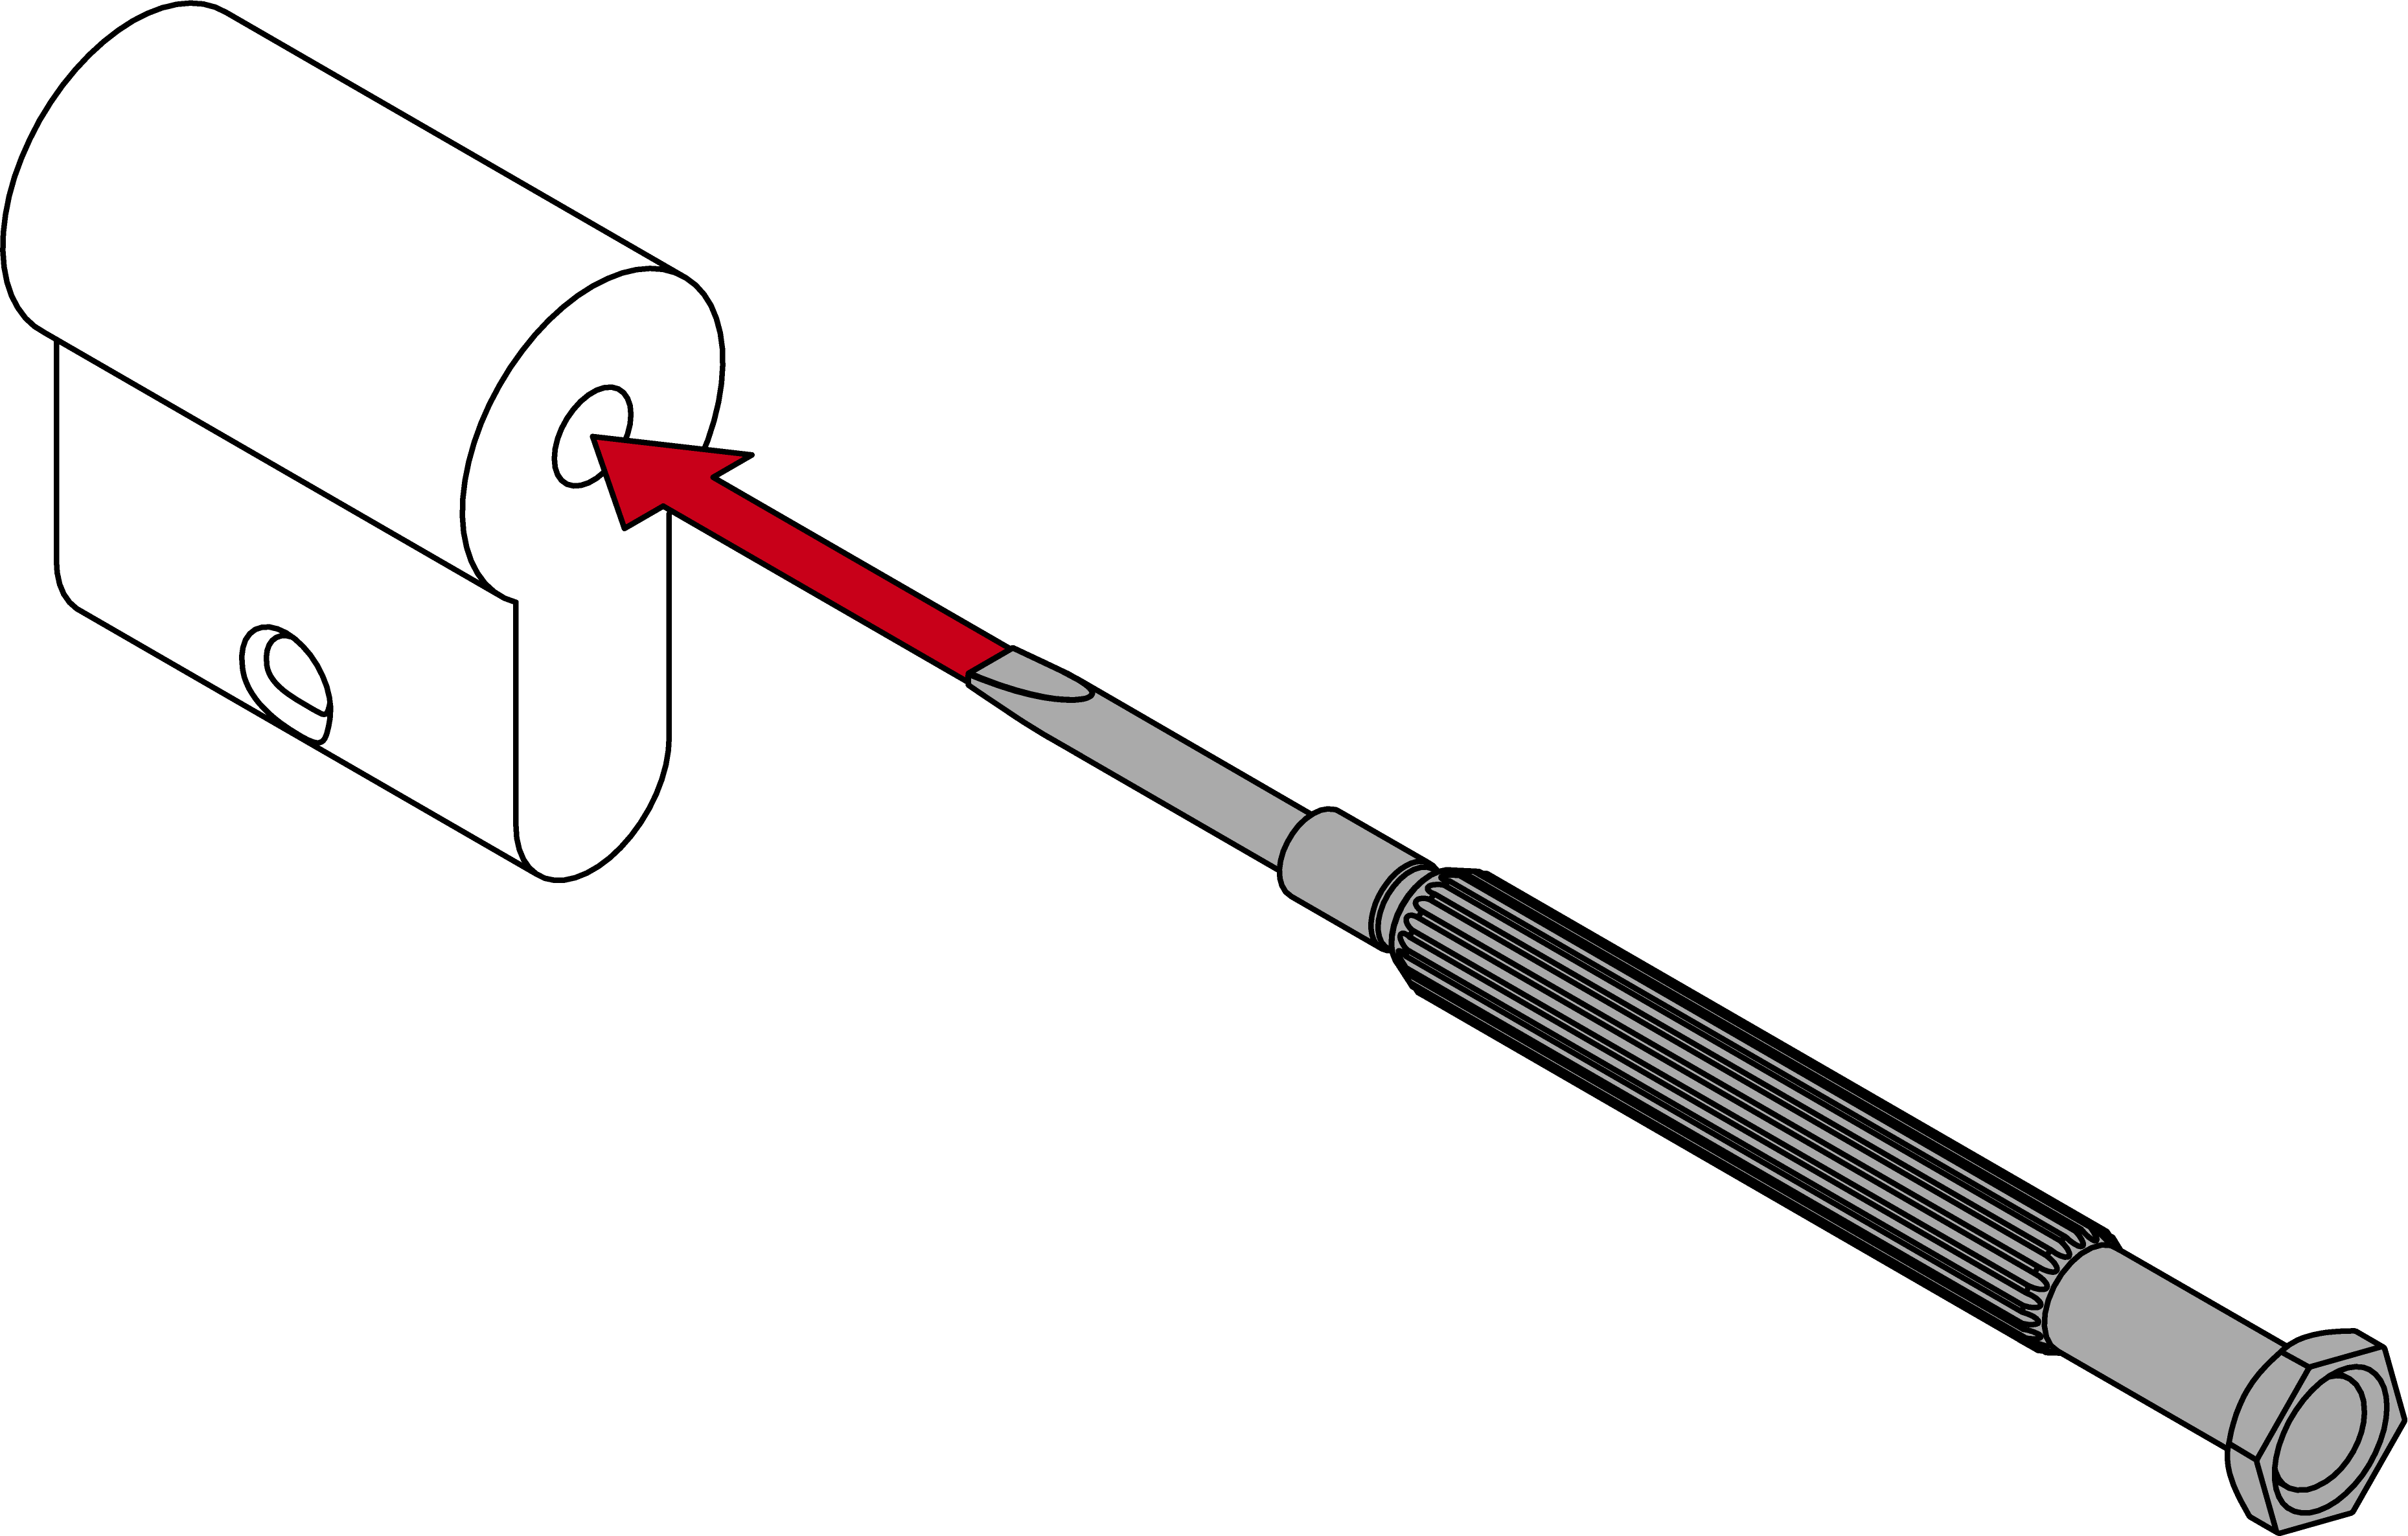
NOTE

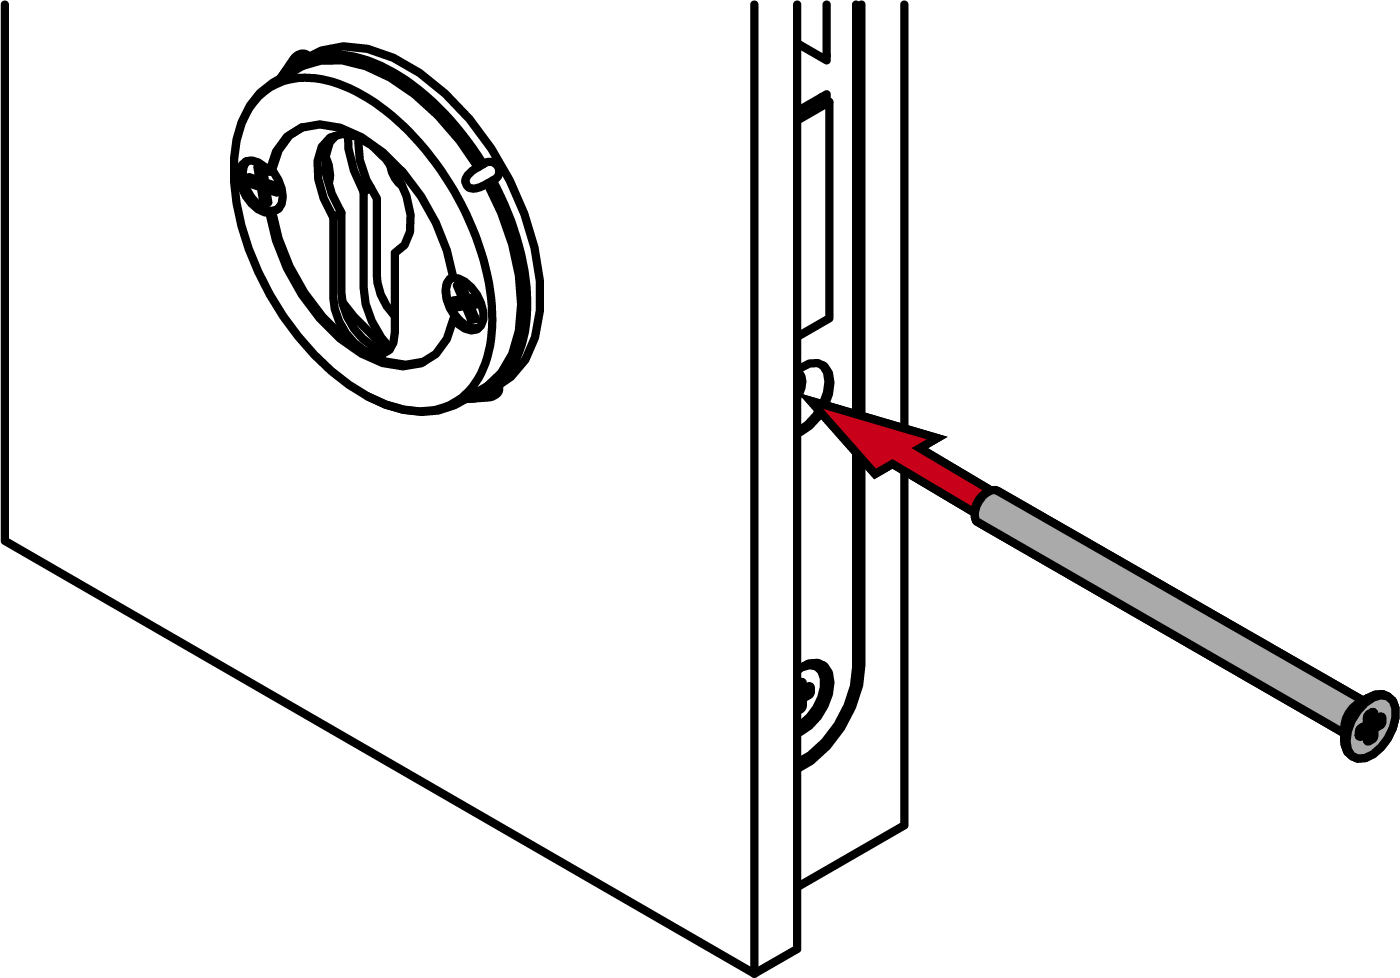
Feed the blank cylinder into the hole using a screwdriver
It is difficult to position the blank cylinder correctly, especially in thick doors.
- Insert a screwdriver into the hole in the blank cylinder.
- Position the blank cylinder using the screwdriver.
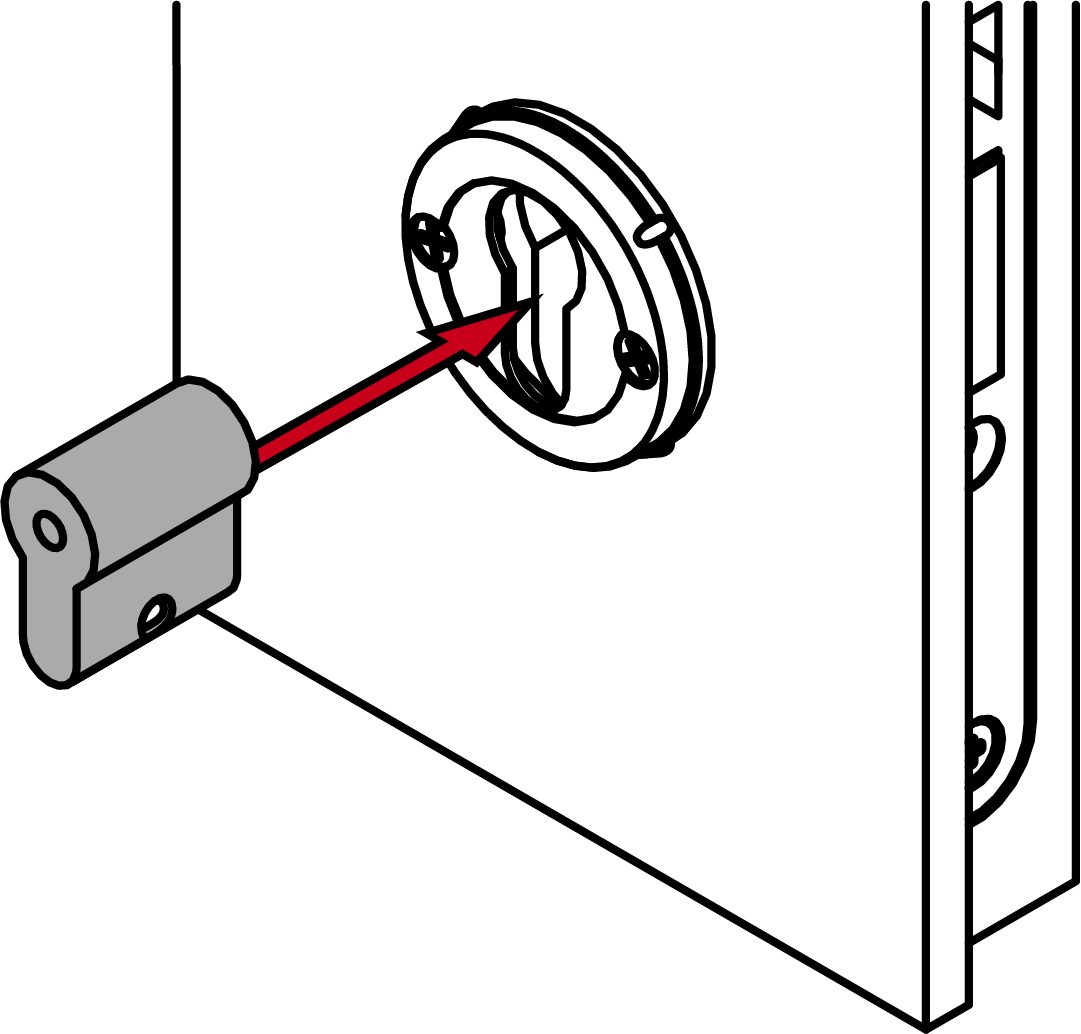
- For FH: screw the dummy cylinder firmly into place (PH2, torque 1.1 Nm).
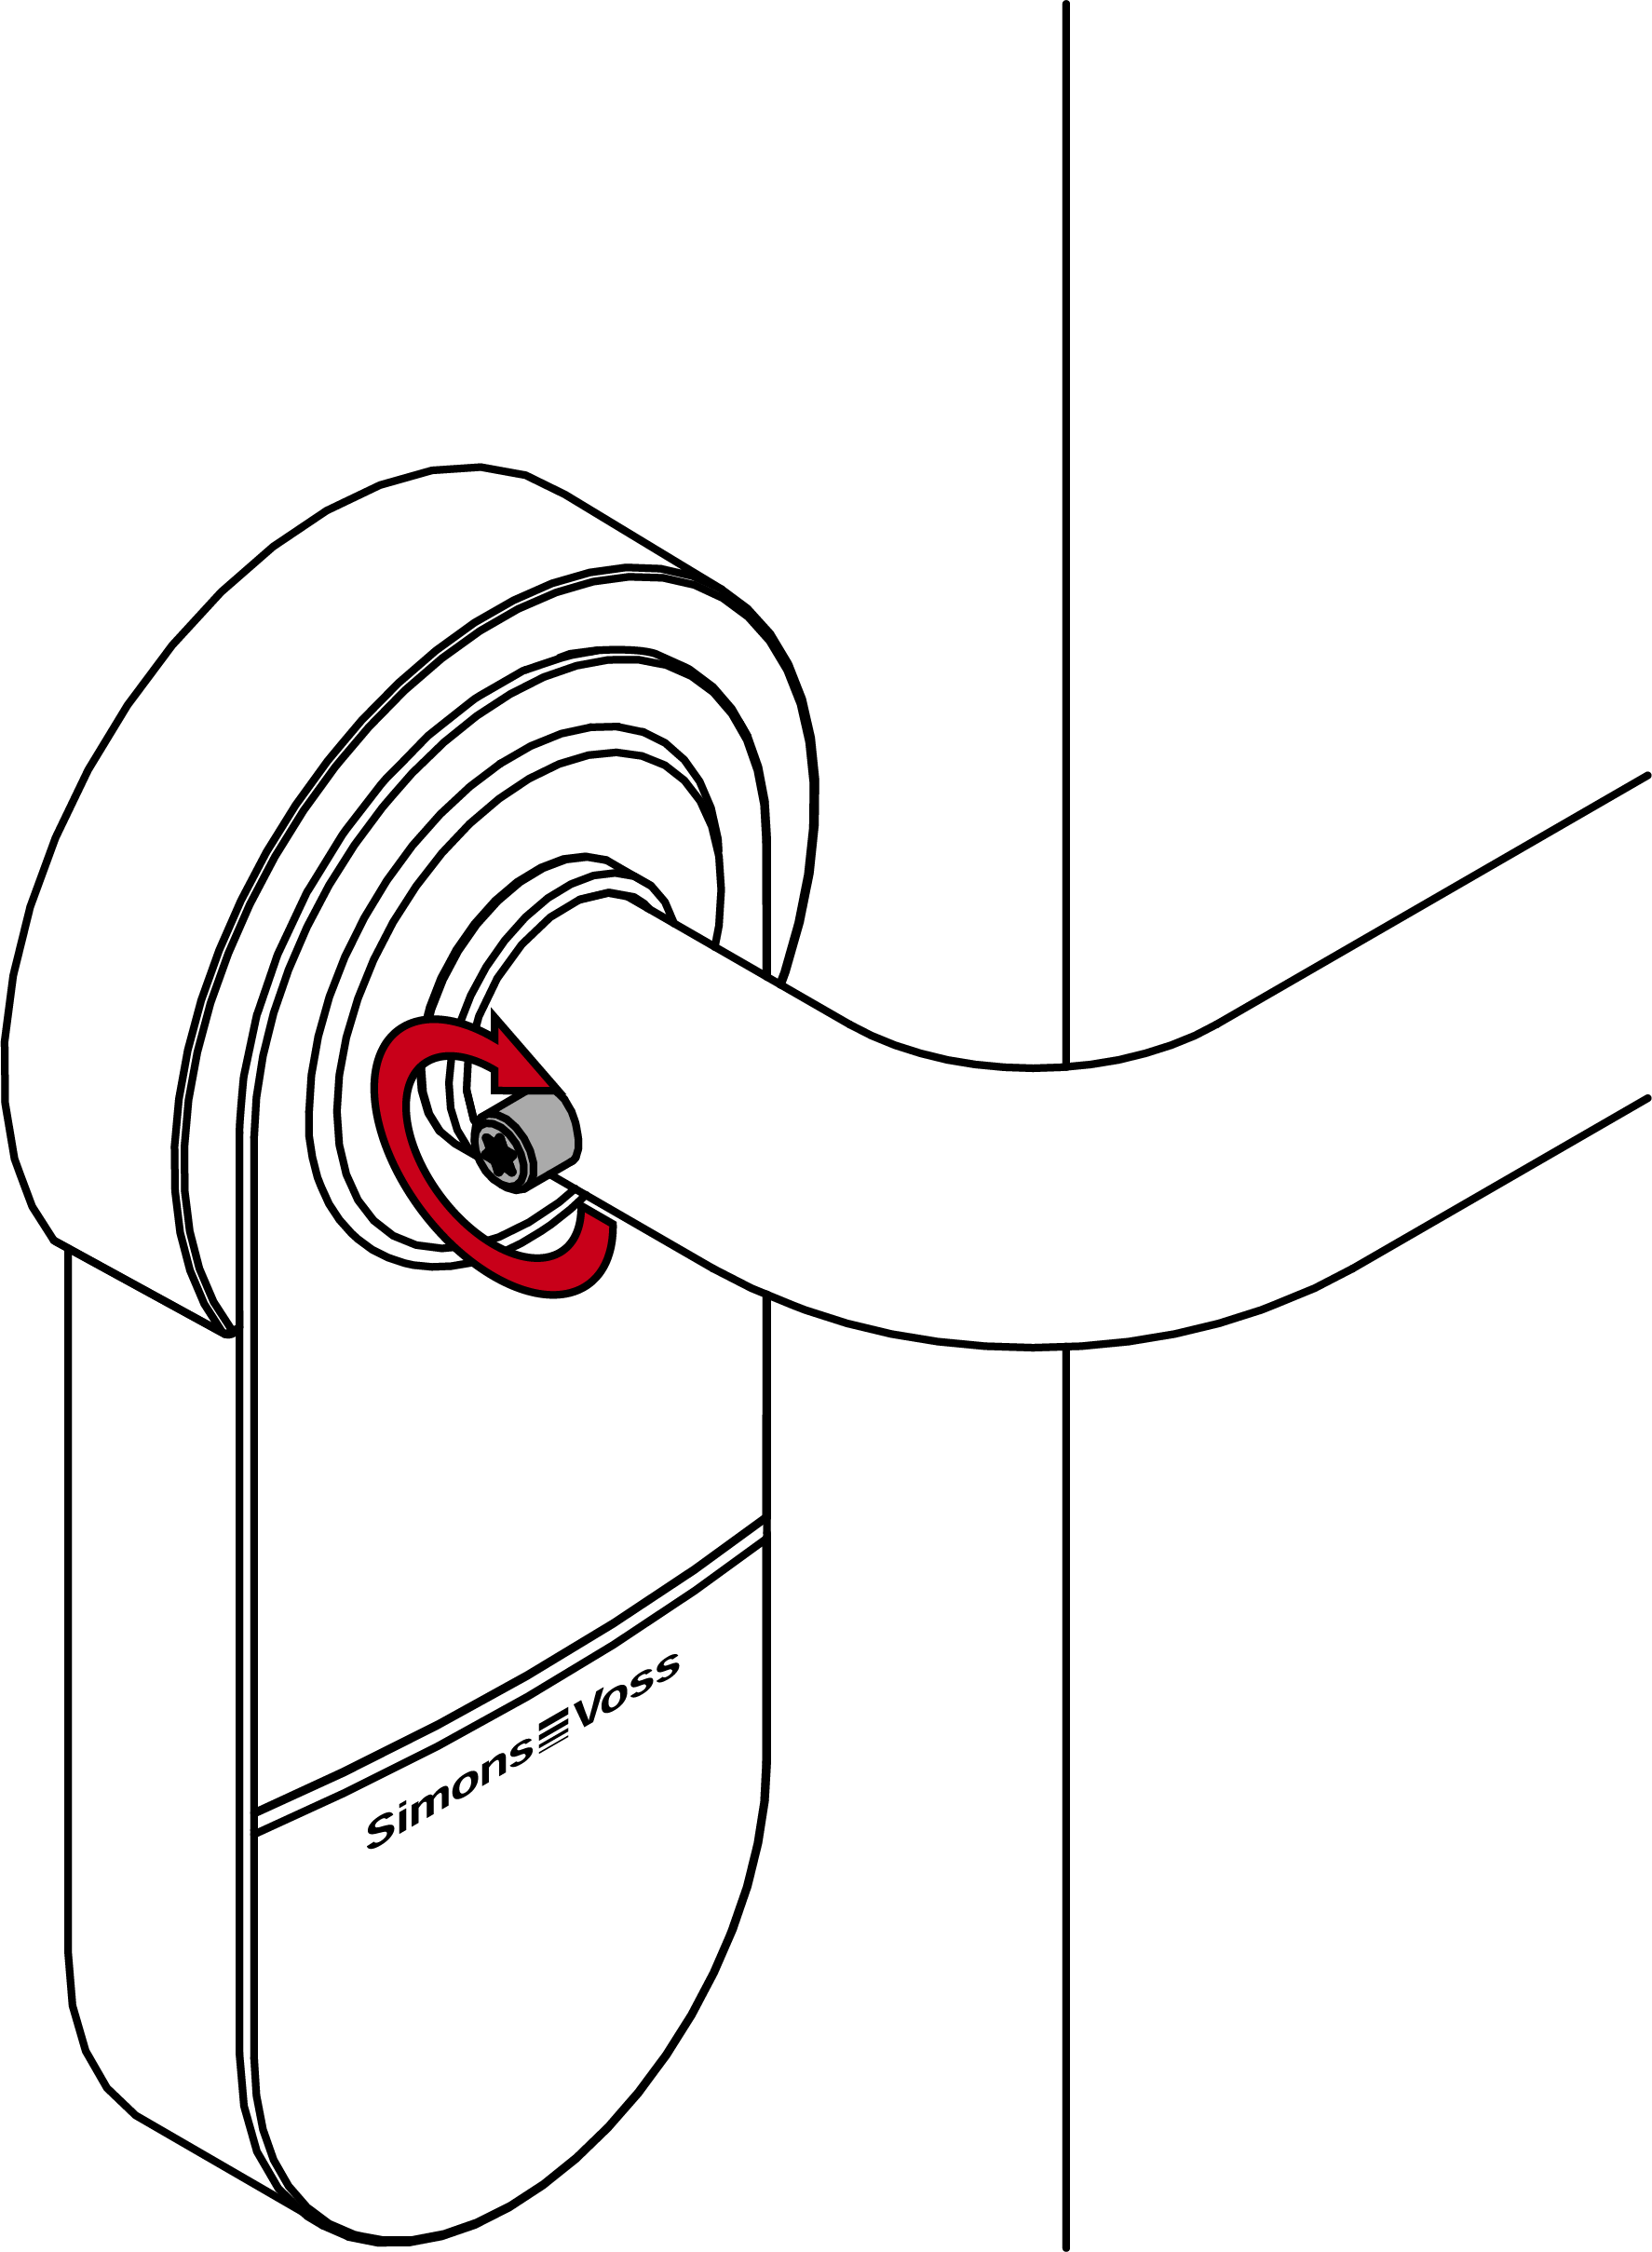
- Fasten the set screw on the inner handle firmly (TX15, torque 5.0 Nm).
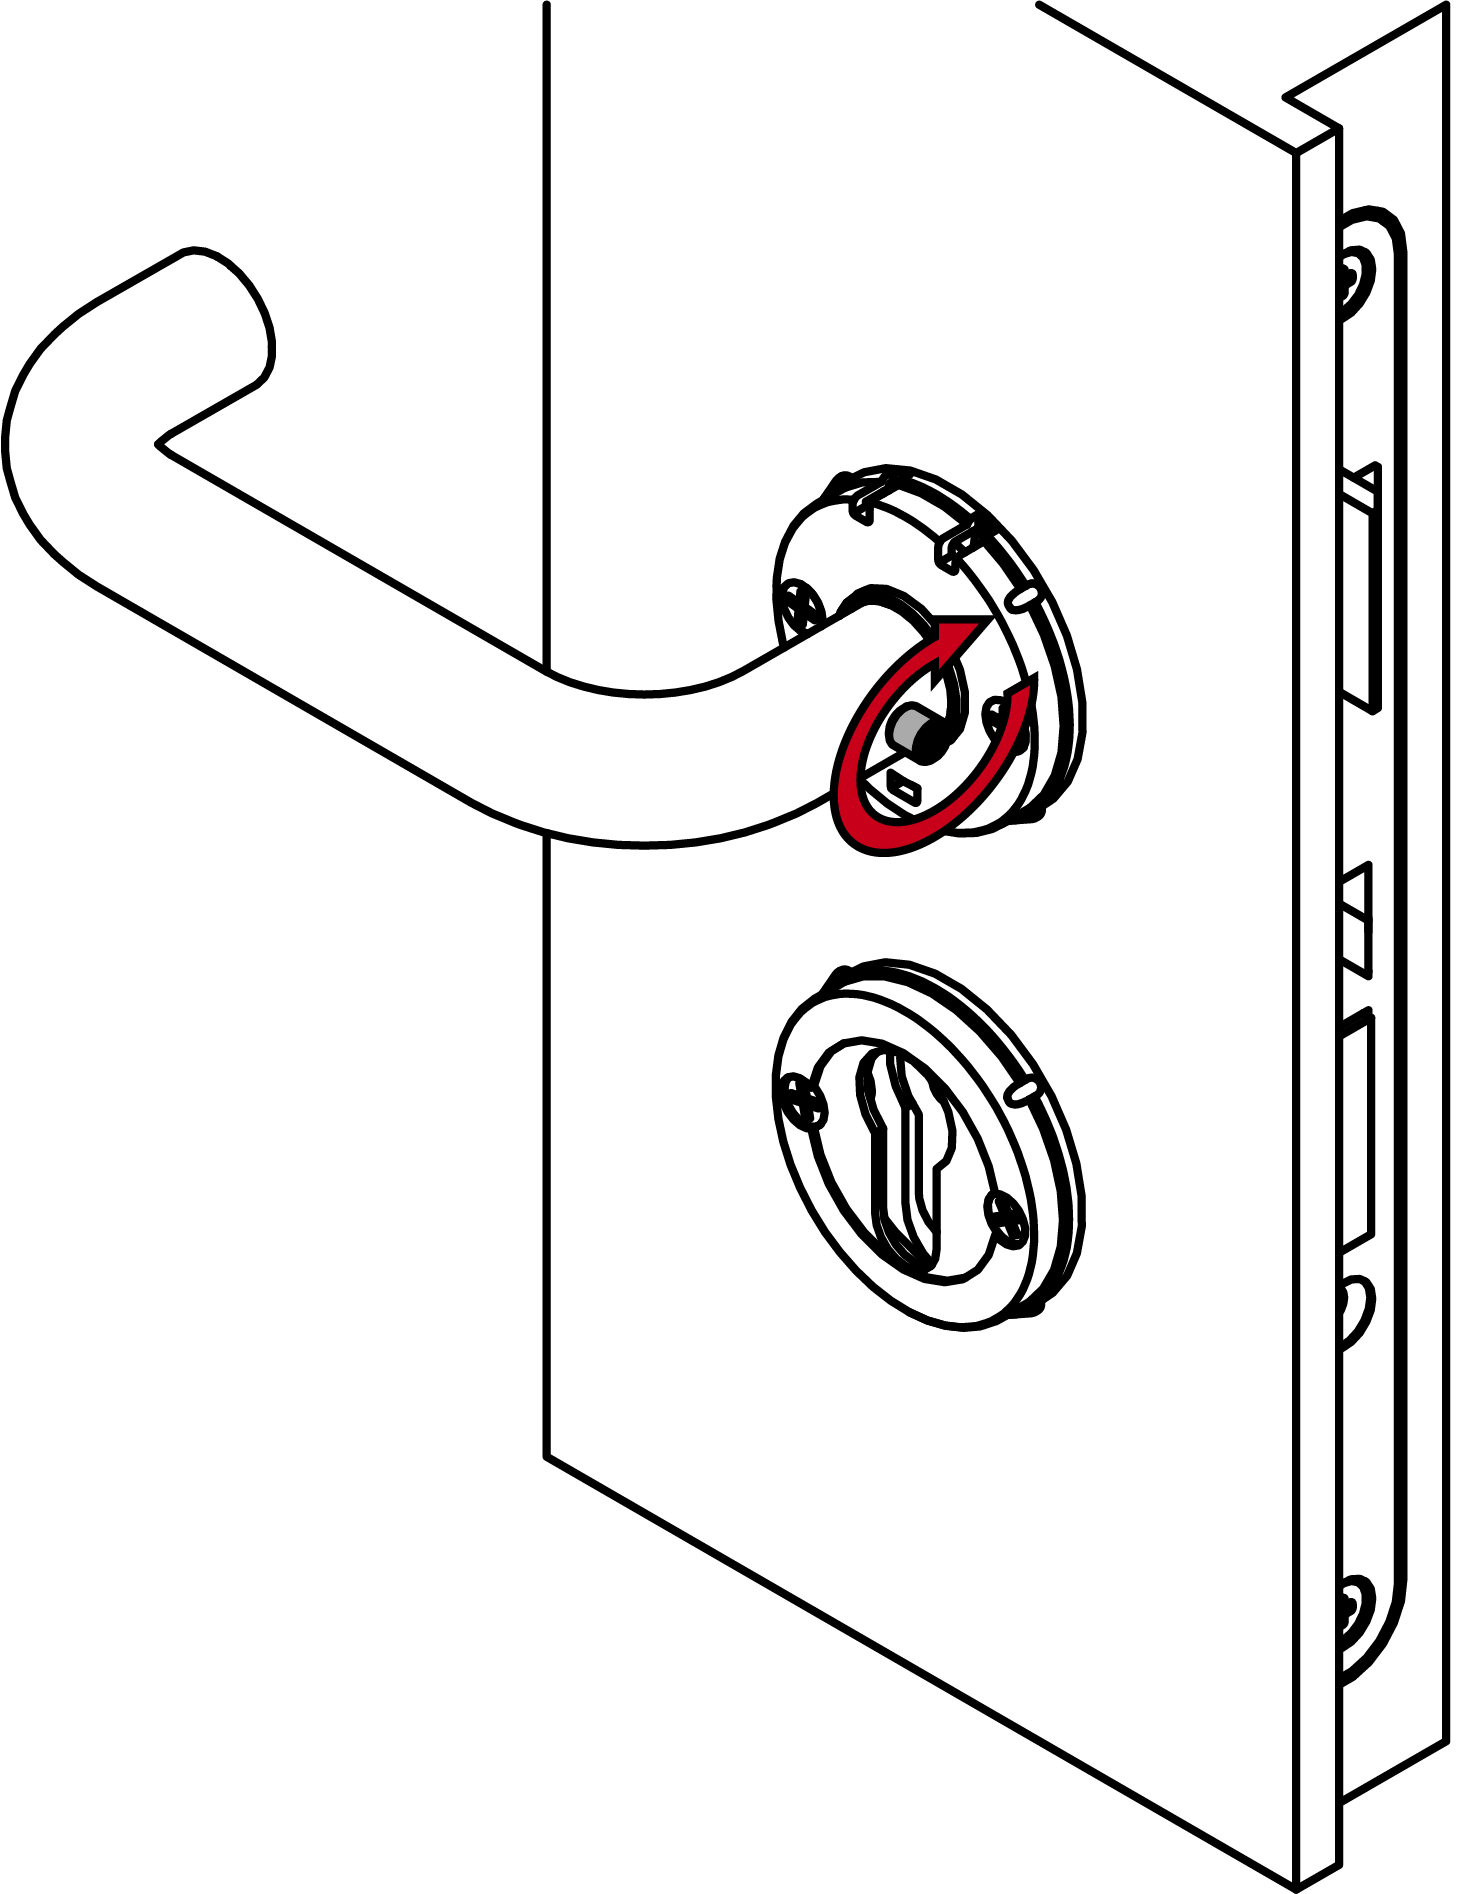
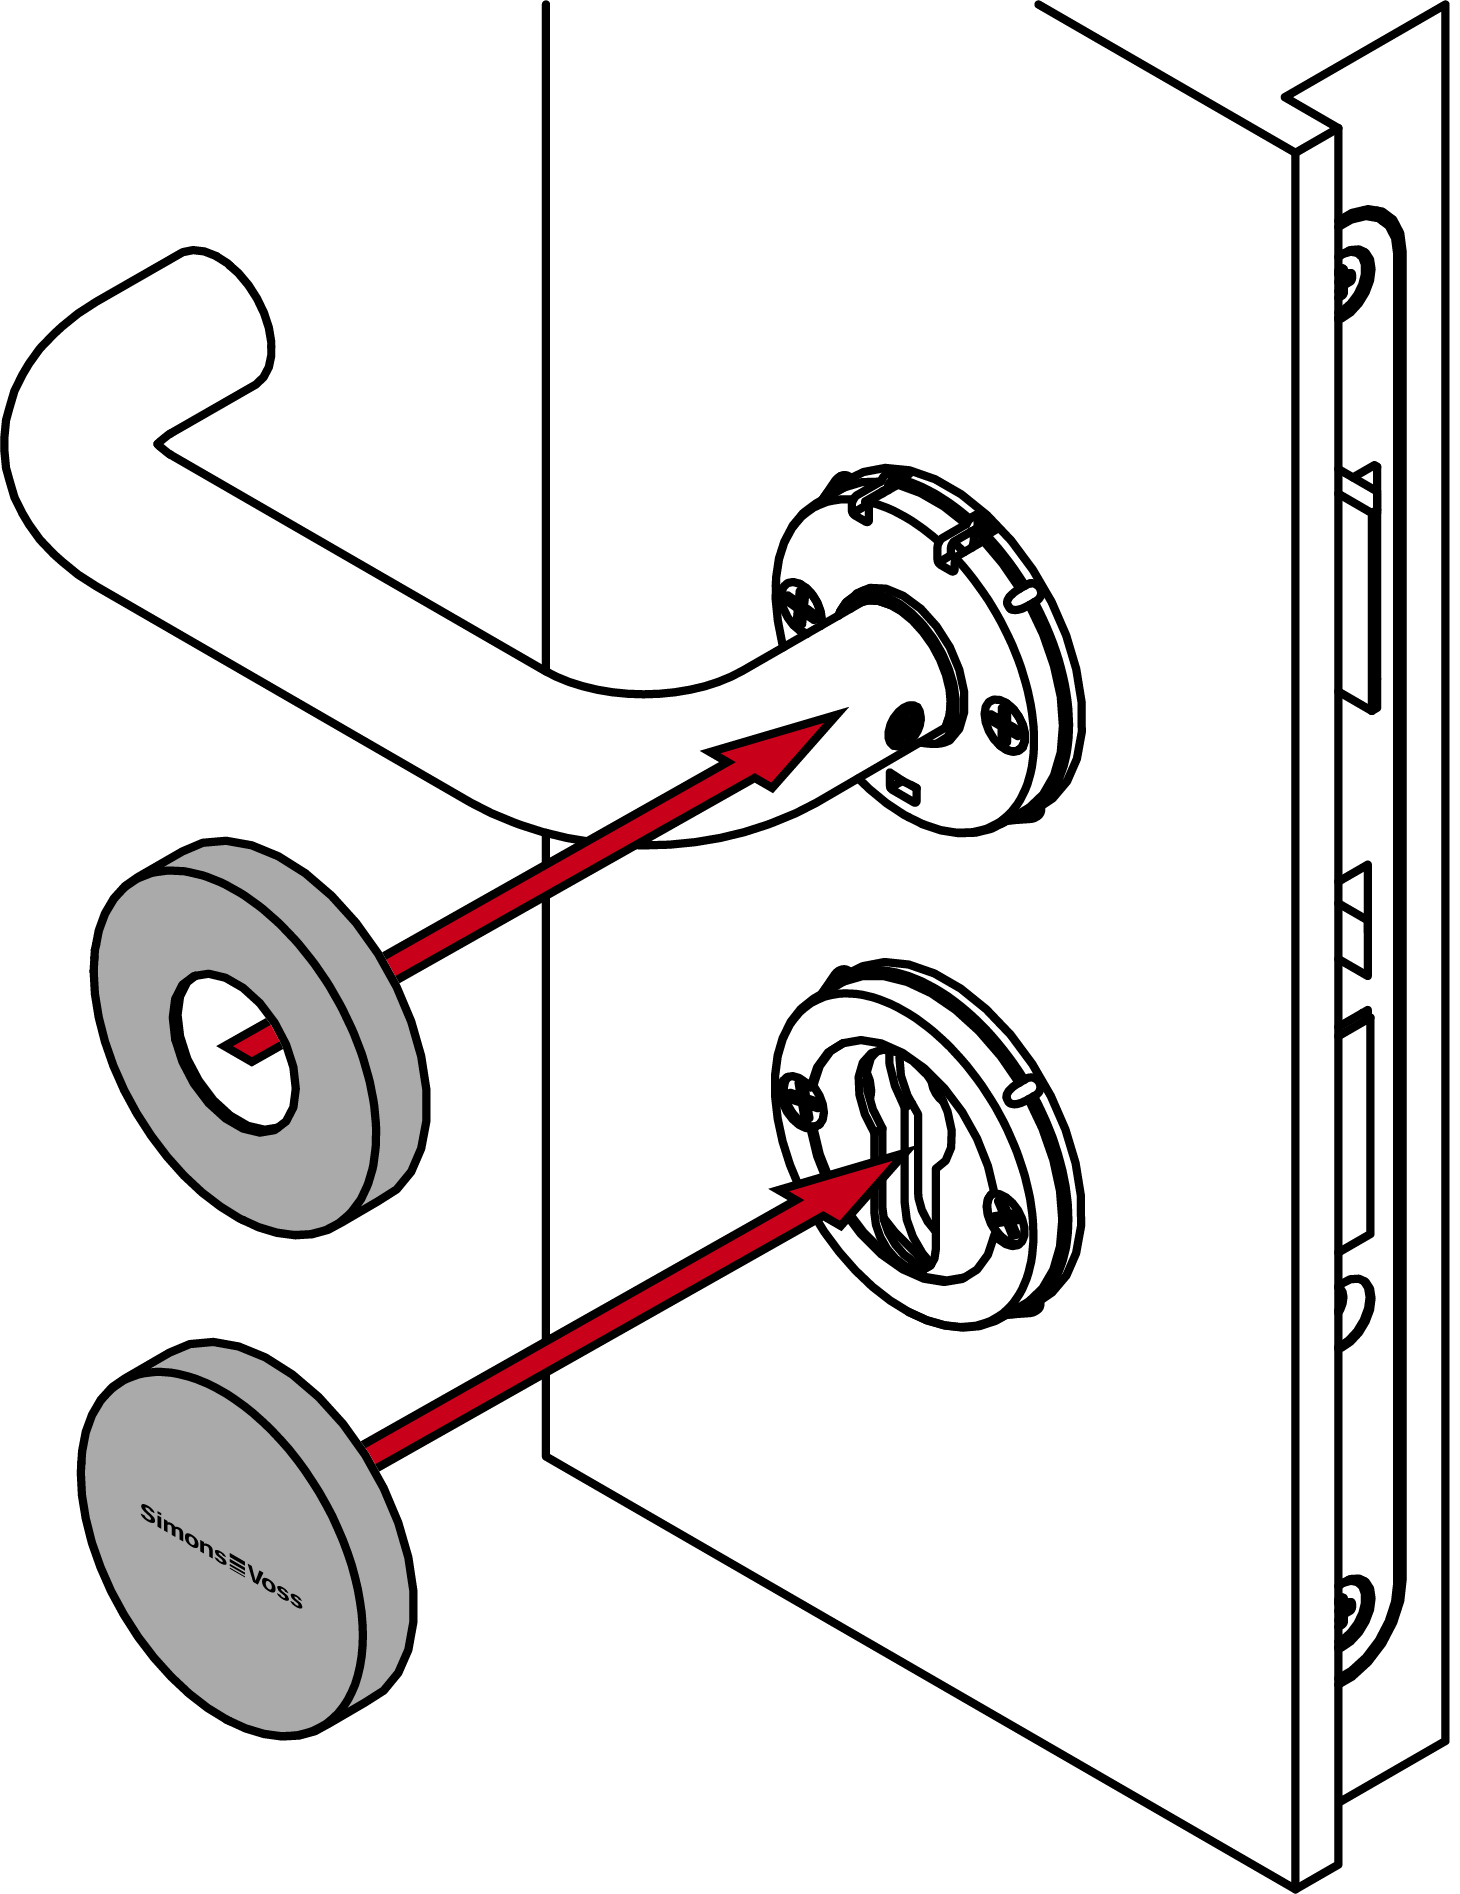
- Place the two cover plates with the notch facing downwards onto the escutcheon base and the inner handle.
- Fit the outside handle into position on the fitting.
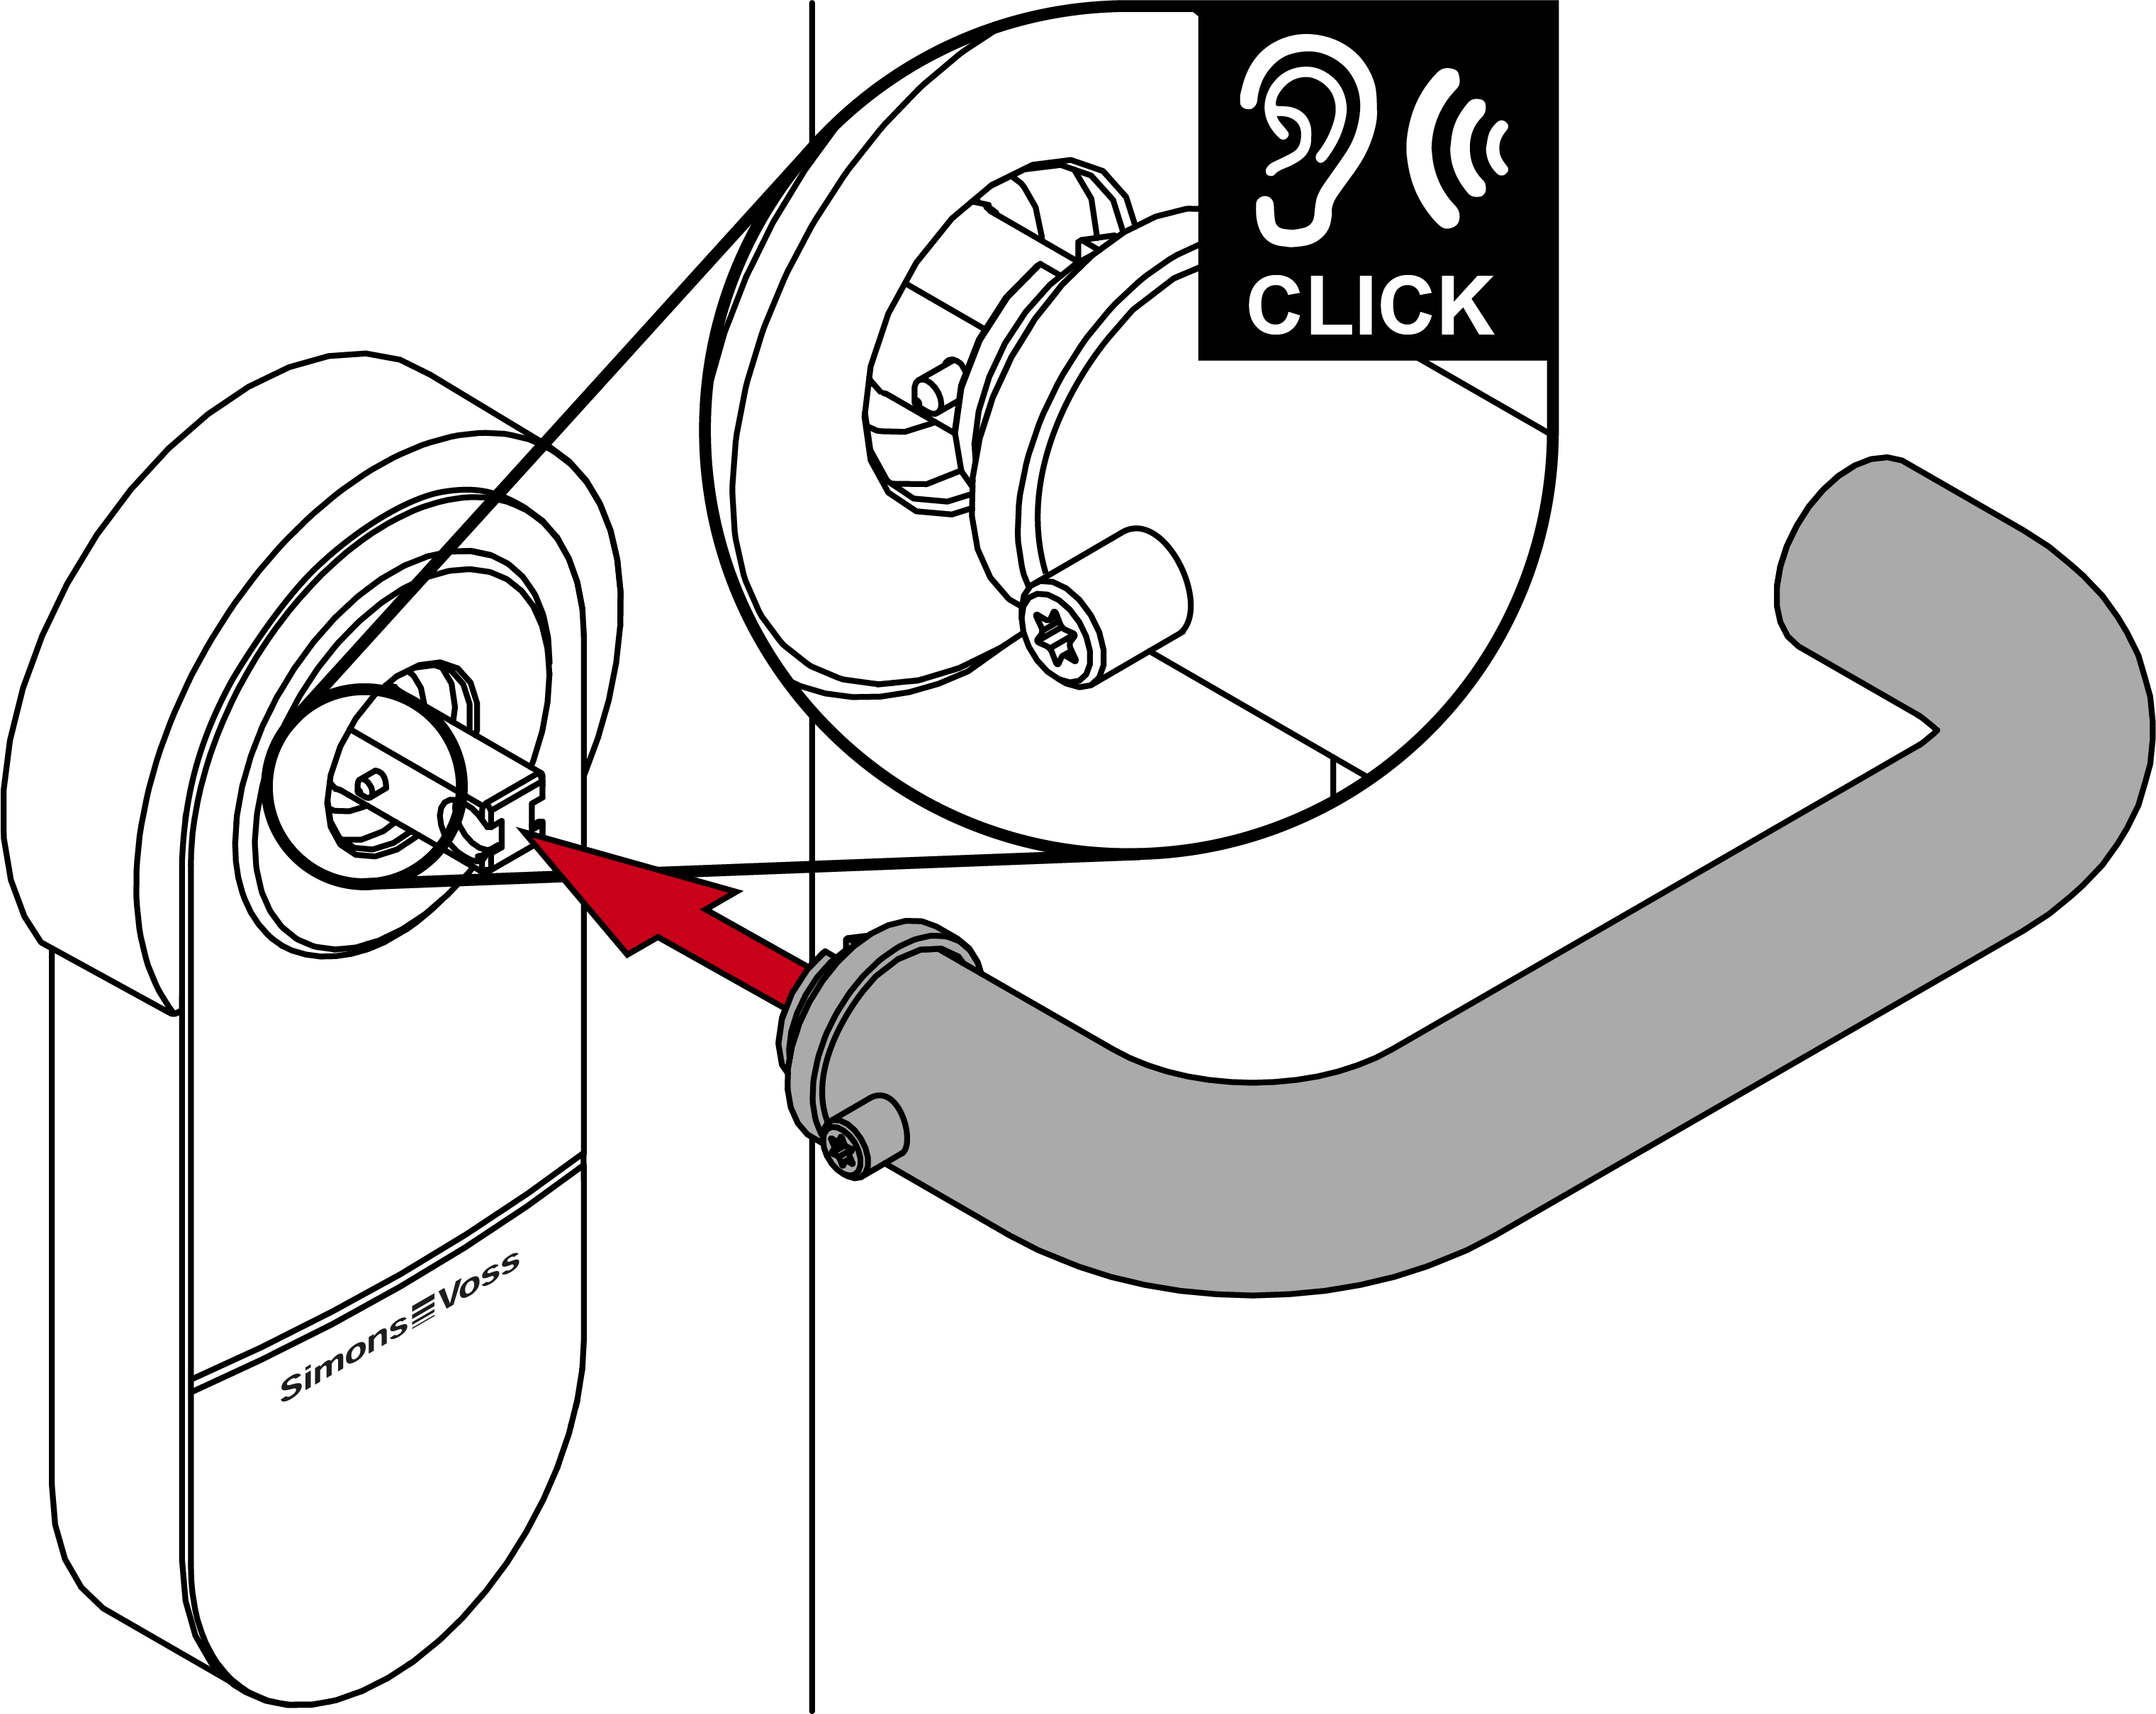
- Firmly fasten the grub screw on the outside handle (TX15; torque: 5.0 Nm).
- Fitting is now installed.