Replacing batteries until 03/2026 (Scandinavian Oval) - SmartHandle AX Advanced
NOTE

Malfunctions due to poor contact or different discharge
Contact surfaces that are too small/contaminated or different discharged batteries can lead to malfunctions.
- Only use batteries that are approved by SimonsVoss.
- Do not touch the contacts of the new batteries with your hands.
- Use clean and grease-free gloves.
- Always replace all batteries at the same time.
- Special tool at hand.
- PH2 screwdriver at hand.
- SW4 screwdriver available.
- Gloves at hand.
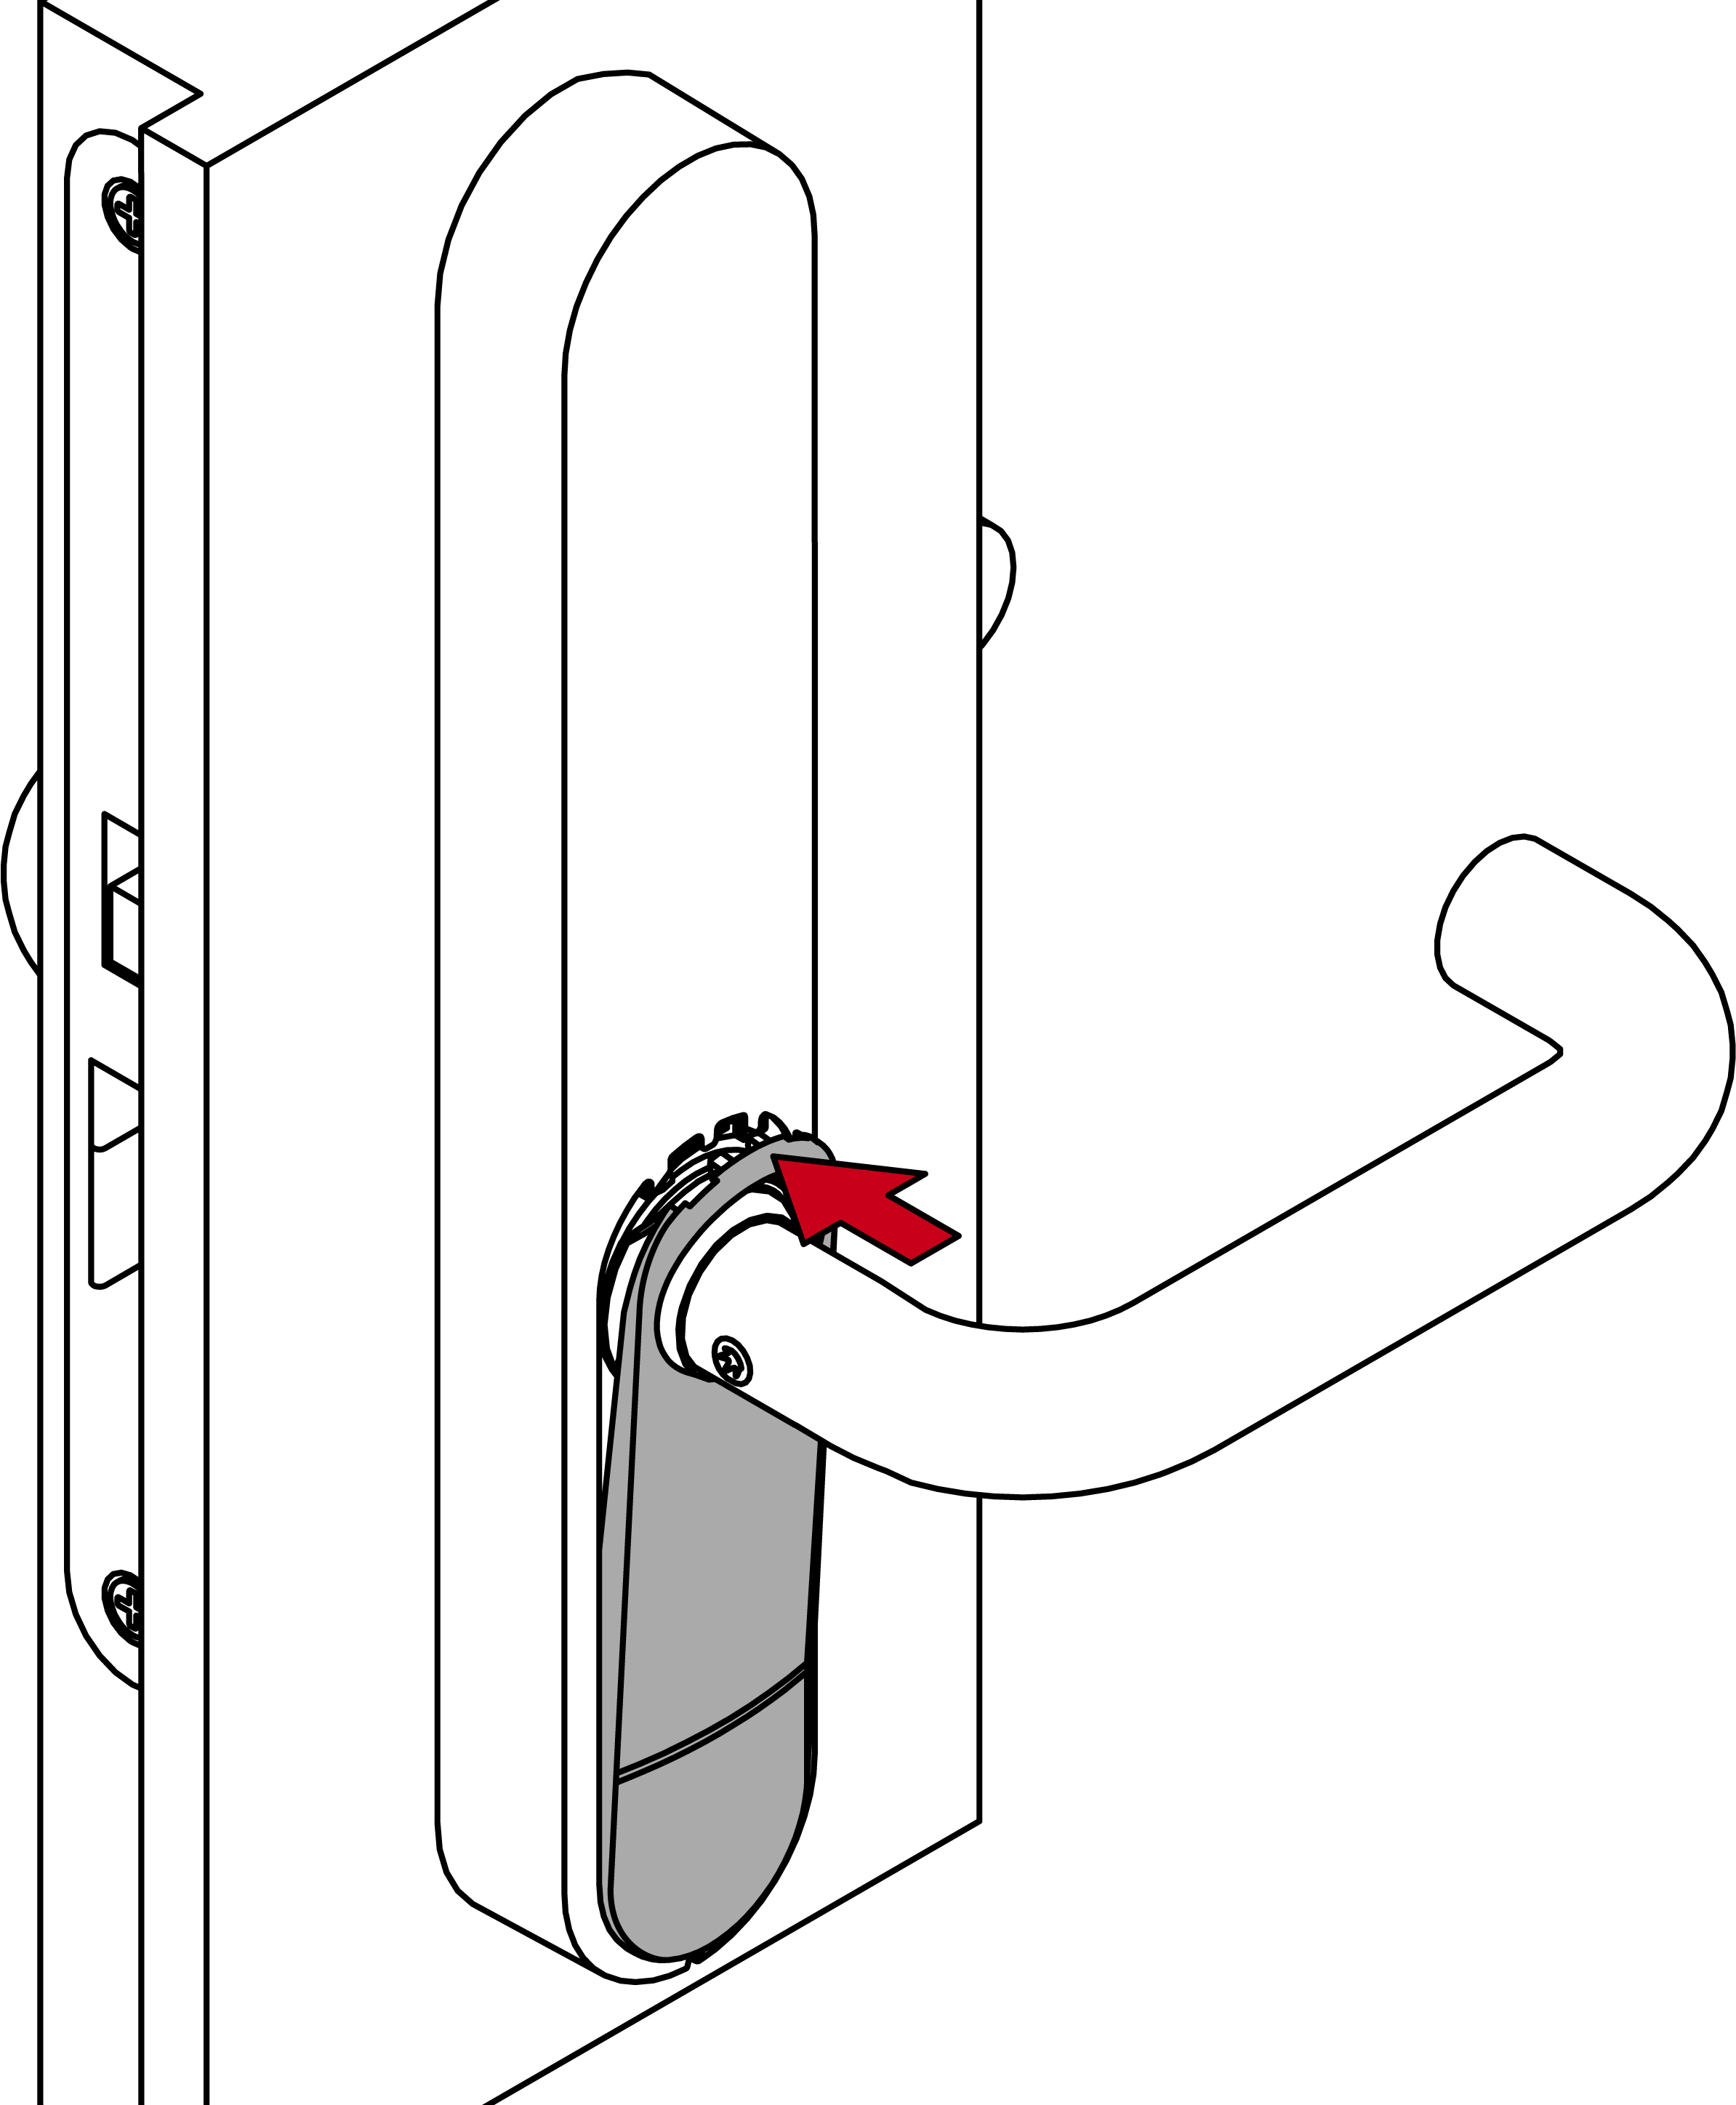
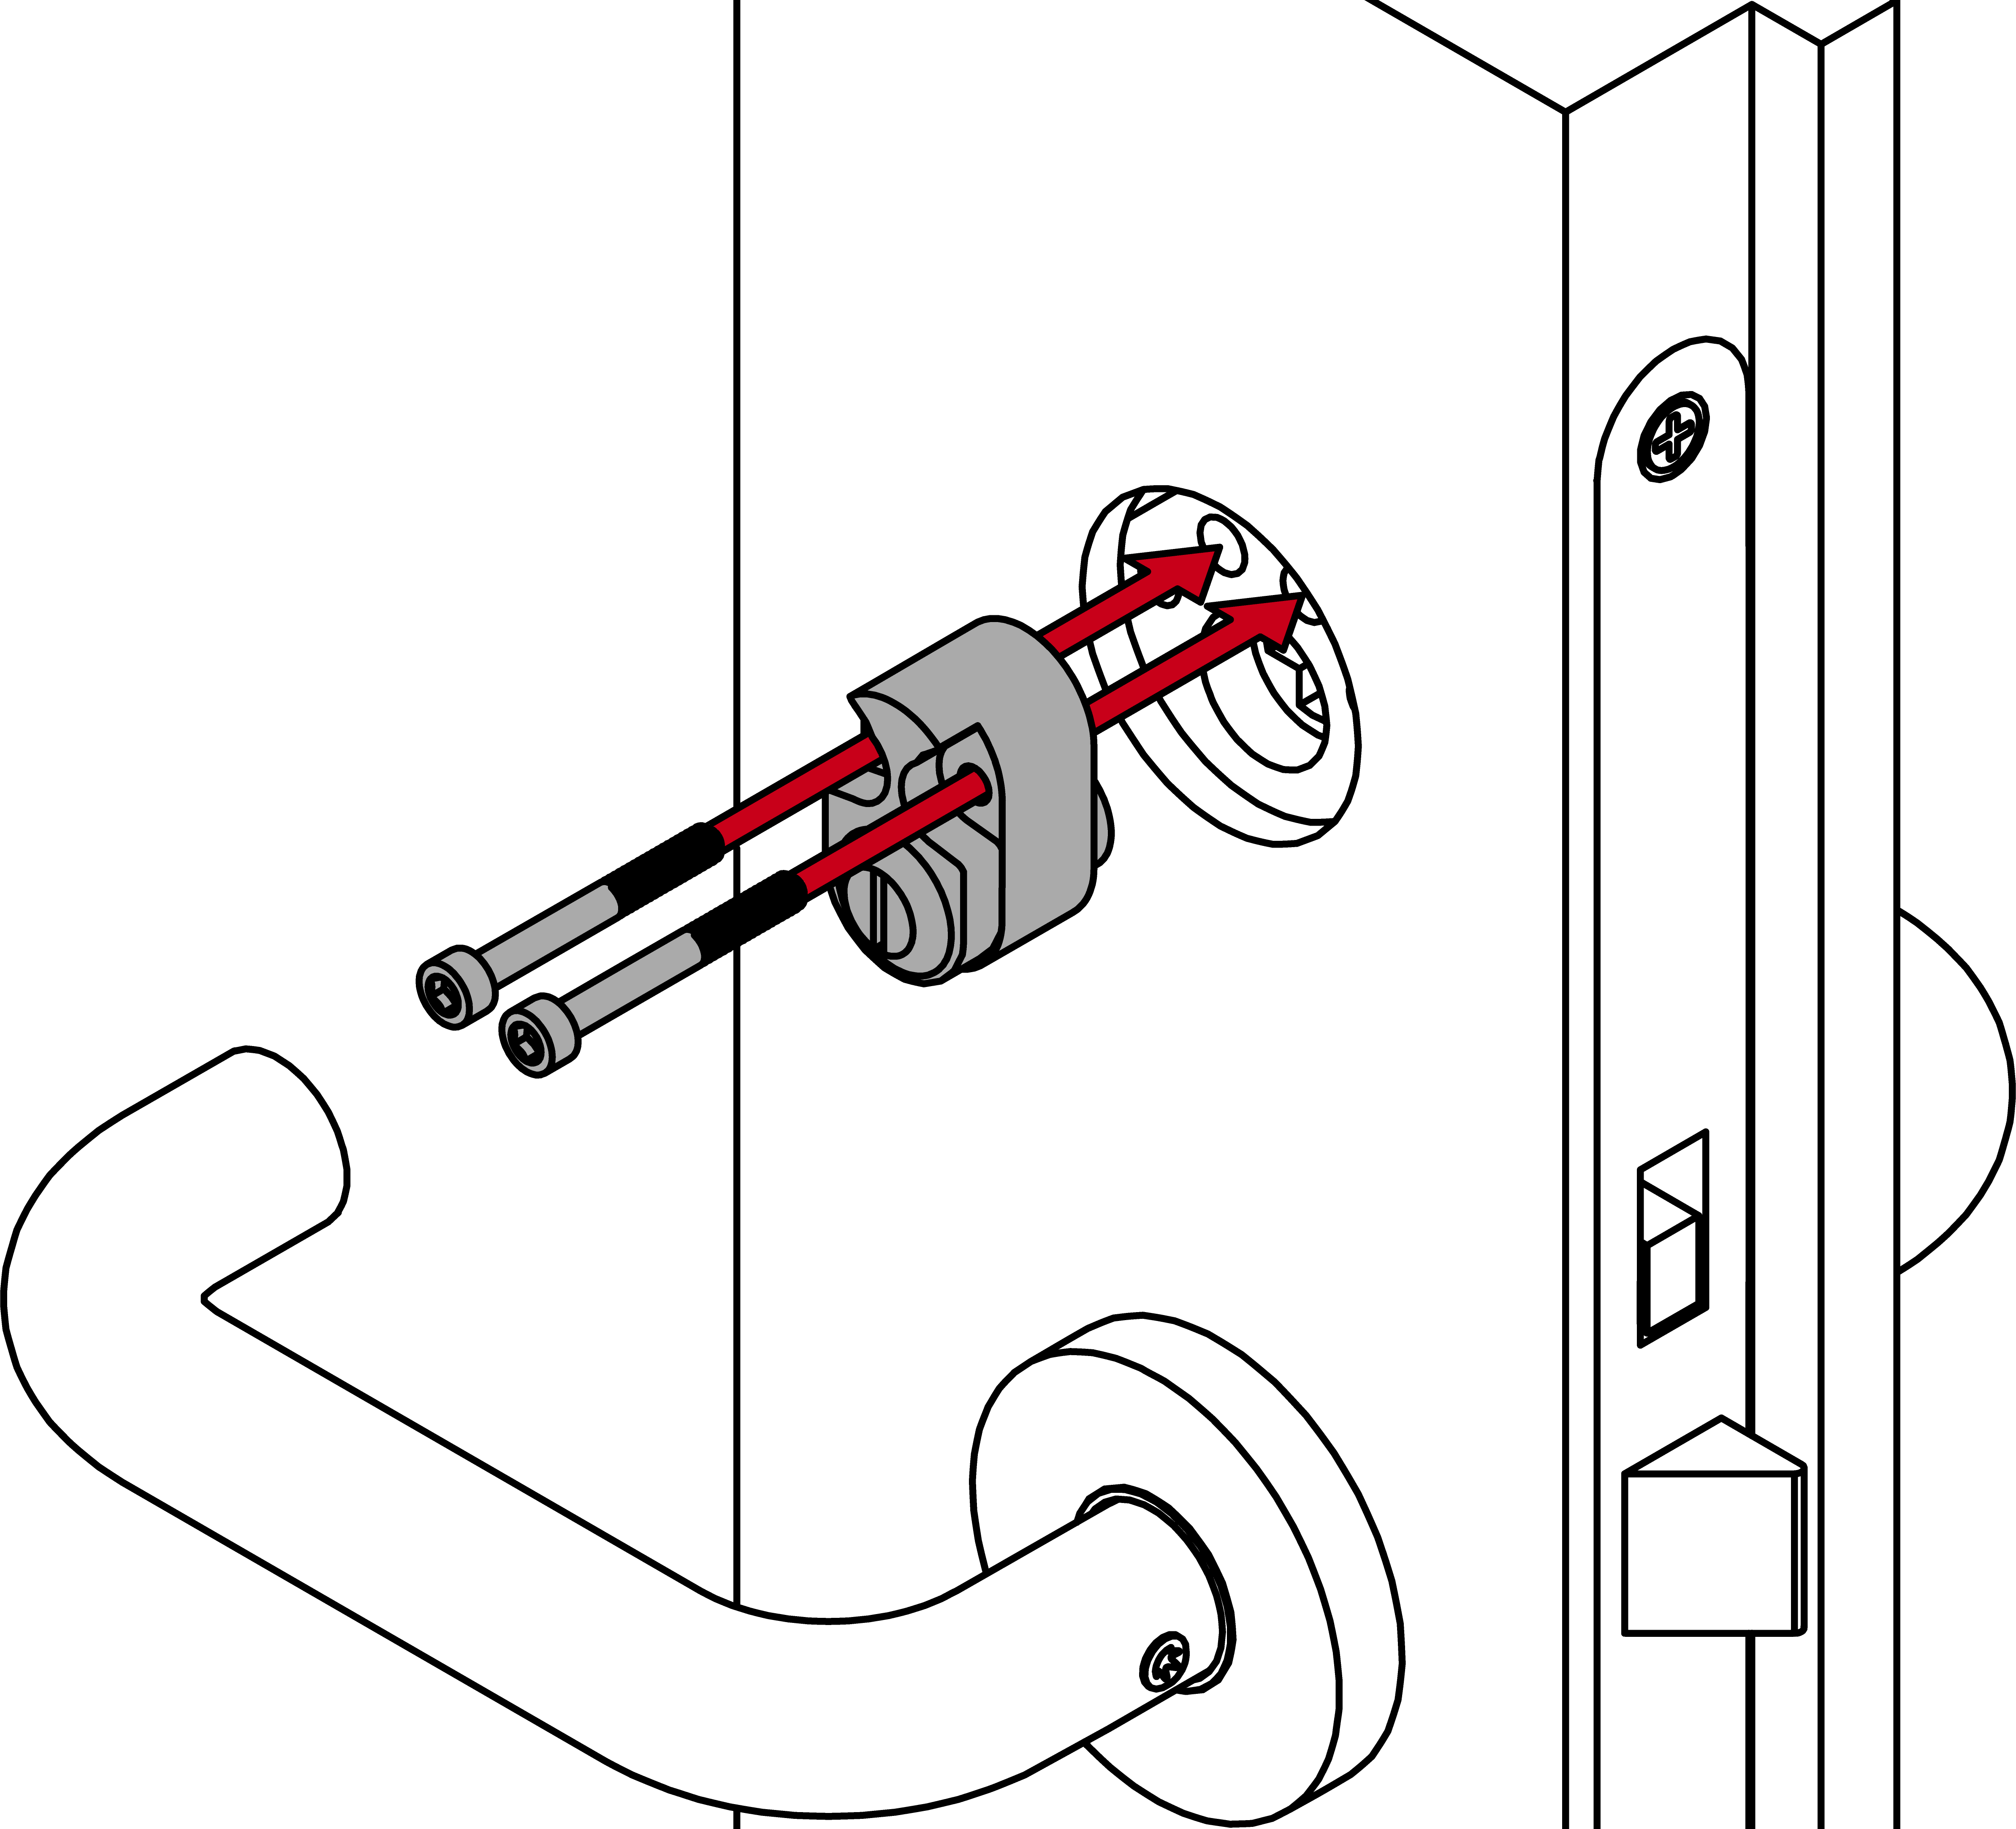
- For MO: remove the cylinder cover screws on the inner side (PH2).
- For MO: remove the cylinder cover.
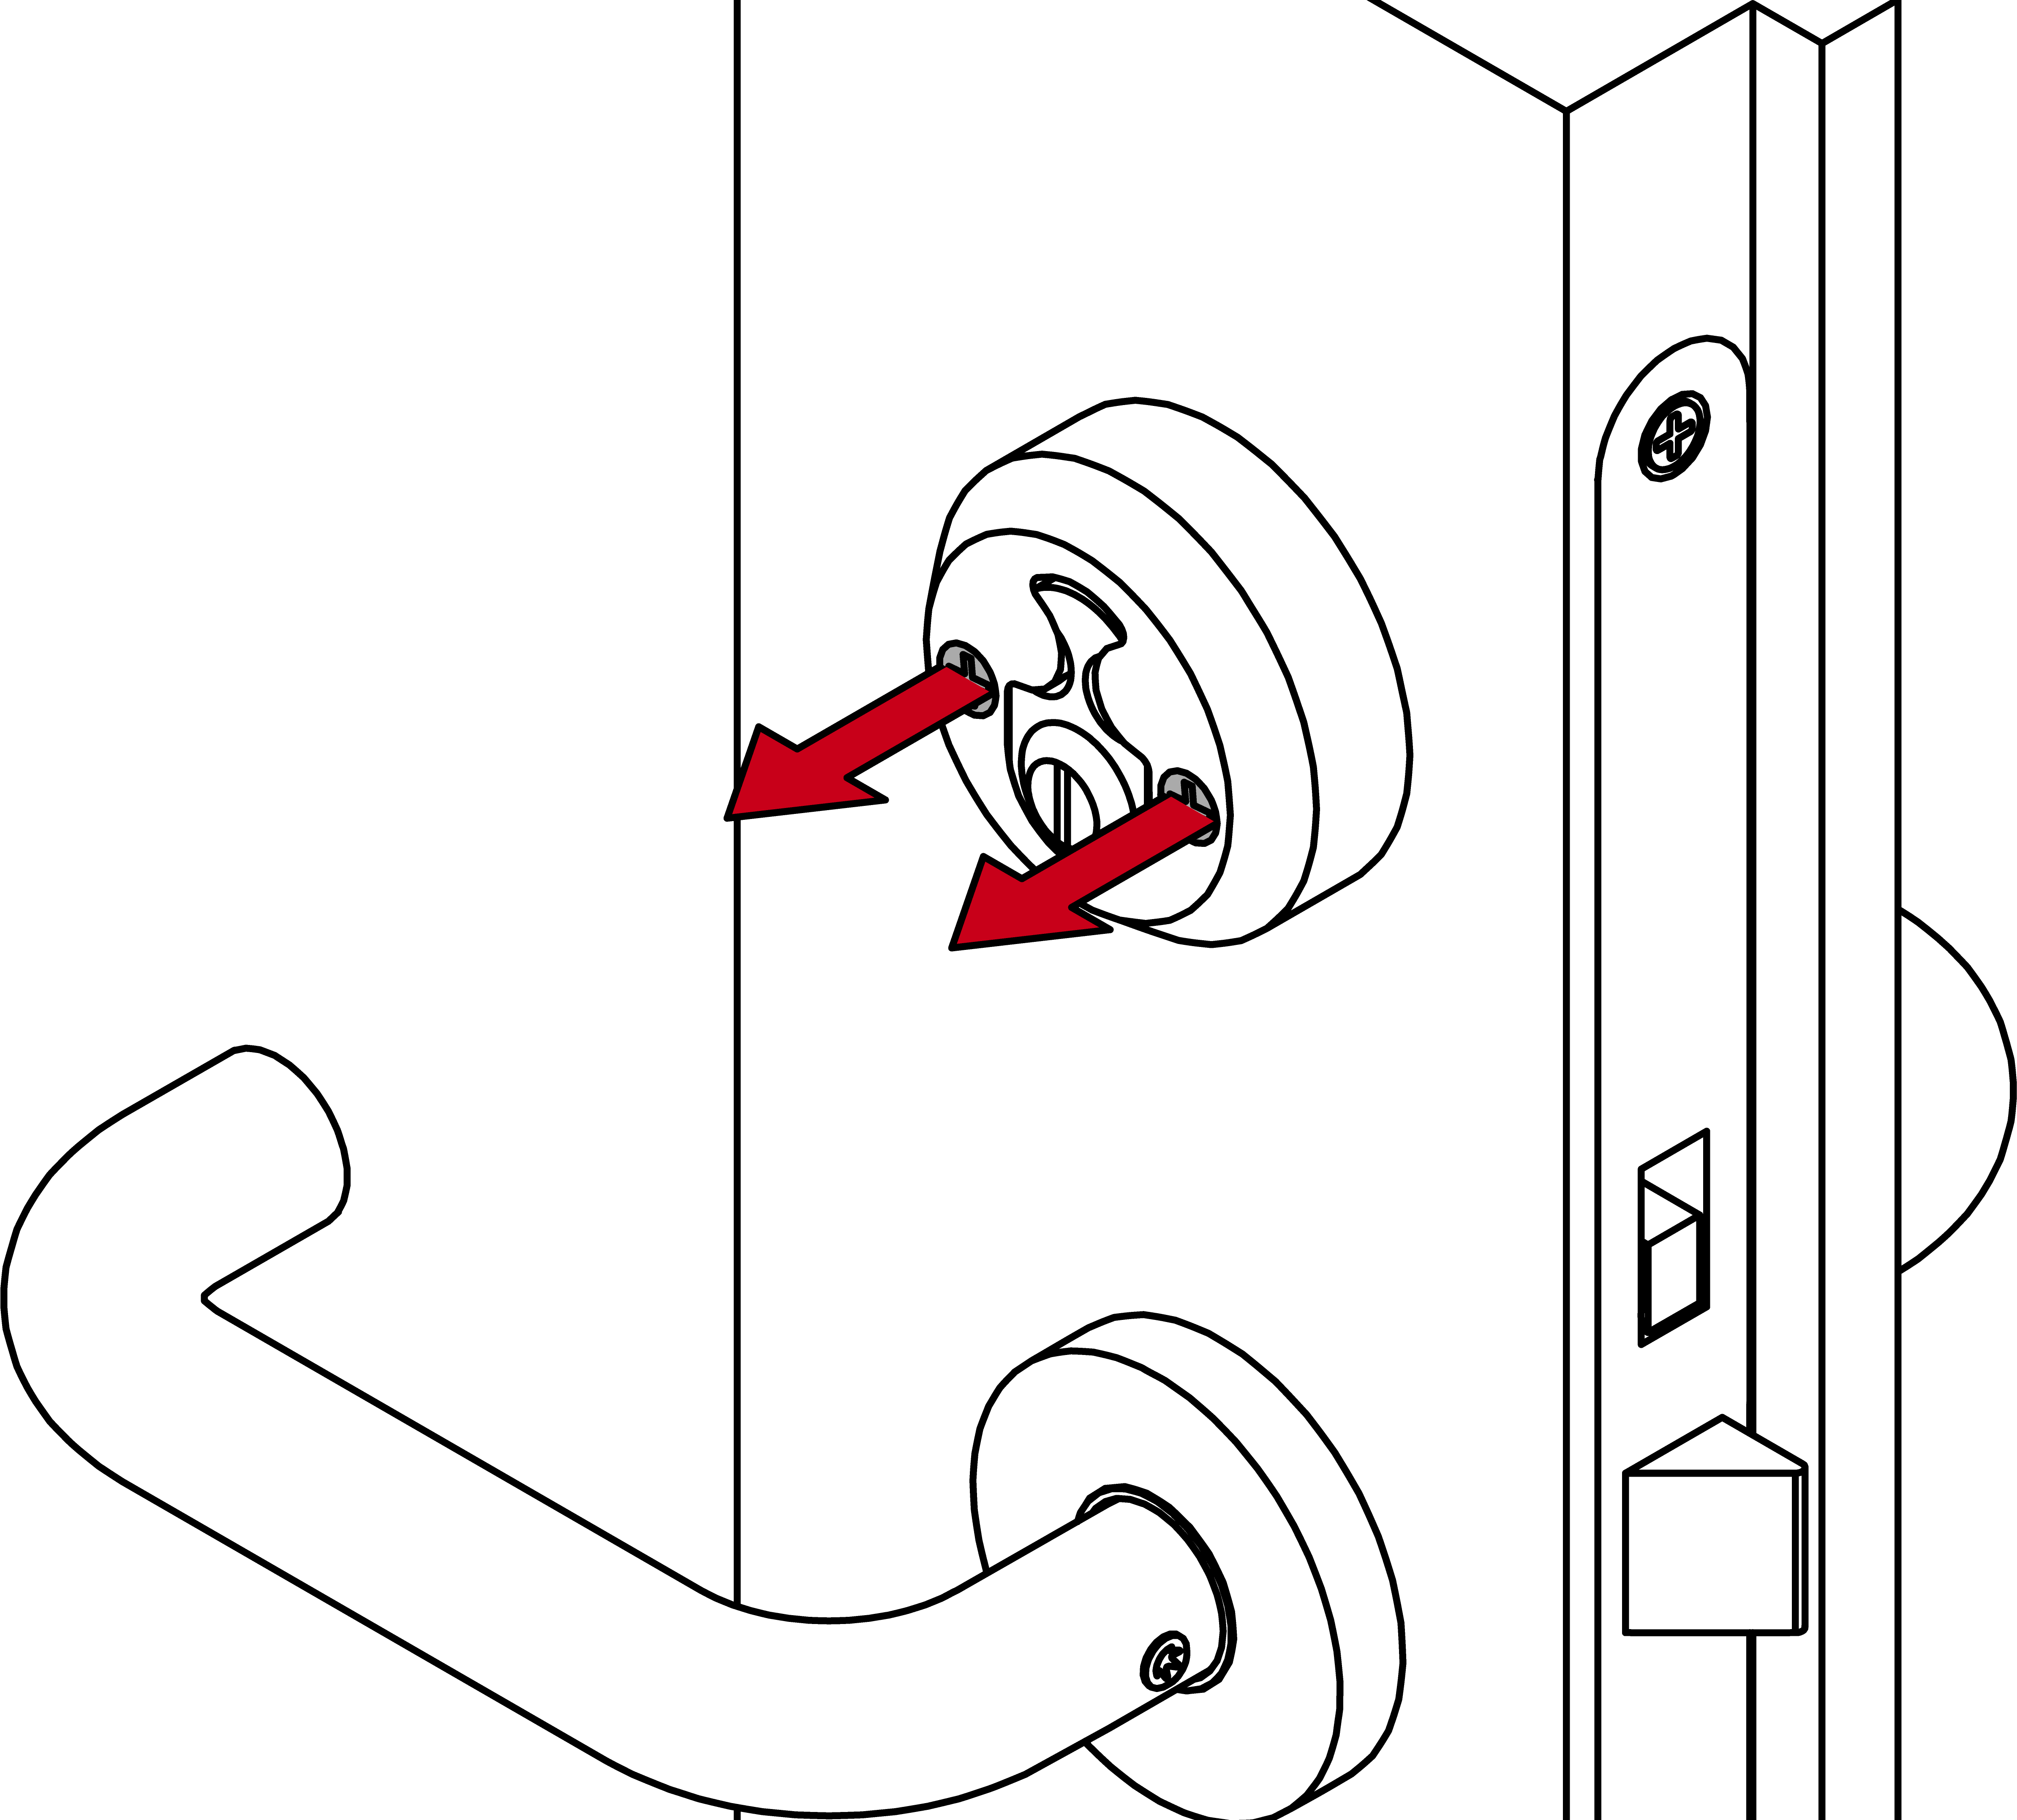
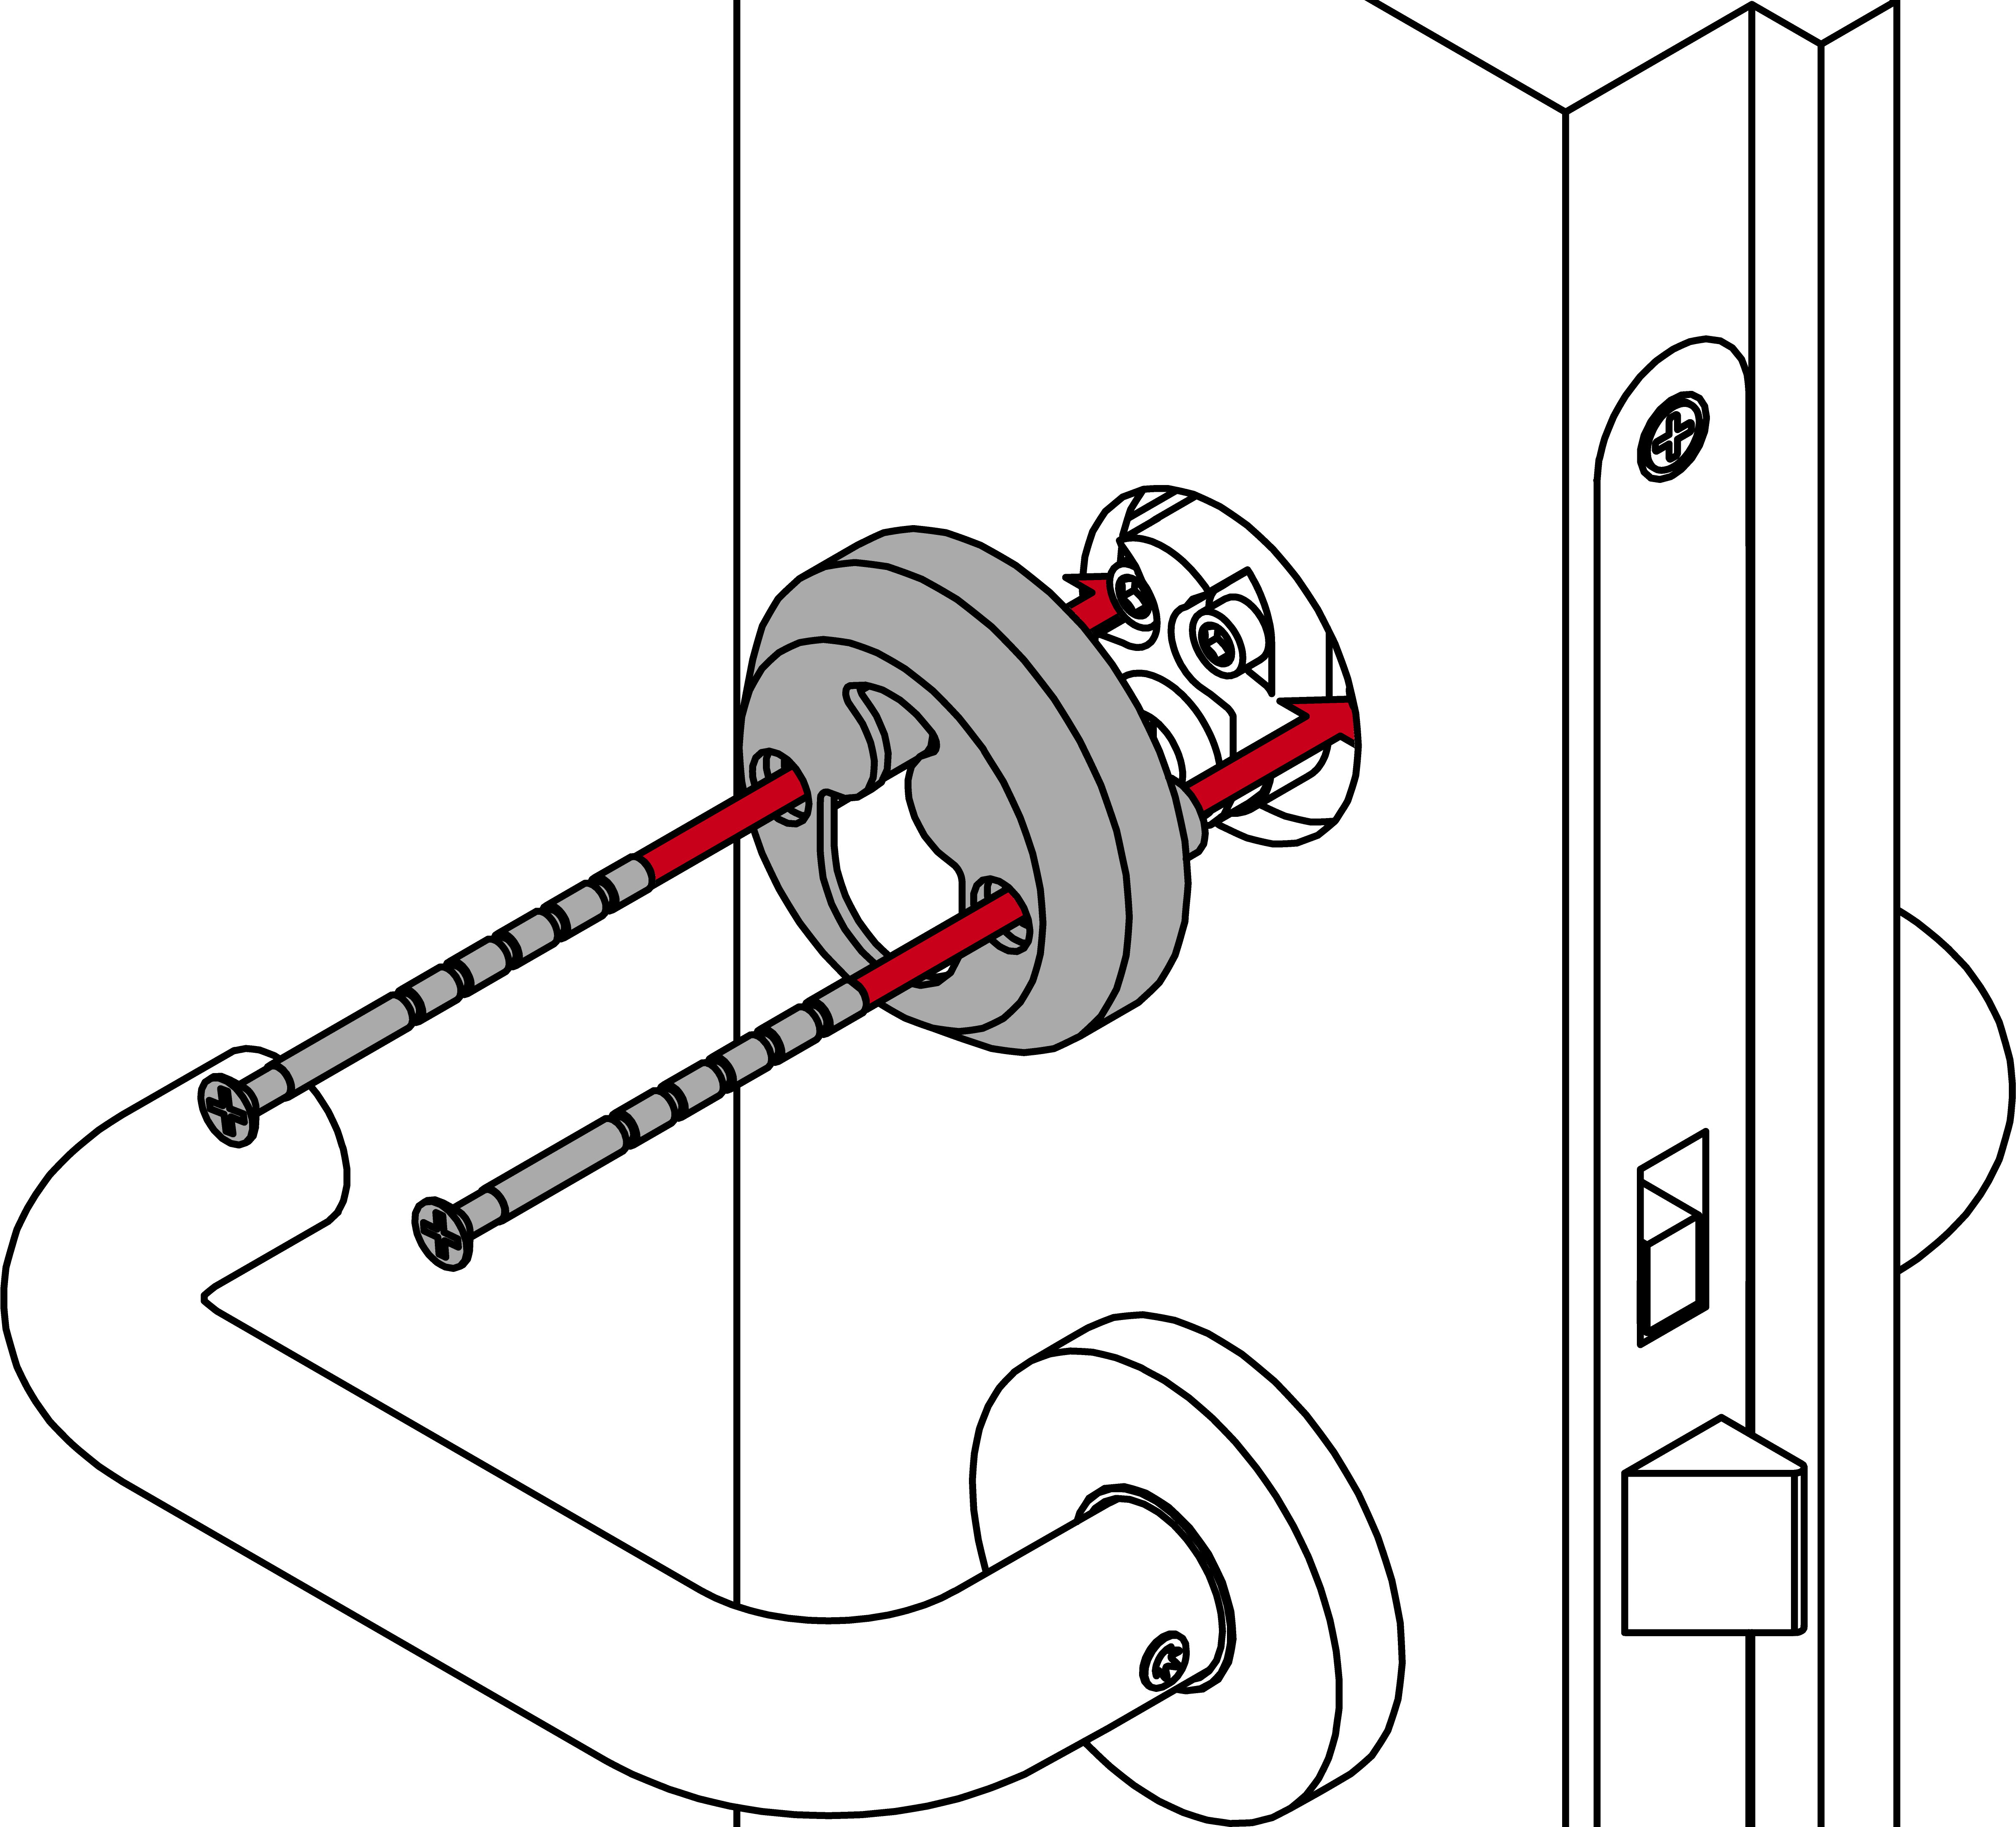
- For MO: remove the cylinder screws on the inner side (SW4).

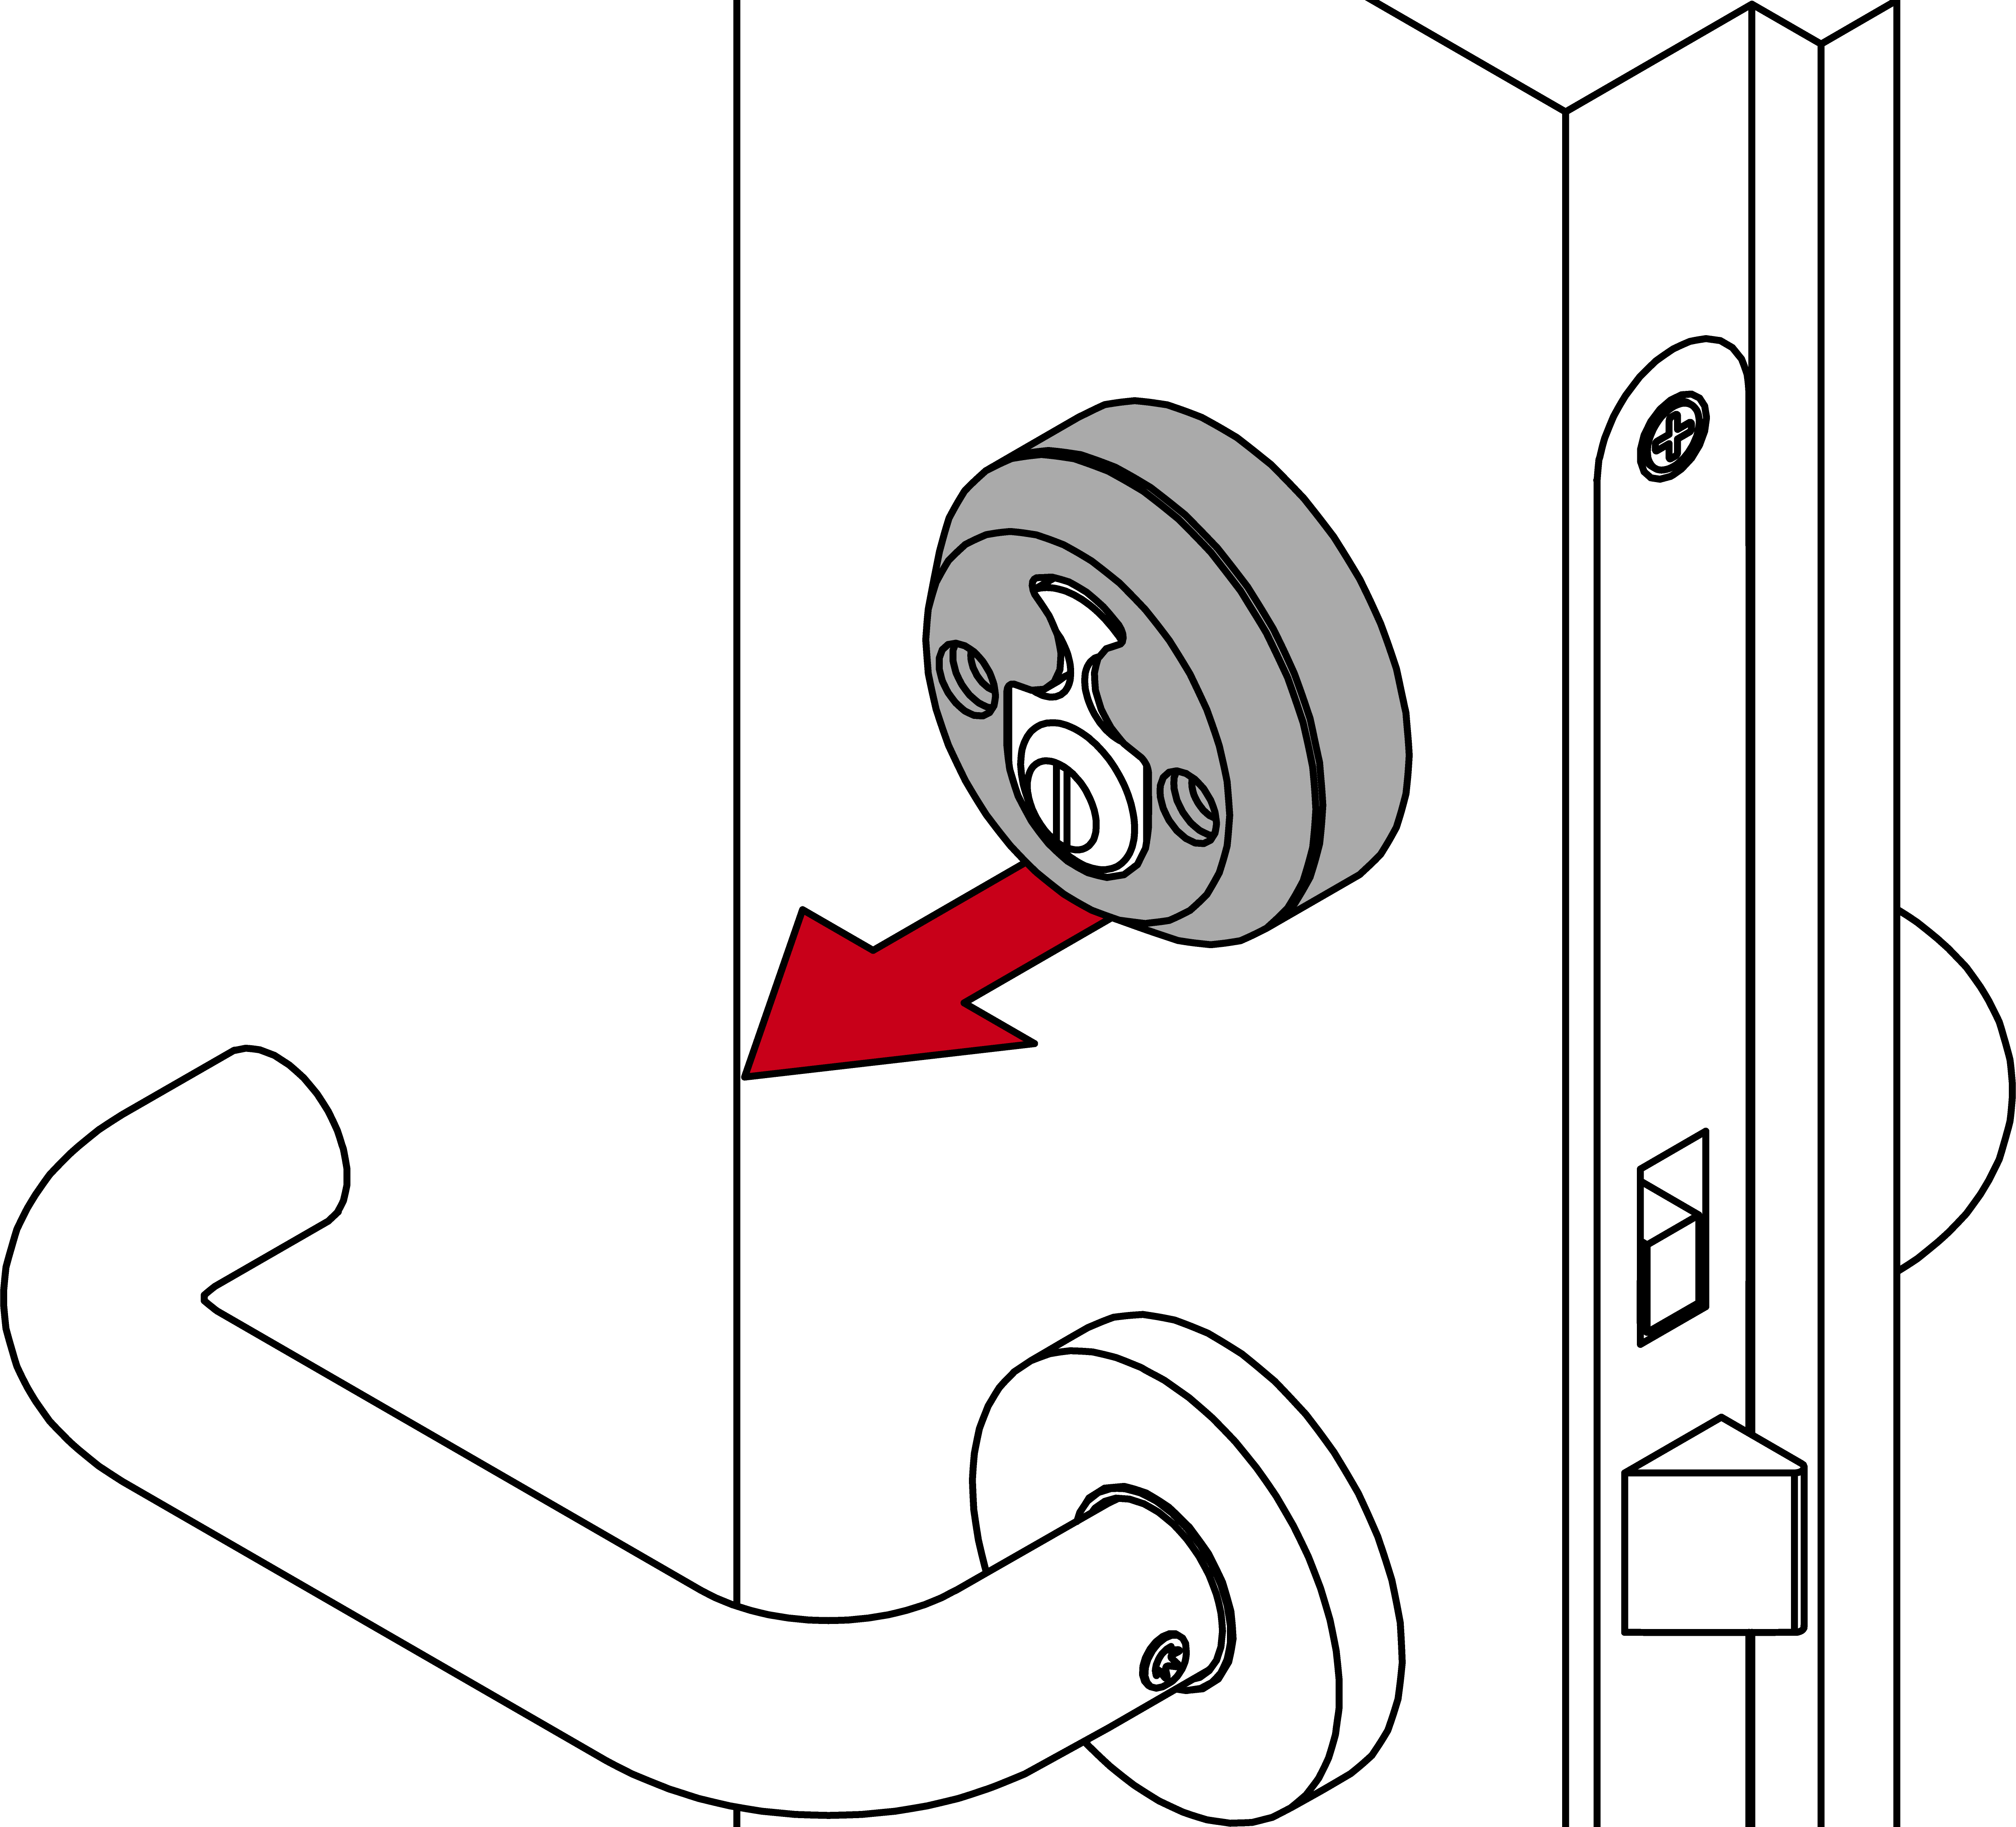
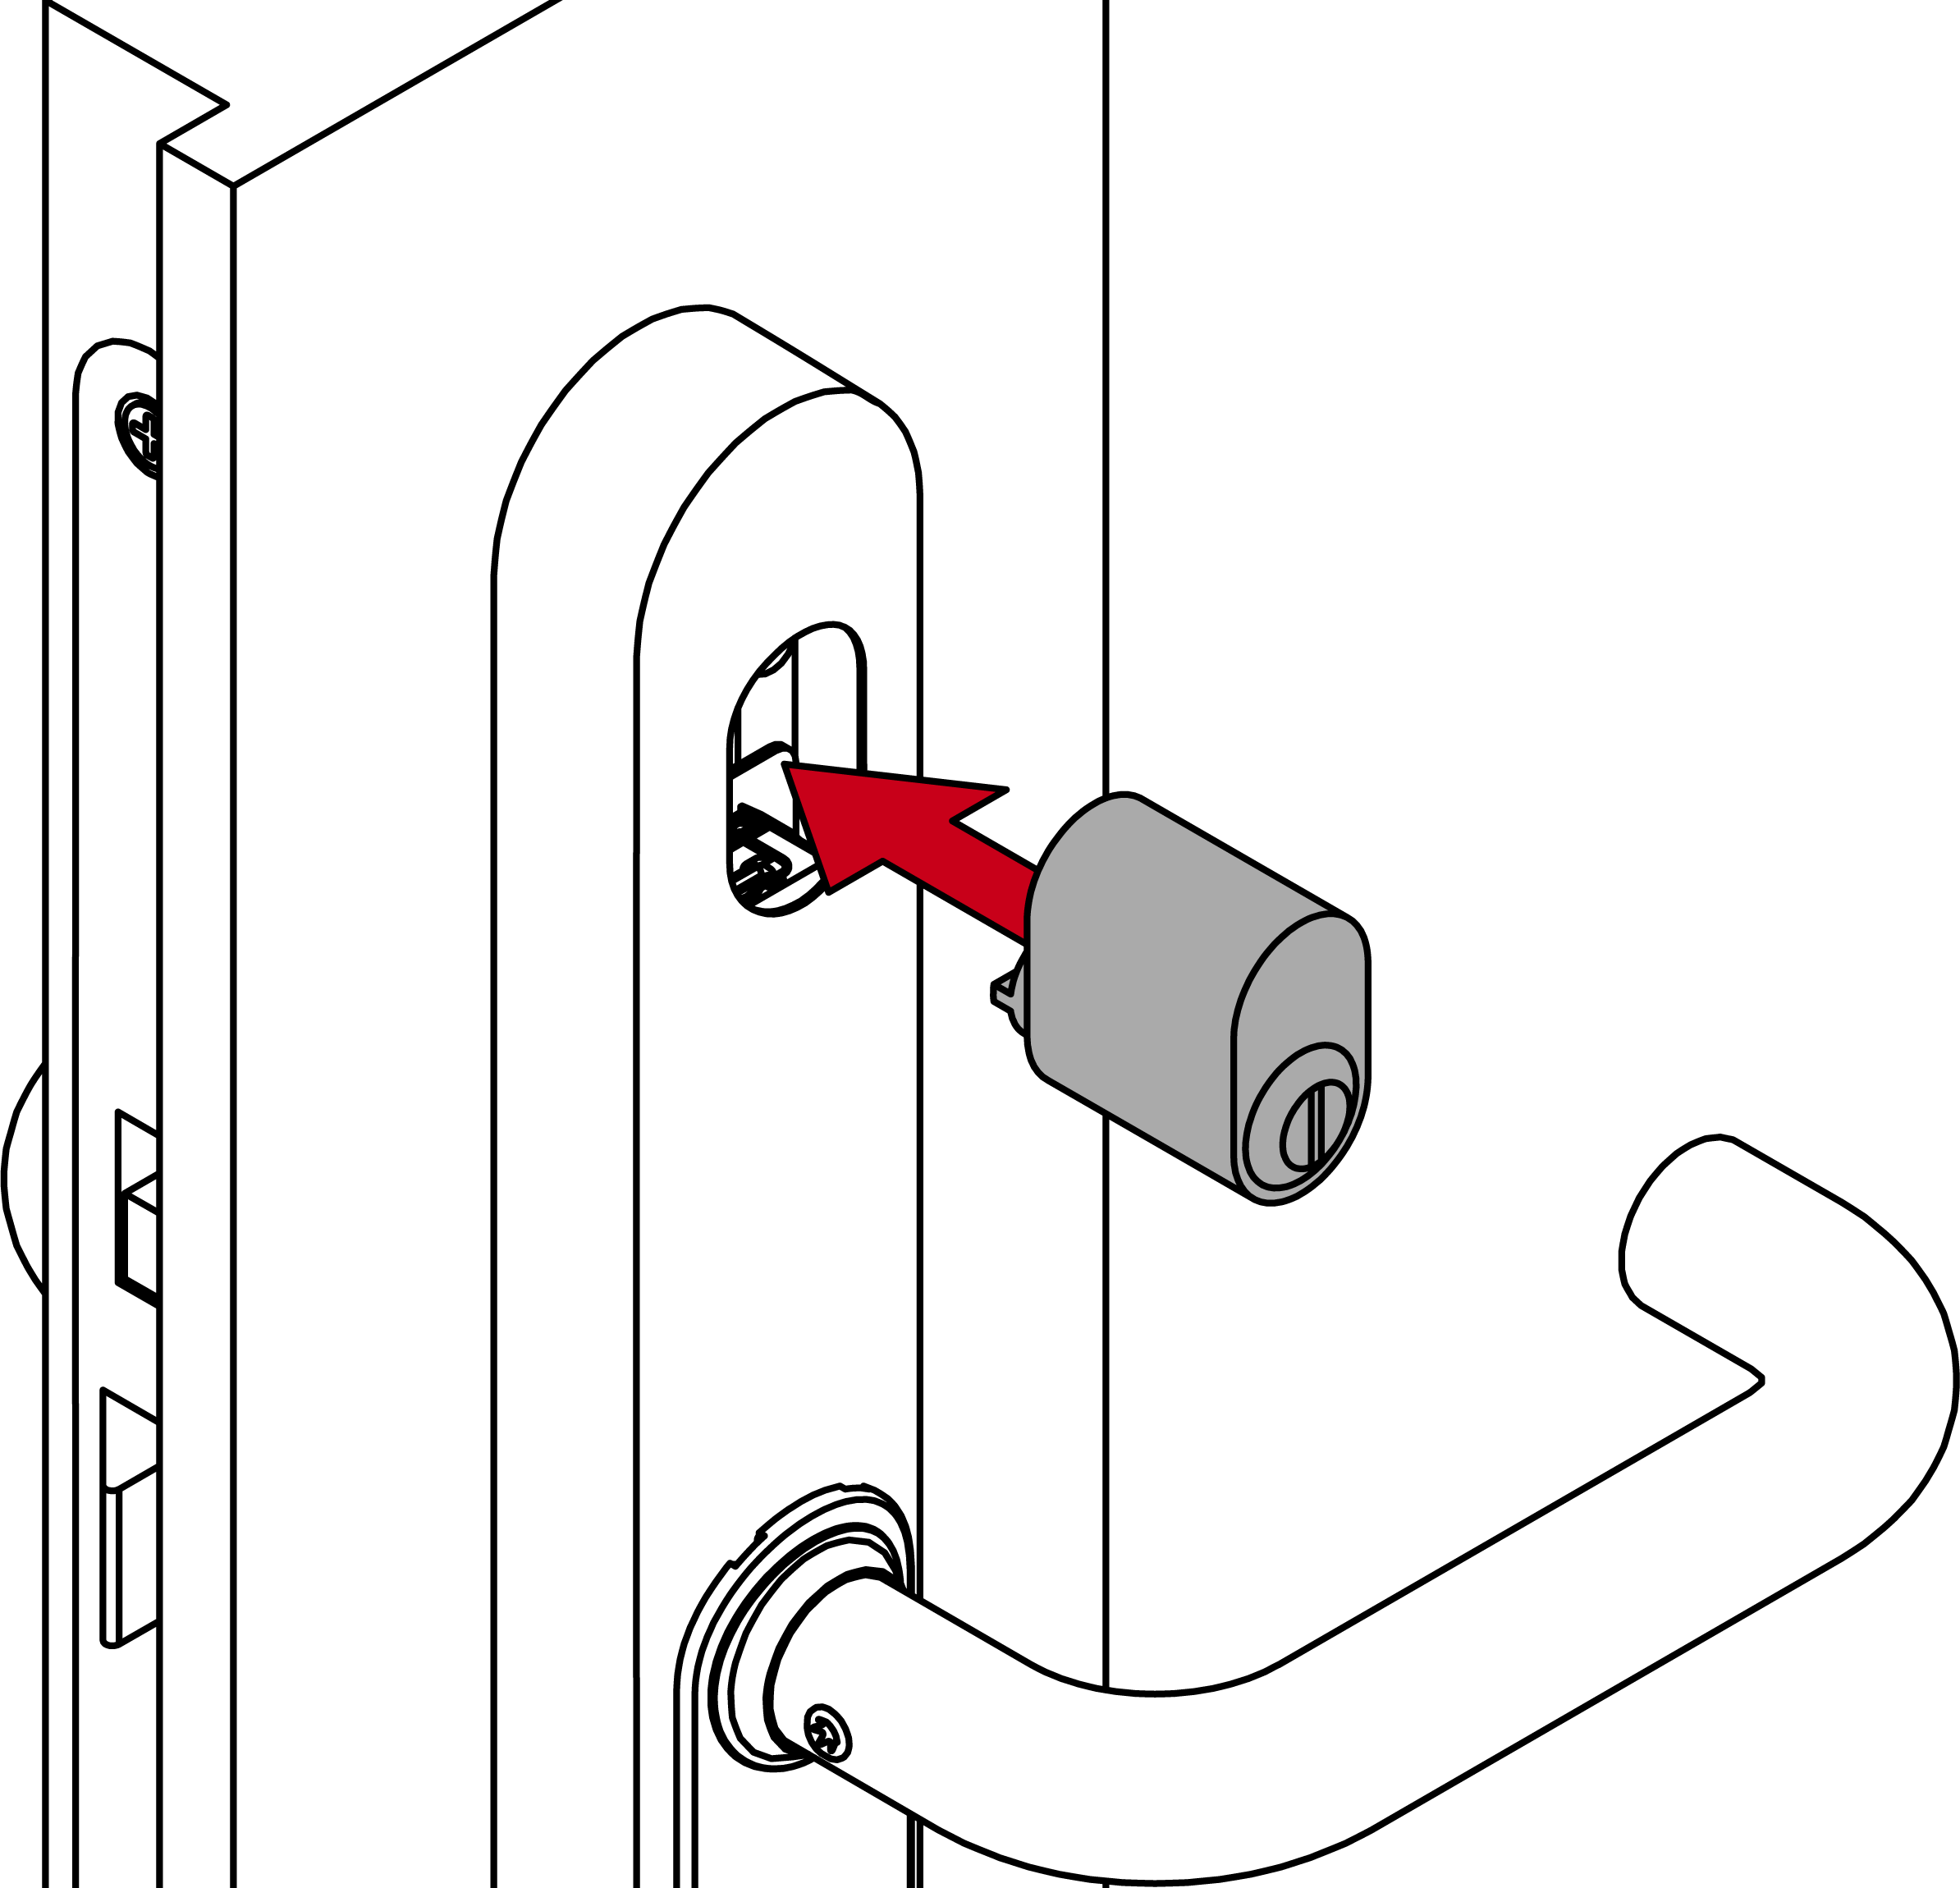
- For MO: remove the inner cylinder.
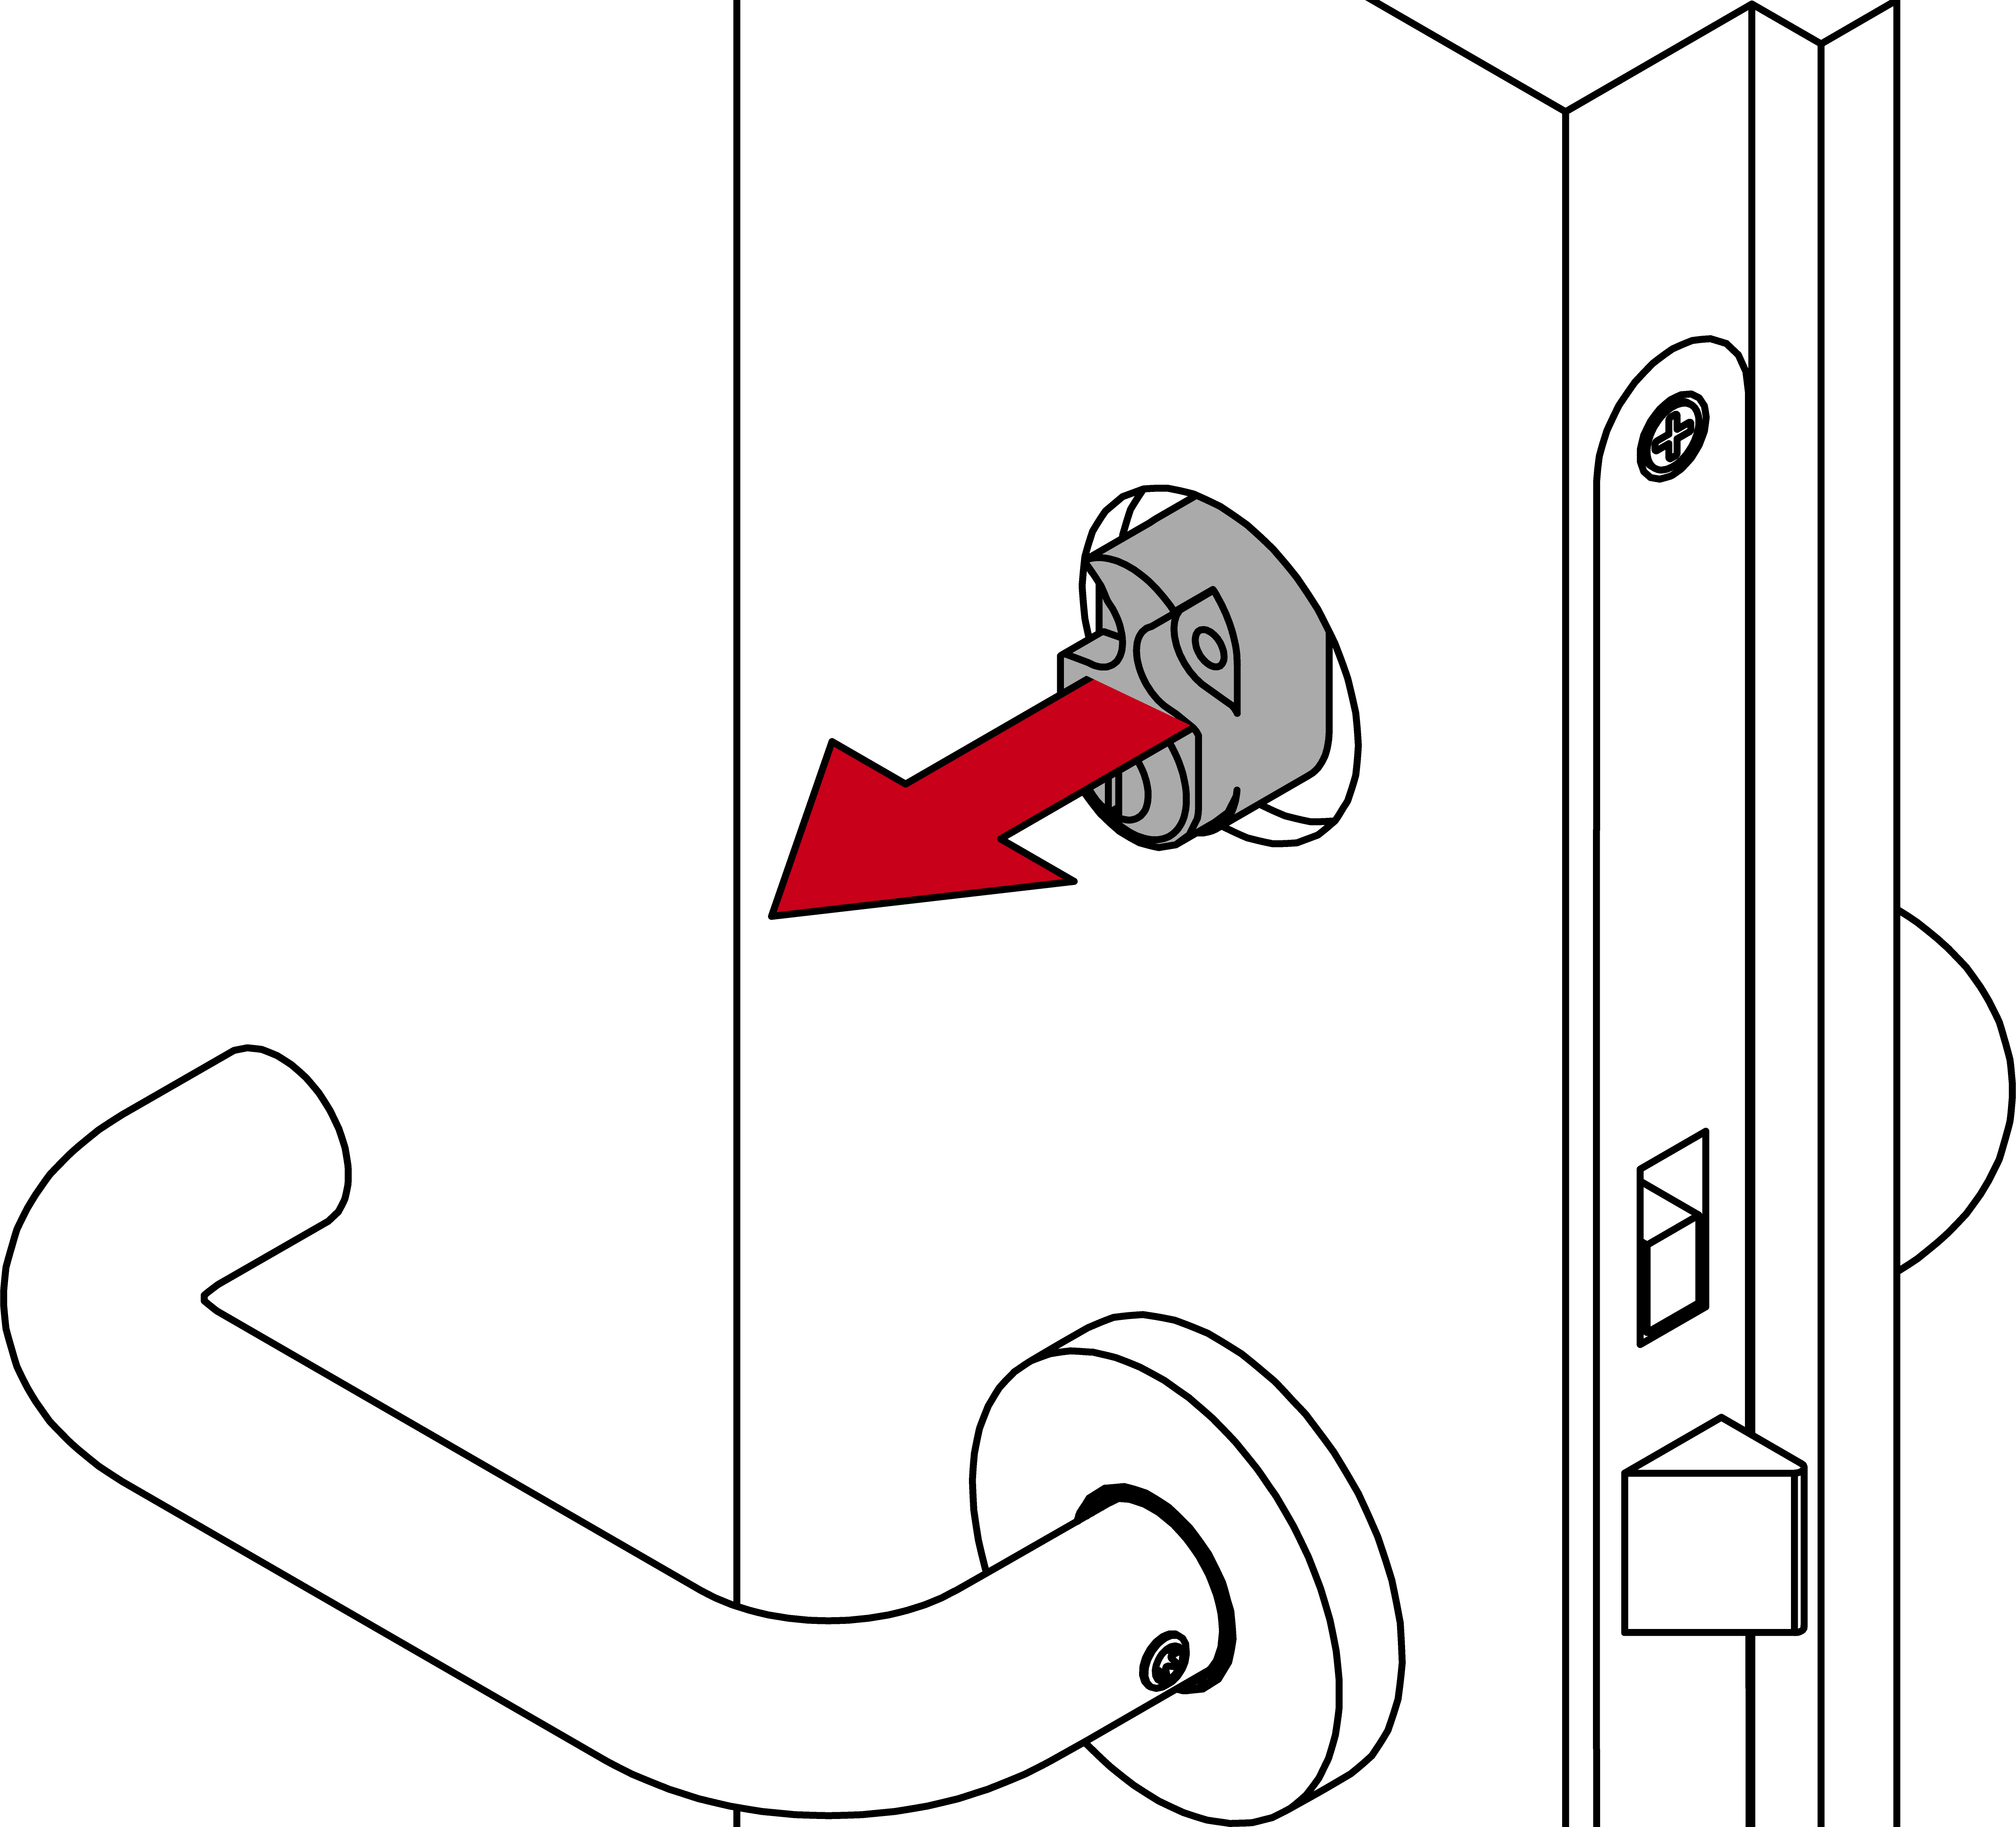
- For MO: remove the outer cam cylinder.
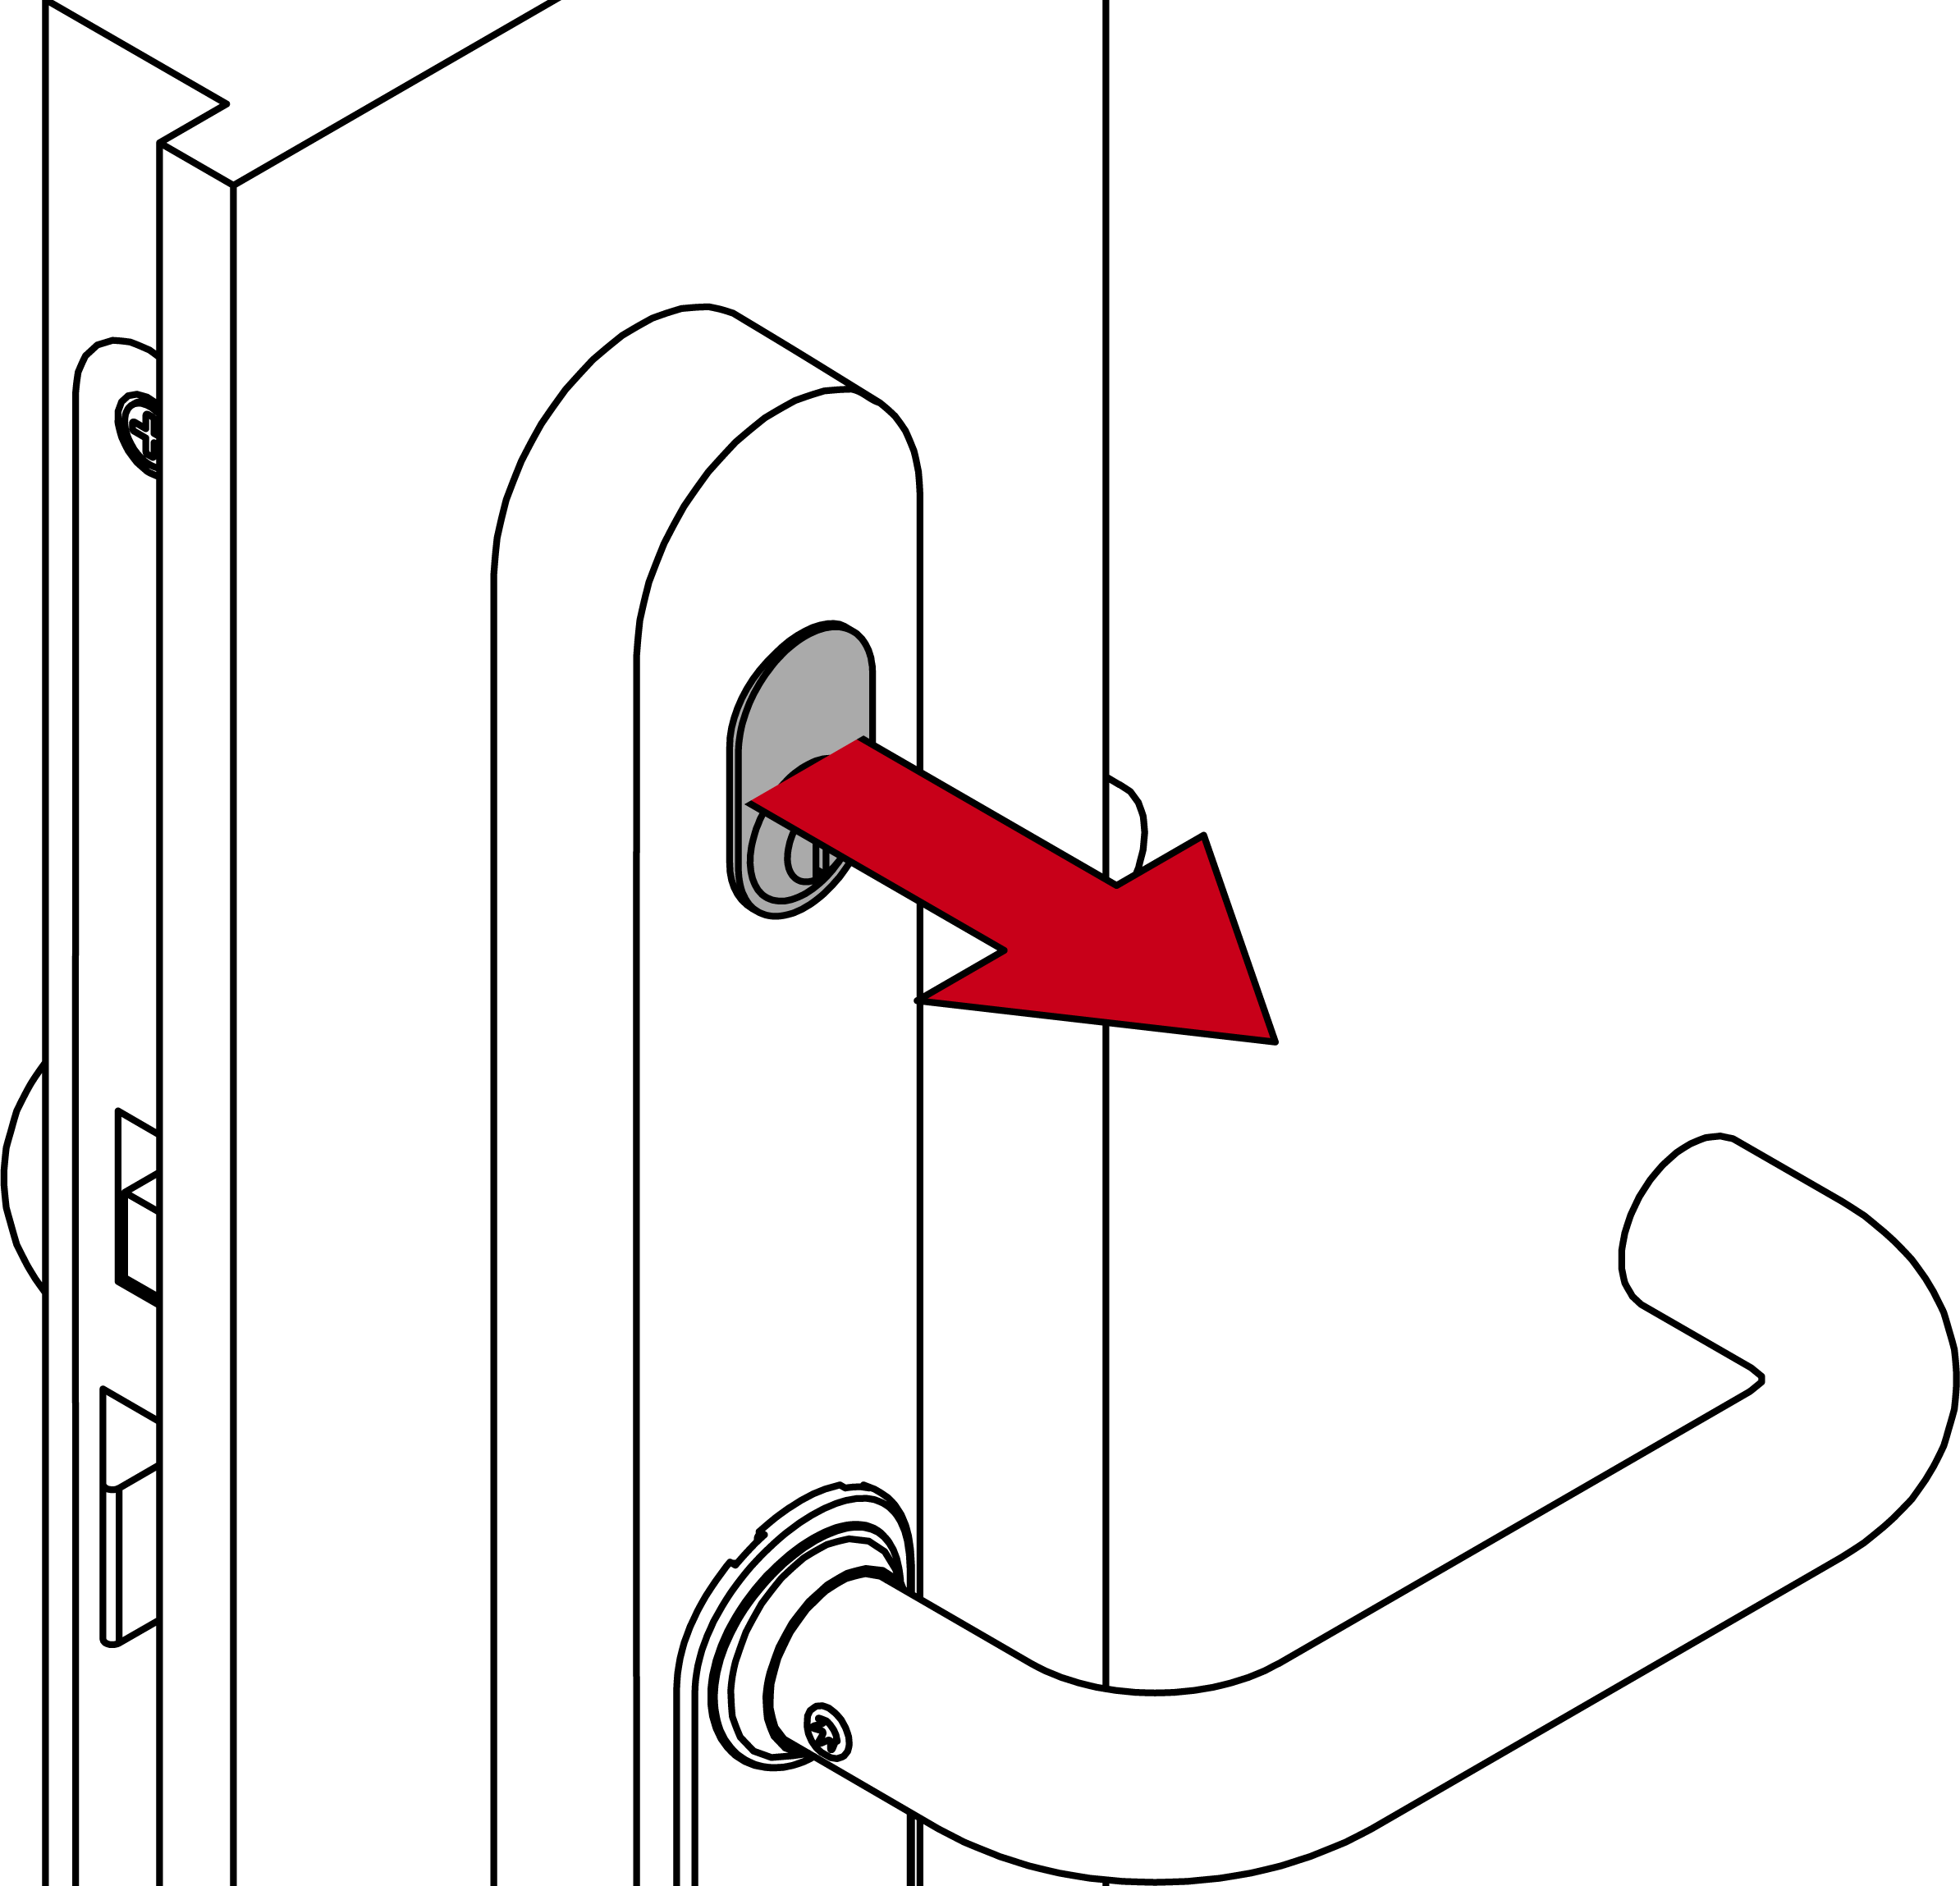
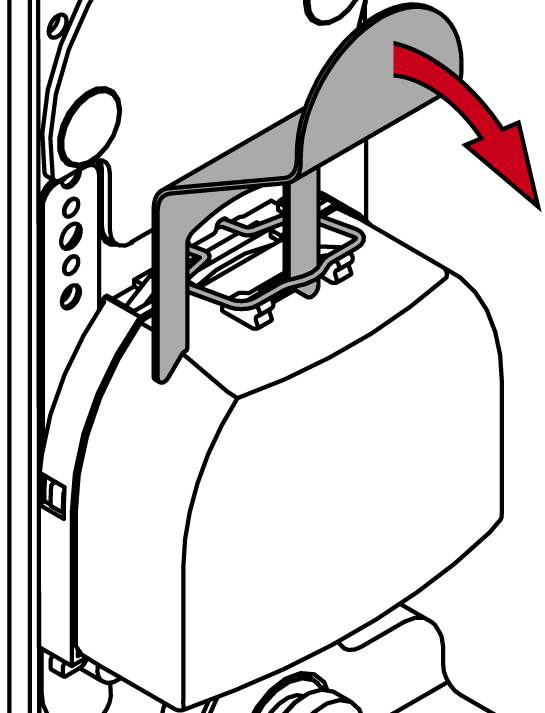
- Insert the special tool into the cover inlay on the electronics side.
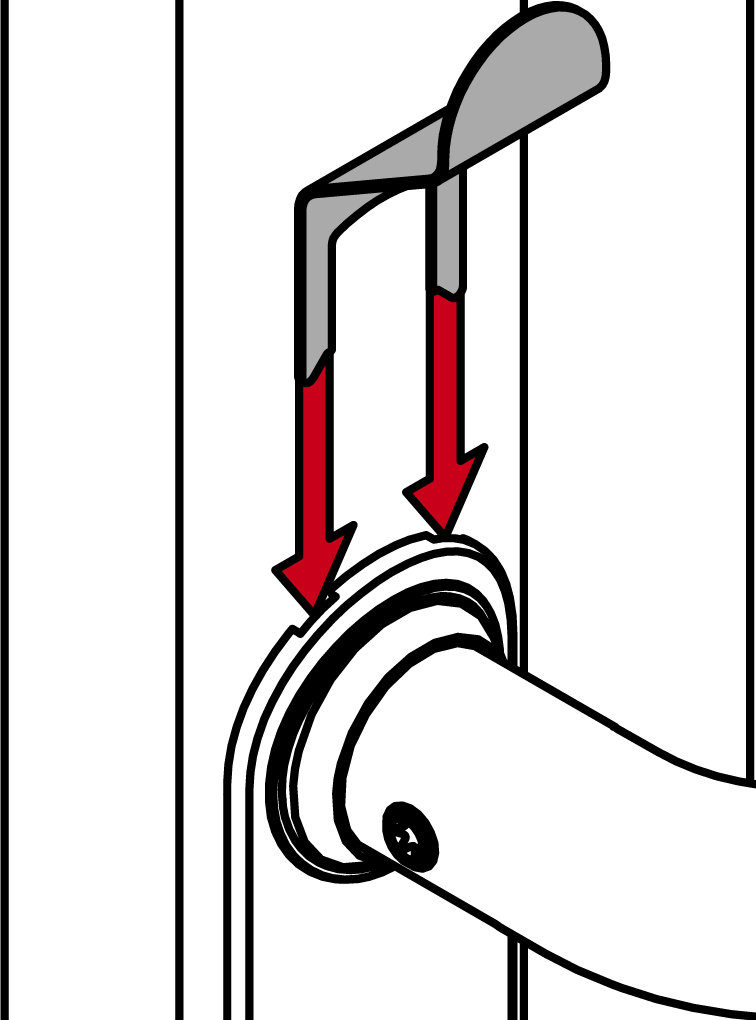
- Use the special tool to carefully bend the cover inlay upwards.
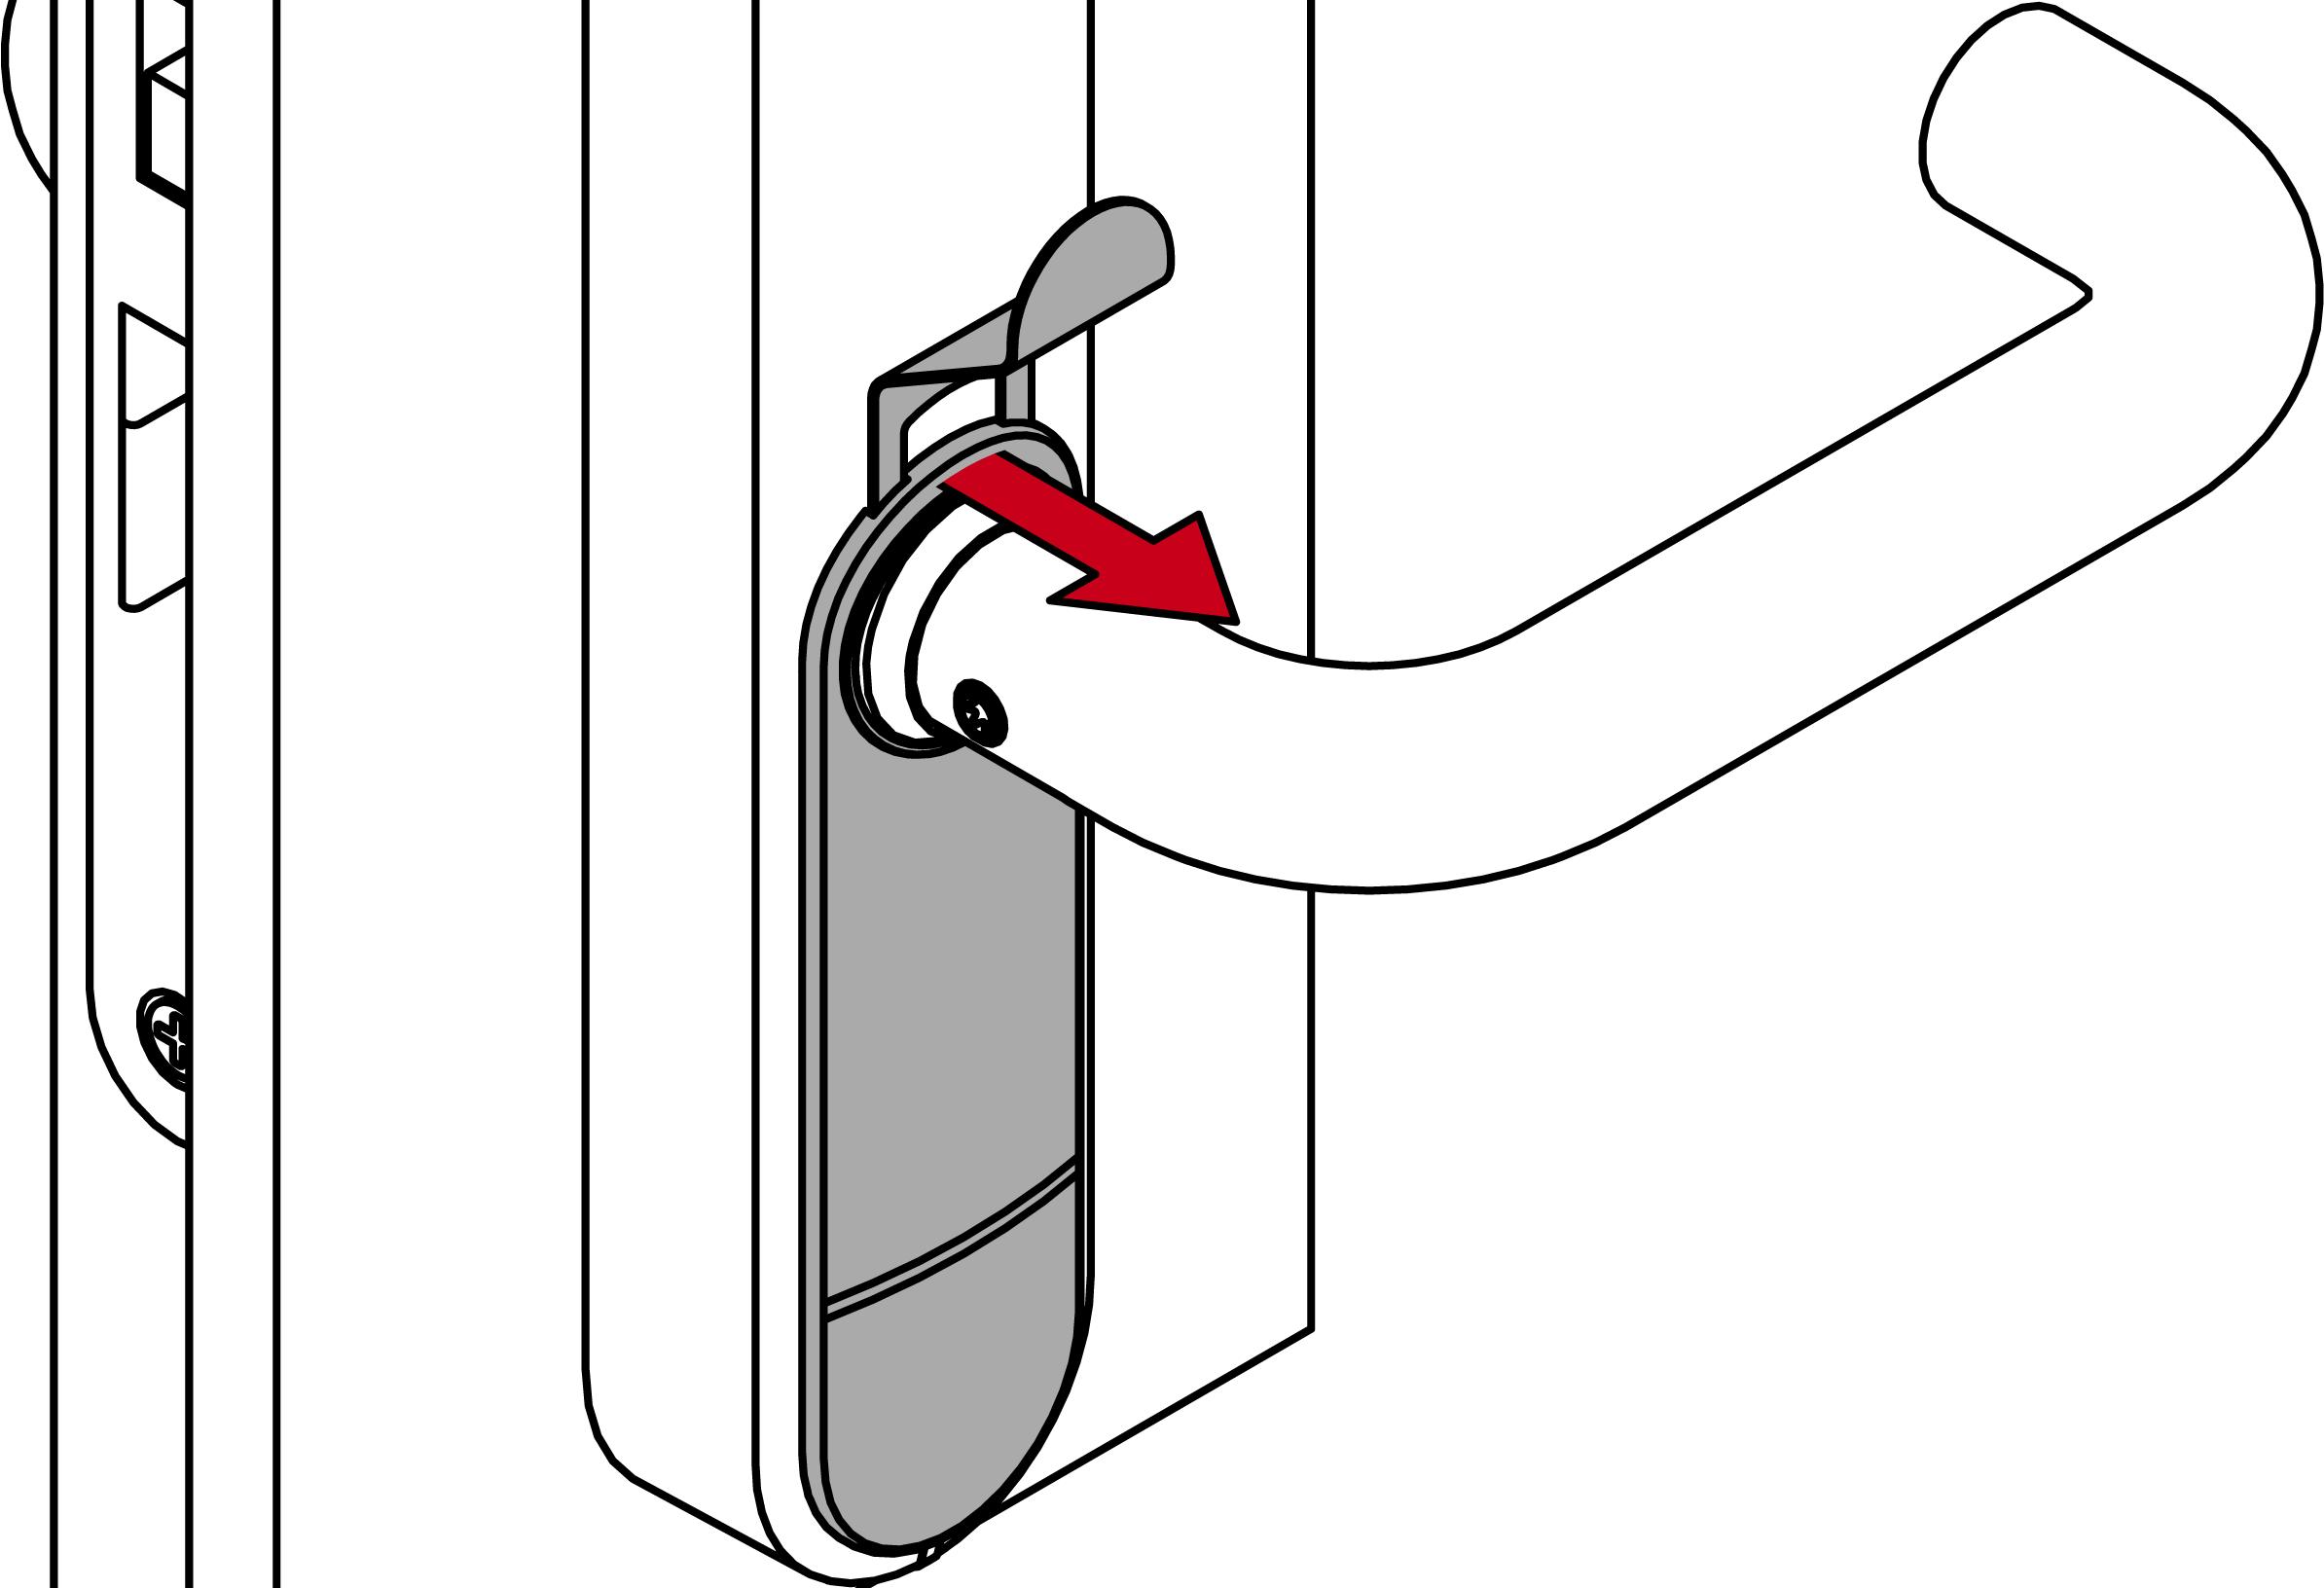
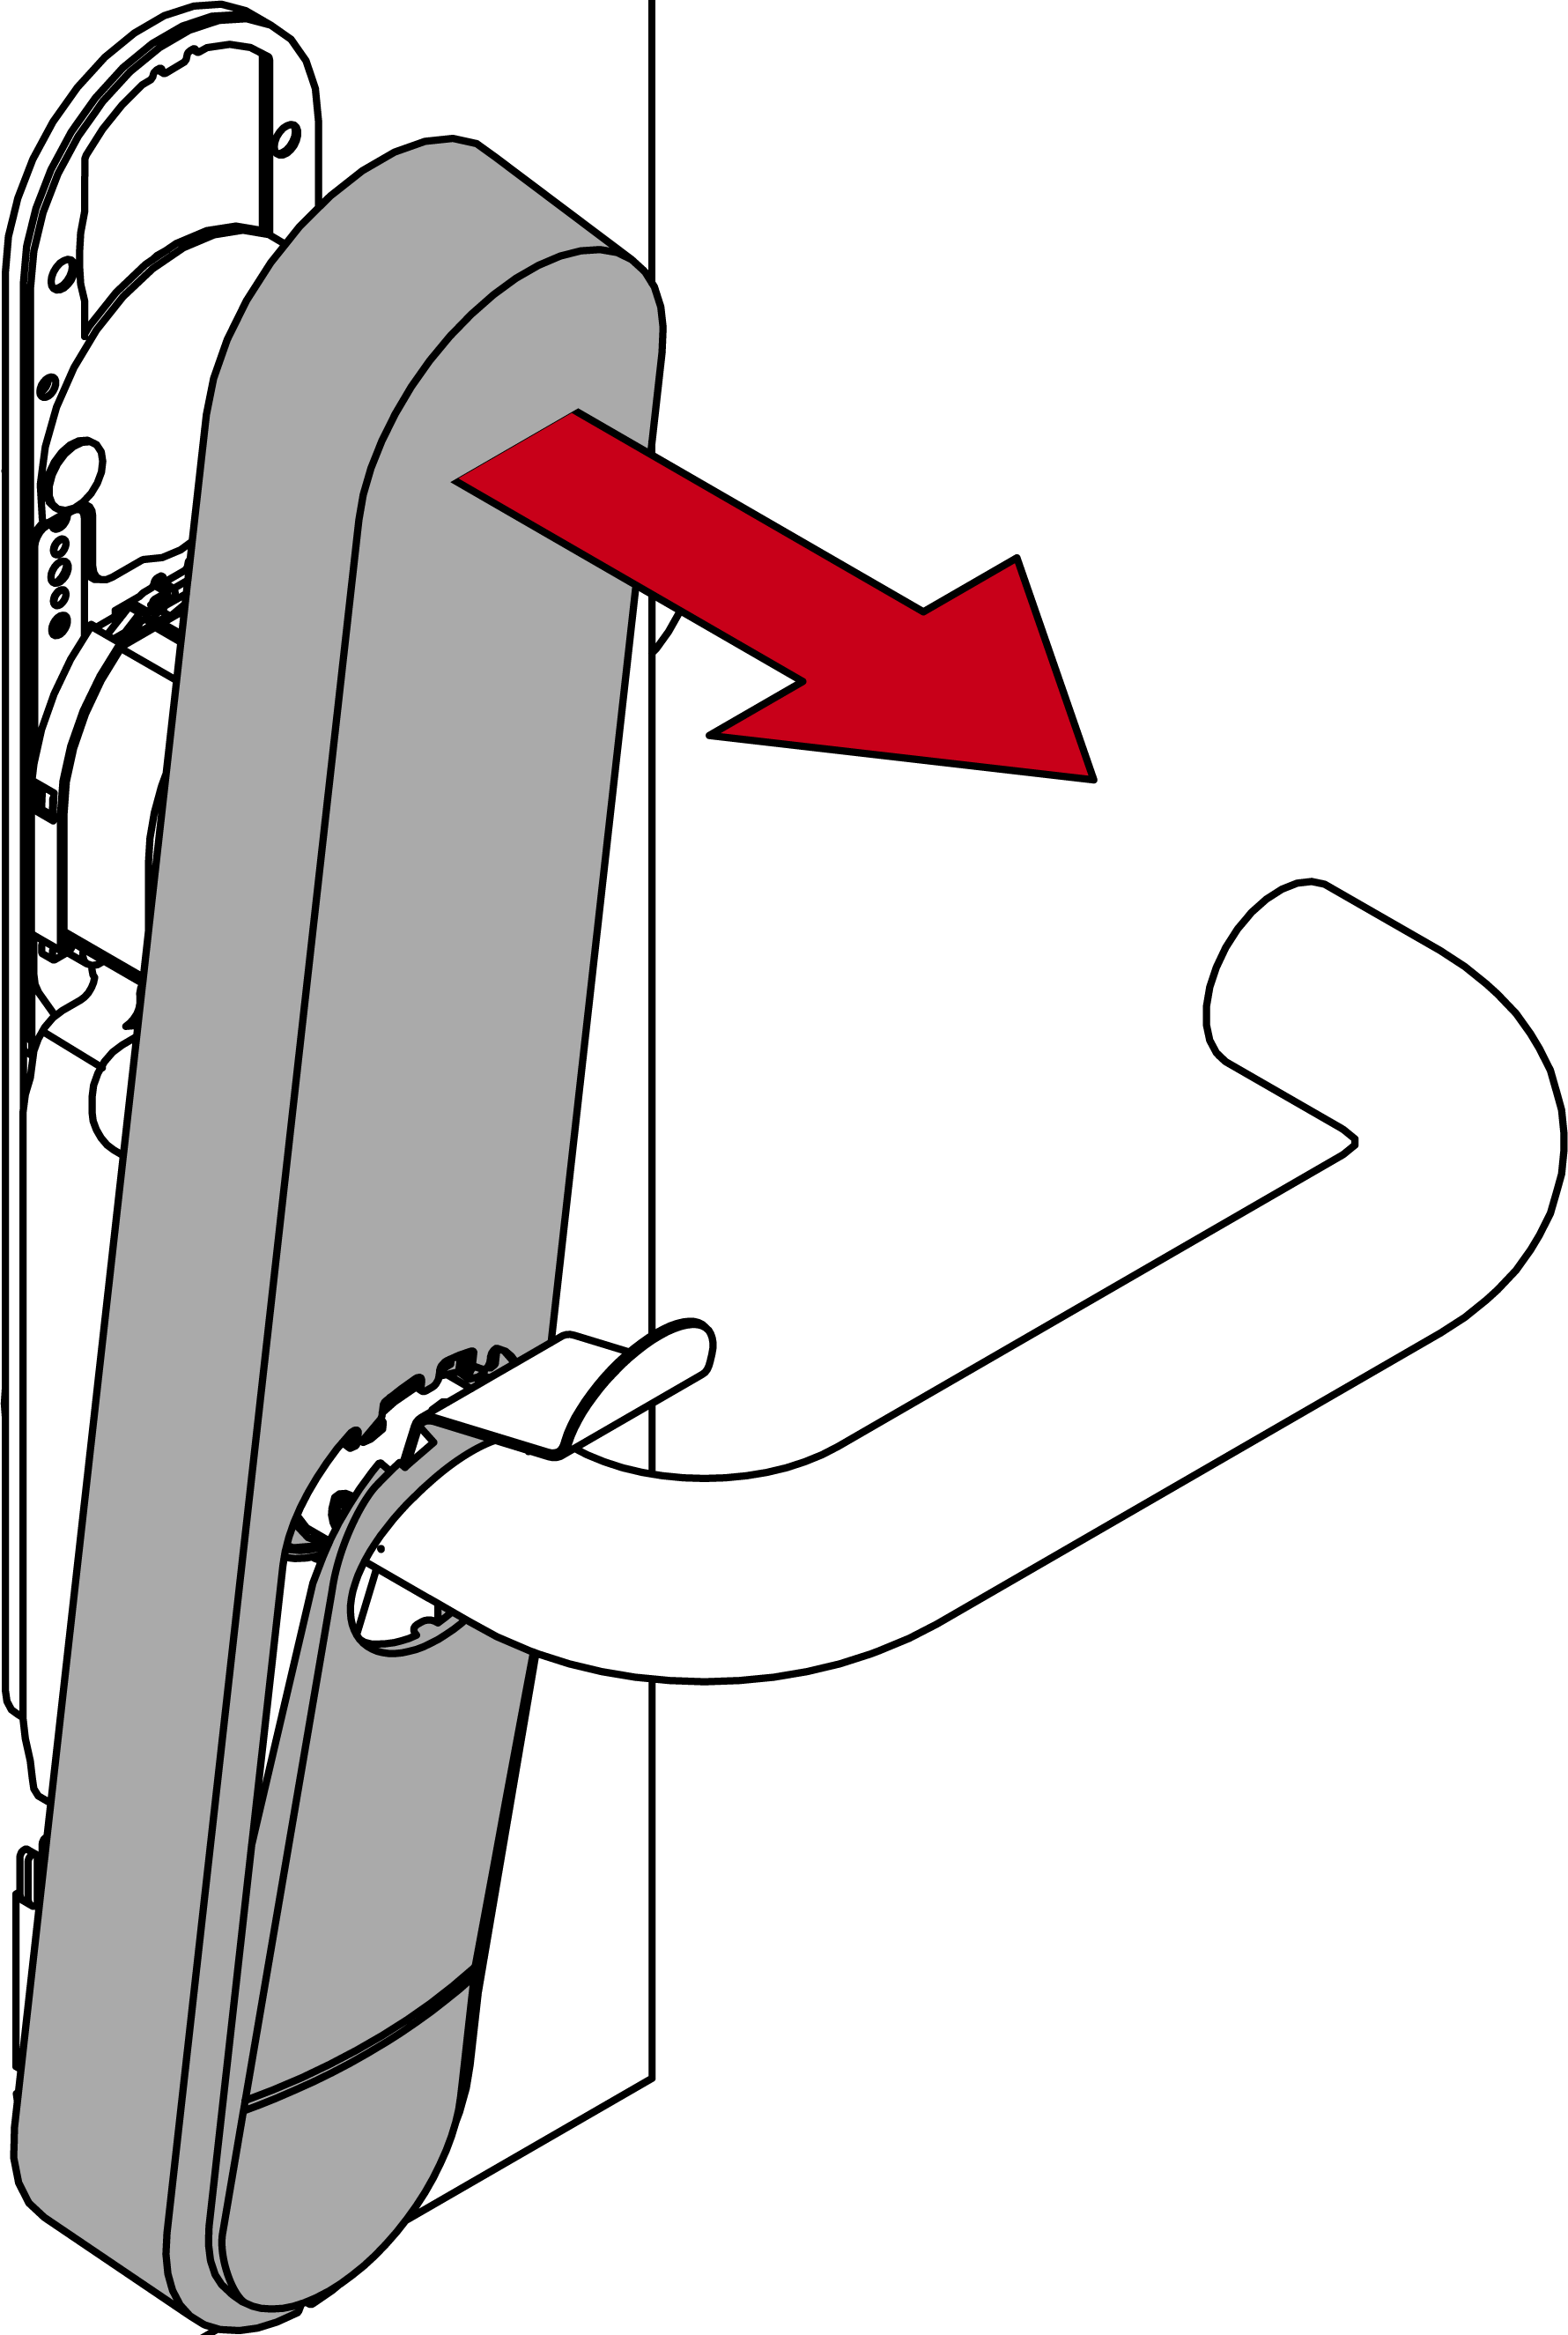
- Slide the cover upwards.

- Cover unlocked.
- Remove the cover.
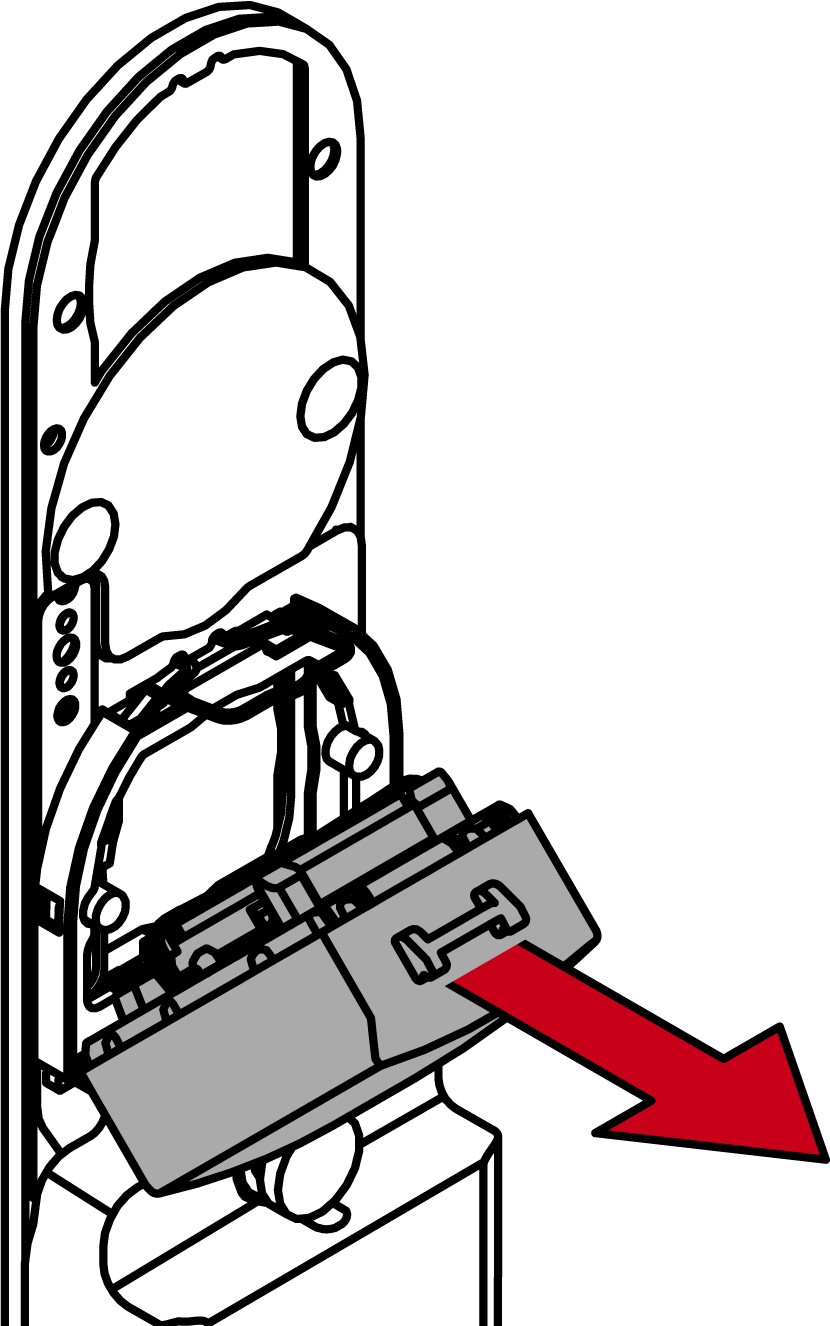
- Use the special tool to detach the battery module clip.
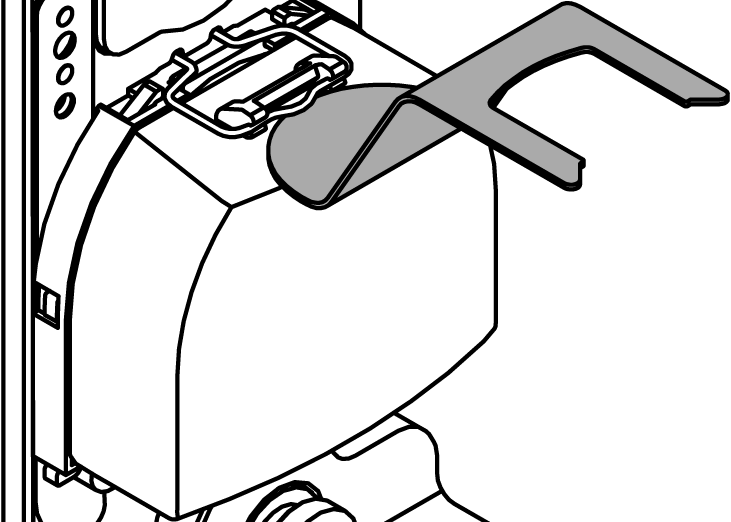
- Remove the battery module.
- Use the special tool to detach the battery clip.
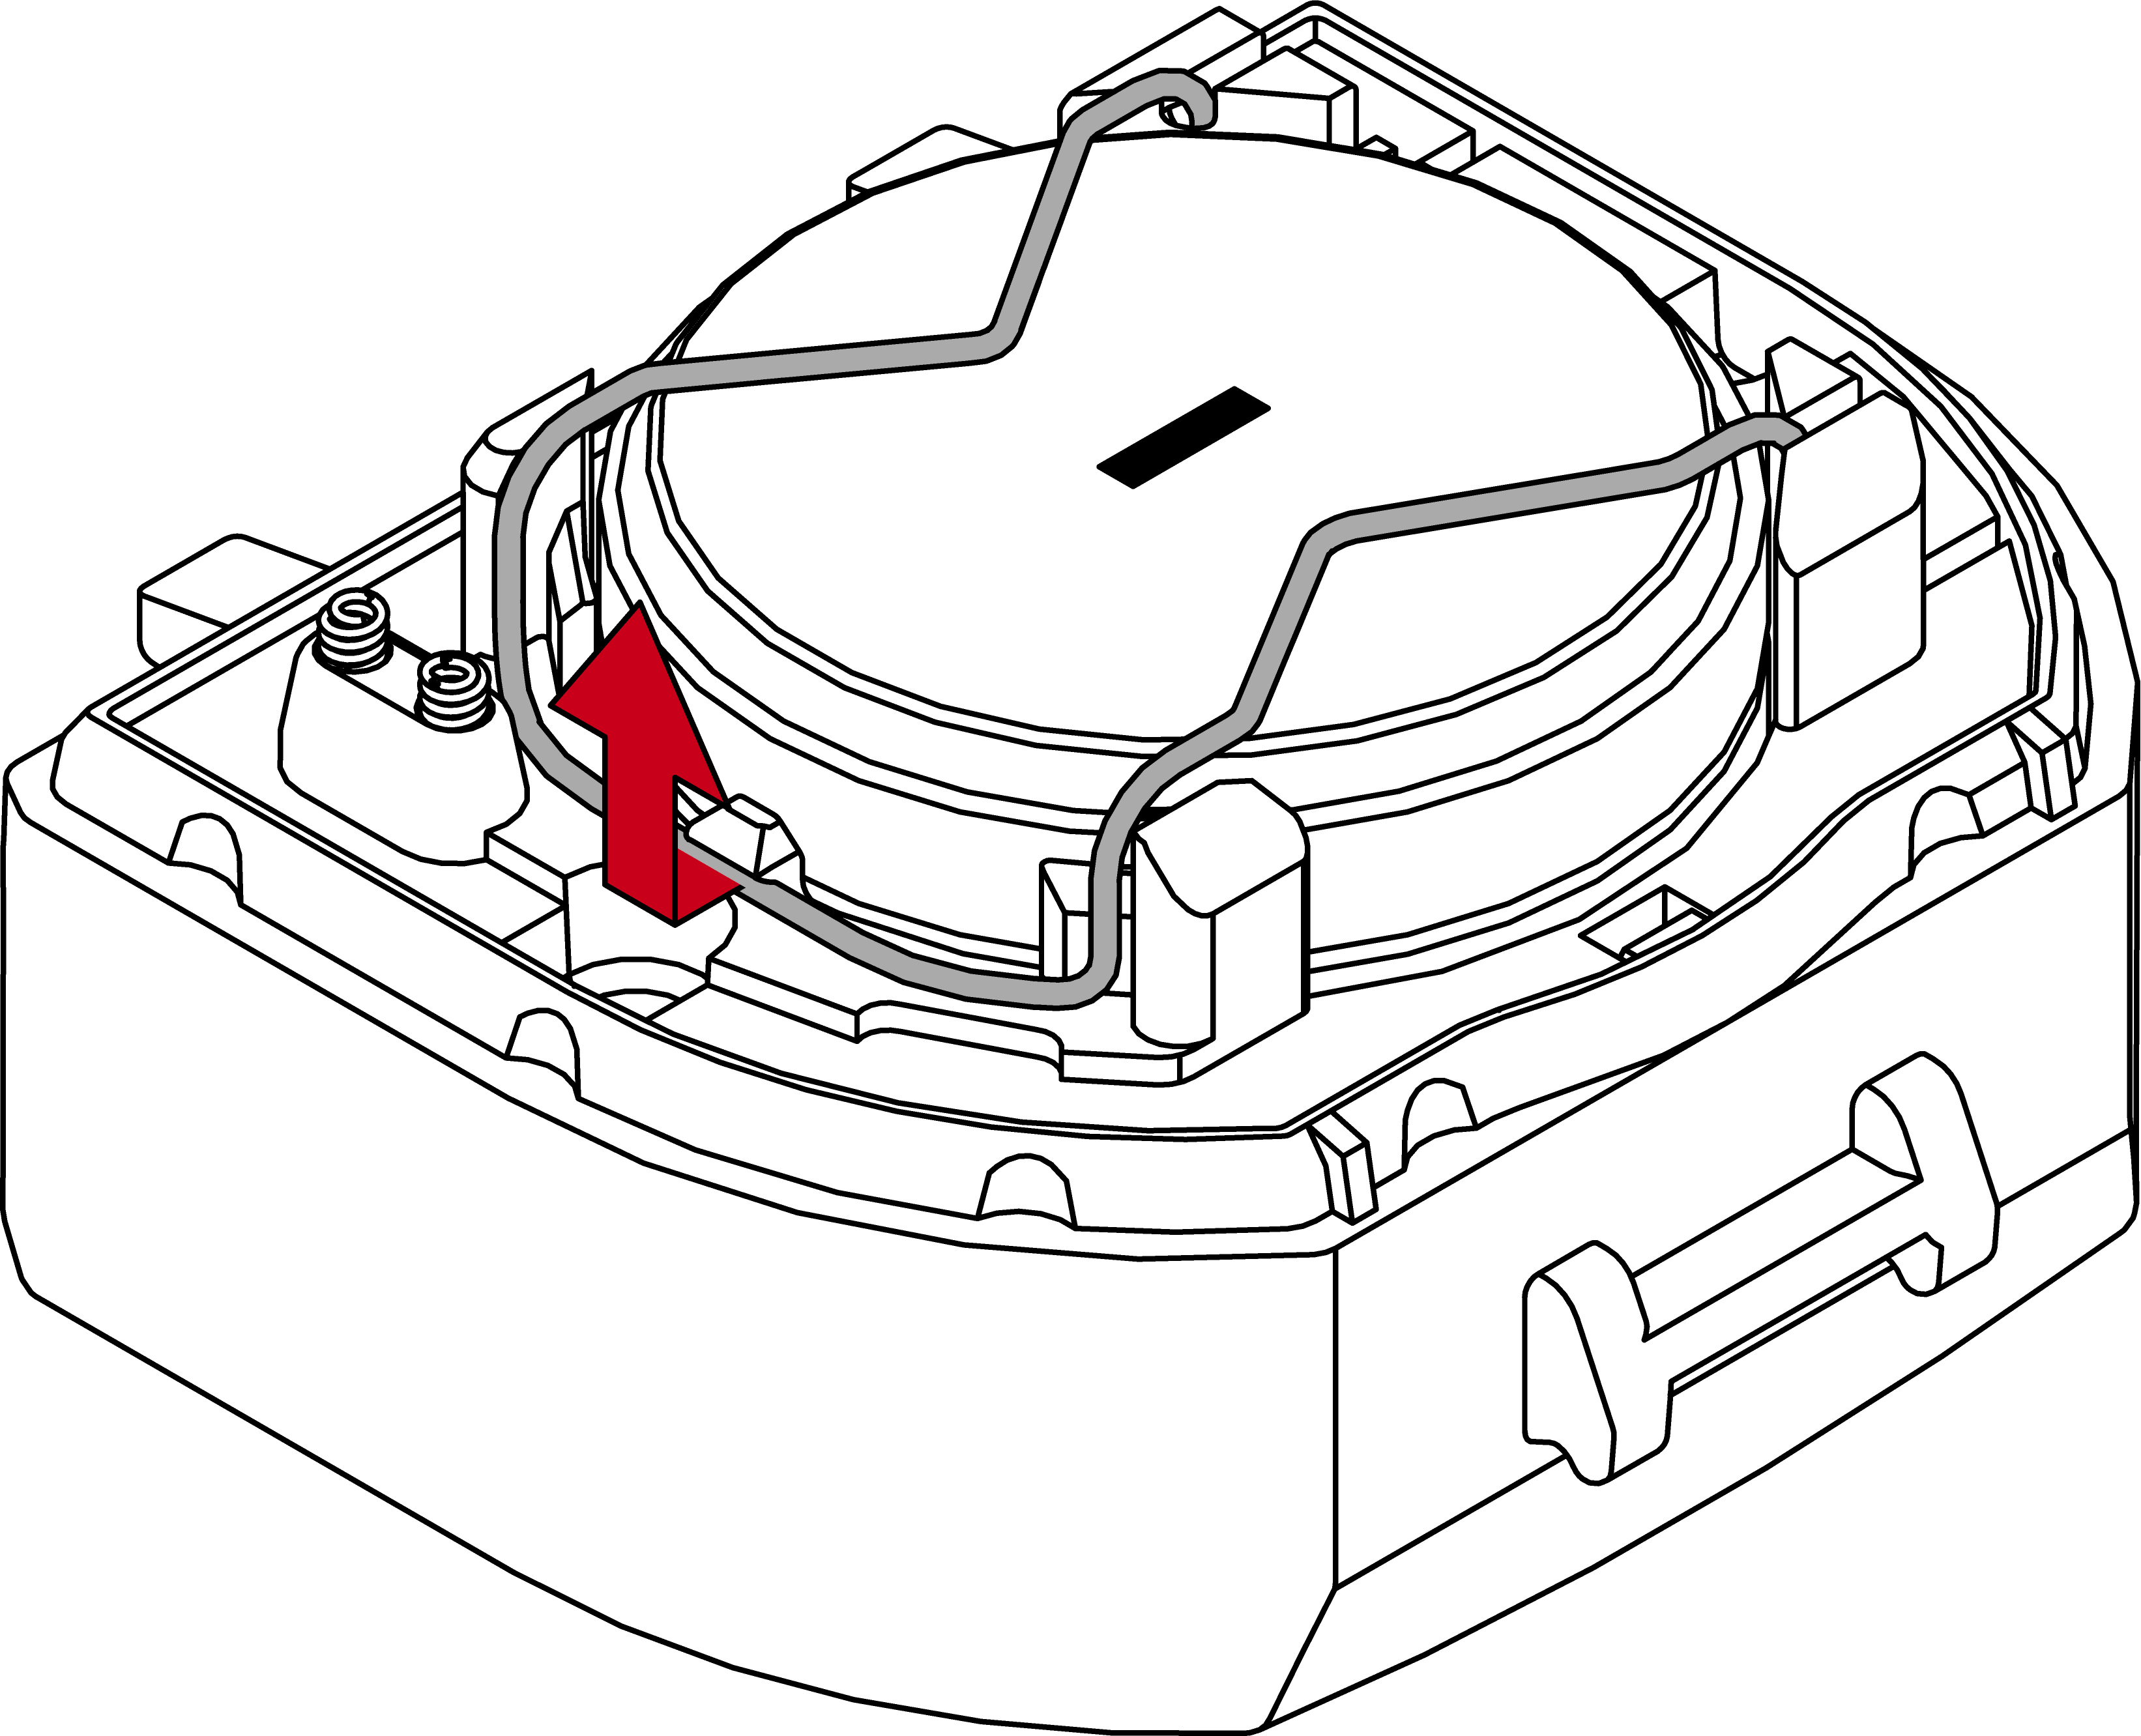
- Remove the upper batteries.
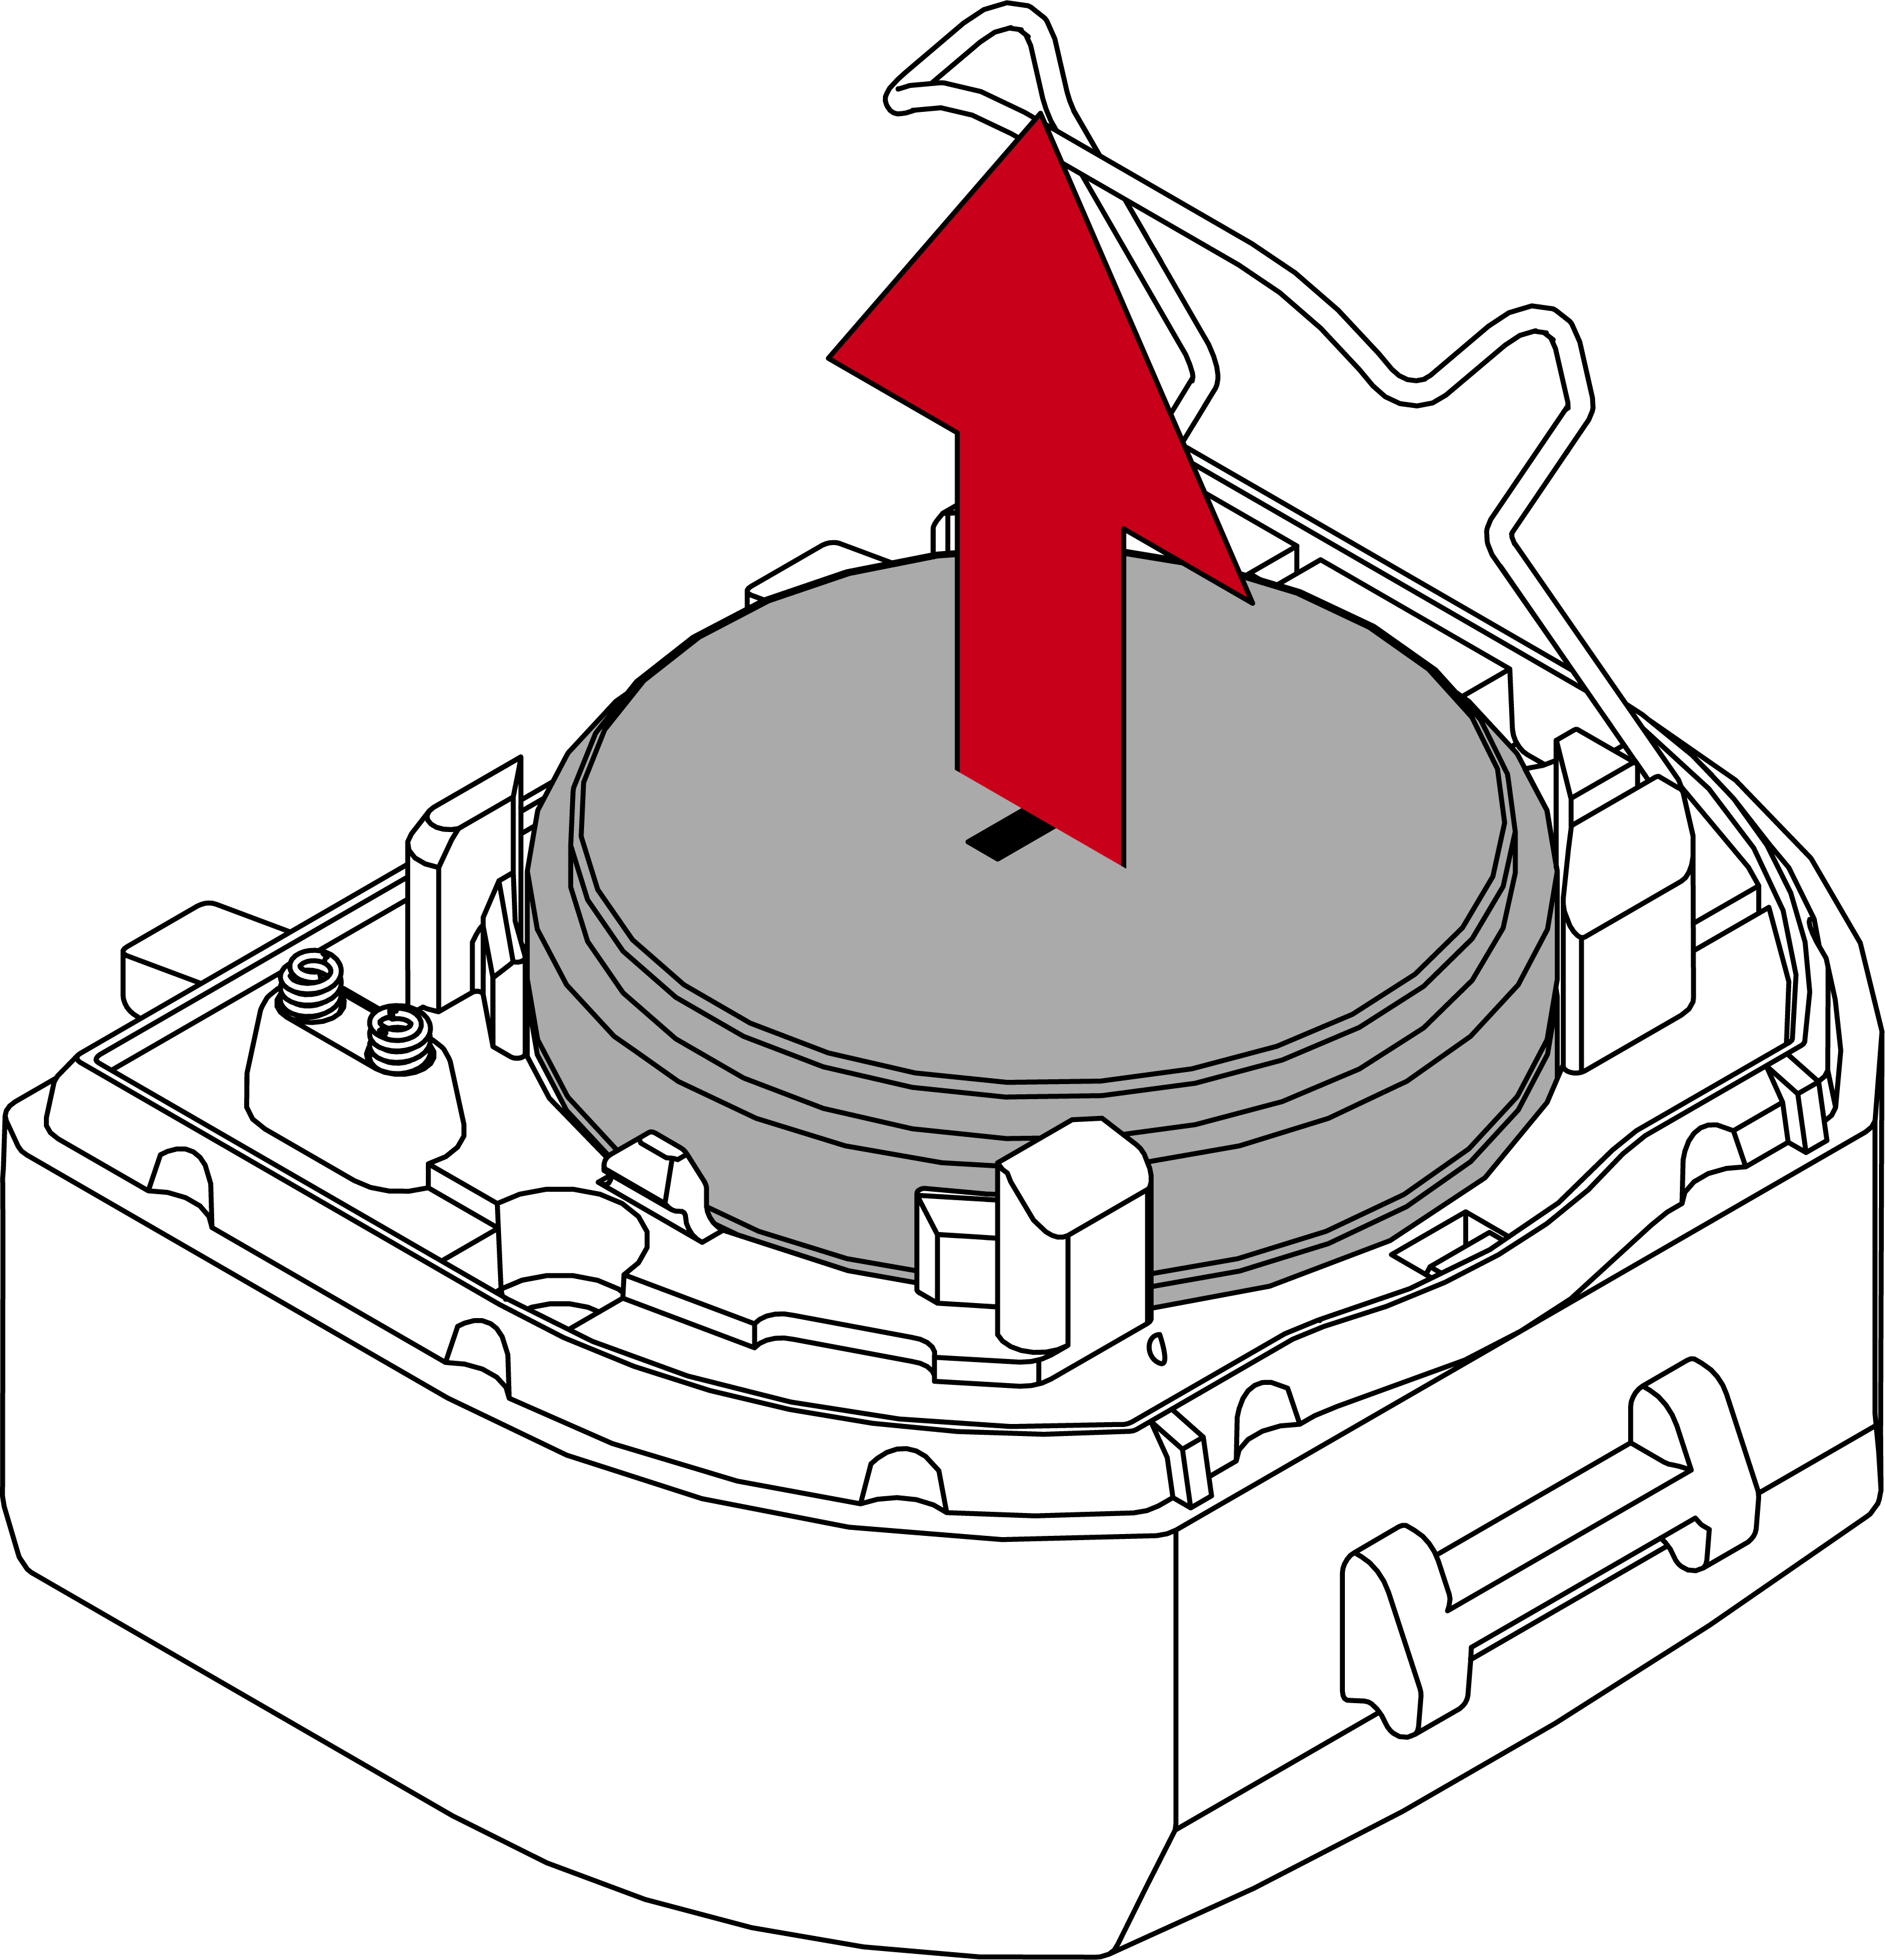
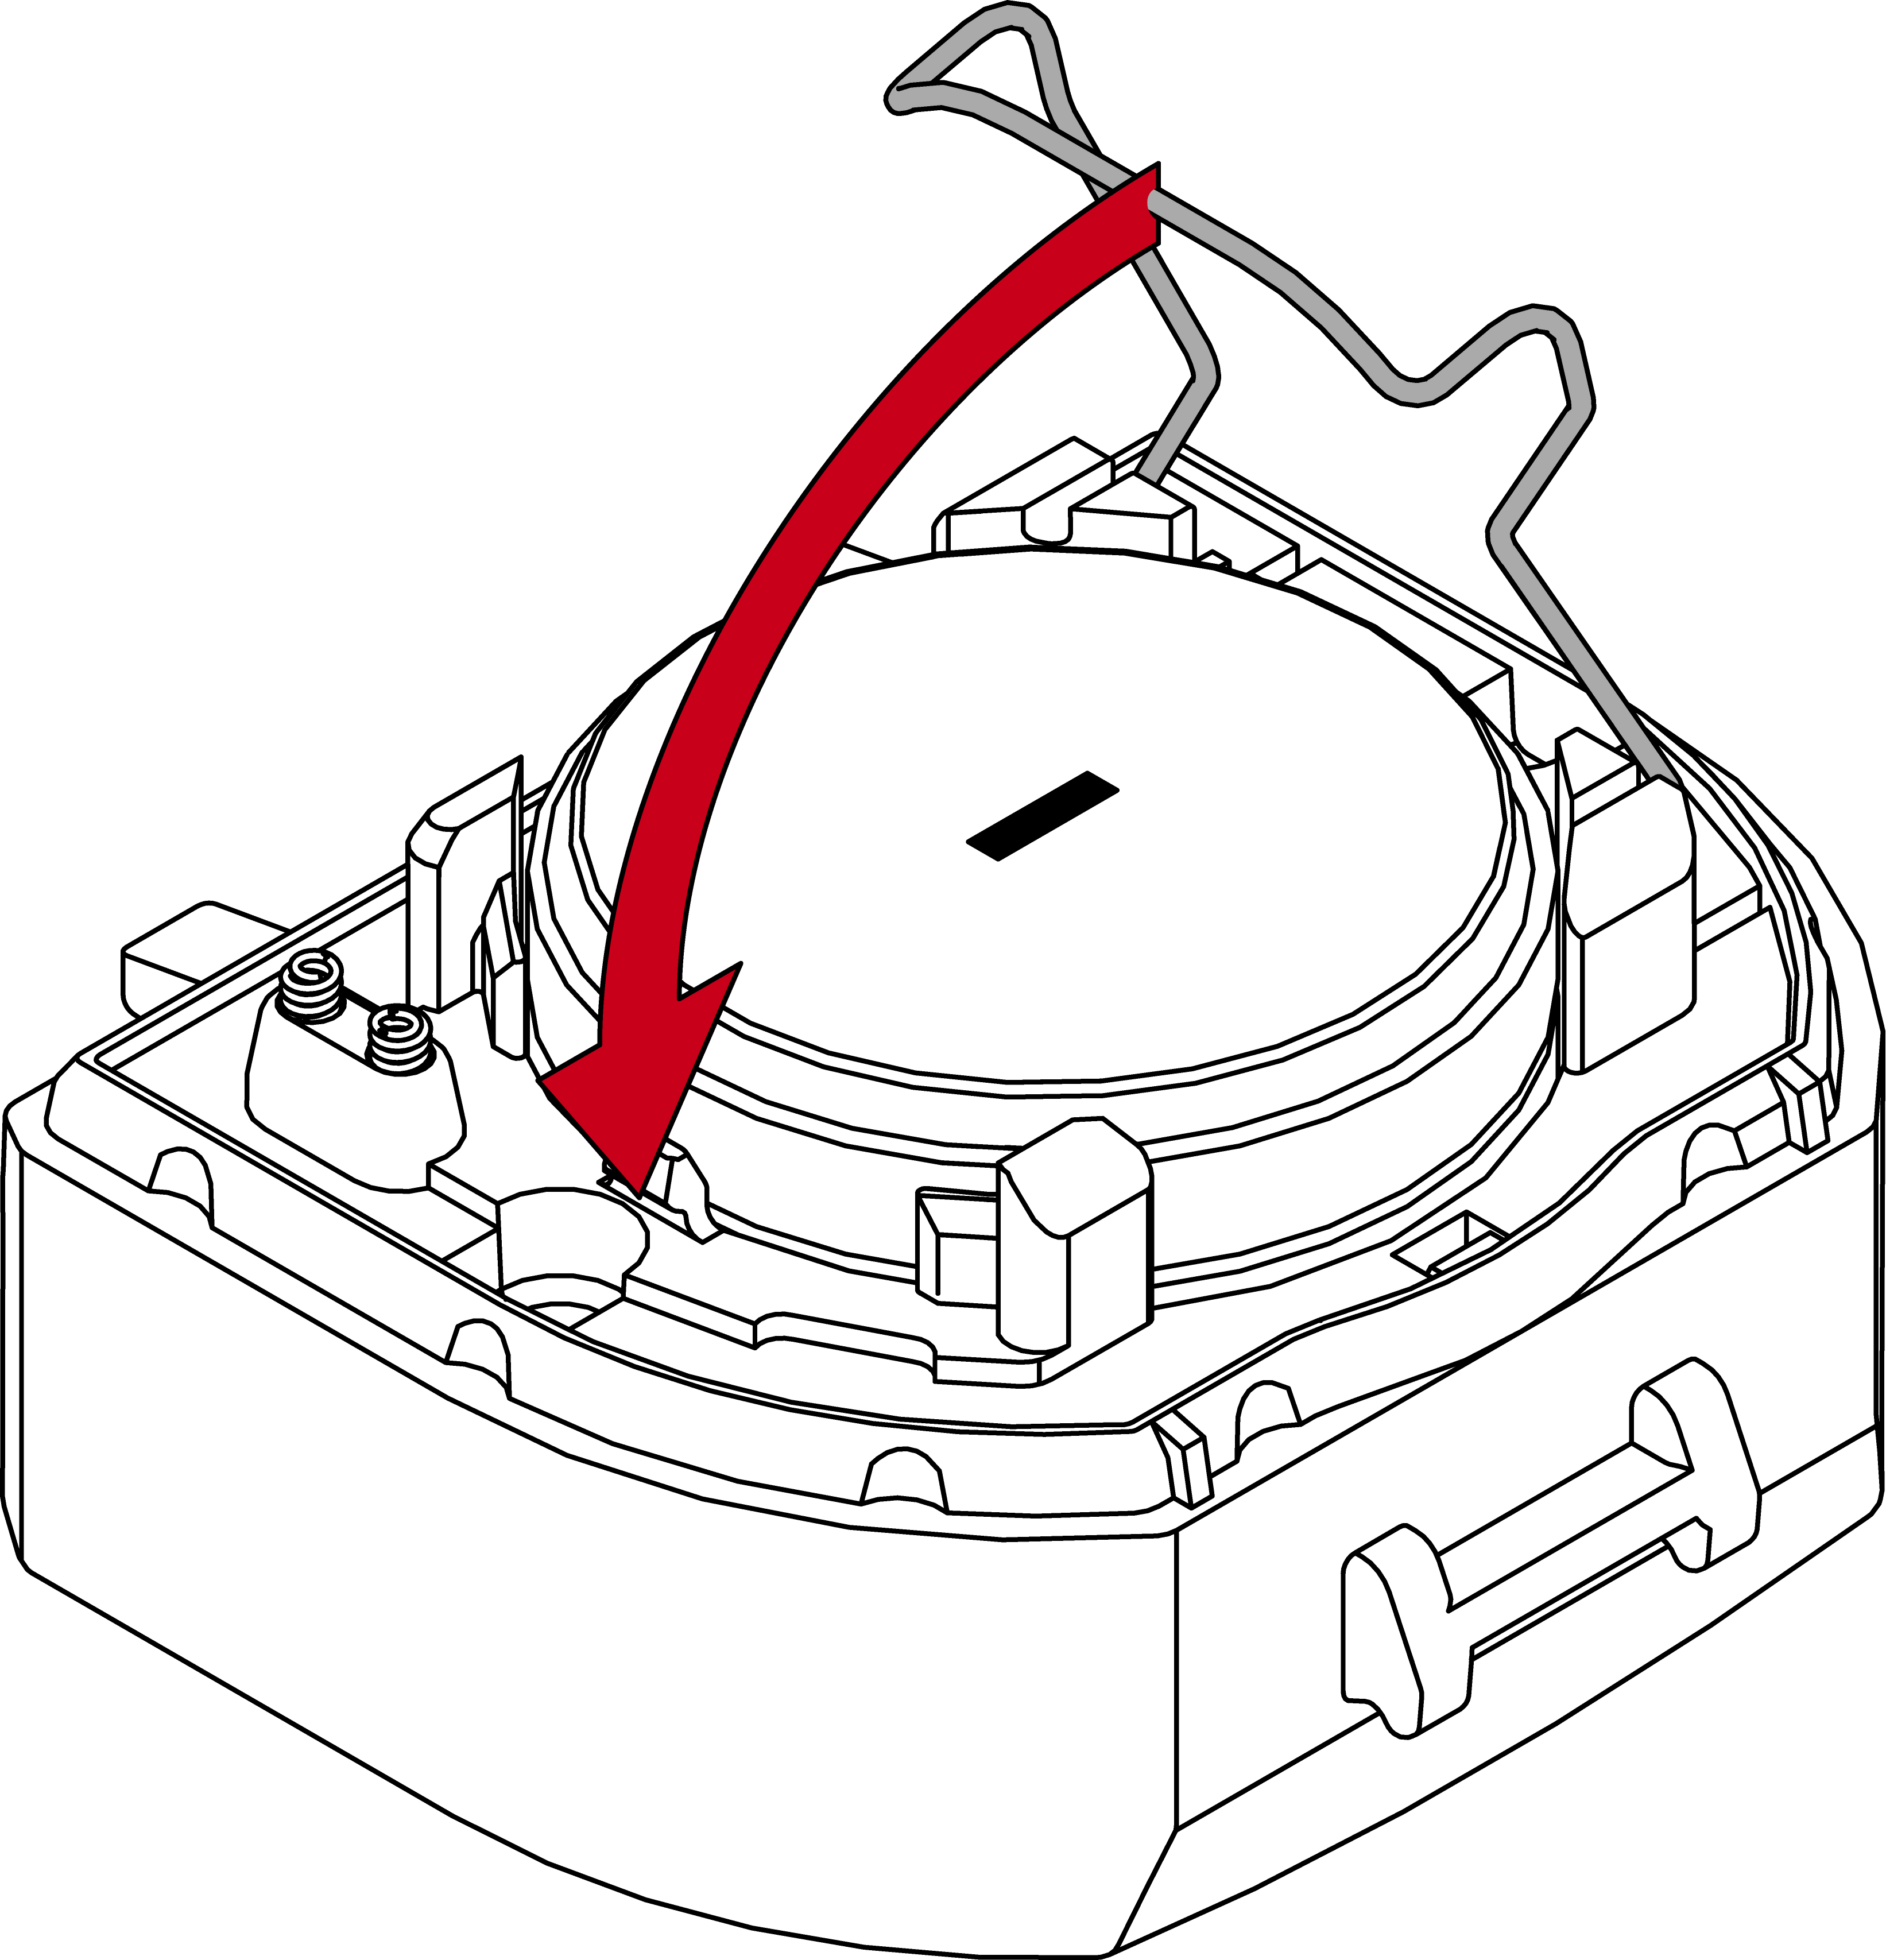
- Carefully bend the intermediate spring to one side.
- Remove the lower batteries.

IMPORTANT
Damage to the SmartHandle AX Advanced due to incorrect battery polarity
Reversed polarity of batteries leads to uncontrolled discharge and damage.
- Check the polarity before inserting the batteries! The positive terminals of the upper and lower batteries must be on top of each other.
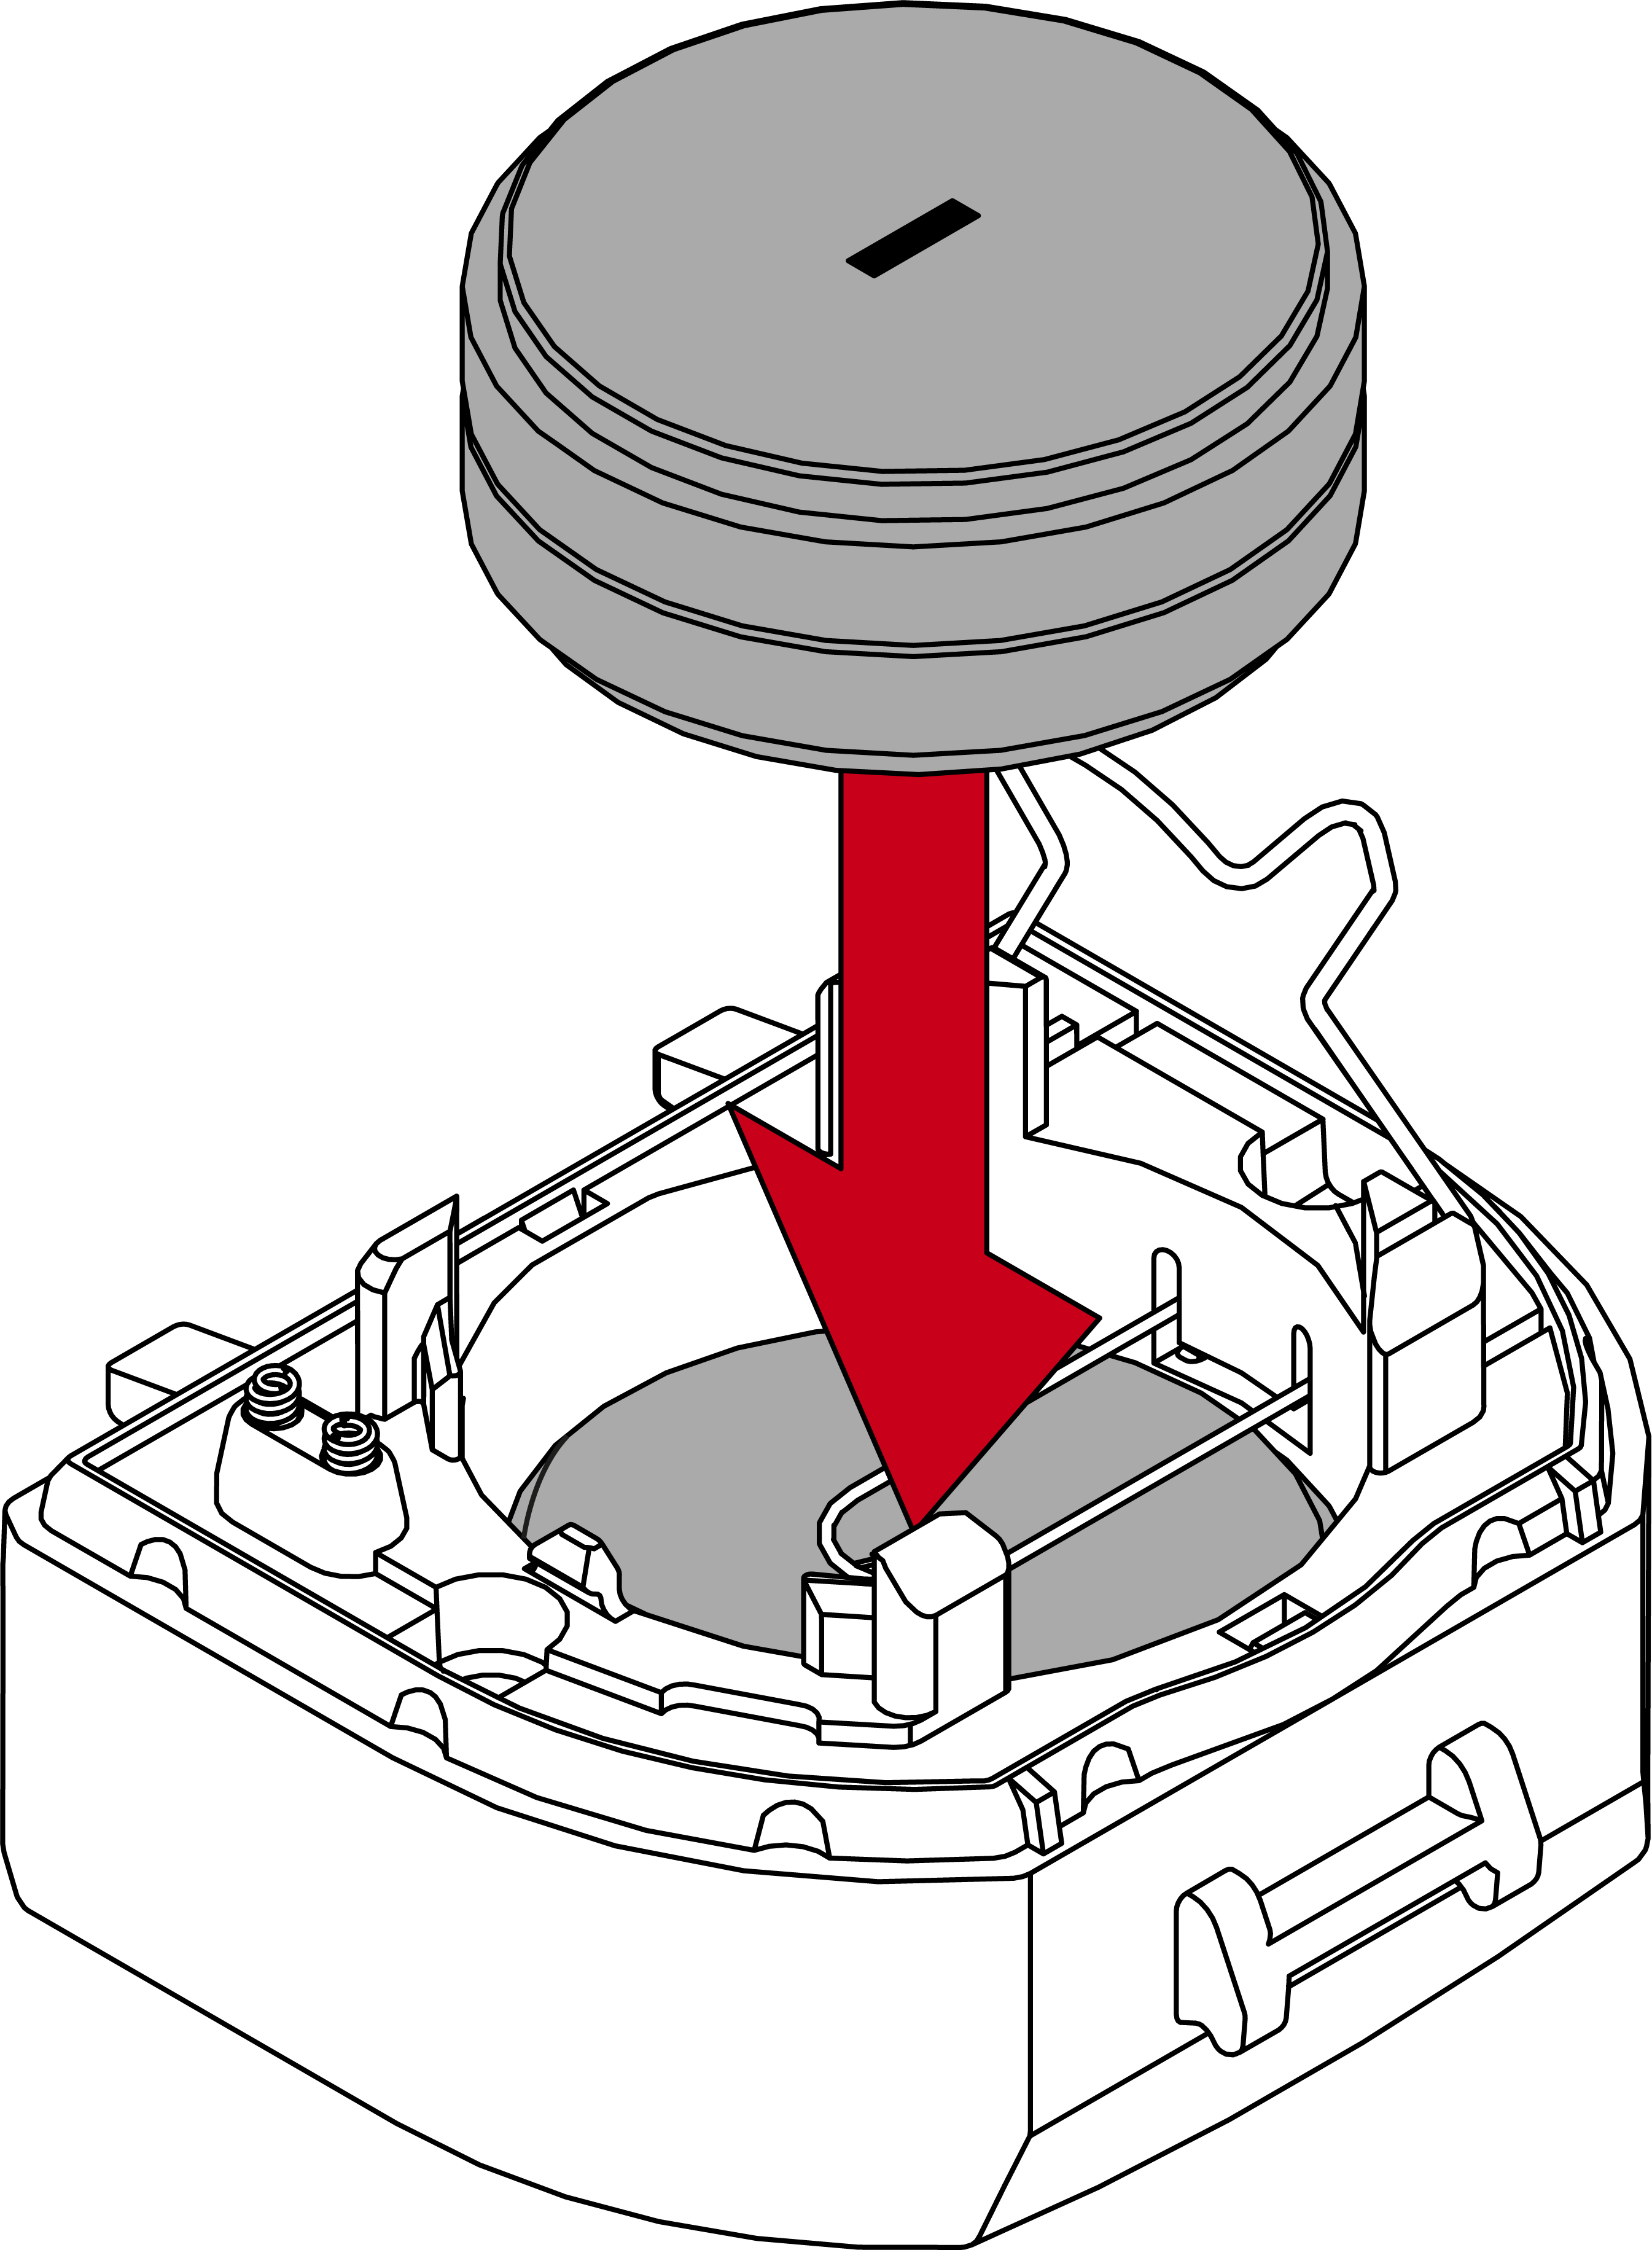
- Insert two new batteries with the positive terminals next to each other (type CR2450).
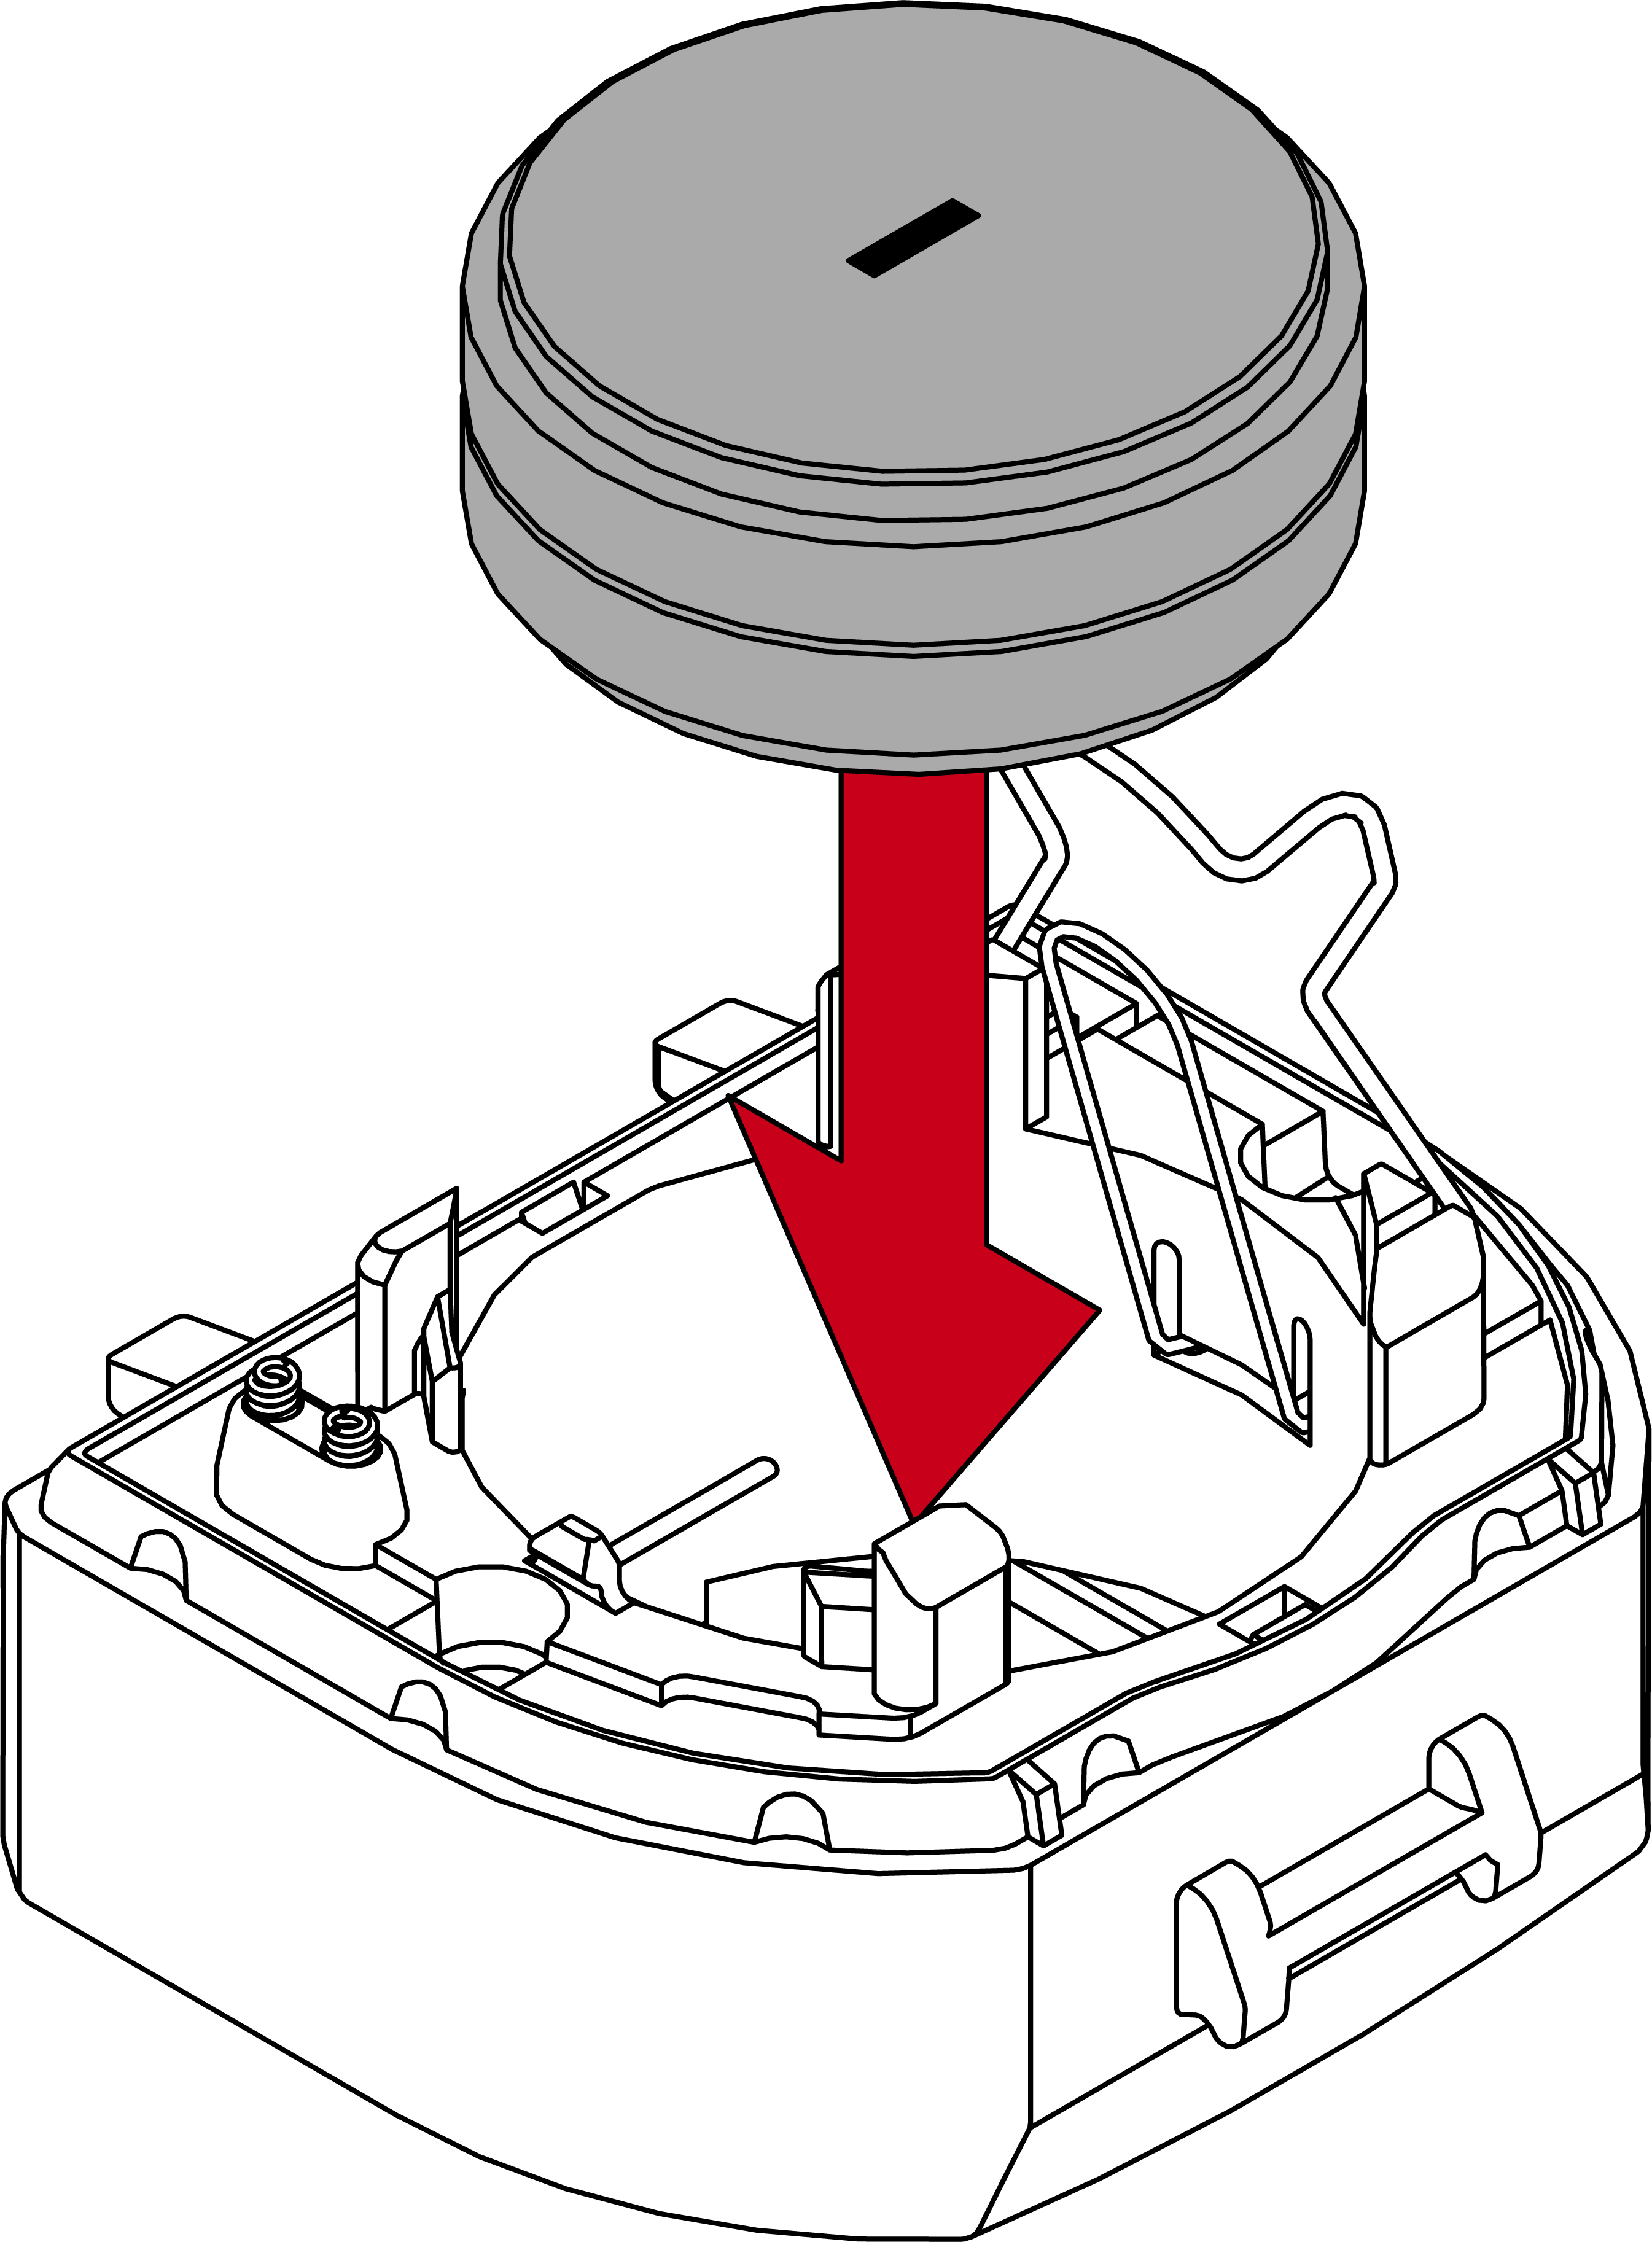
- Intermediate spring visible above the lower batteries.
- Insert two new batteries with the positive terminals next to each other (type CR2450).
- Reattach the battery clip.
- Put the battery module back into the module support.
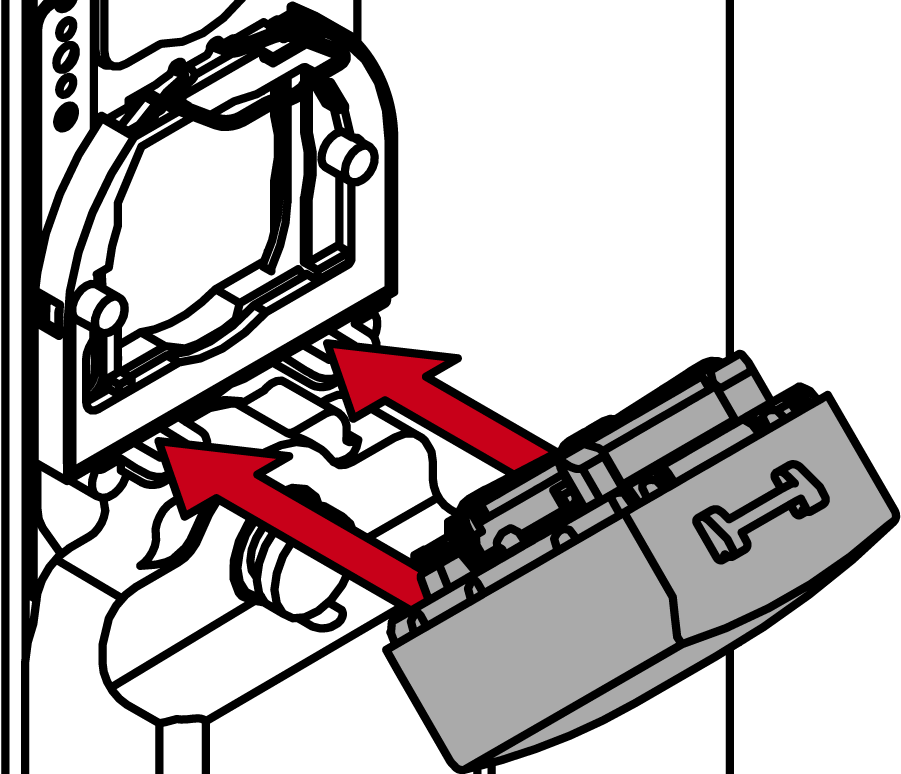
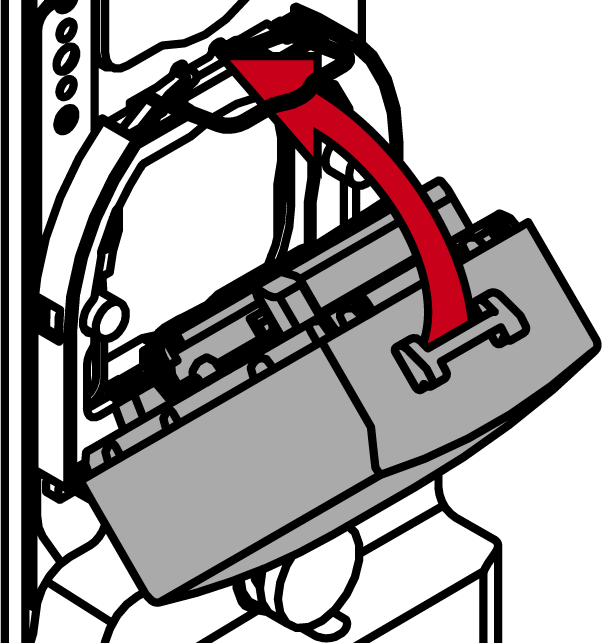
- Use the special tool to reattach the battery module clip.
- SmartHandle AX Advanced will beep three times.
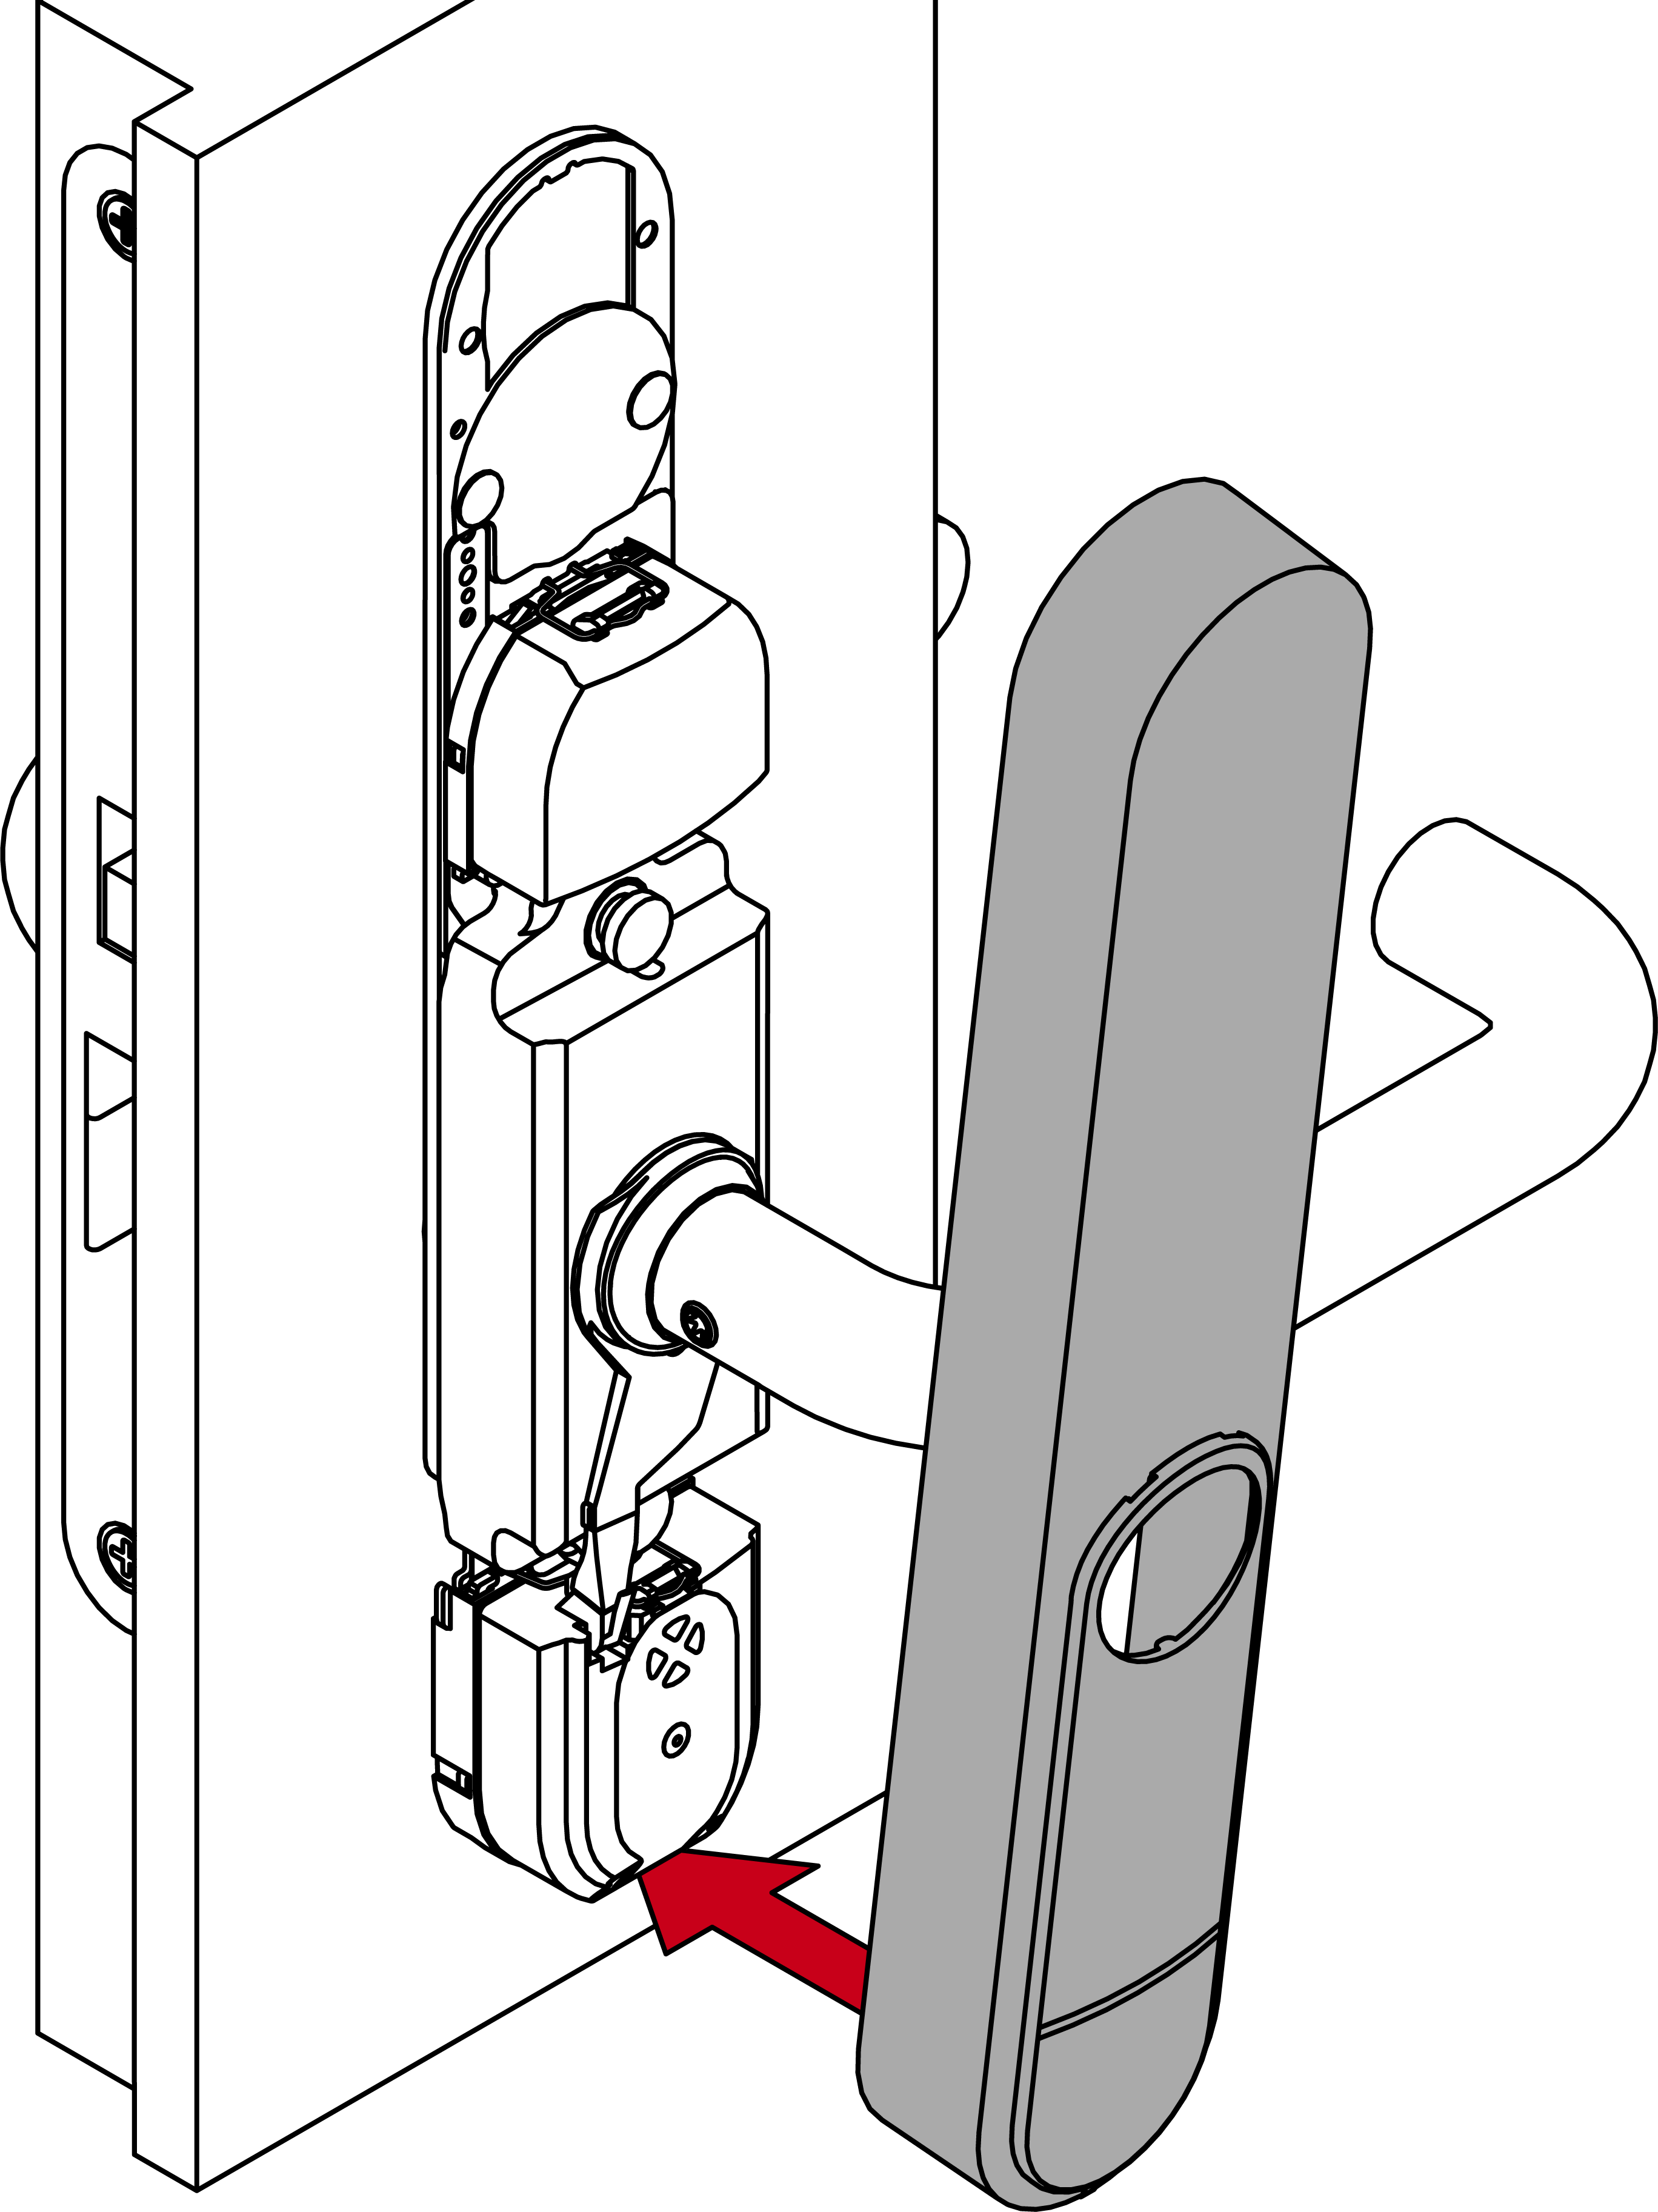
- Position the cover on the fastening plate at the bottom.
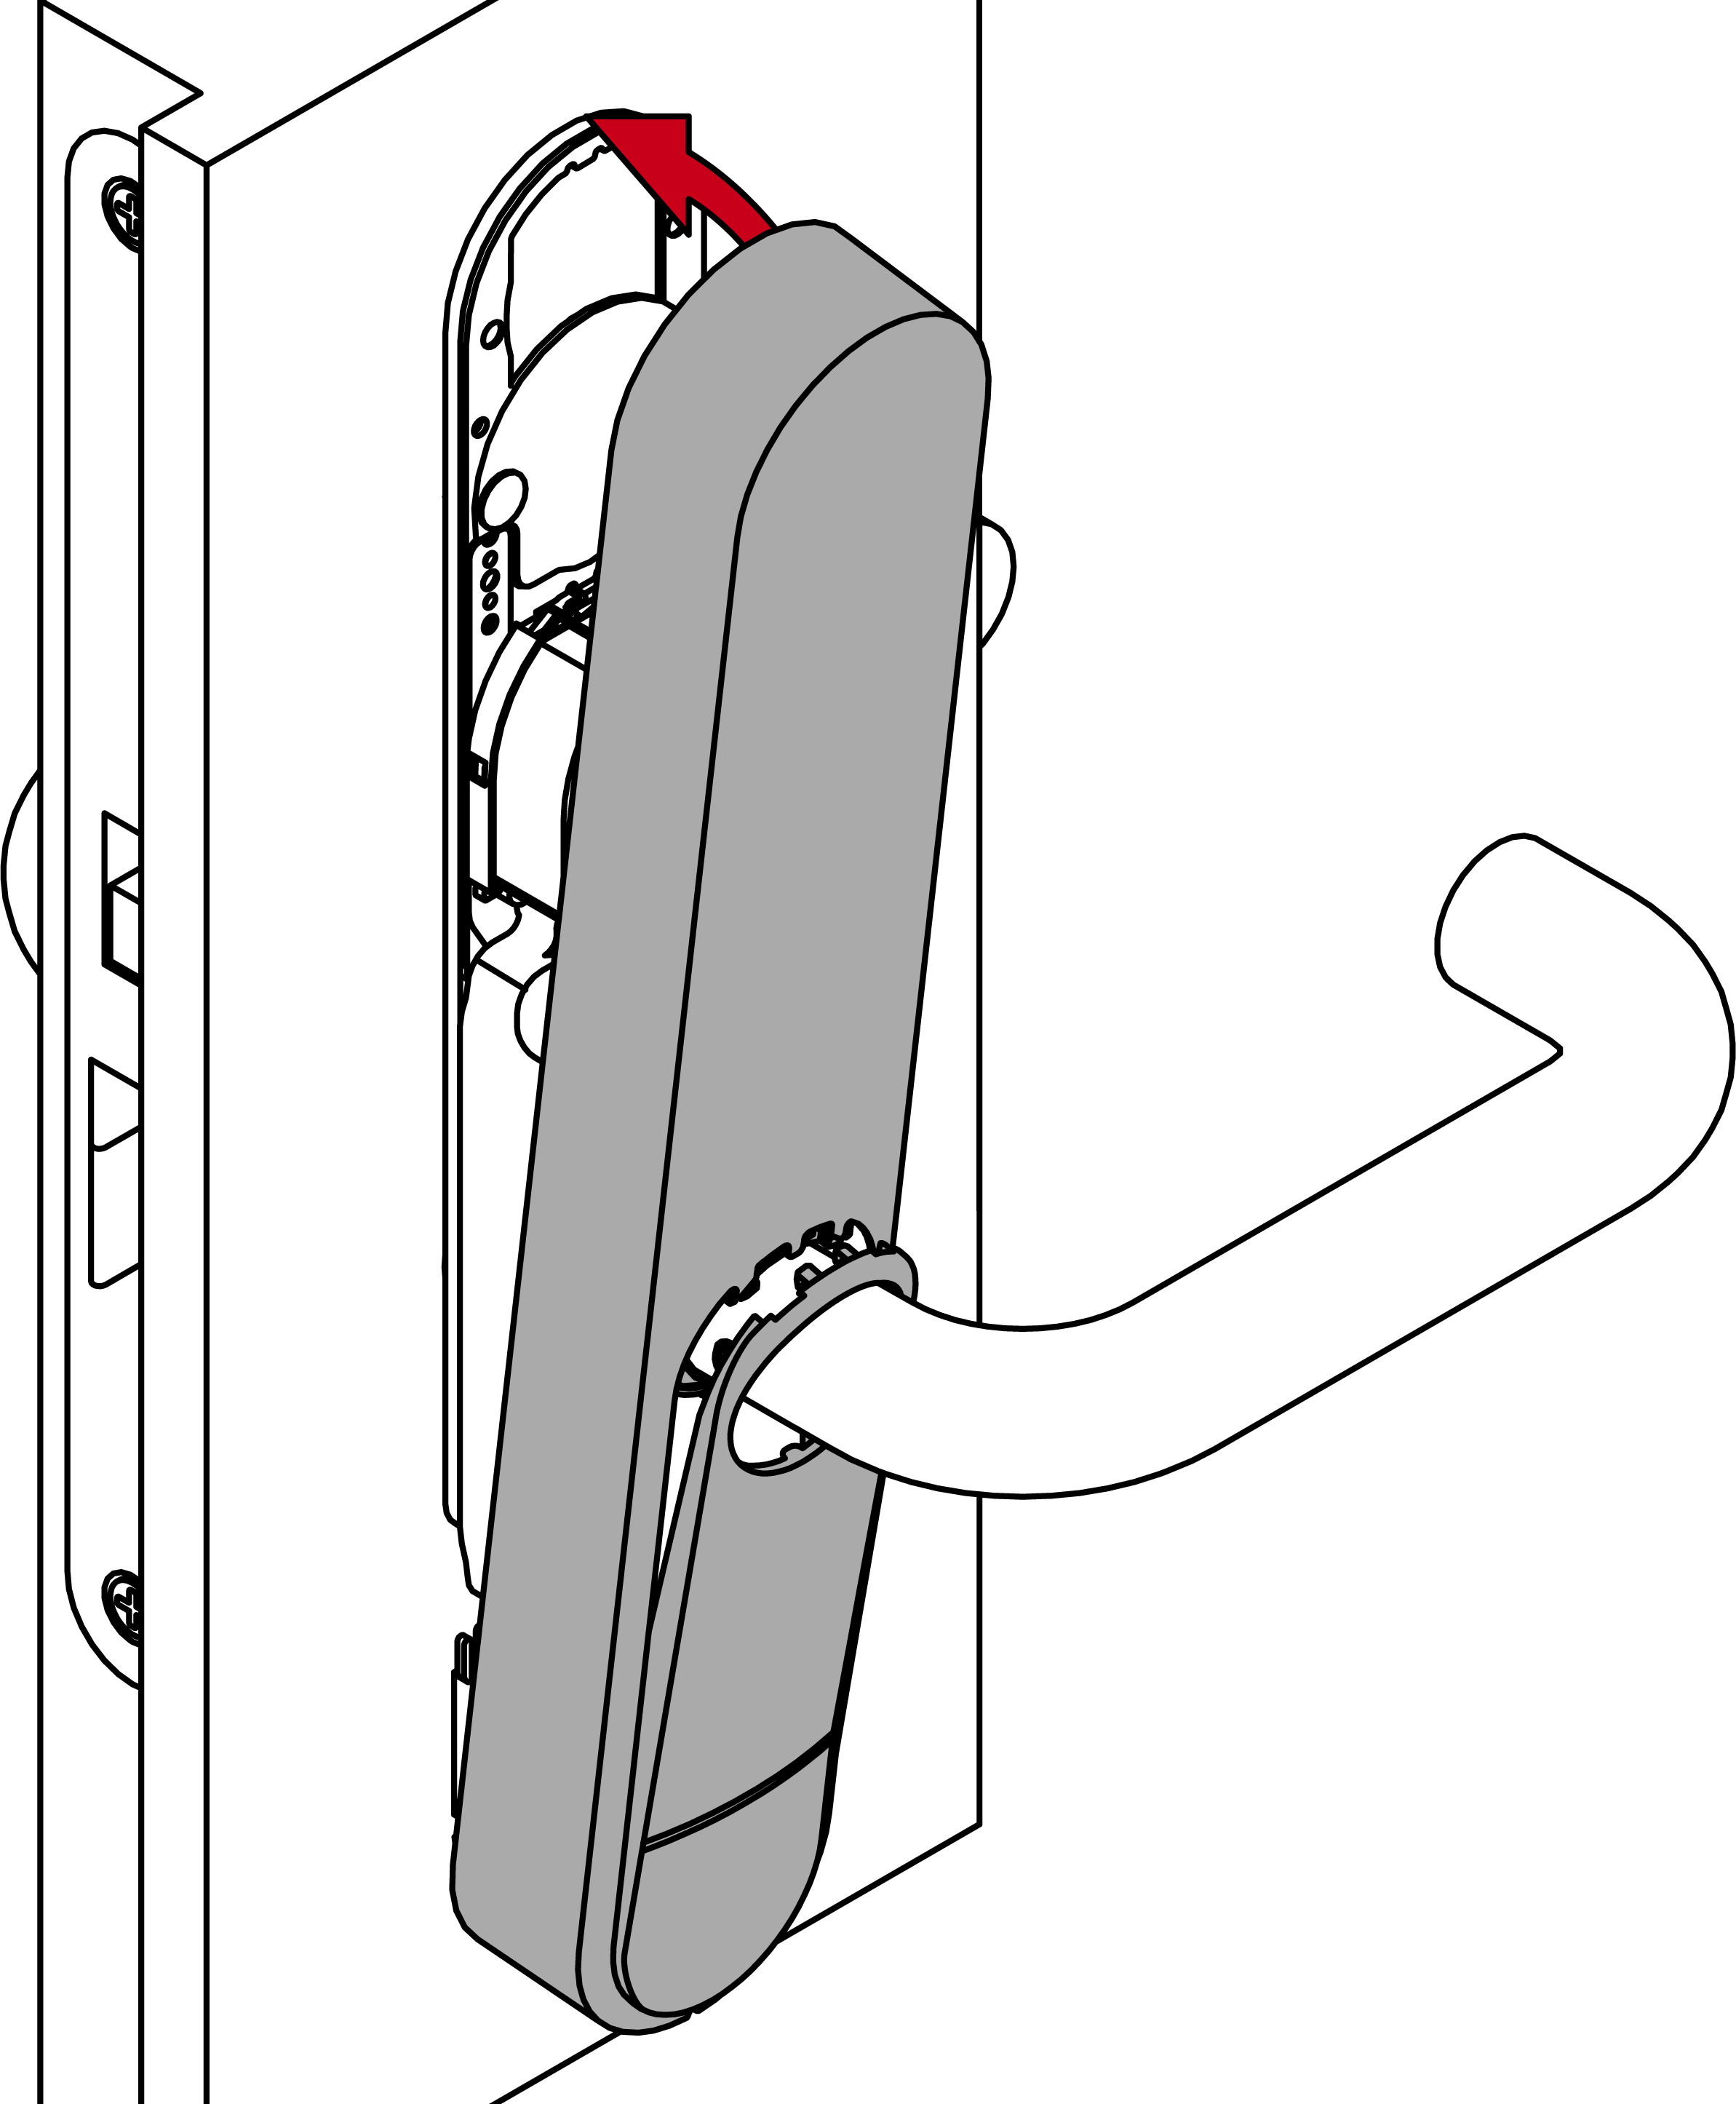
- Fold the cover upwards.
- Push the cover against the door while sliding it downwards at the same time.
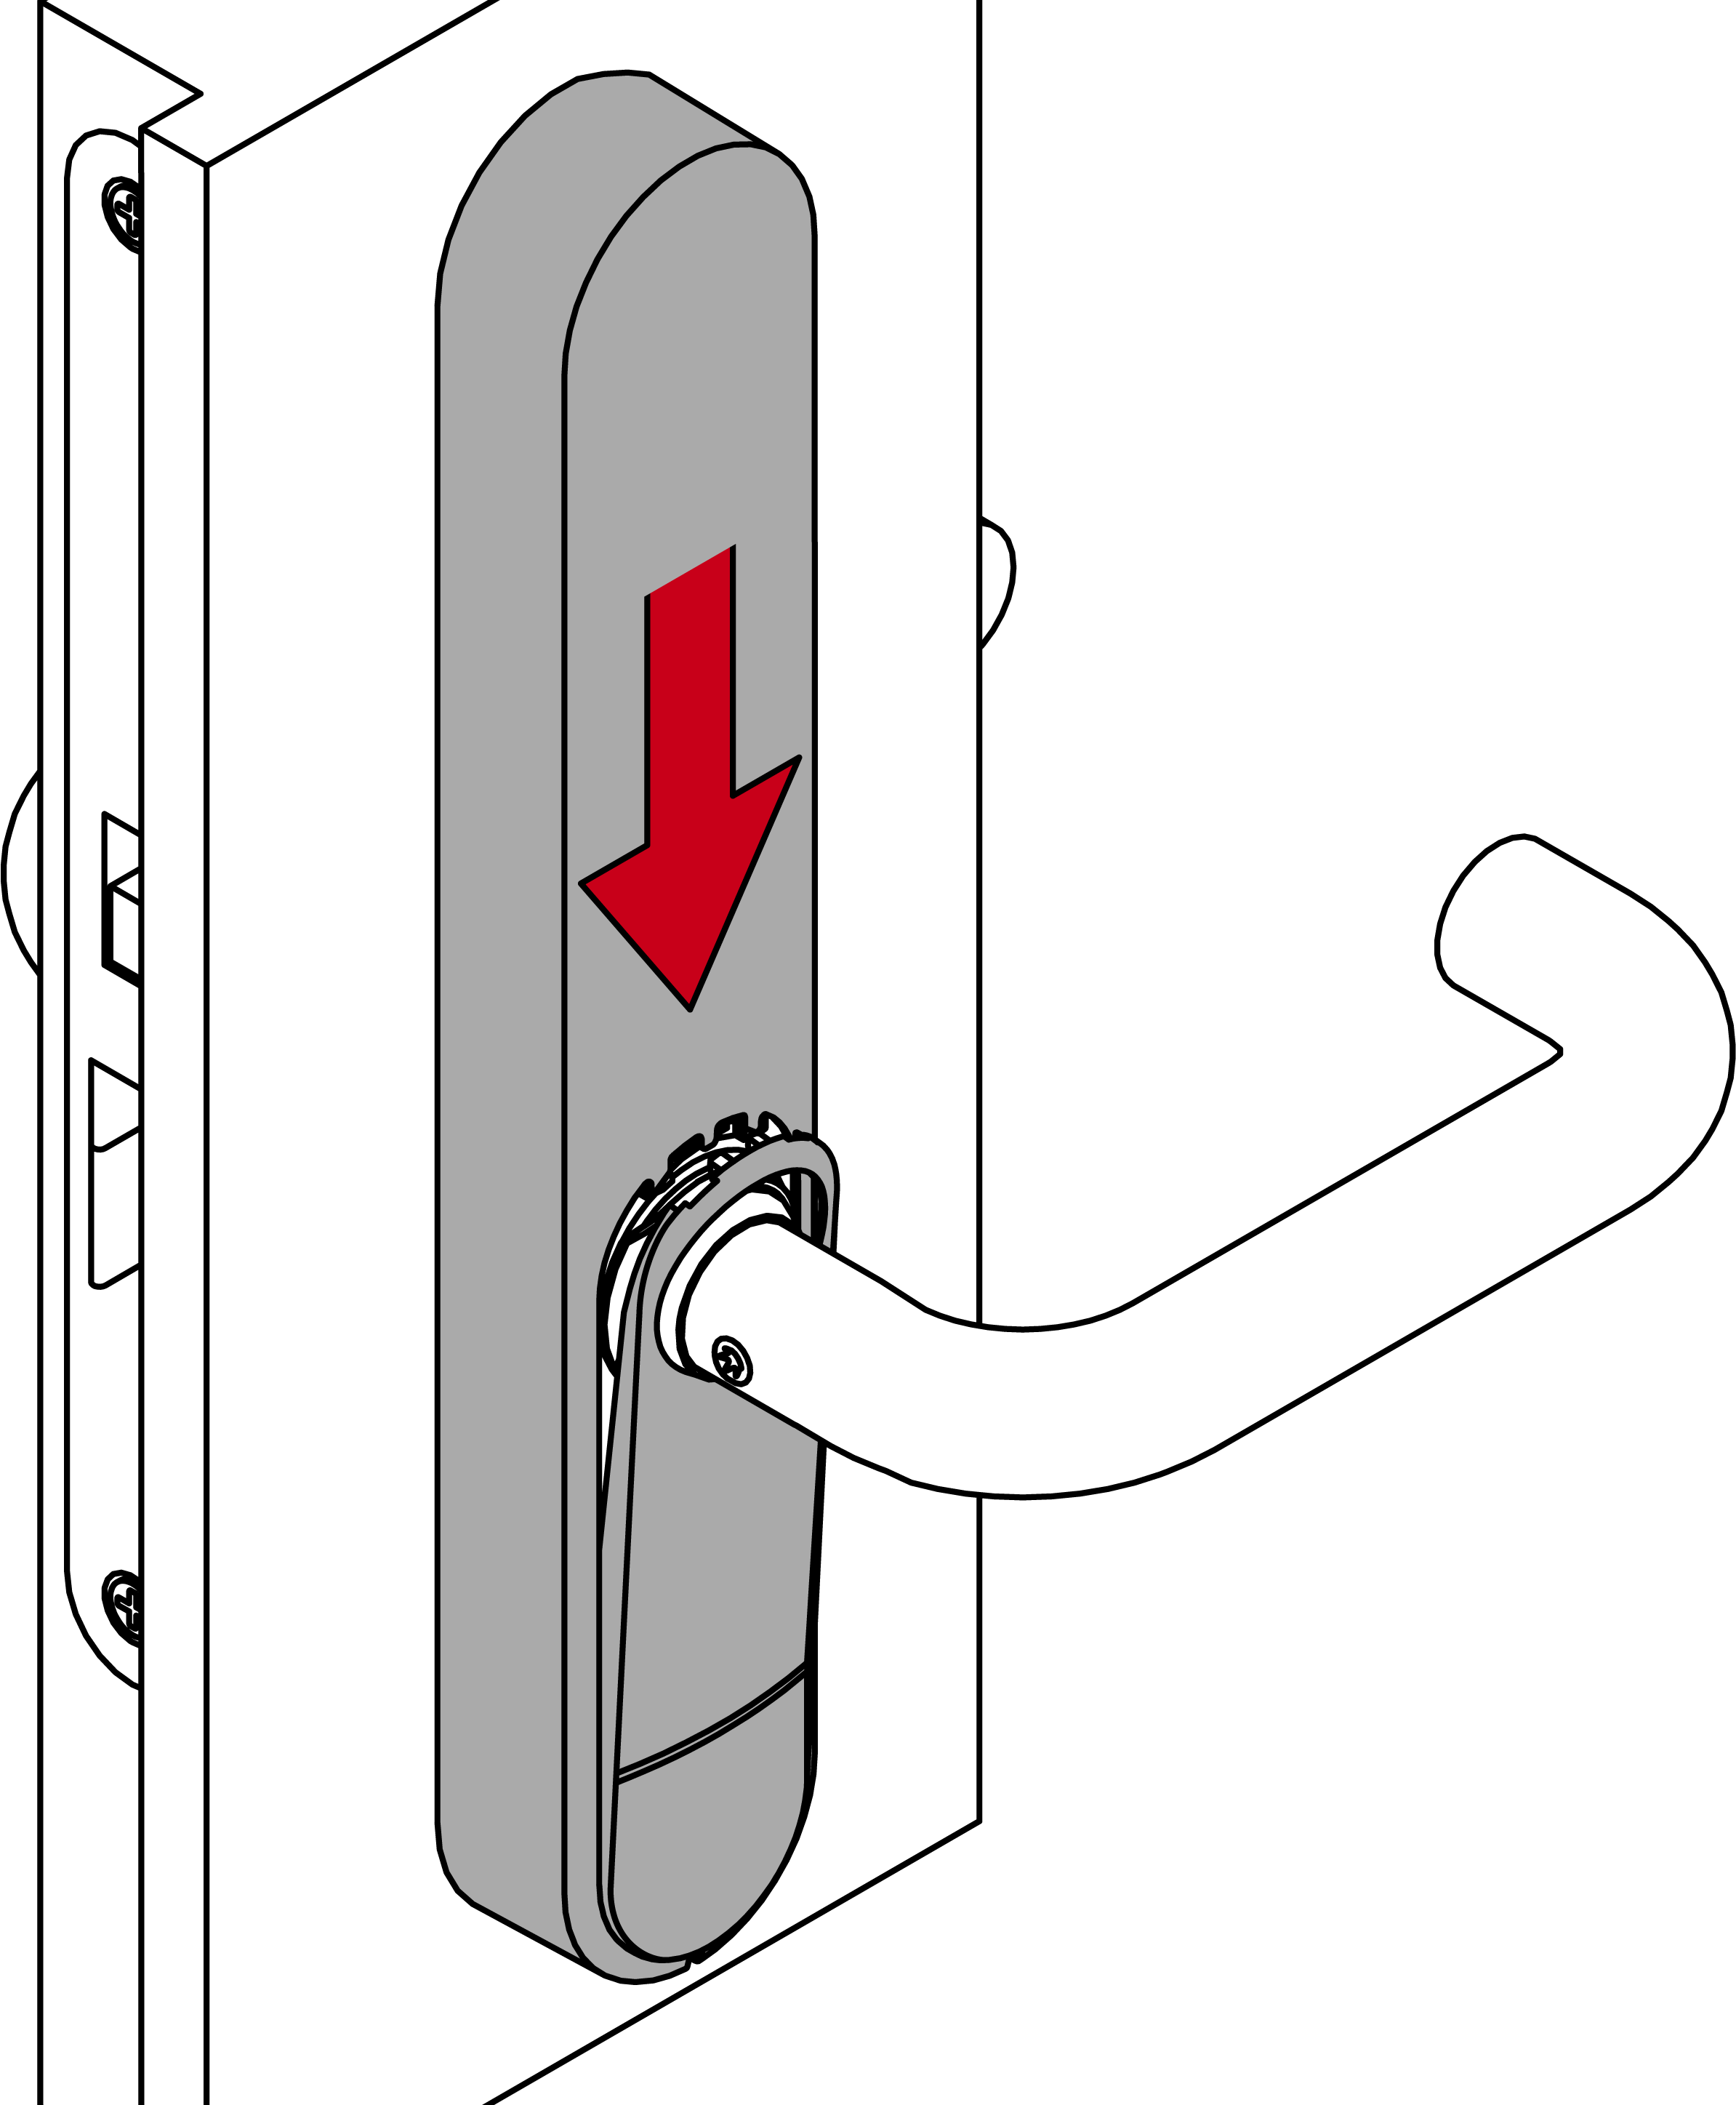
- Cover snaps into place.
- Press the inlay into place.
- For MO: reinsert the outer cam cylinder into the fitting.
- For MO: screw the inner cylinder and outer cam cylinder together again (SW4).
- For FH: screw the cylinder cover firmly into place (PH2; torque: 1.1 Nm).
- Batteries are now replaced.