Preparation: Exporting the database from LSM to LSM Mobile - LSM Mobile
- Locking system has been created correctly.
- Locking device has been created correctly.
- Open the locking system in LSM.
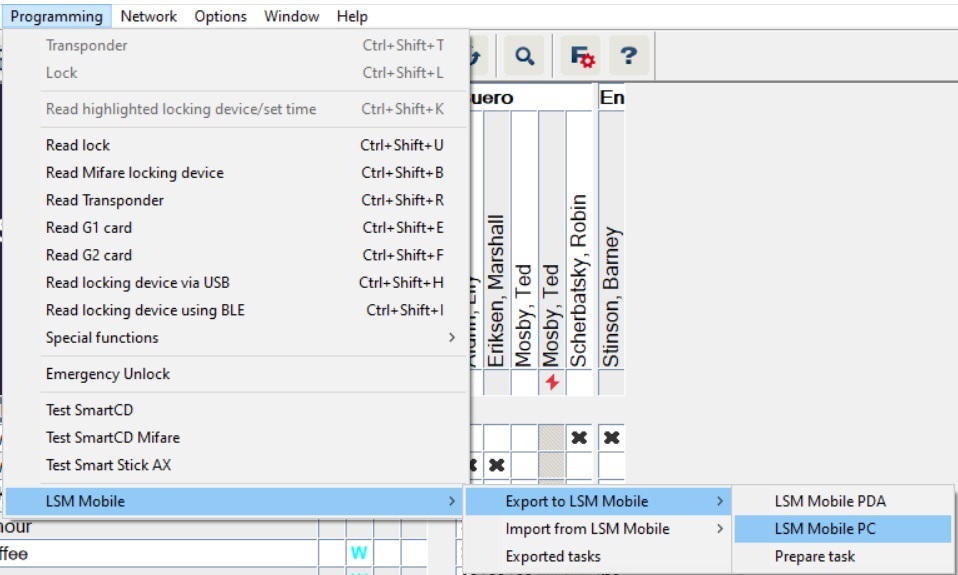
- Go to Programming in the top toolbar to select → → .
- The export screen will open.
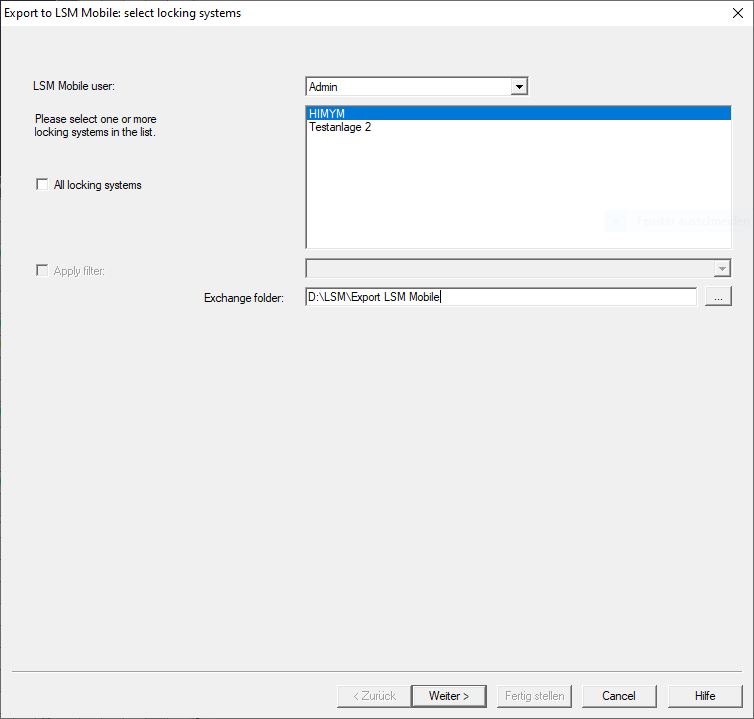
- Select the user who is to work with LSM Mobile from the drop-down menu.
- They will need to log onto LSM Mobile with their password at a later point.
NOTE

Tasks for LSM Mobile may only be exported for one user per database.
If another user is selected with LSM Mobile, any previously exported tasks are overwritten.
- Reimport the data before you select another user for LSM Mobile (see Post-editing: Data reimport).
- If you do not want to export all locking systems, deactivate the
 All locking systems checkbox and mark the desired locking systems.
 - Click on the ... button.
- The Explorer window will open.
- Select a folder you wish to use for the exchange.
- Click on the OK button.
- Explorer window closes.
- Users who are to work with LSM Mobile must be assigned to a suitable user group in LSM (feature: “HB – Use LSM Mobile”).
- Click on the Continue button.
- The Export: Task List window will open.
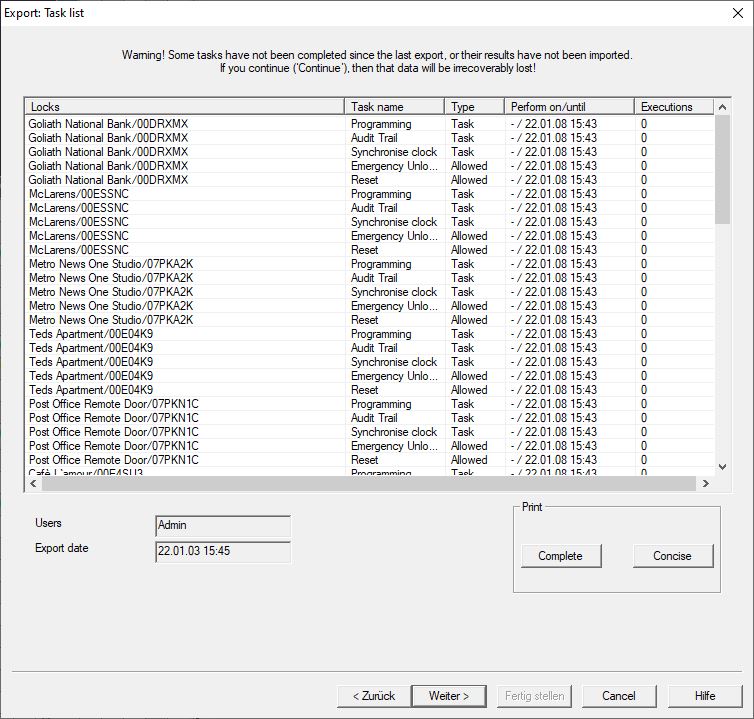
- Click on the Continue button.
- The Export to LSM Mobile: Select locking devices window will open.
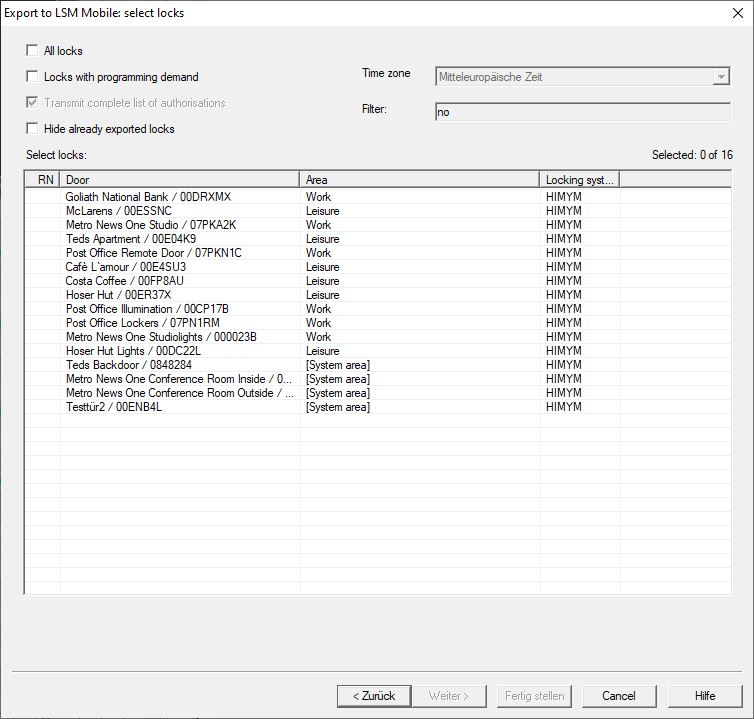
- Select the locking devices (you can select more than one using Ctrl+mouse click and/or Shift+mouse click).
- If all the locking devices or the locking devices with a programming requirement need to be exported, activate the
 All locks or Locks with programming demand checkboxes.
 - Click on the Continue button.
- The Export to LSM Mobile: Select Tasks window will open.

- Select the locking devices which you wish to assign tasks to – you can select more than one device.
- Tick the checkboxes to select the Tasks to be completed in LSM Mobile (see Description of the settings).
- Change the settings and click the Apply button.
- Enter a Password for emergency unlocking in the input field.
- Select which options can be implemented in LSM Mobile by ticking the checkboxes in the Allowed section.
- You can save the Settings by pressing the Save button.
- The default settings can be used again in the next process. To do this, click on the Load button.
- Click on the Continue button.
- The Export to LSM Mobile: Select transponders window will open.
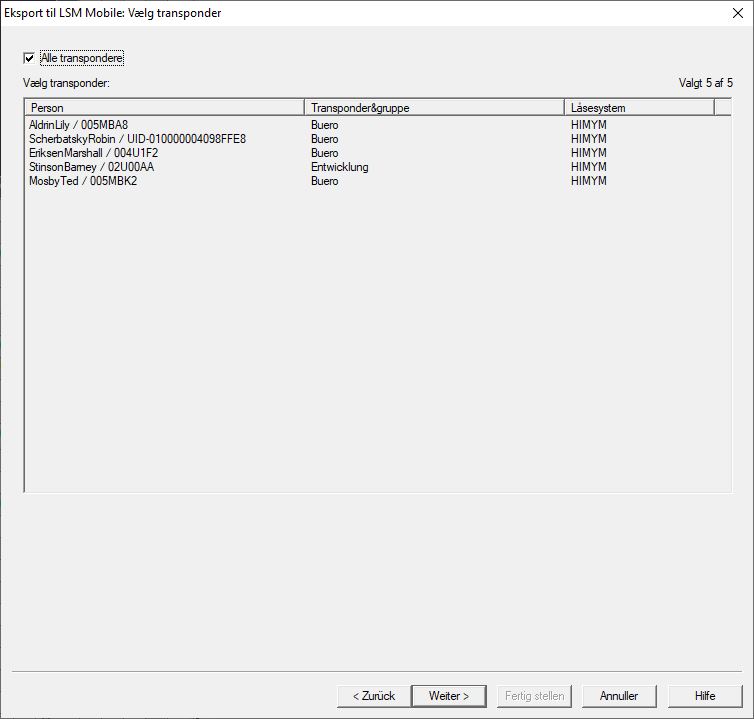
- If you do not wish to export programming tasks for all transponders, deactivate the All transponders checkbox and mark the transponders required (you can select more than one using Ctrl+click and/or Shift+click).

- Click on the Continue button.
- Data are exported.
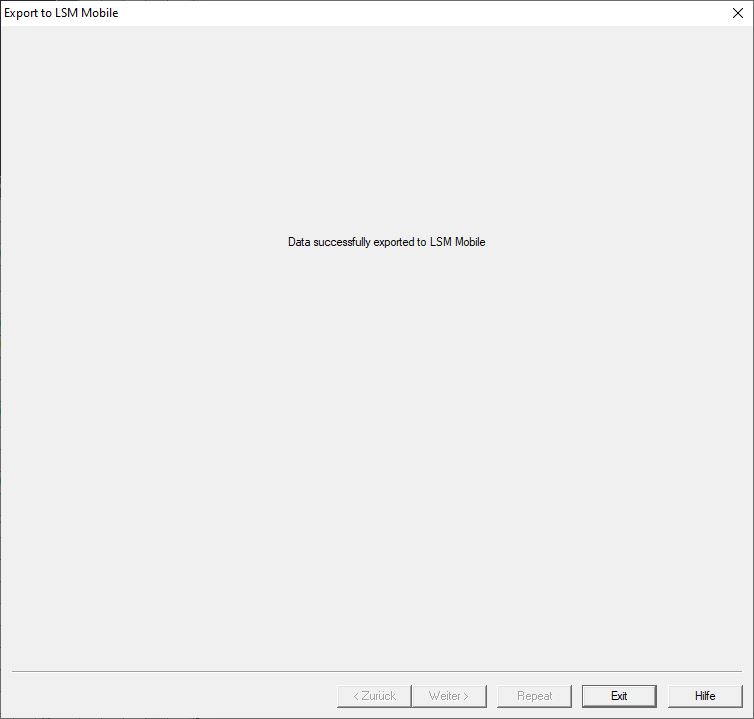
- Click on the Exit button.