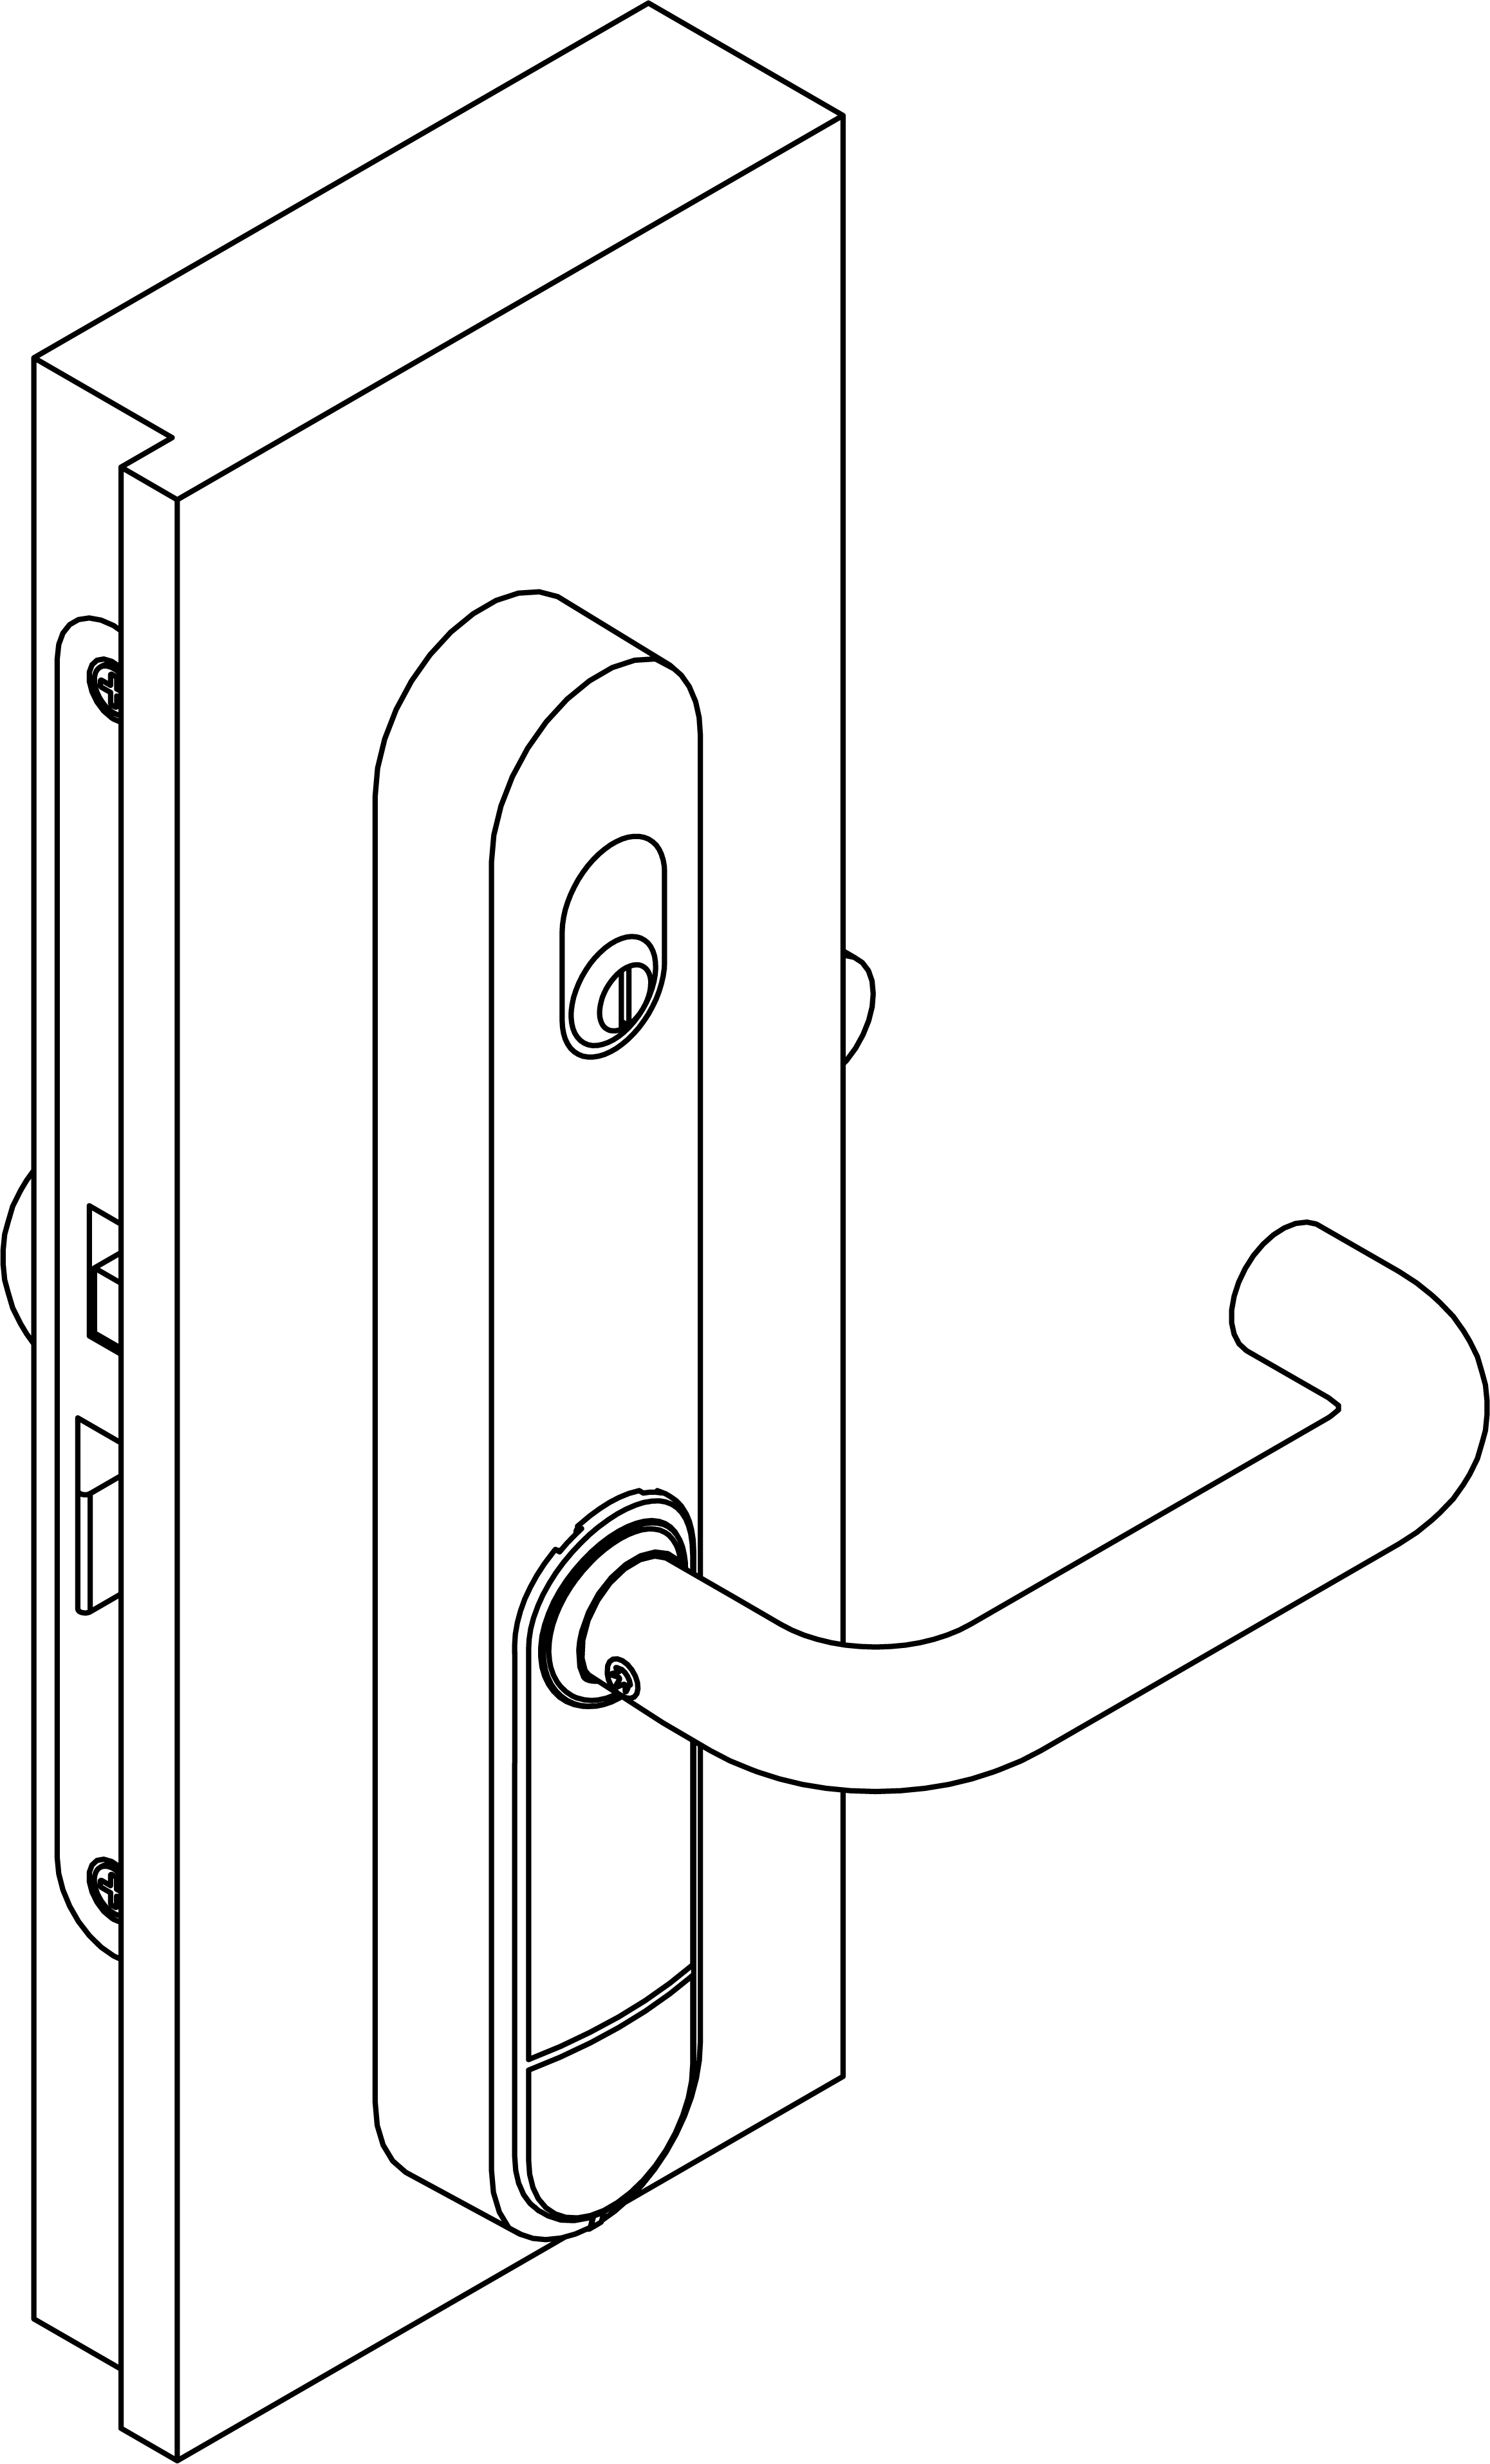
Installing the fitting (MO) - SmartHandle AX Advanced SmartIntego
- Door pre-drilled.
- PH2 screwdriver at hand.
- TX15 screwdriver at hand.
- Caliper gauge at hand.
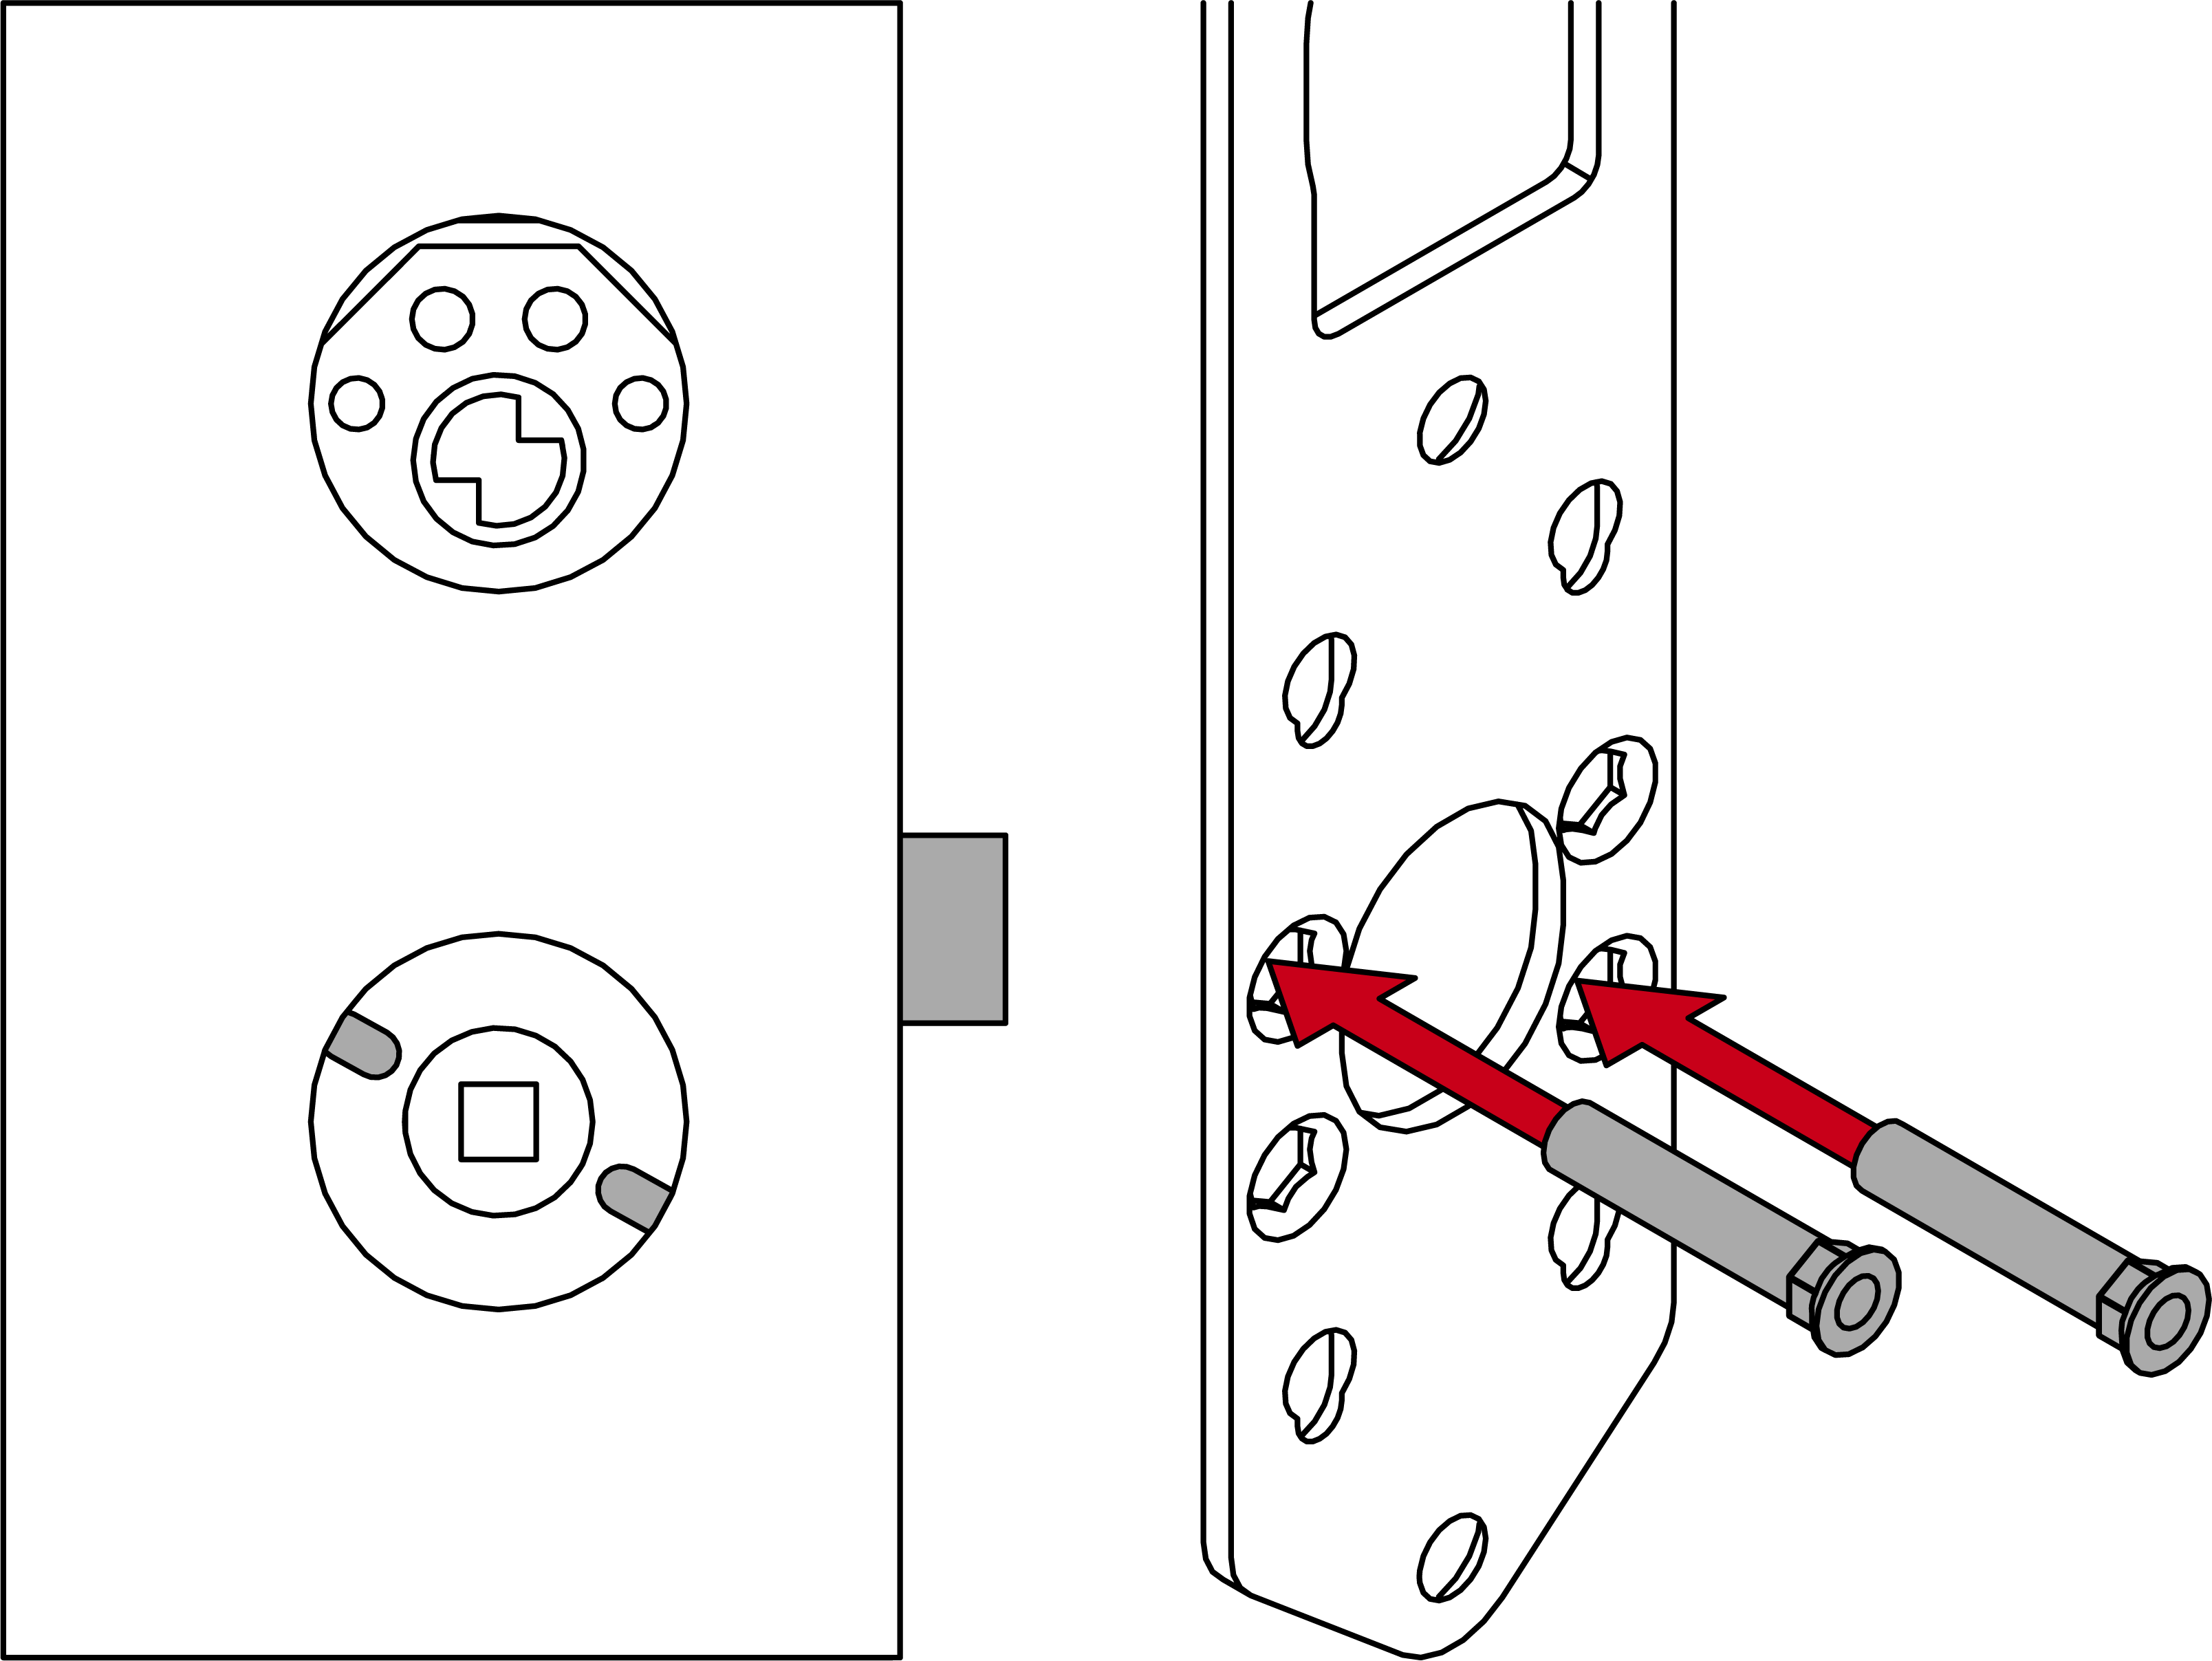
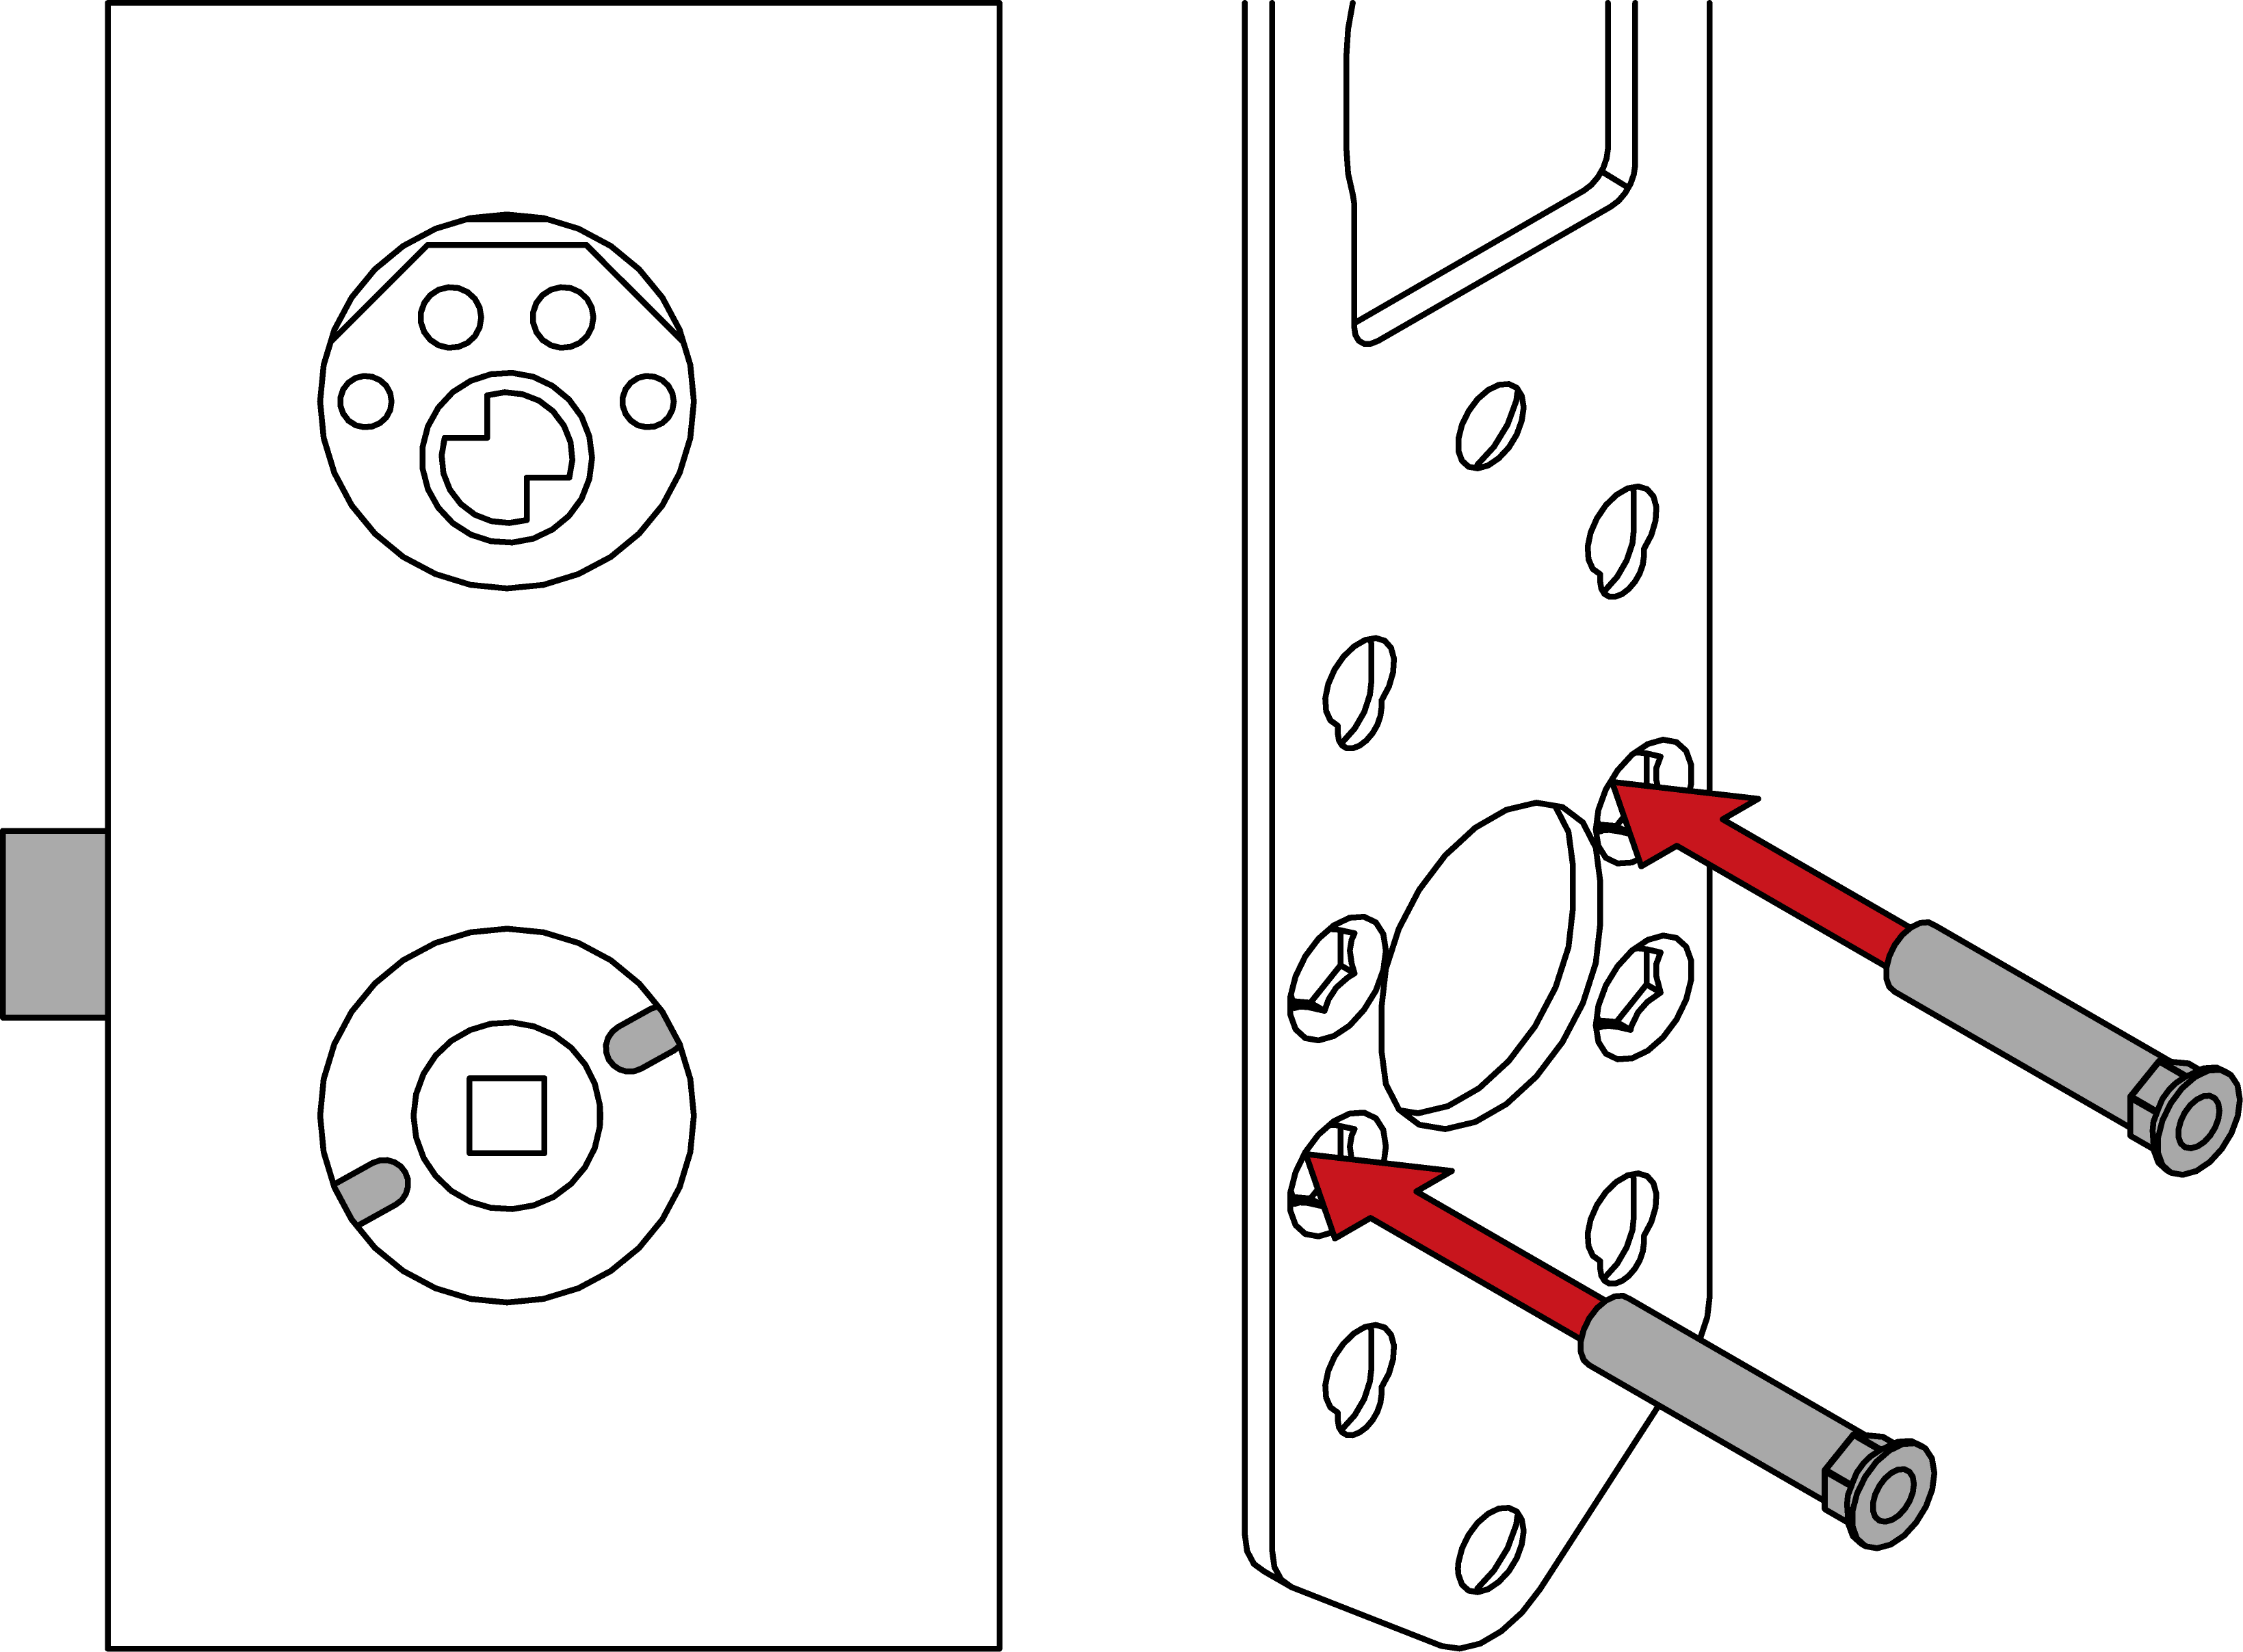
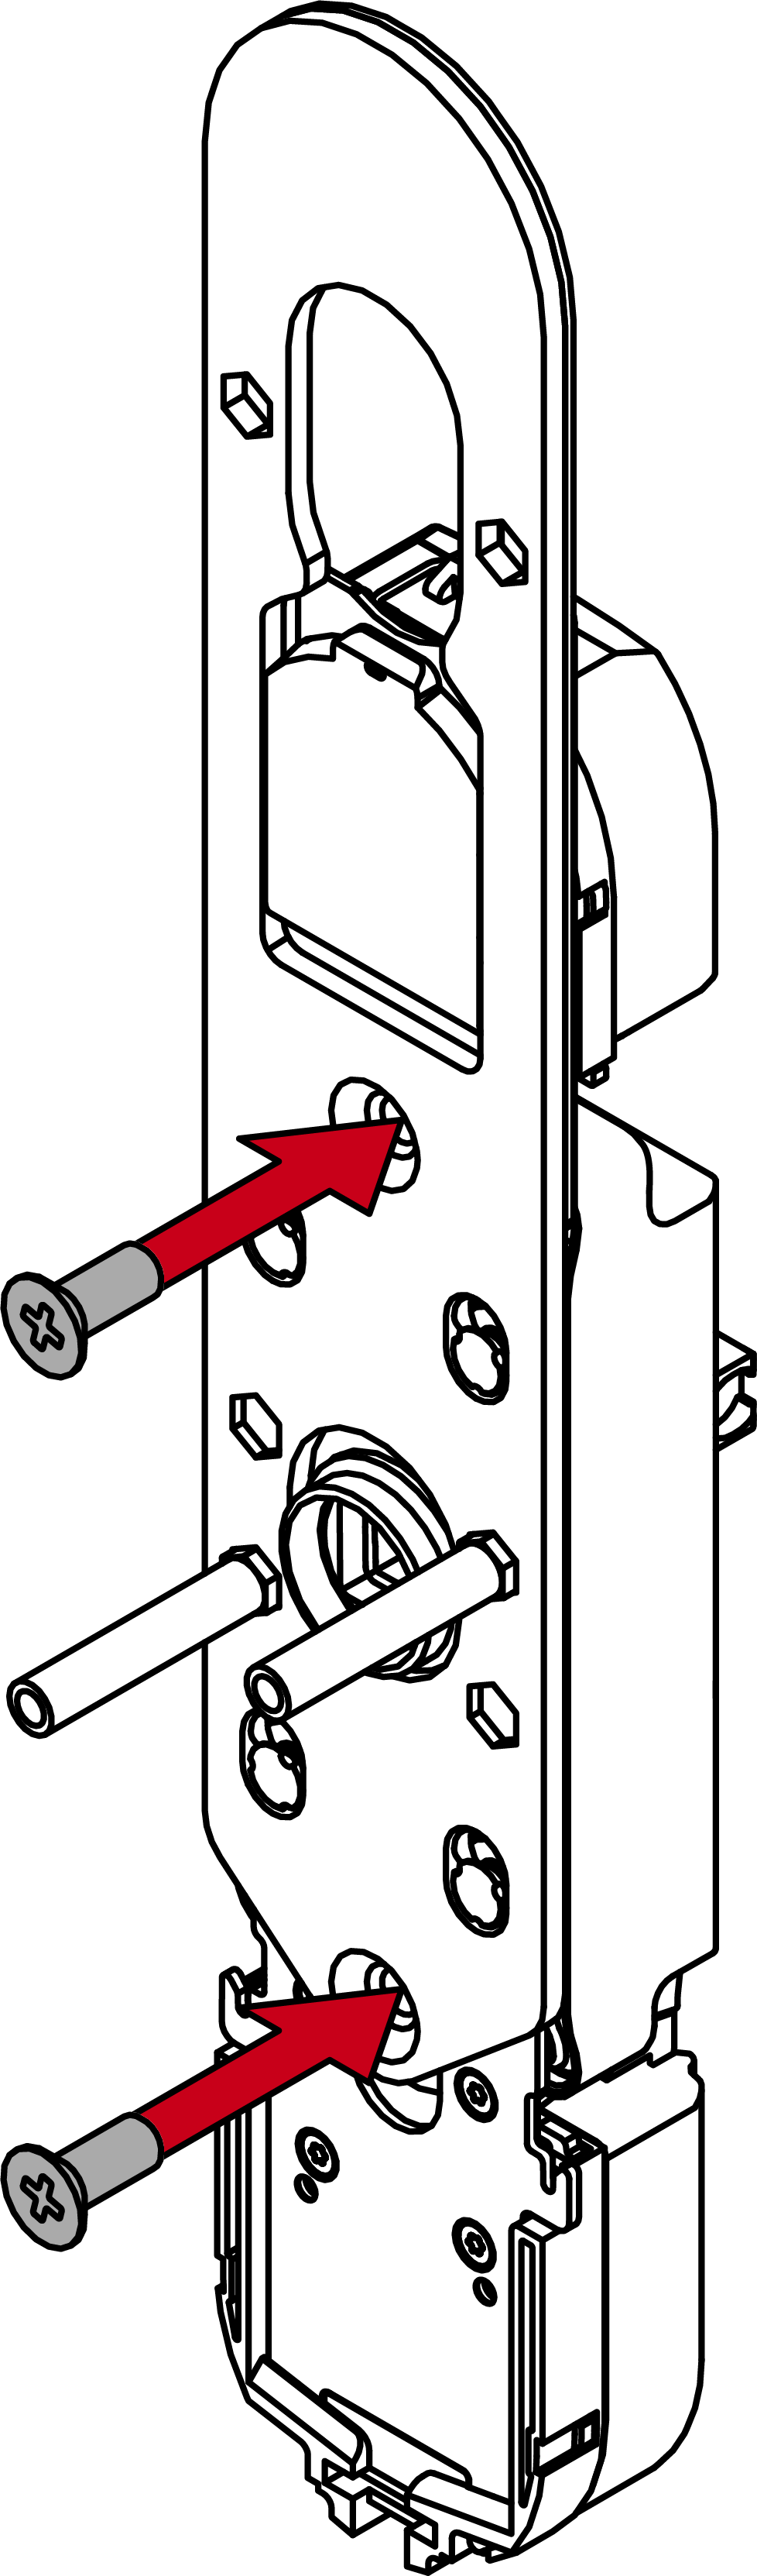
- Look at the mortise lock from the outer side and insert the sleeve nuts for the mortise lock into the fastening plate.
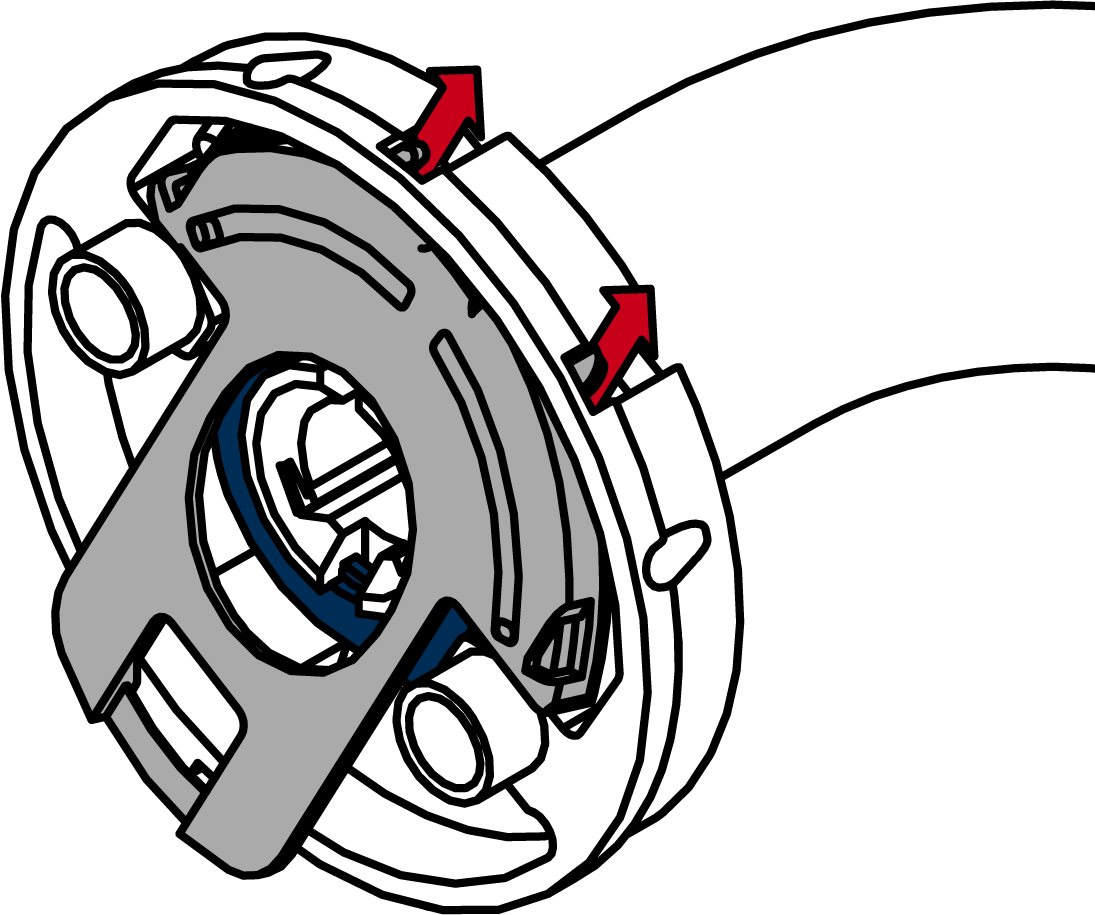
- Insert the module support into the fastening plate.

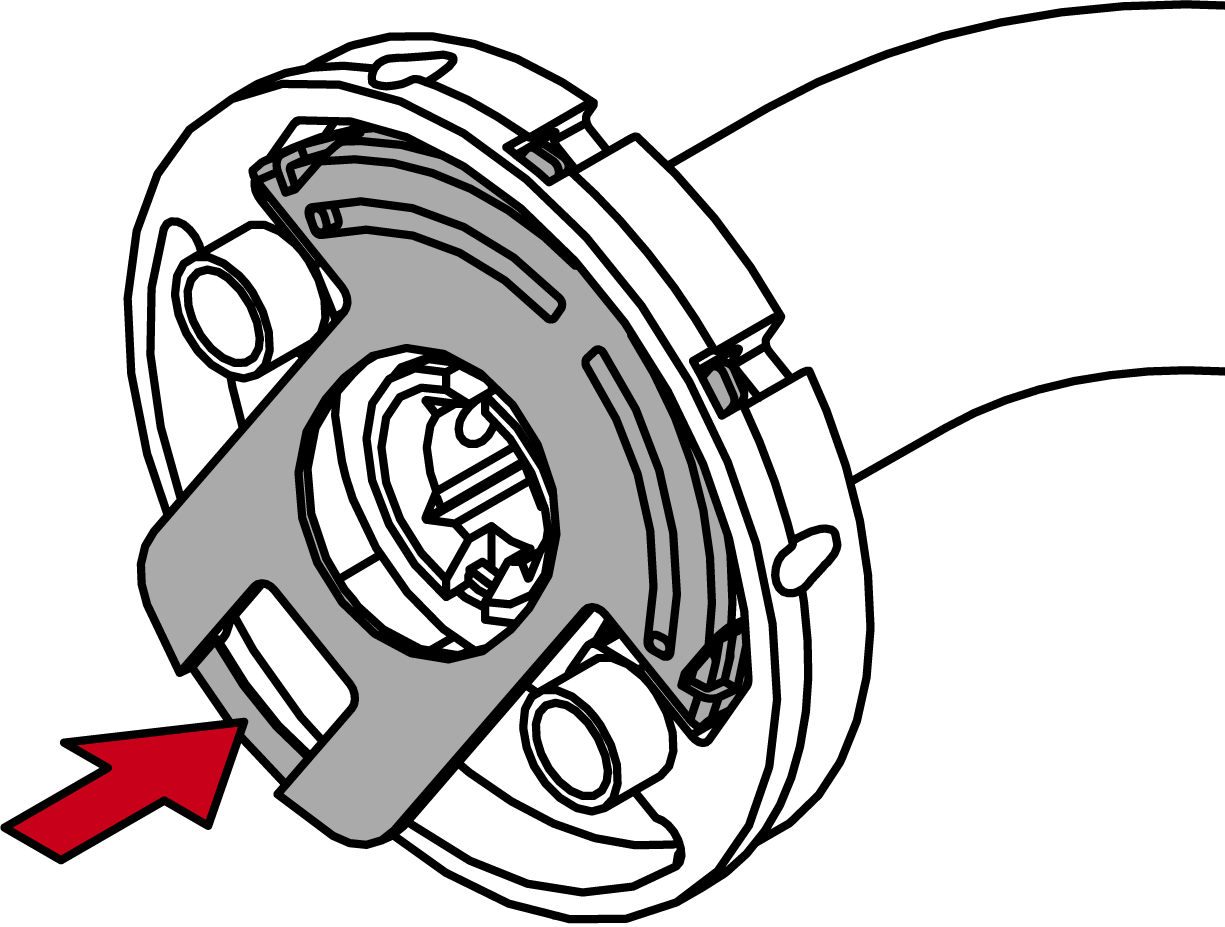
- Slide the module support downwards.
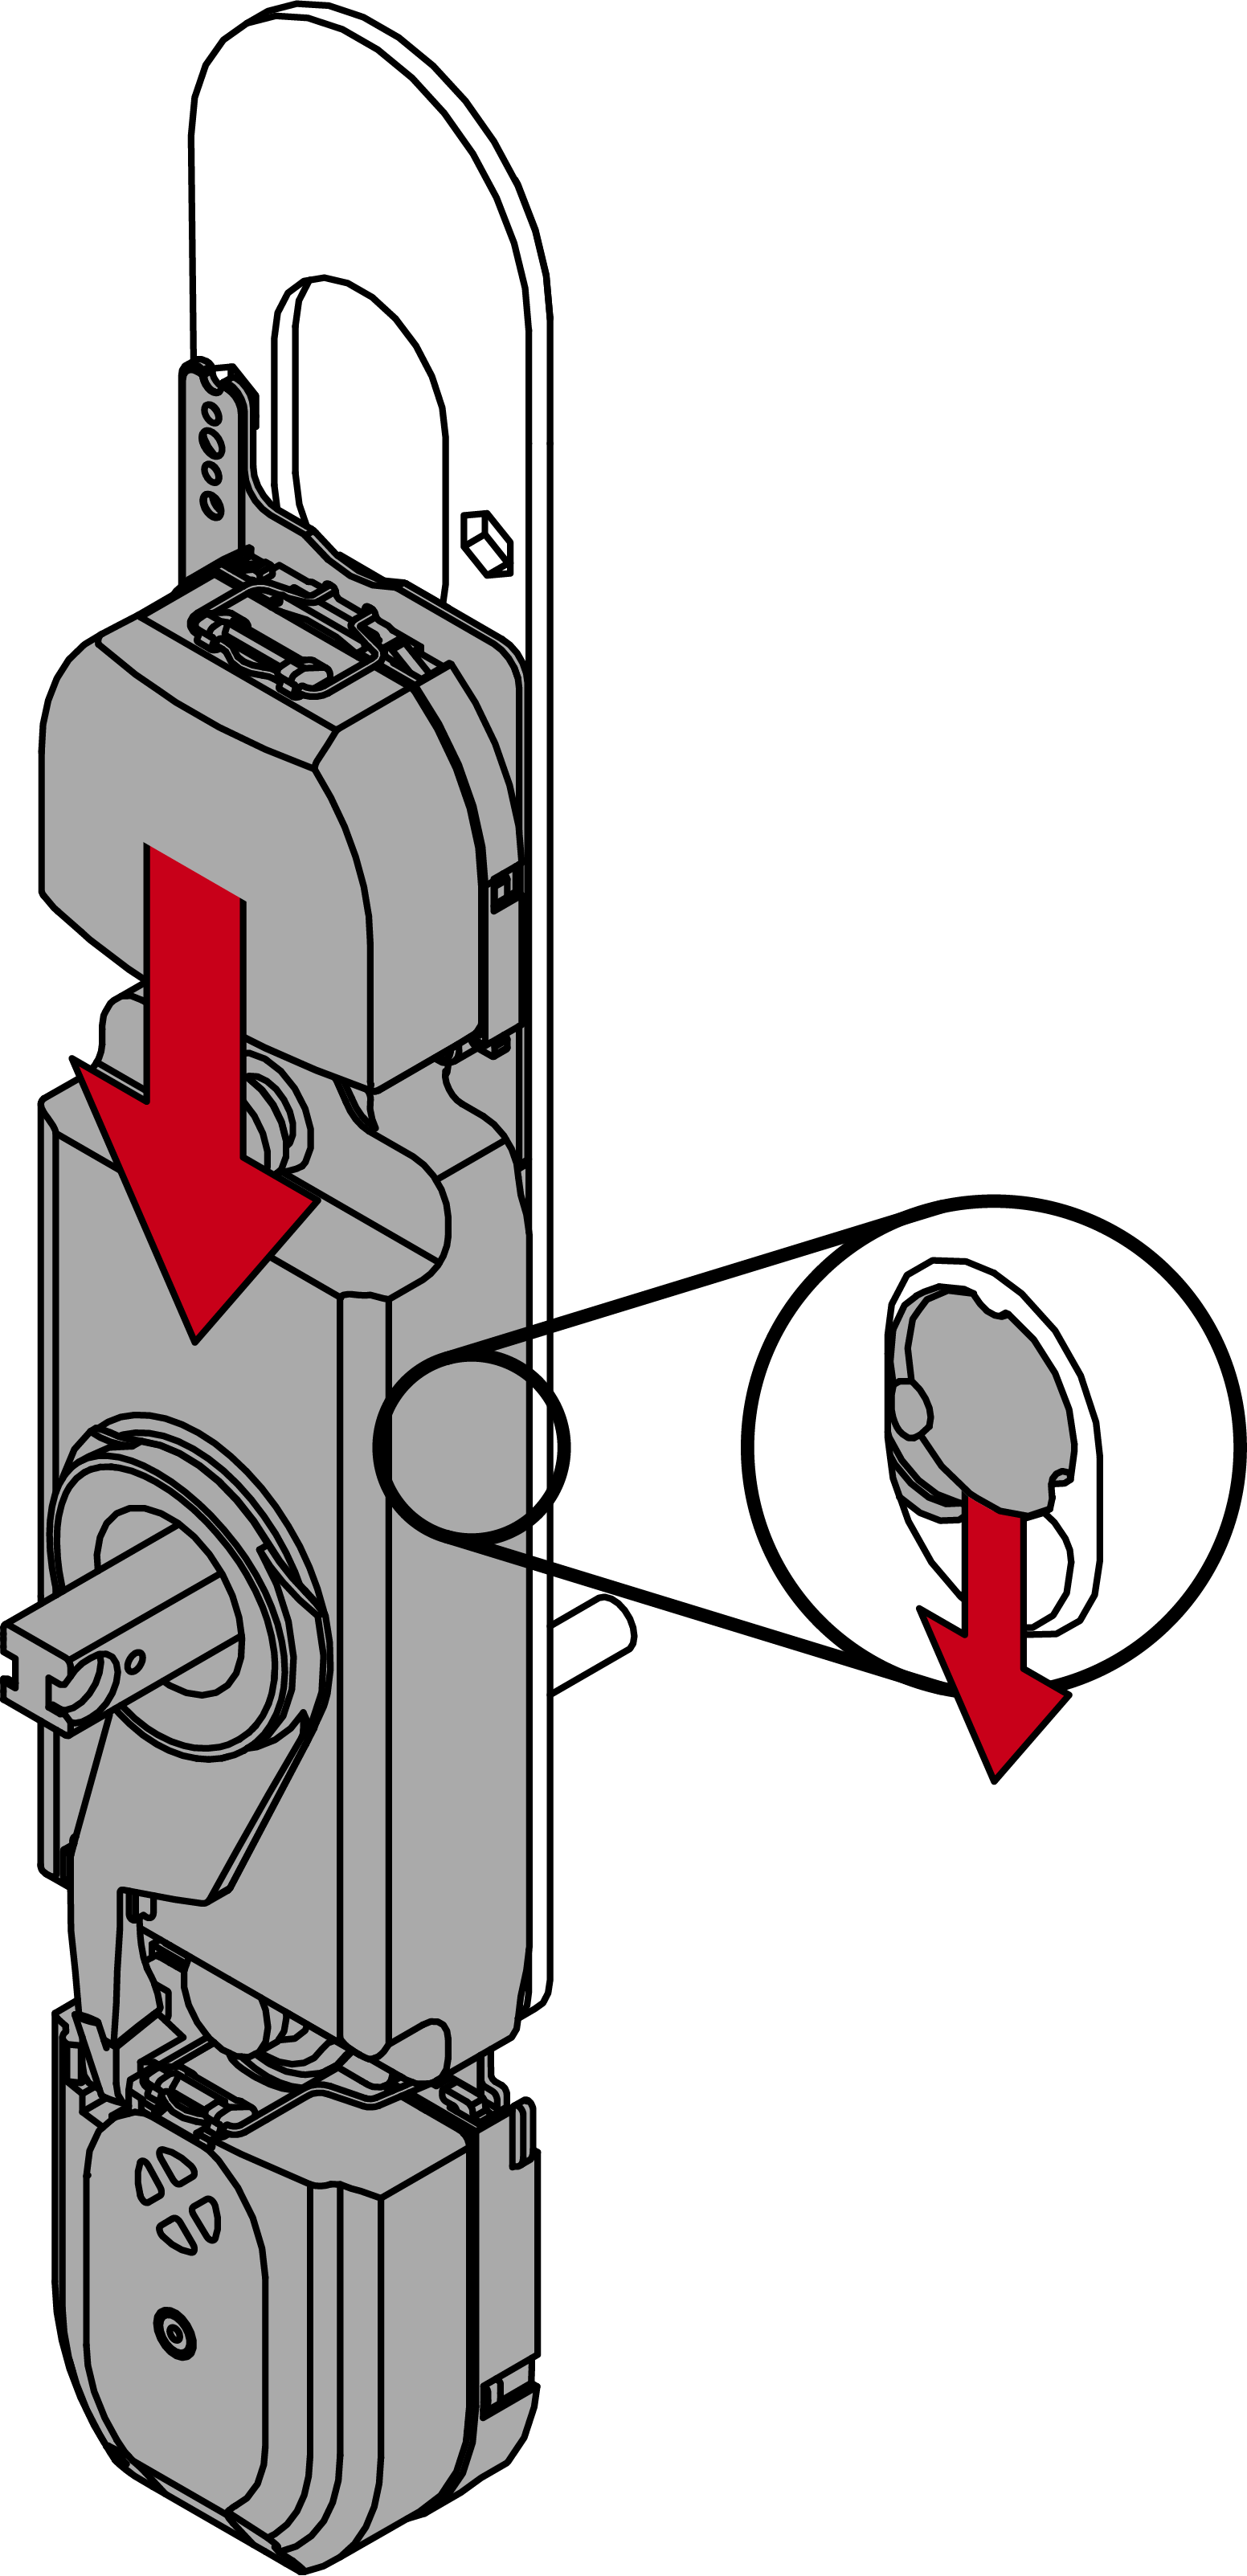
- Module support snaps into place.
- Fasten the module support to the fastening plate with the 12 mm screws (PH2, torque 3.0 Nm).
- Determine the required direction of rotation for your inside handle.
- Place the interchangeable plate into your inside handle escutcheon as required.
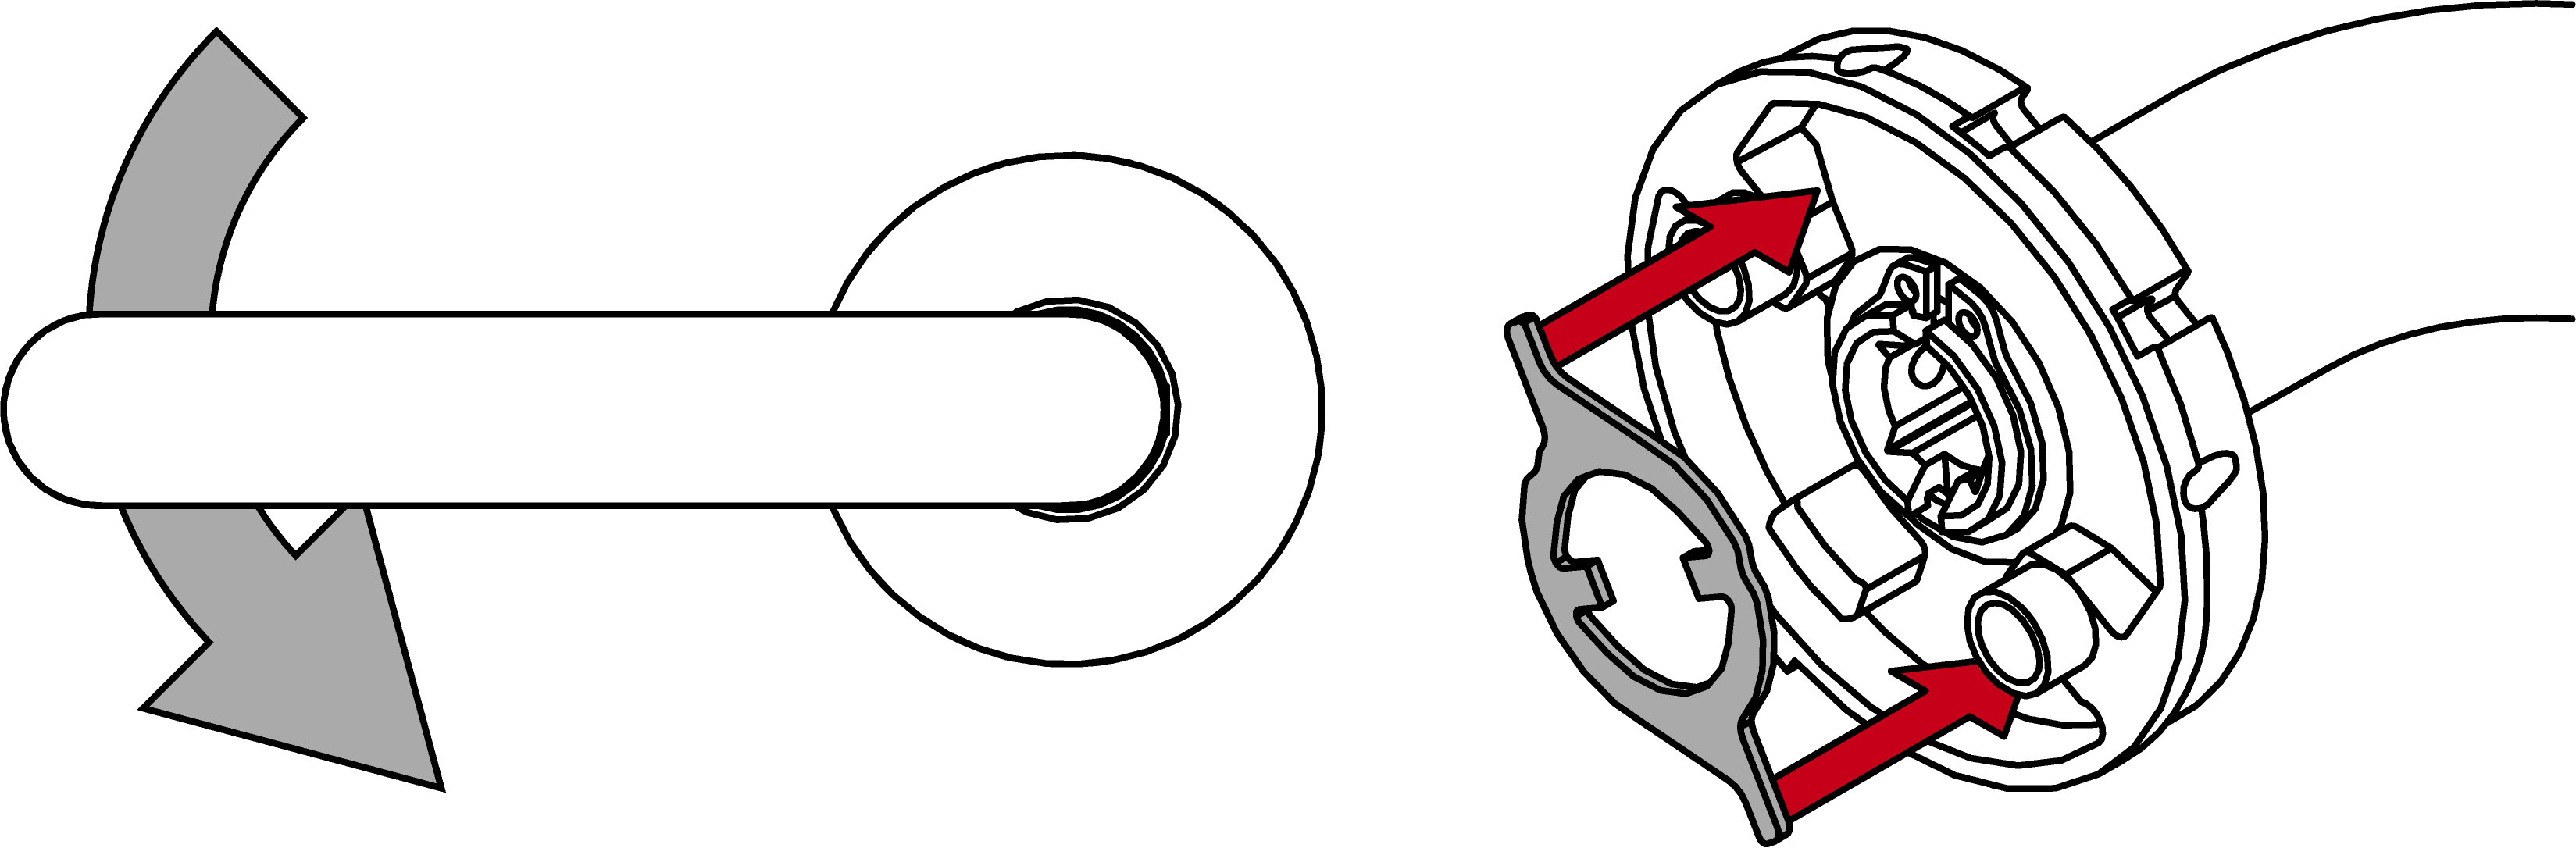
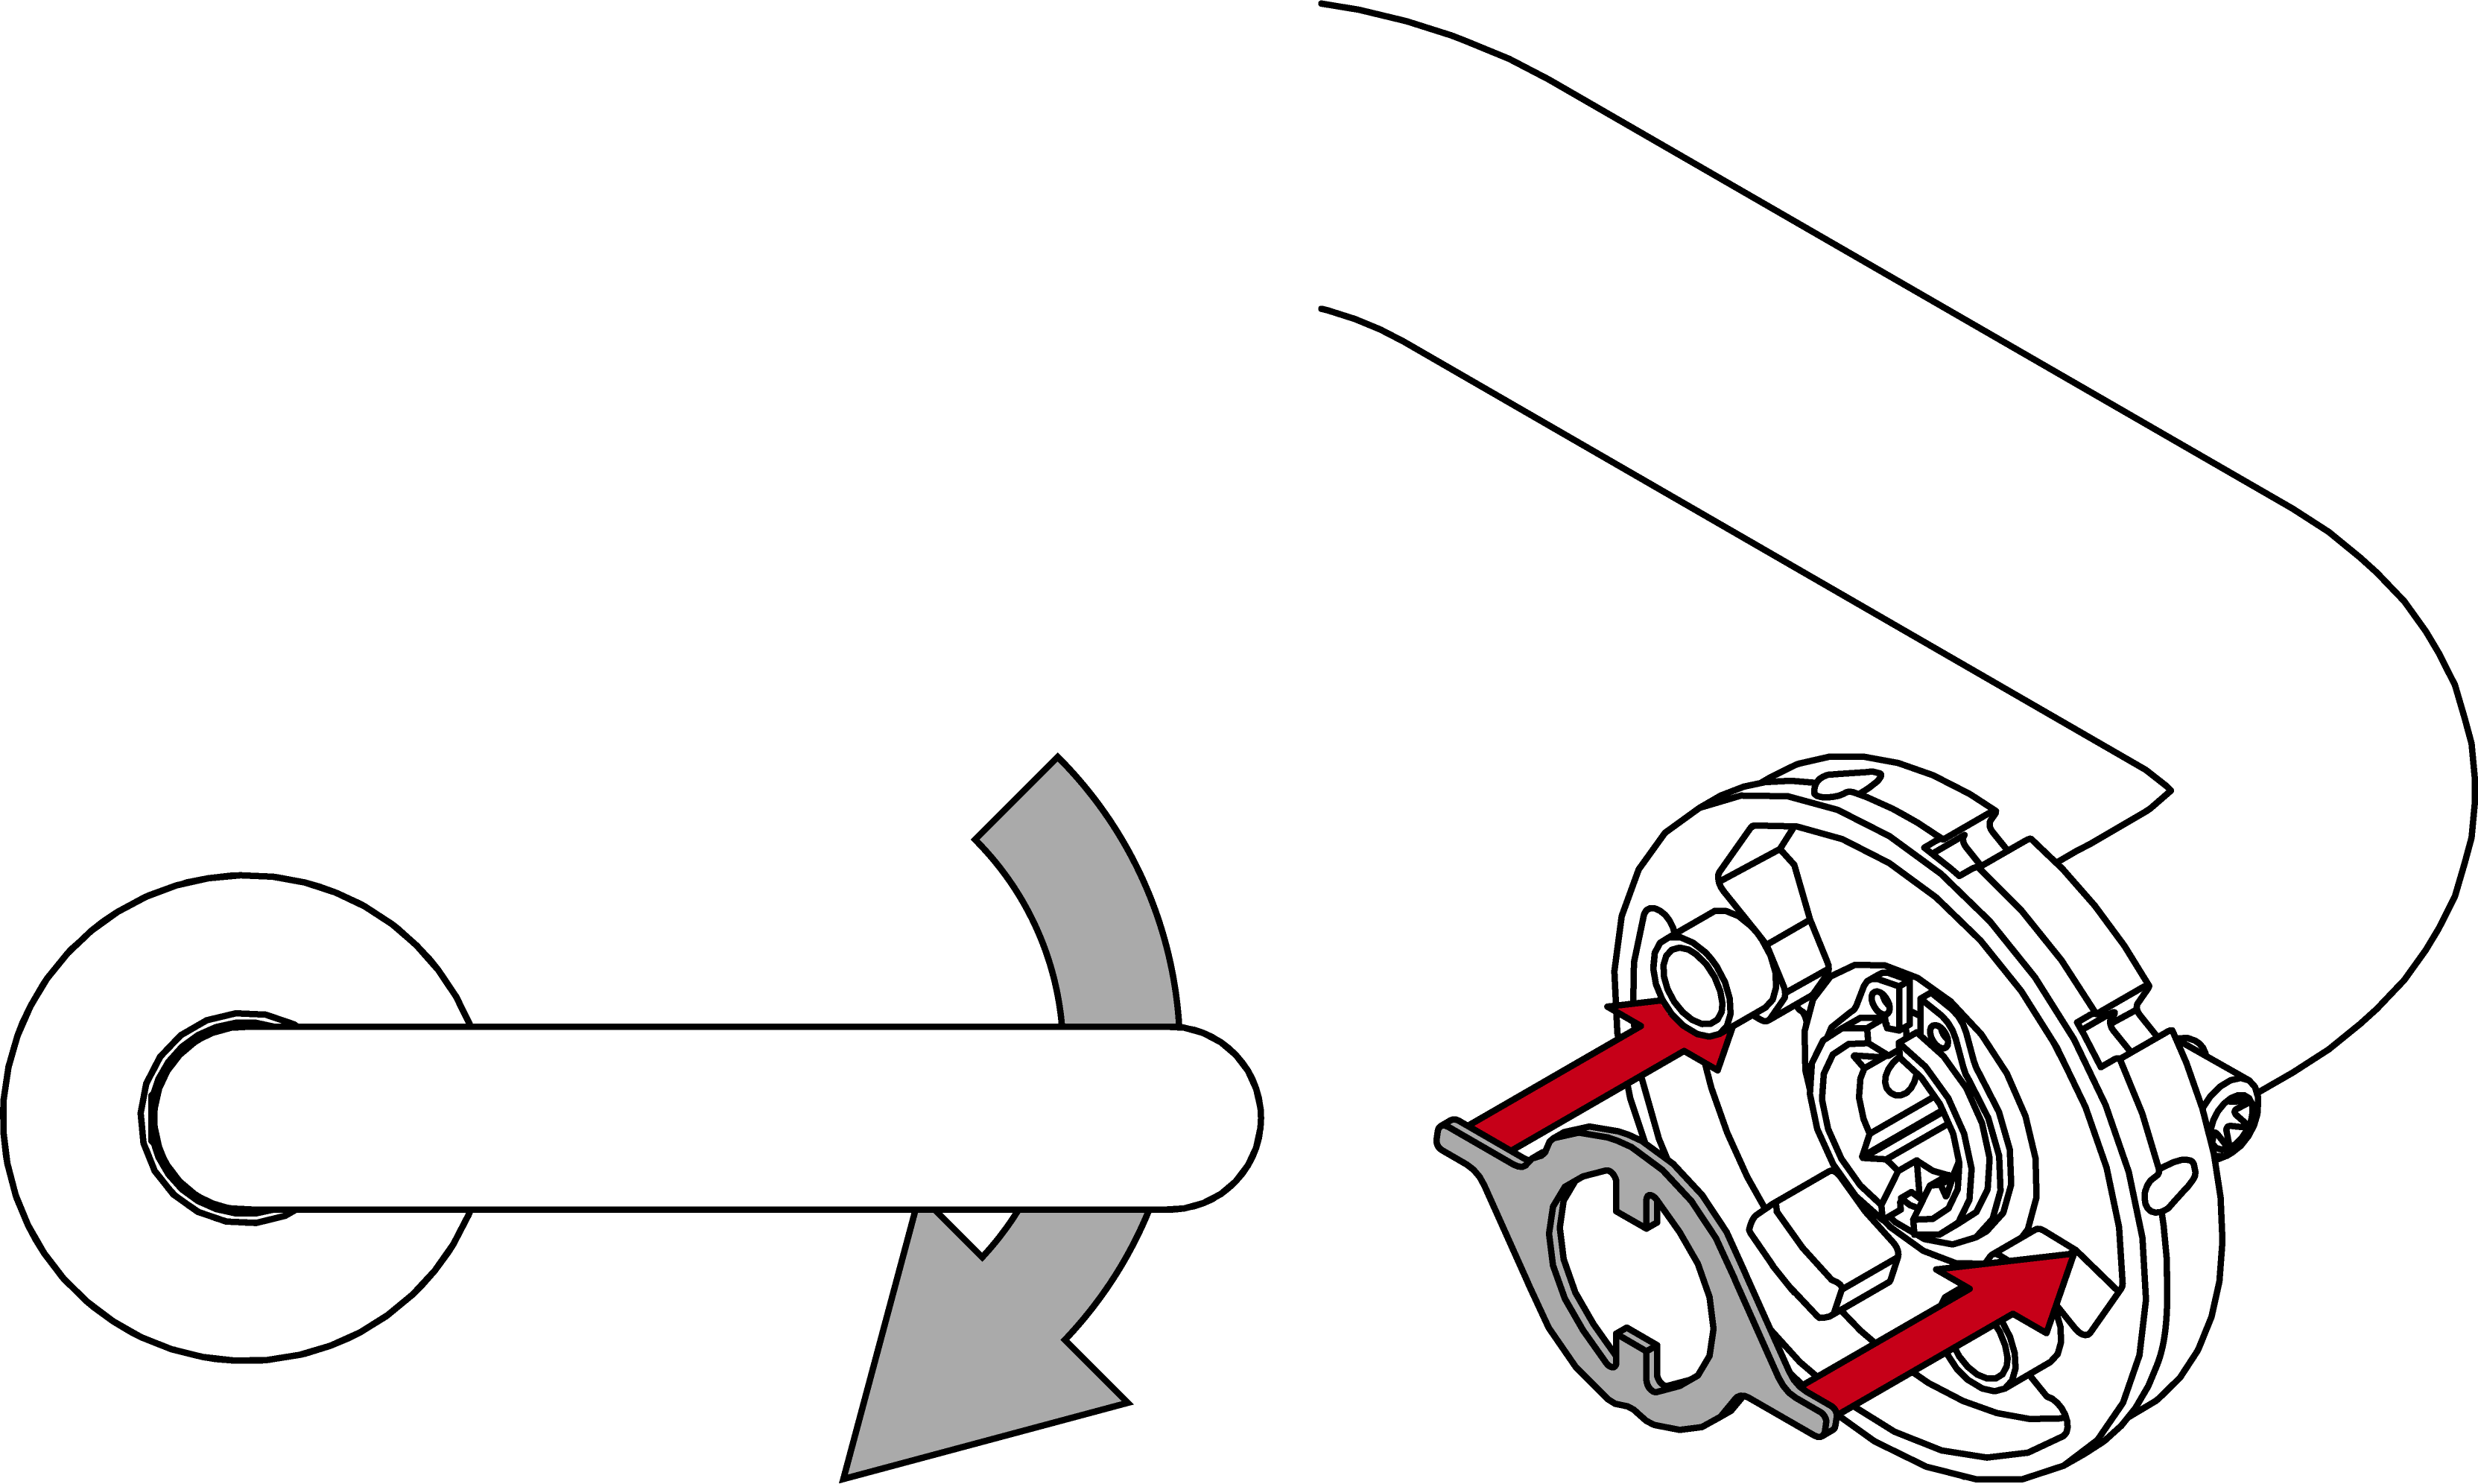
- Pre-tension the spring element on the interchangeable plate.
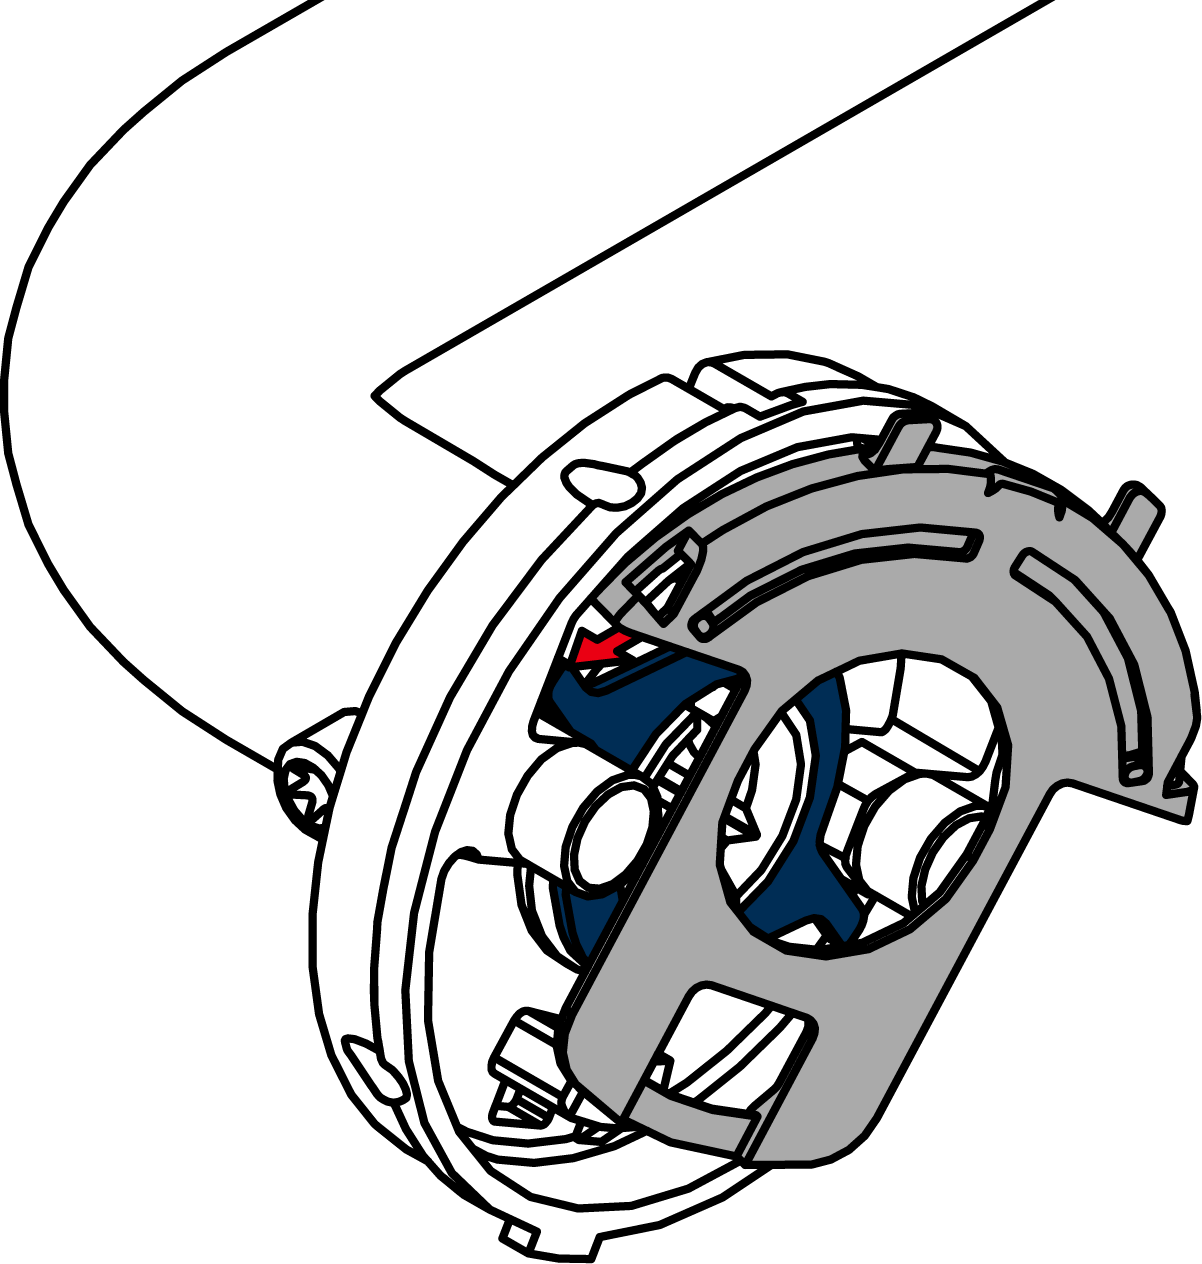
- Slide the spring element nose into the slot in the escutcheon.
- Attach the end of the spring element into the slot in the escutcheon.
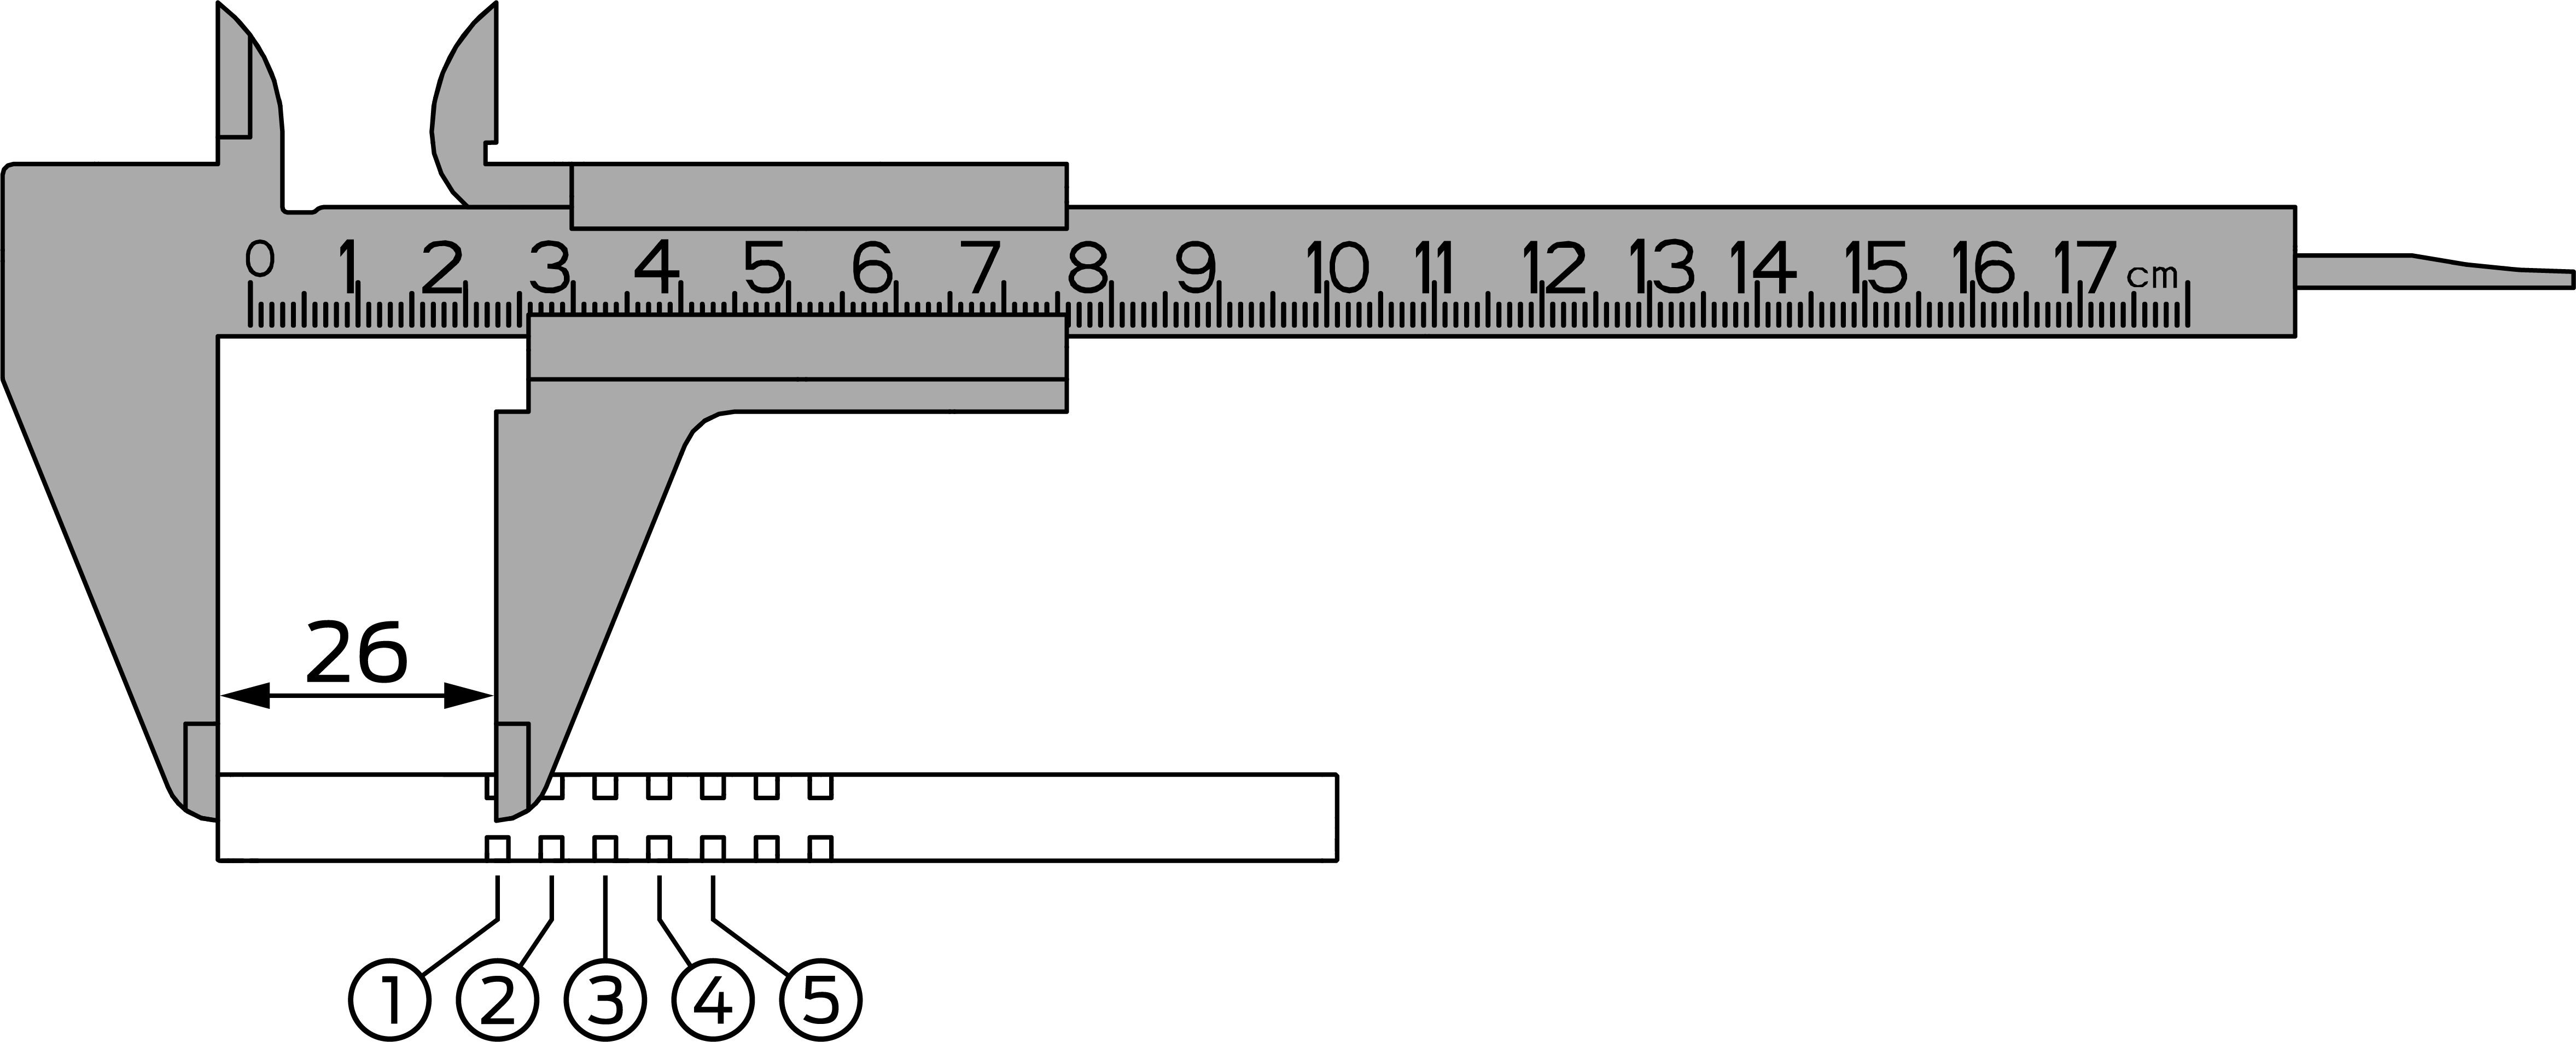
- Measure the total length of the spindle.
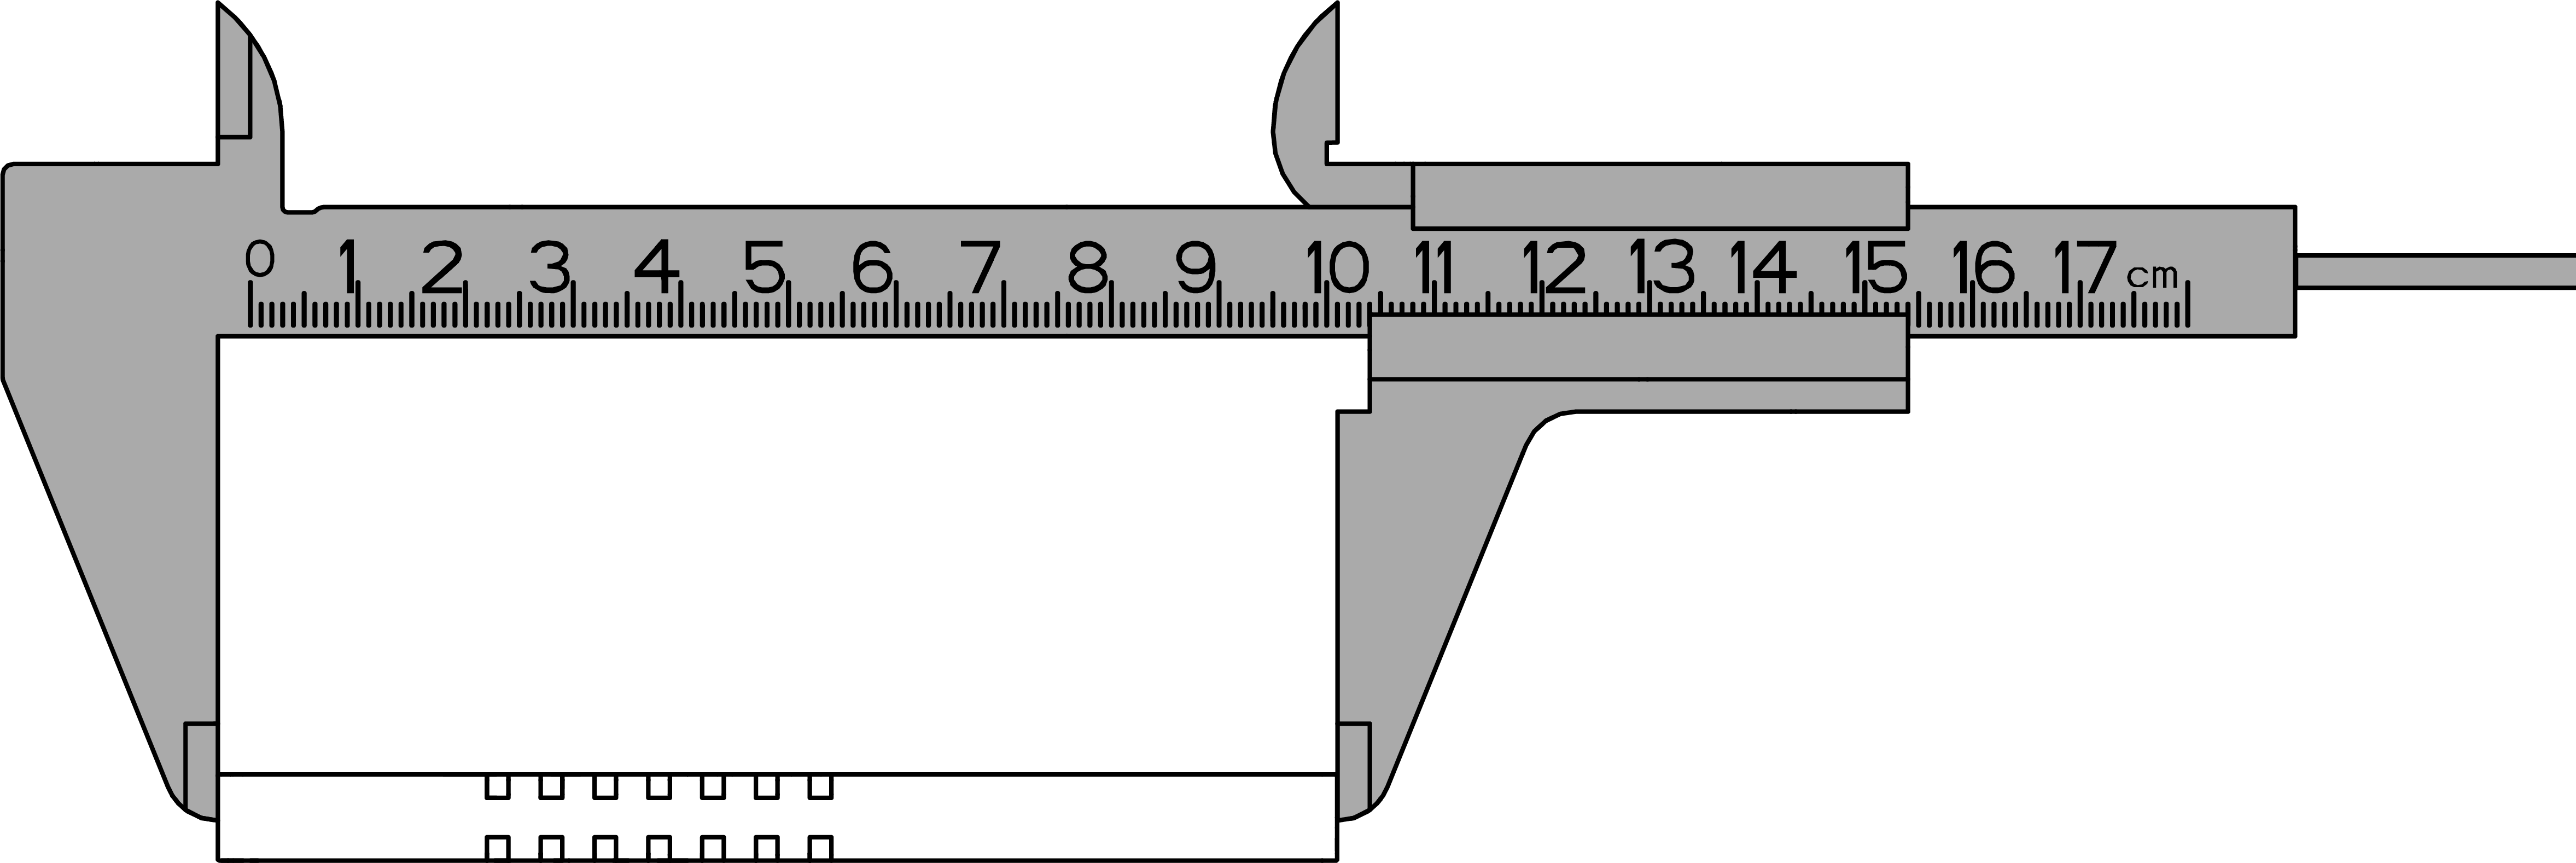
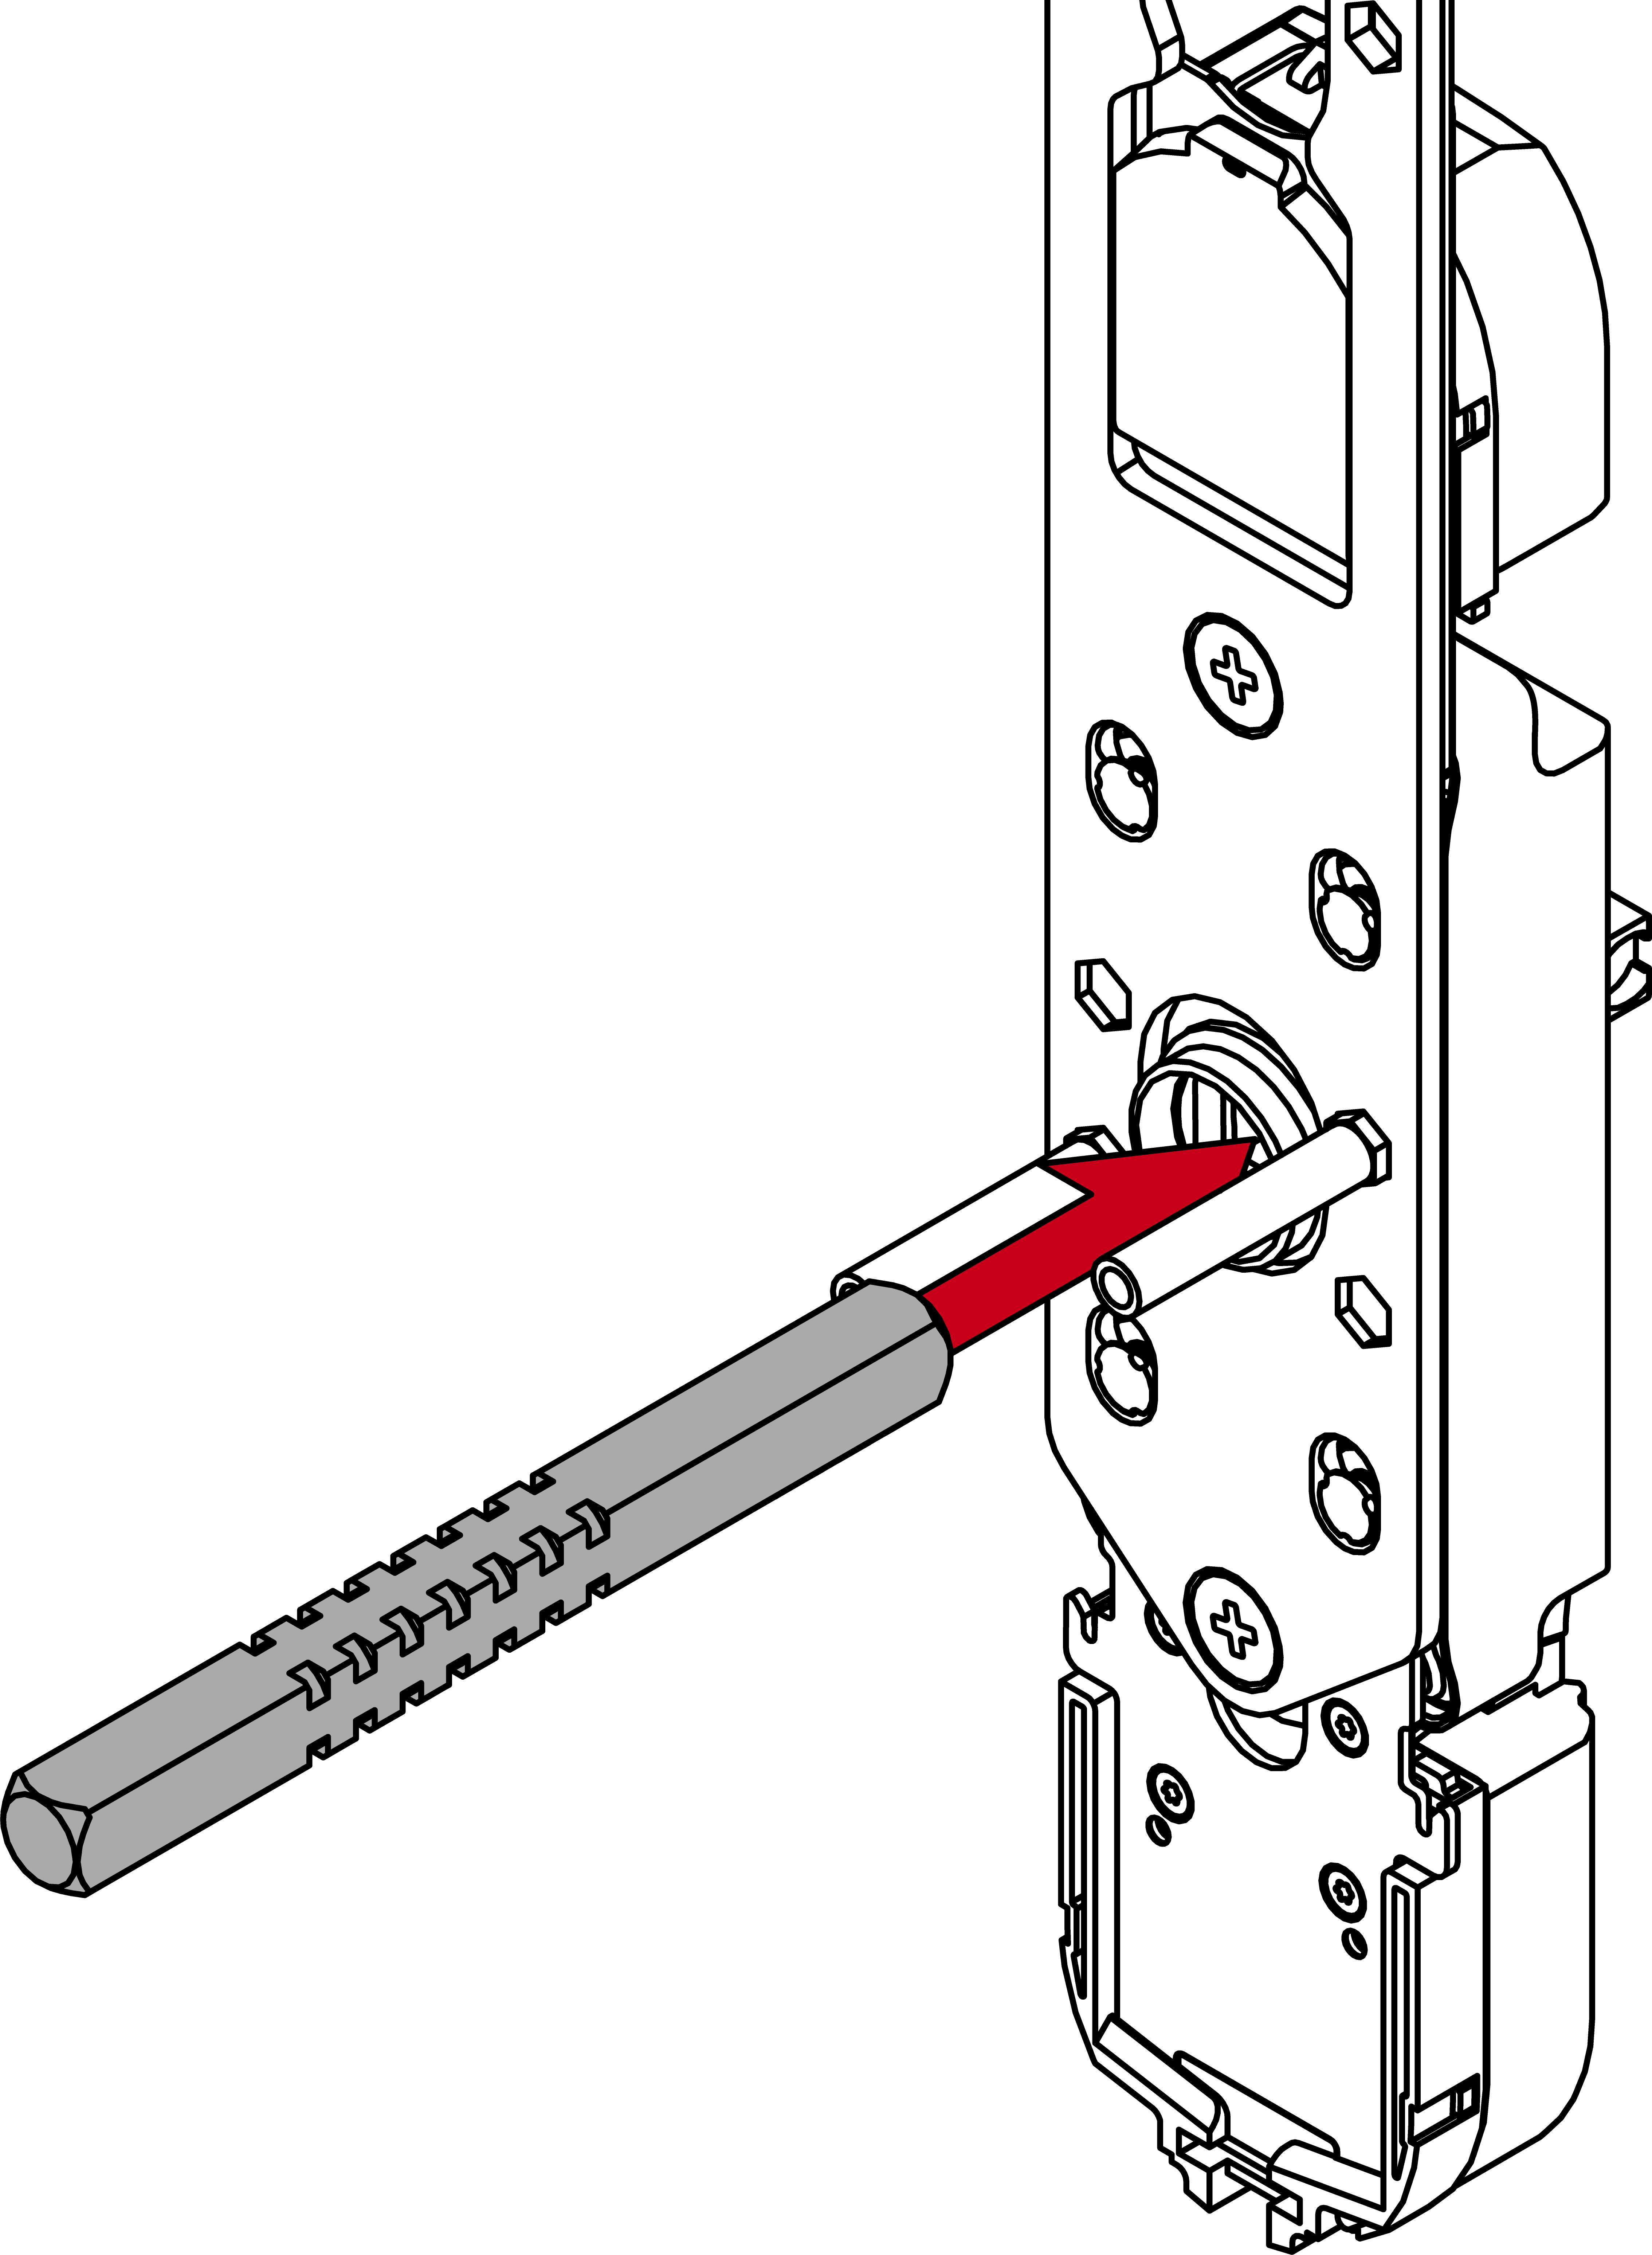
- Locate the inside of the spindle (four-edge end up to the centre of the first groove = 26 mm).
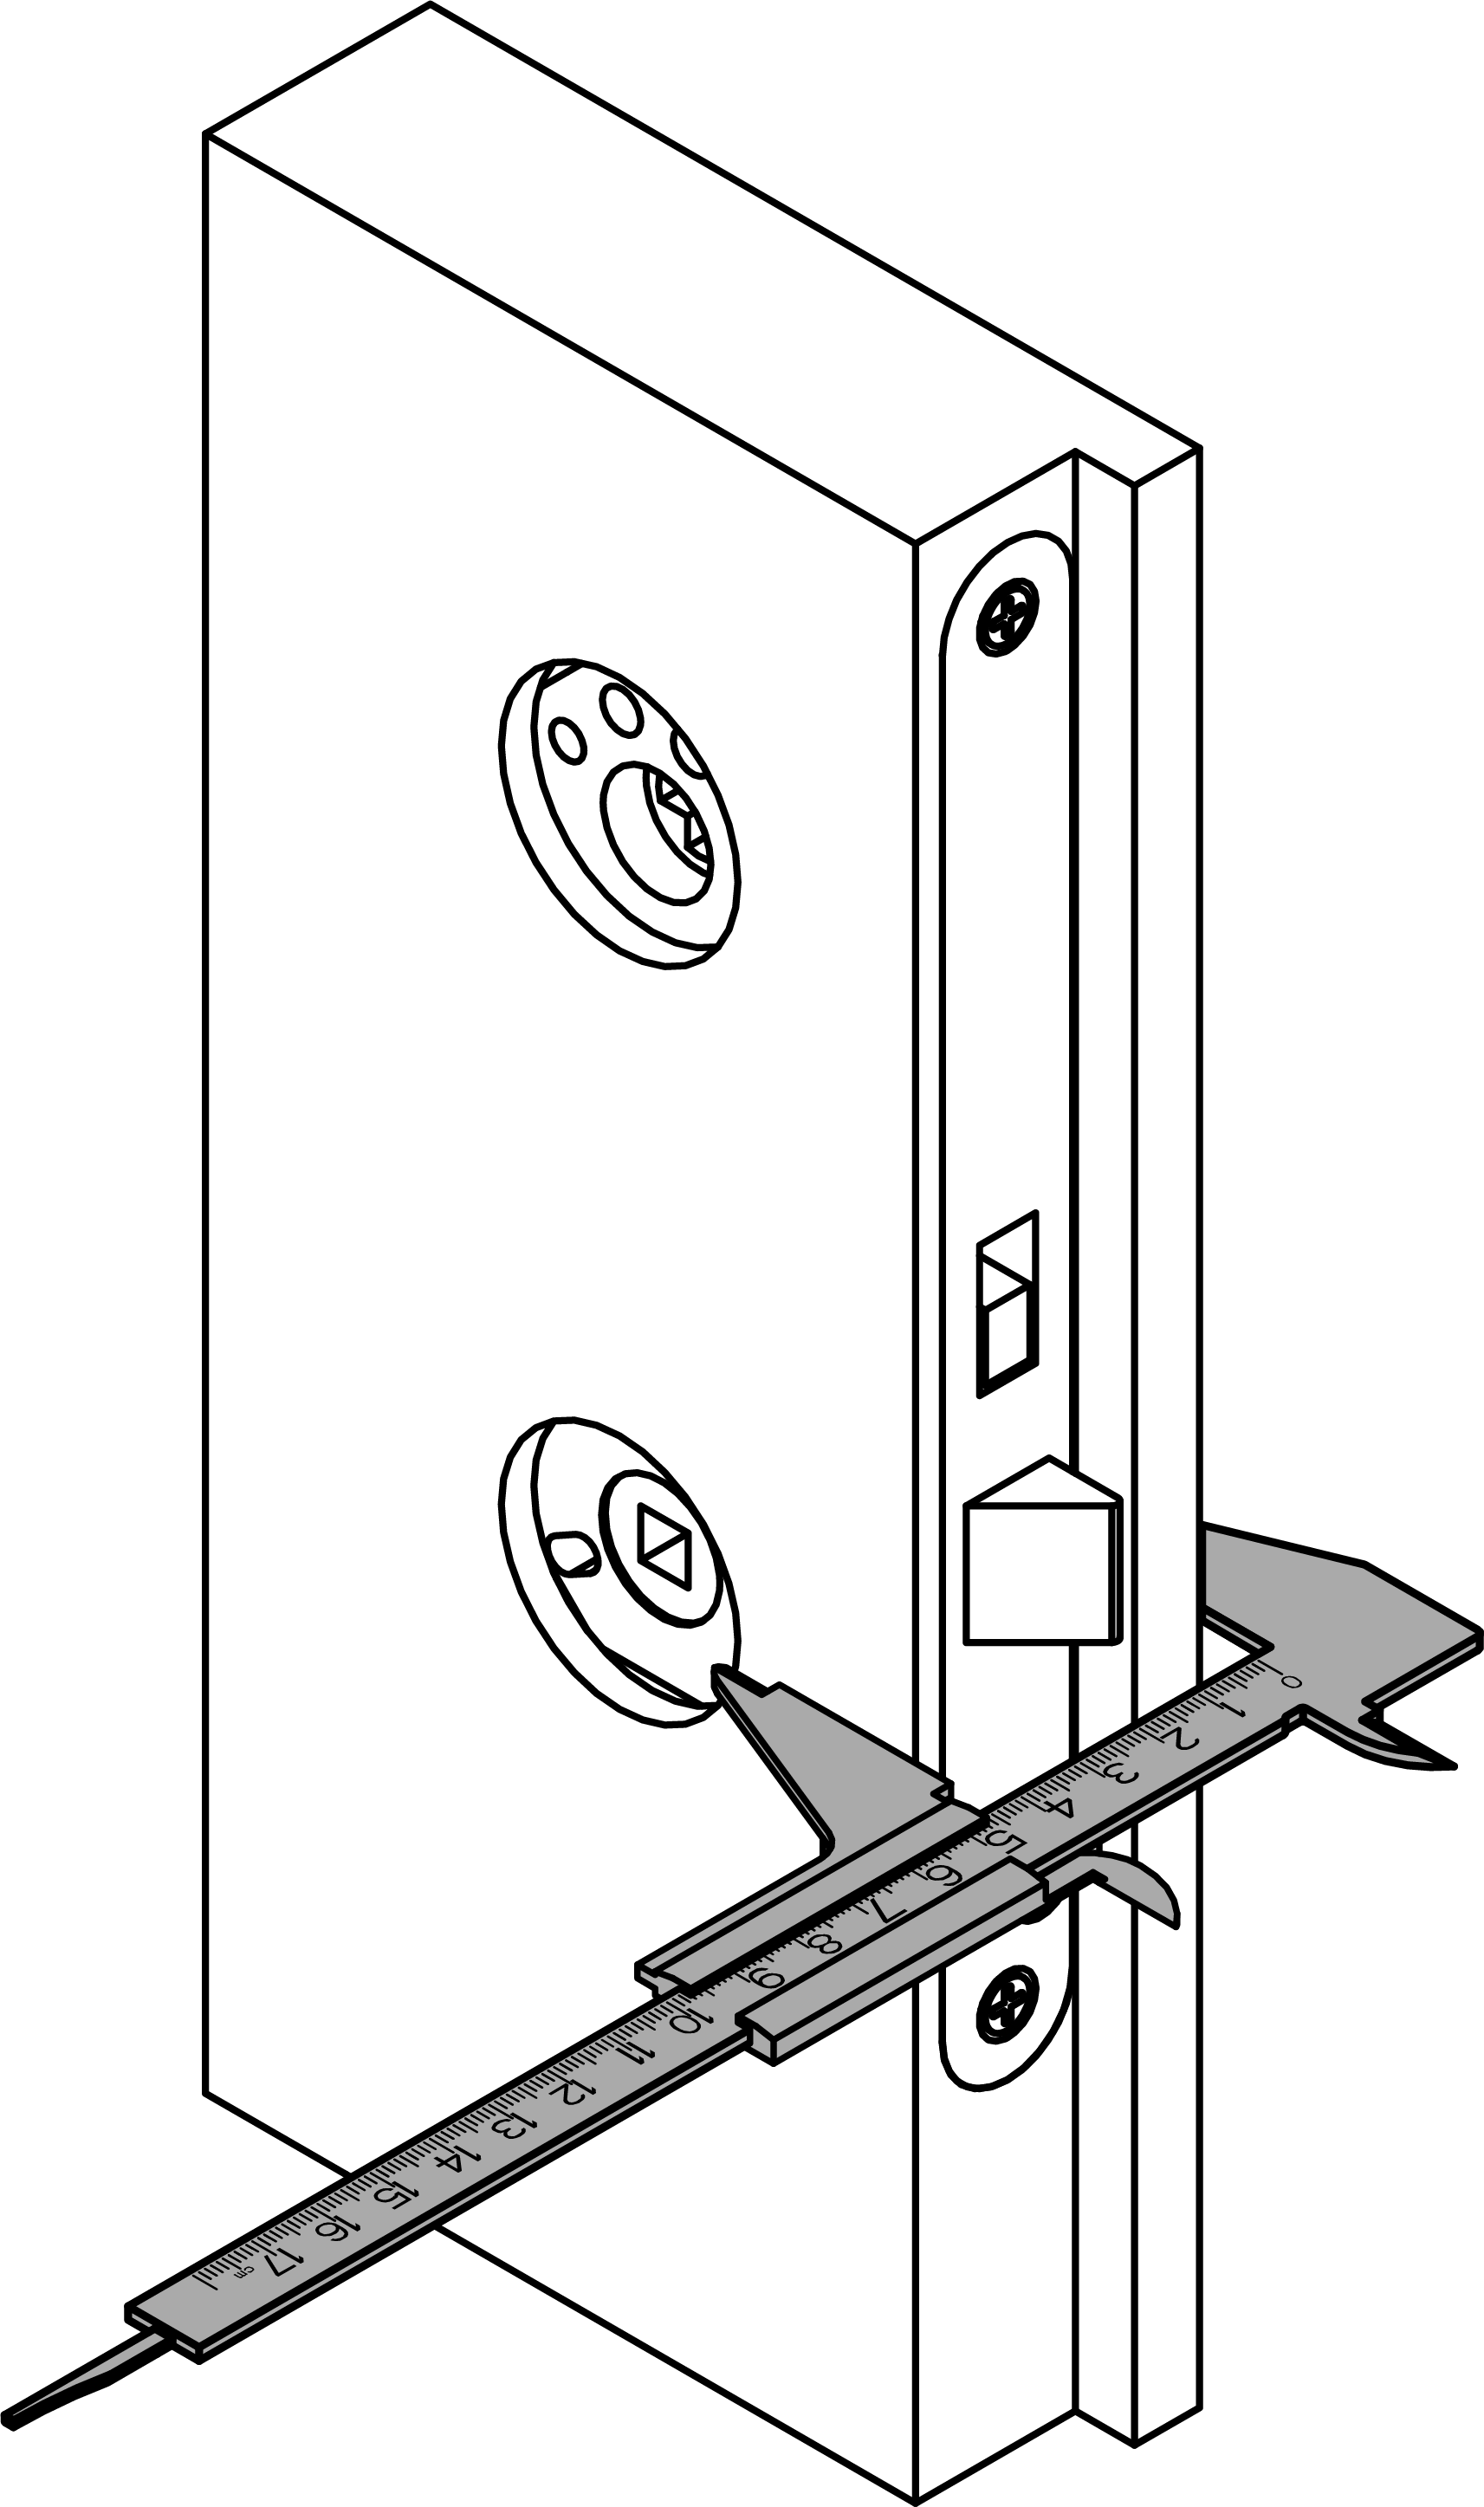
- Measure the door thickness.
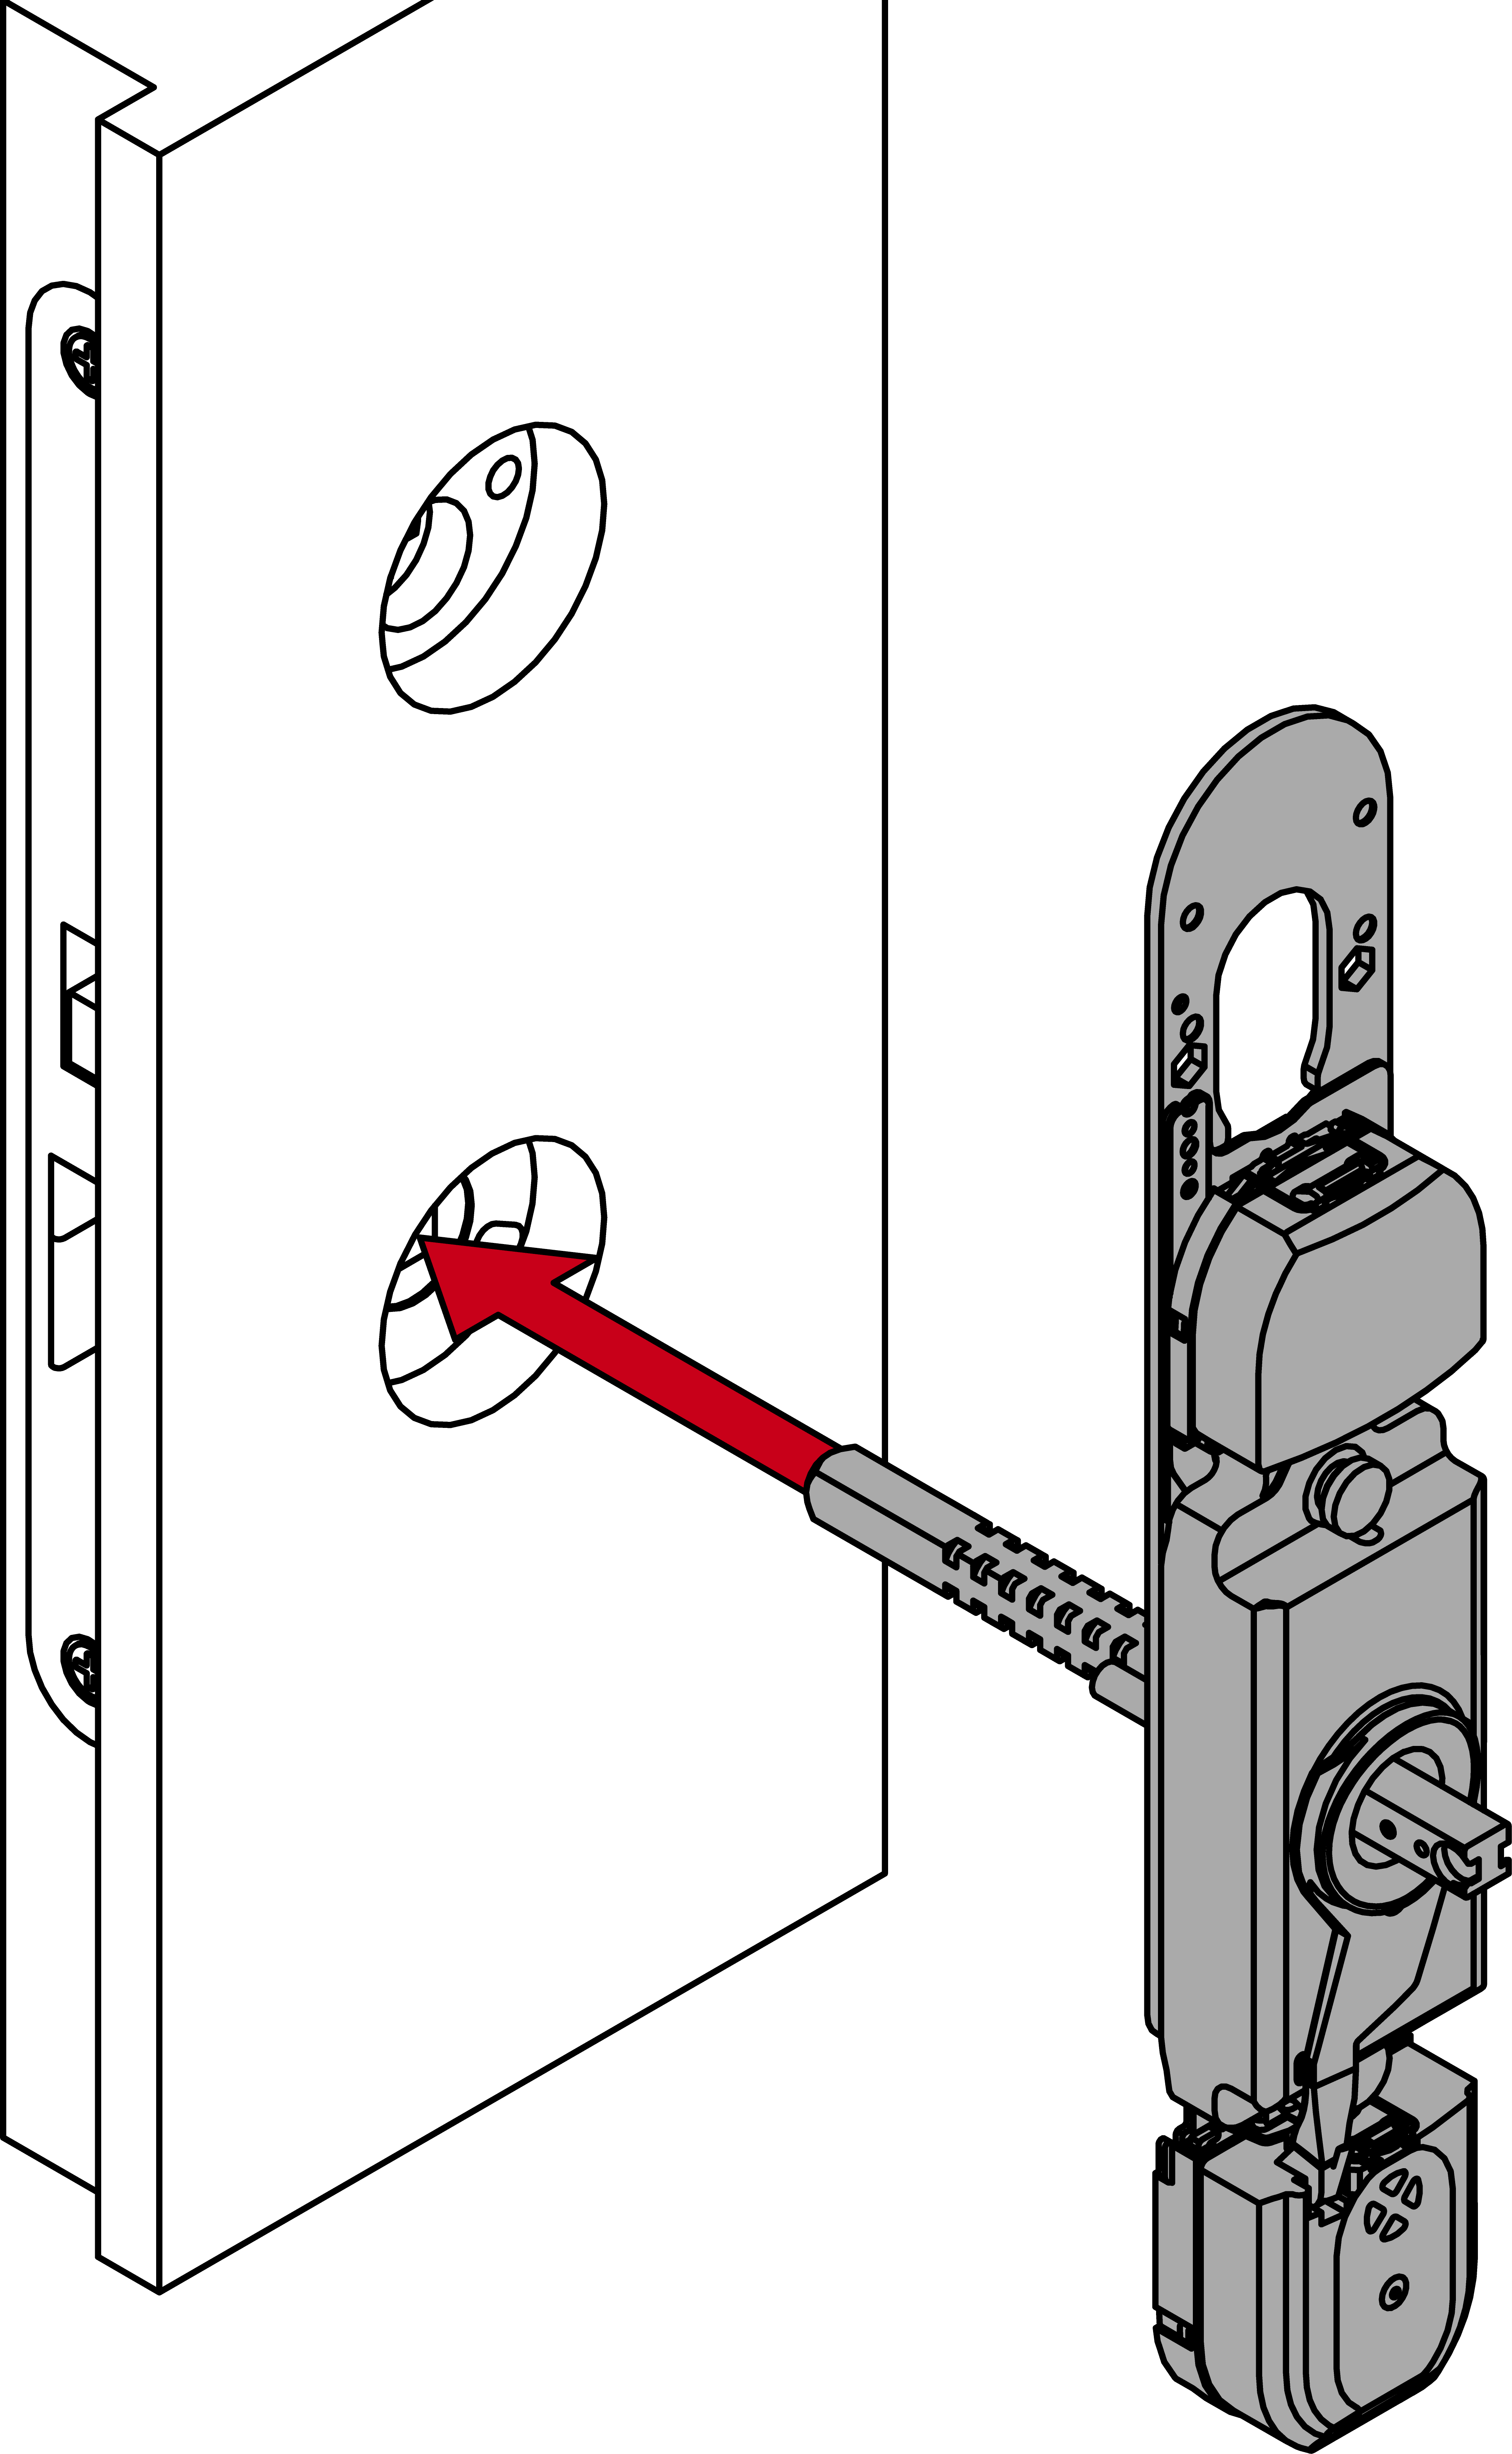
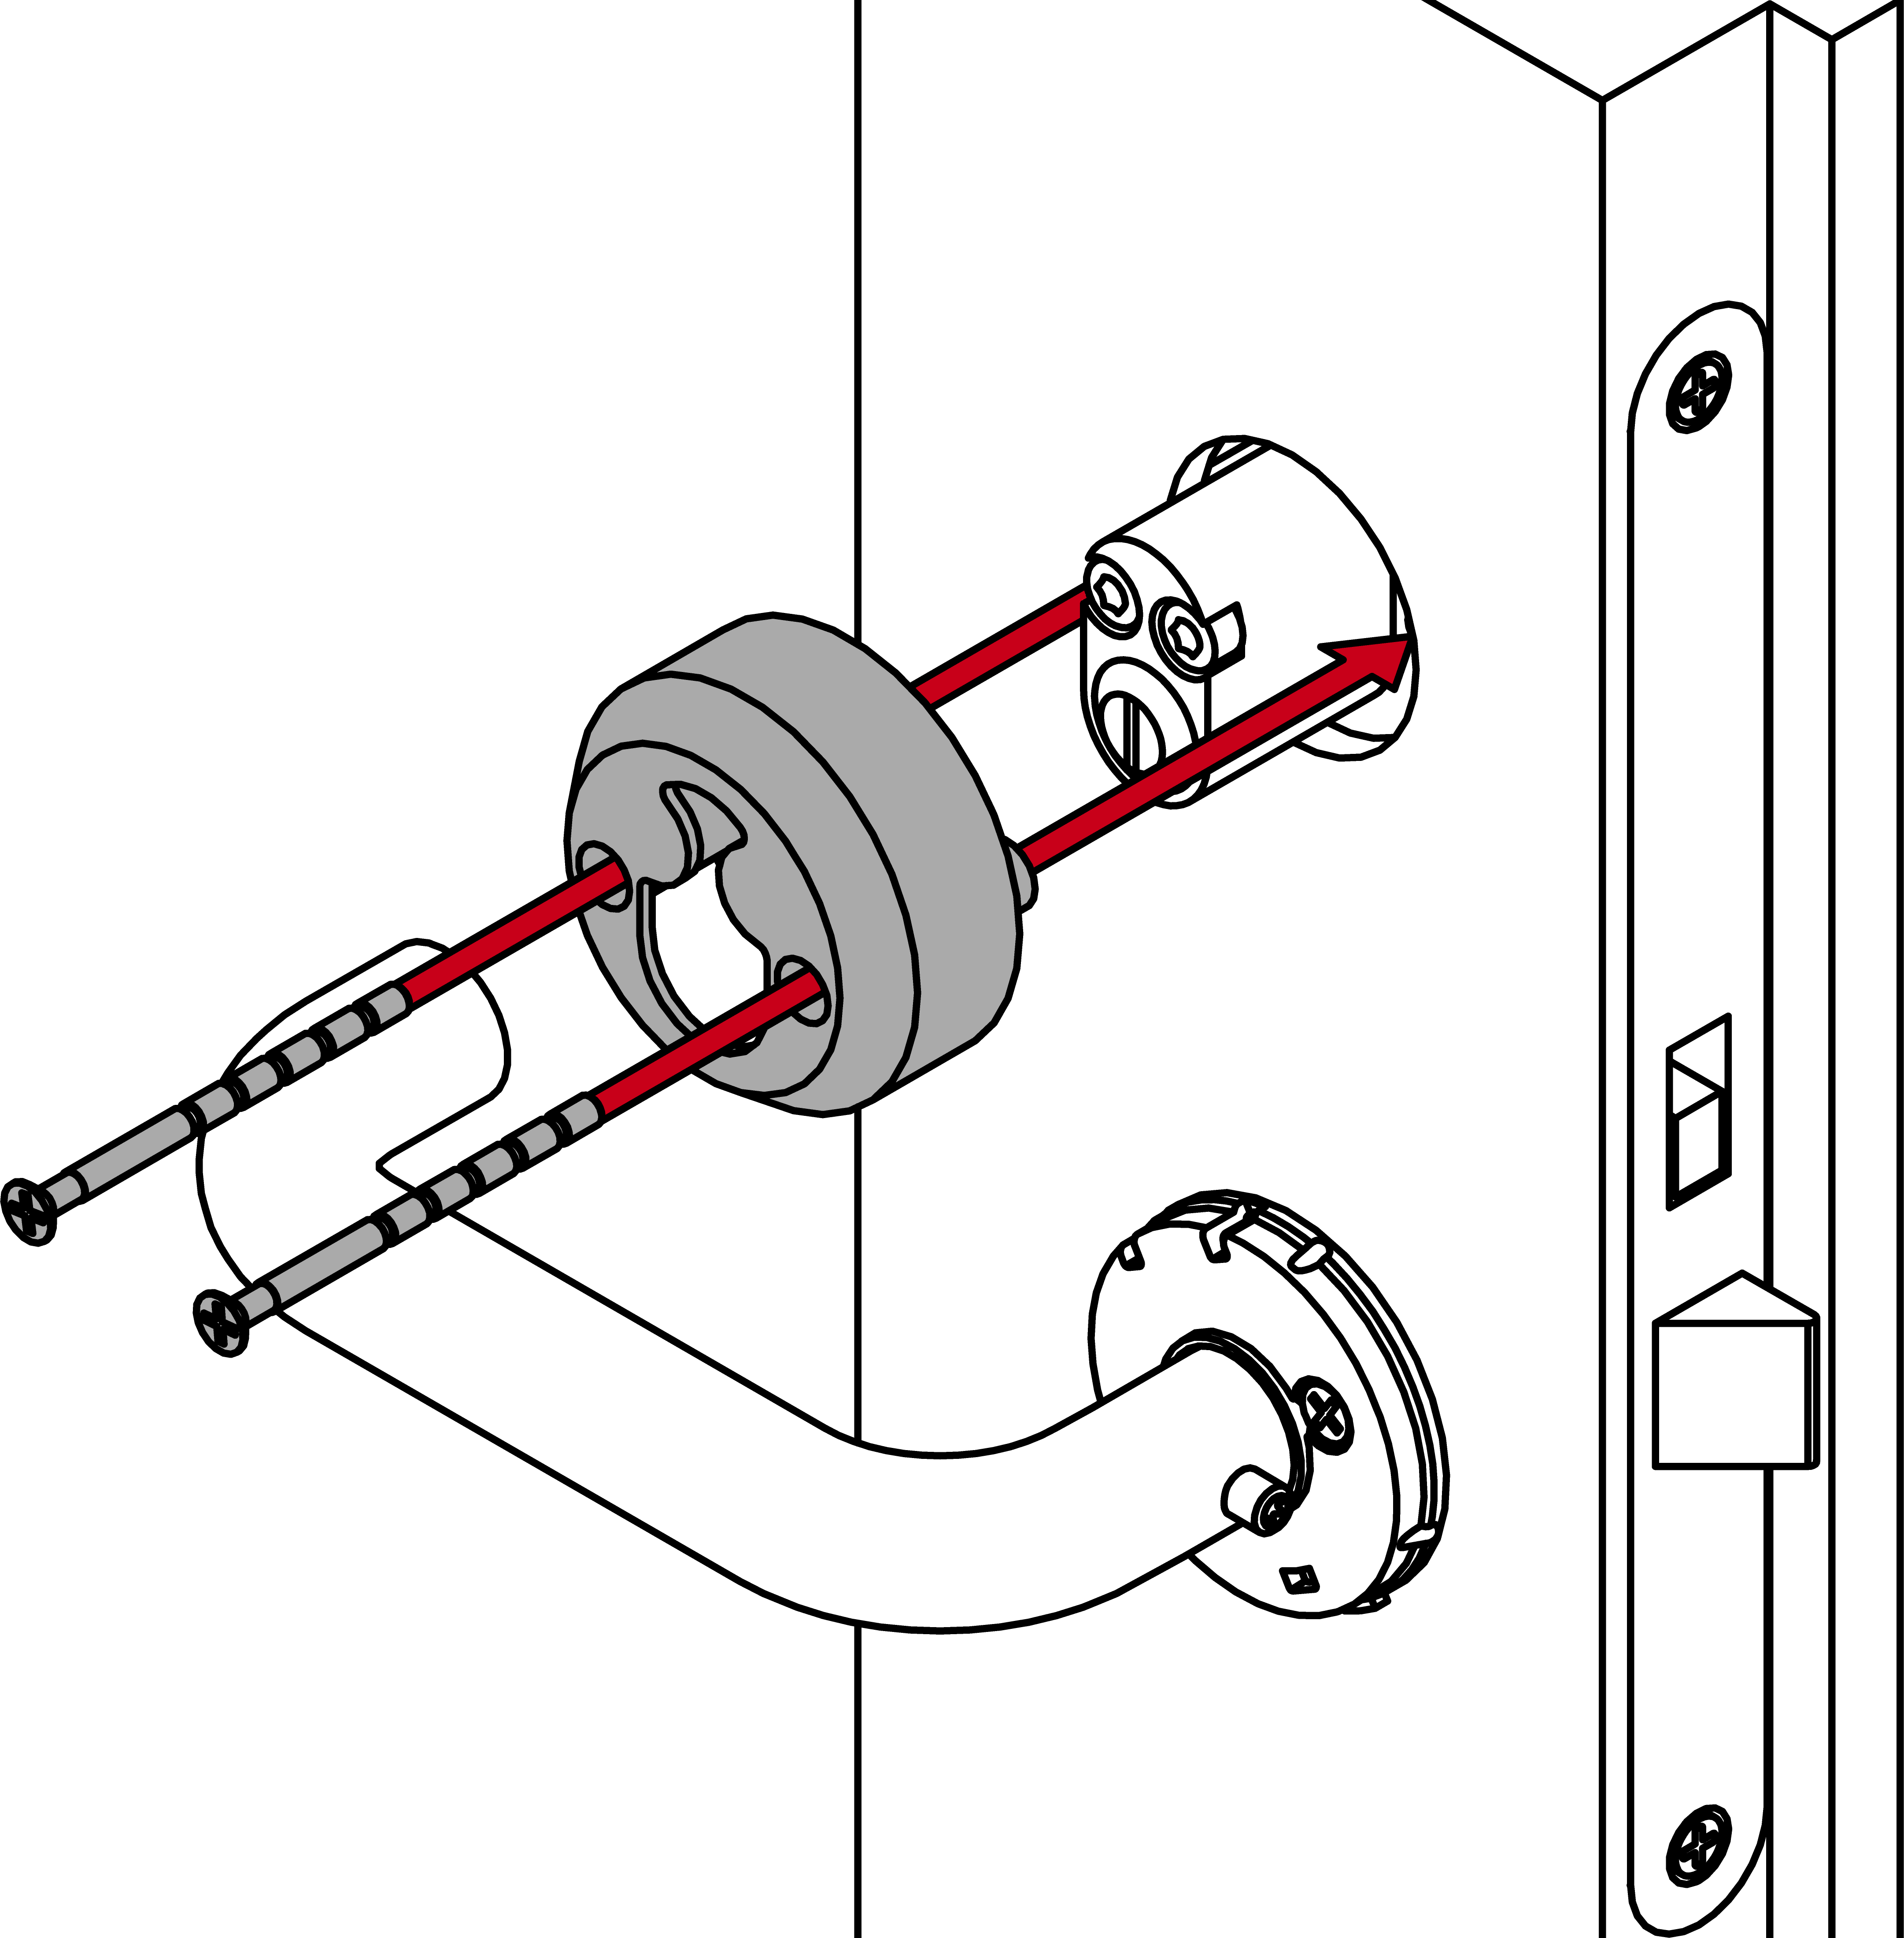
- Insert the outer side of the spindle into the fitting.
- Insert the module support, the fastening plate and the spindle into the outer side of the door.
- Use the table to determine the position of the O-ring.
Area
Door thickness (mm)
Spindle length (mm)
Ring position
S
32 – <36
84
3
S
32 – <36
94
5
S
36 – <41
84
2
S
36 – <41
94
4
S
41 – <46
84
1
S
41 – <46
94
3
S
46 – <51
94
2
S
51 – 54
94
1
M
52 – <56
104
3
M
52 – <56
114
5
M
56 – <61
104
2
M
56 – <61
114
4
M
61 – <66
104
1
M
61 – <66
114
3
M
66 – <71
114
2
M
71 – 74
114
1
L
72 – <76
124
3
L
72 – <76
134
5
L
76 – <81
124
2
L
76 – <81
134
4
L
81 – <86
124
1
L
81 – <86
134
3
L
86 – <91
134
2
L
91 – 94
134
1
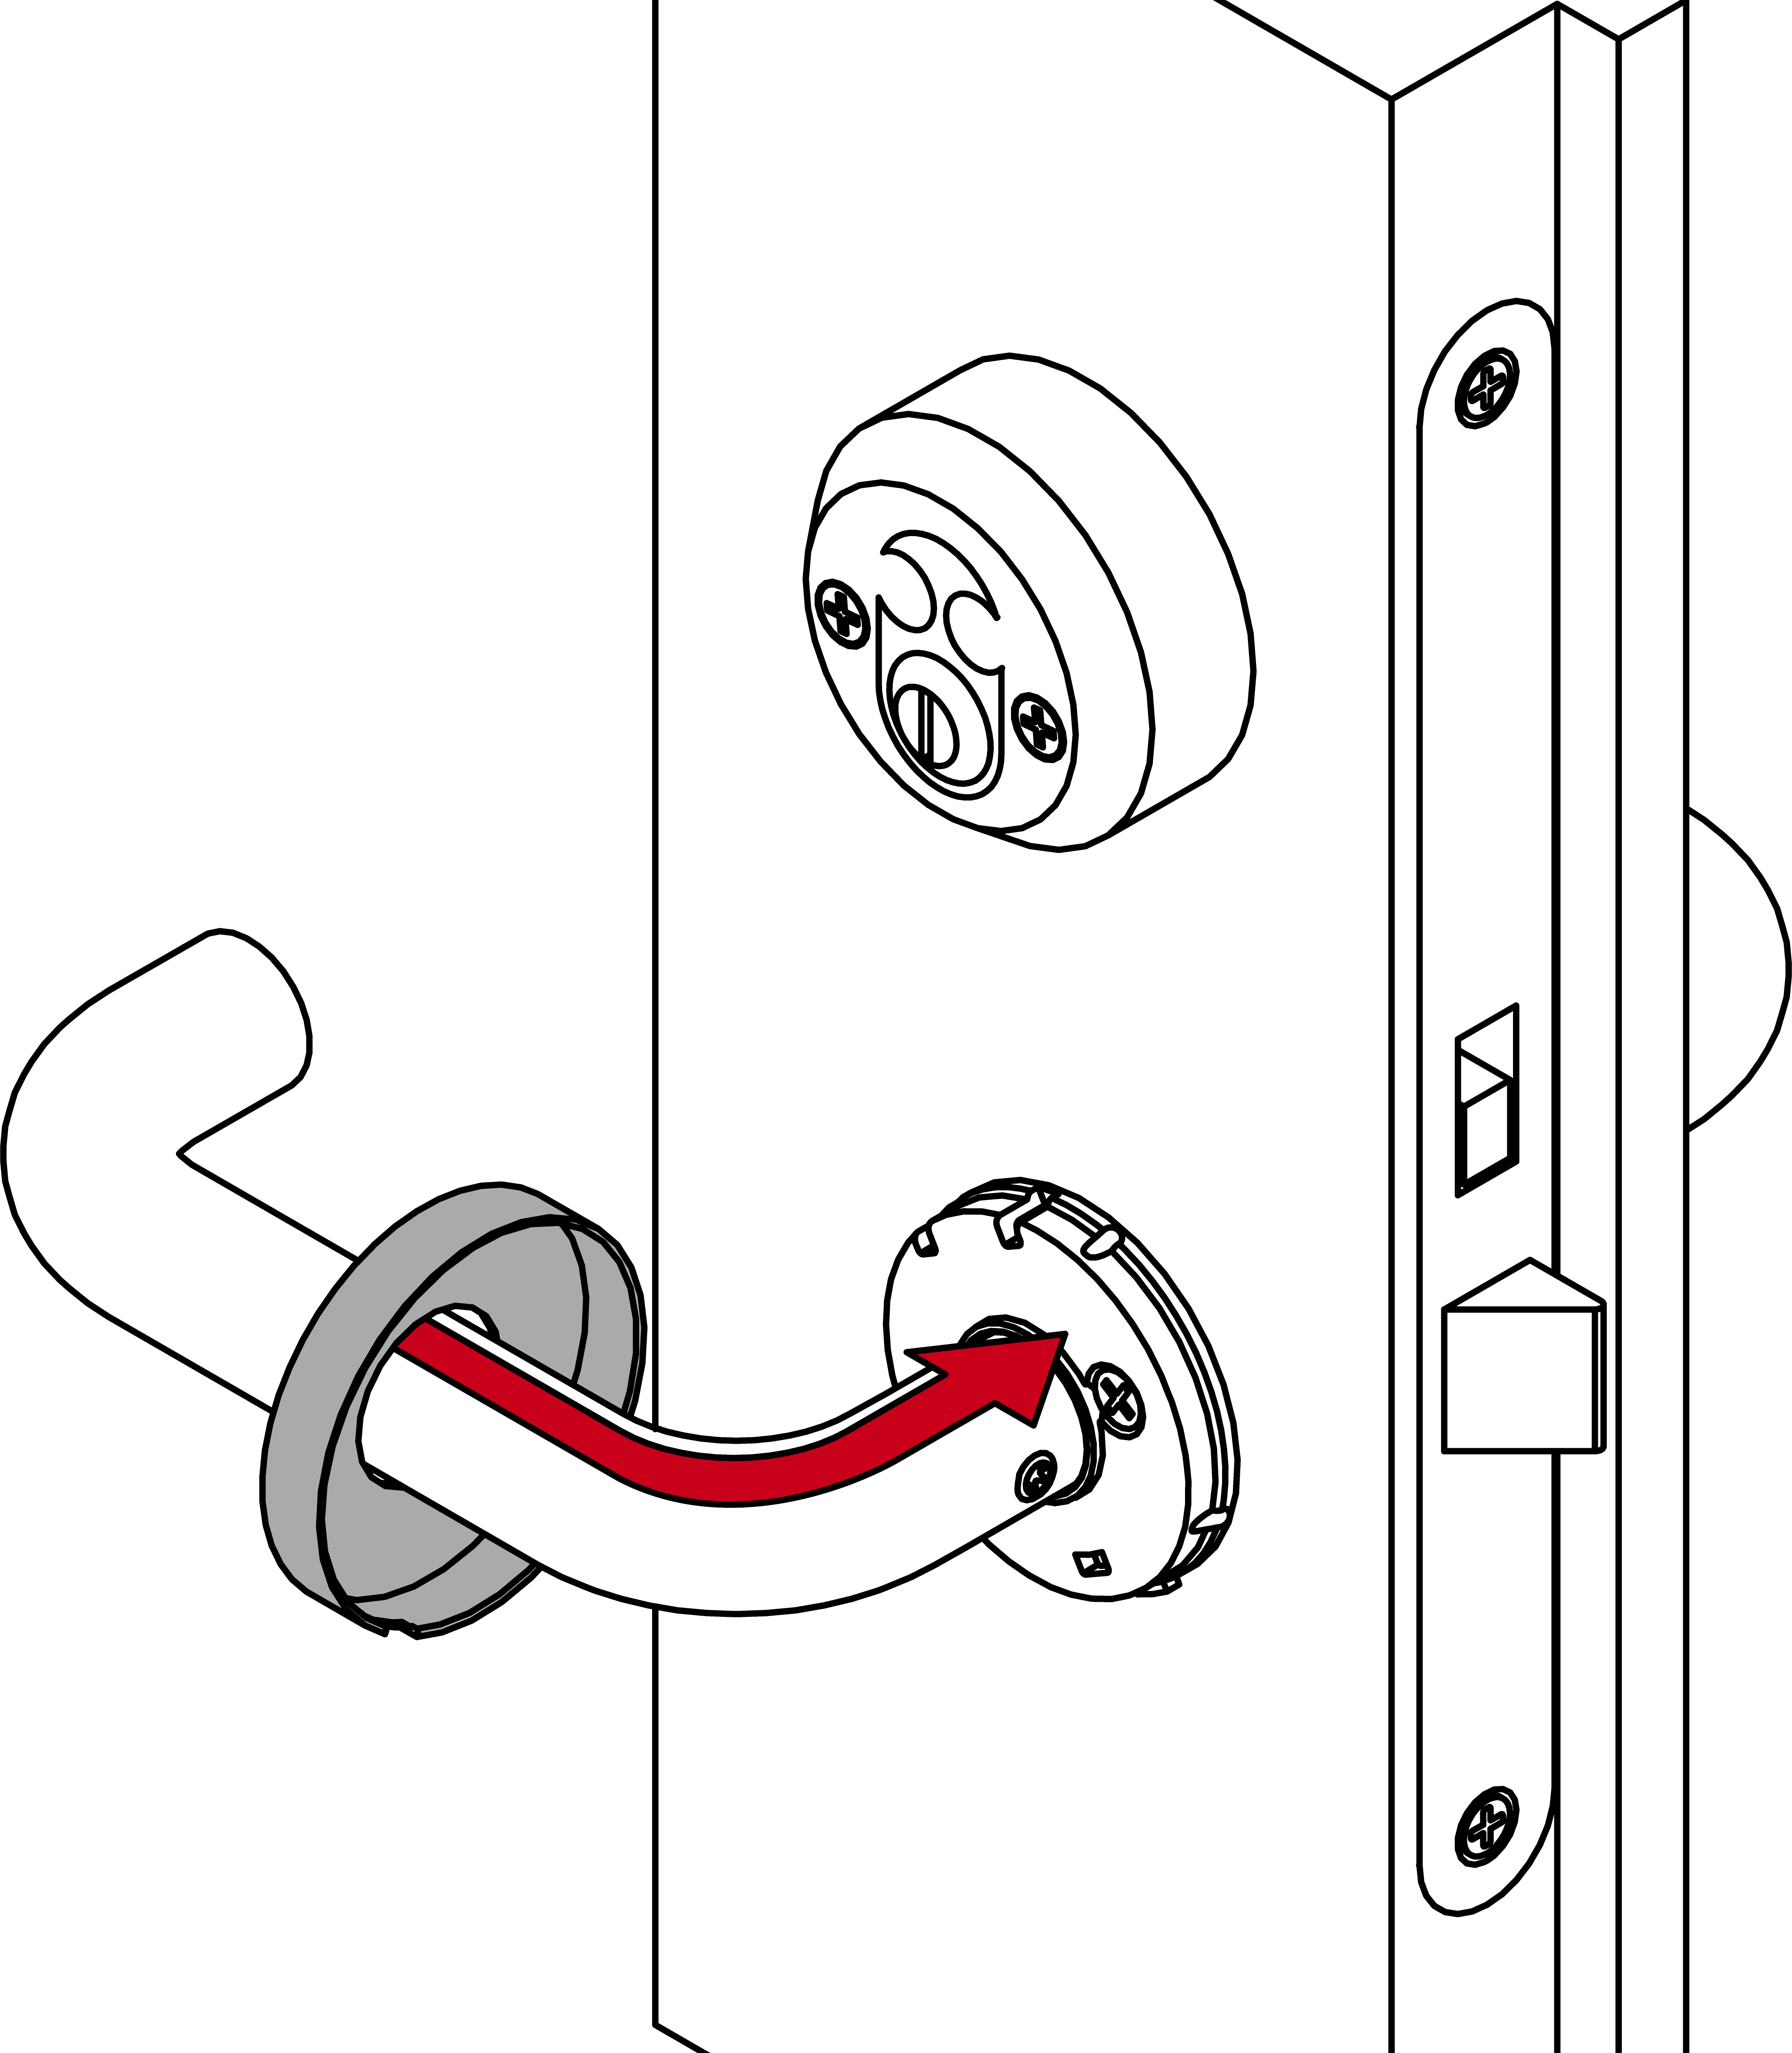
- Slide the O-ring onto the calculated groove.

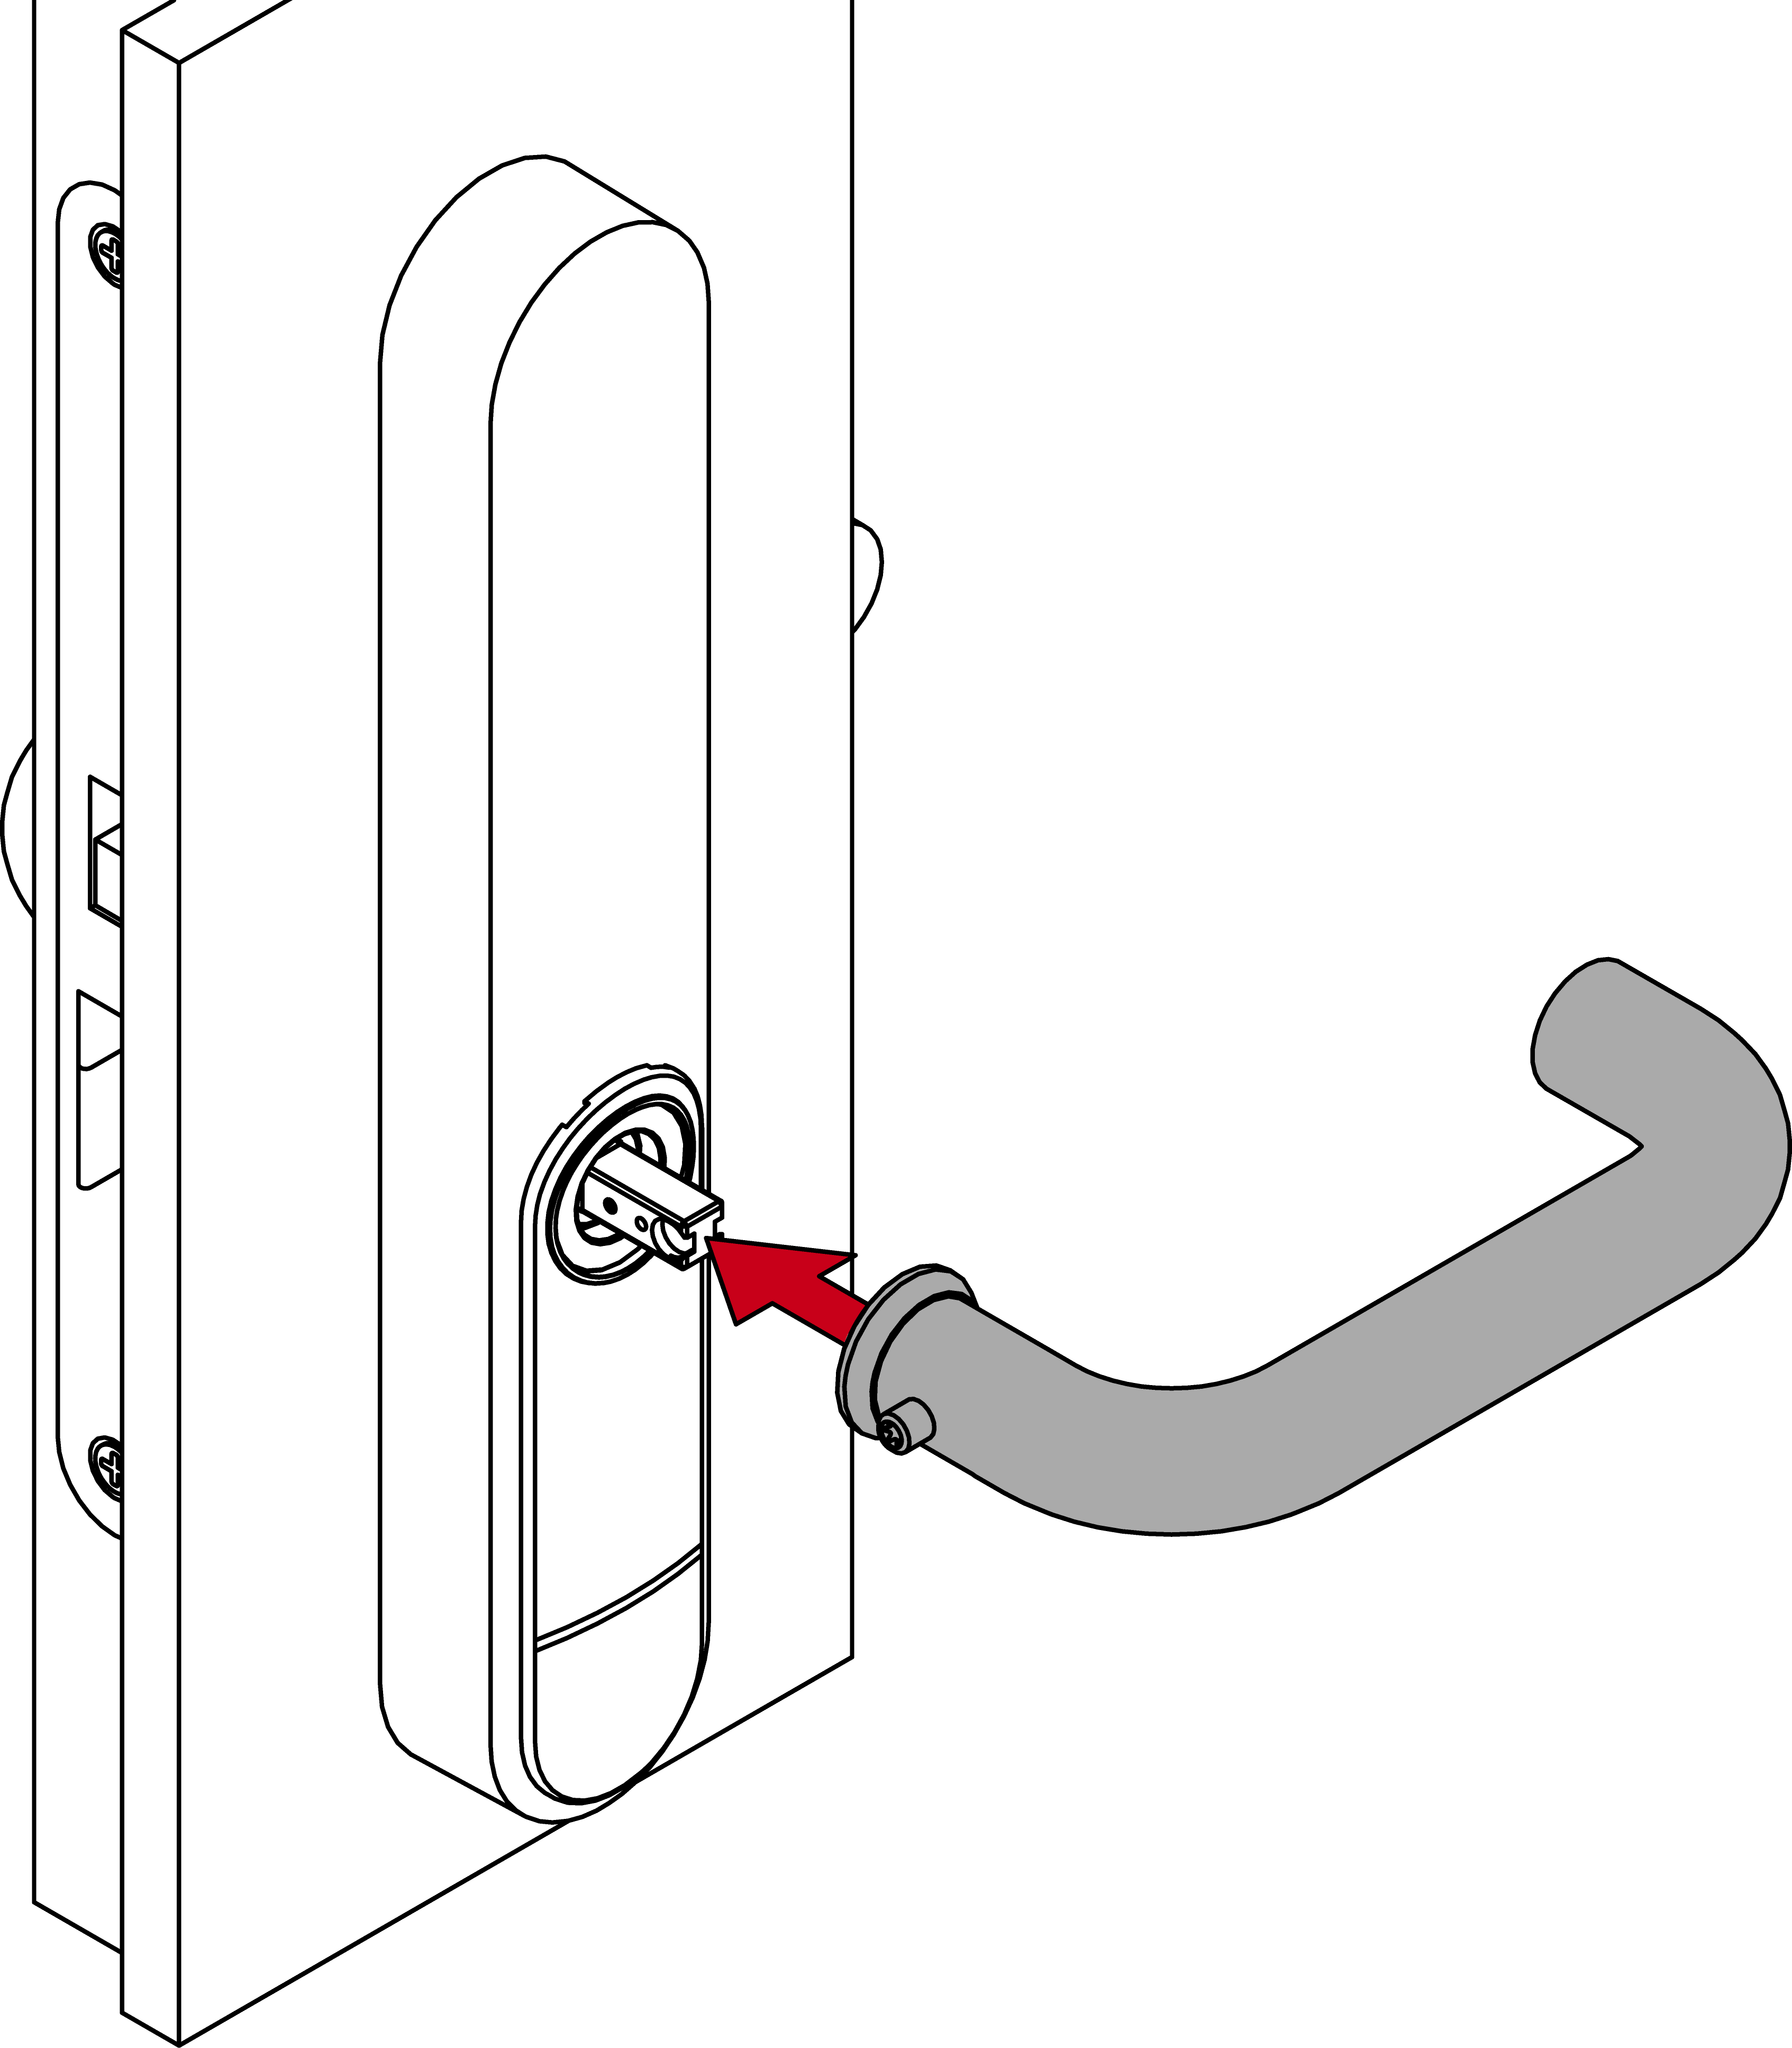
- Place the inside handle unit on the spindle.
- Screw the inner handle unit onto the sleeve nuts (PH2, torque: 1.1 Nm).

- Insert the sleeve nuts and fastening adapter into the fastening plate.
- Position the cover on the fastening plate at the bottom.
- Close the cover upwards.
- Slide the cover downwards.
- Cover snaps into place.
- Press the inlay into place.

- Install the cylinder (SW4).
- Firmly fasten the cylinder plate to the sleeve nuts (PH2).
- Fit the outside handle.
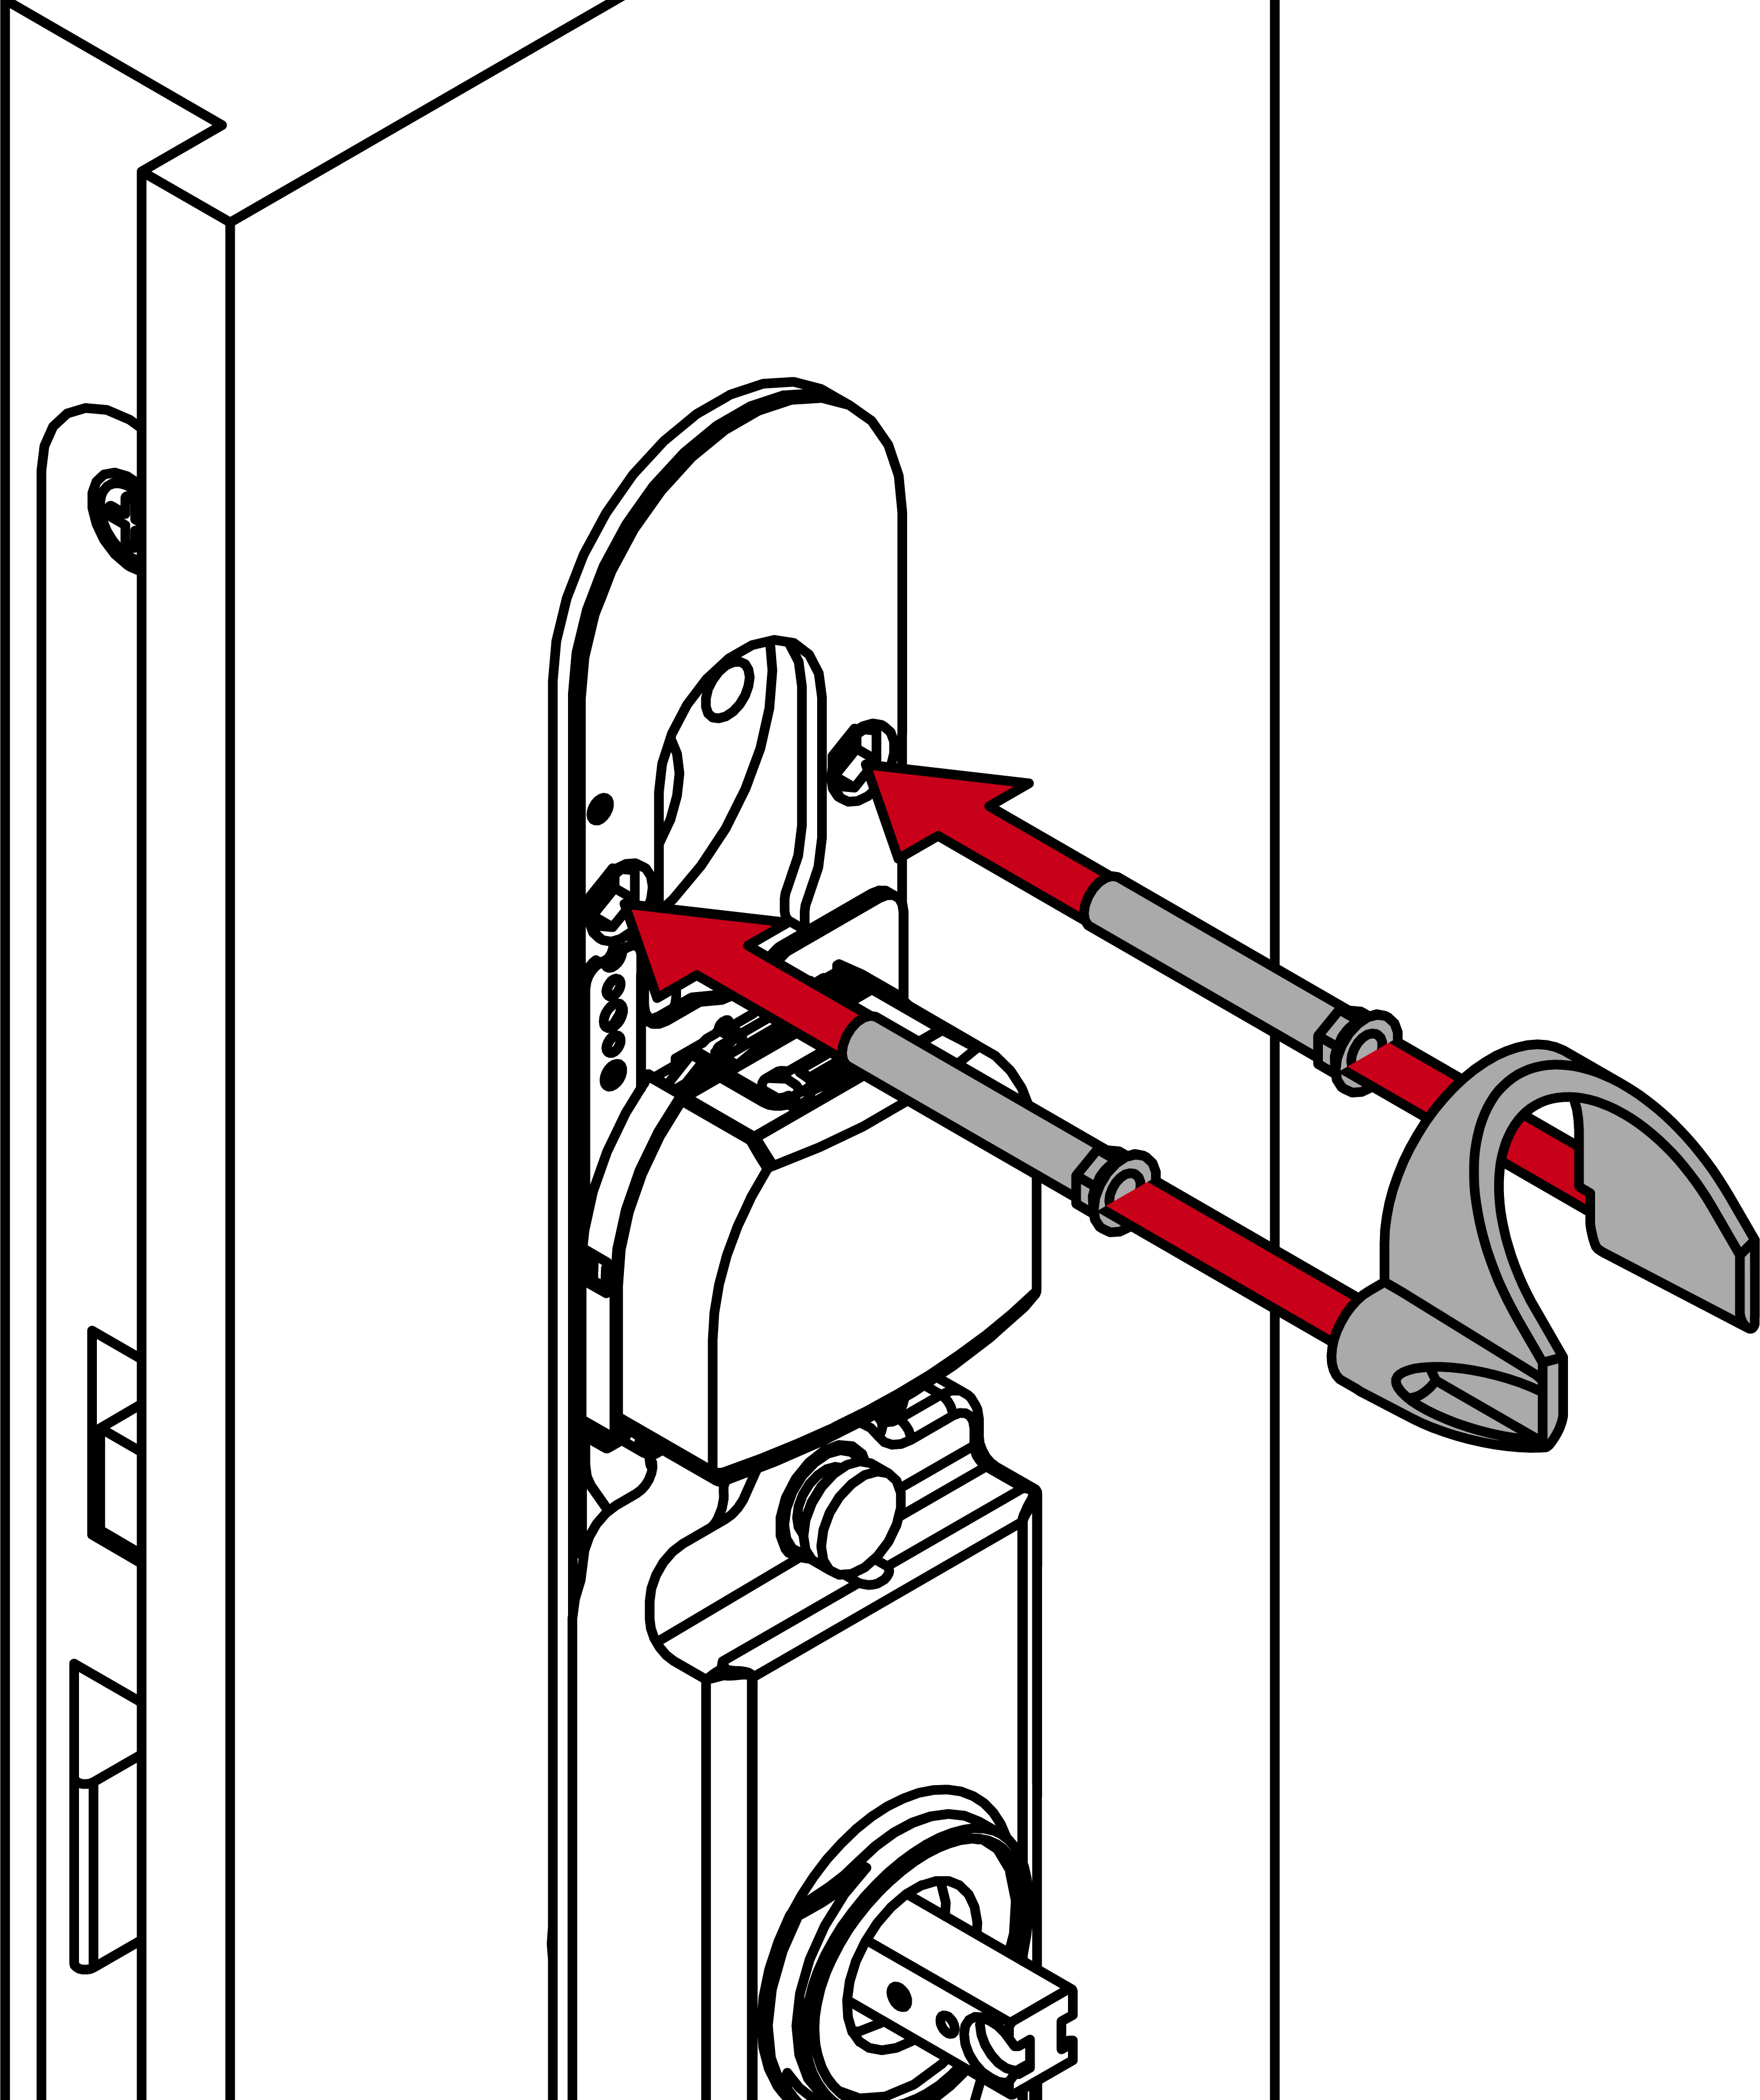
- Use the grub screws to tighten both handles (TX15, torque 5.0 Nm).

- Place the inner handle cover on the escutcheon.
- SI SmartHandle AX Advanced fully installed.