Installation - SmartLocker AX
You will need the following tools:
- 0.9 mm hex wrench (included)
- Electronics needle-nosed pliers
- TX6 screwdriver
- Grounding completed (e.g. on radiator).
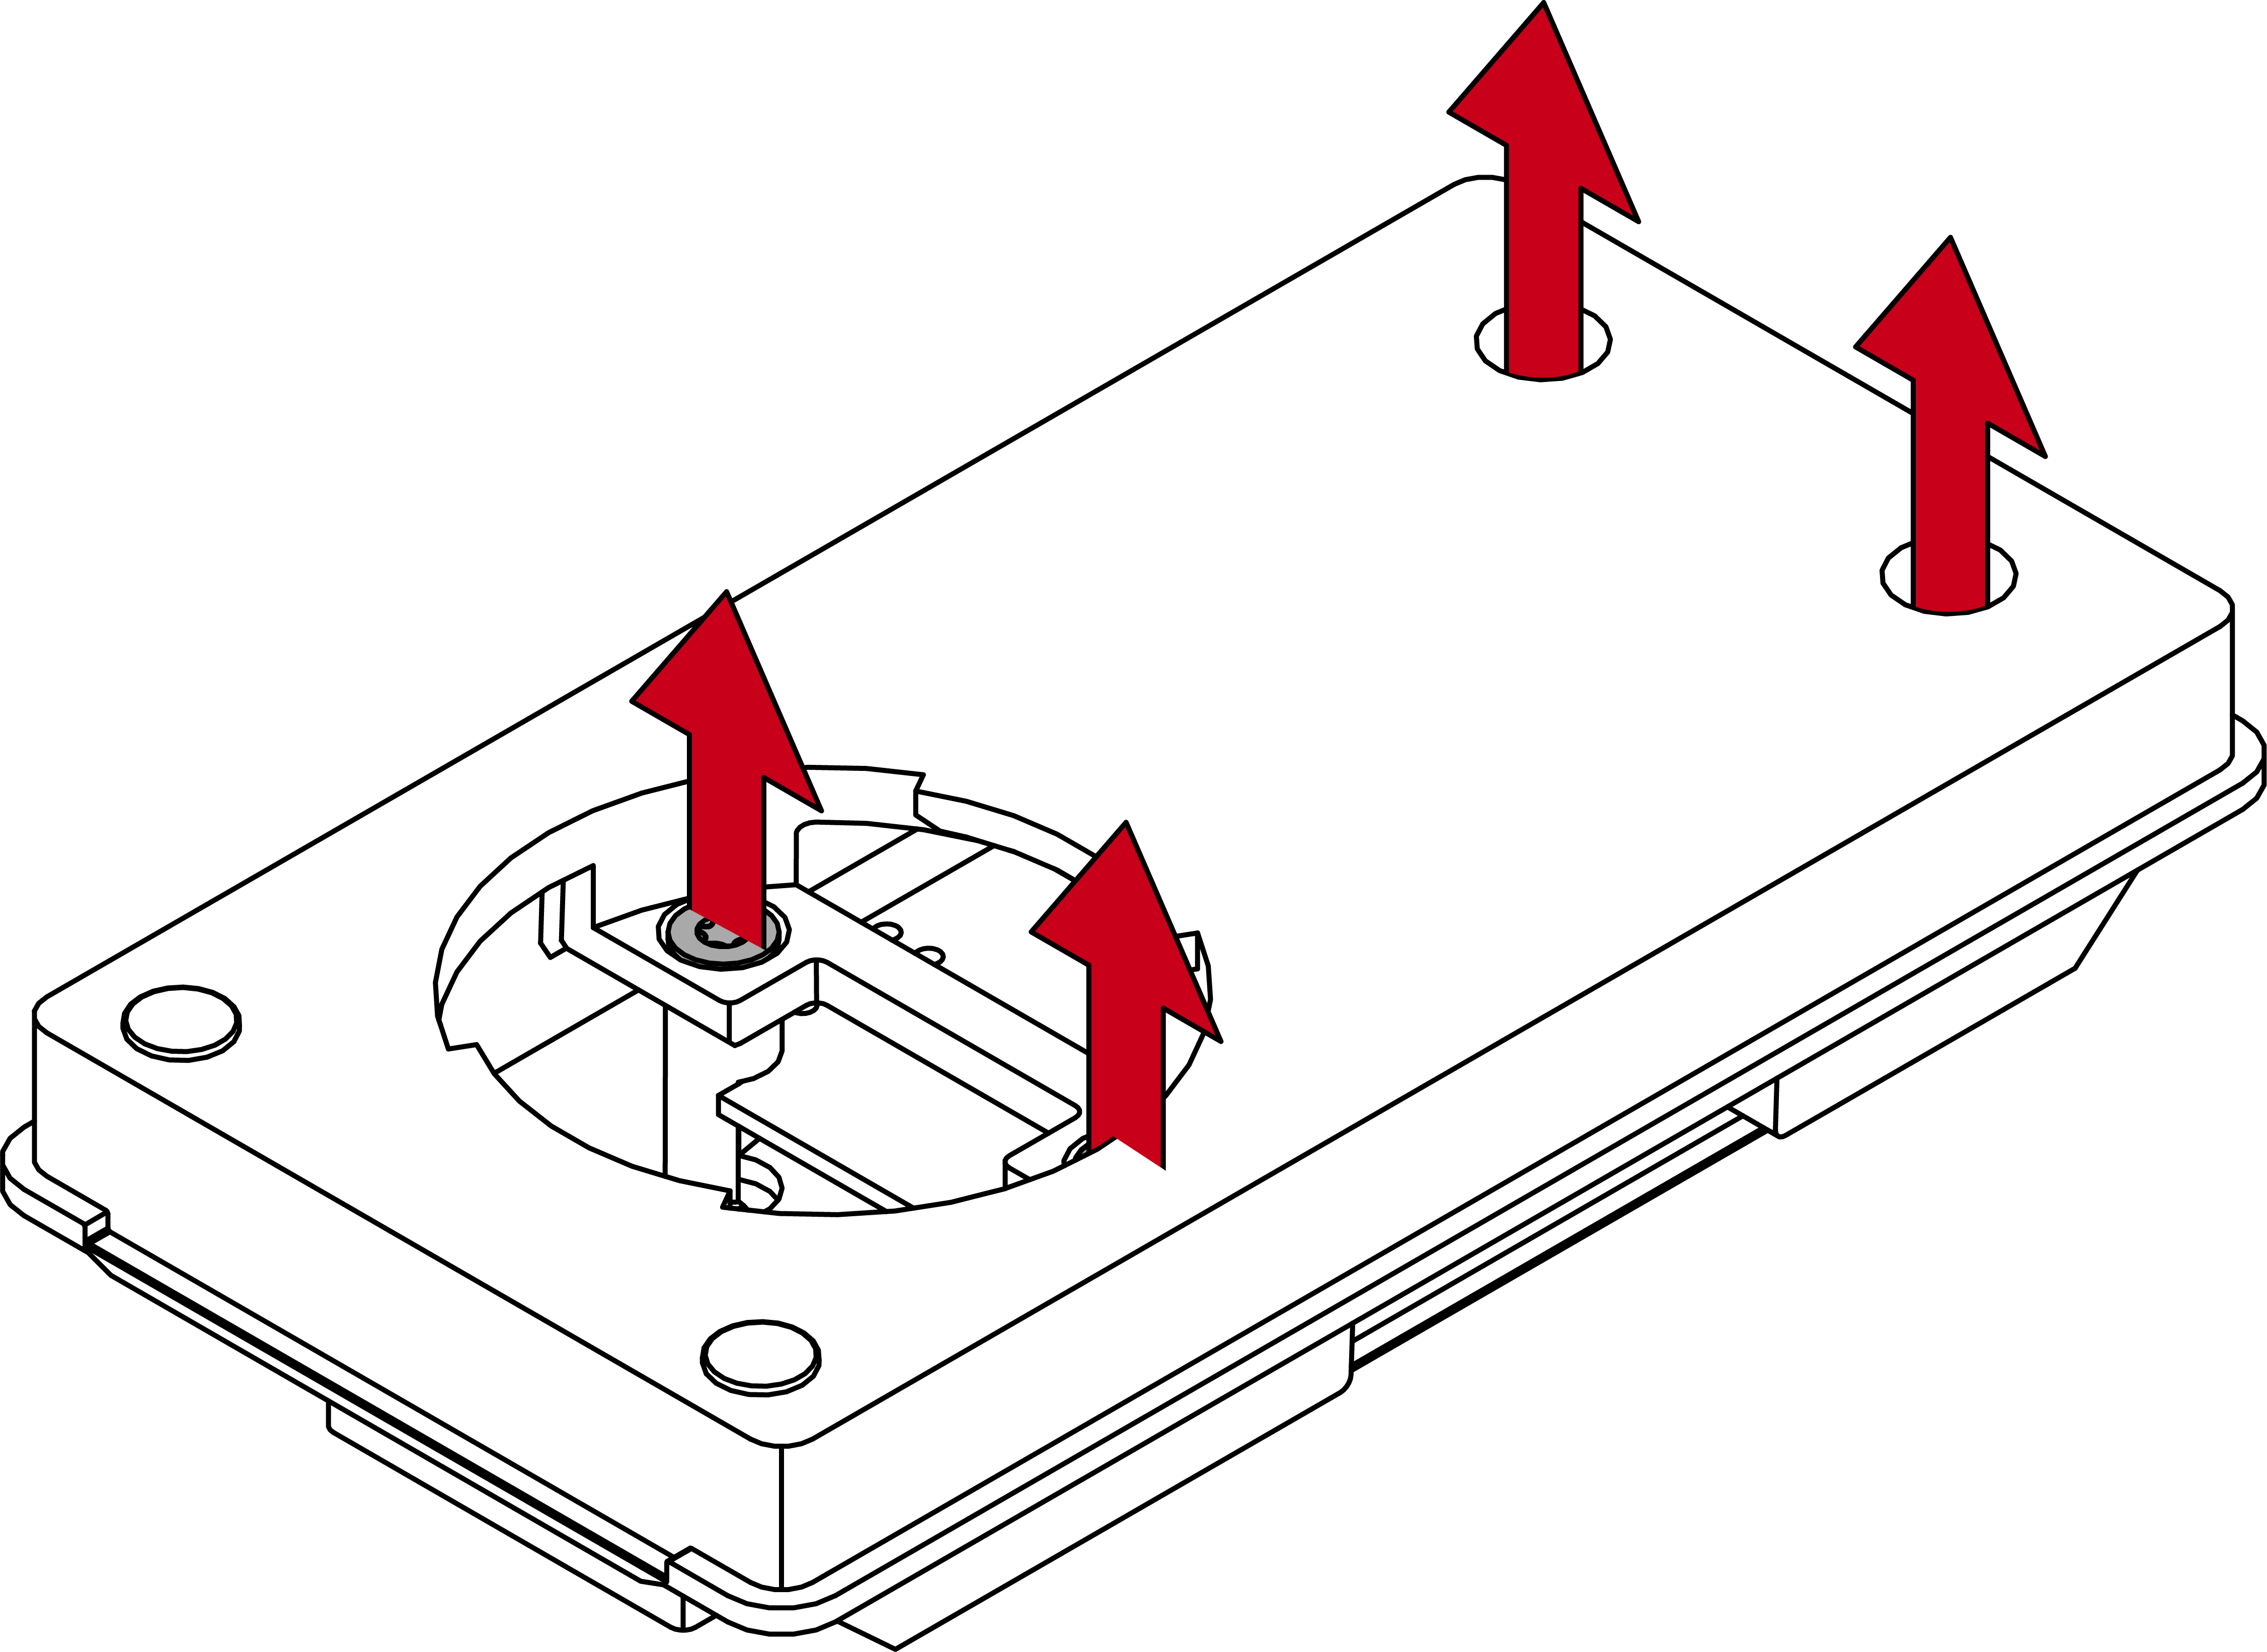
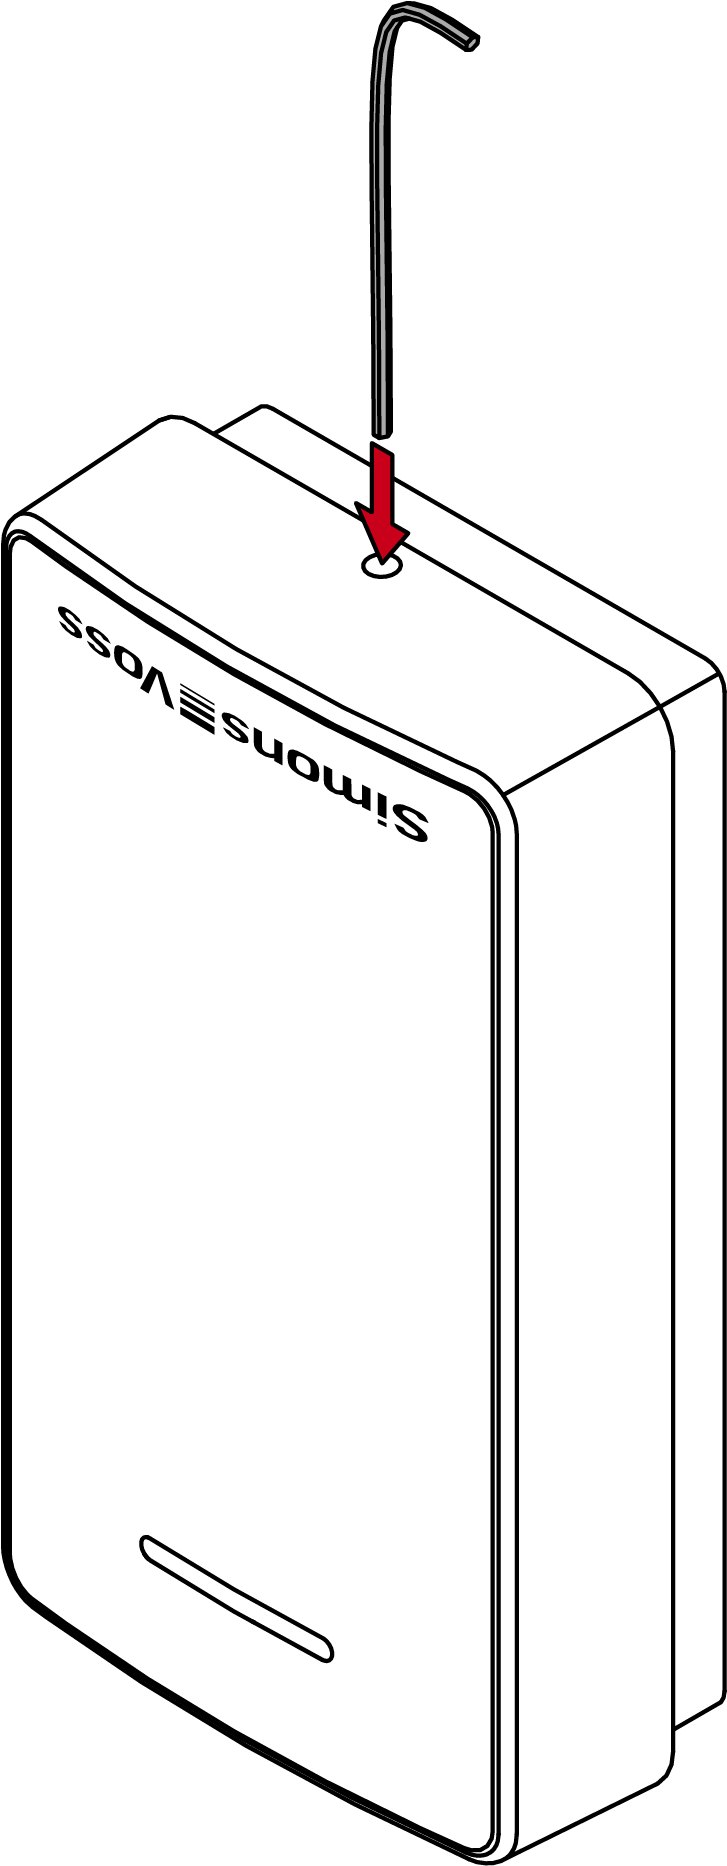
- Insert the 0.9 mm hex key into the lower screw.
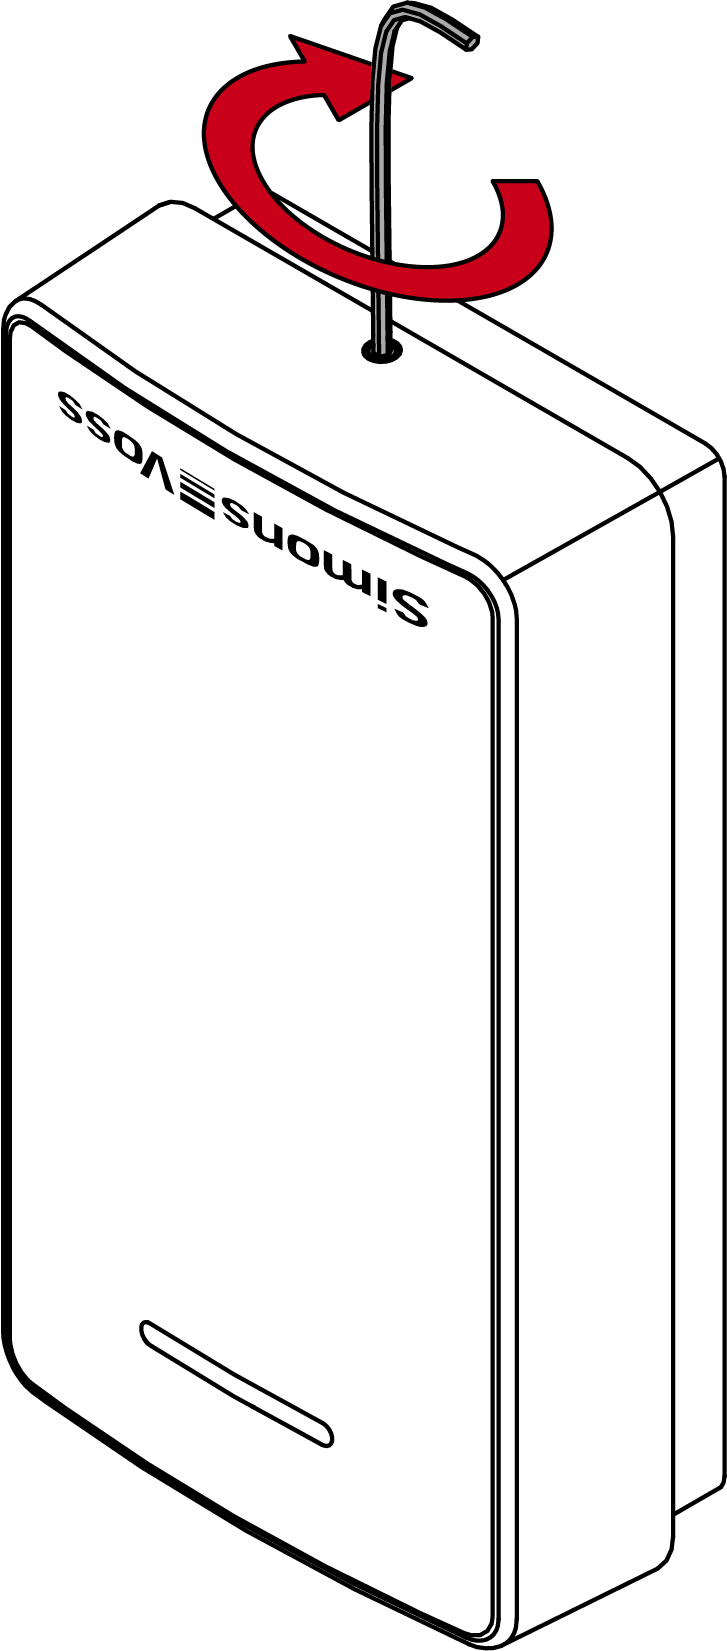
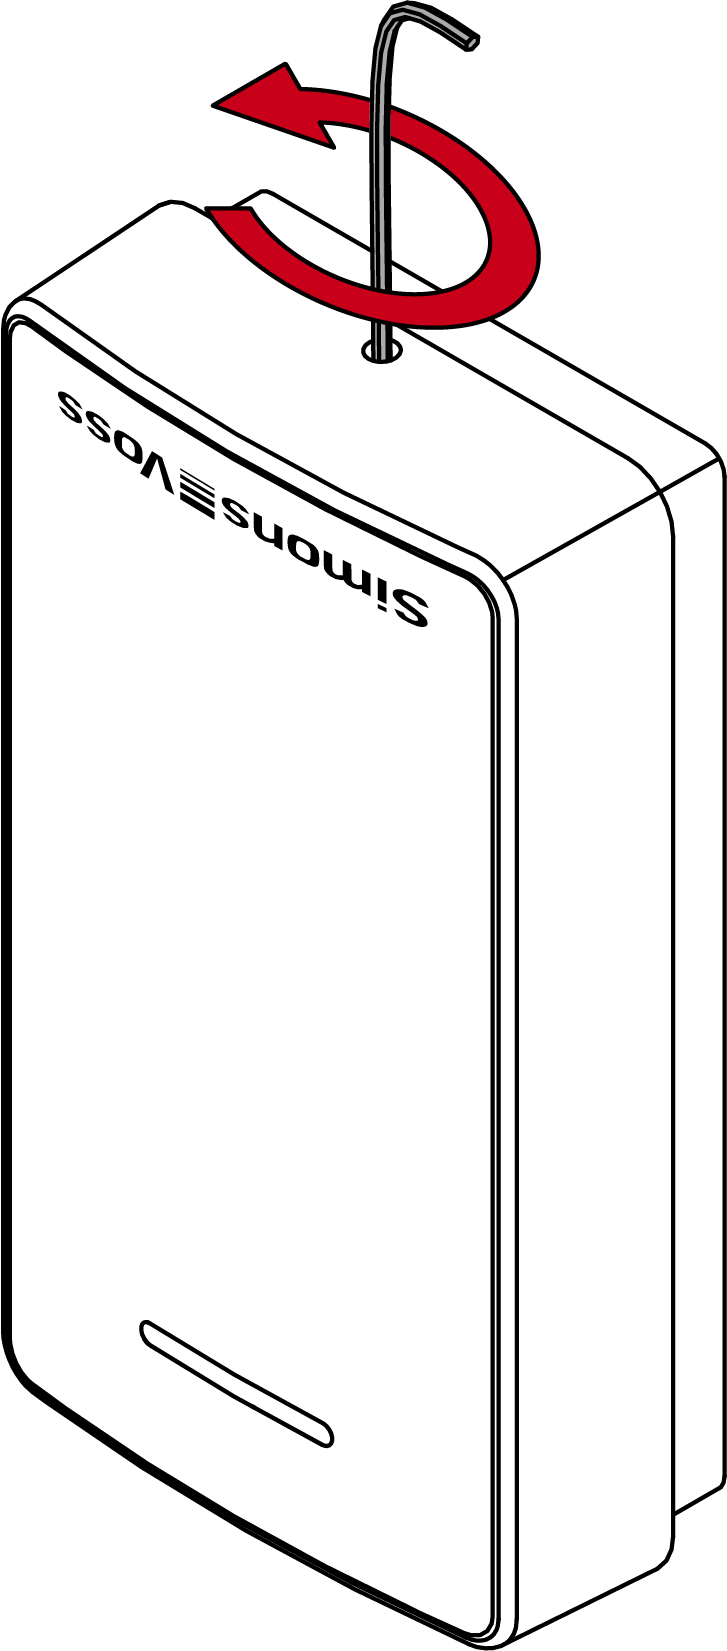
- Gently press the reader cover against the floor and turn the lower screw clockwise inwards until you can lift off the cover.
- Remove the cover.
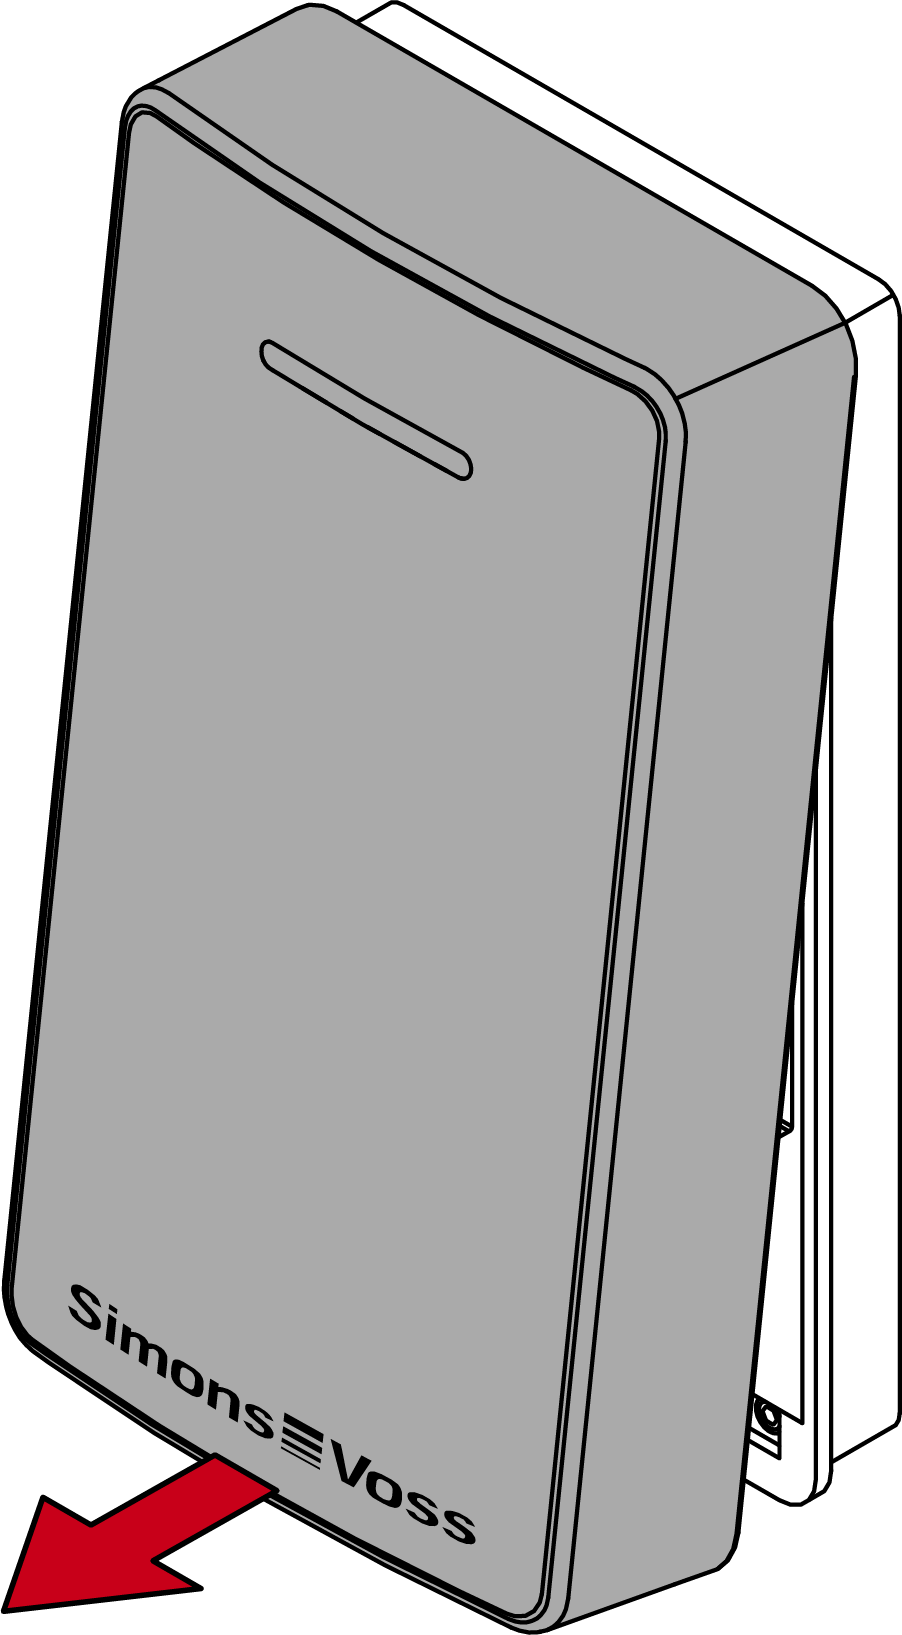
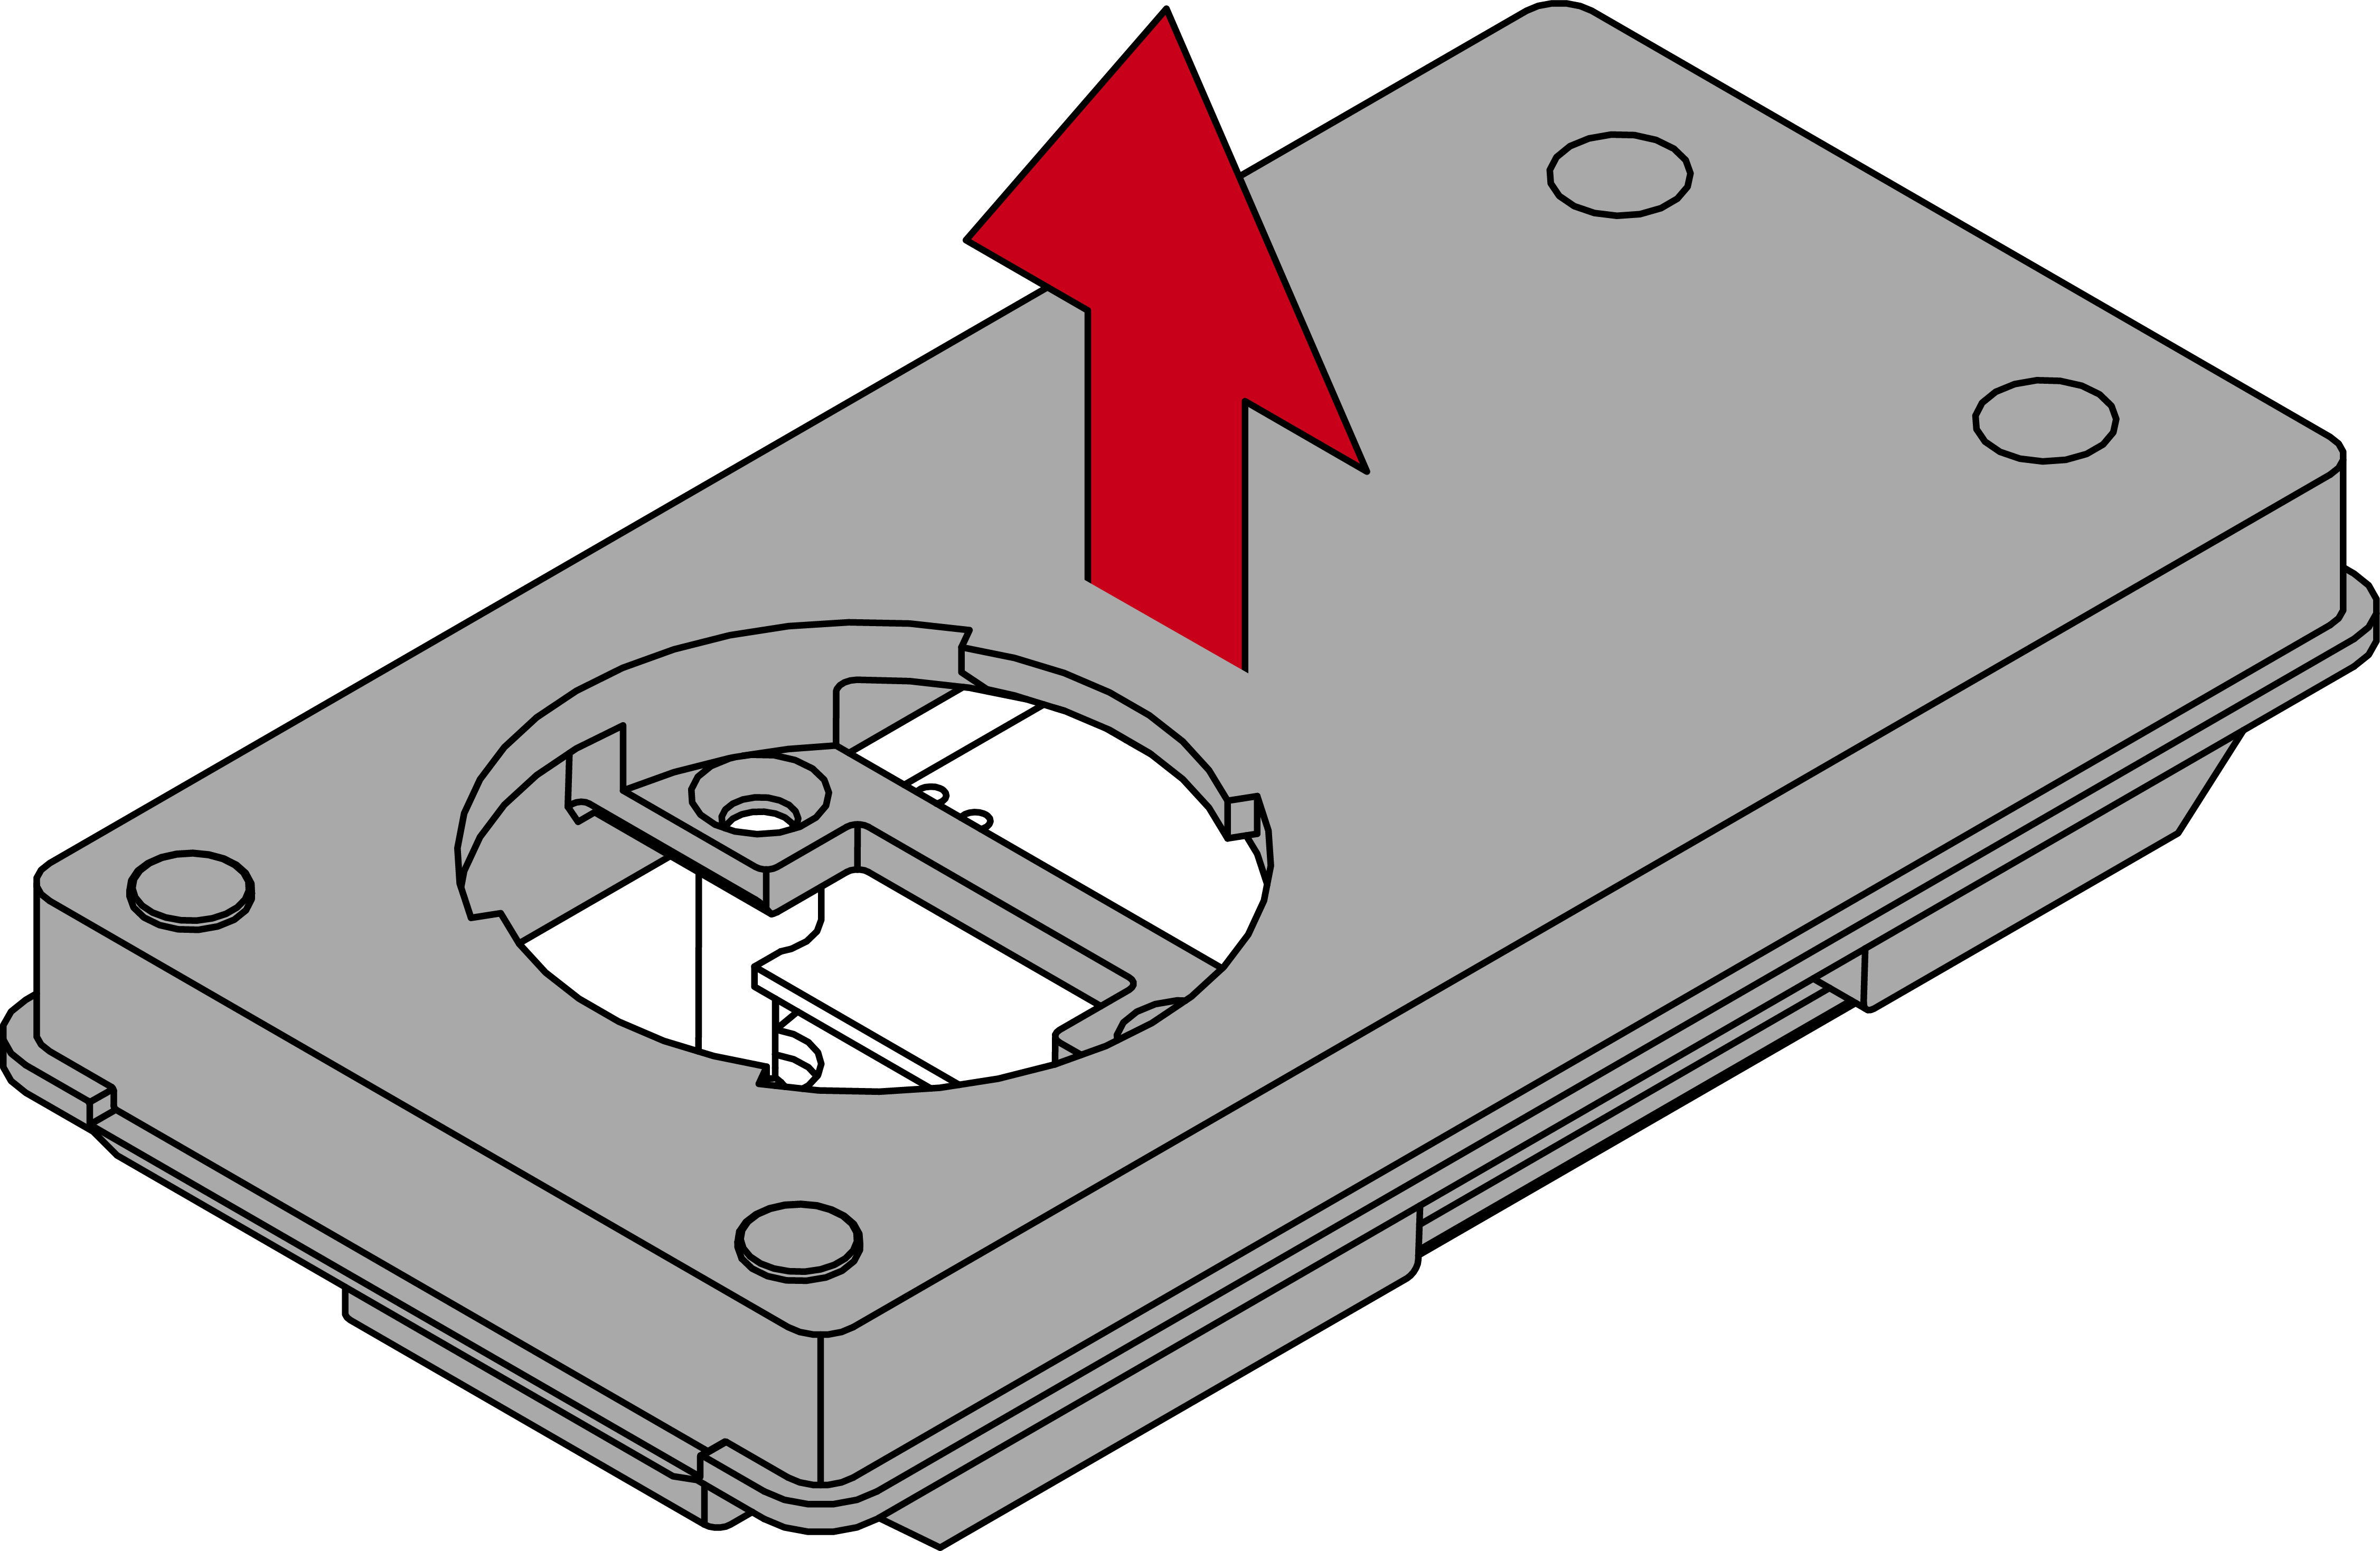
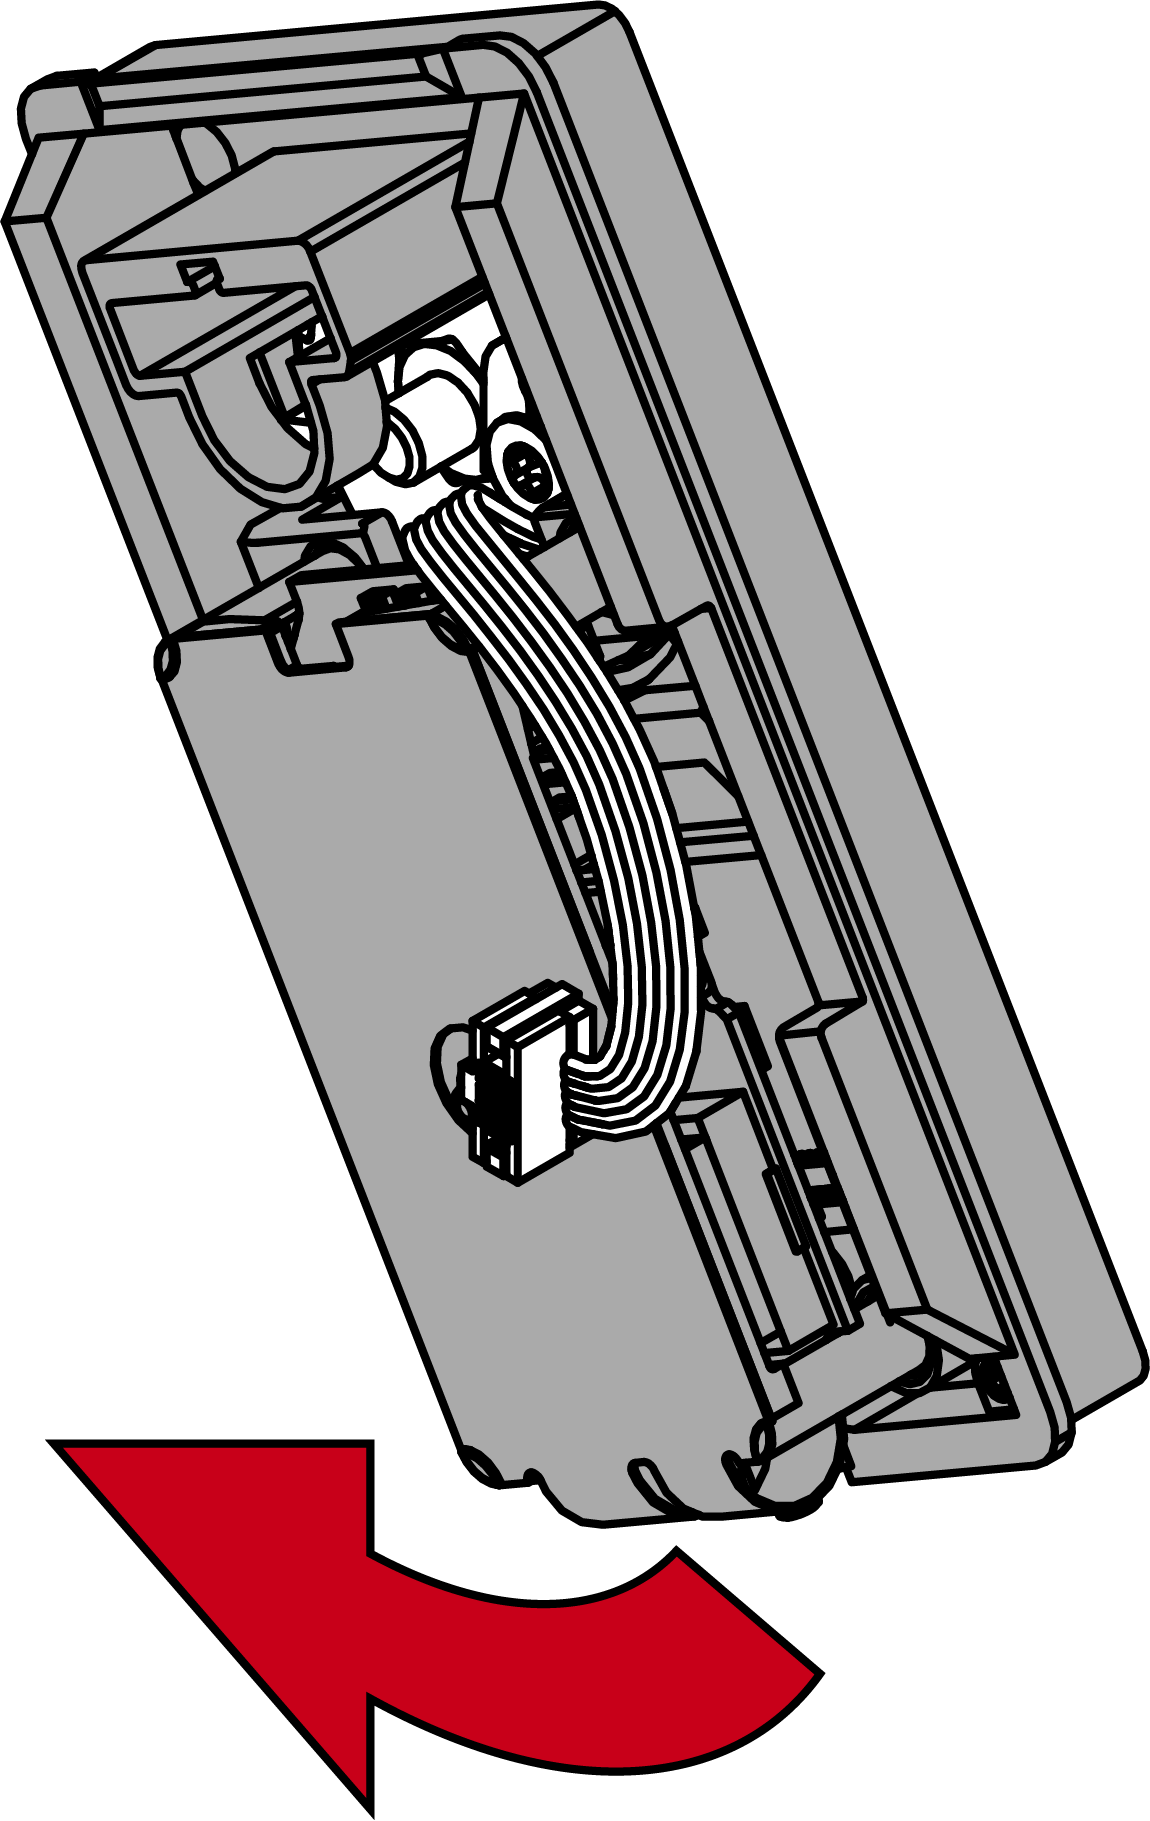
- Pull the optical fibre out of the reader.

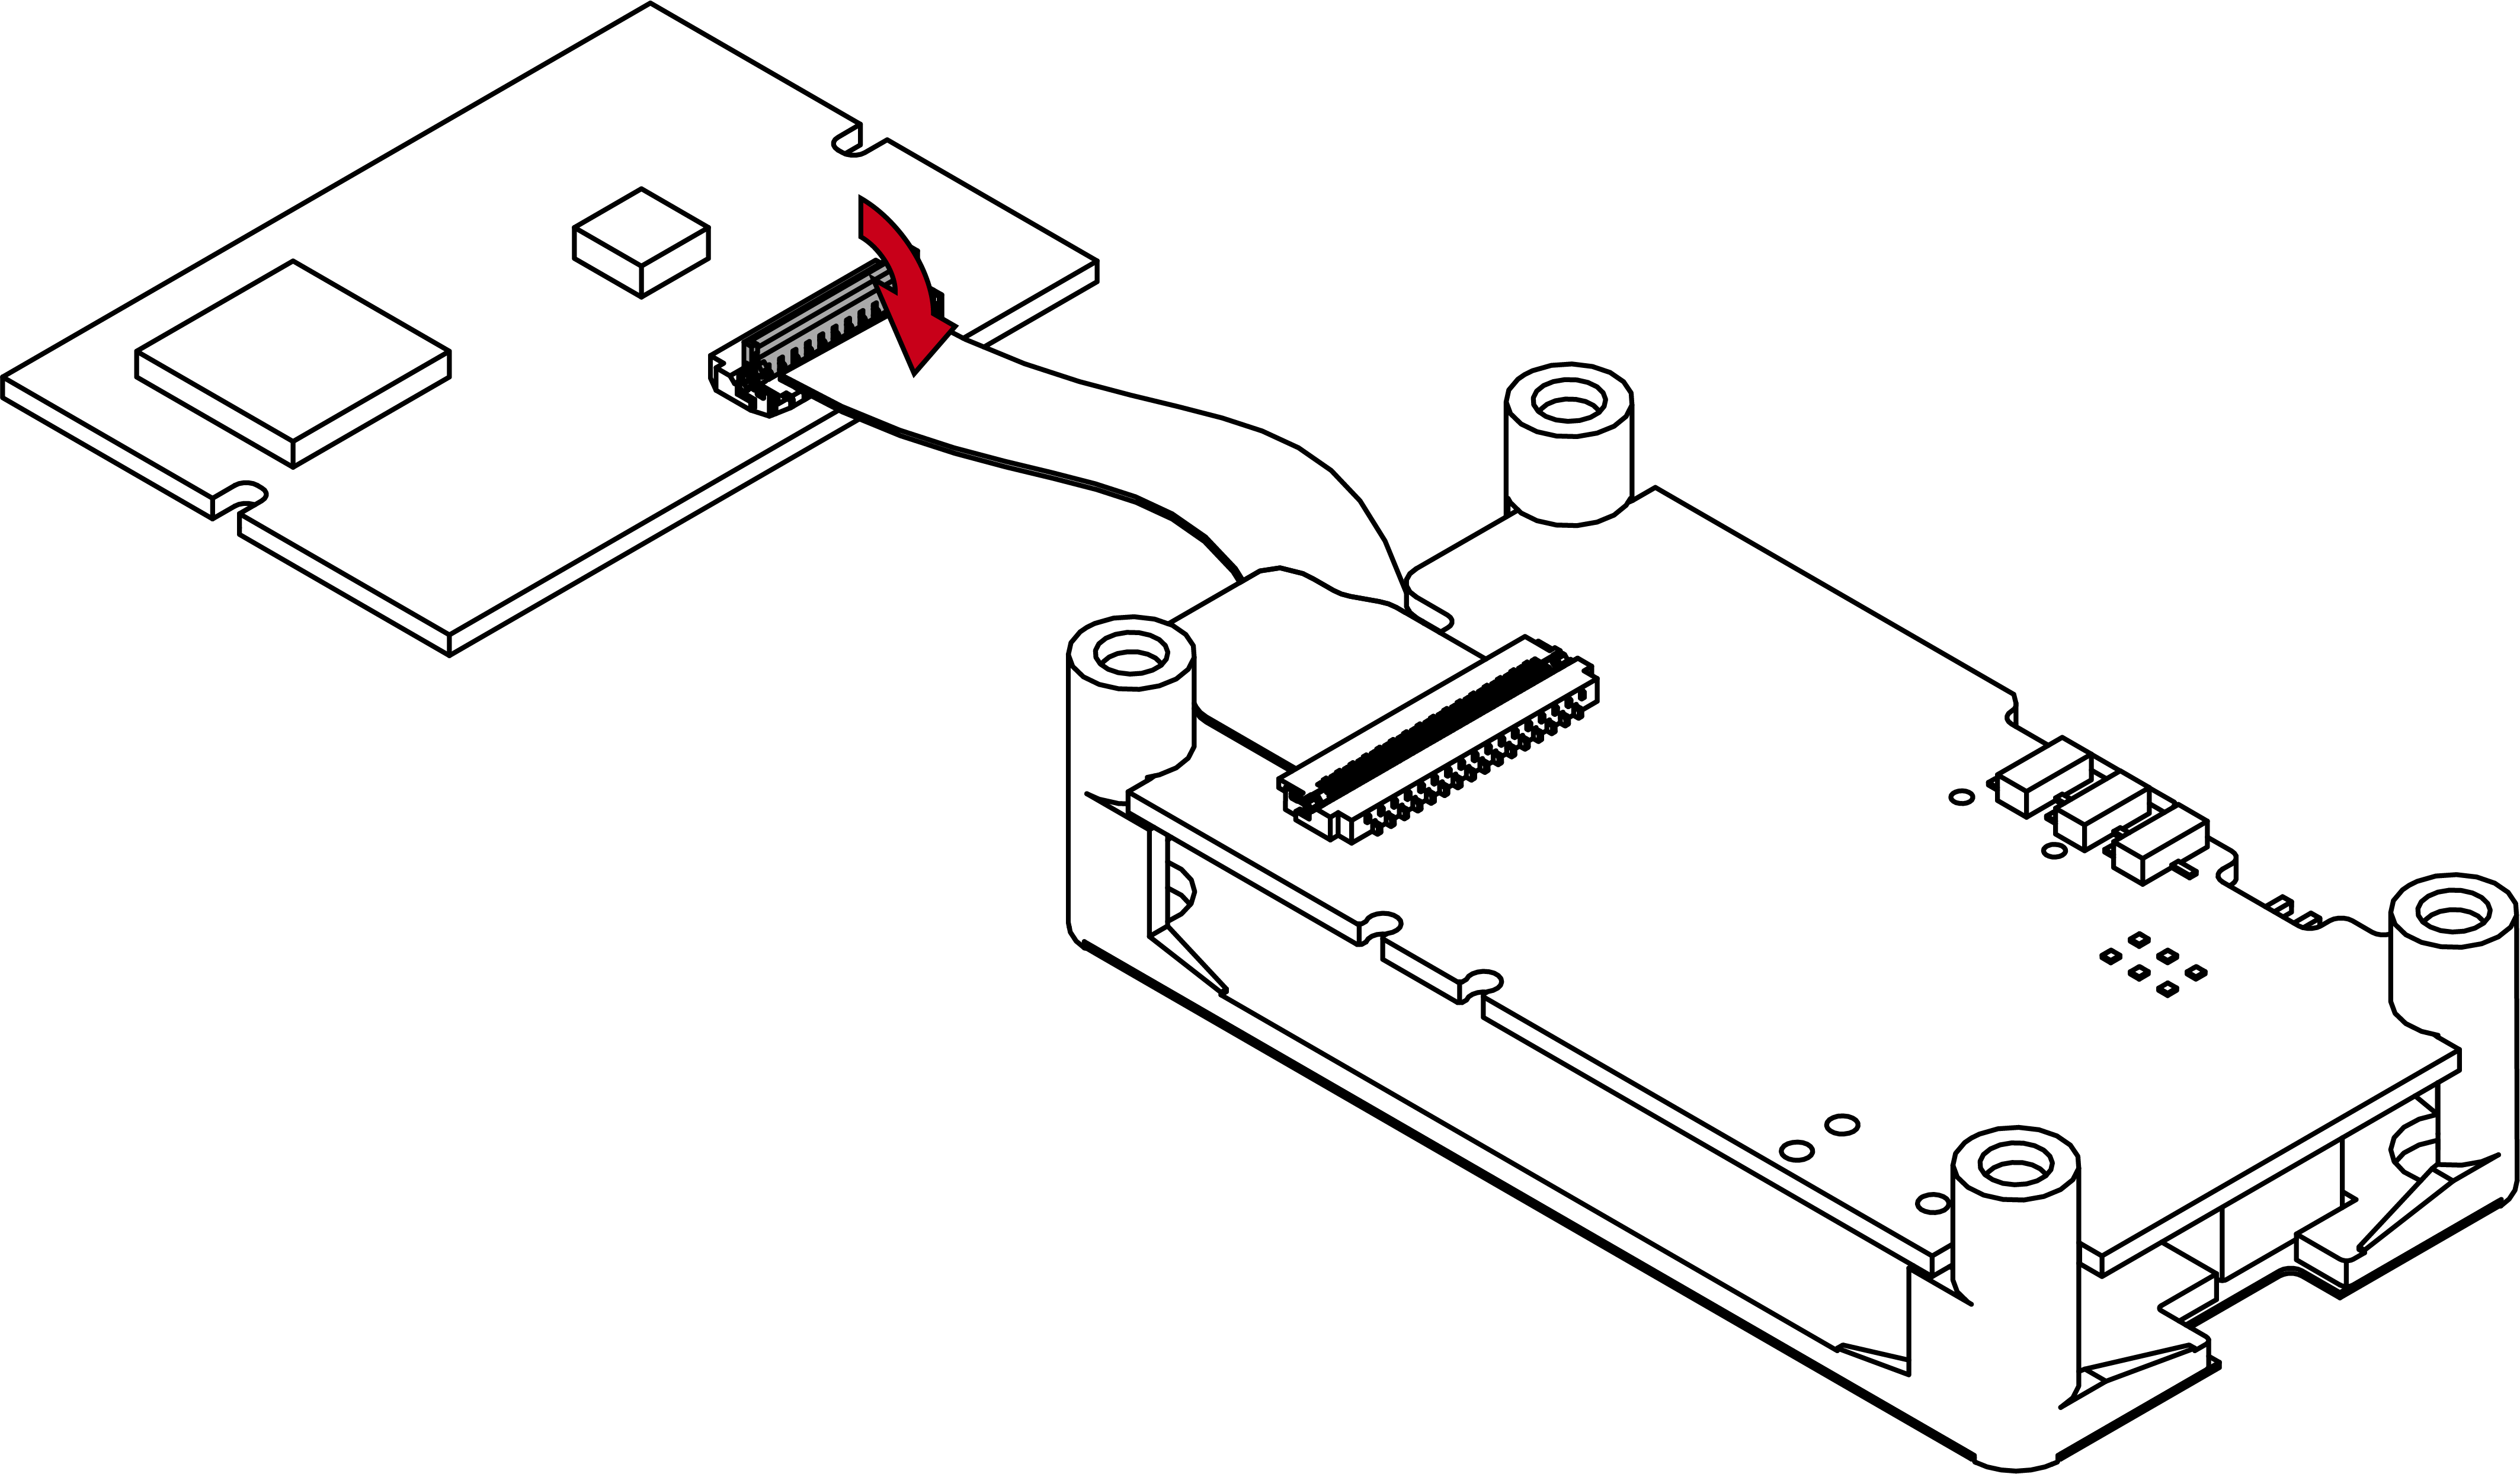
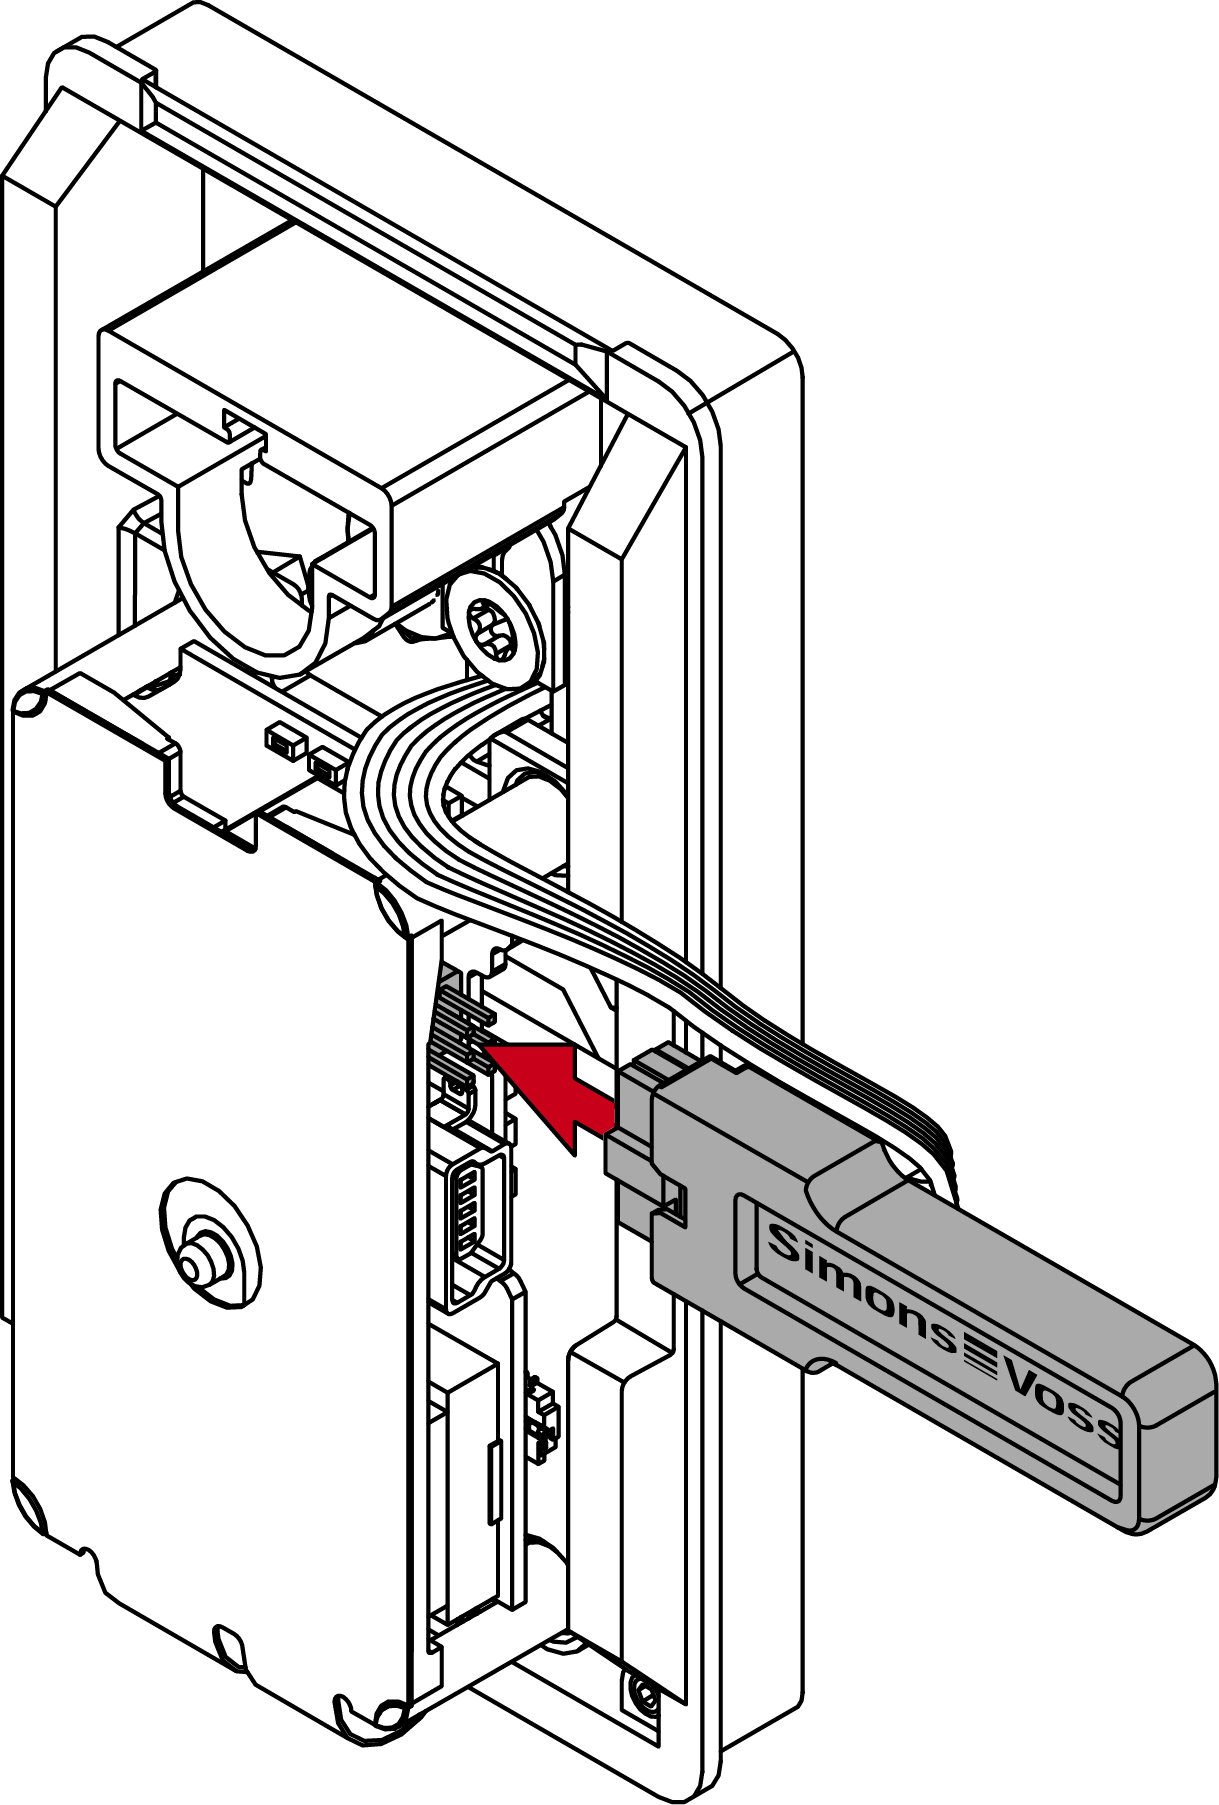
- Using needle-nosed pliers, disconnect the plug of the cable below the circuit board.

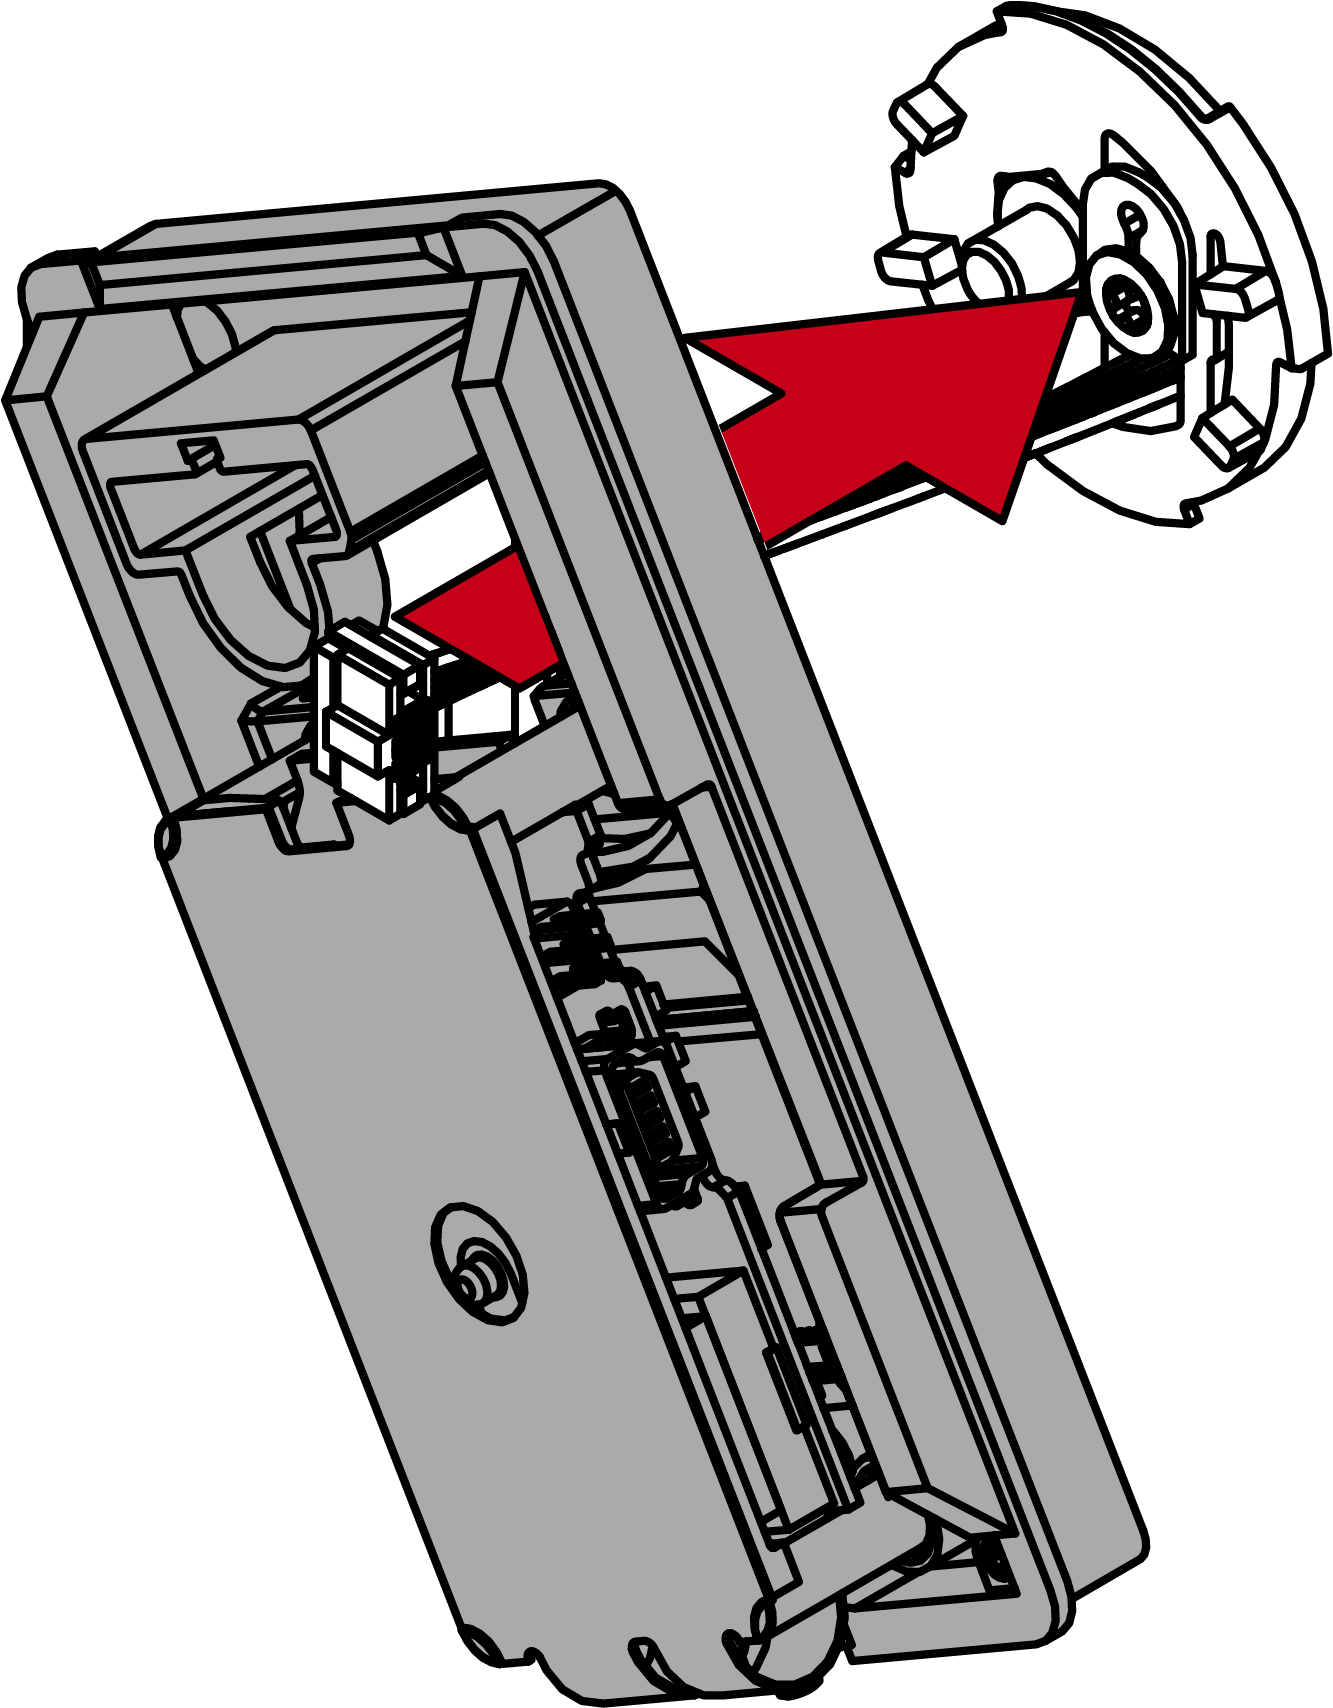
- Turn the reader 60° anti-clockwise (bayonet mount).
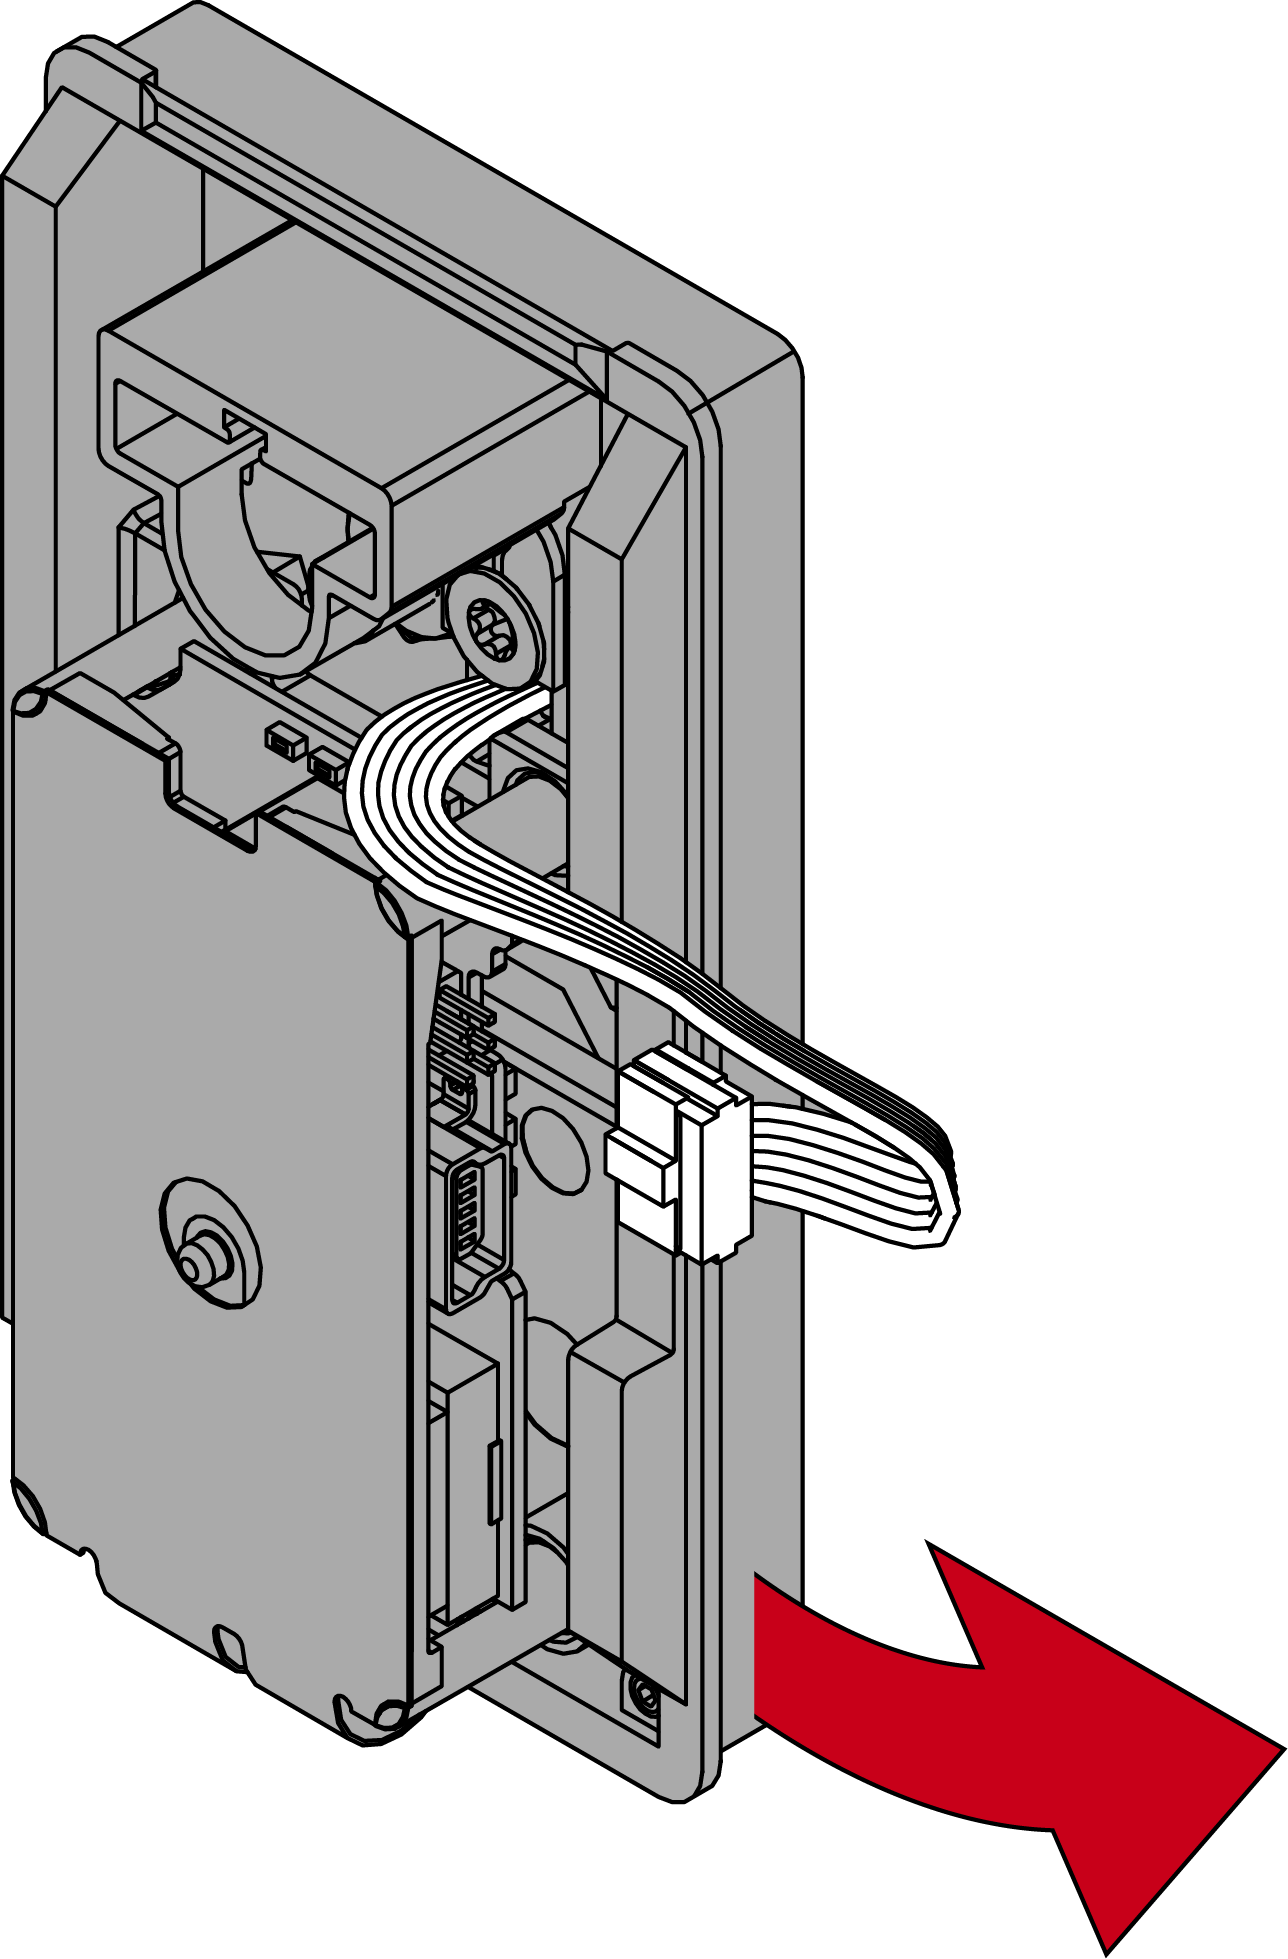
- Remove the reader from the D socket.
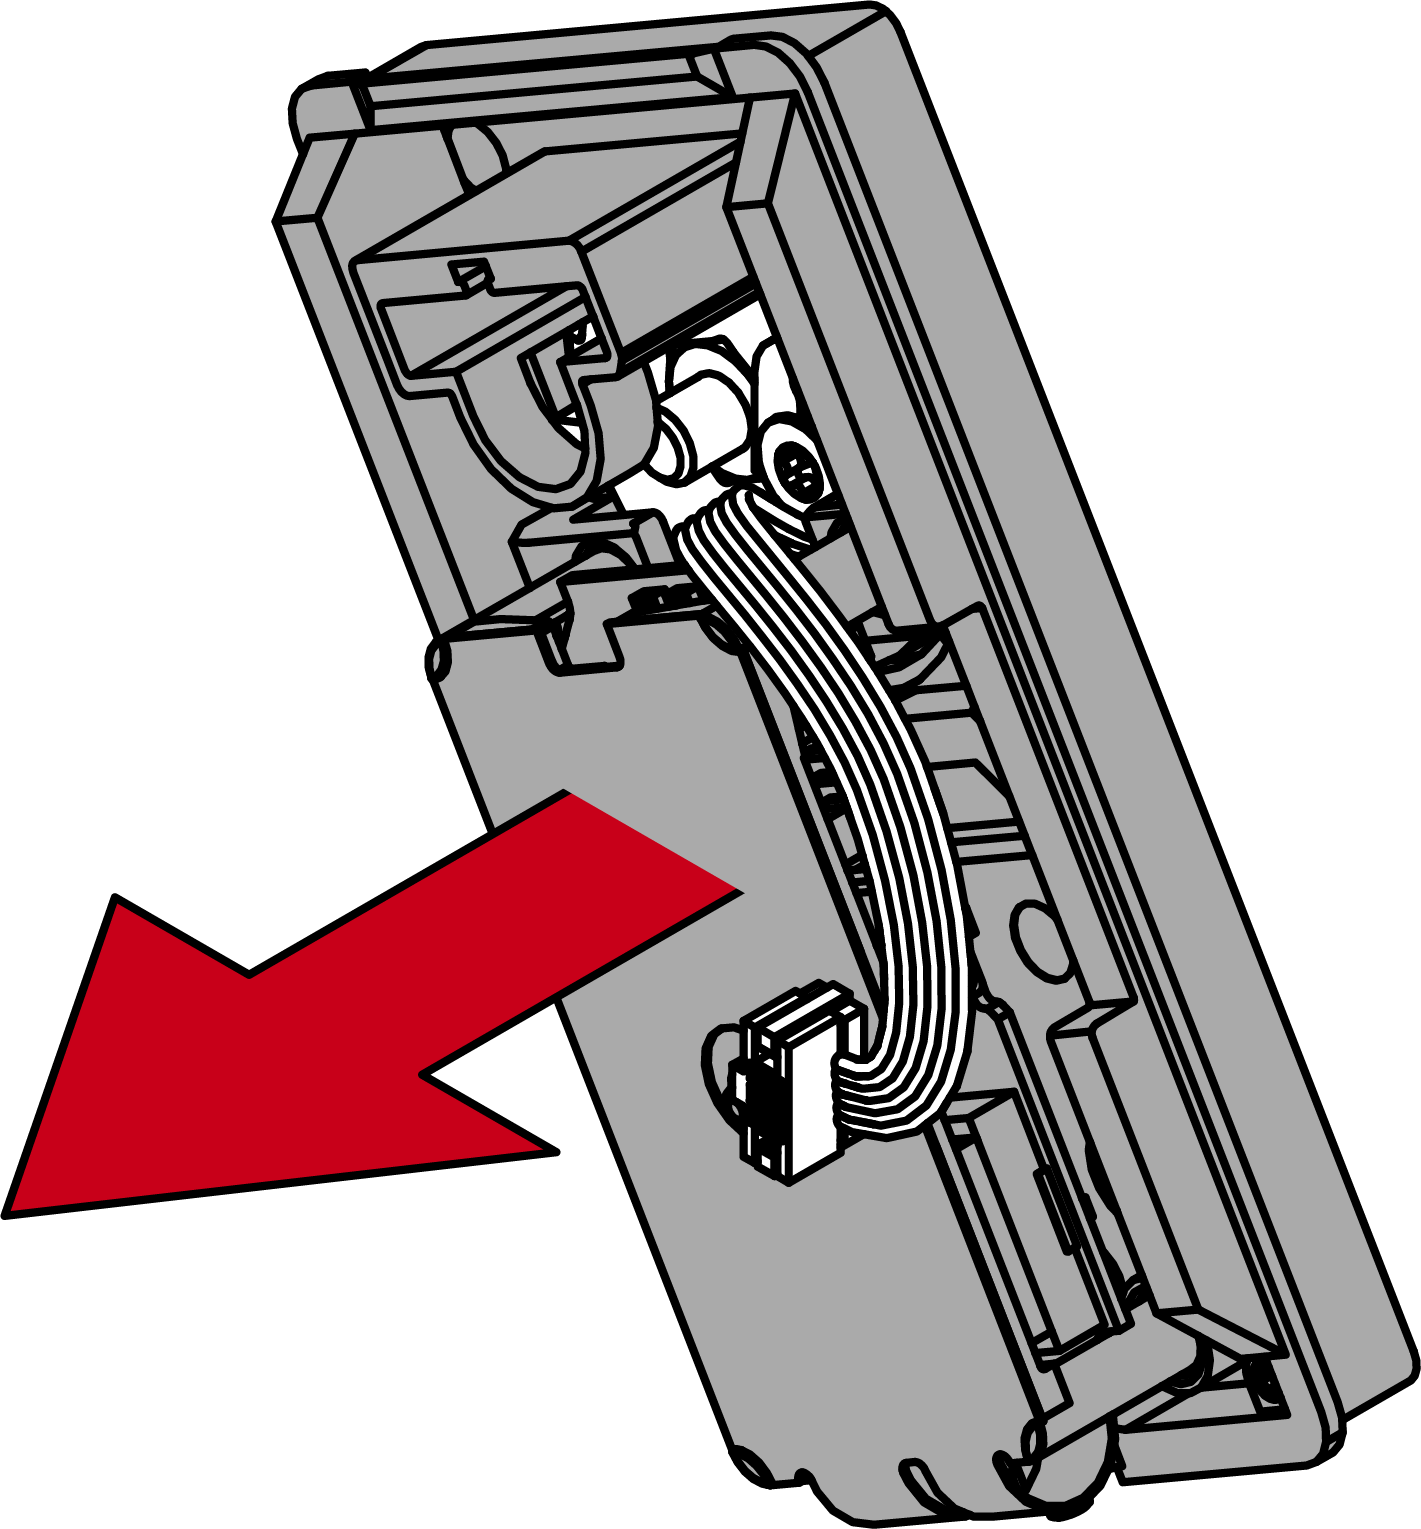
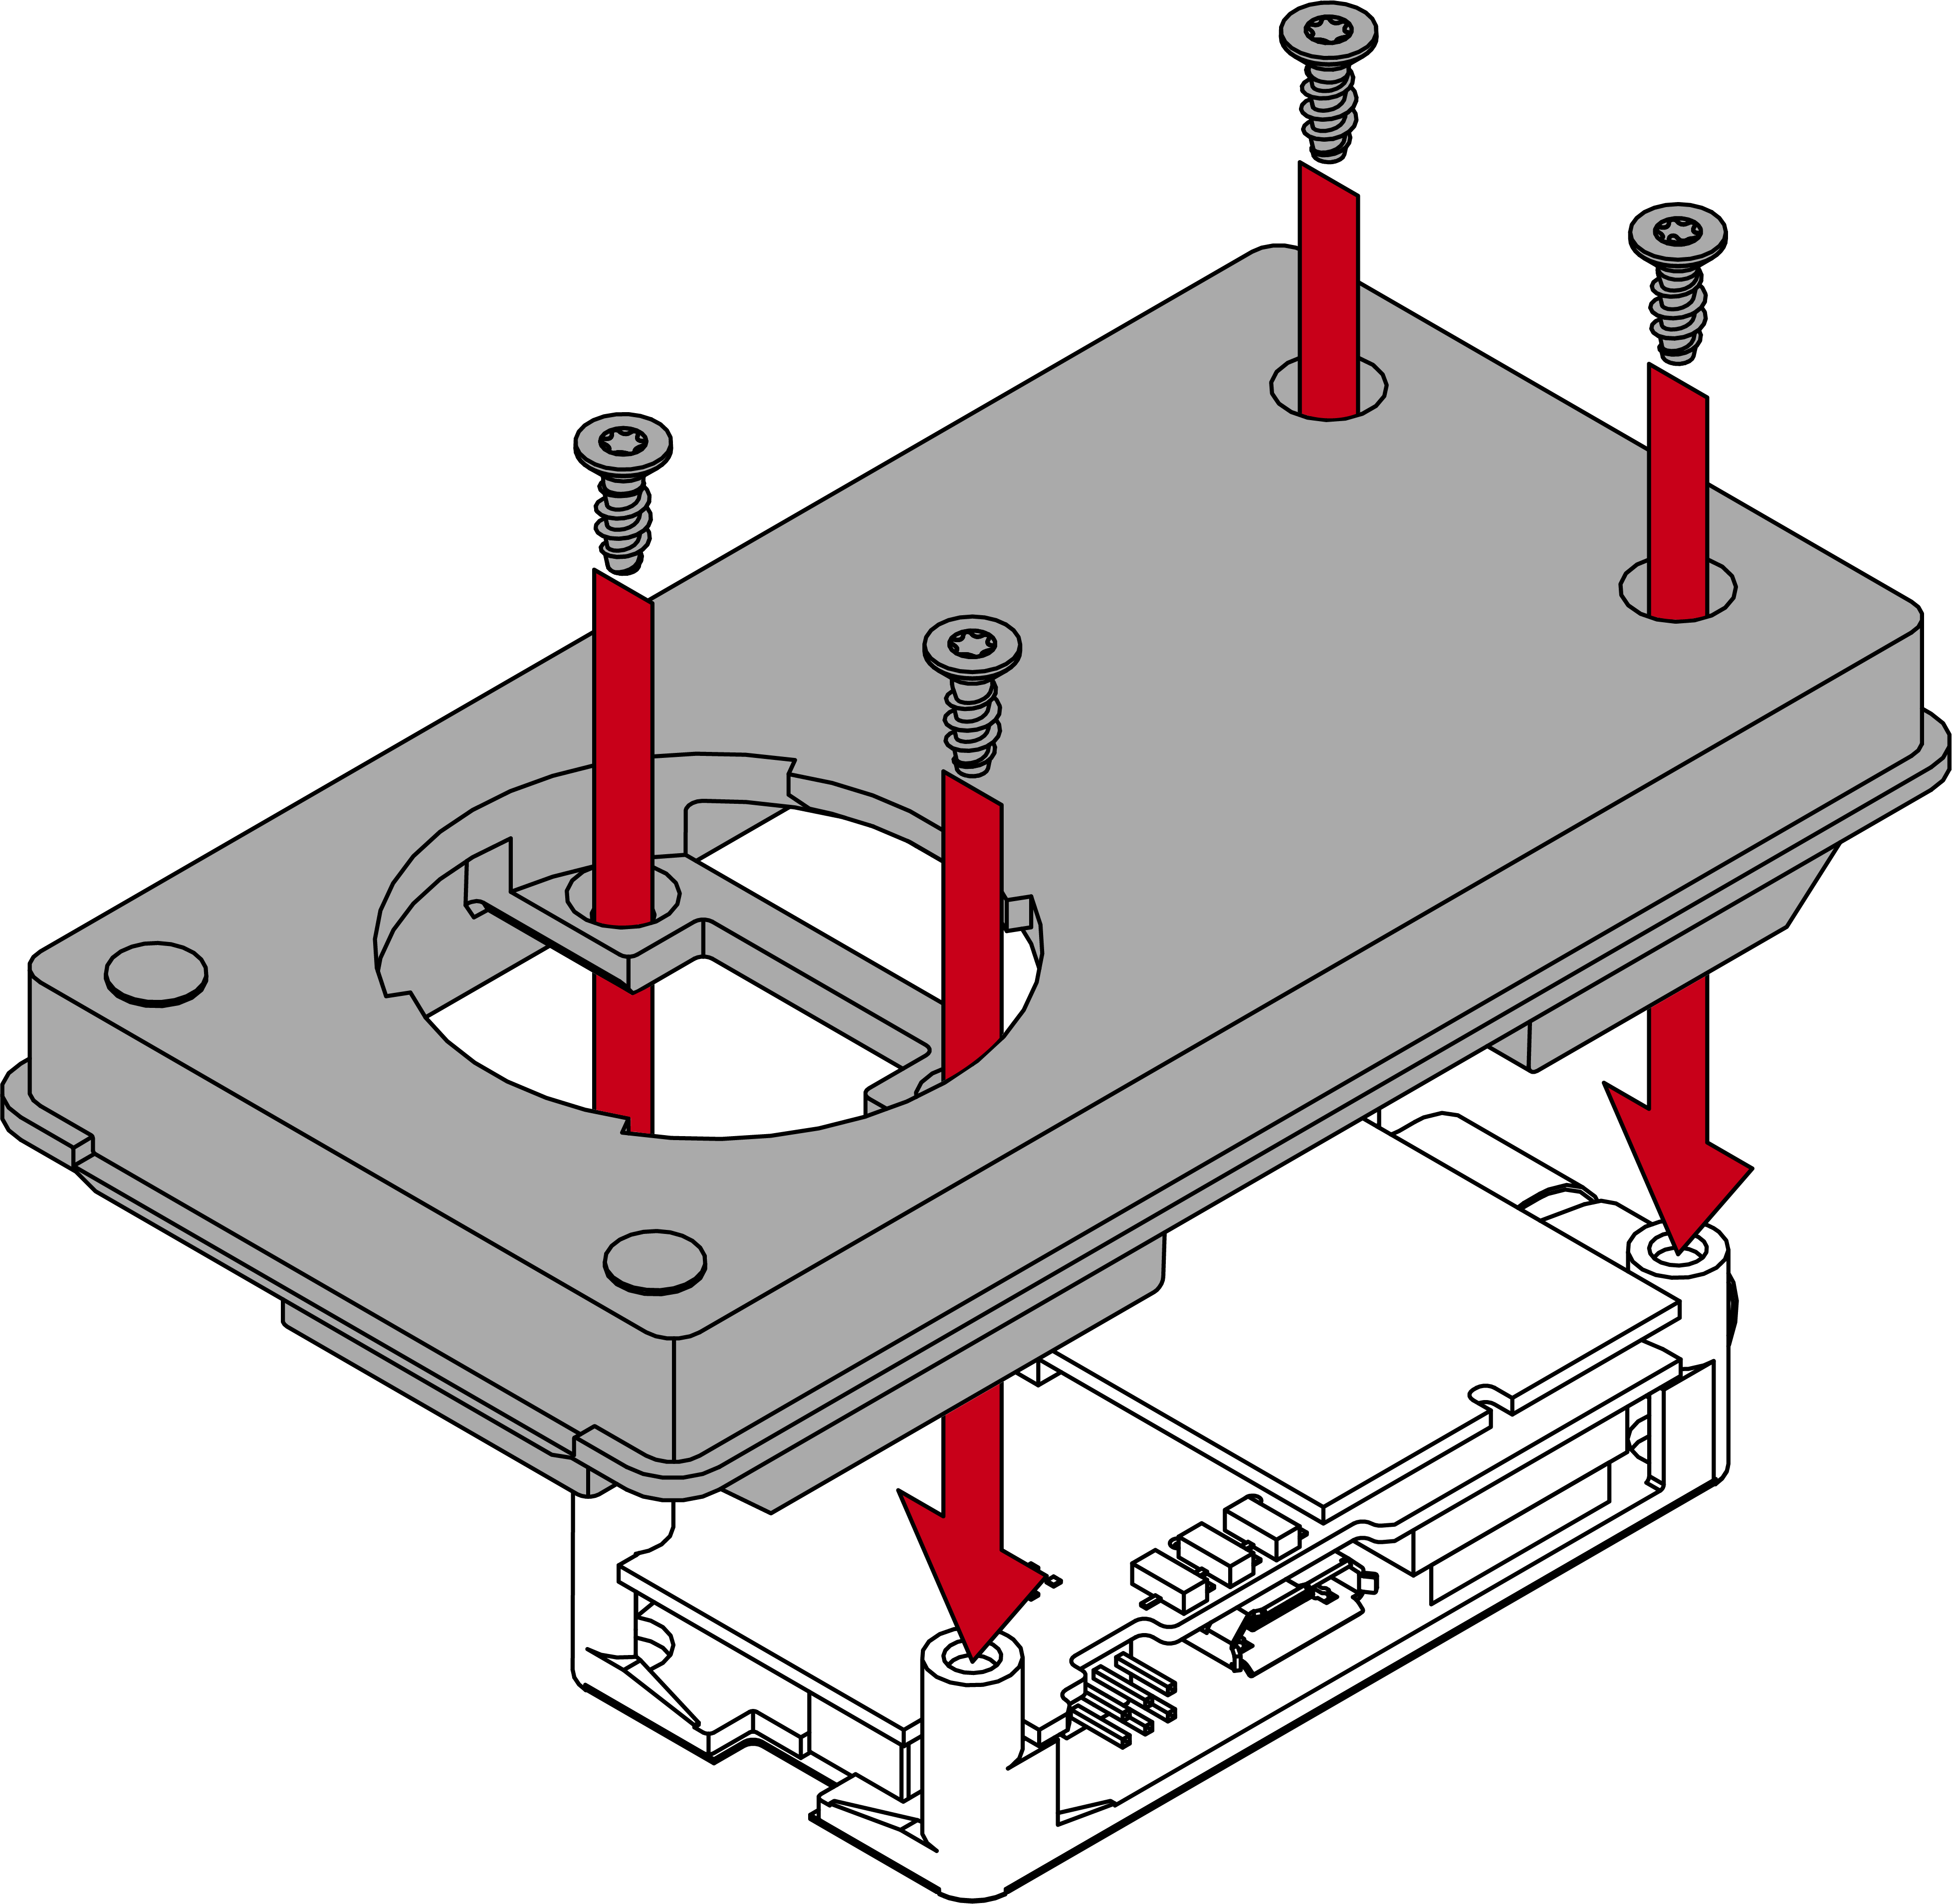
- Undo the four screws from the circuit board mount to separate the circuit board mount from the reader base.
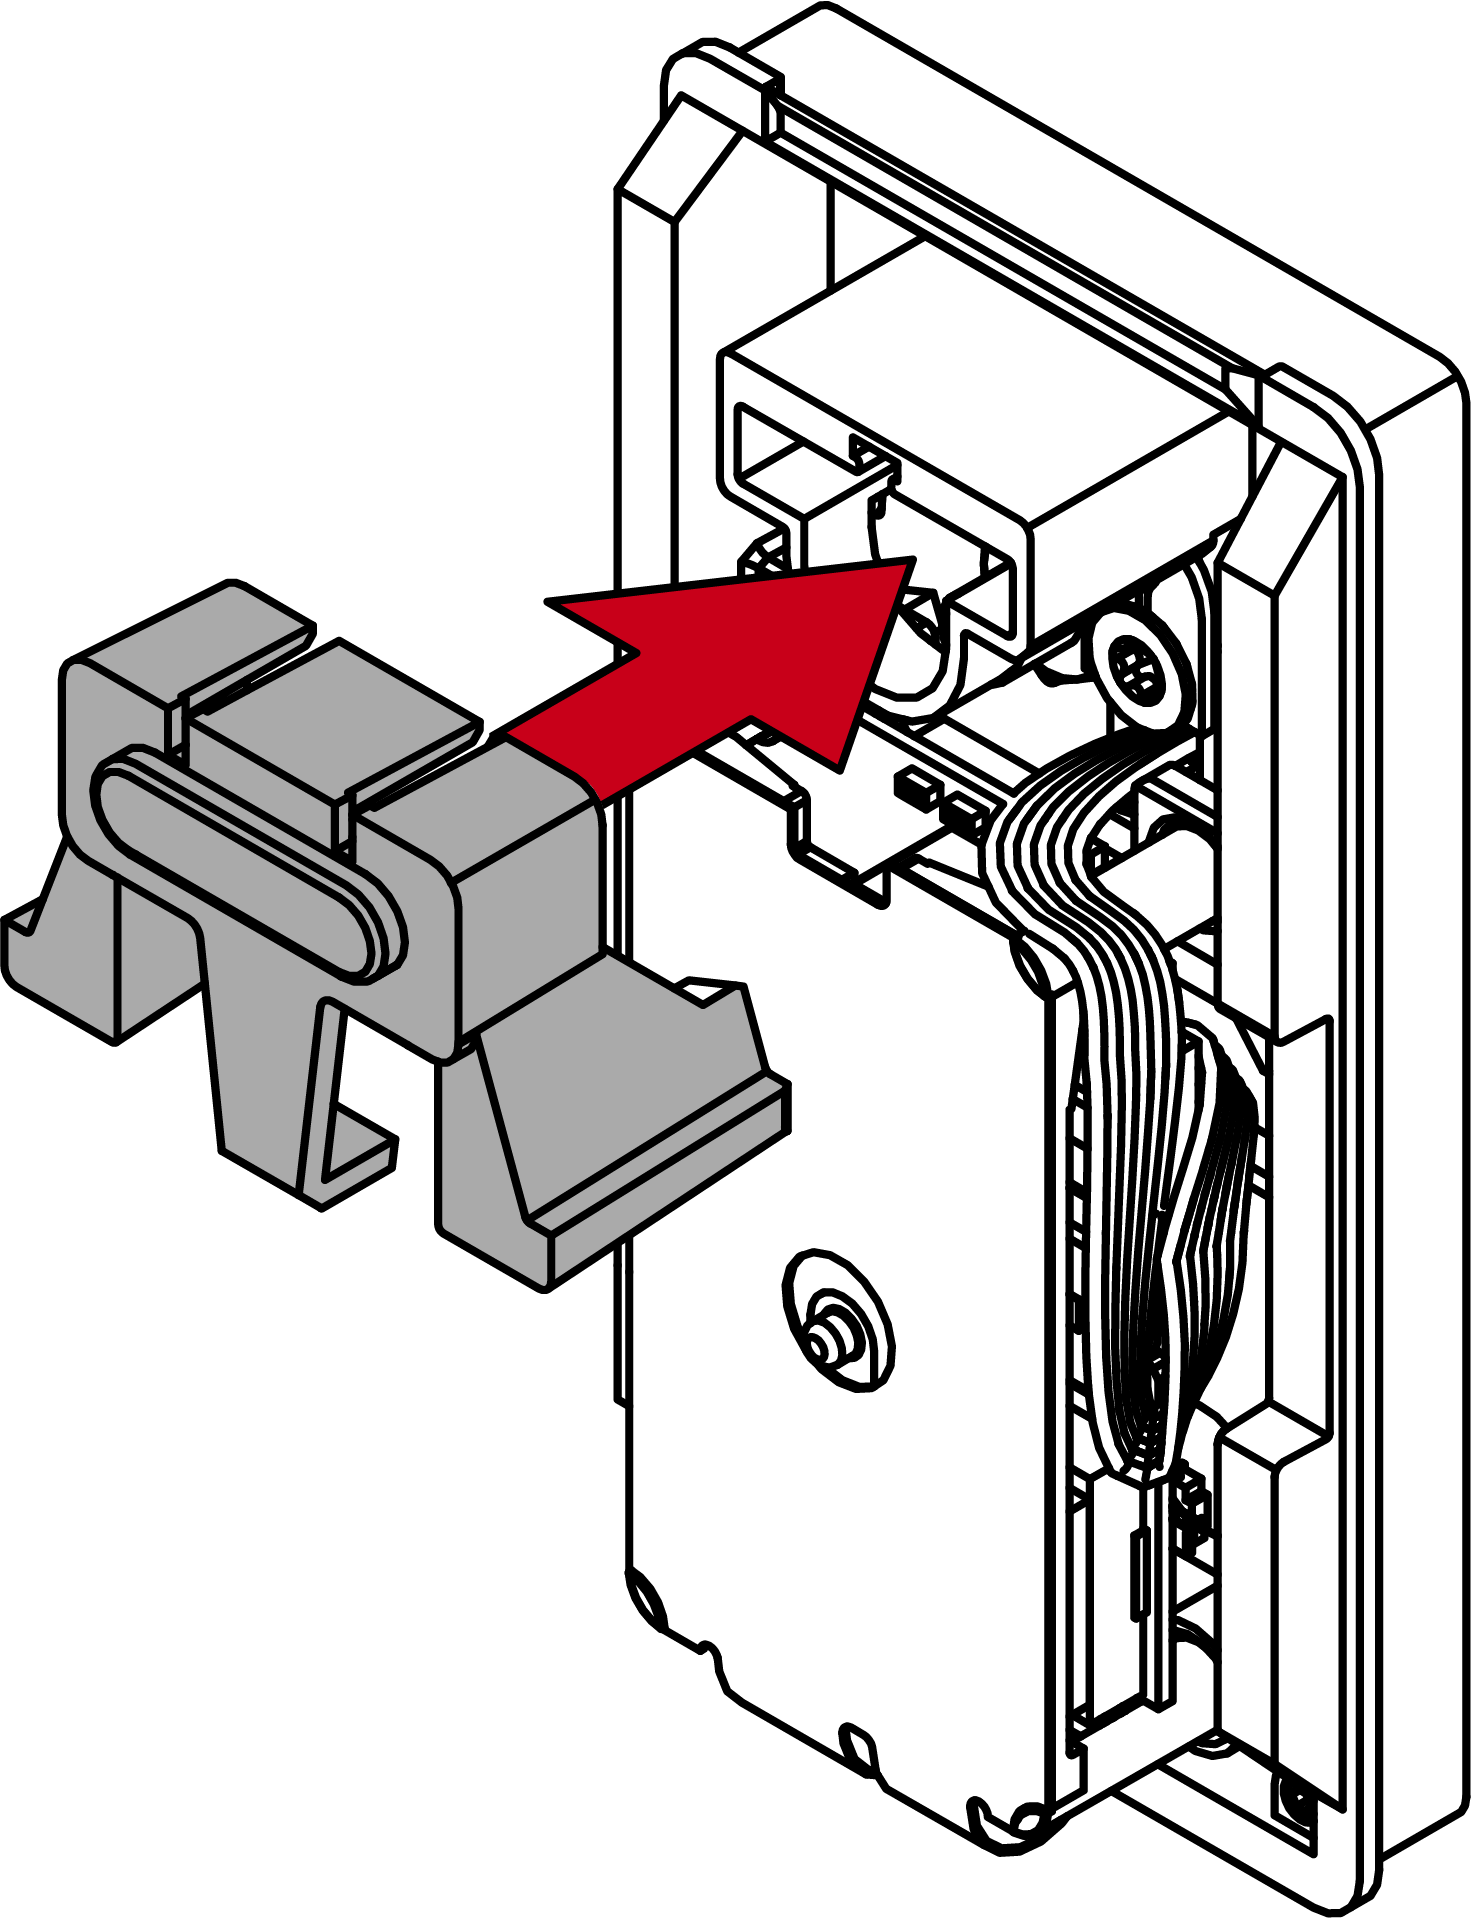
- Open the FPC connector folding mechanism on the LNI.
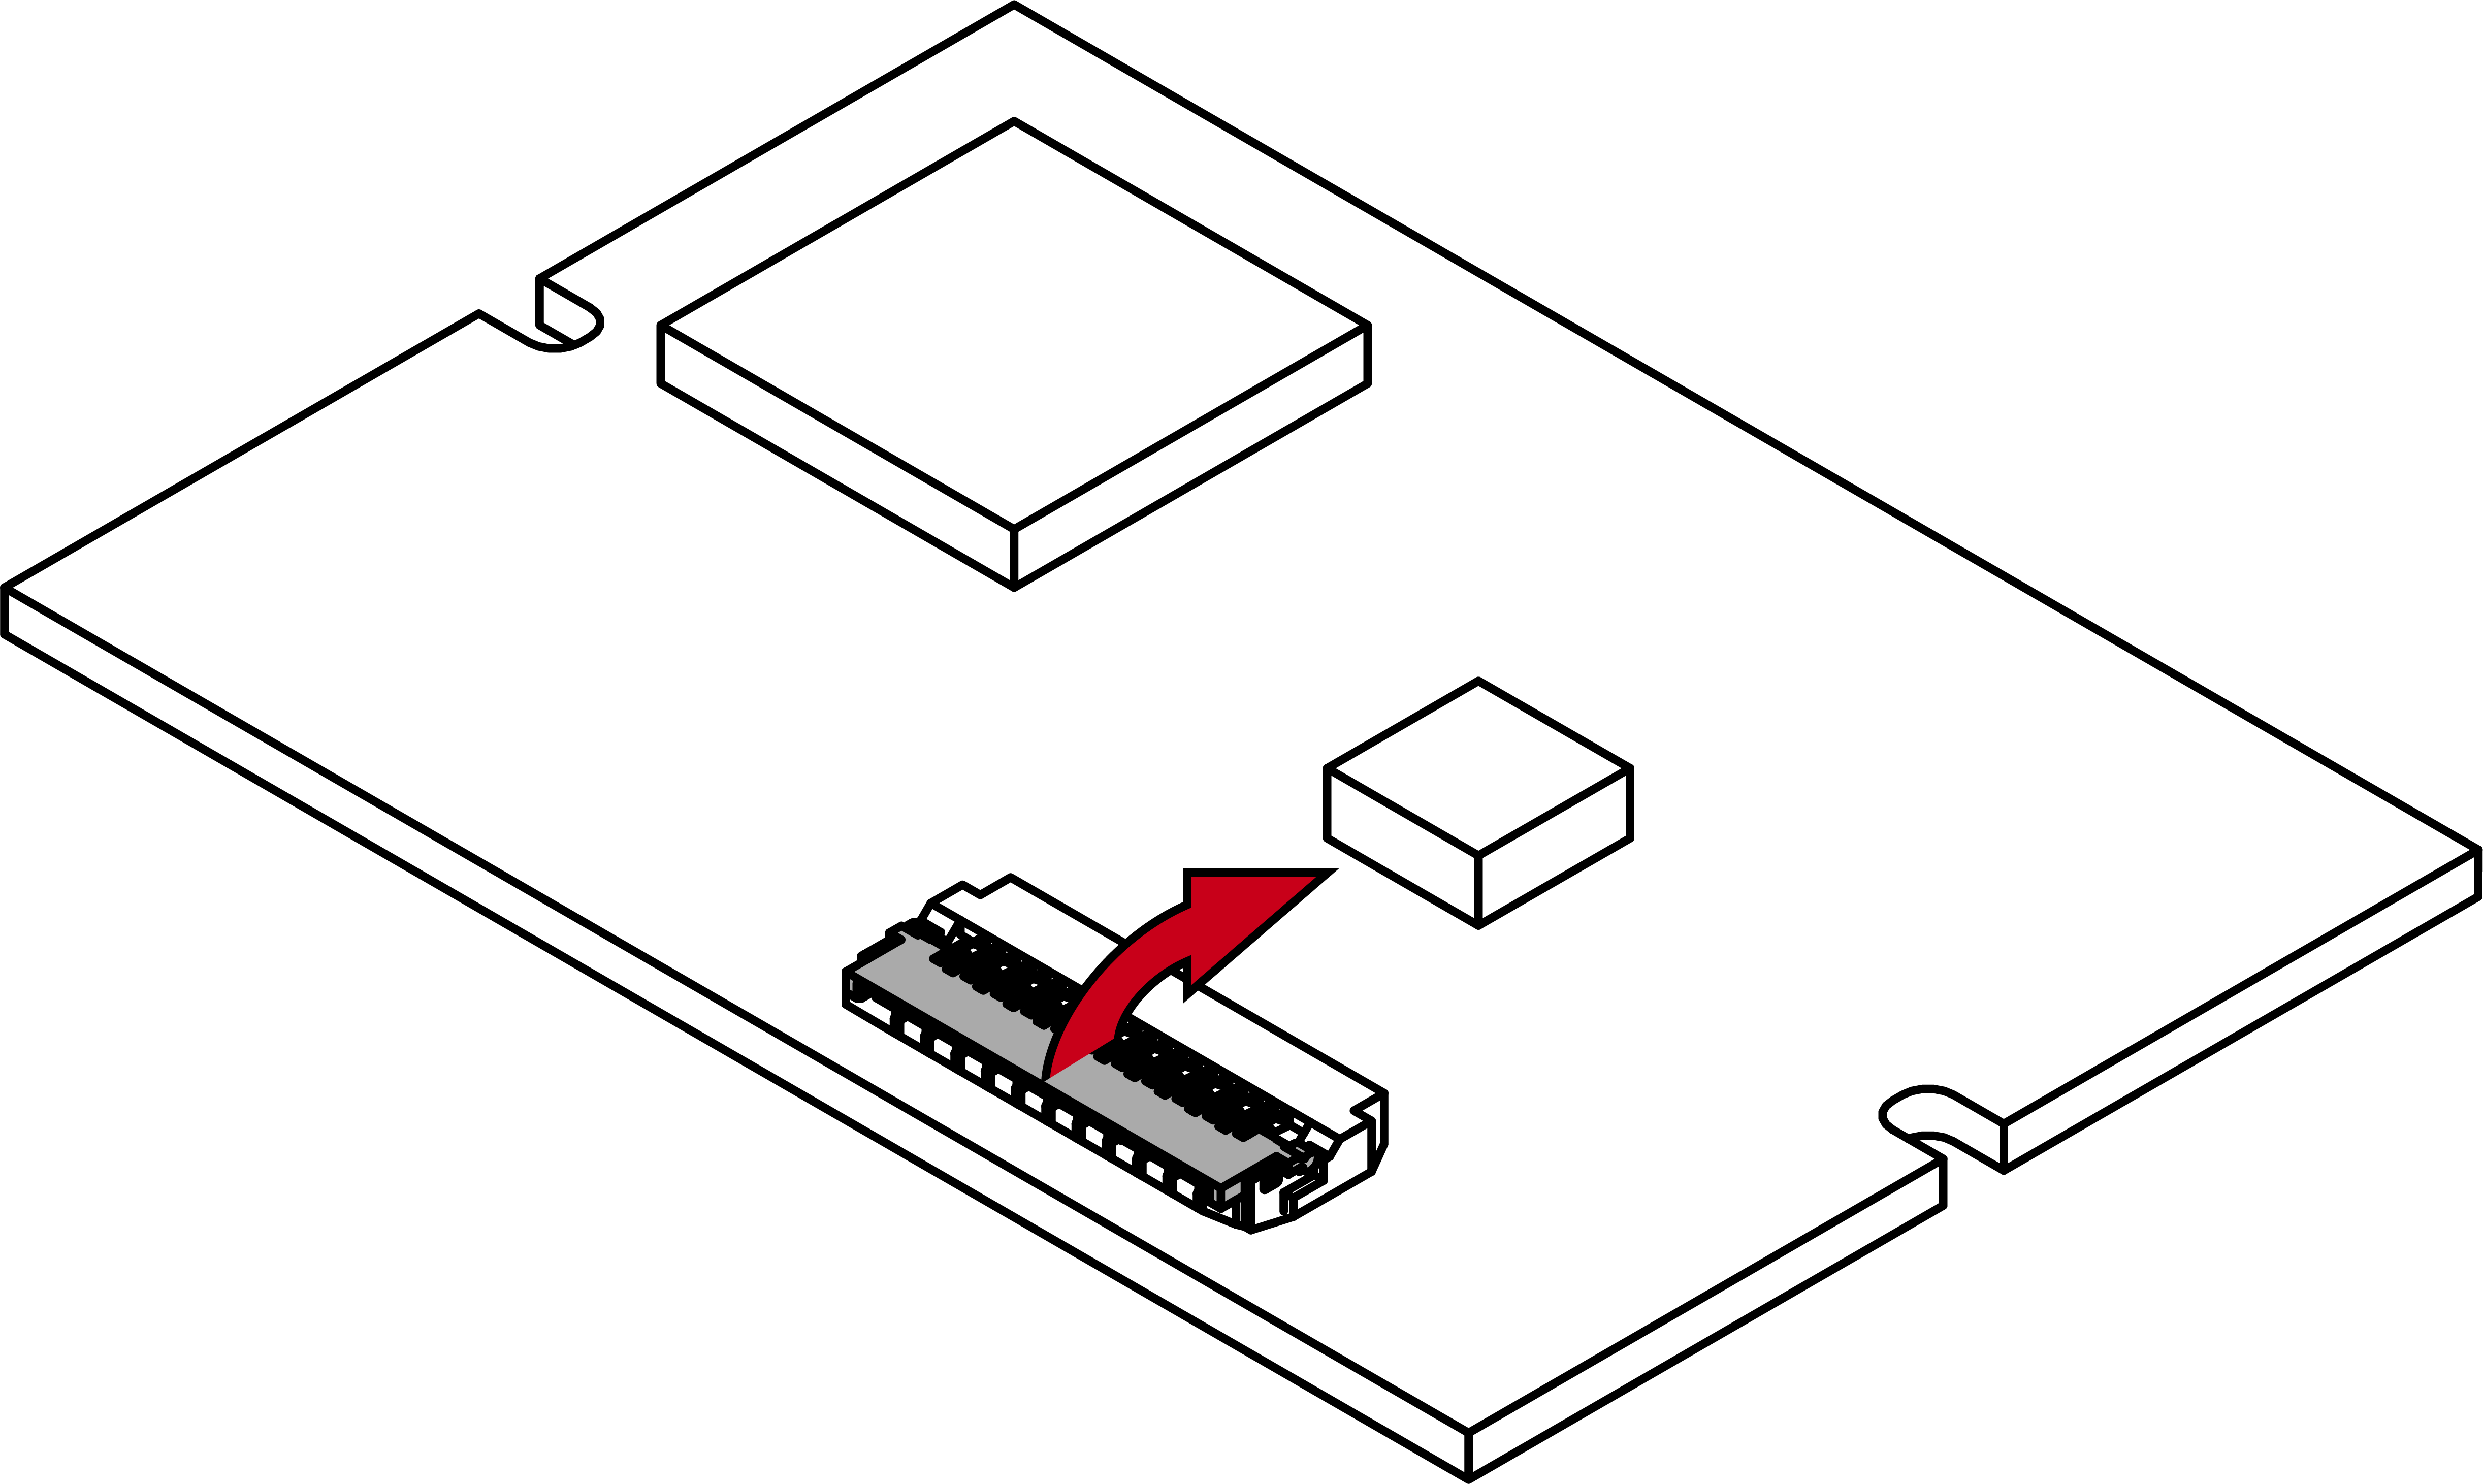
- Insert the reader’s non-assigned connection into the open FPC connector.

- Close the FPC connector’s folding mechanism.
- Screw the circuit board mount and the reader base back together.
- Place the reader at an angle (approx. 60°).
- Turn the reader clockwise straight (bayonet mount).
- Route the cable past next to the area of the light guide.
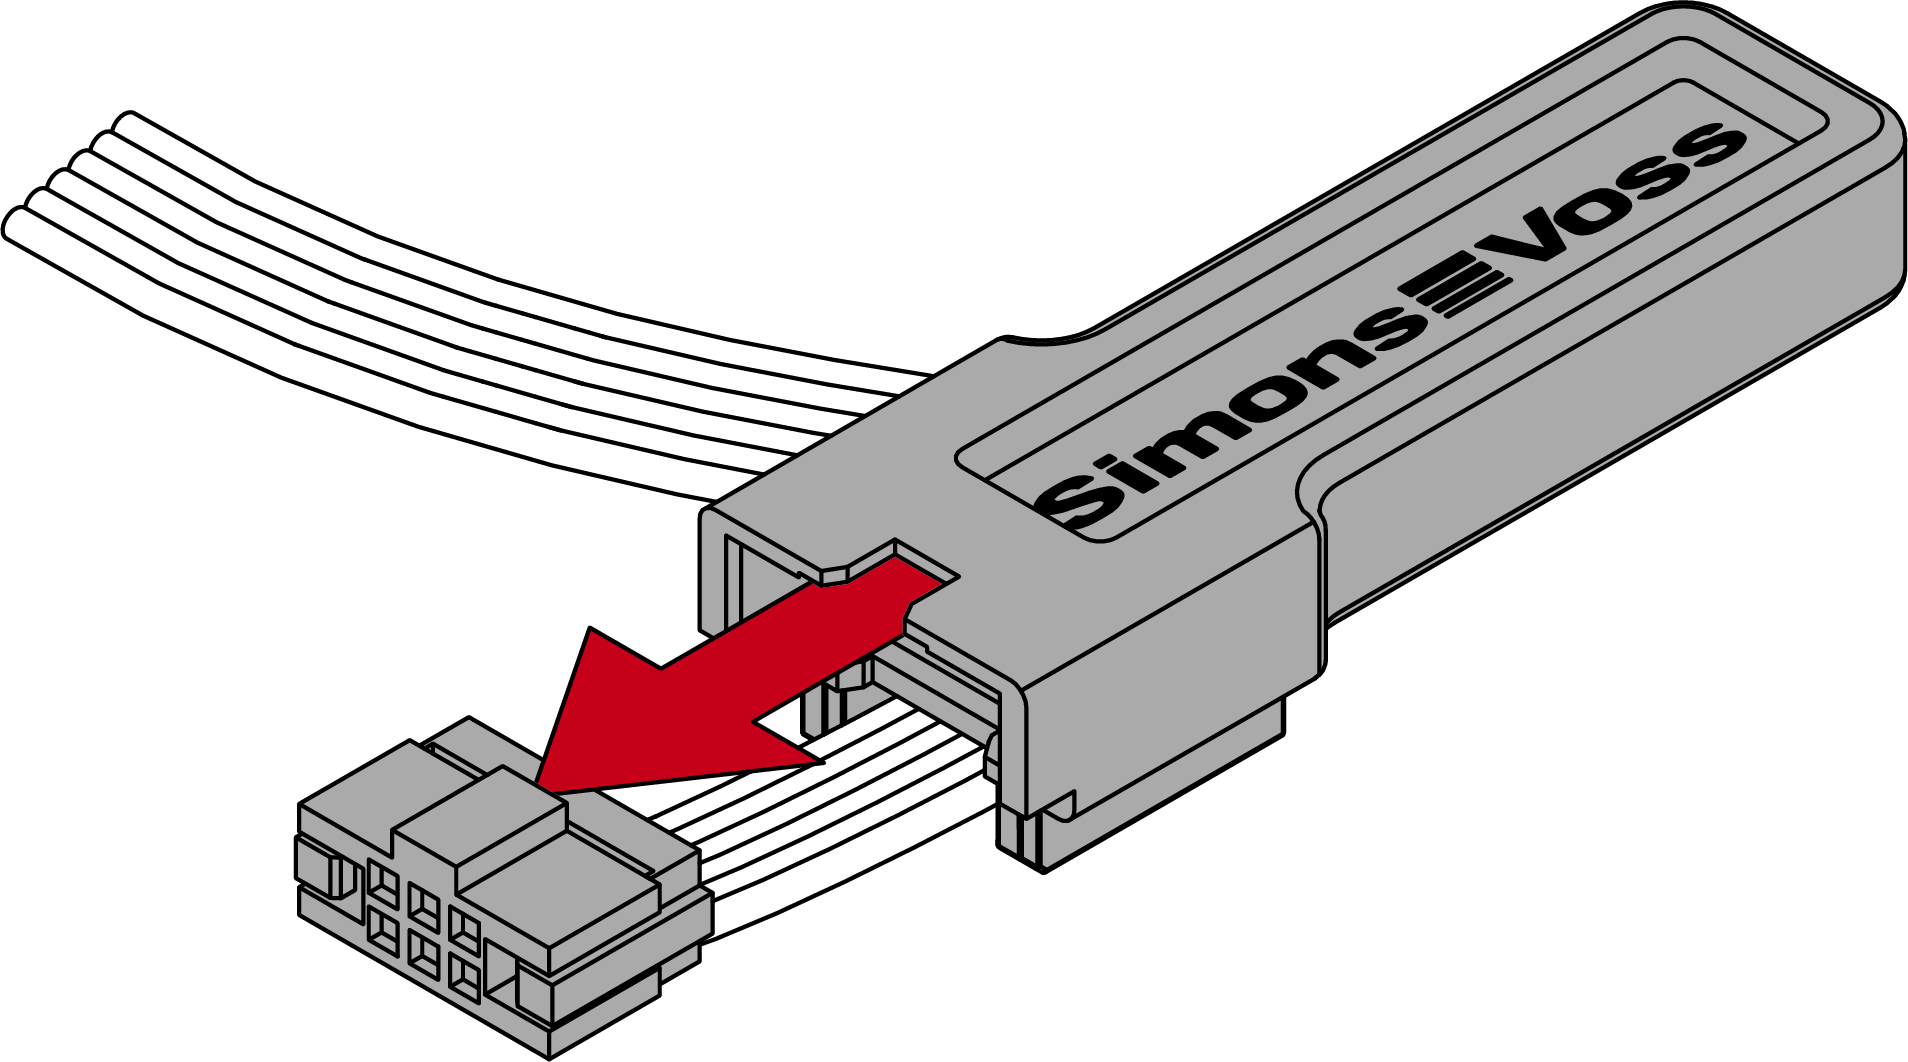
- Insert the plug into the socket with the lug facing the circuit board using the special tool.
- The reader beeps and flashes three times.
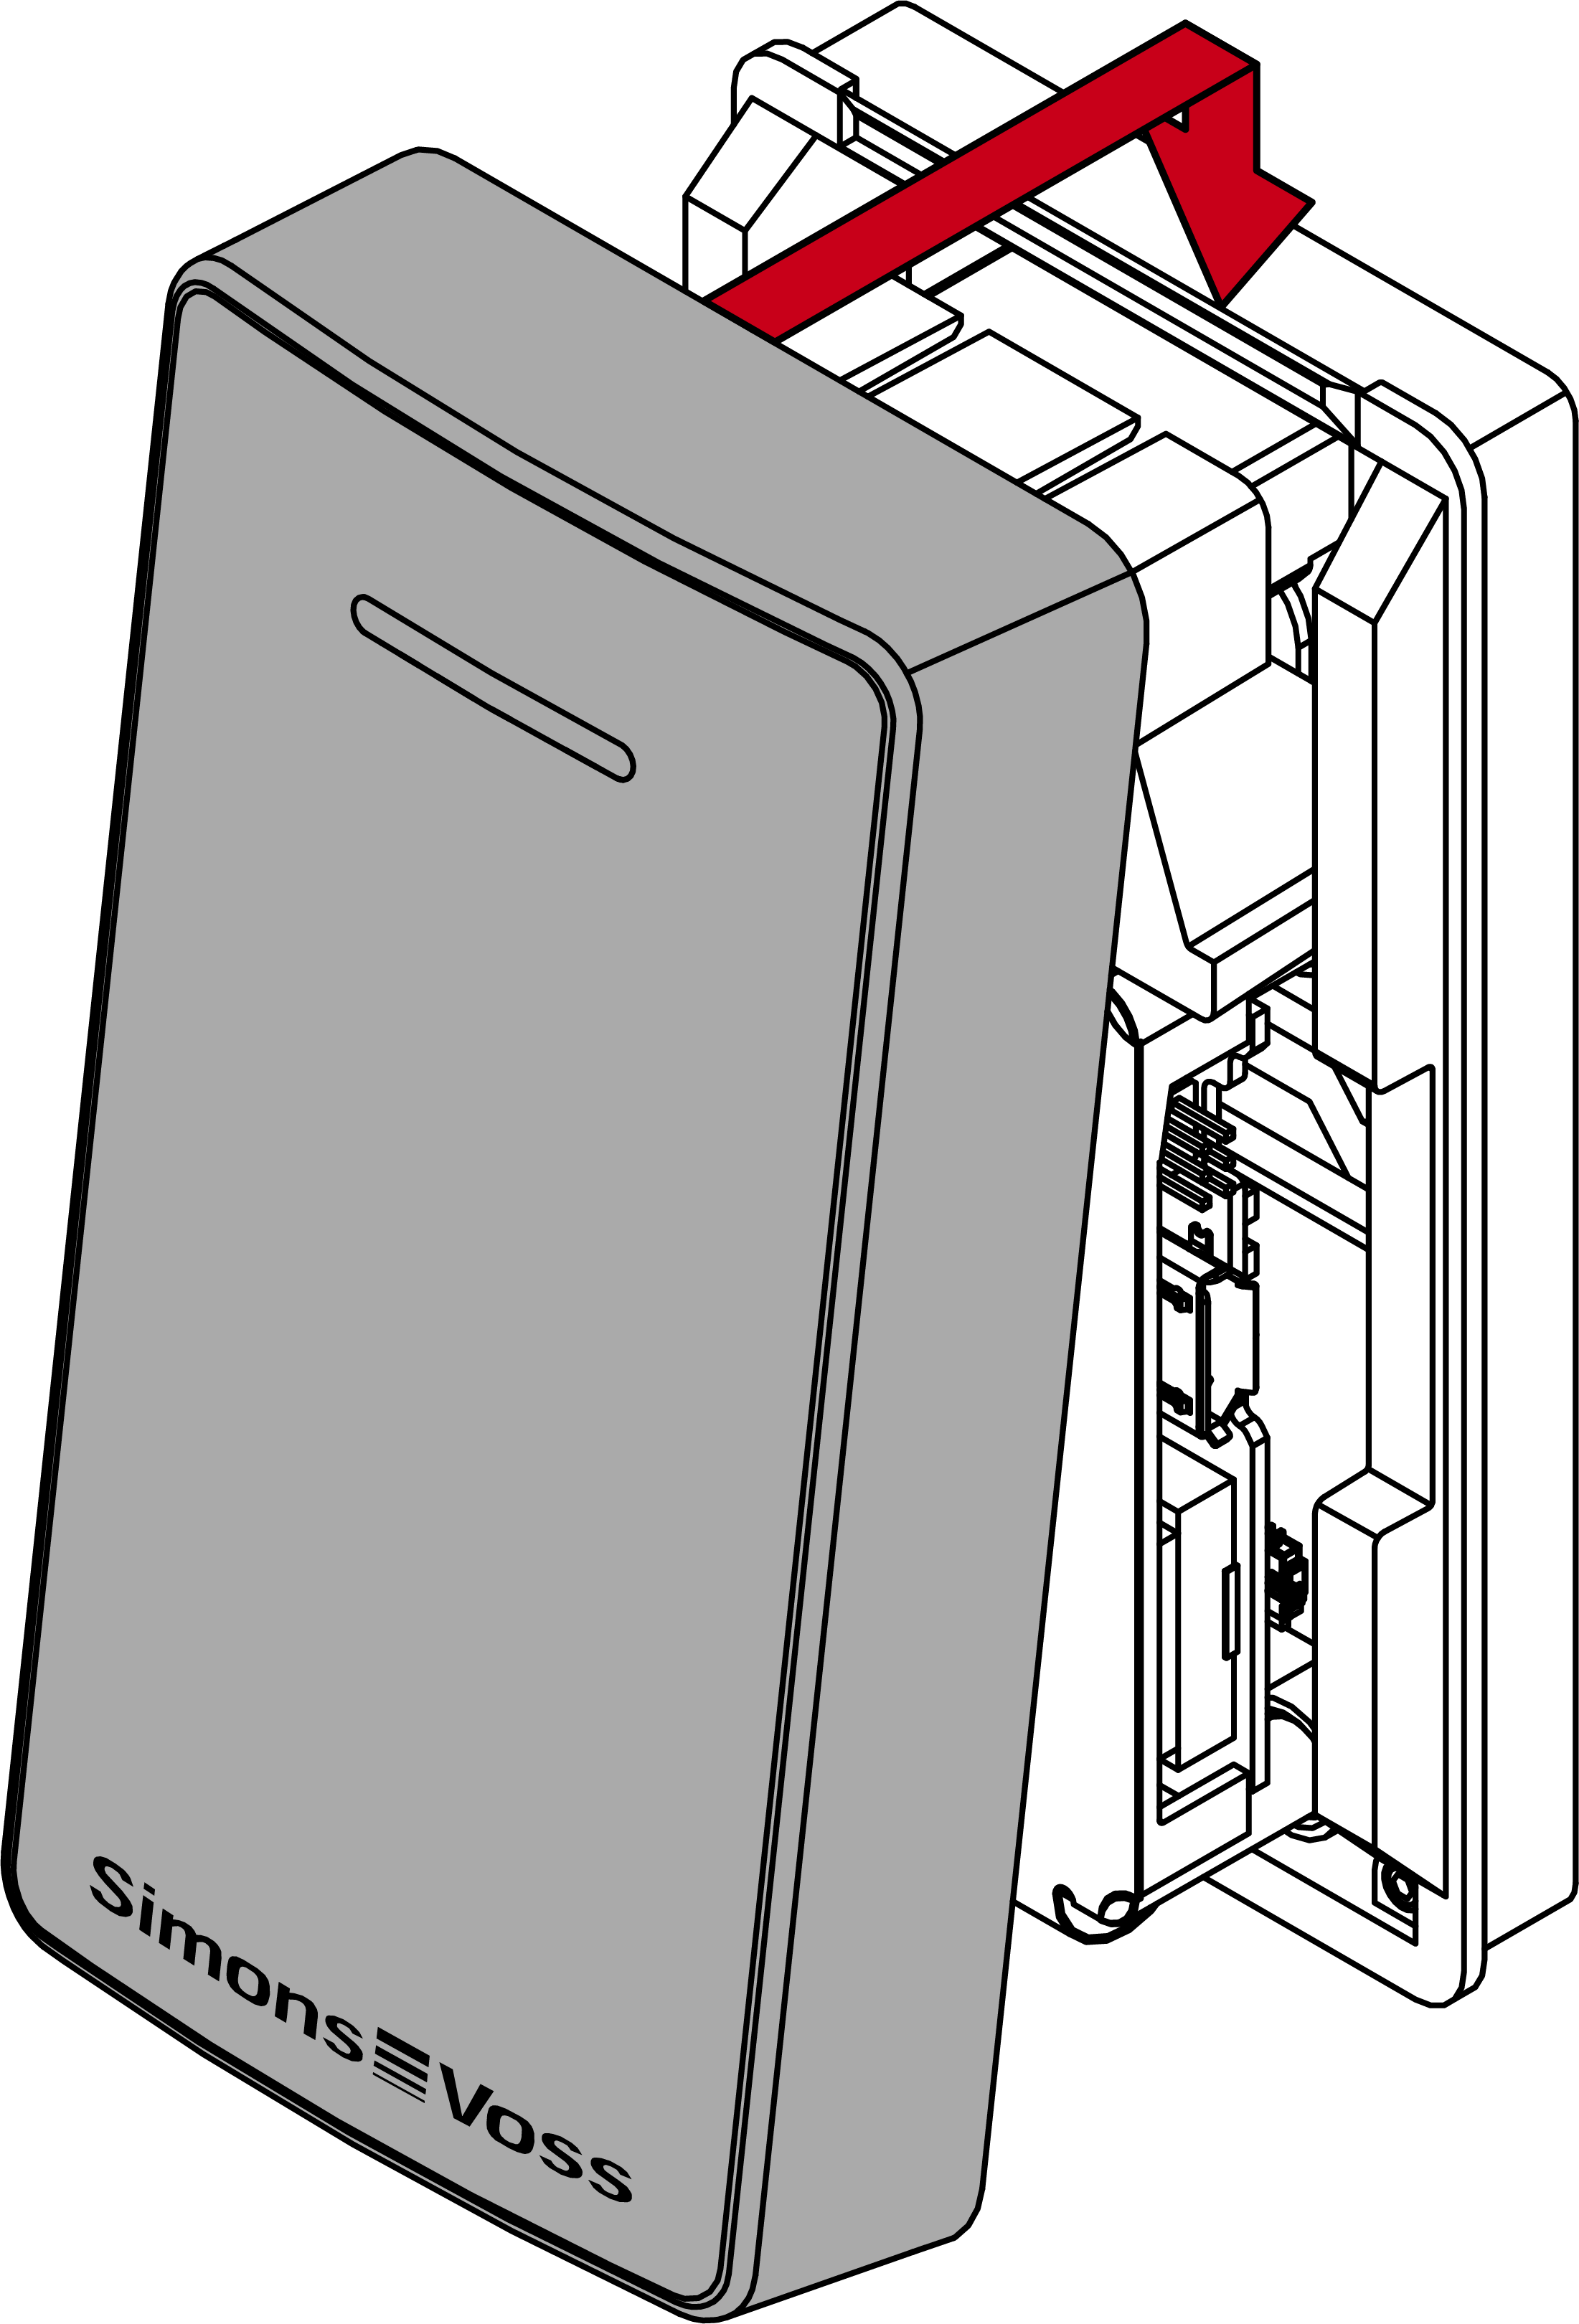
- Attach the light guide and press it firmly.
- Reader protected against twisting.
- Store the excess cable in the gap next to the PCB.
- Hook the lid on top.
- Close the lid downwards.
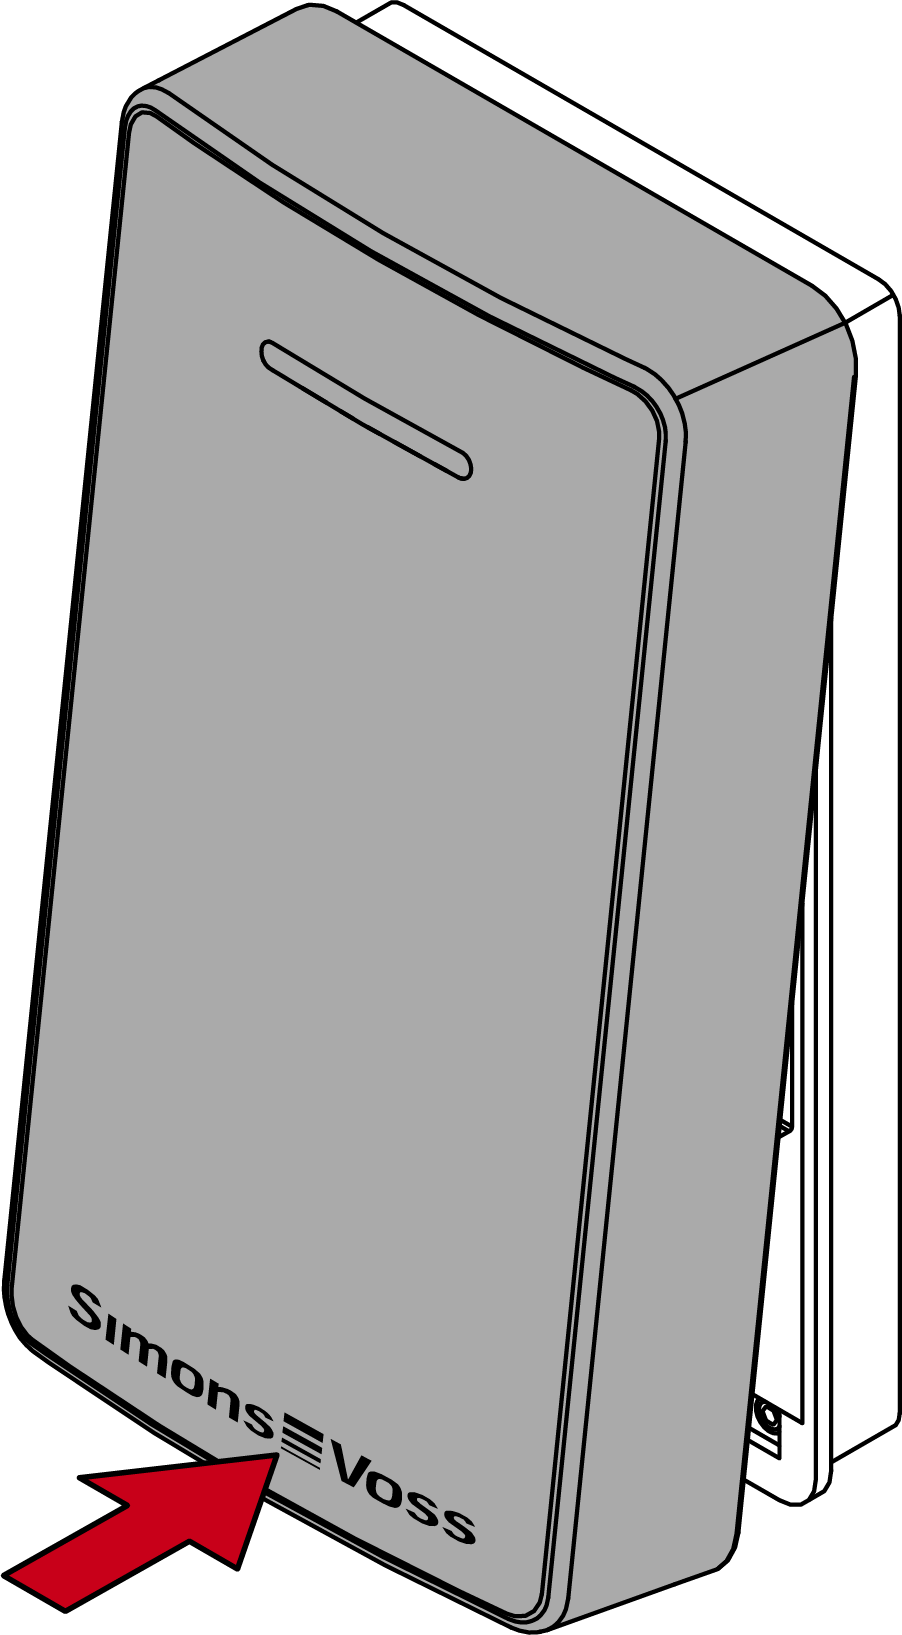
- Gently press the lid against the floor and unscrew the lower screw anti-clockwise (0.9 mm hex wrench) until it is flush with the lid surface.
- LockNode installed in SmartLocker AX.