Language
deutsch
english
français
nederlands
italiano
dansk
svensk
Home
General safety instructions
Product specific safety notices
Meaning of the text formatting
Intended use
General information
Designs
Prerequisites
Mechanical Override (MO)
Profiles
Fastening
RRMO
RMO
Distances and door thicknesses
Profile cylinder (PC)
SnapIn fastening
Conventional fastening
Escutcheon installation
Metal frame mounting
Swiss round (SR)
SnapIn fastening
Conventional fastening
Escutcheon installation
Metal frame mounting
Scandinavian oval (SO)
SnapIn fastening
Conventional fastening
Escutcheon installation
Metal frame mounting
ES1/SKG/PAS24
SmartHandle without electronics
Spindle
Backplate width/wide
DoorMonitoring (DM)
Handle variants
Surface finishes
Reader technology
Options
WP Version (weatherproof)
DP version (drill protection)
Escape&Return function
Storage
Installation (manual)
Snap-in
Contents of packaging
Tools required
Installation instructions SnapIn
Snap-in
Snap-in WP
Snap-in diagrams
Restore storage mode for Snap-in
Snap-in DoorMonitoring
Contents of packaging
Tools required
Installation instructions SnapIn
Assembly Snap-In Door Monitoring
Components
SmartHandle components (SnapIn)
Door Monitoring components (SnapIn)
Step 1: Installing the fastening screw sensor
Step 2: Bolt sensor installation
Step 3: Preparing to install the outer fitting
Step 4: Installation of fittings
Step 5: Installing the inside handle
Step 6: Fastening the covers
Conventional fastening
Contents of packaging
Tools required
Installation instructions
Conventional fastening system
Conventional fastening system WP
Diagrams for conventional fastening system
Restore storage mode for conventional fastening system
Conventional fastening system WO
Contents of packaging
Tools required
Installation instructions MO
Conventional fastening system WO
Conventional fastening system MO WP
Diagrams for conventional fastening system
Restore storage mode for conventional fastening system MO
Conventional fastening ES1/SKG/PAS24
Contents of packaging
Tools required
Installation instructions
Assembly ES1-/SKG-/PAS24 SmartHandle
Components
SmartHandle components
SKG components
Step 0: Preparing drill holes
Step 1: Preparing to install the outer fitting
Step 2: Mount adapter plates to outer fitting
Step 3: Install fittings
Step 4: Check the outer handle to ensure it opens easily
Step 5: Installing the inside handle
Step 6: Fastening the covers
Conventional fastening system for DoorMonitoring
Contents of packaging
Tools required
Installation instructions
Installation conventional fastening door monitoring
Components
SmartHandle components
DoorMonitoring components (conventional fastening)
Step 0: Preparing drill holes
Step 1: Installing the fastening screw sensor
Step 2: Bolt sensor installation
Step 3: Preparing to install the outer fitting
Step 4: Installation of fittings
Step 5: Installing the inside handle
Step 6: Fastening the covers
Disassembling DoorMonitoring components
Additional info: DoorMonitoring sensor lock
Sensor lock components
Installation (manual)
Step 1: check and wire sensor lock
Step 2: Fitting sensor lock with adapter
Step 3: Installing the fitting
Step 4: Connecting cables
Swiss Round MO
Contents of packaging
Tools required
Installation instructions MO
Conventional fastening system, including Swiss Round MO:
Conventional fastening system, including Swiss Round MO WP
Diagrams for conventional fastening system
Restore storage mode for SwissRound MO
Scandinavian Oval
Contents of packaging
Tools required
Installation instructions
Conventional fastening system Scandinavian Oval
Conventional fastening system for Scandinavian Oval DP
Conventional fastening system for Scandinavian Oval MO
Diagrams for Scandinavian Oval
Restore storage mode for ScandinavianOval
SmartHandle Hybrid
Steel frame with/without MO (RRMO)
Contents of packaging
Tools required
Installation instructions MO
Installation
Step 0: Preparing drill holes
Step 1: Preparing the fittings
Step 2: Mounting the outside handle
Step 3: Mounting the outside fitting adapter plate
Step 4: Mounting the outside fitting
Step 5: Mounting the inside fitting
Step 6: Screw on the inside fitting
Step 7: Mounting the inside handle
Escutcheon fixing with/without MO (RMO)
Contents of packaging
Tools required
Installation instructions MO
Installation
Step 1: Preparing the fittings
Step 2: Mounting the outside handle
Step 3: Mounting the outside fitting adapter plate
Step 4: Mounting the outside fitting
Step 5: Mounting the inside fitting
Step 6: Screw on the inside fitting
Step 7: Mounting the inside handle
SmartIntego programming
Configuration
Status messages
Signal
Battery warning in SmartIntego
Battery replacement in SmartIntego
Maintenance, cleaning and disinfection
Disassembly
Restore storage mode for Snap-in
Restore storage mode for conventional fastening system
Restore storage mode for conventional fastening system MO
Restore storage mode for SwissRound MO
Restore storage mode for ScandinavianOval
Restore storage mode for ScandinavianOval DP
Disassembling DoorMonitoring components
Restore storage mode for RRMO
Restore storage mode for RMO
Accessories
Battery set
Sleeves
Handles
Covers
Technical specifications
Dimensional drawings handles
Declaration of conformity
Help and other information
Home
Installation (manual)
Additional info: DoorMonitoring sensor lock
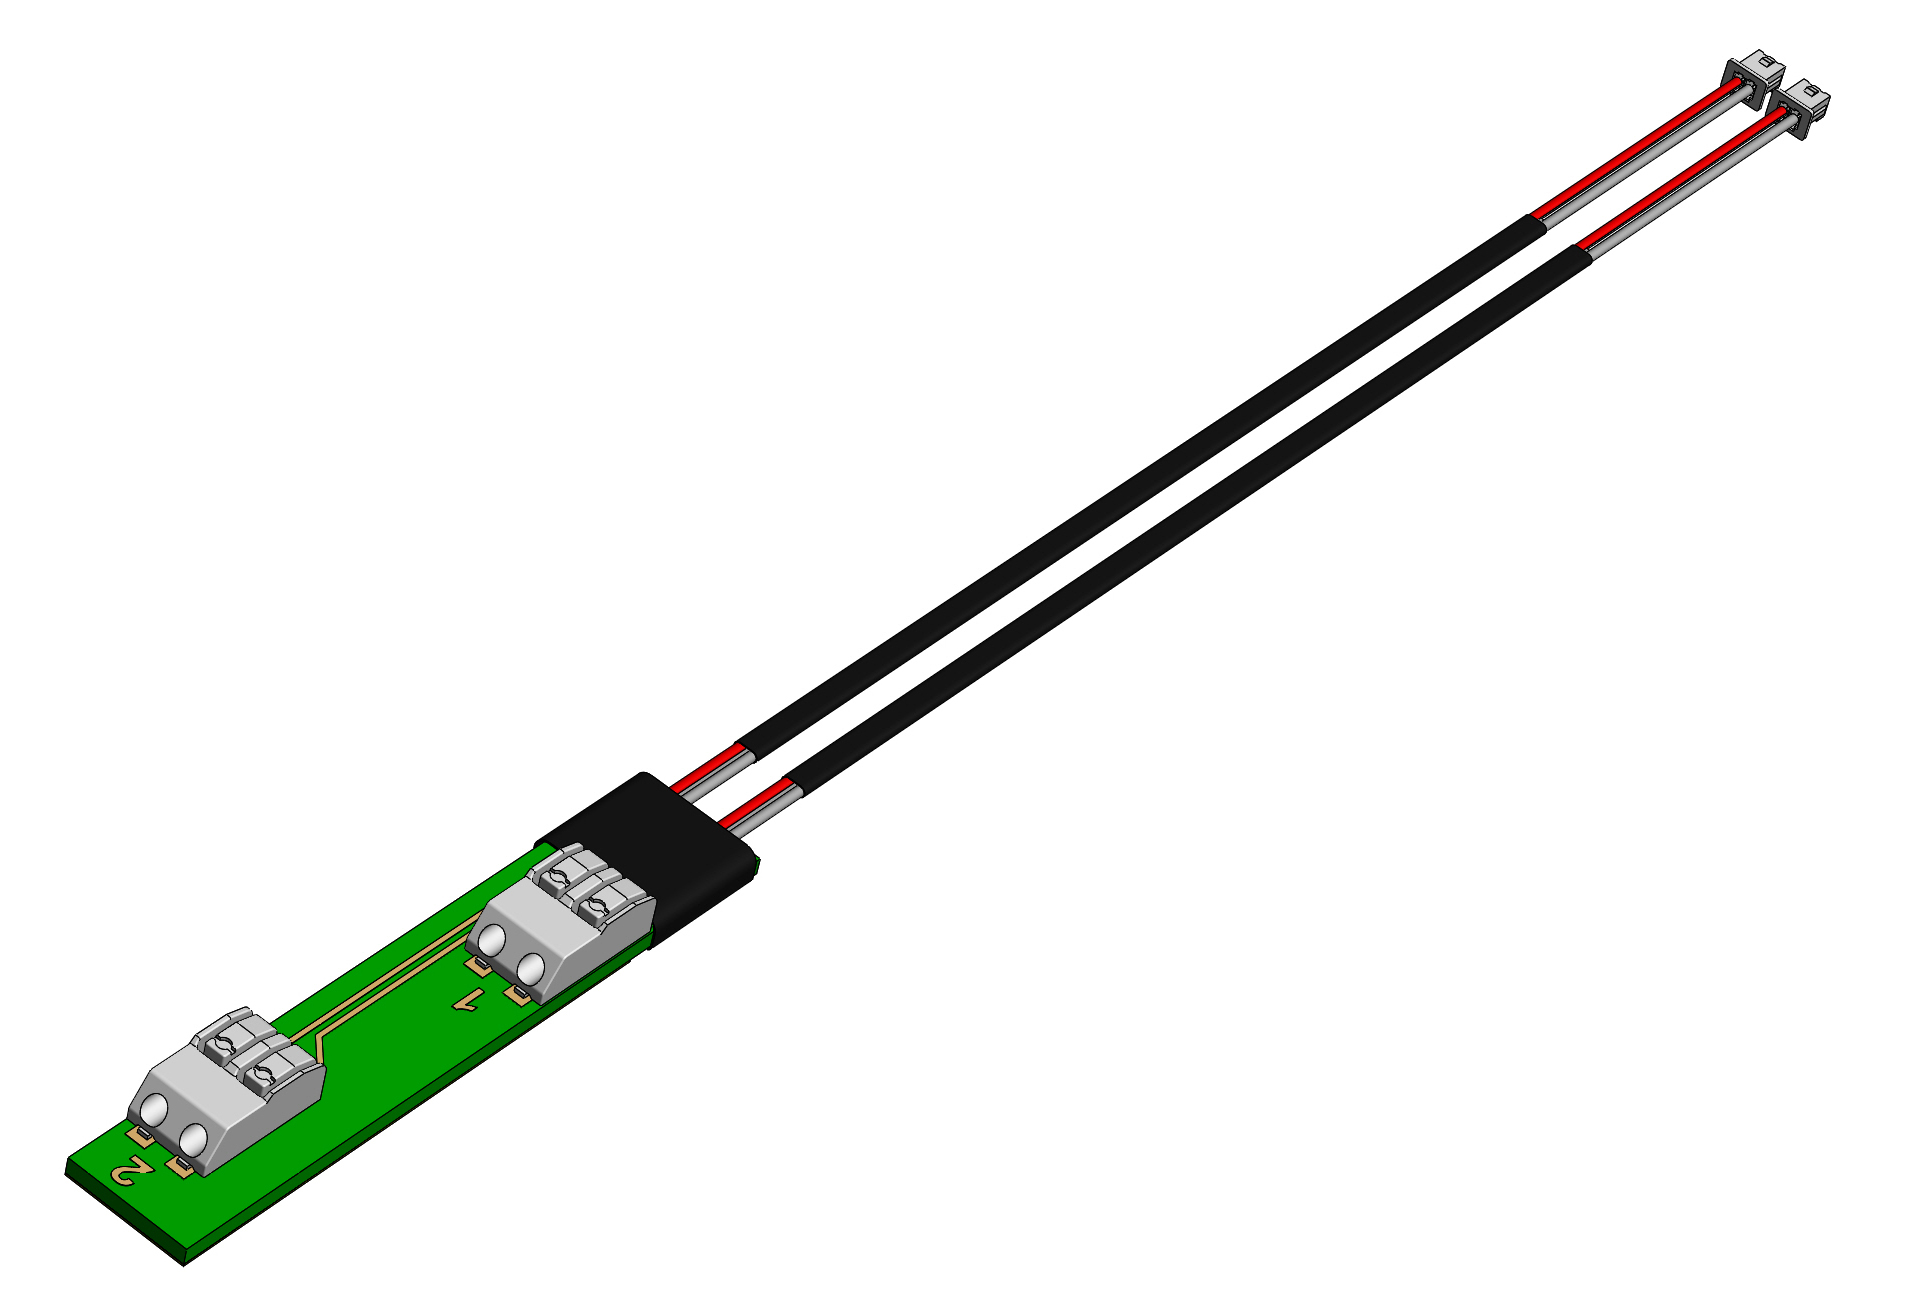
Sensor lock components
Sensor lock components - SmartHandle SmartIntego
Adapter circuit board for sensor lock: