Fitting the transponder terminal - Transponder terminal
- Use the perforated plate to determine the preferred position of the transponder terminal on the wall. To do so, place the mounting plate and the perforated plate on the wall.
- Mark the holes indicated by the mounting plate.
- Mark at least four more holes indicated by the perforated plate.
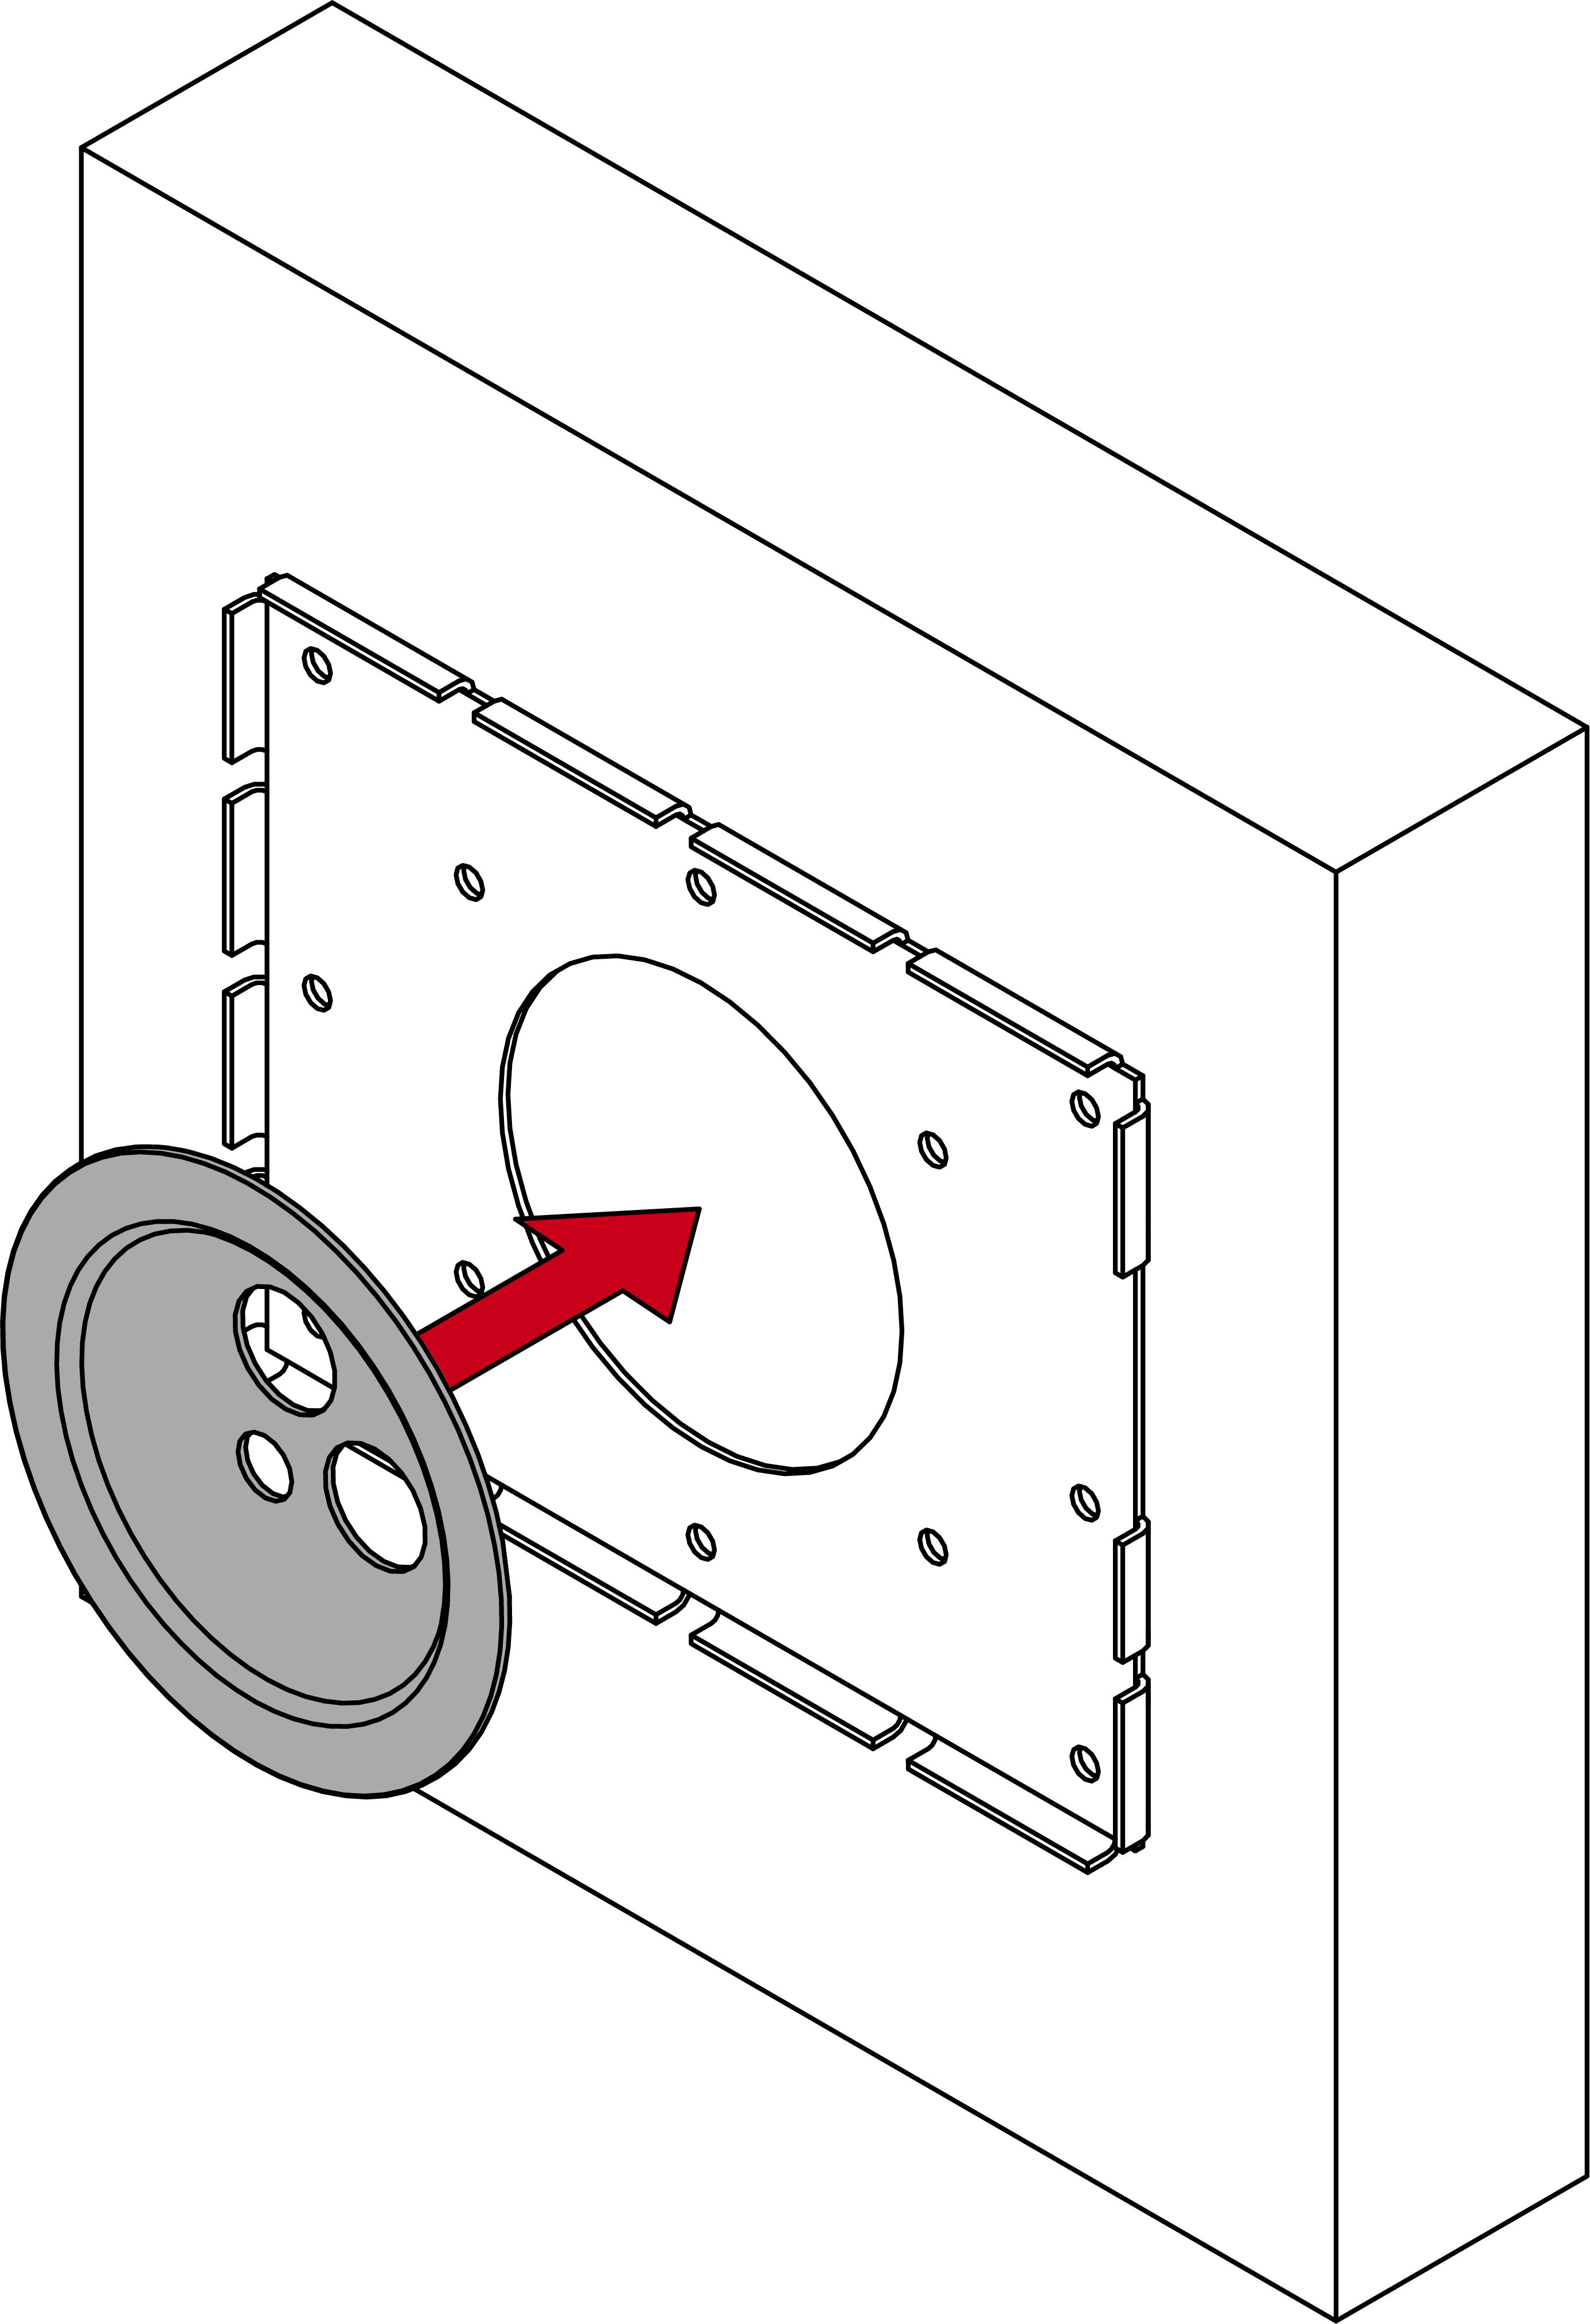
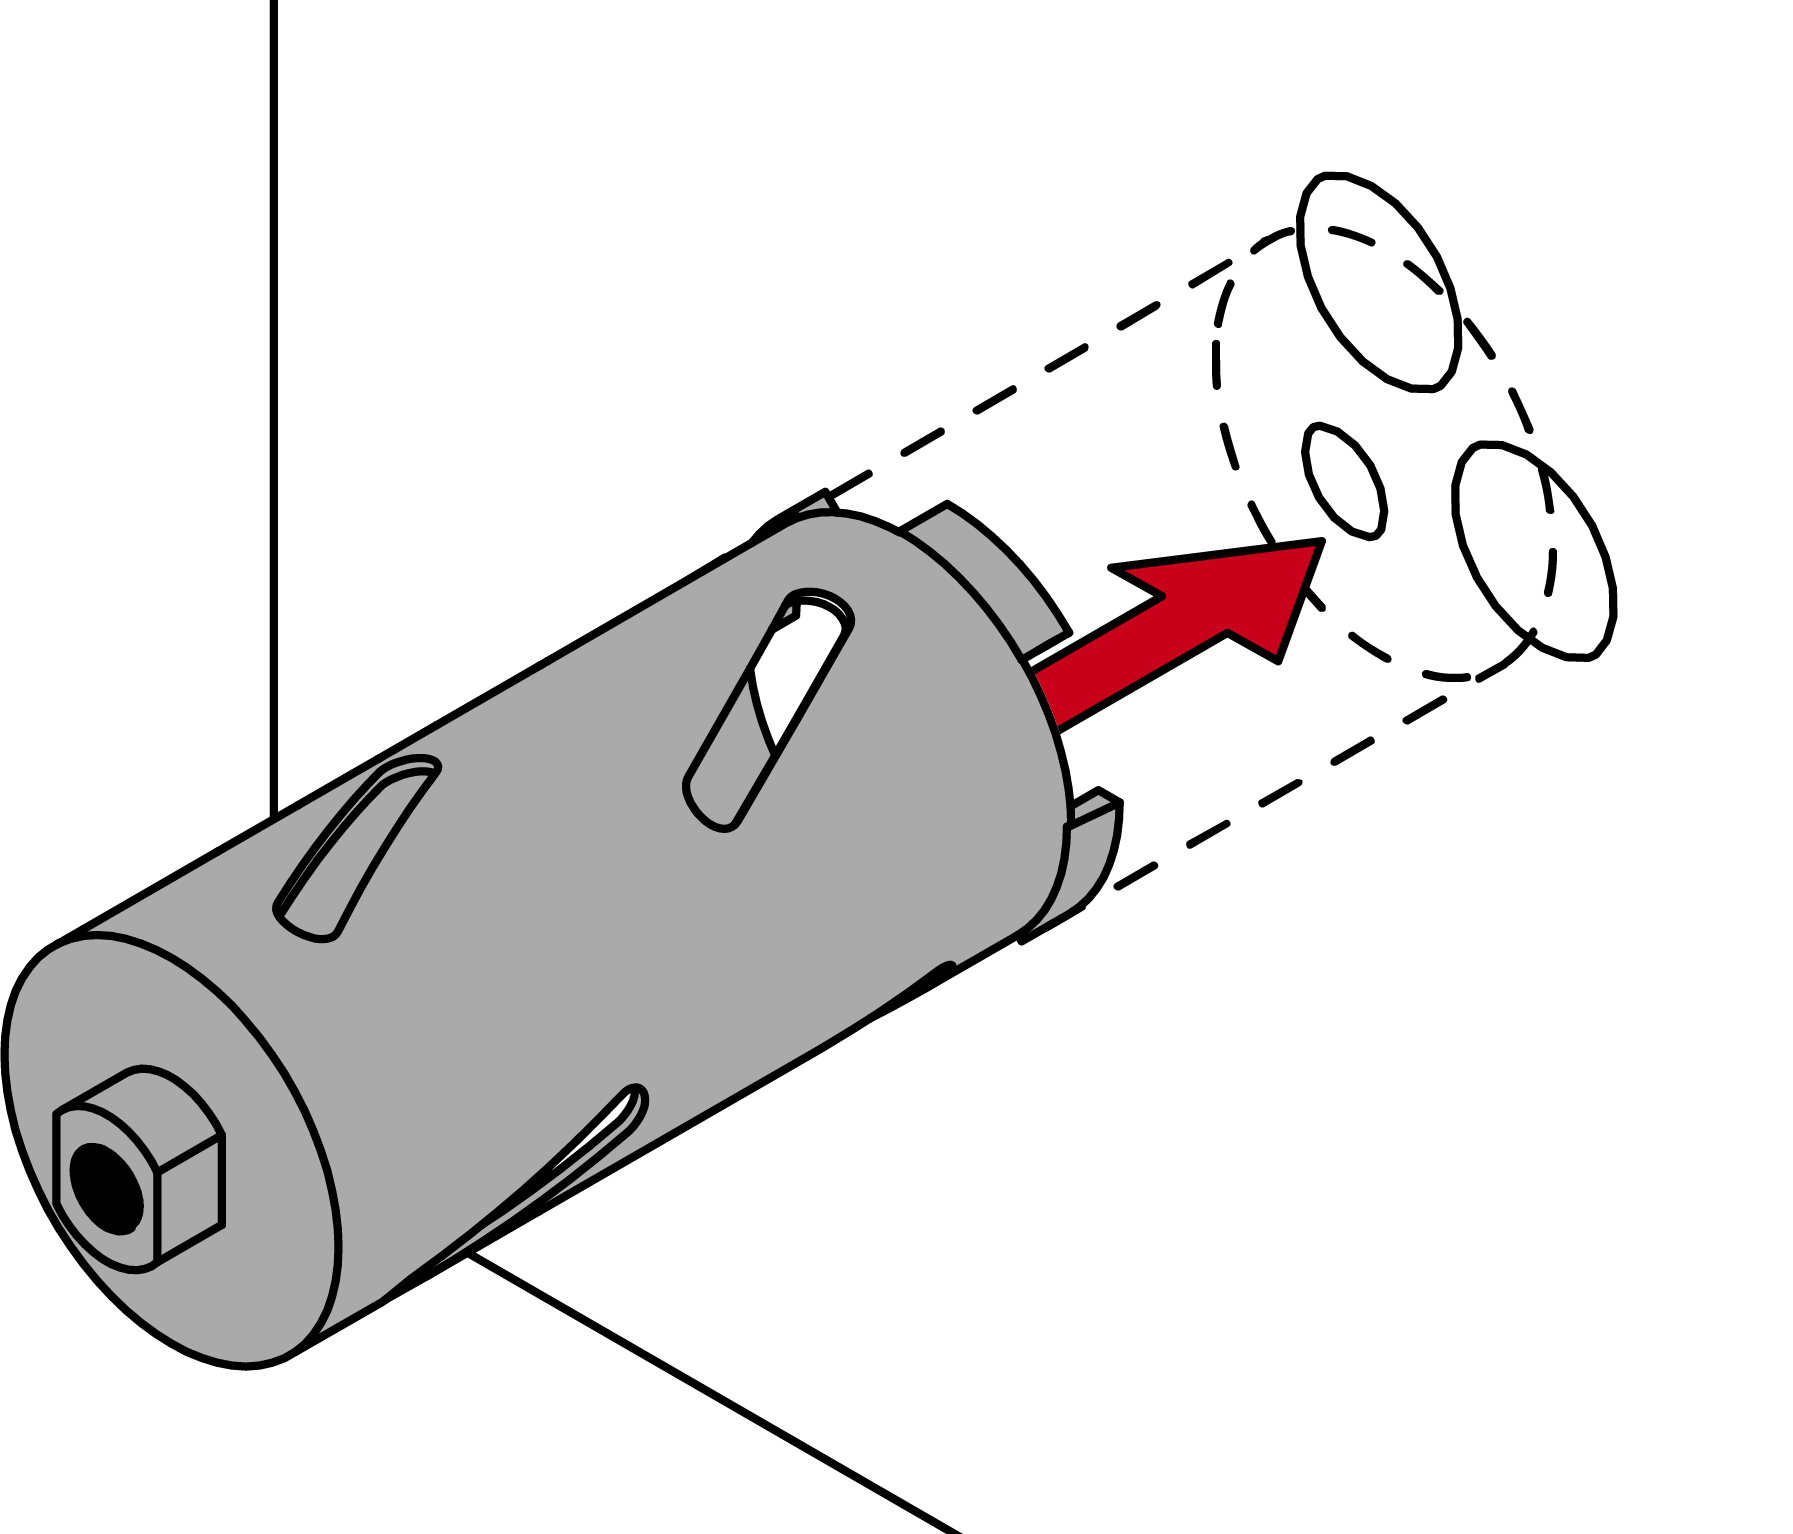
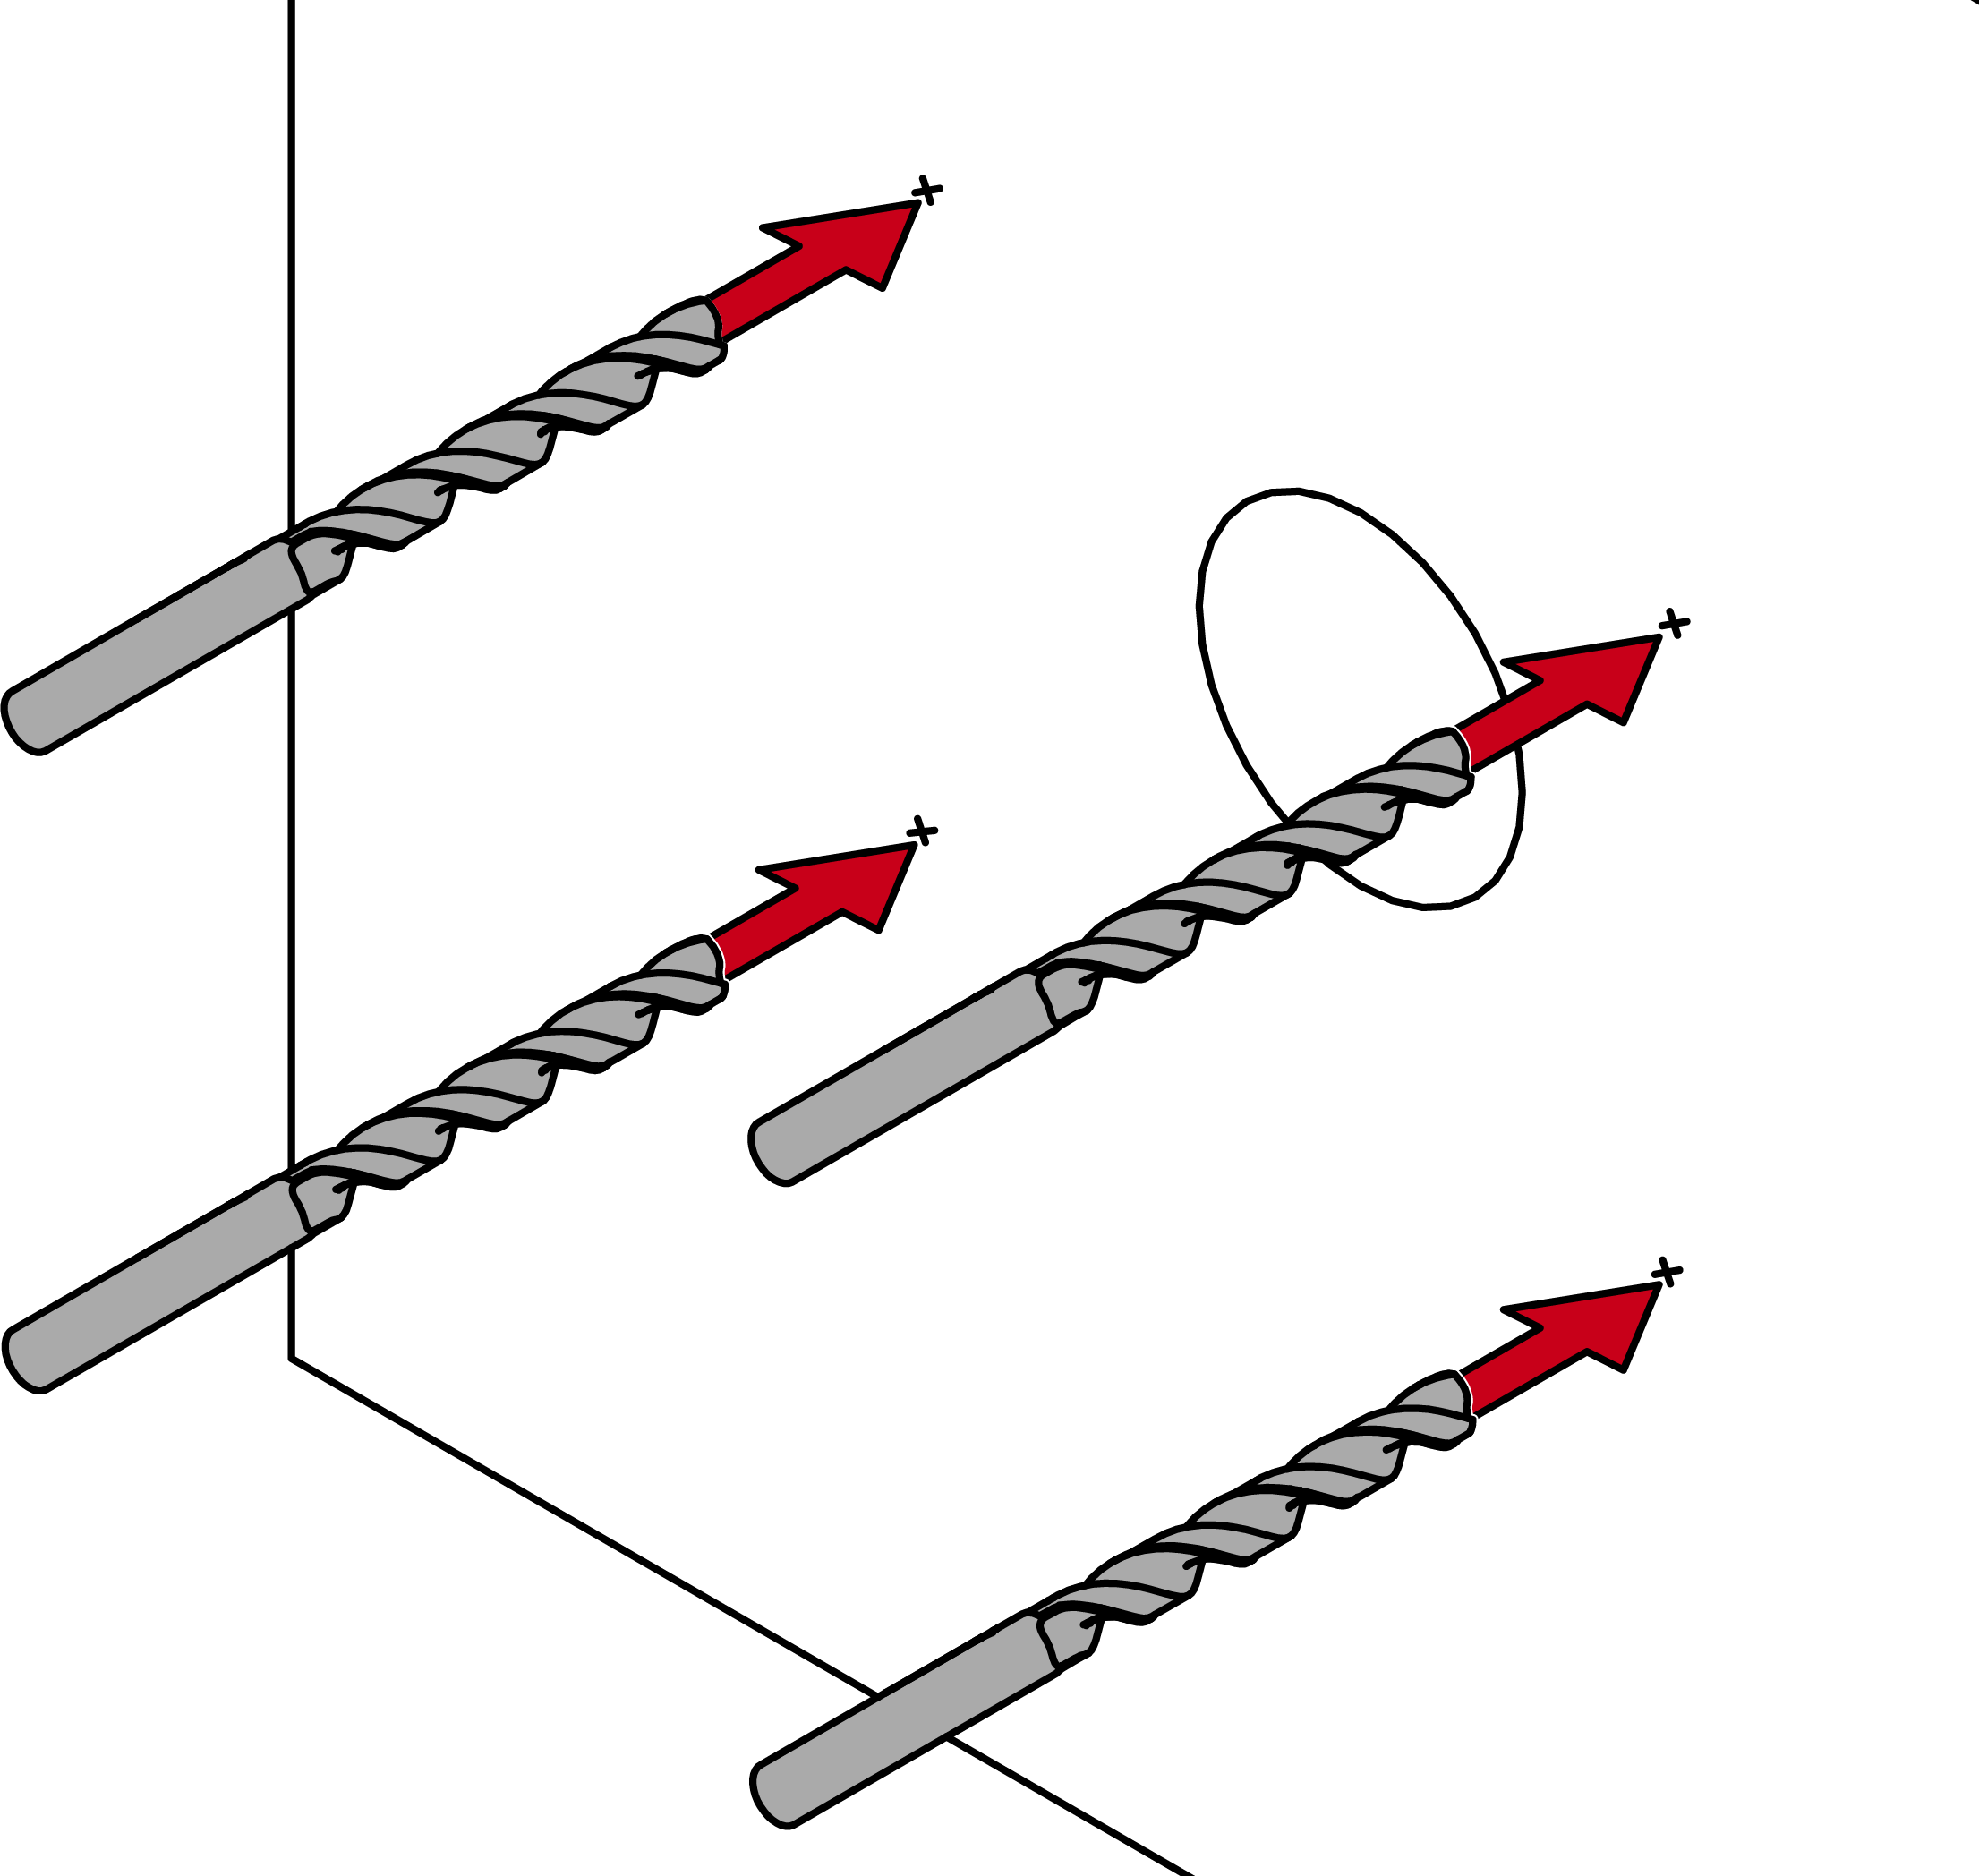
- Position the drill bit so that the holes are covered as shown in the diagram and drill a hole of approx. 40 mm through the wall.
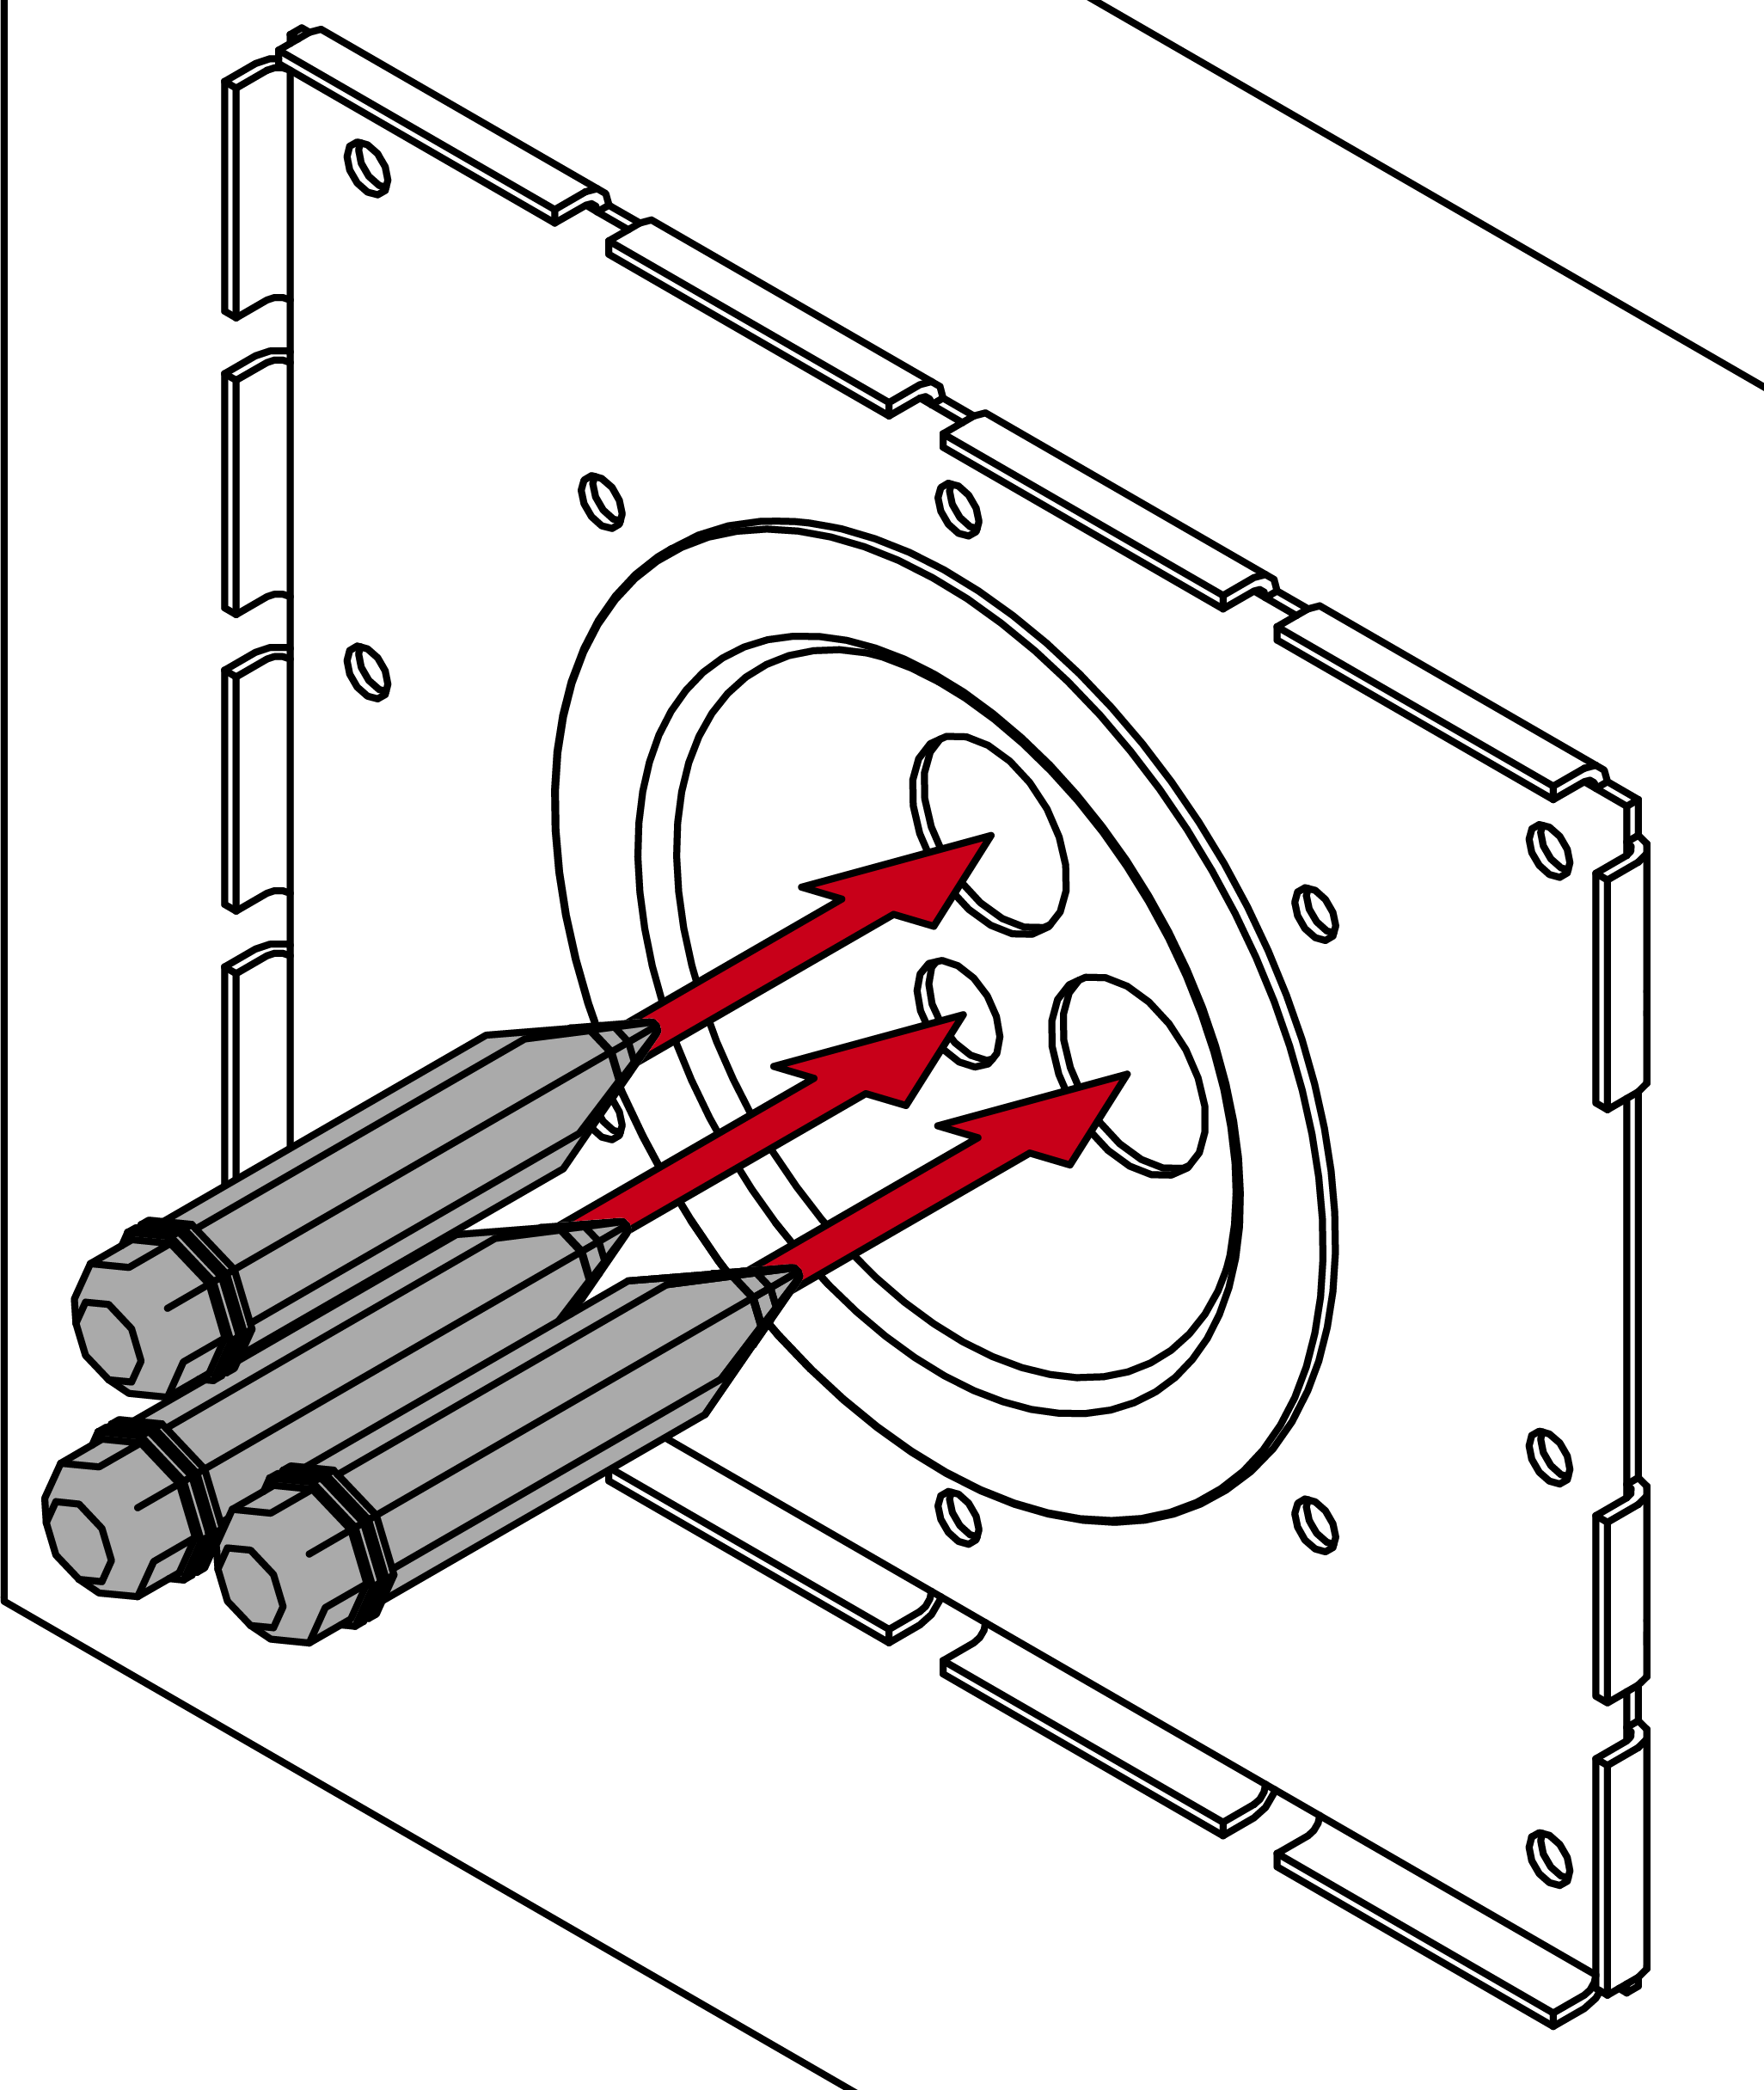
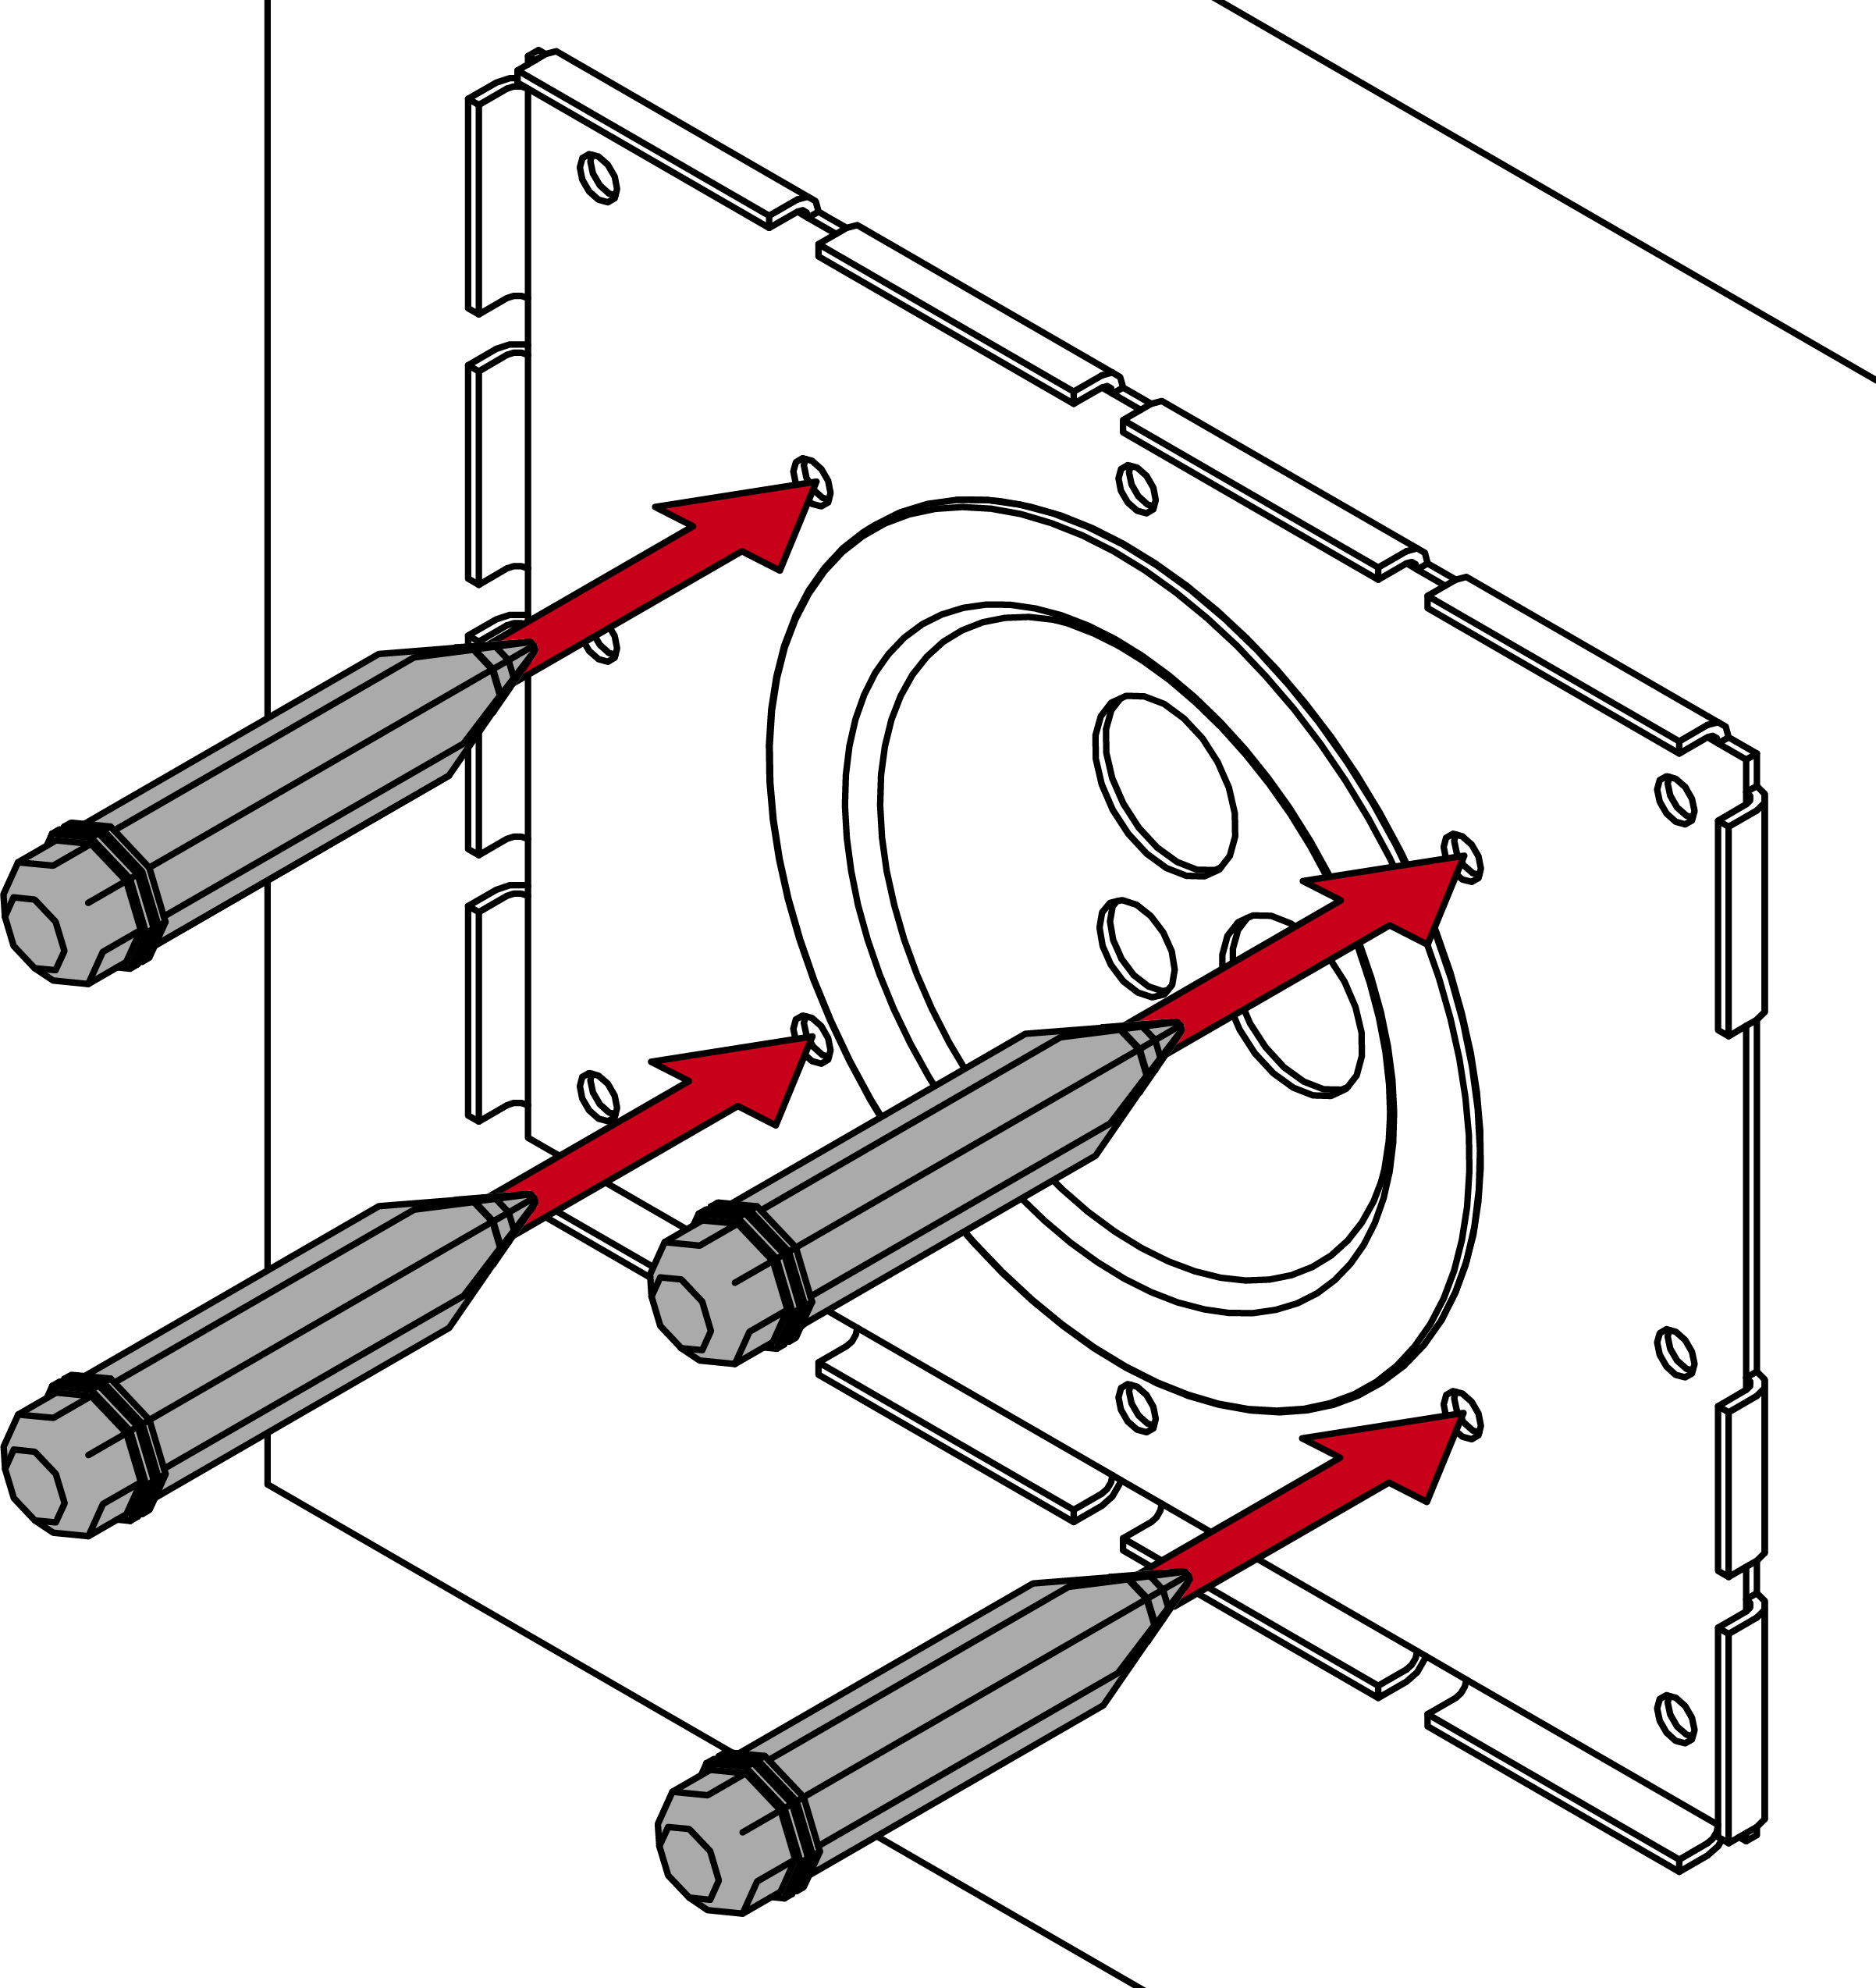
- Next drill at least four blind holes in the wall.
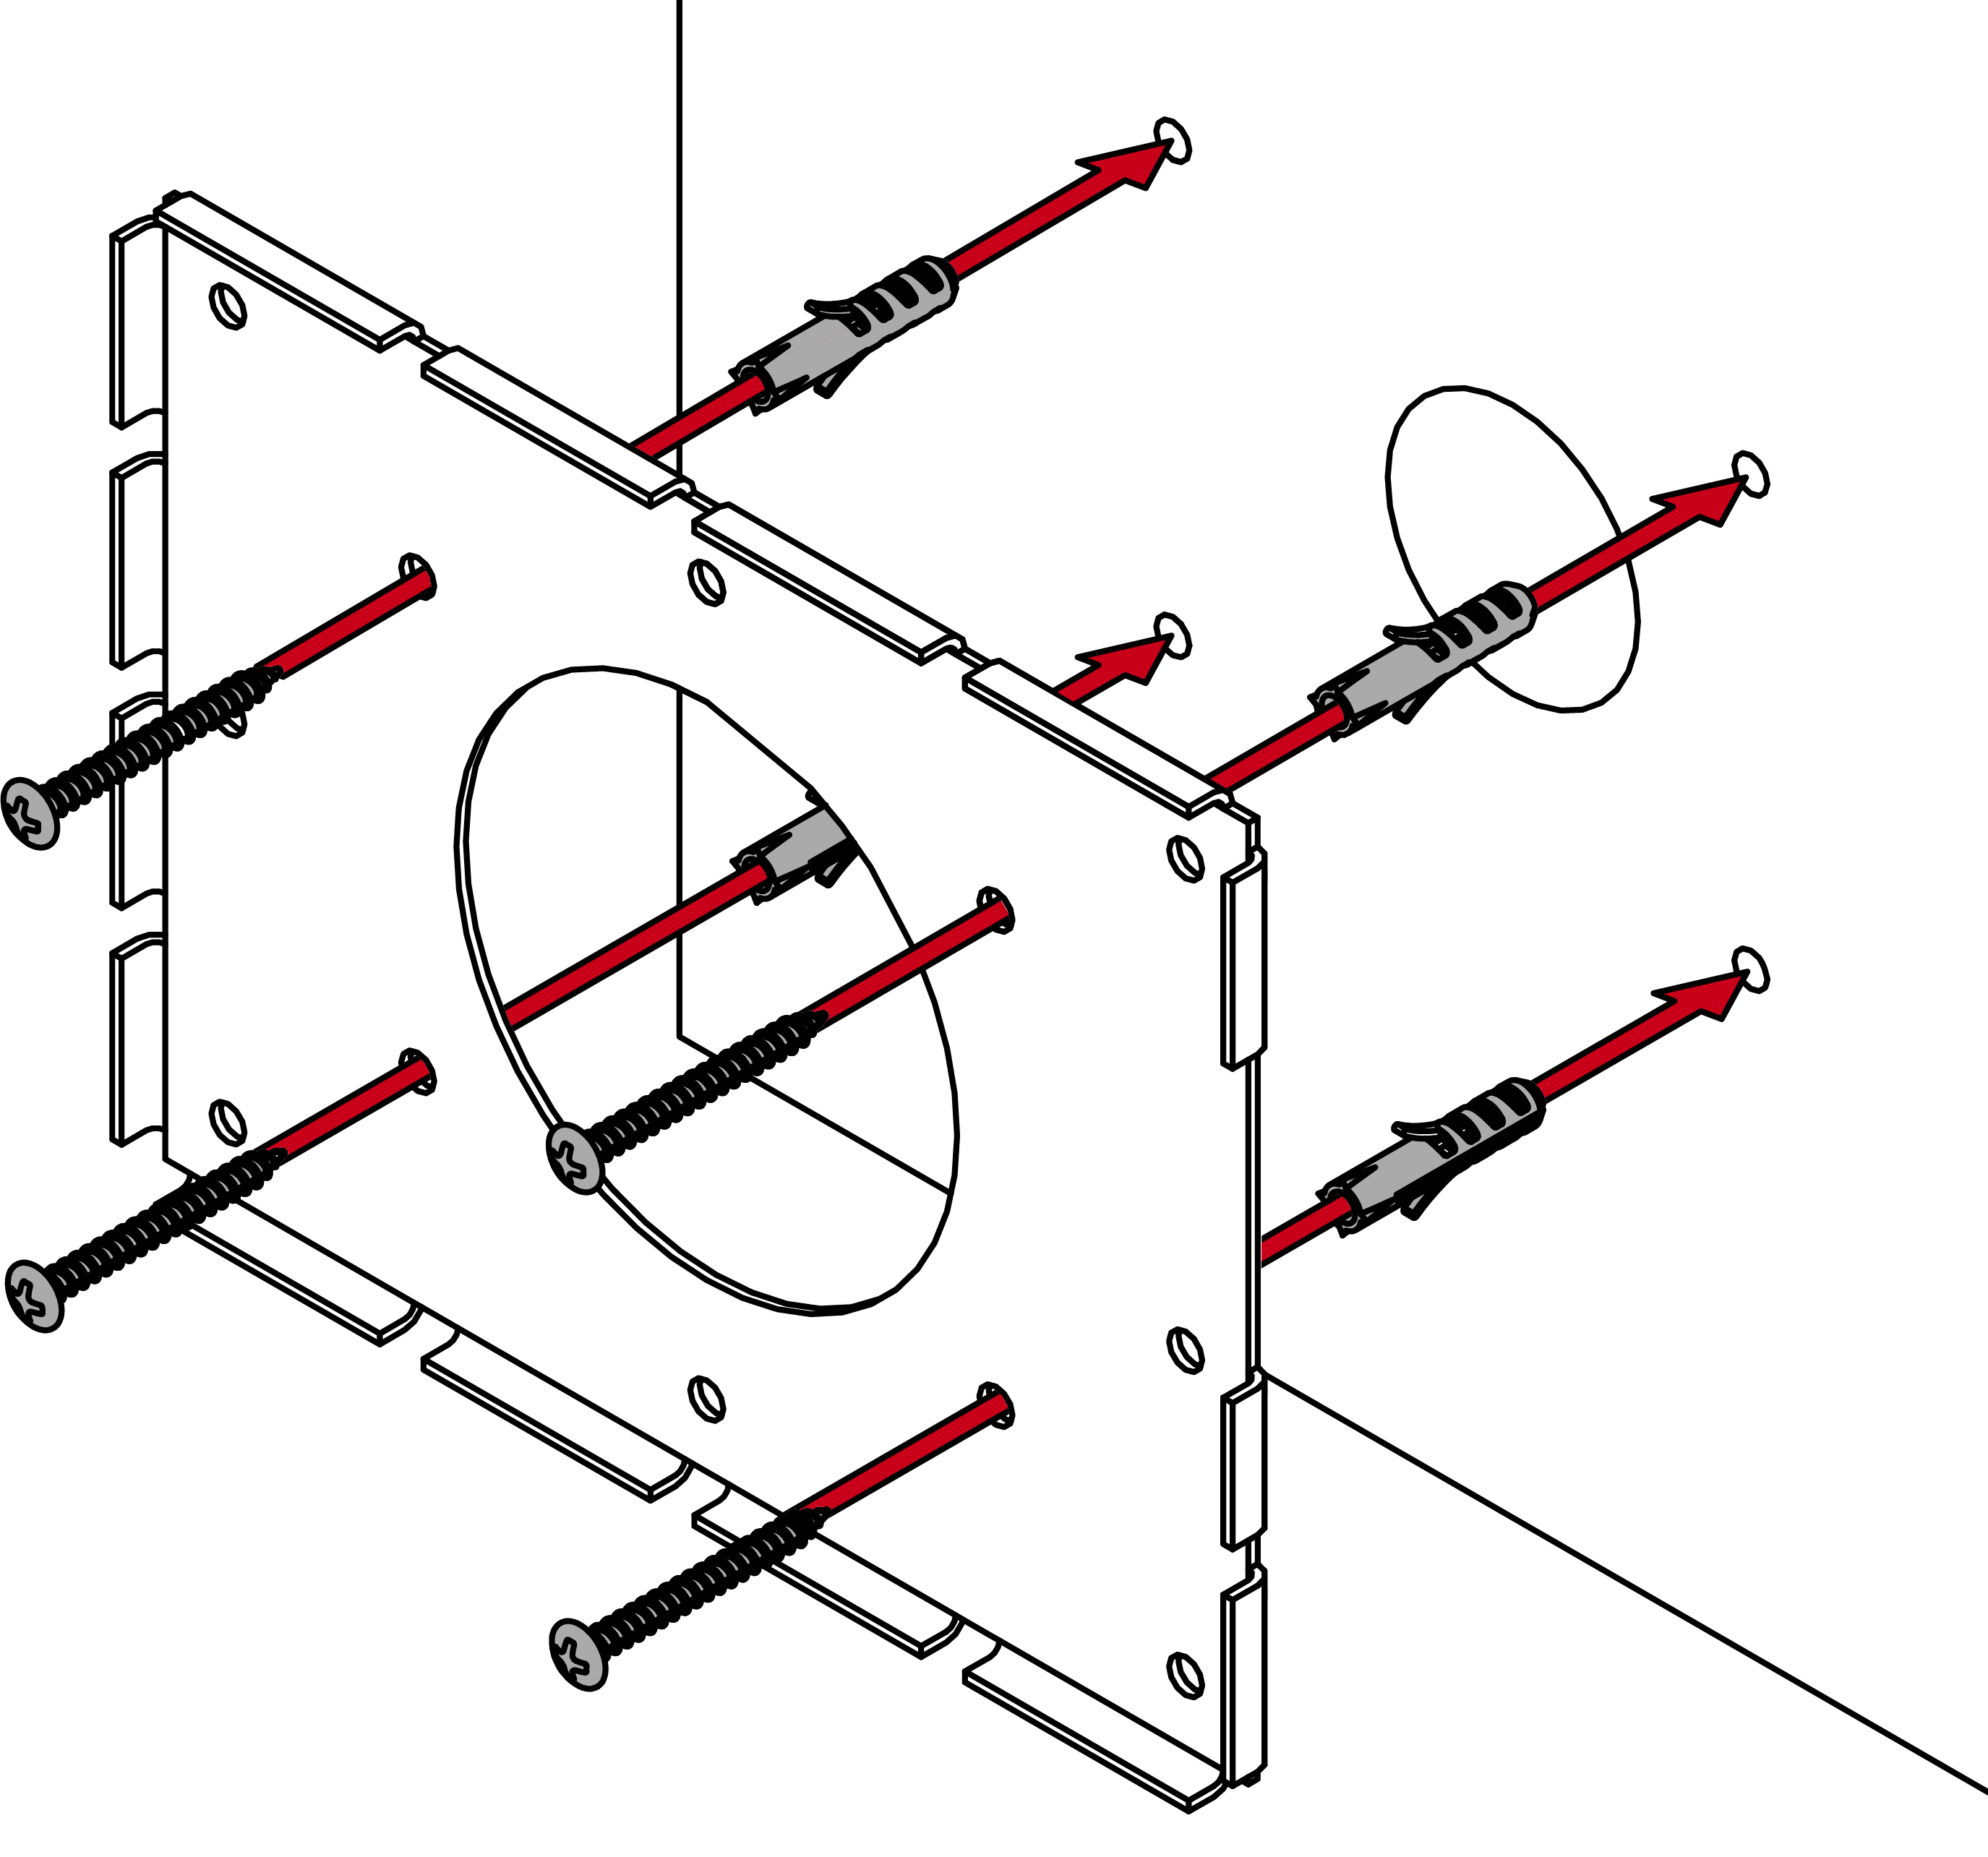
- Use dowels and screws to fix the perforated plate to the wall.
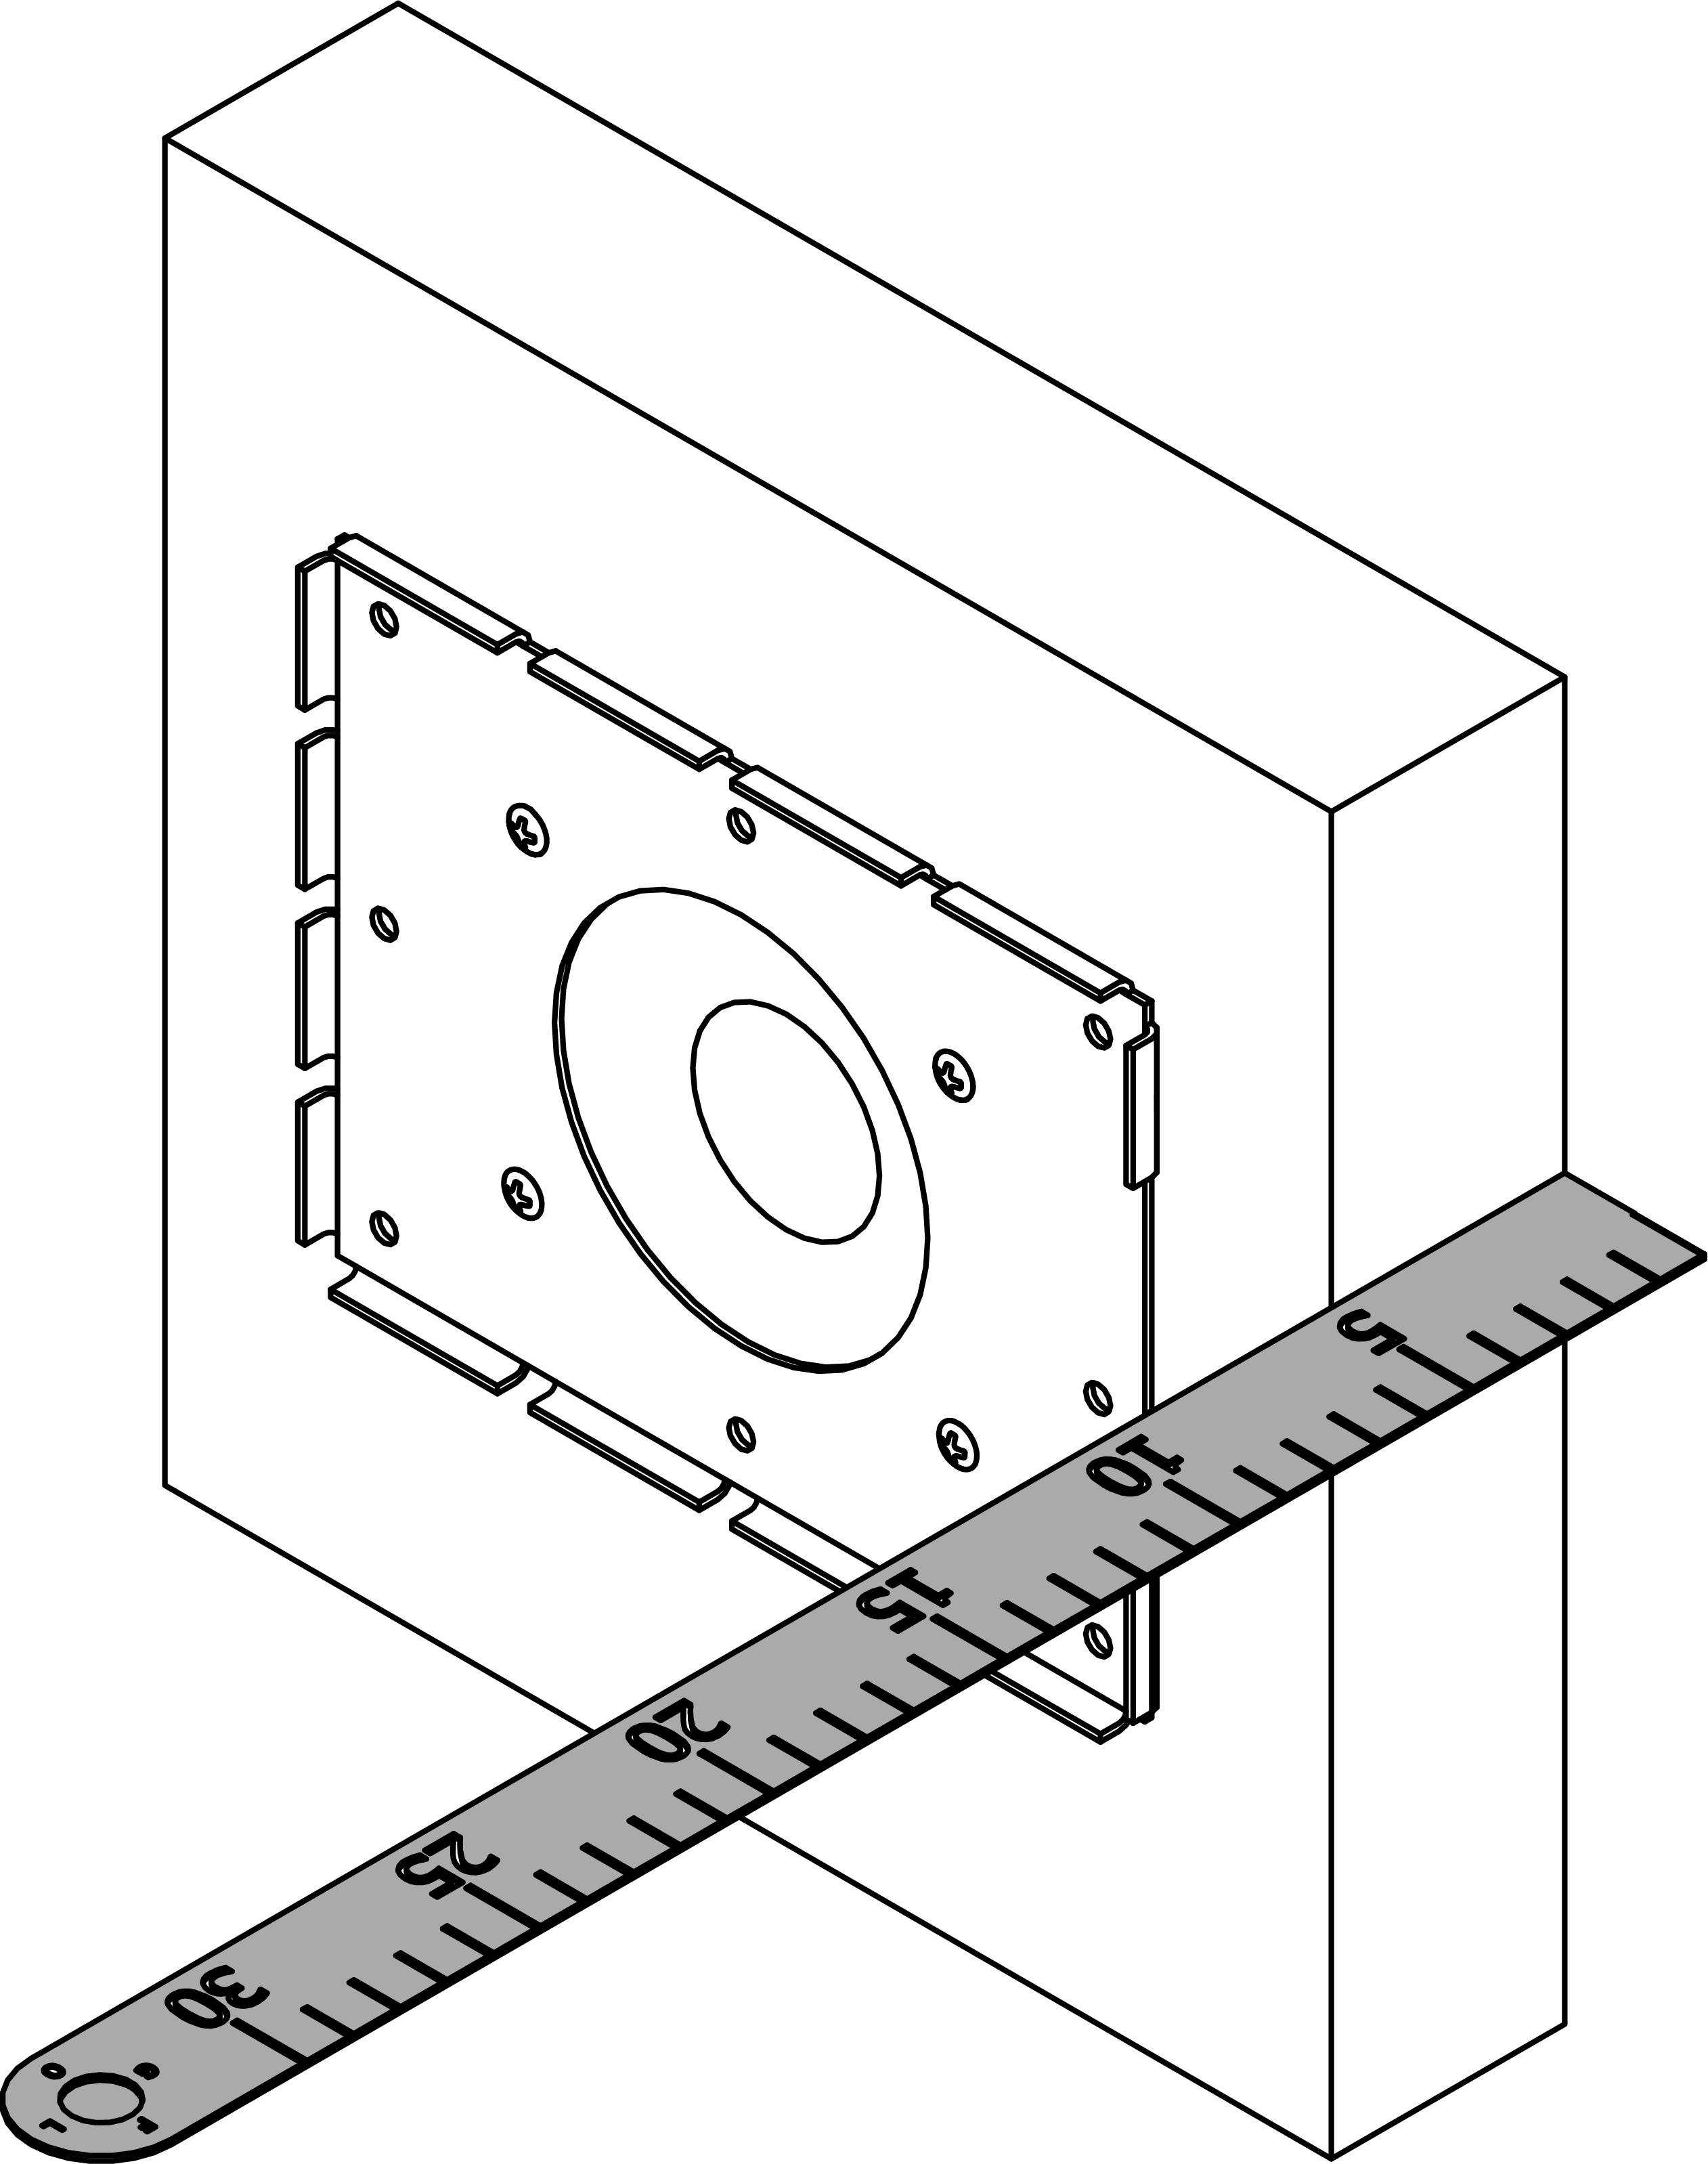
- Measure the wall thickness.
- Select the threaded rod so that its length equals the wall thickness + 35 mm as a minimum. If necessary, extend the threaded rod with another threaded rod through an extension bolt.
- Attach the threaded rod to the rear of the transponder terminal and fasten it by hand.
- Carefully feed the threaded rod and cable through the hole so that the transponder terminal lies flat on the wall.
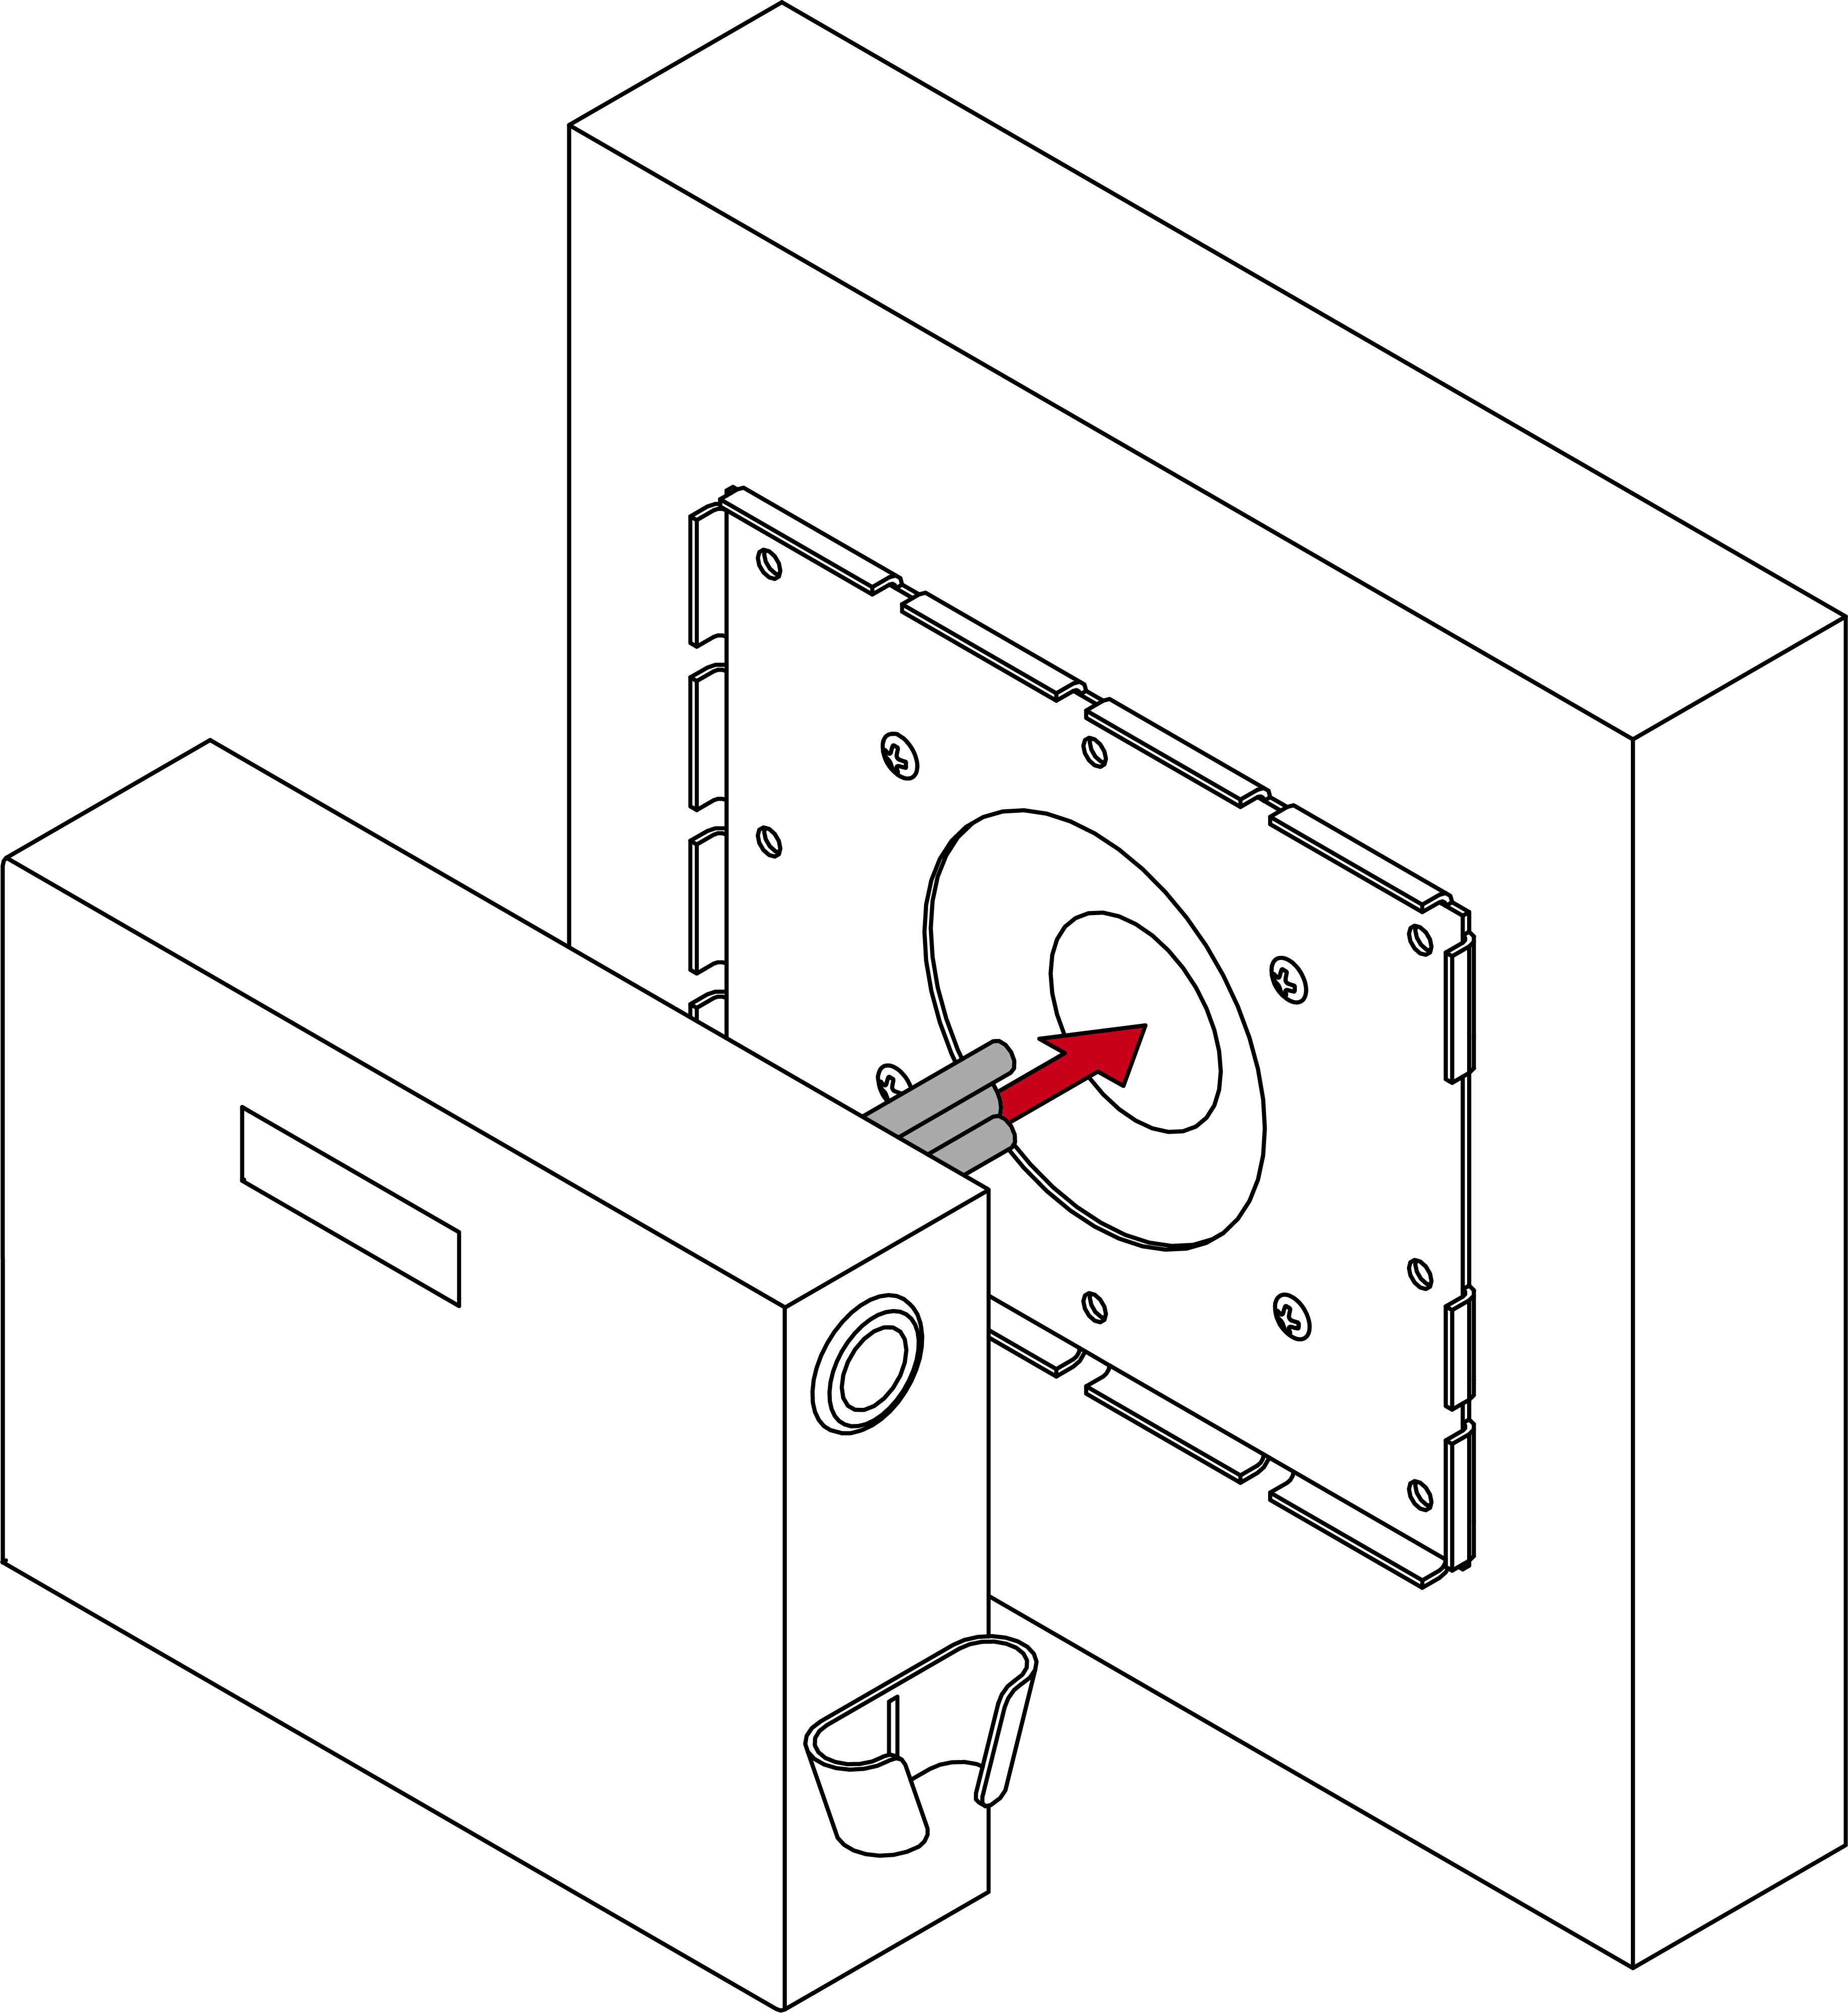
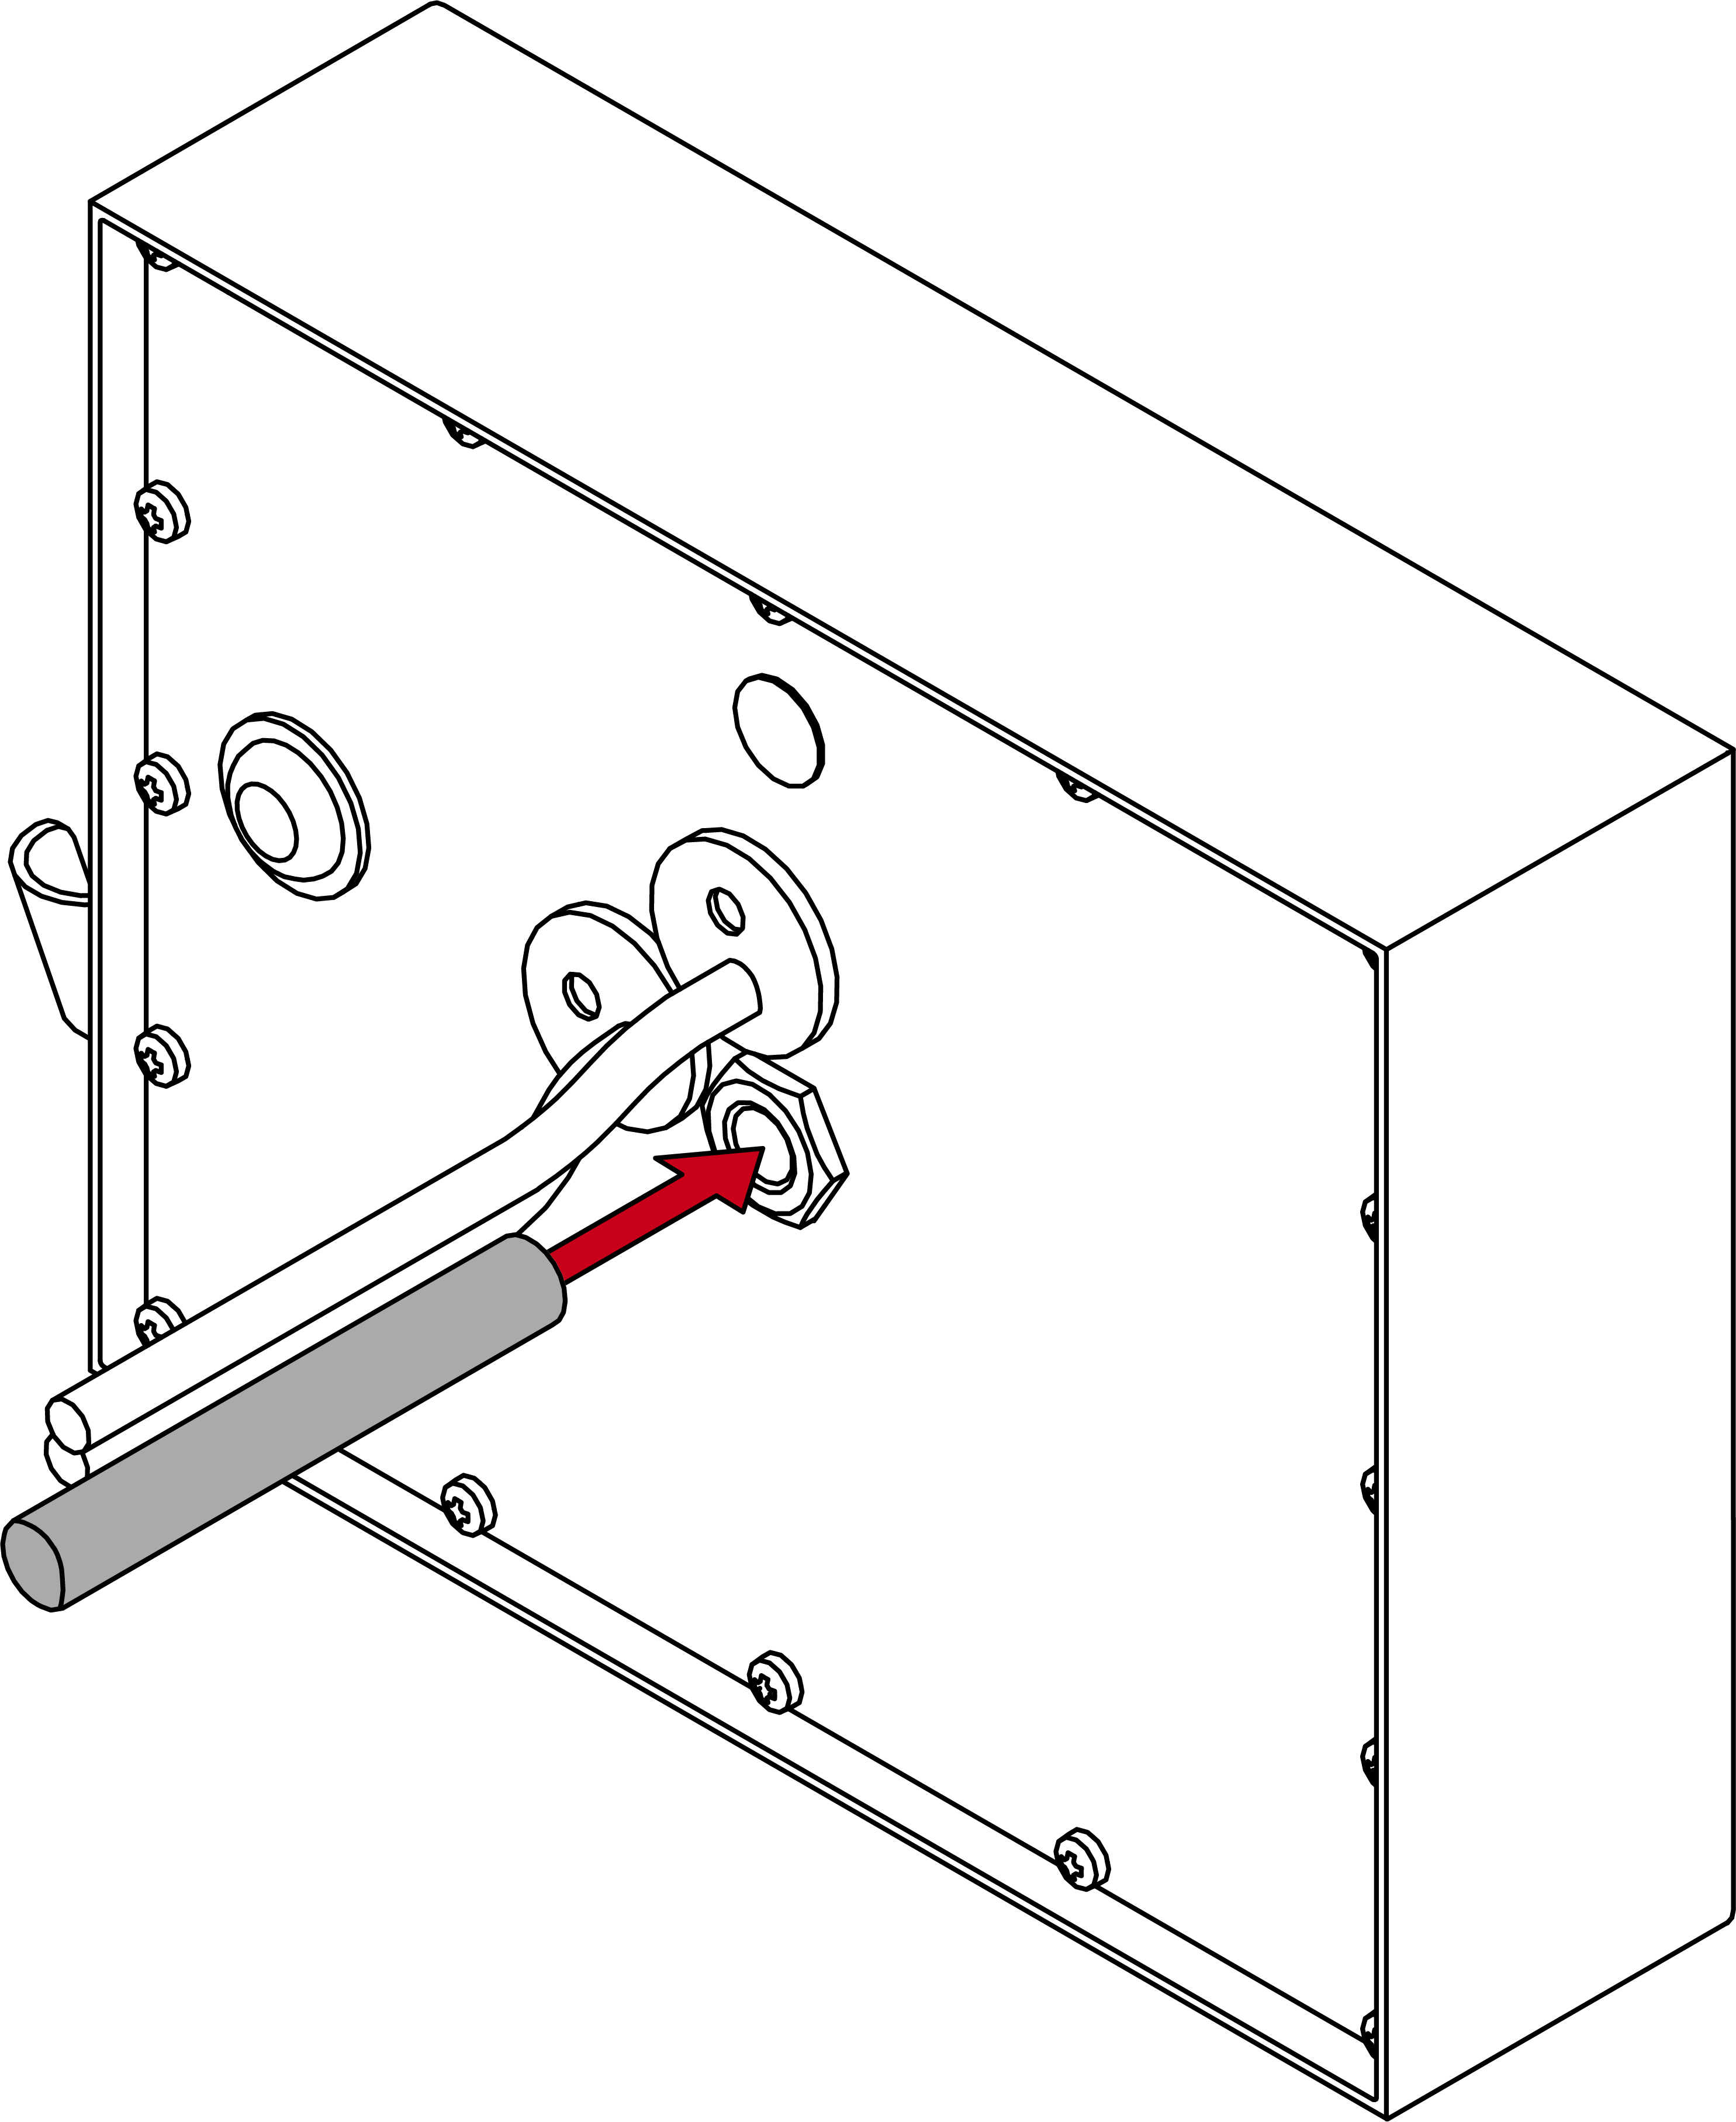
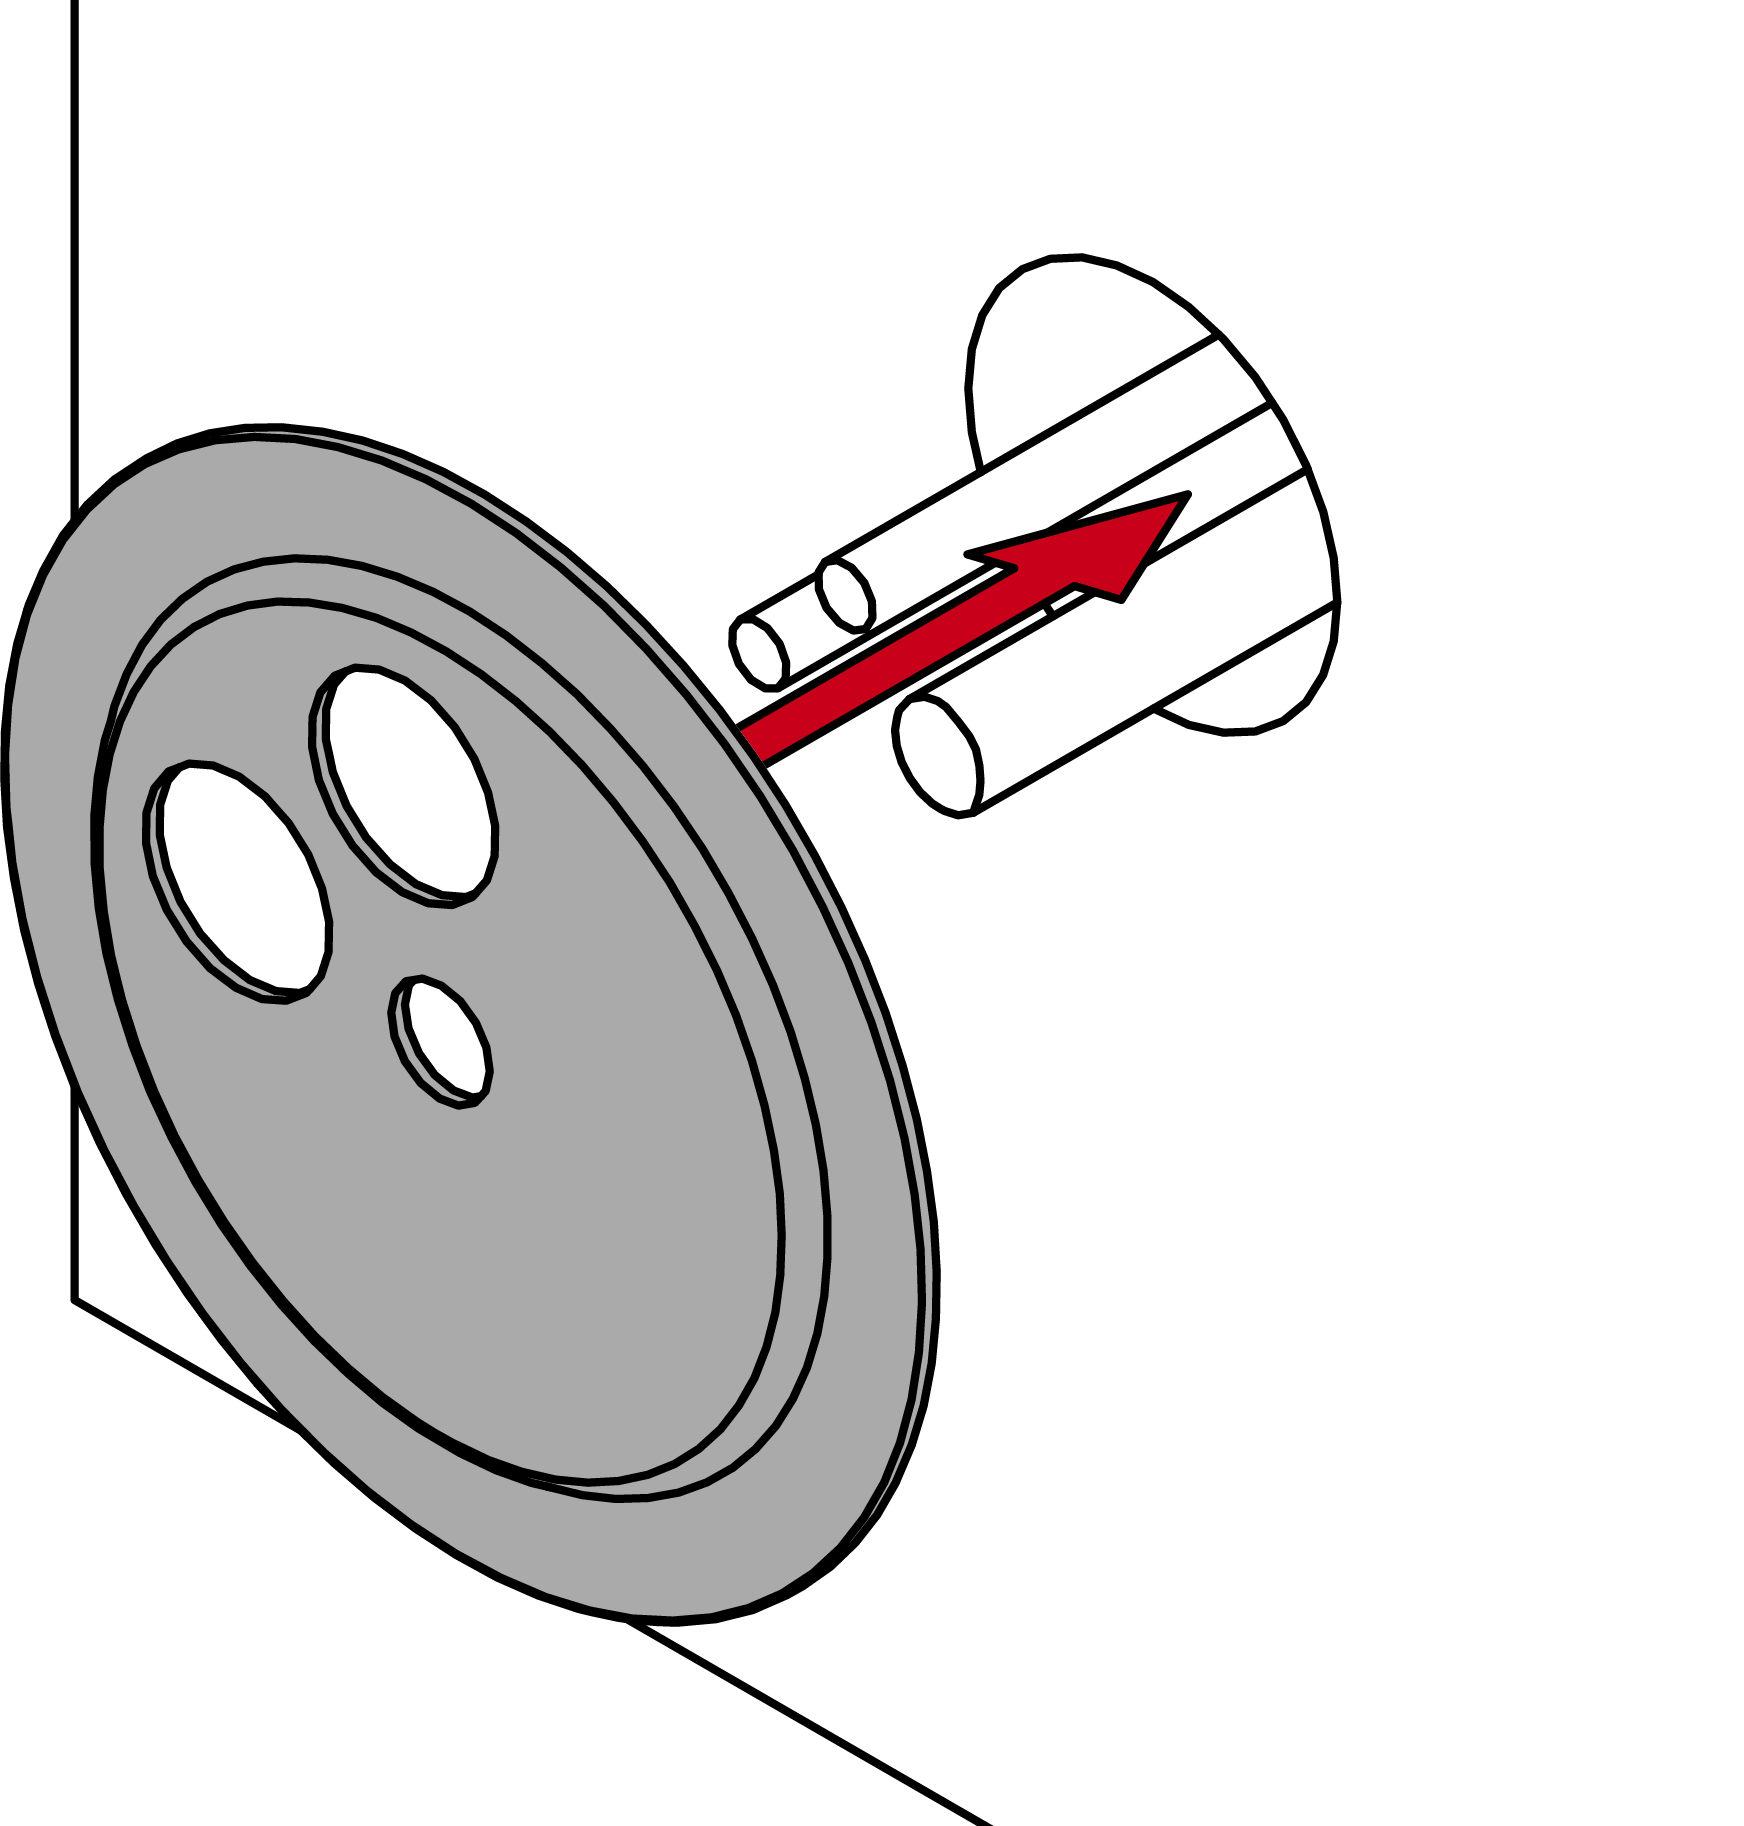
- Feed the two cables and the threaded rod on the inside of the wall through the corresponding holes in the mounting plate.
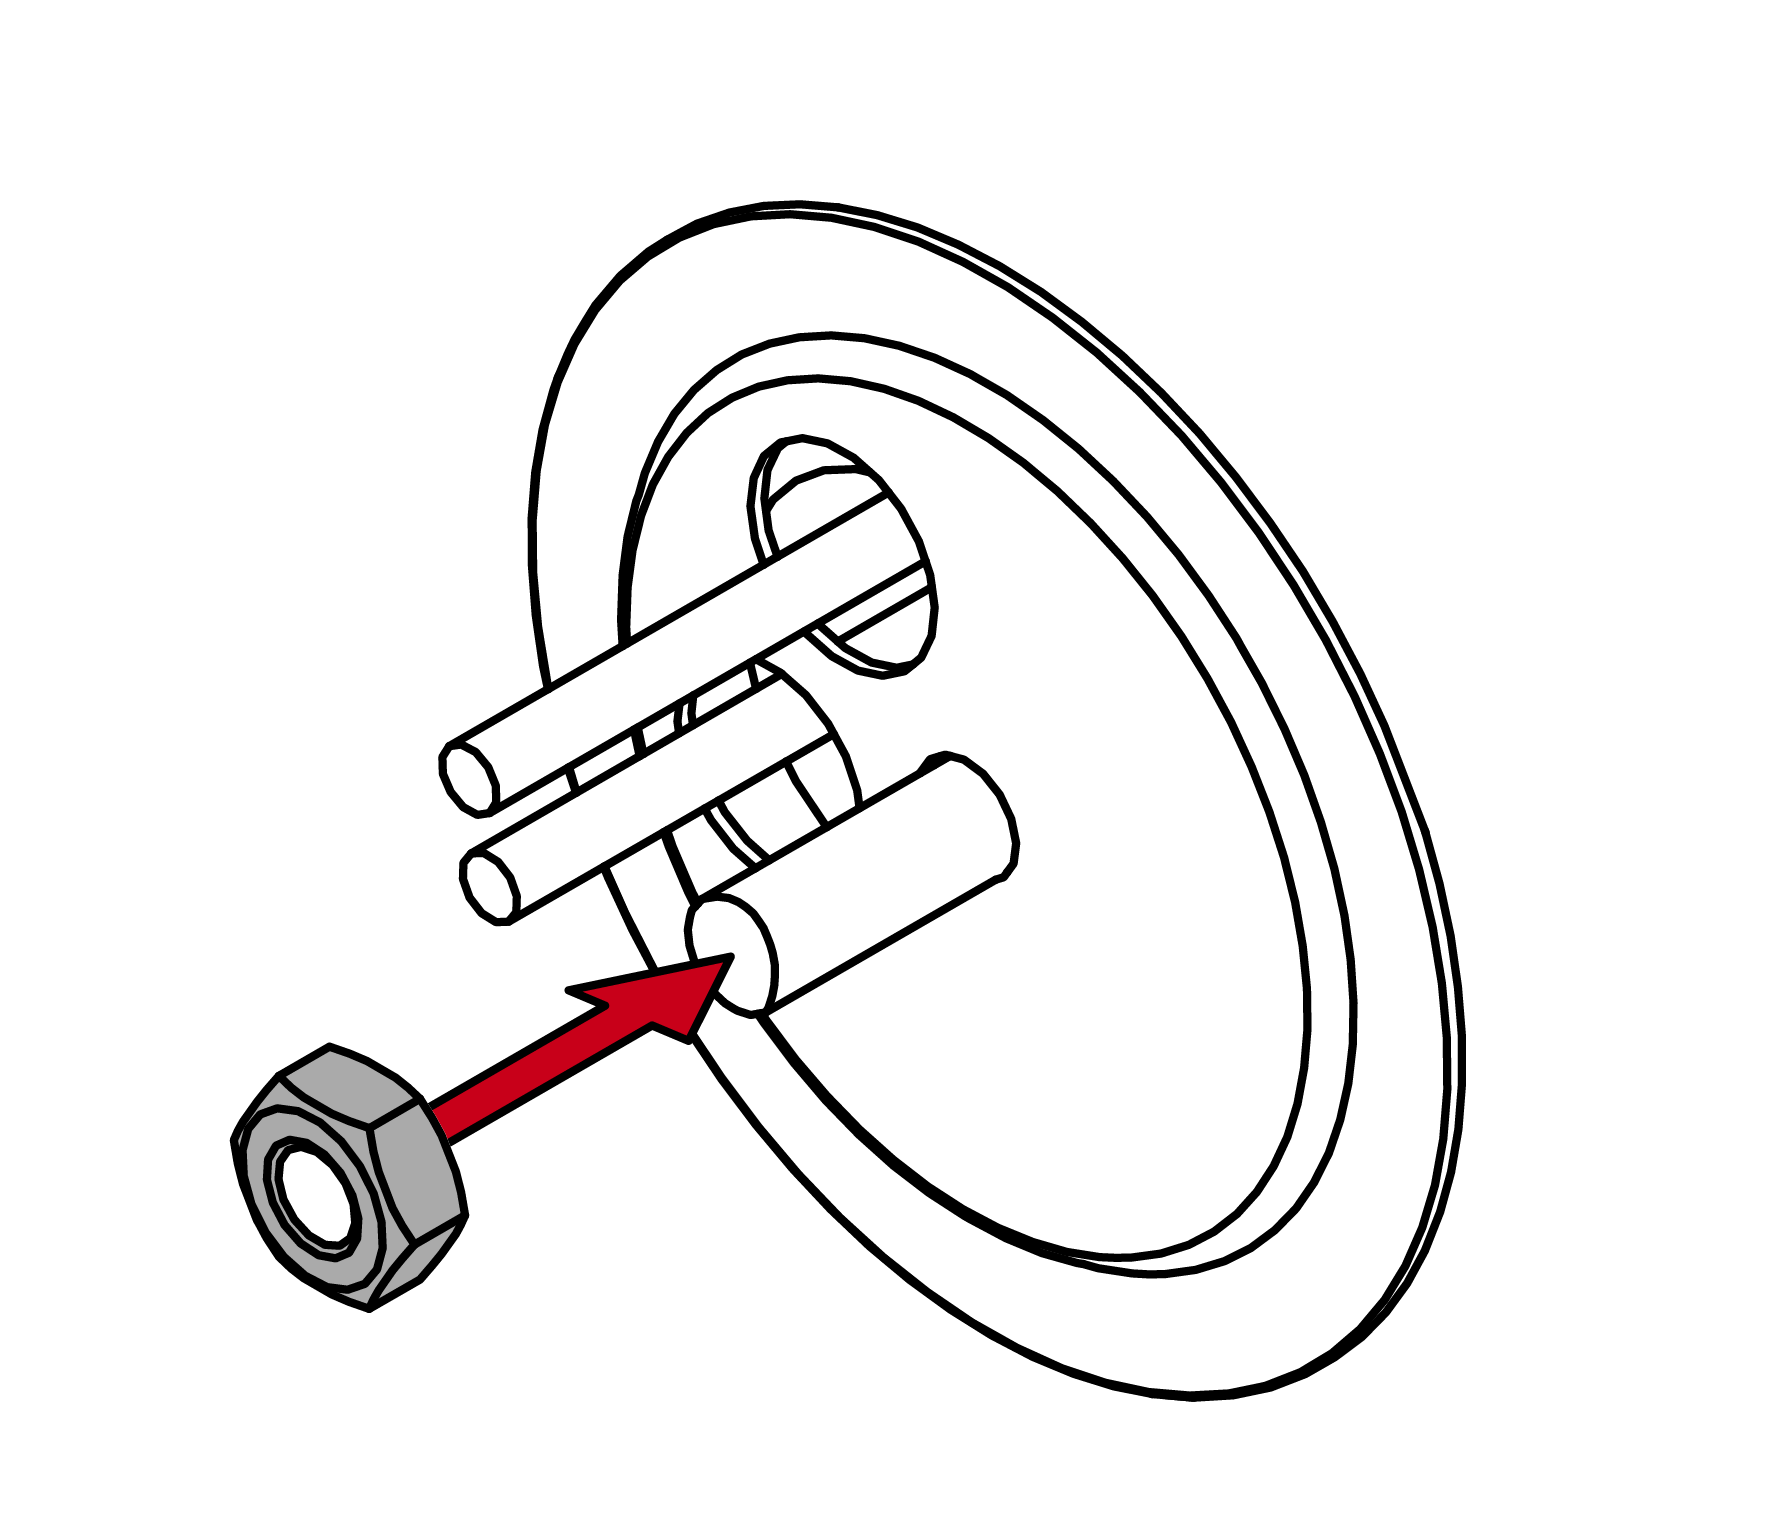
- Use the nut to screw on the transponder terminal and fasten it by hand.
- Pull the rubber seals over both cables and press them firmly into both holes in the mounting plate.
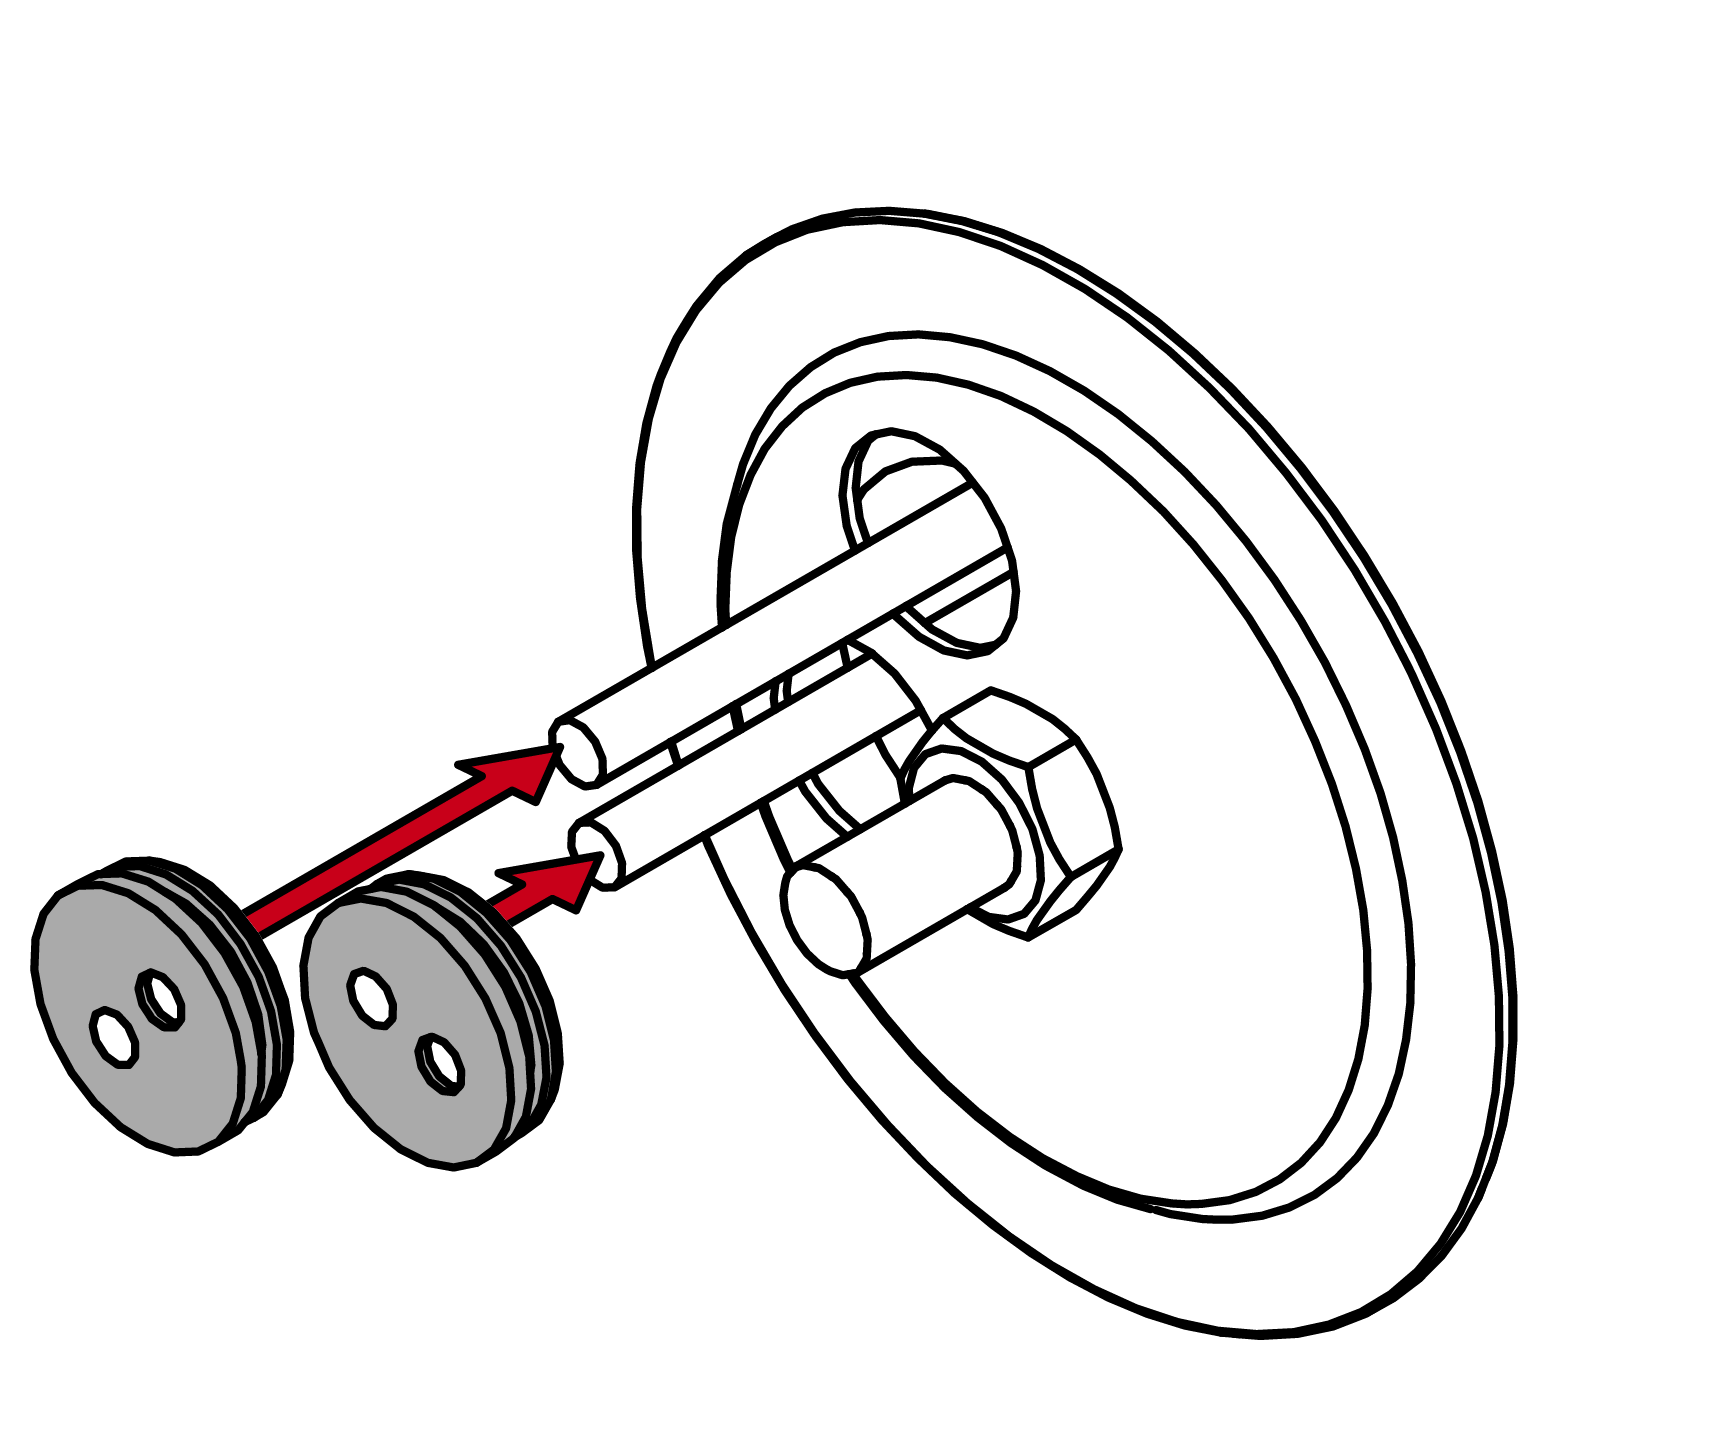
- The transponder terminal is now mounted on the wall.
