Battery replacement (Passive) SC version - Padlock (*Z4.PL)
- Place the installation/battery key on the knob in such a way that its two teeth lock into the openings in the locking disc; If necessary, turn the knob until both teeth engage into the knob. Important: the battery/installation key must be placed flat on the inside front surface of the recessed grip ring to ensure that the installation tool can engage into the locking disc.
- Hold the knob firmly and carefully turn the battery/installation key about 30° in a clockwise direction (until you hear a click).
- Remove battery/installation key from the knob.
- Push recessed grip ring backwards towards the padlock, so that it comes away from the thumb-turn.
- Hold recessed grip ring firmly and turn knob about 10° in an anti-clockwise direction and remove.
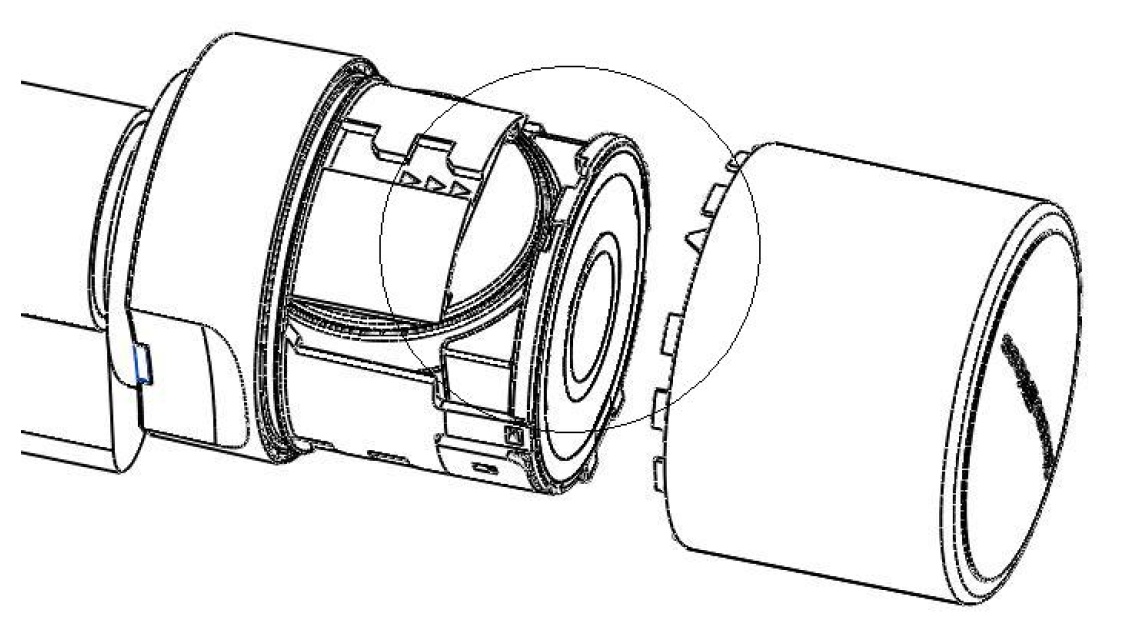
- Carefully press the battery holder together where you see three small arrows, so that the antenna bracket disengages.
- Carefully fold the antenna bracket out (see diagram); do not apply any mechanical load to it.
- Optional: If a network card has been fitted, carefully remove it from the holder.
- Remove the top battery from the holder.
- Turn the knob 180°, so that you can remove the second battery. The battery will then automatically drop from the holder.
- Insert the new batteries into the holder at the same time with the positive poles next to each other; change the batteries as quickly as possible. Use clean gloves free of fat or grease to handle new batteries.
- Carefully lock the antenna bracket back into place. In doing so, ensure that both sides lock firmly into place.
- Replace the thumb-turn (align the three triangle marks as in the diagram) and turn about 10° in a clockwise direction (see diagram).
- Push recessed grip ring back onto the knob, so that the knob and ring close together in a flush fit.
- Place the battery/installation key on the knob in such a way that its two teeth lock into the openings in the locking disc; if necessary, turn the knob until both teeth engage into the knob.
- Lock the knob into place again by turning it about 30° in an anti-clockwise direction (until you hear a click).